

Vintage Cellars Monterey ETL 12-bottle User Manual
MONTEREY ETL
Operating Instructions Manual
Auto Defrost Refrigerators

!
2!
Table of Contents
Setting Up Your Unit 3
Unpacking, installing faucets, installing the regulator, and connecting wine bottles.
Getting to Know Your WineKeeper™ 5
Temperature zones, lights, cords, hoses, knobs, and switches.
Operating Your Unit 6
Changing bottles and gas cylinders.
Cleaning Your Unit 6
Troubleshooting 8
Finding a nitrogen leak, frost build-up, or making temperature adjustments.
FAQs 10
Technical Information 13
System diagram and wiring diagram.
531 Mercantile Drive
Cotati, CA 94931
1.855.511.5113
info@winekeeper.com
www.winekeeper.com
!
3!
Unpacking
While unpacking your unit, please check to make sure that all parts are included and undamaged. Please
call WineKeeper at 855.511.5113 if there are any problems. YOU MUST REPORT damage immediately
and missing parts within 7 days of receiving your unit.
These parts are included with your unit:
• Appropriate number of faucets for your unit
• Regulator (for use with refillable nitrogen or argon cylinder)
• Cleaning kit
• Ventilation screens
• Instructions
Setting Up Your Unit
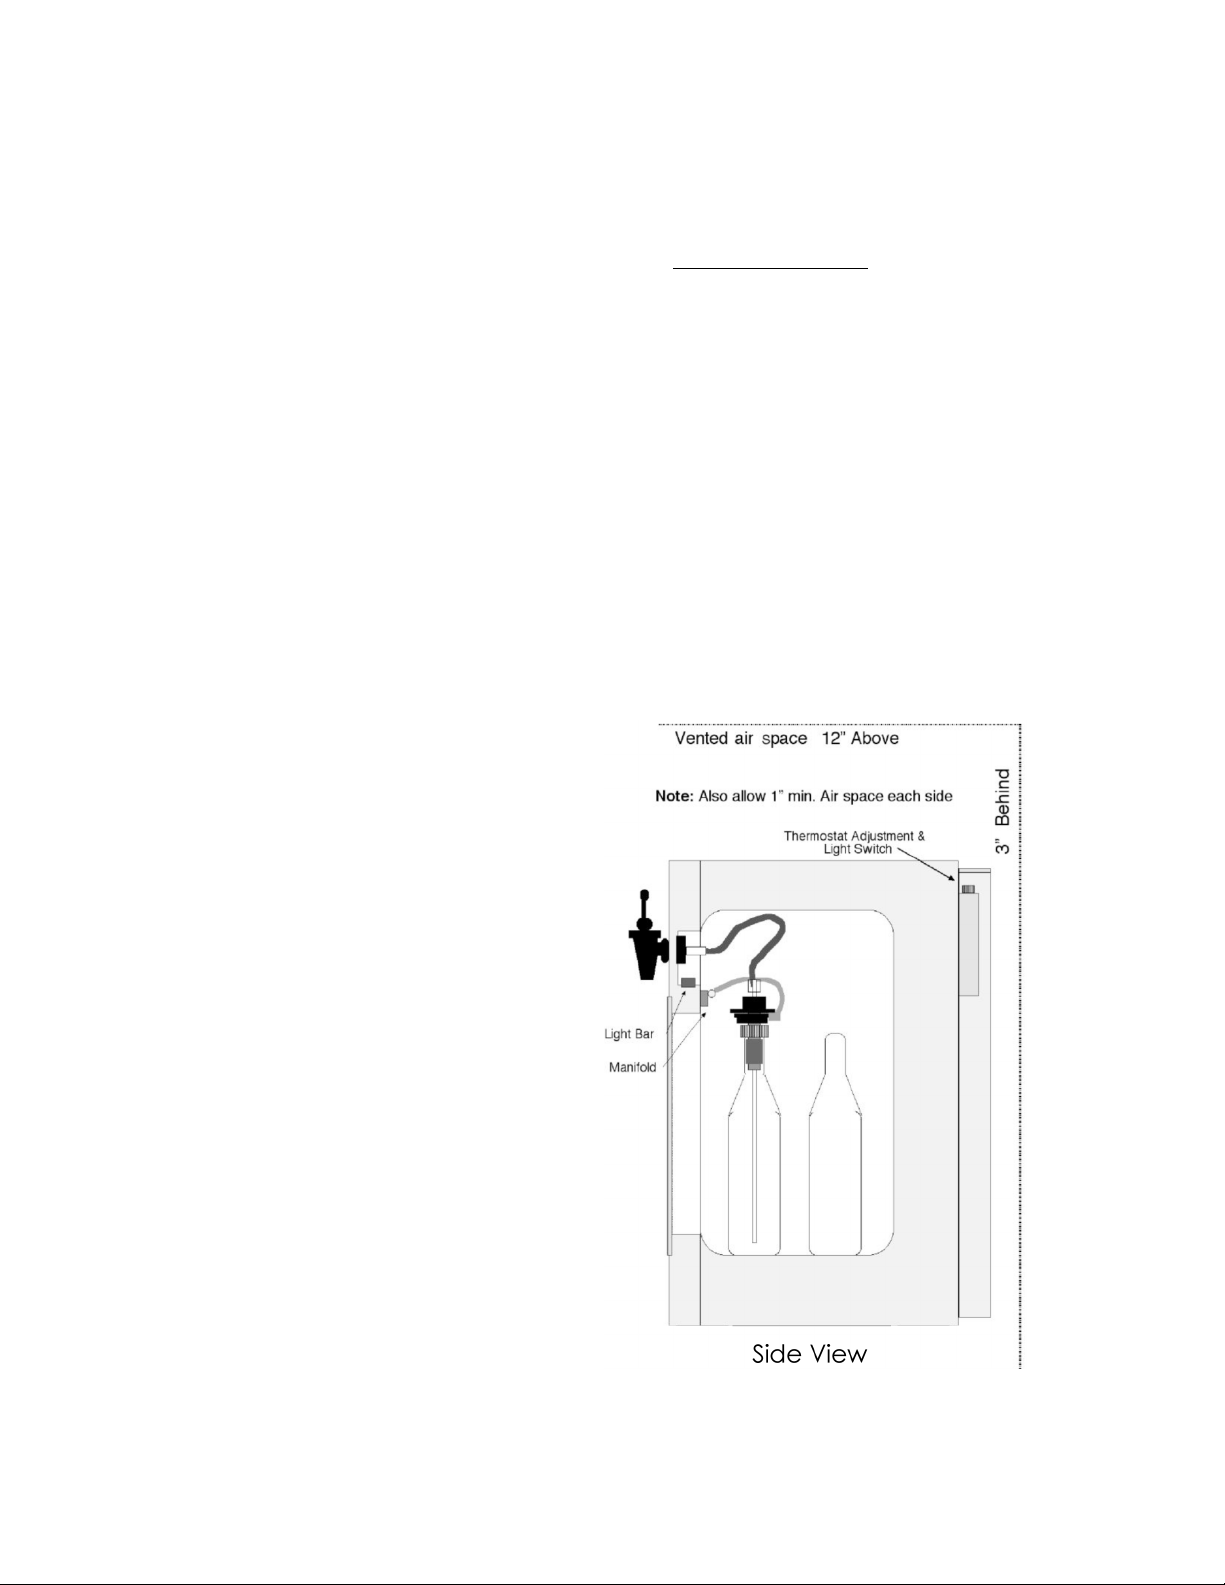
Your WineKeeper wine dispensing unit must be installed on a flat, level surface with vented space of at
least 3" behind, 1" on the sides, and 12" above the unit for proper ventilation. Remove the temporary
glides/feet and seal unit to the counter top. Once your unit is properly located, attach the faucets. Taking
care to align the threads properly, place the faucet
on the thru-wall and tighten the wing nut.
You may now plug the units’ power cord into
110 volt grounded electrical outlets.
• 4-bottle units = 1 plug
• 8-bottle units = 2 plugs
• 12-bottle units = 3 plugs
An 8 foot gas supply line is included with your
unit. The supply line includes a quick connect
fitting that connects to the regulator supplied
with your unit. USING A REGULATOR
OTHER THAN THE ONE SUPPLIED WILL
VOID THE WARRANTY. Your nitrogen/argon
cylinder can be placed anywhere convenient—
vertical or horizontal.
DO NOT TAMPER
WITH OR REMOVE THE
QUICK-DISCONNECT TO
COUPLE YOUR GAS SUPPLY
LINE AND REGULATOR,
THIS WILL ALSO VOID
THE WARRANTY.
!
4!
Hand tighten the supplied regulator to your nitrogen/argon cylinder, do not use a wrench. Do not
connect the gas line to the regulator at this time. Open the gas cylinder valve (turn the valve counter-
clockwise to open.) The gas pressure from the cylinder will seal the regulator in place. The gauge on the
regulator should read approx. 1800 lbs. for an aluminum cylinder, and 2200 lbs. for a steel cylinder, when
full.
You must now bleed the air from the system. With all the pinch clamps open, attach the gas supply line
quick connect fitting to the regulator fitting. Be sure the small metal lever on the gas supply line fitting is
in the down position. When the gas begins to flow through the lines and out the stopper assemblies, move
down the unit closing off all the pinch clamps. You are now ready to connect wine bottles.
How to Attach Wine Bottles to Your Machine
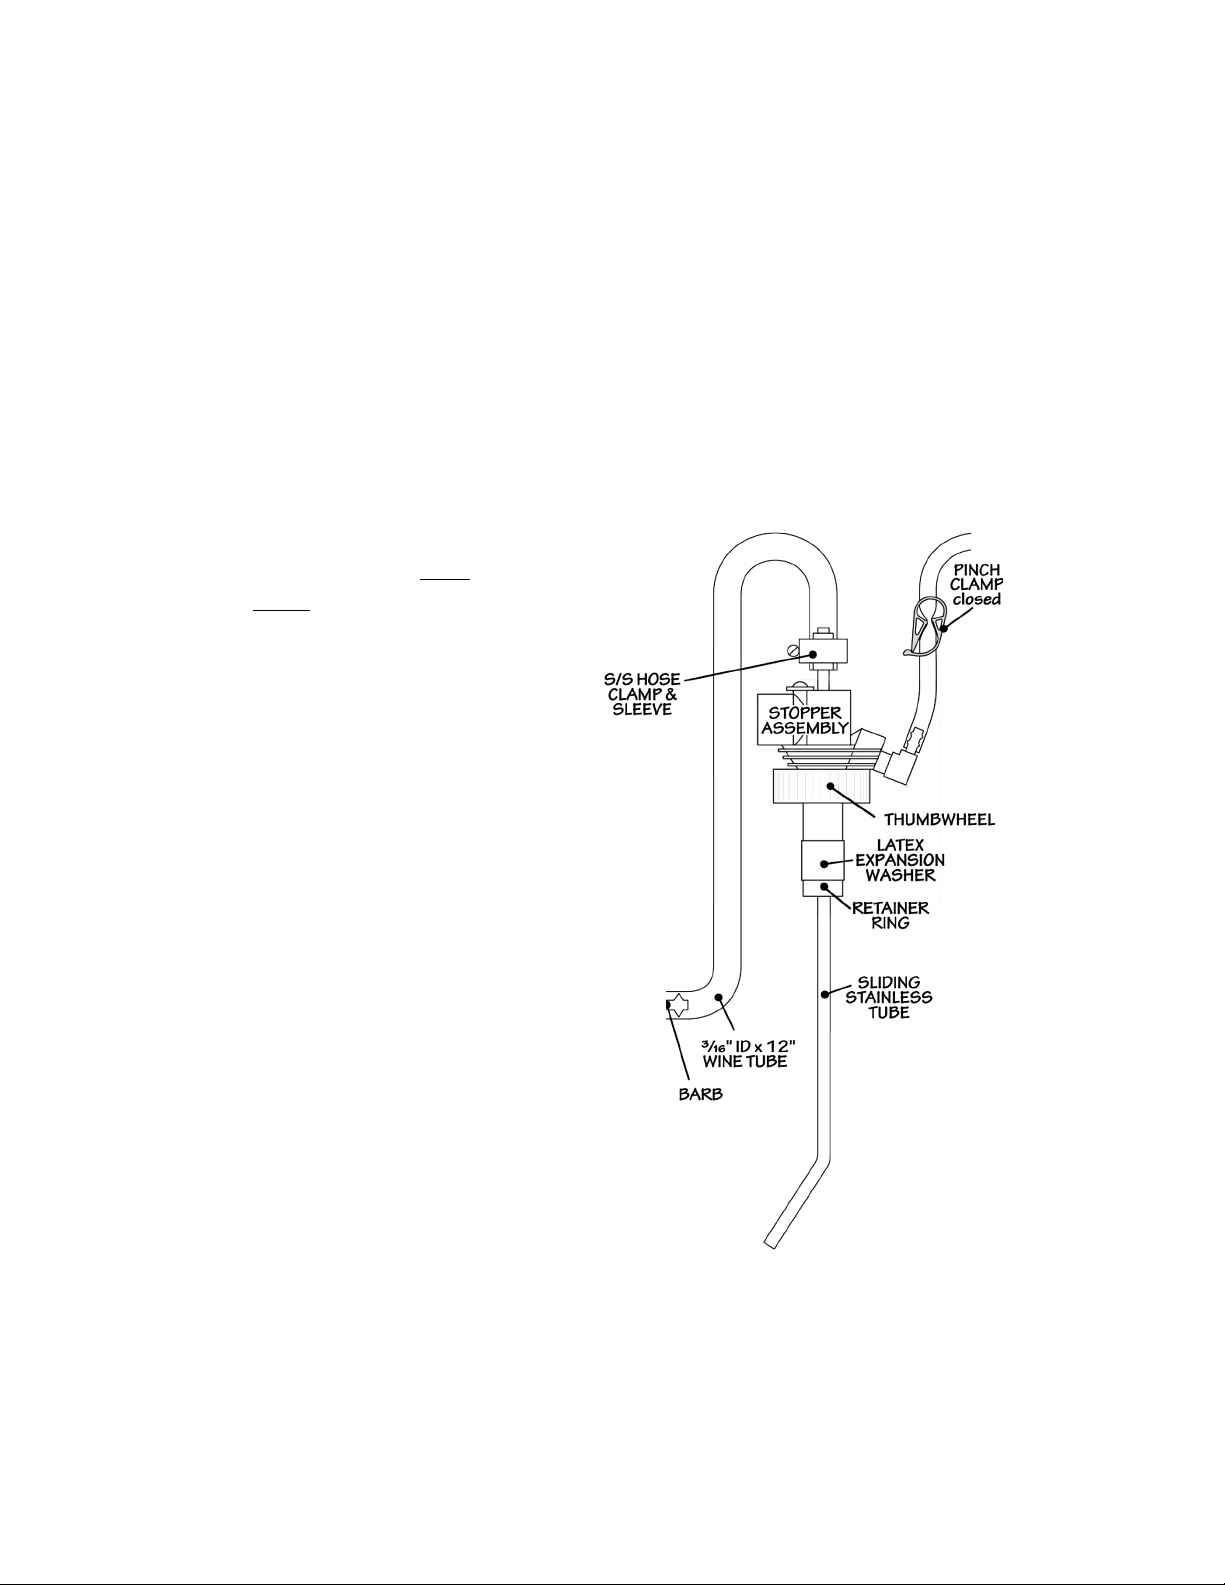
1. Place the stopper assembly into the
wine bottle. (Attach FULL wine bottles
ONLY.)
2. While holding the stopper so that the
latex seal is just at the lip of the bottle
opening, open the pinch clamp for 2
seconds. This will displace the air from
the bottleneck.
3. Close off the pinch clamp, and insert
the stopper all the way into the bottle.
4. Hold the stopper assembly with one
hand and tighten the knurled
thumbwheel clockwise with the other
hand until gently snug. Turn the
thumbwheel 1⁄4 to 1⁄2 of a turn further.
DO NOT OVER-TIGHTEN THE
THUMBWHEEL. If the thumbwheel
“pops” while turning, you have over-
tightened it. The best seal is obtained
with a dry bottleneck and latex seal.
OVER-TIGHTENING will damage
the stopper.
5. Adjust the sliding stainless steel tube for proper bottle depth. The tube may be placed all the way
to the bottom for white wines, and slightly raised off the bottom for red wines with sediment.
 Loading...