

Page 1
Diamond Bin
Rack-Lower
Left
Upright
(1) 13 5/16"
35
9/16"
Right
Upright
(1) 13 5/16"
35
9/16"
Top
Panel (1) 13 5/16"
36"
Bottom Frame
(1) 13 5/16"
34
5/8"
X-Interlocks (4) 13 5/16"
33 7/8"
Face
Trim
Face
trim already attached to
frame
Hardware
1
Wall
Securement Hardware, 1frame
screws
Assembly
Manual DIAB-L-36x36
DIAB-L-36x36
X
X
X
X
X
Assembly
Step
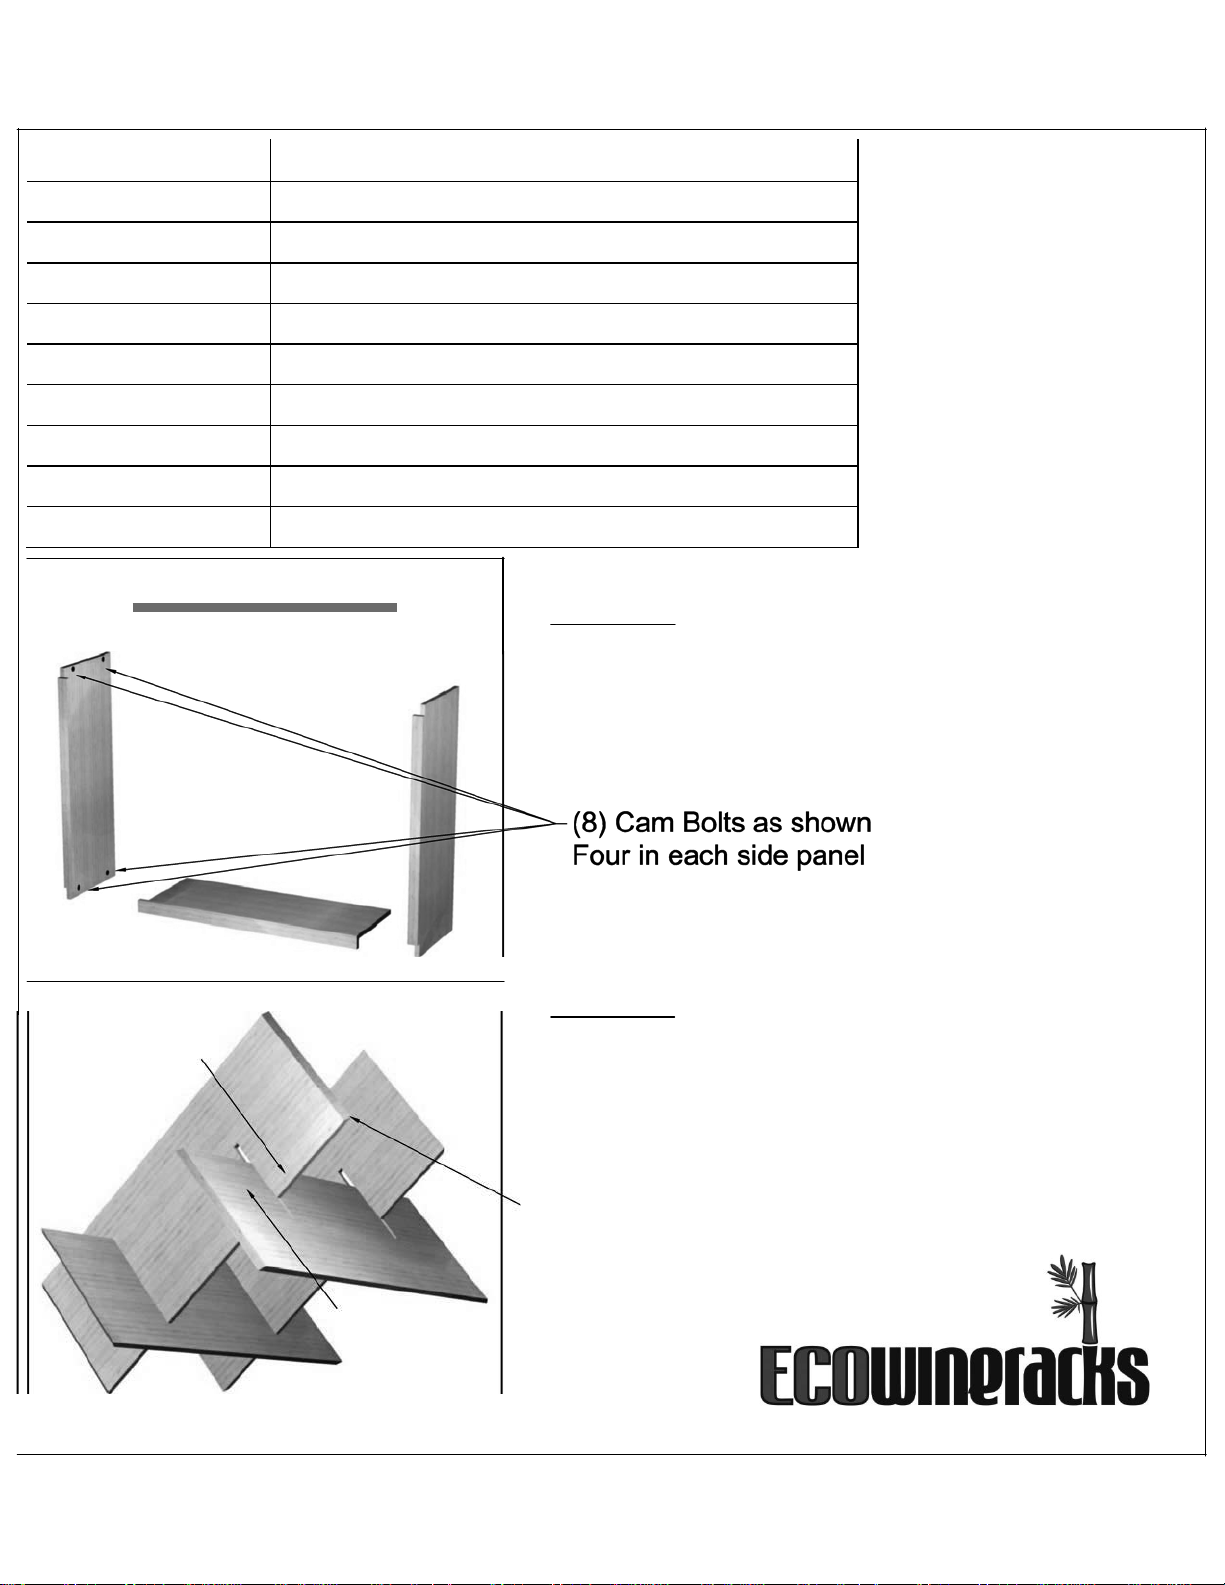
Attach Right and Left sides to Top and
panels with (8) cam-lock bolts provides.
bottom panel face trim is 2" tall, rest are 1
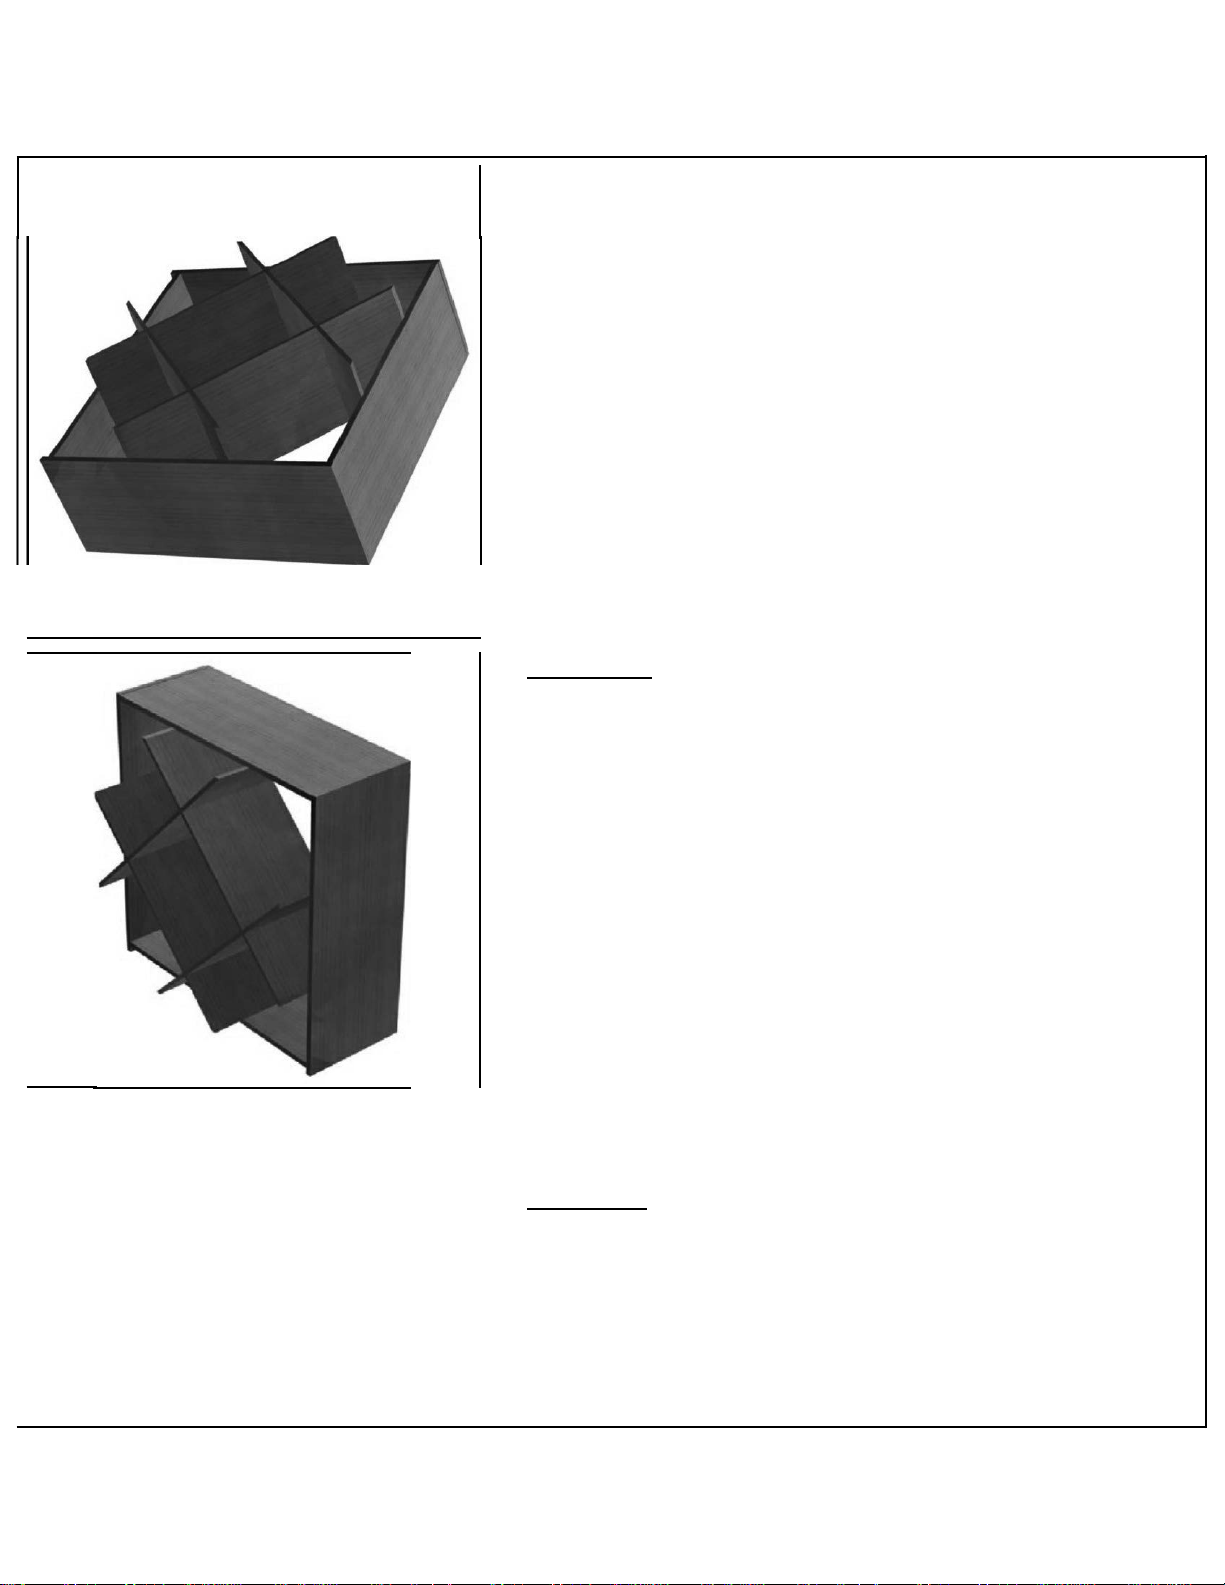
Step
Carefully slide X-lnterlocks into opposing
Interlocks will fit together without the use of
or excessive force. No fasteners required to
the four interlocking
Longer side of interlock points toward
One.
Two.
Instructions:
panels.
Bottom
(Note
1/2")
grooves.
tools
secure
corner
DIAB-L-36X36 ASSEMBLY 4/8/2013
Page 2
Step
Carefully lay the assembled X-Interlocks on the
There is no difference between front and back
interlocks so front is same as
Step
Carefully lay the assembled X-Interlocks on the
There is no difference between front and back
interlocks so front is same as
Slide the perimeter frame gently over the
until the frame touches the floor and rests on face fac
frame trim. Grab the frame and rotate up so the
face trim (2") is at the bottom. If interlocks shifted
rotation, gently slide so they are flush to the back of
cabinet.
Step
Secure to wall with (2) L-Brackets included.
wall
anchors provided and go through
Three.
back.
Four.
back.
Five.
framing cannot be located, use
drywall.
X-lnterlocks
If
screw
plastic
DIAB-L-36X36 ASSEMBLY
of
of
larger
floor.
floor.
during
the
41812013
e
 Loading...