

Vintage Cellars 144 User Manual
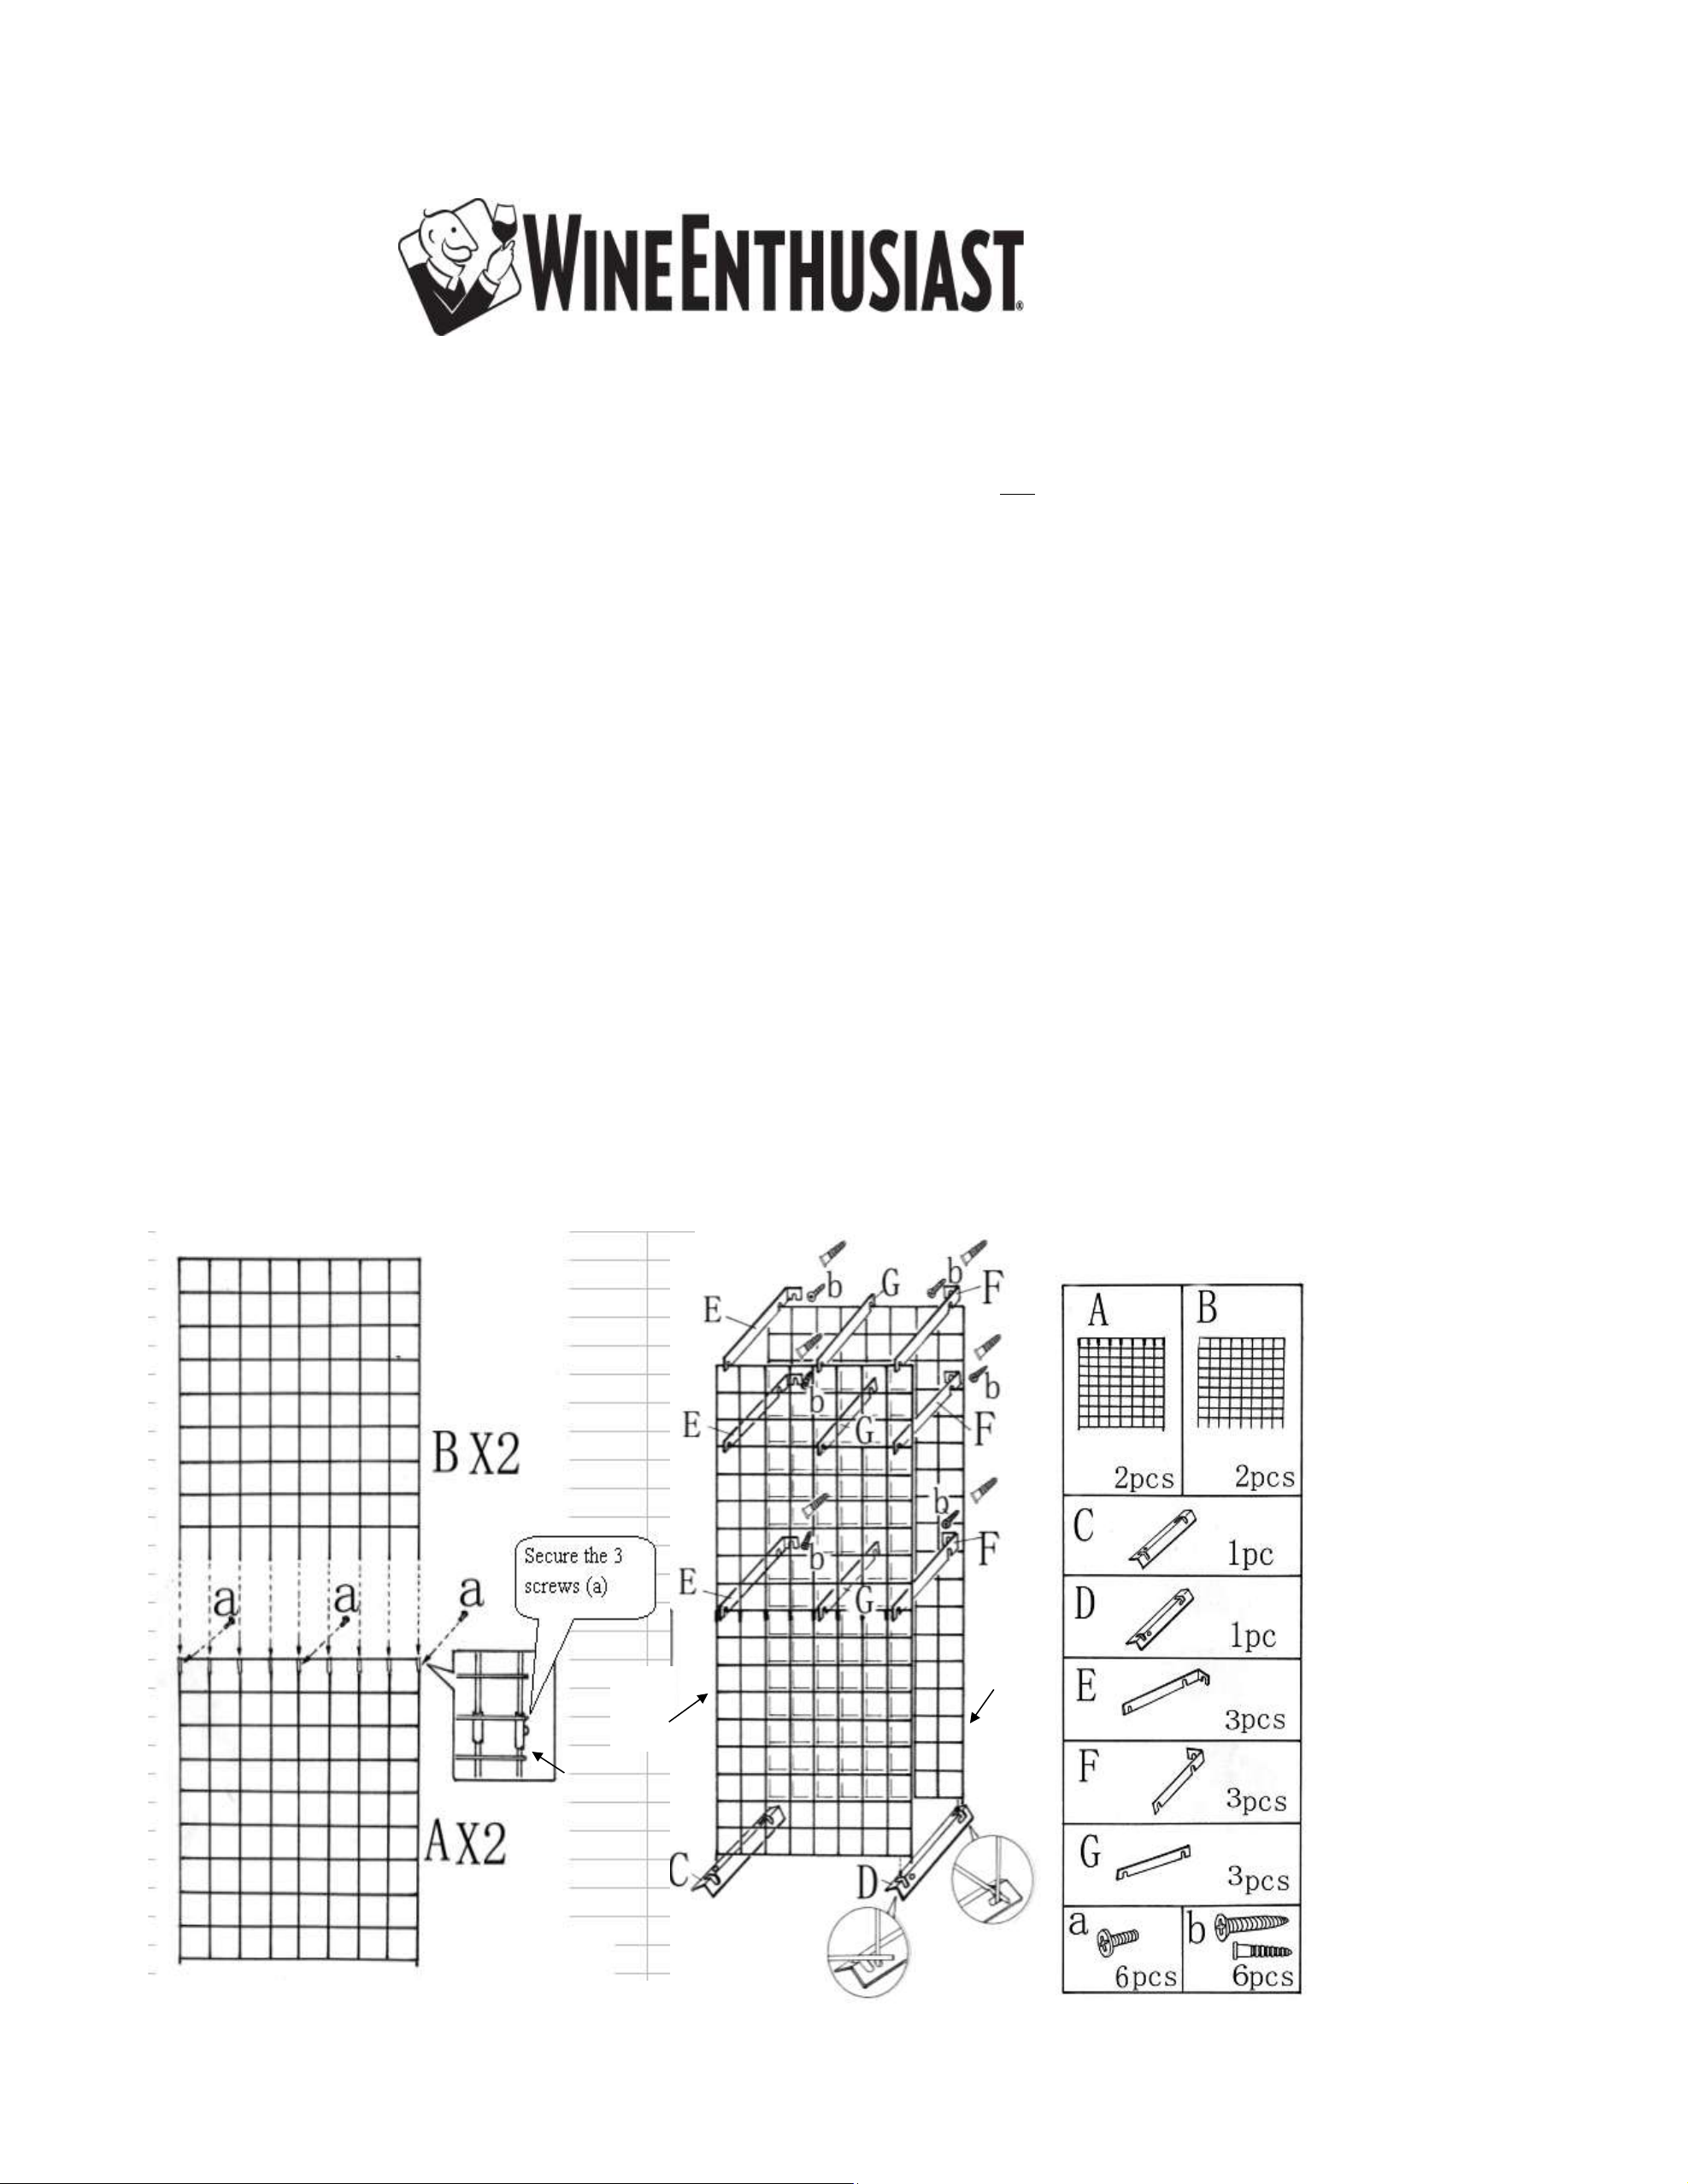
STEP 1
STEP 2 Place left and right bottom spacers C & D on floor (please note differences between
the front and rear of left and right bottom spacers - the front groove is higher than
the rear groove.).
STEP 3 Place rear grid (B+A) in rear grooves of left and right bottom spacers with vertical
bars positioned in grooves as illustrated.
STEP 4 Place front grid (B+A) in front grooves of left and right bottom spacers with horizontal bars
positioned in grooves. Make sure both vertical extensions bars are positioned in holes
of front bottom spacers.
STEP 5 Press grooves of brackets E,G & F over horizontal bars of front and rear grids as
illustrated.
STEP 6 Move the grid and bottom spacers against wall until the rear of brackets touch the wall.
Mark wall with pencil through screw hole in rear of bracket.Drill holes where marked and
insert anchors. Secure racks to wall with screws .Then tighten the screws through
brackets E & F to the wall.
There are 2 pcs of each: panel B and panel A. Put panel B and panel A together by fully inserting legs of panel B into
the brackets of panel A, then tighten the three screws. Repeat this step, then you will get one front grid and one rear
grid.
BLACK TIE GRID ASSEMBLY INSTRUCTIONS
Please visit us at www.wineenthusiast.com or call 800.356.8466
Rear
grid
Front
grid
Rear
grooves
Front
grooves
Leg
bracket
 Loading...