

Page 1
PANDORA
AUTO-PRINTER
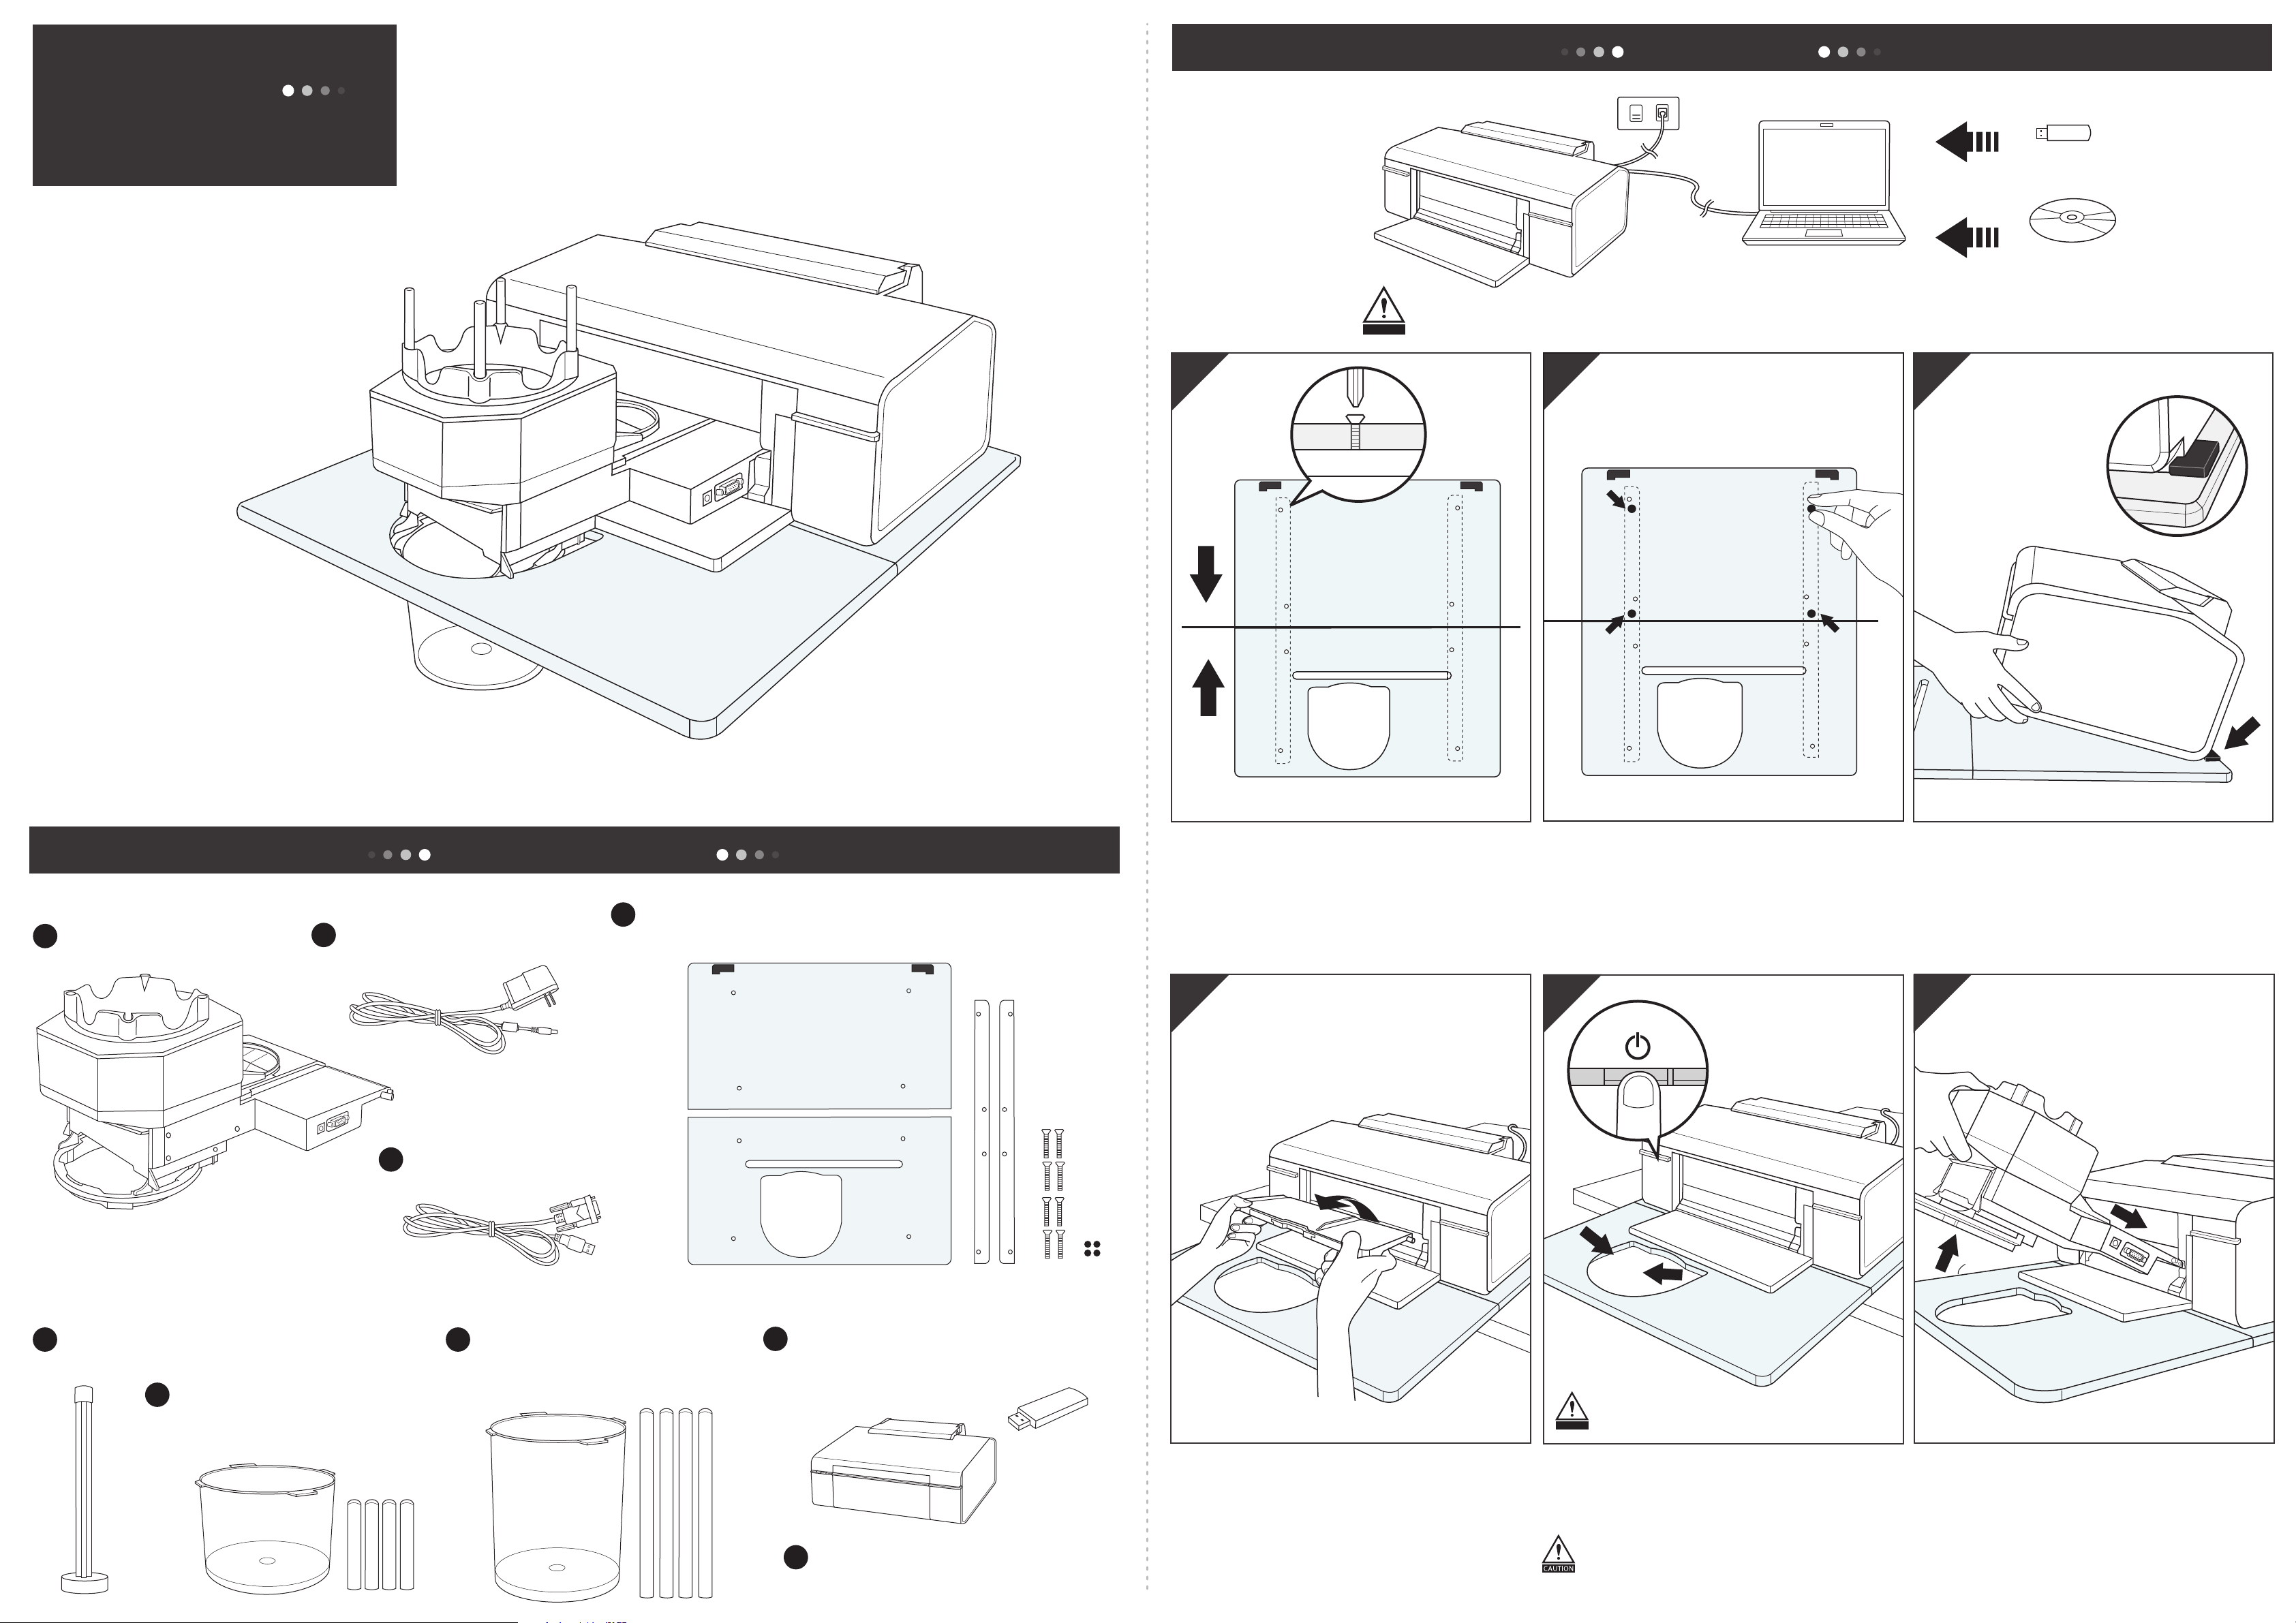
Package Contents
Robotic Disc Loader
Power Adapter
Serial to USB Data Cable
License Dongle
(Include disc loader software)
Device Plate
(2 pcs)
/ Metal Bar
(2 pcs)
/ Screws
(8 pcs) /
non-slip material
(4 pcs)
Spindle
Disc Bin
(50 Discs Capacity)
/ 1 pc
Disc Bar
(50 Discs Capacity)
/ 4 pcs
Disc Bin
(100 Discs Capacity)
/ 1 pc
Disc Bar
(100 Discs Capacity)
/ 4 pcs
(Optional)
A
D
H
B
C
E
F
G
I
Disc Printer
(Optional, separate package)
(For Media Insertion / Remove During Use)
Installation
Printer and Disc Loader software must be installed before proceeding.
CAUTION
Printer Software Disc
Disc Loader Software
1. Screw the metal bars to the Device
Plate from the bottom side.
1
2
2. Place the non-slip material in the
designated locations on the metal
bars..
3
3. Place the printer on the Device Plate
and press securely against the rubber
feet.
(There should be no gap)
4
4. Lift the printer’s front tray up with both
hands, then pull it out of the paper
position. Completely remove the tray
from the printer. Please set the tray aside
for later use.
Remove the Disc Loader each time the printer
is turned o.
5. Turn on the printer. It should initialize
and the power light should turn green.
This means the printer is setup correctly.
The unit should be located so the Disc Bin
has clearance to hang below the DevicePlate.
CAUTION
5
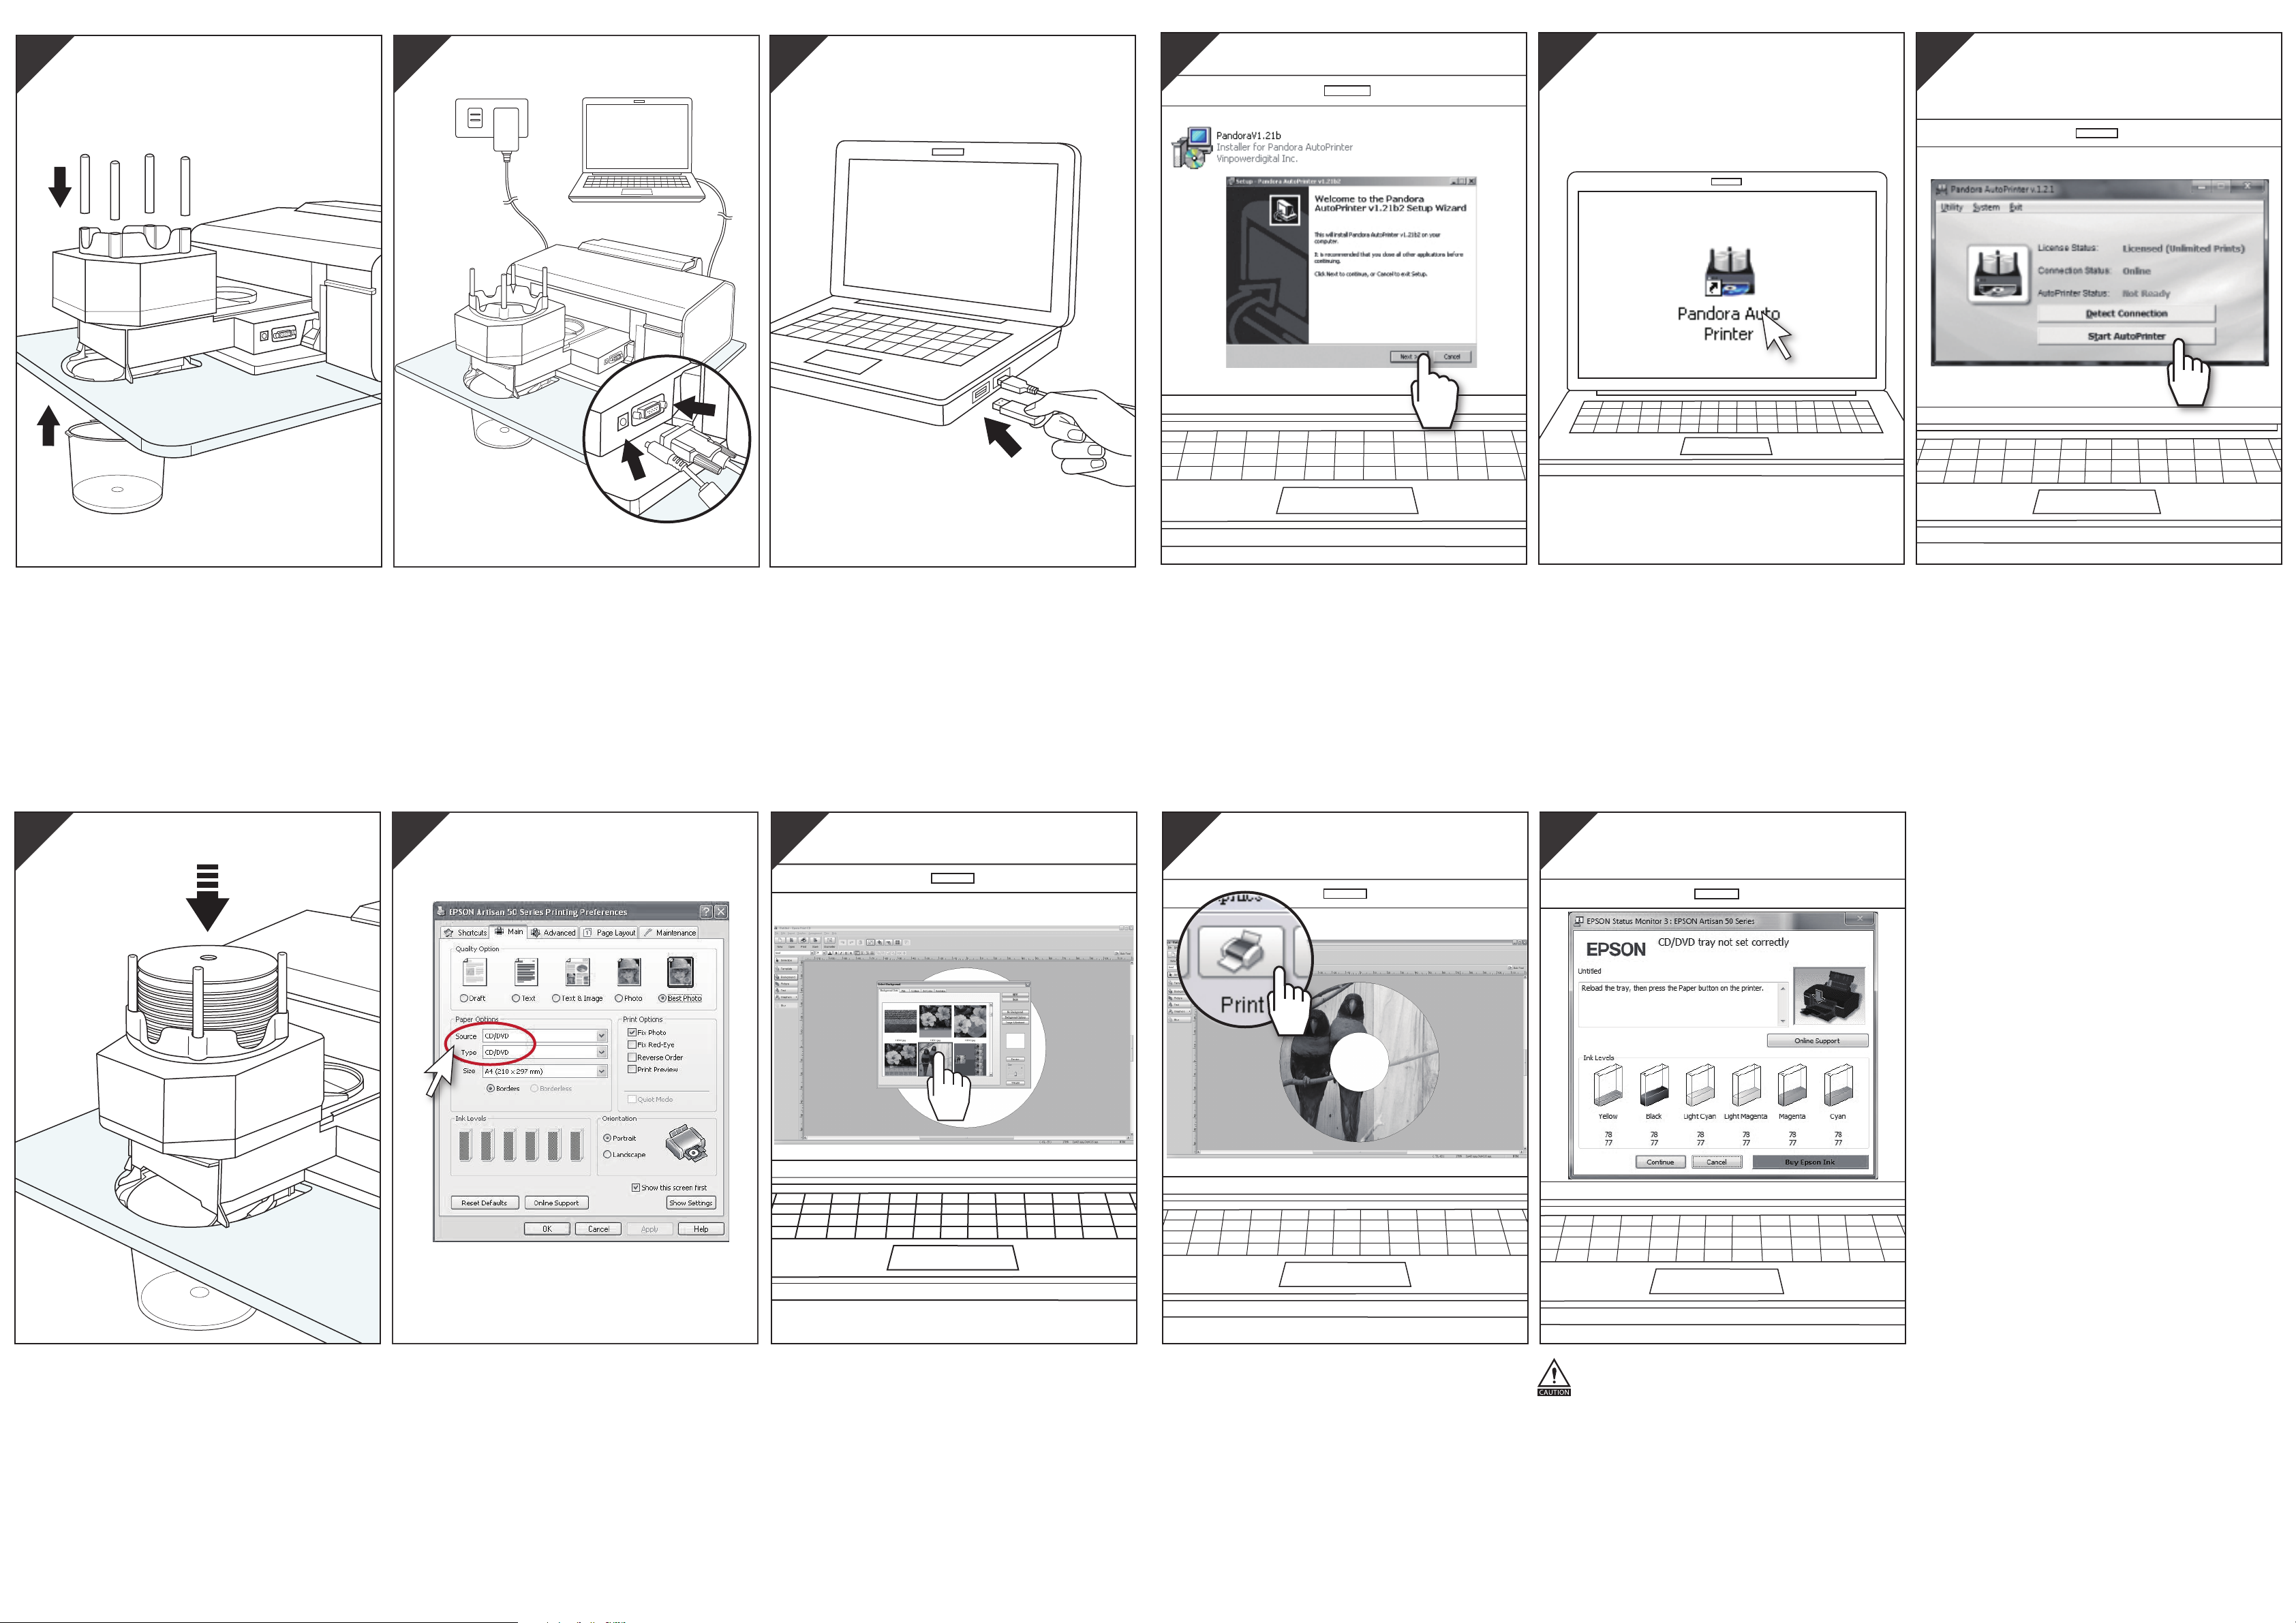
6. Place the Robotic Disc Loader into
the printer. Ensure that the edges of
the loader are lined up with the slots in
the printer.
6
V1.7
Page 2
V1.7
7. Insert the Disc Bars into the Robotic
Disc Loader and the Disc Bin into the
Device Plate.
7
8. Plug the power adapter into the
Robotic Disc Loader. Then plug the
serial to USB Data Cable in between the
computer and the Robotic Disc Loader.
8
9. Insert the License Dongle into PC.
Dongle is required during operation.
9
10 . Execute the Installation File on the
License Dongle. Restart the PC after
the installation is complete.
10
11
11. Double-Click the Pandora Shortcut
on the Desktop
A tone will alert the detection of the device.
12. Click the Start AutoPrinter button
to activate the Robotic Disc Loader.
12
13. Load Inkjet Printable Media into the
Robotic Disc Loader.
13
14
Verify that the “Paper Option” is set
to DVD by clicking on Start > Device
and Printers (or Printers and Faxes)
and then right-clicking on the the
Epson printer, and selecting Printing
Preferences Check the “Paper
Option” on the “Main” tab and verify
that CD/DVD is selected for both the
“Source” and the “Type” fields.
14 .
15. Design the Disc Label using the Epson
“Print CD” or any other label design
software.
15
16. Print the Disc Label by selecting the
installed Epson printer.
16
Please ignore the message: “CD/DVD
not set correctly”, the Disc Loader will
start loading soon.
17
 Loading...