

Vinpower LightScribe, LightScribe Duplicator, SharkCopier LS Software Installation & Quick Start Usage Manual
Vinpower Digital© LightScribe Duplicator (SharkCopier LS) rev 2.0
S
Software Installation &
Quick Start Usage Guide
Minimum Hardware
1. Pentium 3 Class microprocessor or better
2. CD/RW Recorder
3. 32Mbytes of RAM
4. 10Mbytes of free disc space on your hard drive
1. Windows 2000, XP, 2003 or Vista.
1. Insert the LightScribe Installation Disc into the
2. Using the “My Computer” icon or Windows
3. From the CD Drive, double-click the setup.exe
4. Follow the Installation Wizard to start the
Requirements
Minimum Software
Requirements
oftware Installation
CD drive of your computer.
Explorer, click on the CD drive
to run the setup program.
installation process, see screen below:
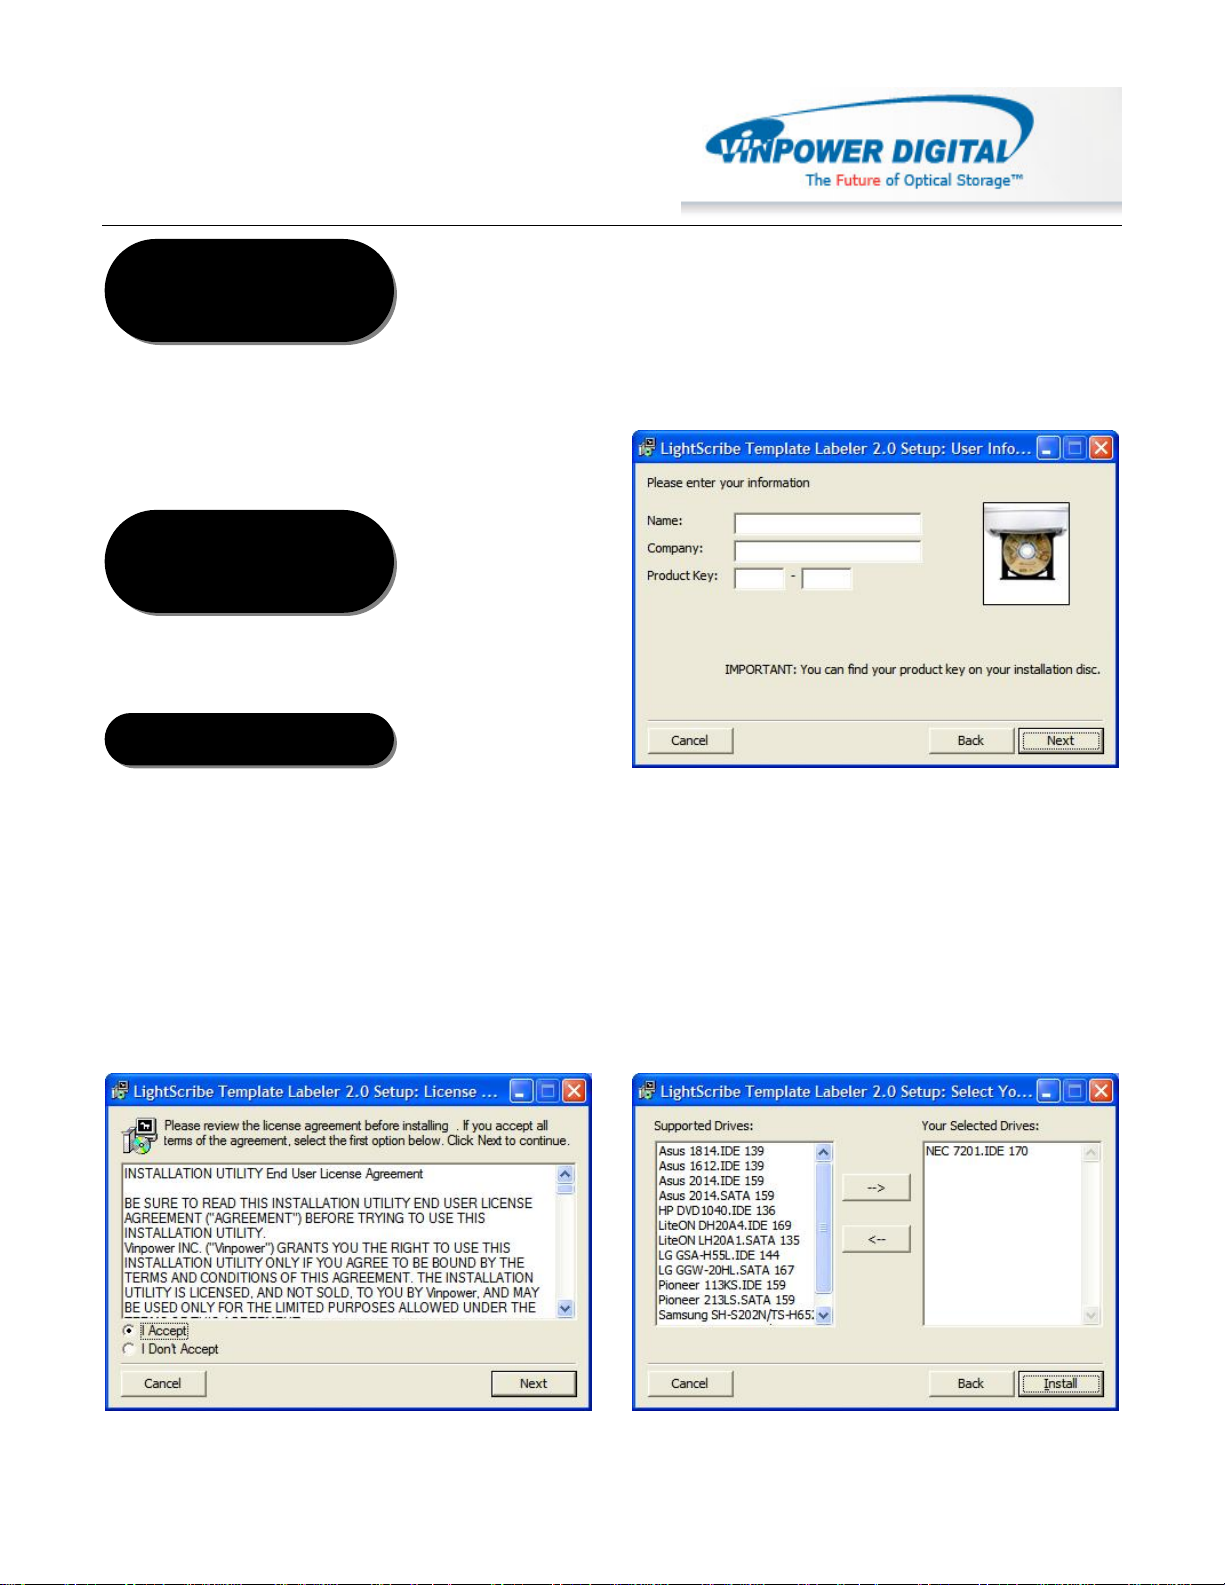
5. During the installation process, you will be
prompted for a Product Key. Such product key
can be found on the Installation Disc.
6. You will then be asked to choose the
LightScribe writer model that was installed in
your duplication system. The default writer that
comes with your system should be pre-selected.
You can then click Install to continue the
installation process.
1
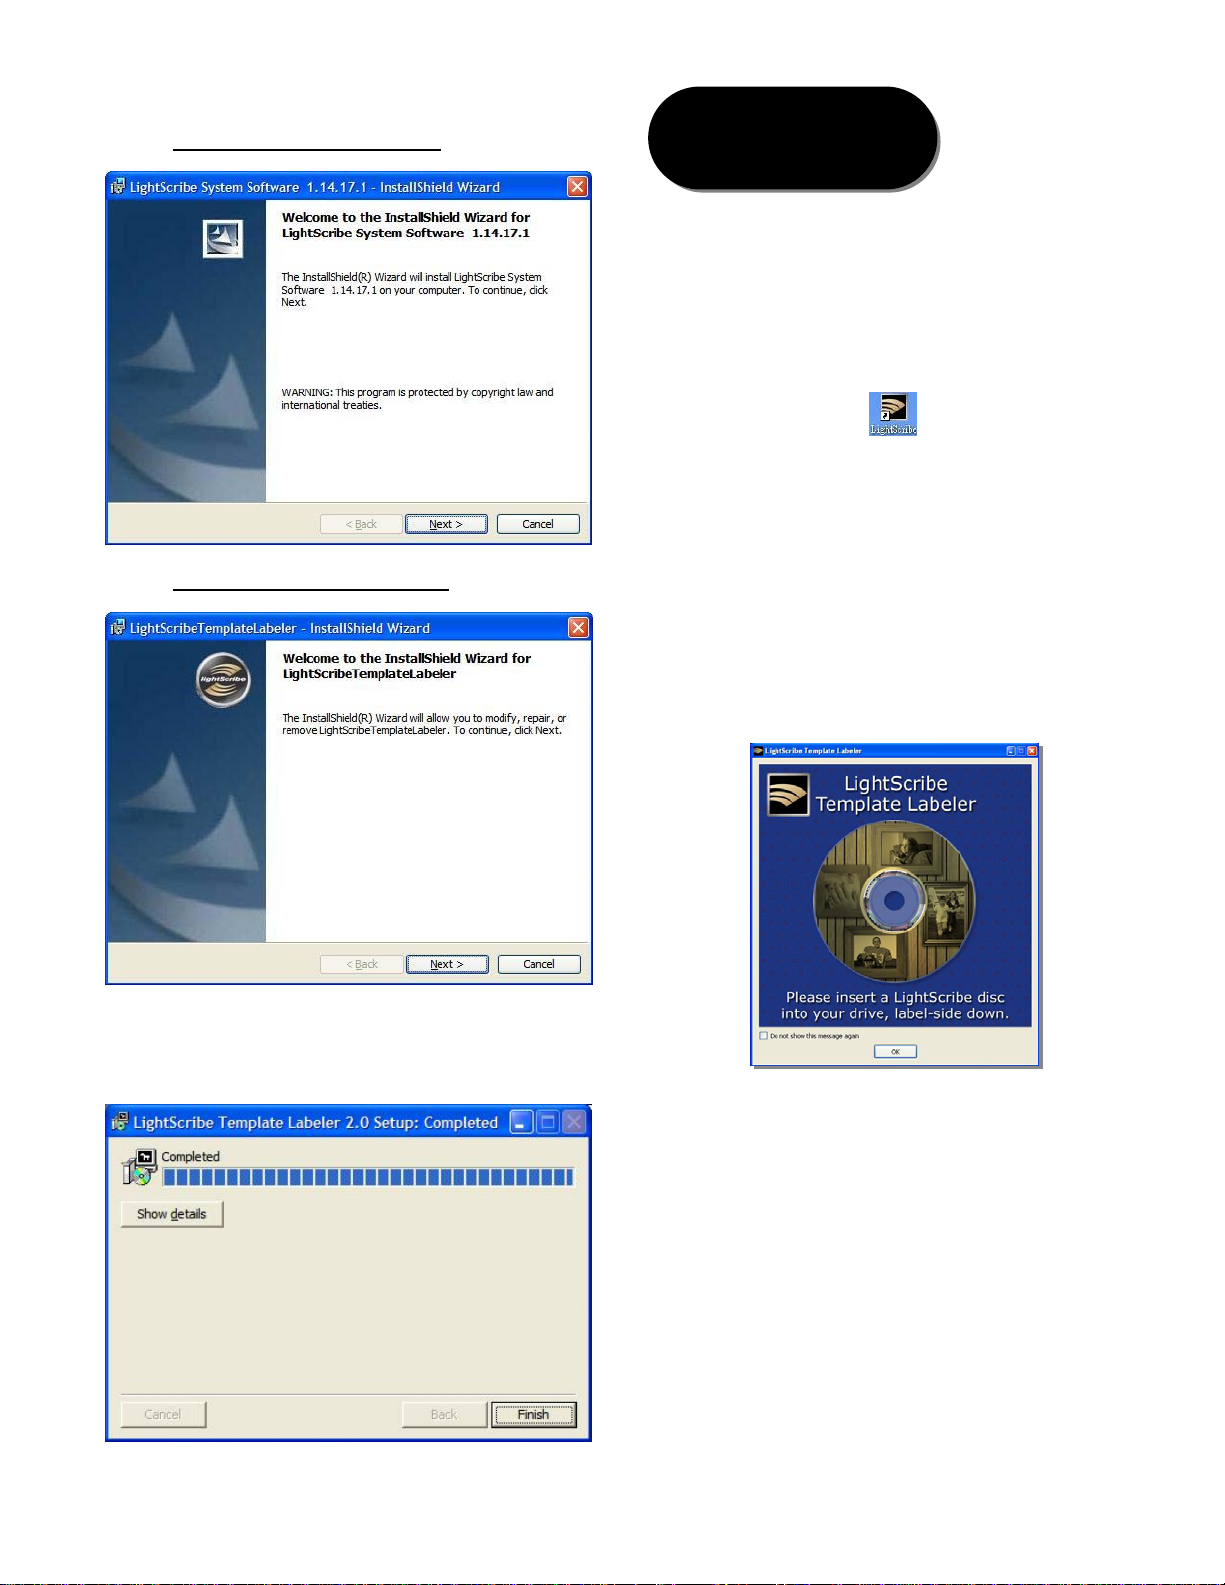
7. During the installation process, the following
applications will be installed:
¾ LightScribe Syst e m S oftware
¾ LightScribe Template Labeler
8. Upon successful installation of the above
software, click the Finish button to complete the
installation.
Software Quick Start
User Guide
The following Quick Start Guide will demonstrate
how to use the Template Labeler to generate the label
files that can be used by the LightScribe Duplicator.
1. Launch the LightScribe Template Labeler
¾ click the shortcut on your desktop
¾ Or you can find the program launch shortcut
in Start > All Programs > LightScribe Direct
Disc Labeling > LightScribe Template
Labeler.
Note: Since we use this software for design
and layout purpose, please ignore the
“LightScribe Disc Insertion” prompt below
by pressing the OK button.
2. Select Template
¾ Choose one of the preinstalled templates, or
click on "Get More Templates" to download
additional templates.
(1)
¾ Select the Category filter function to more
easily view and choose a template. Note that
each template may appear in multiple
categories.
¾ Click on Template choice to activate.
(2)
(3)
2

4. Preview and Print Label
3. Insert Text and/or Pictures
¾ Depending on the template chosen, you may
have options to modify text box(es) or
picture(s).
¾ For inserting pictures, just click on the
dedicated area to select the picture you'd like
to use.
(4)
¾ Use the Zoom button or the scroll wheel of
your mouse to size the picture, then drag it to
position it within the selection window.
¾ For text, just click on the text field, then type
the text you'd like to appear within the text
field. Note you can enter multiple lines of text
depending on the template chosen.
(6)
(1)
(2)
(3)
(5)
¾ Click on "Preview and Print" to bring up the
print window.
¾ Select the "Best" contrast mode for the
darkest print.
(7)
¾ Select the label surface color of the disc you
wish to label onto.
(8)
¾ Click "Print" to start the label file (.lsi files)
generating process if you are satisfied with
the preview.
(9).
You will be asked for the location & the
name of the lsi label file you wish to
generate. In addition, due to the system
display limitation, make sure the file name
does not contain any foreign characters
other than 26 Greek alphabets, numerical
digits, and/or some basic symbols like “-“,
etc.
(7) (8)
(9)
5. Create a Data CD with the generated label
file(s)
¾ Locate the label file(s) (.lsi files) on your PC.
¾ Create a Data CD with one or more lsi label
file(s) via a CD/DVD Creating Software; like
Nero Burning-ROM.
Do NOT place label file(s) under any
directory/folder of the Label CD. Failure to
(4) (5)
(6)
3
do so will result in the label file(s) not being
recognized by your system.

6. Using LightScribe Duplicator to print copies
of your disc label
¾ Power On the LightScribe Duplicator
¾ Place all LightS c ribe media, with printing
surface facing down, into the remaining
writer trays.
¾ Go to menu “2. Print” by pressing UP or
DOWN navigation buttons. Then press
“>>”/“ENT” key once to start the label printing
process.
¾ Place the Data CD that contains the label files
you wish to copy into the 1
st
(Top) Tray.
¾ Upon completion, the printed discs will be
ejected.
4
 Loading...