

vinmetrica sc-300 kit User Manual

Vinmetrica SC-300 Kit™
User Manual
The Vinmetrica SC-300* is a simple and robust device that provides high accuracy in determination of
sulfite (SO2), pH and titratable acidity (TA) levels in wines, ciders, and other liquids. These are
essential parameters to control in the effort to make high quality wines.
Table of Contents:
Materials Provided in the Kit............................................................................................................... 2
Things you will need............................................................................................................................ 2
Why Test for SO2, pH and TA?............................................................................................................ 3
Theory of Operation............................................................................................................................. 4
Setup.................................................................................................................................................... 5
Setting up the SC-300 for the first time................................................................................... 5
Instrument Operation....................................................................................................................... 7
Procedures.......................................................................................................................................... 9
Measuring Free Sulfite (SO2) by Titration.............................................................................. 9
Measuring Total Sulfite (SO2) by Titration.............................................................................. 12
Calibration of pH .................................................................................................................... 12
Measuring pH........................................................................................................................... 13
Measuring Titratable Acidity (TA) by Titration....................................................................... 13
Finishing up............................................................................................................................. 16
Warranties, Liabilities & Hazards.................................................................................................... 17
Appendix A - Test Mode..................................................................................................................... 18
Appendix B - Sulfite & TA Adjustments........................................................................................... 20
Appendix C1 - Troubleshooting: pH and TA Issues........................................................................ 21
Appendix C2 - Troubleshooting: SO2 Issues.................................................................................... 24
*
US Patent pending
SC-300 manual 1 Version 3.0a
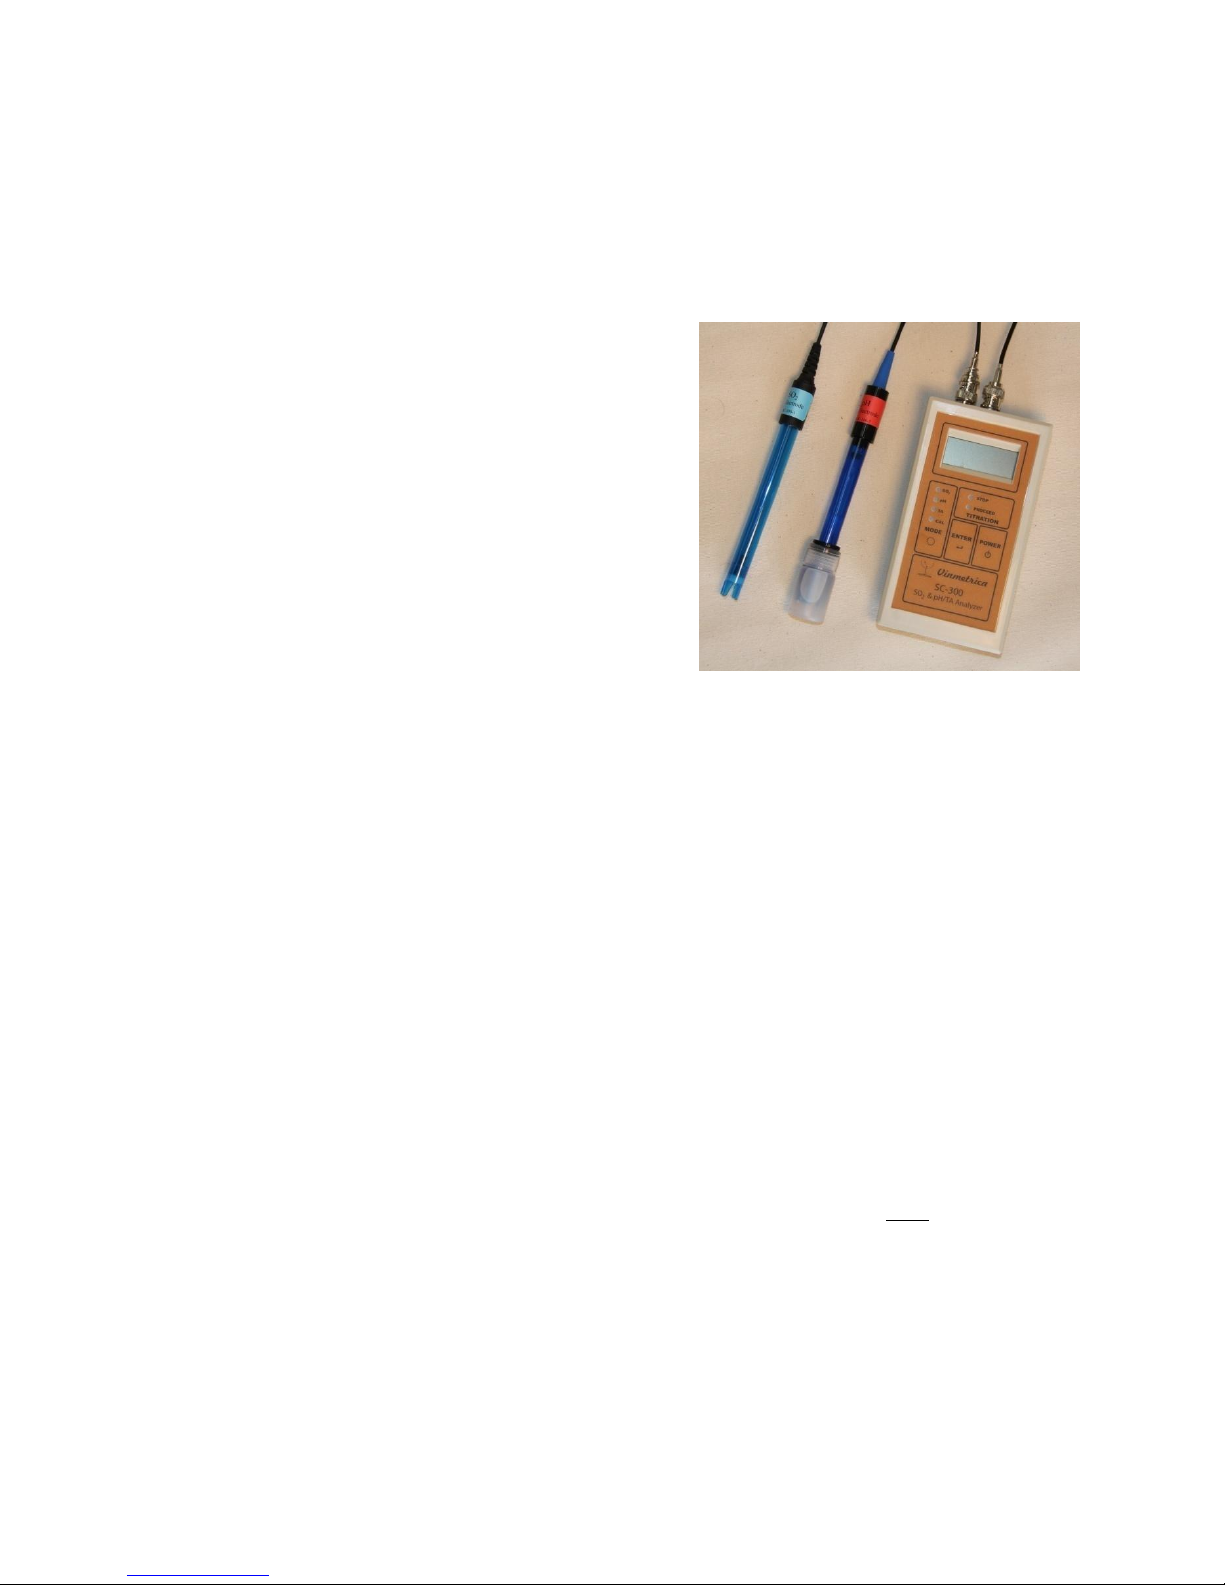
Figure 1. The SC-300 instrument with the SO2
and pH/TA electrodes.
Materials provided in the kit:
1. Vinmetrica SC-300 SO2/pH controller unit (Part number SC-300-1)
2. SO2 Electrode (Part number SC-100-3), blue polycarbonate housing
3. pH Electrode (Part number SC-200-7), red or blue polycarbonate housing
4. SO2 Reagent set (Part number SC-100-2):
SO2 Titrant Solution (0.0156N)
SO2 Acid Solution
SO2 Reactant Solution
5. pH/TA Reagent Set (Part number SC-200-8):
pH 4.01 Reference Solution
pH 7.00 Reference Solution
TA Titrant (0.13 N NaOH)
6. Two 5 mL syringes
7. Two 3 mL polyethylene transfer pipettes
8. One 25 mL serological pipette
9. One 5mL serological pipette
10. 100 mL polypropylene beaker
Things you will need:
1. Two standard AA batteries (alkaline type).
2. Distilled water (aka purified water by deionization), which can be found at most grocery stores.
3. (Optional but highly recommended) It’s handy to have a wash bottle for rinsing. Rinse bottle
available from Vinmetrica (Part number SC-100-17, or included in the Deluxe Lab Accessory Kit).
4. (Optional) Deluxe Lab Accessory Kit which includes: magnetic stirrer, burette (10mL or 25mL),
lab support stand, electrode holder, and wash bottle. Available from Vinmetrica (Part Number SC300-9).
5. (Optional) Sodium Hydroxide solution, 1N concentration (if you want to do total SO2). Available
from Vinmetrica (Part number SC-100-7)
SC-300 manual 2 Version 3.0a

Free SO2 (ppm)
13
16
21
26
32
40
50
63
79
99
125
pH
3.0
3.1
3.2
3.3
3.4
3.5
3.6
3.7
3.8
3.9
4.0
Why Test for SO2, pH and TA?
Testing for sulfite (SO2) is crucially important for making sure your wine does not spoil by
oxidation or from microbial growth. By monitoring your SO2 levels, you can make adjustments when
needed, especially before starting primary fermentation, after malolactic fermentation has completed,
after racking or when ready to bottle. To correctly adjust sulfite, you need values for your current "Free
SO2" level and your wine's pH, both of which can be measured with the Vinmetrica SC-300 analyzer.
The key parameter in protecting your wine is molecular SO2 which for most wines should be at
0.8 ppm (mg/L) following secondary fermentation. This in turn depends on the free SO2 (it can also be
referred to as unbound SO2) and the pH. Overall, you can reach your target molecular SO2 by
measuring and adjusting your free SO2 levels and considering your wine's particular pH. See Table 1.
Table 1. Free SO2 concentrations necessary to attain 0.8 mg/L molecular SO
at a designated pH.
2
We recommend using a sulfite calculator for determining how much sulfite to add to your wines
after taking a sulfite measurement with the SC-300 Analyzer Kit. Winemaker Magazine's Sulfite
Calculator at http://winemakermag.com/guide/sulfite can walk you through the process. See Appendix
B for more information on how to adjust your wine for sulfite.
Monitoring your wine's pH is also important for the first few months of the wine making
process. Proper pH and Titratable Acidity (TA) levels influence mouth feel and provide wine stability.
During malolactic fermentation, the pH can increase somewhat and should be monitored. Typically,
wine pH and TA are inversely related; when pH goes up, TA goes down and vice versa. Adjustments
may be made to your wine to prevent wine instability. See Appendix B for more information on
adjustments.
SC-300 manual 3 Version 3.0a

Theory of operation:
Sulfite (SO2): The SC-300, with the SO2 electrode and reagents provided, can be used to determine
sulfite (or SO2) levels in wine, musts, and other samples. It relies on the Ripper titration based on the
quantitative reaction of the SO2 with iodine (generated during the titration) which oxidizes the SO2 in
the sample under acid conditions.
-
IO
+ 5I- + 6H+ 3I2 + 3H2O generation of iodine from iodate
3
SO2 + I2 + H2O 2I- + SO3 + 2H
When all the SO2 is titrated at the endpoint, excess iodine appears in solution. This is detected as
current with the SO2 electrode and signaled by audible and visual indicators. The endpoint is much
more sensitive than the starch color change commonly employed for Ripper titration, and it is sharp
and clear, even when titrating red wines and musts. From the known concentration of the titrant and its
volume required to reach the endpoint, the free SO2 is simply calculated.
pH and TA: The SC-300 kit also provides a pH electrode and reagents for calibration and
determination of pH and titratable acidity (TA) values in wines and other samples. The pH value is
simply determined by placing the calibrated electrode into a sample and reading the value. TA is
determined by titrating a 5 mL sample of wine to an endpoint pH of 8.2* (or 7.0 if preferred, see below)
with the TA titrant (0.13N NaOH) from the syringe in the kit. From the known concentration of the TA
titrant and its volume required to reach the endpoint, the TA is simply calculated (results are in units of
g/L tartaric acid).
+
reaction of SO2 and iodine
Potential measurements: In firmware versions 3.1.1 and higher of the firmware, the SC-300 can
display the voltage reading on an electrode attached to the pH connector. This can be used with certain
electrodes, for example, galvanic oxygen probes, potassium, or sodium electrodes, or to view the raw
voltage reading of a pH electrode.
*In some countries, pH 7.0 is used as the endpoint; see Instrument Operation, Step 5 (page 7).
SC-300 manual 4 Version 3.0a
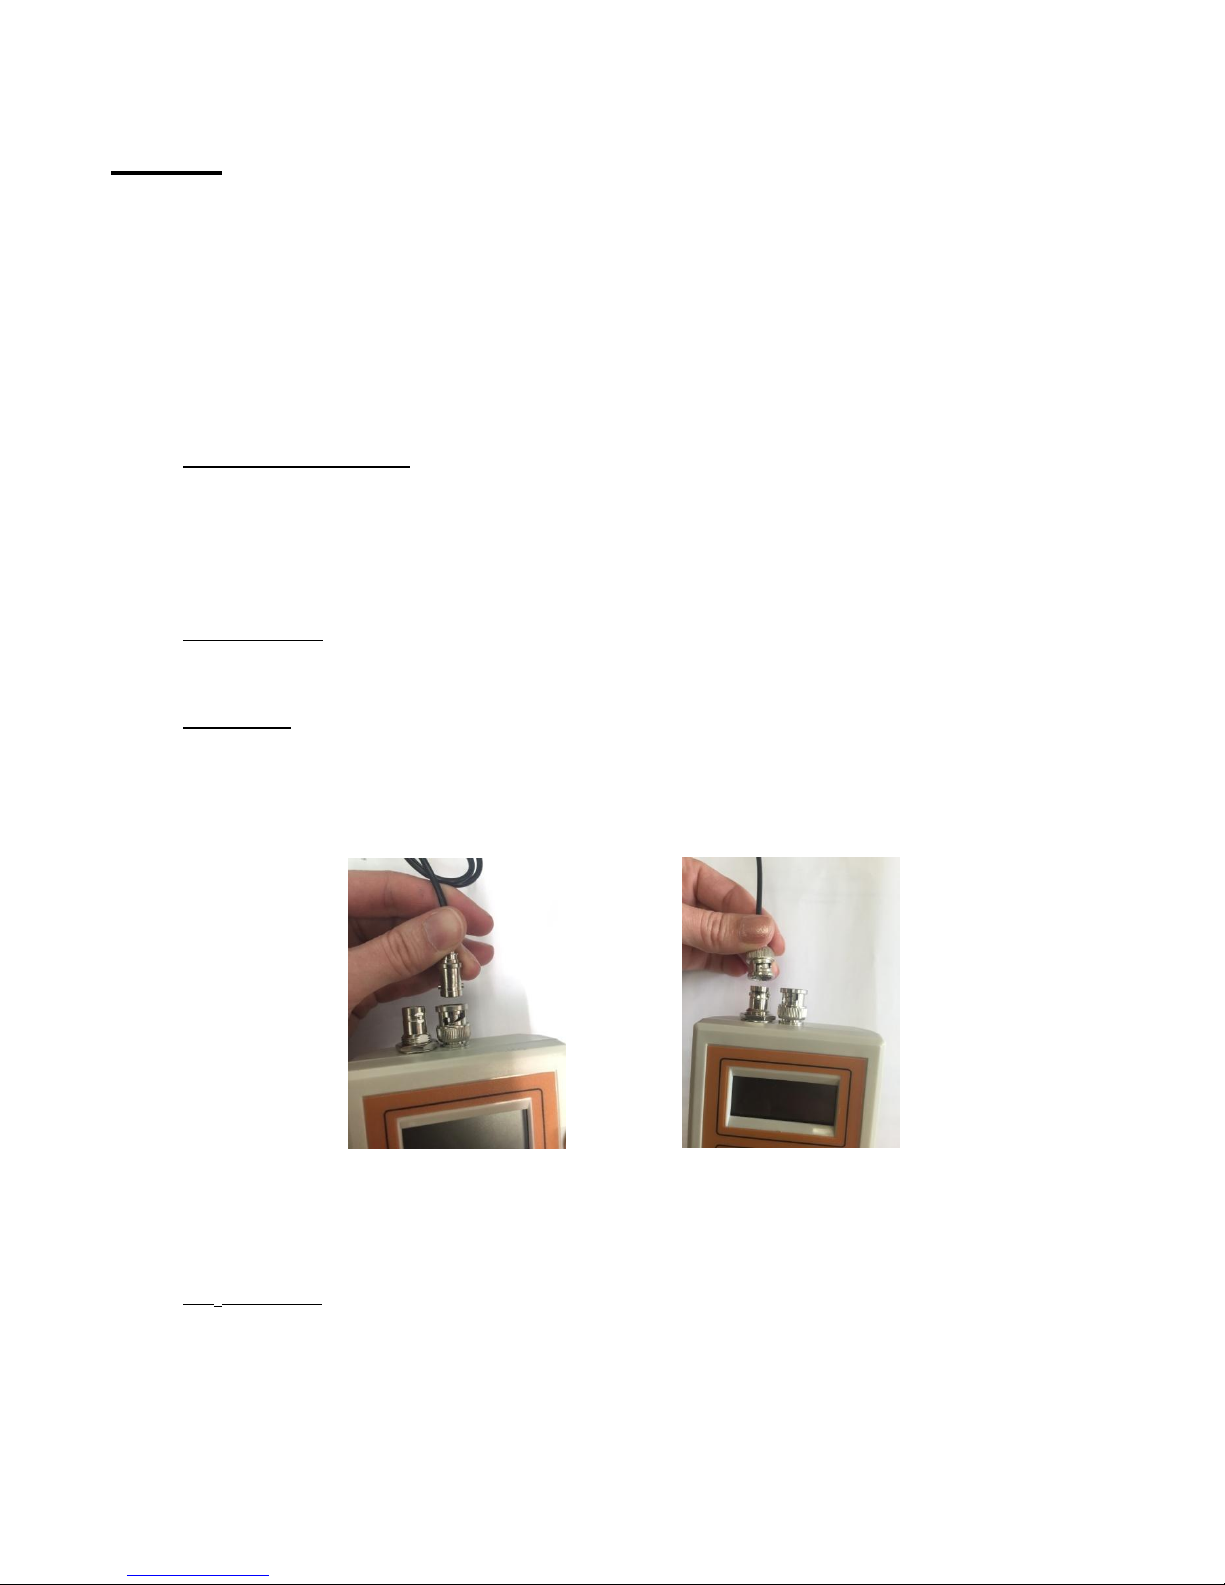
Figure 2. Attach the SO2 electrode
to the connector on the SC-300.
Figure 3. Be sure the pH
electrode attachment is screwed
into place on the BNC connector.
Setup:
Setting up the SC-300 for the first time:
1. The SC-300 (Figure 1) runs on two standard AA batteries (alkaline cells recommended). To
insert the batteries, open the battery housing on the bottom of the back of the unit by removing
the two screws and gently prying off the lid. Install the batteries, then close the housing. If
desired, you can prop the unit up using its folding stand.
2. Low Battery Detection: When the battery level is getting low, the instrument shows a low
battery icon on the upper left side of the display but continues to operate without impairment of
any function. Replace the batteries as soon as practicable. When the battery level drops too far,
the instrument does not operate. It rapidly flashes the low battery icon for 3.0 seconds, beeps
and shuts itself off.
3. Auto Shut-off: The SC-300 shuts off after 30 minutes. If this happens unexpectedly, just press
the POWER button to resume from where you were.
4. Electrodes: When directed to do so, attach the desired electrode (SO2 or pH, Figures 2 & 3) via
the proper connector protruding from the top (on earlier model SC-300s, there is just a single
connector for both electrodes). Be sure to secure the electrode plug to the BNC connector to
ensure proper function.
5. SO2 electrode: Remove any protective cover from the electrode tip (most electrodes are
shipped without one). This cover need not be used routinely. Put the electrode on its side, or
hang it from an electrode stand if you have one. The SO2 electrode is sturdy with its plastic
housing, but do take care not to let things touch or strike the platinum wires; they are somewhat
fragile and will break if bent and straightened repeatedly. Attach the SO2 electrode to the proper
SC-300 manual 5 Version 3.0a

connector. In some cases this is a BNC-style plug as in figure 2; on older units this may be a
phono style plug (not pictured). Electrode care: When done, always rinse with DI water and let
air dry. There is no need to store the SO2 electrode in any kind of solution.
5. pH electrode: Attach the pH electrode via the BNC connector on the top of the SC-300
(Figures 3). The pH electrode is fragile and should always be handled carefully. Remove the
liquid storage bottle from the electrode by unscrewing the cap first, then gently removing the
bottle and pulling off the cap. Rinse the electrode with distilled water before each use.
Electrode care: Do not touch the glass bulb, nor attempt to wipe it with anything. When
necessary, you may gently blot excess liquid away from the electrode surface, but avoid directly
touching it. When finished using the electrode, rinse the electrode with DI water and gently blot
or shake off excess water. Push the electrode through the hole in the cap about an inch and
gently screw the bottle onto the cap so that the electrode is in contact with the solution in the
bottle. The pH electrode should always be kept in the liquid storage bottle with its pH
Electrode Storage Solution (Part Number SC-200-10) when not in use.
Note: We recommended replacing the pH Electrode Storage Solution once a year or when the solution
becomes cloudy or moldy.
SC-300 manual 6 Version 3.0a

Instrument Operation:
1. Disconnect any electrodes. Turn on the instrument by pressing the POWER button briefly (Note:
depressing the POWER button longer than two seconds at start-up will cause the instrument to
enter Test Mode; see Appendix A). The instrument will go through a power-up sequence. After
a few seconds the instrument will start in whatever mode was last selected. The mode is
indicated by the yellow LED panel on the left. Select the desired mode by pressing the MODE
button.
2. SO2 mode: This is for titration in determining ppm of SO2 (see below under ‘Procedures’)
where the SO2 electrode must be used. [Warning: On older style, single connector units (pre-
2014), the pH electrode can be damaged by connecting it to the instrument in SO
safety precaution, on these older units after selecting SO2 mode you must press the ENTER
button after selecting SO2 mode to confirm that the SO2 electrode is attached before the mode
will be enabled. However, scrolling through the MODE selections (such that you pass by the
SO2 selection) with a pH electrode attached is safe, as long as you do not press ENTER to
confirm the SO2 mode.] You should see the display show a value less than 50 (usually 0.0) and
the green "PROCEED" LED should be on.
3. pH mode: In this mode, the meter measures the pH. The pH electrode must be attached. If the
instrument has not yet been calibrated, the message “do Cal” scrolls across the screen, and you
will need to do a calibration (see “Calibration of pH” below). We recommend re-calibrating the
instrument for pH once each day of use, or whenever the Reference solutions do not give the
expected pH in pH mode. Warning: Be careful on earlier (pre-2014/single connector) versions
not to press ENTER when the pH electrode is attached while the instrument is in SO2 mode, as
this can potentially damage the pH electrode. If this does happen, and the pH electrode does not
respond correctly, place it into the pH 4 Reference solution for an hour and it should return to
normal function. With recent versions there are two separate connectors; the pH electrode
should be attached to the silver BNC connector.
4. Potential mode (Firmware version 3.1.1 and higher) (pH LED flashing): In this mode the
instrument displays the potential (in volts, version 3.1.1, or millivolts, v 3.1.2) coming from an
electrode attached to the pH connector. This can be used with certain electrodes, for example,
the Vinmetrica Dissolved Oxygen probe, ORP, potassium, or sodium electrodes, or to view the
raw voltage reading of a pH electrode. In this mode, when the red STOP LED is illuminated,
the values on the screen are negative; otherwise the values are positive.
5. TA mode: This is for titration in determining titratable acidity (TA). As in the pH mode, the pH
is displayed and the pH electrode must be attached. The green (“PROCEED”) LED is lit if the
pH is below the TA endpoint (normally 8.2, but can be set to 7.0, see Appendix A, Test Mode,
mode. As a
2
SC-300 manual 7 Version 3.0a

section 16), while the red "STOP" LED is lit if the pH is above the endpoint (see below under
Measuring TA by Titration).
6. CAL mode: This is for calibrating the pH electrode, which must be attached. The display
initially shows “CAl” for a few seconds as it prepares to read pH and lets readings settle.
Thereafter, the display shows the measured pH level with two decimal places.
7. Calibration works with one of the following reference calibration sets:
pH 4.01 and 7.00 or “4/7”
pH 7.00 and 10.00 or “7/10”
pH 3.00 and 7.00 or “3/7”
Vinmetrica recommends use of the pH 4/7 Reference Solution set provided with the kit.
8. The pH electrode: The pH electrode should always be kept in the liquid storage bottle with
plenty of storage solution (pH electrode storage solution; Part Number SC-200-10) when not in
use. If there is an odor, if the liquid is cloudy or moldy, or you suspect the electrode storage
solution has been compromised please replace it immediately. Over time, improper storage of
the electrode can damage its functionality.
9. (Optional) The magnetic stirrer (Included in the SC-300 Pro Kit, or bought separately) has two
modes. Pressing the "light bulb" button on the magnetic stirrer activates a light underneath the
sample and the stirrer. The power button activates just the stirrer. After pressing either button,
the stirrer remains active for 60 seconds, a feature to conserve its batteries. If during the
titration it turns off, simply press the button again for it to continue. We recommend using the
light mode because it helps us indicate when the stirrer stops. Plus when doing TA titrations
watching the wine turn from deep red to dark green is cool!
Note: When using the magnetic stirrer, be sure that the electrode does not touch the spinning
stir bar as there is a slight chance that it can damage the glass bulb of the pH electrode or the
platinum wires of the SO2 electrode. If you are using the Vinmetrica Electrode Holder, adjust
the electrode’s height so that its probe end is above the level of the stir bar.
SC-300 manual 8 Version 3.0a
 Loading...