

Vimco Lutron Sivoia SV-CP Operating Instructions Manual
Page 1
shading solutions by
VIMCO
TM
Description
The Sivoia ® SV-CP Coupled Pin Kit (to be used in
conjunction with an SV-MDU-20) allows a single Motor Drive
Unit (MDU) to drive more than one shade.
Important Notes
1. All shades controlled by the MDU must be the same height.
2. All shades must be made of the same fabric to ensure
hembar alignment.
3. The total combined fabric from all shades connected to the
MDU must not exceed 100 sq. ft. (30.5 sq. m).
4. The maximum width allowed for each tube in the coupled
system is 10 ft. (3.05 m).
5. All shades must be driven along a single axis (no off angle
positioning).
6. The MDU can be configured to operate from the left or right
side. See the original MDU Installation Instructions for
details.
Required Tools:
Parts Included With This Kit:
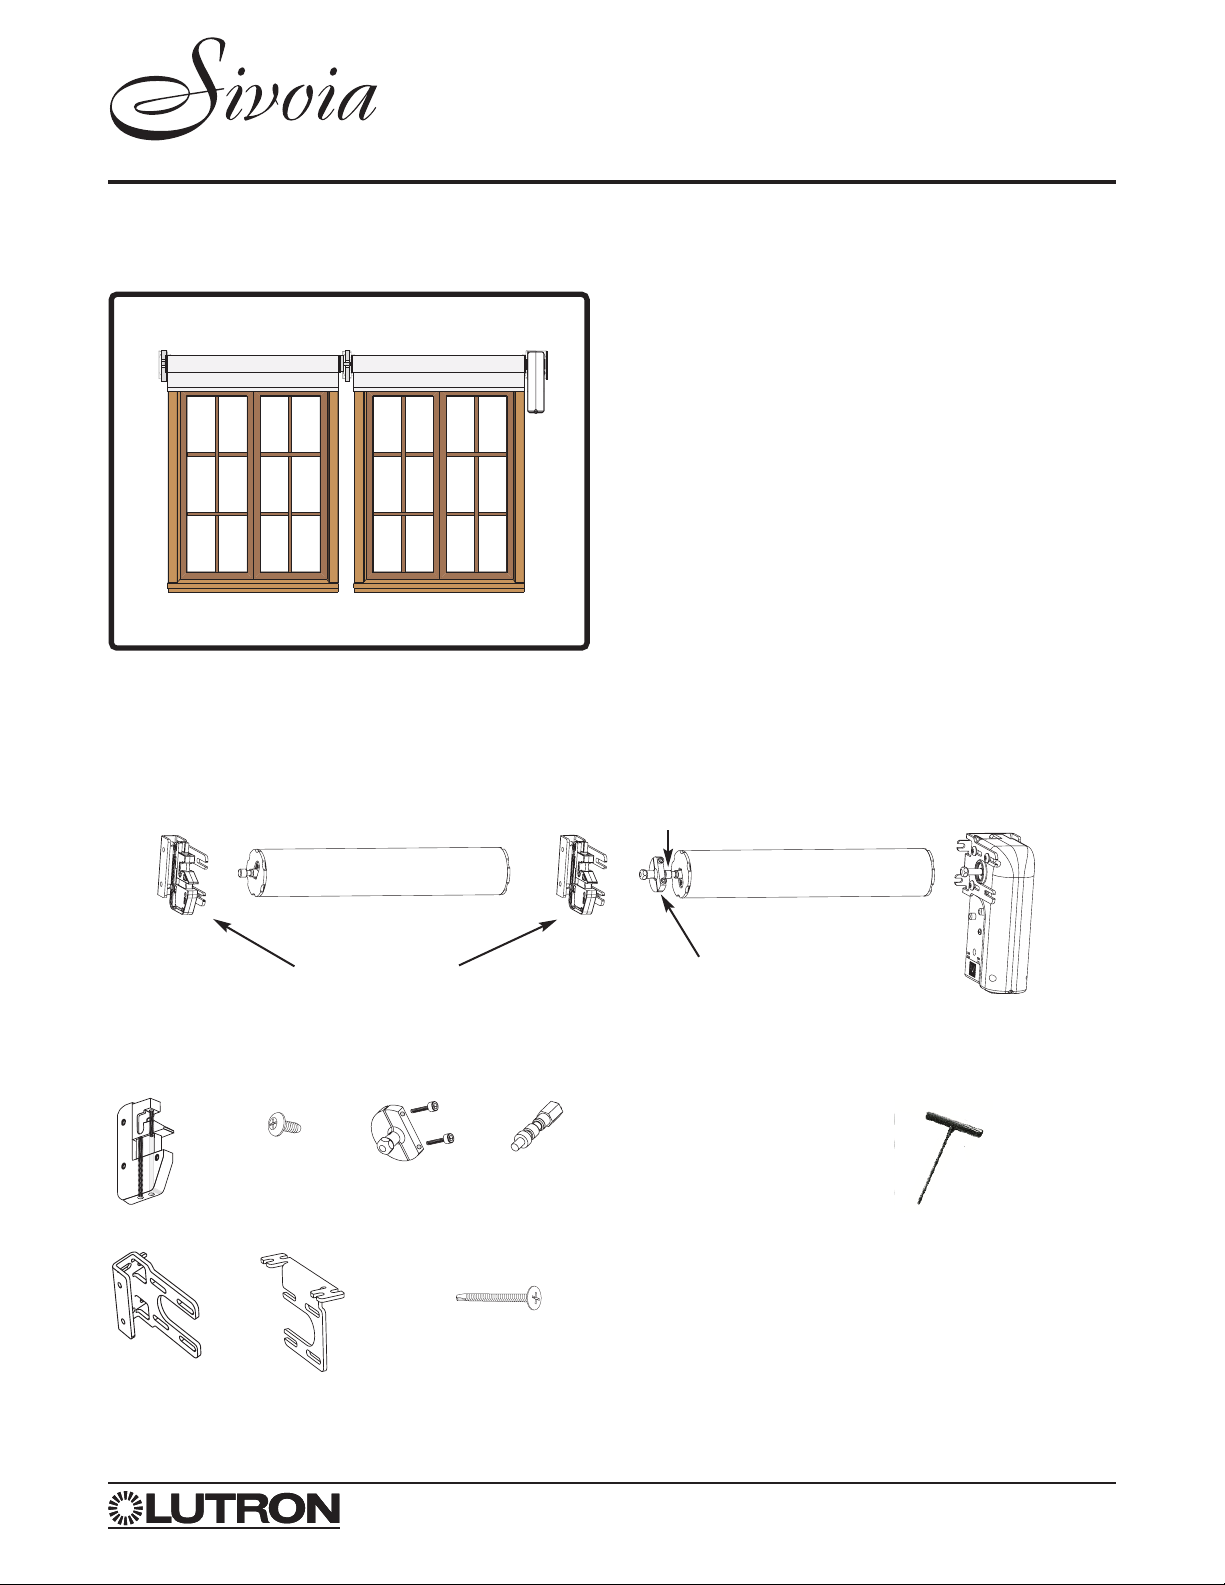
Expanded View of the Coupled Shade System
■ 9/64" (3.6 mm) Hex
Wrench (T-bar style
preferable)
SV-CP Coupled Pin Kit
Coupled Shade System
with End Motor
■ #2 Phillips Screwdriver
■ Tape Measure
■ Power Drill: Drill Bits, Screwdriver Attachments
■ Level
Idler Support (x2)
2” Pan-Head Mounting
Bracket Screws (x8)
1/2” Idler and
MDU Truss-
Head Screws
(x4)
Coupled Idler
Pin
Idler Mounting
Bracket
Ceiling-Mount
Bracket
*
Adjustable Hub
1st Shade
MDU
2nd Shade
Adjustable Hub
Coupled Idler Pin
Idler Supports
* See the SV-MDU-20 instructions for details on installing these brackets.
Installation & Operating Instructions
Motorized Shade Systems
®
Page 2
shading solutions by
VIMCO
TM
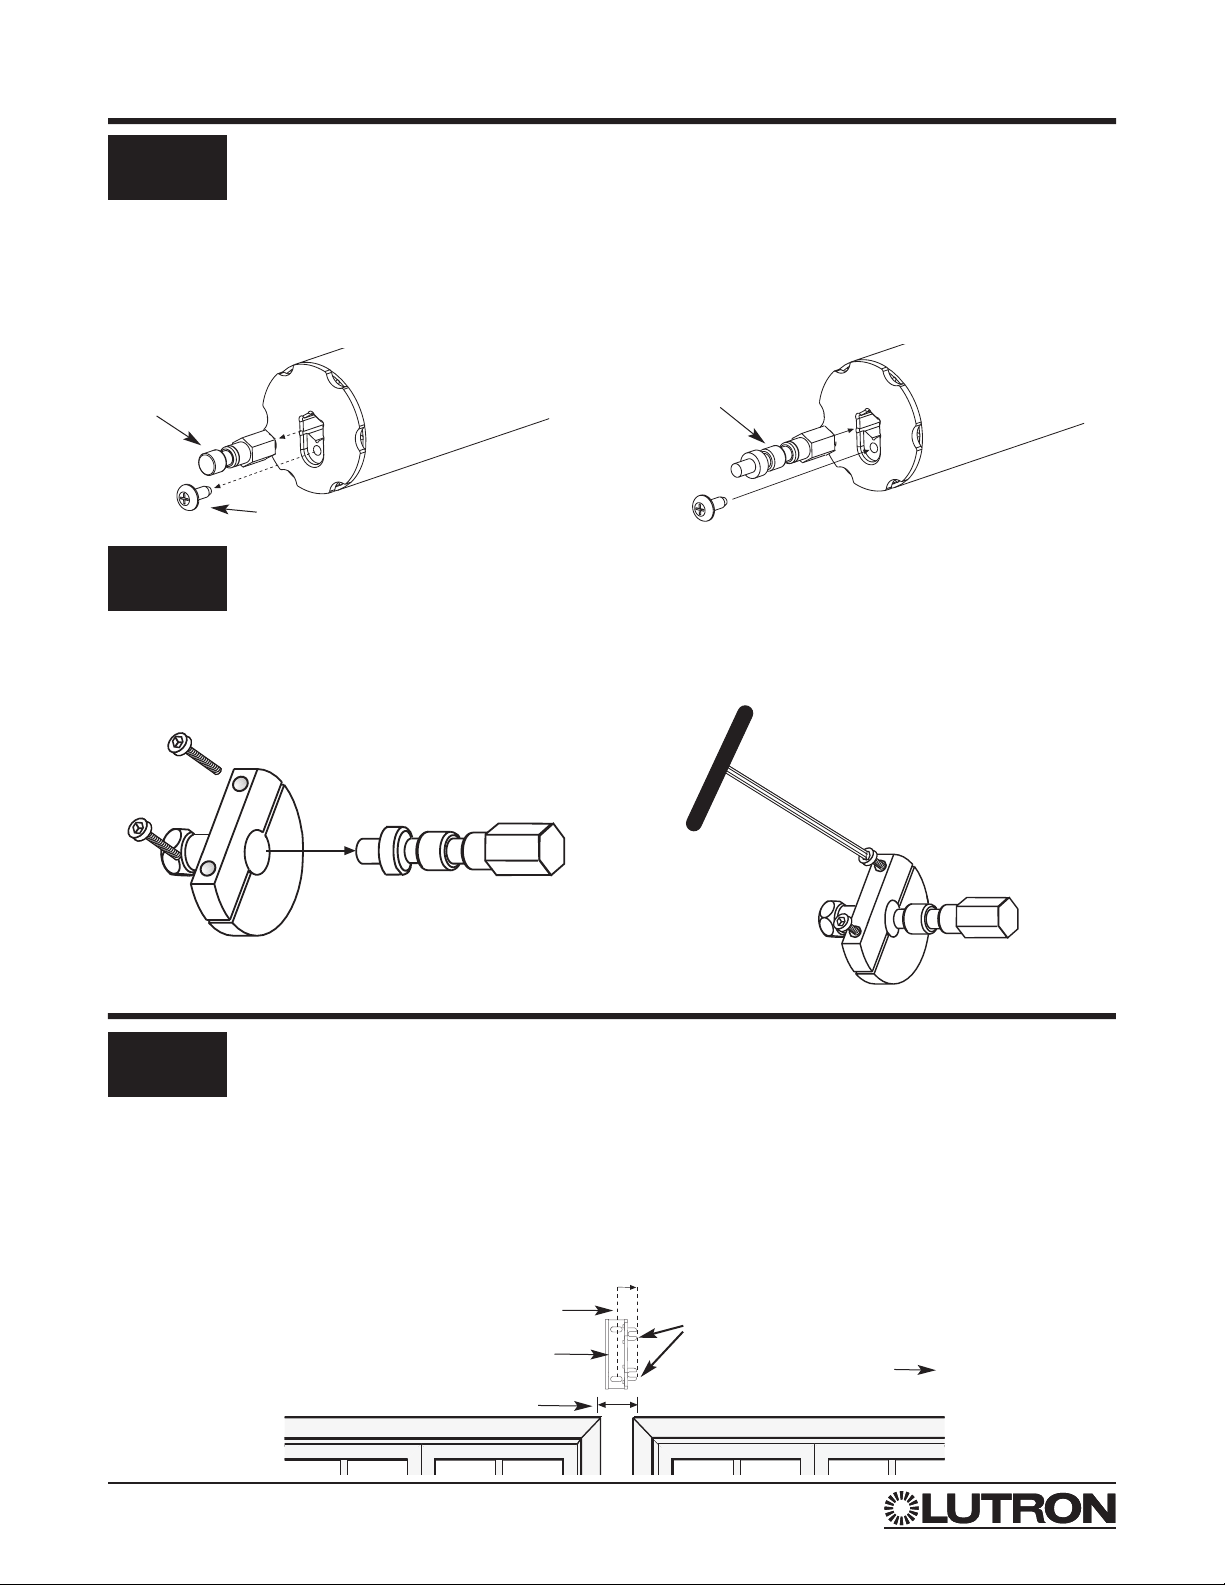
Replace Idler Pin
A. Place the adjustable hub onto the end of the coupled
idler pin.
B. Tighten the two (2) hex screws on the adjustable hub
snug enough to keep the shade from unrolling.
I. Pre-Installation
II. Fasten Mounting Brackets
Attach Adjustable Hub
Fasten Mounting Brackets
A. Mark a vertical center line with respect to the fabric gap / windows.
B. Mark 3/4” (19 mm) from the center line of the fabric gap / windows toward the MDU. This designates where the
fabric locators of the idler mounting bracket will be positioned.
Note: This bracket placement is based on a right-mounted MDU. The bracket placement for the left-mounted
configuration will be reversed.
Note: These screws will be loosened again
near the end of installation for final
adjustments.
A. Remove the idler pin from the shade coupler (from
the shade to be mounted closest to the MDU) by first
removing the retaining screw using a #2 phillips
screwdriver.
B. Place the new coupled idler pin in the shade coupler
and replace the retaining screw.
Center Line of the Fabric Gap / Windows
1 1/2" (38 mm) Fabric Gap
Idler Bracket
Fabric Locators
Right-mounted
MDU
Idler Pin
Coupled Idler Pin
1st Shade
1st Shade
Retaining Screw
3/4" (19 mm)
1
1
2
Page 3
shading solutions by
VIMCO
TM
Fasten Mounting Brackets (continued)
II. Fasten Mounting Brackets (continued)
Attach Idler Supports
Attach the idler supports to the appropriate mounting
brackets using three (3) truss-head screws.
Note: Do not attach the idler supports or the MDU before fastening the brackets.
C. Mark the Bracket to Bracket width for each shade.
D. Fasten the brackets to studs in the wall using four (4) pan-head mounting bracket screws. Use the Bracket to
Bracket width as a guide to properly position the end brackets. Use a level to ensure the brackets are at the same
height.
Notes:
•
All four (4) screws must be securely fastened to a stud or other structural member.
• Place the top of the brackets 5”(127 mm) from the top of the window trim to ensure complete window exposure
when the shades are in full up position.
MDU
Bracket
Idler
Bracket
Bracket to Bracket
1st Shade
Bracket to Bracket
2nd Shade
Fabric Width
Fabric Width
3/4" (19 mm)
Bracket Height:
5" (127 mm)
1 1/4" (32 mm) Fabric Gap 1 1/2" (38 mm) Fabric Gap 2 3/4" (70 mm) Fabric Gap
1
2
 Loading...