

Page 1
46812.036D
Istruzioni
User manual
123
SPECIFICHE
Modello 46812.036D
Sensore Sensore ad alta sensibilità
OSD Inglese/Cinese
Uscita video BNC CVSB
Range dinamico 67 dB
Formato video PAL/NTSC
Risoluzione 1000 TVL
Illuminazione min. 0 Lux (con IR ON)
Rapporto S/N Più di 45dB (con AGC OFF)
Bilanciamento del bianco AWB-PRO/AWB-TEMPORA/AWB-AI/
AWB-GW/AWB-CCT
Otturatore AUTO(1/100~1/100000)
D/N AUTO/SMART/ COLORE/ B/N
Privacy AUTO/OFF
DNR 3D
Modo Sync INTERNO
Tensione 12 VCC
Corrente 210 mA±10%(IR ON); 90 mA±10%(IR OFF)
Raggio IR 25 m
Impermeabilità IP66
Attacco obiettivo 3,6mm HD LENS
Temp. immagazzinamento -20°~70°
Temp. esercizio -10°~50°C RH90% MAX
Dimensioni 182 (L) * 88 (H) * 73 (P)
Peso 322 g
*Le specifiche sono soggette a modifiche senza preavviso.
Design sorgente di luce IR a lunga efficacia
Altri marchi
Durata utile
Sensibilità IR
1 anno
ATTENZIONE
RISCHIO DI SCOSSA
ELETTRICA. NON APRIRE
ATTENZIONE: PER RIDURRE IL RISCHIO DI INCENDIO O DI SCOSSA ELET-
TRICA NON RIMUOVERE IL COPERCHIO O IL PANNELLO POSTERIORE.
L’INTERNO NON CONTIENE PARTI CHE POSSONO ESSERE RIPARATE
DALL’UTENTE.
PER L’ASSISTENZA TECNICA RIVOLGERSI A PERSONALE QUALIFICATO.
123
DESCRIZIONE
Questa telecamera IR impermeabile utilizza un sensore ad alta sensibilità e una
progettazione avanzata della circuiteria, risoluzione fino a 1000TVL, design moderno e professionale. Il potente menu OSD include le funzioni di regolazione
di Luminosità, Contrasto, Saturazione. Le funzioni Multi-area, Bilanciamento del
bianco, AGC, 3D-DNR e altre ancora assicurano immagini nitide e luminose.
Inoltre, le funzioni Mirror (Specchio), Privacy e altre funzioni assistite con il modello del filtro IR-CUT offrono funzionamento diurno e notturno 24 ore su 24
senza difficoltà.
ATTENZIONE
Grazie per aver acquistato questo prodotto. Prima di cercare di collegare o utilizzare il prodotto, leggere attentamente le istruzioni e conservare il manuale per
consultazione futura.
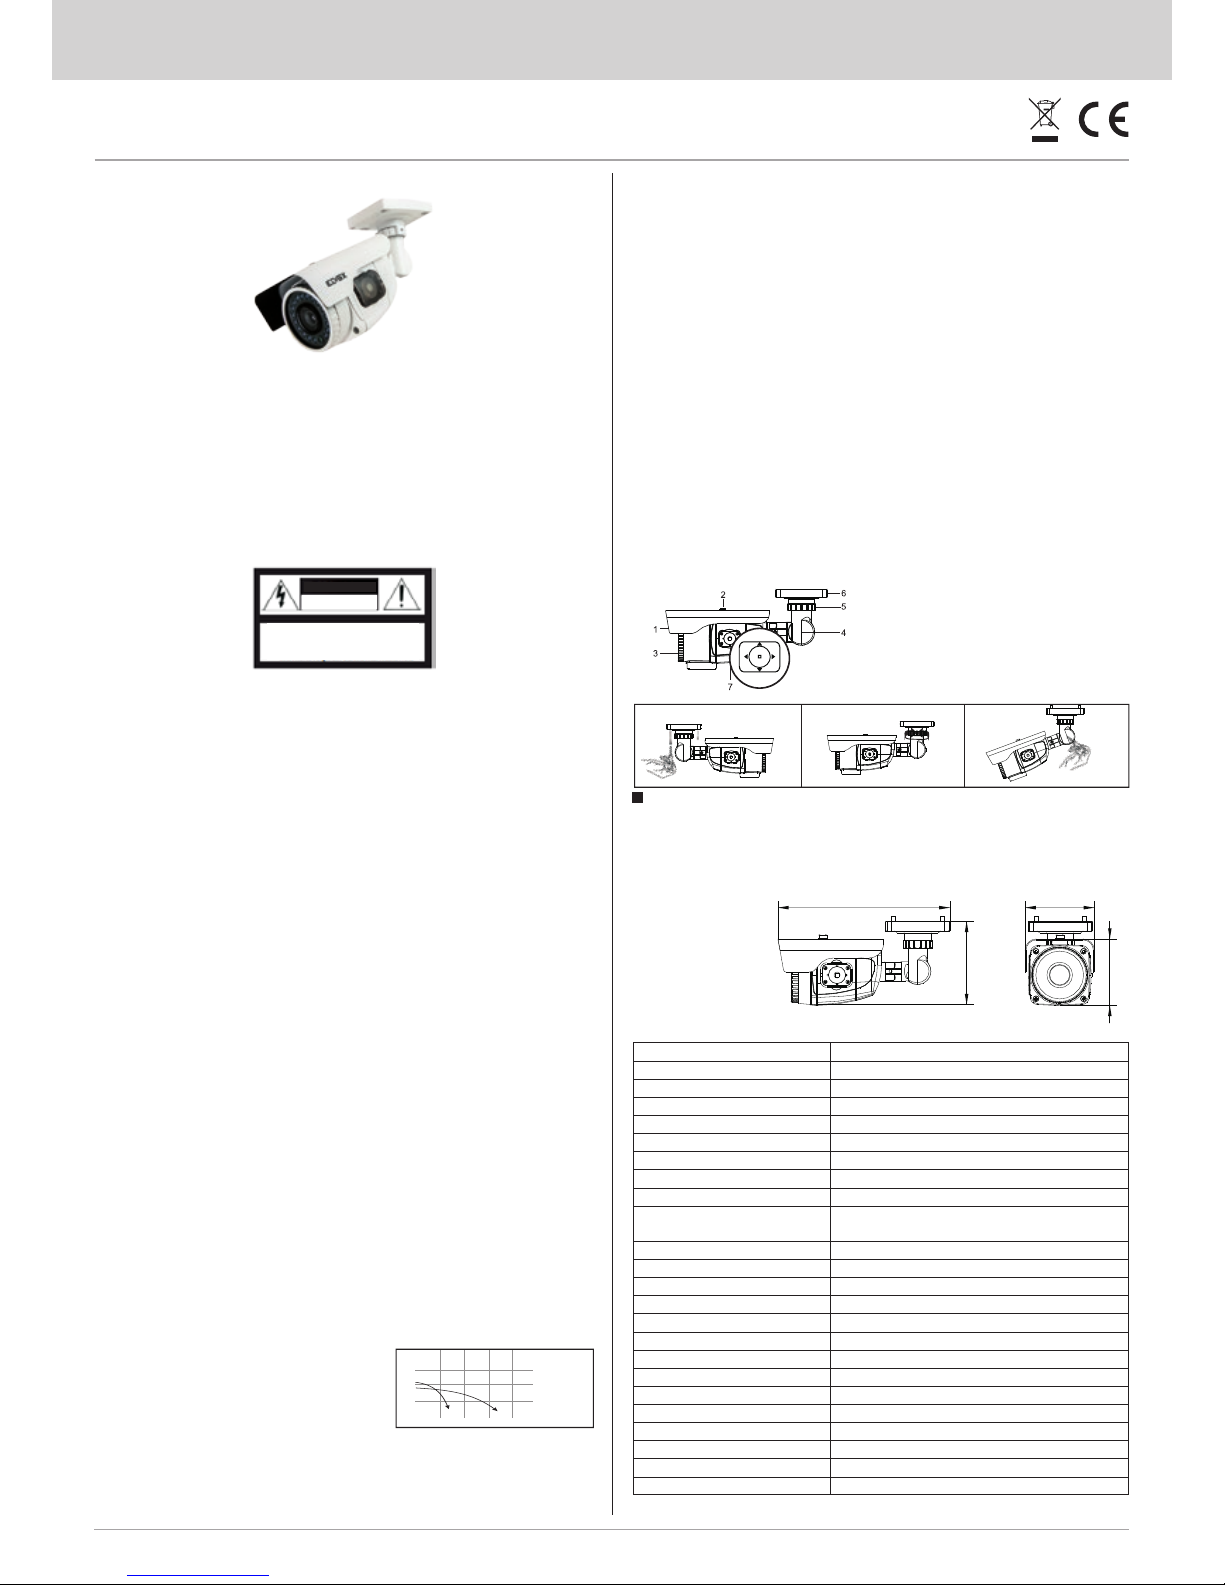
Telecamera Bullet IR 1000TVL, obiettivo 3,6mm
1. Utilizzare una rete di alimentazione appropriata.
La tensione di ingresso della telecamera è 12 Vdc. Assicurarsi di collegarla a una
sorgente di alimentazione idonea. Una connessione errata può causare malfunzionamenti e/o danneggiare la telecamera.
2. Non cercare di smontare la telecamera.
Per evitare il rischio di scosse elettriche, non rimuovere viti o coperchi. All'interno non vi sono parti che possono essere riparate dall'utente. Per l'assistenza
rivolgersi a un tecnico qualificato.
3. Maneggiare la telecamera con cura.
Non utilizzare la telecamera in modo improprio. Evitare colpi, scossoni e si-
mili. La telecamera potrebbe riportare danni a seguito di utilizzo o conservazione non idonei.
4. Non utilizzare detergenti aggressivi o abrasivi per pulire il corpo della telecamera. Se la telecamera è sporca, passare un panno asciutto. Se lo sporco
risulta difficile da rimuovere, utilizzare un detergente delicato e strofinare leggermente.
5. Pulire la piastra anteriore del sensore con cautela.
Per pulire il pannello del sensore, non utilizzare detergenti aggressivi o abra-
sivi. Utilizzare carta per la pulizia di obiettivi o la punta di un bastoncino cotonato inumidito con alcol.
6. Non cercare di puntare la telecamera verso il sole
Non cercare di puntare la telecamera verso il sole o altri oggetti molto lumino-
si che farebbero comparire macchie anche se la videocamera non è in uso.
Si potrebbe danneggiare il sensore.
7. Non collocare la telecamera in luoghi soggetti a interferenza.
Quando la telecamera è installata vicino ad apparecchiature come dispositivi
che comunicano in wireless, che emettono forti campi elettromagnetici, potrebbero verificarsi alcune irregolarità quali rumore sullo schermo del monitor.
FUNZIONI
Utilizza un sensore a prestazioni elevate, l'immagine risulta nitida e perfetta
Funzione automatica da colore a bianco/nero
Monitoraggio giorno e notte: di giorno con luce sufficiente, immagine a colori; di
notte, con luce bassa; passa all'immagine in bianco e nero automaticamente per
migliorare la sensibilità e la qualità dell'immagine.
Alta risoluzione
Fino a 1000TVL di alta risoluzione.
Rapporto S/N elevato.
Definizione del rapporto S/N: il rapporto tra la tensione del segnale e la tensione
del rumore, più è alto il rapporto, minore è l'interferenza del rumore e più è chiara
l'immagine.
Menu OSD (in opzione)
Il potente menu OSD consente di impostare
numerose funzioni.
Design dei LED IR per lunga durata
LED IR a elevate prestazioni, con luminosità molto
superiore e durata utile molto più lunga rispetto ai
normali LED.
Staffa
Elegante staffa di tipo robusto e combinato, con cavo video e di alimentazione
incorporati. Il montaggio è più pratico e solido.
Controllo automatico del guadagno (AGC)
Per emettere un segnale video standard in diverse condizioni di illuminazione, il guadagno dell'amplificatore deve essere in grado di regolarsi automaticamente in grandi
ambiti. La sensibilità aumenta automaticamente quando la luce è bassa e migliora
l'uscita del segnale fornendo un'immagine chiara e nitida.
Bilanciamento automatico del bianco
Il bilanciamento automatico del bianco è l'inversione degli oggetti bianchi eseguito
dalle telecamere. Quando la temperatura del colore cambia, l'occhio umano rie
sce comunque a percepire il bianco come bianco. Questo accade perché l'occhio
umano può adattarsi alla temperatura del colore, ma la telecamera non è in grado
di farlo con altrettanta precisione, in presenza di luce il bianco cambia in altri colori
dopo le riprese. La tecnologia del bilanciamento del bianco può correggere questo
problema.
Grado di impermeabilità IP 66
Modello resistente all'acqua e alla polvere.
3-DNR
Adotta un algoritmo speciale che riduce il rumore video e del colore e migliora così la
risoluzione dell'immagine restituendo un'immagine più chiara e più nitida.
IR CUT
Filtro IR incorporato, filtro normale durante il giorno e filtro IR durante la notte per ottenere immagini chiare e nitide diurne e notturne, assicura una sorveglianza ininterrotta.
1. Paraluce
2. Vite di fissaggio del paraluce
3. Corpo della telecamera
4. Vite di fissaggio verticale della telecamera
5.
Anello di regolazione verticale della telecamera
6. Base staffa
7. Tasto Menu
Installazione della telecamera
1. Fissare la telecamera nel luogo desiderato con le quattro viti.
2. Allentare l'anello di regolazione orizzontale, regolare nella posizione richie-
sta, quindi stringerlo di nuovo.
3.
Allentare la vite di fissaggio dell'angolazione, regolare nella posizione richiesta,
quindi stringerla di nuovo.
DIMENSIONI (mm)
ISTRUZIONI E INSTALLAZIONE DELLE PARTI
2 anno 3 anno 4 anno
Page 2

46812.036D
Istruzioni
User manual
MENU OSD
CONFIGURAZIONE:
Premere il pulsante MENU per visualizzare il menu principale MAIN MENU.
Consente di regolare le voci IMAGE (Immagine), DAY&NIGHT (Giorno e notte),
ZONE MASKING (Maschera zona), MOTION DETECTION (Rilevamento movimento) e LANGUAGE (Lingua) per assicurare la buona qualità dell'immagine.
MAIN MENU
IMAGE
DAY NIGHT EXTERNAL (COLOR, B&W, AUTO)
ZONE MASKING
MOTION DETECTION
VIDEO STANDARD NTSC
LANGUAGE ENGLISH
LOAD DEFAULT
SOFT VERSION 34641
SAVE&EXIT
RETURN
IMMAGINE:
Quando si accede a MAIN MENU, spostare il cursore su IMAGE (Immagine)
quindi premere il pulsante MENU per visualizzare il sottomenu. È possibile regolare SHARPNESS (Nitidezza), CONTRAST (Contrasto), SATURATION (Saturazione), BRIGHTNESS (Luminosità) in base alle esigenze. Si può anche impostare la modalità WB (Bilanciamento del bianco), la modalità AE, DNR, MIRROR
(Specchio), IRIS per assicurare la migliore qualità dell'immagine. Al termine della configurazione, spostare il cursore su RETURN (Invio).
IMAGE
3D-DR
AE-MODE GLOBAL (CENTER; CENTER WELG;
BACK LIGHT; FRONT LIGHT; DISTIN-
GUISH; INTELLIGENT)
WB AWB-PRO (AWB-TEMPORA; AWB AI; AWB-GW; AWB-CCT)
IMAGE ENHANCE
MIRROR OFF (ON)
FLIP OFF (ON)
BRIGHTNESS 80 (0-100)
ZOOM IN 0 (1-5)
RETURN
3D-NR
NR-MODE AUTO (MANUAL)
VALUE 9
RETURN
MASCHERA ZONA:
Quando si accede a MAIN MENU, spostare il cursore su ZONE MASKING, (Maschera zona) quindi premere il pulsante MENU per visualizzare il sottomenu.
Sono disponibili otto aree, è possibile scegliere un colore diverso per impostare
aree diverse, inoltre si possono modificare le dimensioni dell'area in base alle
esigenze.
IMAGE ENHANCE
SHARPNESS
CONTRAST
SATURATION
RETURN
SHARPNESS
DETAIL AUTO (MANUAL)
VALUE 0
EDGE AUTO (MANUAL)
VALUE 0
RETURN
CONTRAST
CONTRAST MANUAL (GAIN MAP; AUTO)
VALUE 27
RETURN
SATURATION
SATURATION MANUAL (AUTO)
VALUE 0
RETURN
ZONE MASKING
COLOR MOSAIC (WHITE; YELLOW;
CYAN; GREEN; MAGENTA; RED
BLUE; BLACK)
AREA N°1
AREA N°2
AREA N°3
AREA N°4
AREA N°5
AREA N°6
AREA N°7
AREA N°8
RETURN
AREA N° 1
STATUS OFF (ON)
HORIZON SIZE 220
VERTICAL SIZE 120
HORIZON MOVE 10
VERTICAL MOVE 90
RETURN
RILEVAMENTO MOVIMENTO:
Quando si accede a MAIN MENU, spostare il cursore su MOTION DETECTION
(Rilevamento movimento), quindi premere il pulsante MENU per visualizzare il
sottomenu. Sono disponibili quattro aree, è possibile scegliere un colore diverso
per impostare aree diverse, inoltre si possono modificare le dimensioni dell'area
in base alle esigenze. Al termine della configurazione, spostare il cursore su
RETURN (Invio).
MOTION DETECTION
SENSITIVITY HIGH (MIDDLE; LOW; WEAK)
AREA N°1
AREA N°2
AREA N°3
AREA N°4
RETURN
AREA N° 1
STATUS OFF (ON)
COLOR WHITE (YELLOW; CYAN; GREEN,
MAGENTA; RED; BLUE: BLACK:)
HORIZON SIZE 380
VERTICAL SIZE 230
HORIZON MOVE 50
VERTICAL MOVE 20
RETURN
LINGUA:
Quando si accede al MAIN MENU, spostare il cursore su LANGUAGE (Lingua),
premere i pulsanti DESTRA o SINISTRA per impostare la lingua su ENGLISH
(Inglese) o CHINESE (Cinese).
1.SAVE & EXIT (Salva ed Esci)
Page 3

46812.036D
Istruzioni
User manual
SPECIFICATION
Model 46812.036D
Sensor High Sensitivity Sensor
OSD English/Chinese
BNC Video Output CVSB
Dynamic range 67dB
Video For mat PAL/NTSC
Resolution 1000TVL
Mini Illumination 0 lux /IR ON
S/N Ratio more than 45dB (with AGC OFF)
White Balance AWB-PRO/AWB-TEMPORA/AWB-AI/AWB-GW/AWB-CCT
Shutter AUTO(1/100~1/100000)
D/N AUTO/ SMART/ COLOR/ B/W
Privacy AUTO/OFF
DNR 3D
Sync Mode INTERNAL
Voltage DC12V
Cur rent 210mA±10%(IR ON); 90mA±10%(IR OFF)
IR range 25m
Water proof Ip66
Lens Mount 3.6mm HD Lens
Storage Temp -20°~70°
Operating Temp -10°~50°C RH90% MAX
Dimension 182(L) * 88(H) * 73(W)
Weight 322g
*Specifications subject to change without notice.
CAUTION
RISK OF ELECTRIC
SHOCK DO NOT OPEN
CAUTION: TO REDUCE THE RISK OF ELECTRIC
SHOCK, DO NOT REMOVE COVER (OR BACK).
NO USER-SERVICEABLE PARTS INSIDE.
REFER SERVICING TO QUALIFIED SERVICE
PERSONNEL
123
DESCRIPTION
This IR Waterproof Camera adopt high sensitivity sensor and advanced circuit
design,The resolution up to 1000TVL, Fashionable and professional appearance
design; Powerful OSD menu includes Brightness, Contrast, Saturation adjusting
functions; Multi-area, White Balance, AGC , 3D-DNR,and other functions ensure
clear bright pictures. Besides, Mirror, Privacy and other aided functions with IRCUT filter design, easily have 24 hours day and night.
ATTENTION
Thank you for your purchasing this product. Before attempting to connect or
operate this product, please read these instructions carefully and save this
manual for future use.
Bullet IR 1000TVL camera, 3,6mm lens, OSD
1. Use the appropriate power supply
The input power for the camera is 12Vdc. Be sure to connect it to the appropriate
power. Wrong connection may cause malfunction and/or damage to the video
camera.
2. Do not attempt to disassemble the camera.
To prevent electric shock, do not remove screws or covers. There are no user
serviceable parts inside. Ask a qualified service person for servicing.
3. Handle the camera with care.
Do not abuse the camera. Avoid striking, shaking, etc. The camera could be
damaged by improper handling or storage.
4. Do note use strong or abrasive detergents when cleaning the camera body.
Use a dry cloth to clean the camera when dirty. In case the dirt is hard to
remove. Use a mild detergent and wipe gently.
5. Clean the sensor faceplate with care.
When cleaning the sensor panel, do not use strong or abrasive detergents.
Use a piece of lens tissue or cotton tipped applicator and ethanol.
6. Do not attempt to aim the camera at the sun
Do not attempt to aim the camera at the sun or other extremely brightobjects
that causes mear to appear irrespective of whether the camera is operating
or not. This can damage the sensor.
7. Do not put the camera in a place with interference.
When this camera is installed near the equipment like wireless communica-
tion device which emits strong electromagnetic field, some irregularity such
as noise on monitor screen may happen.
FEATURES
Adopt high performance sensor, the image is clear, exquisite
Auto color to black function
Day and Night Monitoring daytime with enough light, color image, at night, low
light, change to black image automatically to improve the sensitivity and picture
quality.
High resolution
Up to 1000TVL high resolution.
High S/N Ratio.
S/N Ratio definition: the ratio between signal voltage and noise voltage,the higher of the ratio, the less interference of the noise, and the image is more clearer.
OSD Menu(optional)
Powerful OSD menu allows for various function settings
Long-life IR LEDS Design
High-performance IR LED,whose brightness is
several times higher and service life longer
than an ordinary LED’s.
Bracket
Elegant and solid combined type bracket, with video and power cable built-in.
makes installation convenient and reliable.
Automatic gain control (AGC)
In order to output standard video signal under different illumination conditions,
The amplifier gain need to adjust automatically in large scope.it can increase the
sensitivity automatically when low light and enhance the signal output to have a
clear bright image.
Auto White Balance
ATW is the cameras’ reversion of the white objects, it can adjust the room temperature and outside temperature.when the temperature change, the human eye
can see that white is white,This is because human eye can adapt to the changes
of the color temperature, but the camera does not perform well equally, when
Light occurs, the white color will change to others after shooting. White Balance
technology can correct this problem
IP 66 Waterproof
Water-resistant and dustproof design.
3-DNR
Adopts special algorithm, reducing video and color noise and thus improve image resolution, to produce clearer and sharper image.
IR CUT
Built-in IR filter, normal filter in daytime and IR filter at night, clear and beautiful
image both in daytime and night, ensures efficient round-clock surveillance.
1. Sunshade
2. Fixing Screw for Sunshade
3. Camera Body
4. Camera Vertical Fixing Screw
5. Camera Horizontal Adjusting Ring
6. Bracket Base
7. Menu Button
Camera Installation
1. Fix the camera to the needed place with the four pieces of screws.
2. Loosen the horizontal adjusting ring, adjust it to the needed place, then fix the
horizontal adjusting ring.
3.
Loosen the angle fixing screw, adjust it to the needed place, then fix the angle fixing
screw.
DIMENSION (mm)
PARTS INSTRUCTION AND INSTALLATION
123
Long-effective IR Light Source Design
Other brands
Service Life
IR Sensnsitivity
1 yr 2 yr 3 yr 4 yr
Page 4

46812.036D
Istruzioni
User manual
49400710A0 00 14 09
VIMAR - Marostica - Italy
Vimar SpA: Viale Vicenza, 14
36063 Marostica VI - Italy
Tel. +39 0424 488 600 - Fax (Italia) 0424 488 188
Fax (Export) 0424 488 709
www.vimar.com
OSD MENU
SETUP:
Press the MENU button to display MAIN MENU. You can adjust the IMAGE,
DAY& NIGHT, ZONE MASKING, MOTION DETECTION and LANGUAGE to ensure the image quality.
MAIN MENU
IMAGE
DAY NIGHT EXTERNAL (COLOR, B&W, AUTO)
ZONE MASKING
MOTION DETECTION
VIDEO SETNDARD NTSC
LANGUAGE ENGLISH
LOAD DEFAULT
SOFT VERSION 34641
SAVE&EXIT
RETURN
IMAGE:
When you enter the MAIN MENU, move the cursor to IMAGE, then press the
MENU button to display the submenu. You can adjust SHARPNESS, CONTRAST, SATURAST, BRIGHTNESS as needed. Also can set WHITE BALUN
mode, AE mode, DNR mode, MIRROR, IRIS mode to ensure image. When it is
completed, move the cursor to RETURN.
IMAGE
3D-DR
AE-MODE GLOBAL (GENTER; GENTER WELG;
BACK LIGHT; FRONT LIGHT;
DISTINGULISH; INTELLIGENT)
WB AWB-PRO (AWB-TEMPORA; AWB AI; AWB-GW; AWB-CCT)
IMAGE ENHANCE
MIRROR OFF (ON)
FLIP OFF (ON)
BRIGHTNESS 80 (0-100)
ZOOM IN 0 (1-5)
RETURN
3D-NR
NR-MODE AUTO (MANUAL)
VALUE 9
RETURN
ZONE MASKING:
When you enter the MAIN MENU, move the cursor to ZONE MASKING, press
the MENU button to display submenu. There are 8 areas, can chose difference
color to set difference area, also can change areas size as needed.
IMAGE ENHANCE
SHARPNESS
CONTRAST
SATURATION
RETURN
SHARPNESS
DETAIL AUTO (MANUAL)
VALUE 0
EDGE AUTO (MANUAL)
VALUE 0
RETURN
CONTRAST
CONTRAST MANUAL (GAIN MAP; AUTO)
VALUE 27
RETURN
SATURATION
SATURATION MANUAL (AUTO)
VALUE 0
RETURN
ZONE MASKING
COLOR MOSAIC (WHITE; YELLOW;
CYAN; GREEN; MAGENTA; RED
BLUE; BLACK)
AREA N°1
AREA N°2
AREA N°3
AREA N°4
AREA N°5
AREA N°6
AREA N°7
AREA N°8
RETURN
AREA N° 1
STATUS OFF (ON)
KORIZON SIZE 220
VERTICAL SIZE 120
LPROZON MOVE 10
VERTICAL MOVE 90
RETURN
MOTION DETECTION:
When you enter the MAIN MENU, move the cursor to MOTION DETECTION,
press the MENU button to display submenu. There are 4 areas, can chose difference color to set difference area, also can change areas size as needed. When
it is completed, move the cursor to RETURN.
MOTION DETECTION
SENSITIVITY HIGH (MIDDLE; LOW; WEAK)
AREA N°1
AREA N°2
AREA N°3
AREA N°4
RETURN
AREA N° 1
STATUS OFF (ON)
COLOR WHITE (YELLOW; CYAN; GREEN,
MAGENTA; RED; BLUE: BLACK:)
KORIZON SIZE 380
VERTICAL SIZE 230
LPROZON MOVE 50
VERTICAL MOVE 20
RETURN
LANGUAGE:
When you enter the MAIN MENU, move the cursor to LANGUAGE, press RIGHT
and LEFT button to set language to ENGLISH or CHINESE.
1.SAVE & EXIT
 Loading...