

Page 1

Instructions manual
Thermostat 02950
User Manual
Page 2

Page 3

1
Table of Contents
1. Thermostat 02950 ………………………………………………………………………………………………… 2
2. Display ……………………………………………………………………………………………………………… 2
2.1 Functions of the buttons ……………………………………………………………………………………… 2
2.2 Symbols ………………………………………………………………………………………………………… 3
2.3 Ecometer ……………………………………………………………………………………………………… 3
2.4 Locking the interface via PIN ………………………………………………………………………………… 4
3. Operating mode …………………………………………………………………………………………………… 4
3.1 Switched off (OFF) …………………………………………………………………………………………… 5
3.2 Manual (ON) …………………………………………………………………………………………………… 5
3.3 Away …………………………………………………………………………………………………………… 6
3.4 Nighttime reduction …………………………………………………………………………………………… 7
3.5 Antifreeze ……………………………………………………………………………………………………… 8
3.6 Remote reduction ……………………………………………………………………………………………… 9
3.7 Remote activation …………………………………………………………………………………………… 10
4. Settings menu …………………………………………………………………………………………………… 12
4.1 Operating mode setting …………………………………………………………………………………… 12
4.2 Unit of measurement setting ……………………………………………………………………………… 12
4.3 Heating/air-conditioning setting …………………………………………………………………………… 12
4.4 Temperature set point setting ……………………………………………………………………………… 12
4.5 Calibration setting …………………………………………………………………………………………… 12
4.6 External probe setting ……………………………………………………………………………………… 12
4.7 Multi-function input setting ………………………………………………………………………………… 12
4.8 OnOff/PID setting …………………………………………………………………………………………… 12
4.9 Colour setting ………………………………………………………………………………………………… 13
4.10 Standby brightness level setting ………………………………………………………………………… 14
4.11 Info…………………………………………………………………………………………………………… 14
4.12 Lock/unlock PIN setting …………………………………………………………………………………… 14
5. Alarms …………………………………………………………………………………………………………… 14
6. Cleaning the device …………………………………………………………………………………………… 15
7. Main characteristics …………………………………………………………………………………………… 15
8. Regulatory compliance ………………………………………………………………………………………… 15
Page 4
2
1. Thermostat 02950
The thermostat 02950 is designed to control room temperature by acting on the control circuit of the burner
or circulation pump (heating) or on the control circuit of the air conditioner (air conditioning), ensuring an ideal
temperature. Thanks to a touch screen display with an extremely user-friendly graphical interface, the user can
manage the system easily and comprehensively while keeping the environment in a state of energy saving.
2. Display
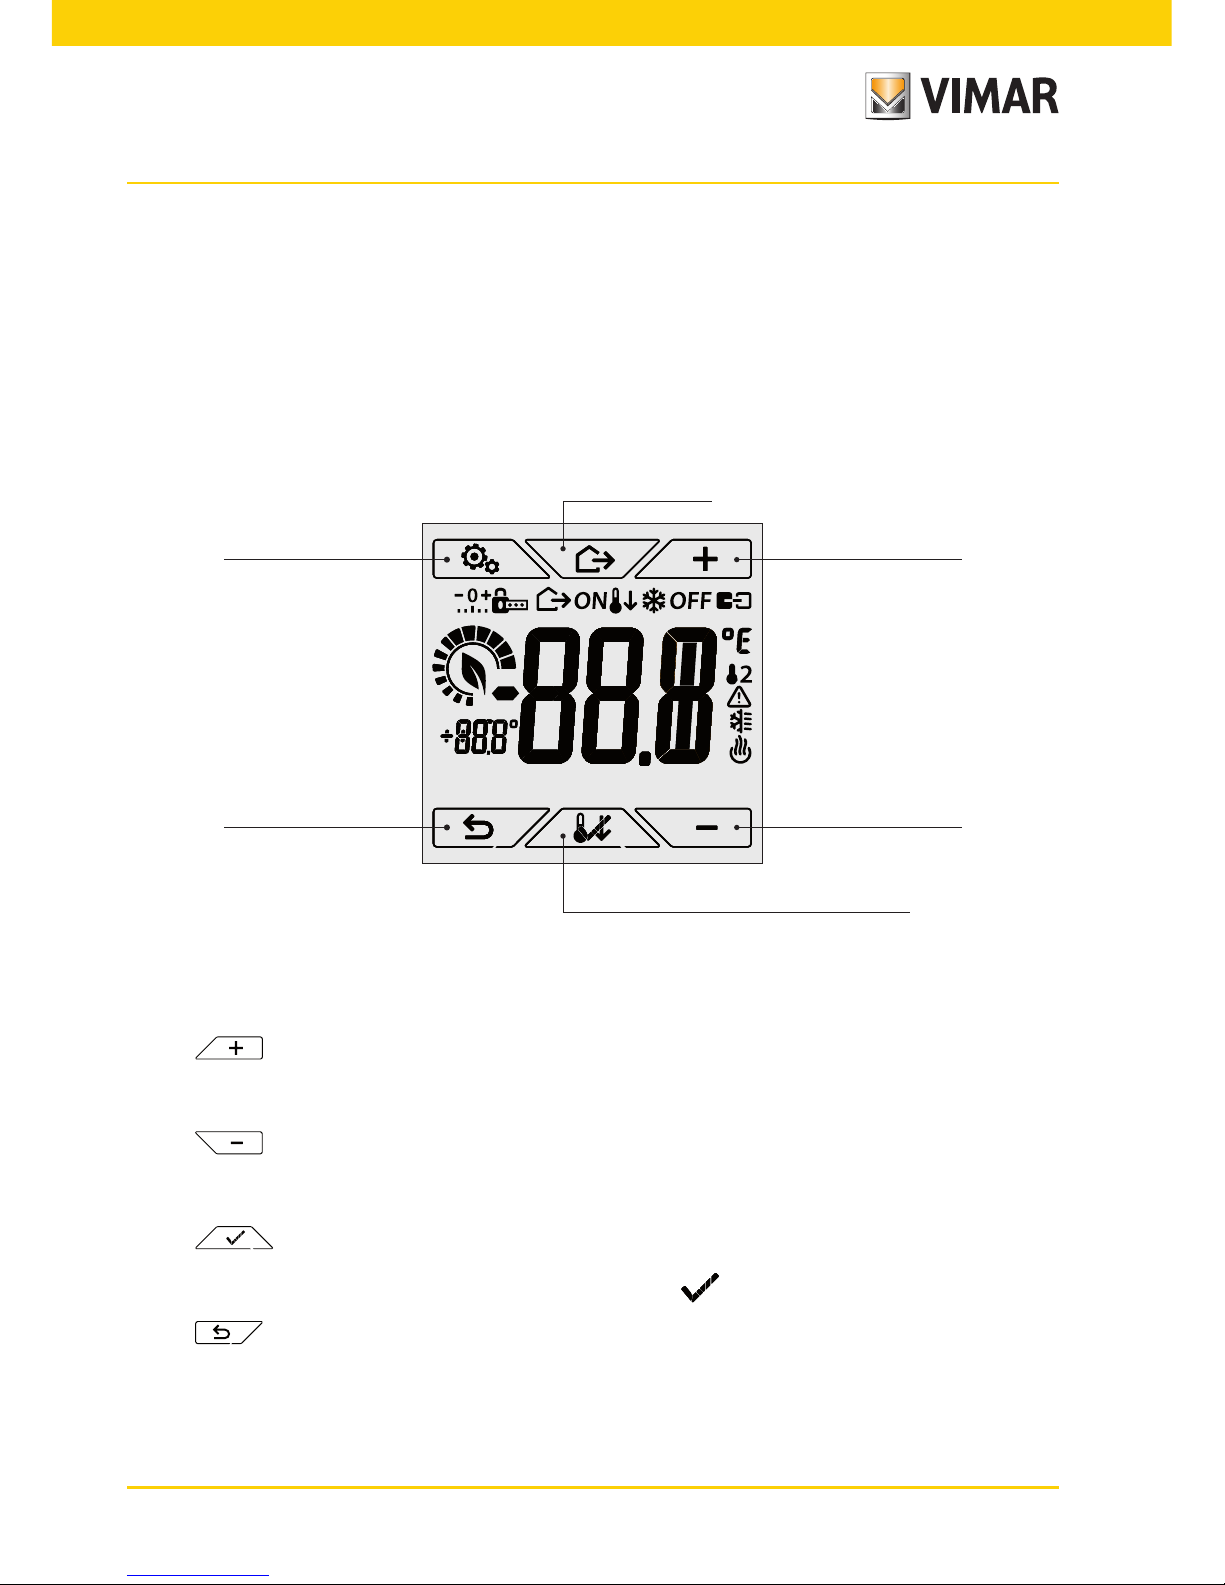
The touchscreen display allows you to control the system using the following buttons and icons:
Figure 1: graphical interface and buttons
2.1 Functions of the buttons
: increases the numerical values and, in the process of navigation, scrolls through the available
menus. When it "disappears" from the display it means that the value cannot be increased any
more or the first of the scrollable items has been reached.
: decreases the numerical values and, in the process of navigation, scrolls through the available
menus. When it "disappears" from the display it means that the value cannot be decreased any
more or the last of the scrollable items has been reached.
: confirms the selected option (activates the submenu if there is one or displays the next
parameter/digit).
After each confirmation, the display shows the icon for approximately 1 s.
: back (or cancel) exits the current screen/menu and returns to the previous one without saving
any changes. In menus with changes to multiple digits it lets you go back to change the previous digit.
N.B.: The field/value being edited is highlighted by the field/value itself flashing.
Button
“Settings Menu”
“Away” button
"Increase" button
"Decrease" button "Back" button
"Confirm" or "Nighttime reduction" button
Page 5

3
• If no operations are performed on the device for 30 seconds, the brightness of the backlighting decreases, and the touch screen does not respond to touch (thus you avoid the effects due to inadvertent
touching and the backlighting is less “invasive”); on standby the button symbols are no longer visible
because they are disabled.
• To exit standby mode, touch the screen and see that the button icons appear. The increase in the
brightness level of the device and the appearance of active buttons will confirm restoration of the normal
functions.
2.2 Symbols
Depending on the different operating modes, the following icons could also be displayed:
: Calibration
: Entering the PIN
: Away
: Manual (ON)
: Nighttime Reduction
: Antifreeze
: OFF
: Multi-function input ON
: External temperature probe
: Alarm
: Air conditioning
: Heating
: Confirm
2.3 Ecometer
Figure 2: set of ECOMETER icons
On the left-hand side of the display there is a set of icons called the "ECOMETER" that provide an overview
of the expected consumption.
The colour of the display, if configured in "ECO" mode, shows the expected consumption provided by the
ECOMETER via the background colour (see 4.9).
This indicator facilitates system management geared to energy saving by associating a different colour
depending on the estimated forecast.
Page 6
4
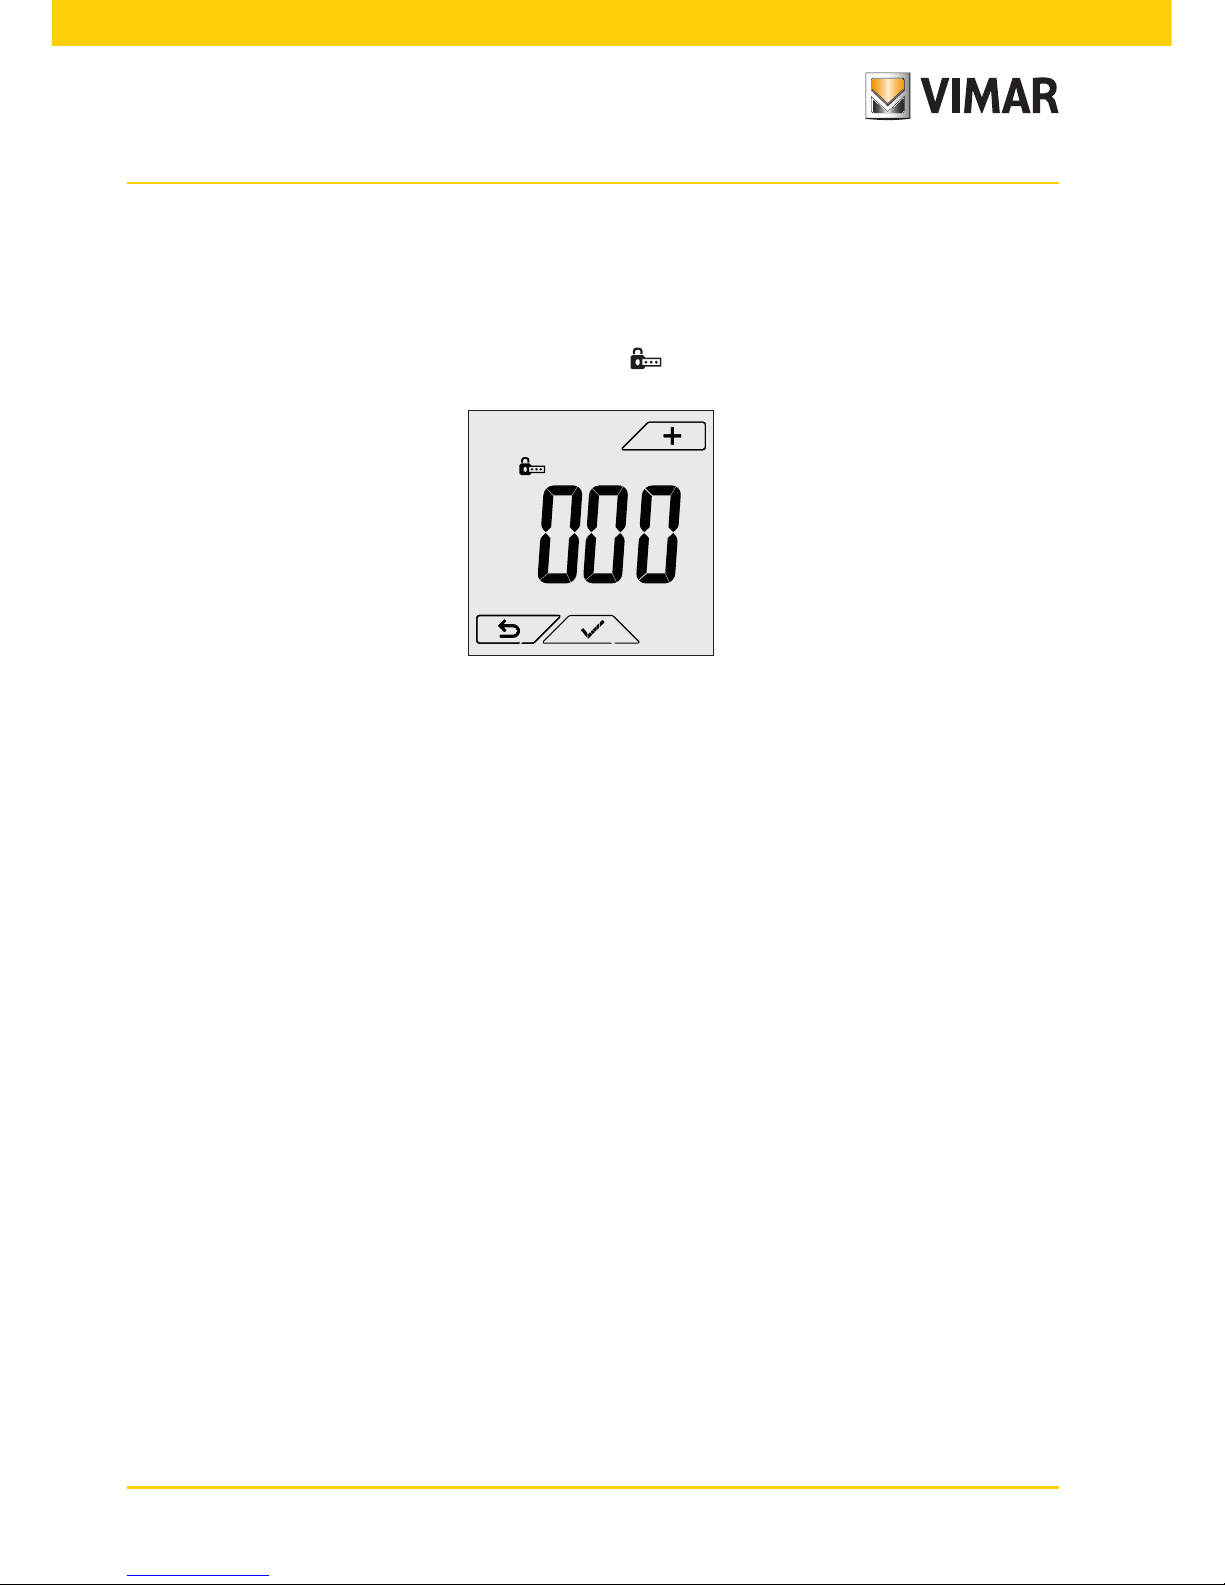
2.4 Locking the interface via PIN
The thermostat lets you set a password (see par. 4.12) which inhibits any change to the operating mode
(eg switching from Manual to OFF), limits setting the temperature values and, more generally, blocks
access to the configuration menu.
This feature is useful to prevent the thermostat being used by unauthorized persons: the device prompts
you to enter the PIN, indicating a shutdown with the icon.
Fig. 3 : Locking with PIN
3. Operating mode
The thermostat 02950 is able to adjust the temperature according to the following operating modes:
• Switched off (OFF): switches the system off
• Manual (ON): lets you set the environment temperature set-point manually
• Away: lets you set the set-point in order to achieve significant energy savings during periods when the user
is away
• Nighttime reduction: this mode, which can be activated locally, is useful for changing the manual adjustment
set point in the hours of nighttime operation.
• Antifreeze: used to set a minimum temperature level to avoid damage to pipework or prevent the temper-
ature from falling below a safety level.
In addition, if the multi-function input of the thermostat has been suitably configured (your installer will give you
the relevant information), you can remotely activate the following modes:
• Remote reduction: conceptually similar to nighttime reduction, it acts on the comfort set point instead of
the manual set point
• Remote activation: lets you activate the system remotely by setting the comfort set point
The operating mode is selected via the SETTINGS menu (see chap. 4).
Page 7

5
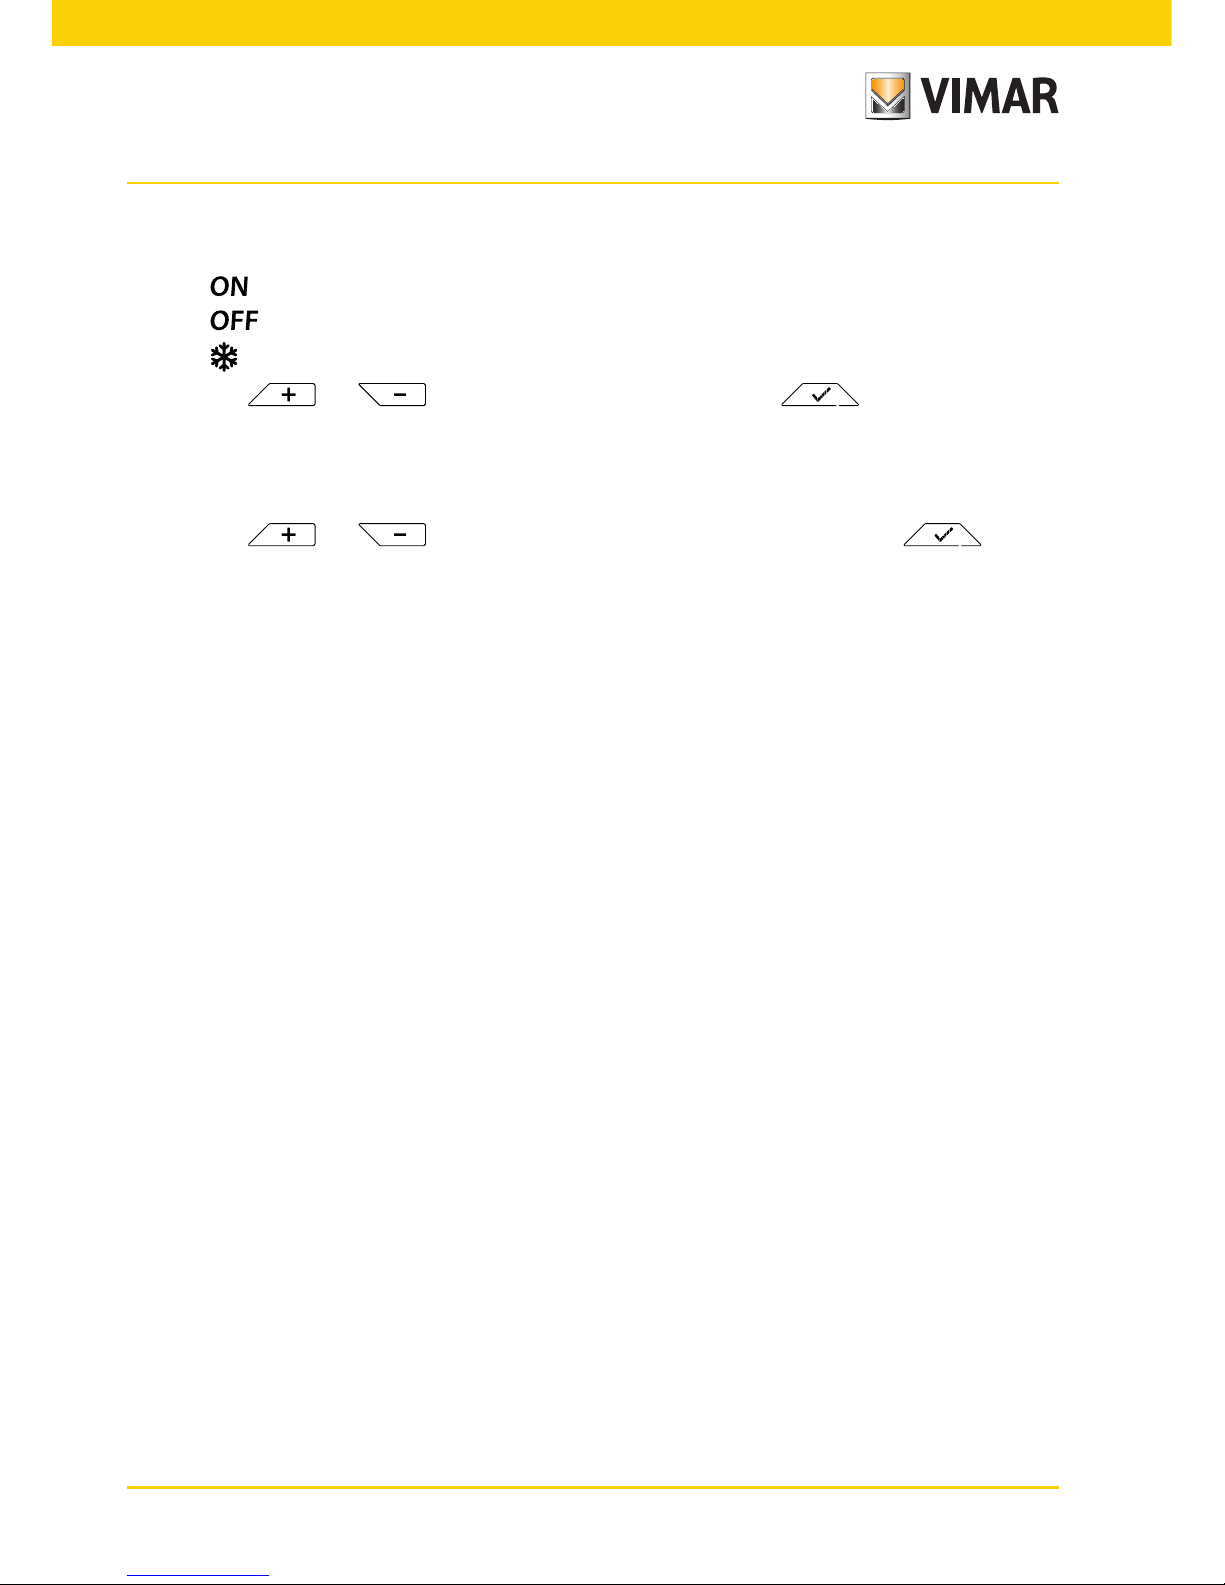
3.1 Switched off (OFF)
In this mode, the thermostat is turned off and you cannot make any adjustments; in this case, the
icon is displayed above the temperature indicator.
Fig. 4 : Typical screen for OFF mode
For heating-only systems this mode is typically used in the summer.
3.2 Manual (ON)
This is the "traditional" operating mode. The thermostat controls the room temperature and takes it to
the value set by the user.
Figure 5: Typical screen for Manual mode
The set point can always be changed via or .
In the process of setting, the set point flashes; the colour1 of the display may also vary, providing an indication of the expected consumption associated with the setting being made:
green yellow red
optimum consumption excessive consumption
1 Only if the colour set for the display is white (C0) or ECO, see par. 8.9.
Page 8

6
Fig. 6: Manual set point setting
The selection is confirmed by touching .
The and icons in the lower right corner indicate whether the system is operating in heating or
air-conditioning mode respectively (icon illuminated = system on).
3.3 Away
This mode is useful to achieve energy savings quickly and effectively whenever the user leaves the regulated room.
In "Away" mode the system makes the adjustment according to the "away temperature" setpoint
(see para. 4.4.2) which is more cost-effective than the manual setpoint and different to switching off the
system completely.
The Away mode can only be activated in manual mode by touching .
The display will show the "away temperature" setpoint for approximately 2 seconds:
Fig. 7: Input in away mode showing the away temperature
Page 9

7
Activation of this mode is identified by the icon above the temperature indicator:
Fig. 8: Away Mode
To exit and return to Manual mode touch the button again.
3.4 Nighttime reduction
This is the typical mode to use at night to reduce system consumption significantly.
In "Nighttime reduction" mode the device reduces the consumption of the system, taking the room temperature to a lower value (or higher, if on air-conditioning) than the Manual mode by degrees (see
par. 4.4.4).
"Nighttime reduction" is activated starting from Manual mode by touching or remotely via the
multi-function input (if enabled).
The display will show the "nighttime reduction" setpoint for approximately 2 seconds:
Fig. 9: Input in Nighttime reduction mode showing the reduction set point
Activation of this mode is identified by the icon above the temperature indicator:
Page 10

8
Fig. 10: Nighttime reduction mode
To exit and return to Manual mode touch again.
3.5 Antifreeze
This mode, which can only be activated when the system is operating in heating mode (see par. 4.3), lets
you set a minimum temperature value ( setpoint) to avoid damage to the pipework or to keep it from
falling below a certain safety level when you are away for lengthy periods in the winter.
The "antifreeze" mode is activated directly from the Settings menu (see par. 4.1).
Once activated, antifreeze mode is identified by the icon above the temperature indicator.
Fig.11: Antifreeze mode
Page 11

9
3.6 Remote reduction
Remote reduction is a useful way to "centralize" energy saving if there are multiple 02950 thermostats in
different rooms of the same house.
It is similar to Nighttime reduction mode with the only difference being that activation is by remote control.
Example: Before going to bed, using a simple switch, all the thermostats in the house are set onto "reduction" at the same time.
This mode comes into operation when the multi-function input is activated only if this has been
suitably configured by your installer.
The multifunction input is activated solely when the thermostat is in Manual mode.
In "remote reduction" mode, the device sets the temperature to a value below Tcomfort.
In this condition the display and its buttons have limited functions; access to the settings menu is disabled
and you can only change the temperature setpoint within a limited range.
The "Remote reduction" mode is identified by the and icons located simultaneously above the
temperature indicator.
The and buttons in any case let the user change the temperature in a limited range.
Fig. 12 : Input in Remote reduction mode
On disabling the multi-function input, the thermostat returns to the previously set mode and the user can
again manage the device completely.
3.7 Remote activation
This mode is typically used in applications where you want to remotely enable or disable temperature
control of a room and limit the functions that can be performed by the user (typical mode for hotel room
management).
This mode comes into operation when the multi-function input is activated only if this has been
suitably configured by the installer.
Page 12

10
In "remote activation" mode, the device sets the temperature to a value equal to Tcomfort.
In this condition the display and its buttons have limited functions; access to the settings menu is disabled
and you can only change the temperature setpoint within a limited range.
The "Remote activation" mode is identified by the icon located above the temperature indicator.
The and buttons in any case let the user change the temperature in a limited range.
Fig. 13: Input in Remote manual mode
On disabling the multi-function input, the thermostat switches to Antifreeze mode (system on heating) or
OFF (system on air-conditioning) and the user can again manage the device completely.
Page 13

11
4. Settings menu
From the settings menu you can configure all the features of the thermostat.
On the main screen (see Fig. 1) tap the icon.
From the main menu, using and will display the following (flashing) symbols in succession,
which provide access to the corresponding submenus:
1. operating mode setting
2. unit of measurement setting
3. heating/air-conditioning setting
4. temperature set point setting
5. calibration setting
6. external probe setting
7. and multi-function input setting
8. OnOff/PID temperature control algorithm setting
9. display colour setting
10. standby brightness level setting
11. device info
12. lock/unlock PIN setting
Touching opens the submenu and then the flashing highlights the parameters of the submenu.
Page 14
12
4.1 Operating mode setting
This menu is used to select the operating mode of the device:
• Manual
• Off
• Antifreeze (only if the thermostat is set on "heating")
Using and select the desired mode and confirm with .
4.2 Unit of measurement setting
• The menu lets you set the unit of measurement used for the temperature (°C or °F)
Using and select the desired unit of measurement and confirm with .
4.3 Heating/air-conditioning setting
This menu is for the sole use of the installer.
4.4 Temperature set point setting
This menu is for the sole use of the installer.
4.5 Calibration setting
This menu is for the sole use of the installer.
4.6 External probe setting
This menu is for the sole use of the installer.
4.7 Multi-function input setting
This menu is for the sole use of the installer.
4.8 OnOff/PID setting
This menu is for the sole use of the installer.
Page 15

13
4.9 Colour setting
This menu is used to select the background colour of the display.
In addition to the four default colours, you can set a colour to your choice selected from the full range of
colours, or set "ECO" mode in which the display colour is a clue to the expected level of consumption
in the building.
Via and you can select:
• : white default colour
• : colour matching the Plana series
• : colour matching the Eikon series
• : colour matching the Arkè series
• (custom colour): takes you to another menu and via and you set a custom
colour; while the numbers scroll, the display shows the corresponding colour
in real time.
• : ECO mode allows displaying a colour that, depending on the set temperature, is associated
with the expected level of energy consumption. Specifically:
green yellow red
optimum consumption excessive consumption
ECO mode therefore does not display the colour as a function of the temperature measured at that
time but only in relation to the set point.
Lastly, tap to confirm your choice.
Page 16

14
4.10 Standby brightness level setting
The menu lets you set the brightness level when the thermostat is in standby mode.
Via and select one of the following levels with gradually increasing brightness:
•
•
•
•
•
•
•
While scrolling through the values, when the selection stops on a certain level, the brightness of the
display will, for approximately 2 s, take on the brightness corresponding to the selected level in order to
allow the user to check the visual effect.
Lastly, tap to confirm your choice.
4.11 Info
This menu is for the sole use of the installer.
4.12 Lock/unlock PIN setting
This menu lets you add/change the password to inhibit use of the thermostat.
Using and set the three digits of the PIN one at a time and then confirm each set digit
with .
If you wish to have free access to the thermostat (so without it prompting you for a password) it is sufficient to set the PIN to "000".
IMPORTANT: Take care to note down the password so that you can use it again for the device when
needed.
5. Alarms
The thermostat is capable of displaying an alarm condition associated with the use of the external temperature
probe; in this situation, the device controls the system independently so the alarm will cease in a matter of
minutes.
Page 17

15
6. Cleaning the device
The device features a touchscreen display with capacitive buttons and therefore requires you to be gentle during
the cleaning phase. Avoid using aggressive products. Clean the display with a special cloth for cleaning lenses.
7. Main characteristics
• Power supply: 120-230 V~, 50-60 Hz.
• Maximum power draw: 1 VA.
• Output: relay with clean changeover contact 5(2) A 230 V~.
• Type of setting: ON/OFF or PID algorithm
• Room temperature display: 0°C +40°C.
• Reading resolution: 0.1°C.
• Settings resolution: 0.1°C.
• Accuracy of reading:
- ≤ ±0.5°C between +15°C and +25°C;
- ≤ ±0.8°C at the extremes.
• Software calibration: ability to change the probe reading with software calibration (±3°C max) to adapt the
measurement to each specific installation condition.
• Hysteresis: adjustable from 0.1°C to 1°C.
• Adjustment range:
- +4°C - +10°C on antifreeze;
- +10°C - +35°C on heating or air-conditioning.
• Main functions:
- adjustment for heating and air conditioning;
- antifreeze function;
- turning on and off with multi-function input
- device reset;
- keypad lock via password with 3-digit PIN to block access to all the functions of the device and protect
its operation and programming (for example, if it is installed in a public place).
• Touchscreen display.
• Protection class: IP20.
• Appliance of class II
• Number of manual cycles: 3,000.
• Number of automatic cycles: 100,000.
• Type of contact opening: micro-disconnection.
• Action type: 1.B
• Tracking index: PTI175.
• Degree of pollution: 2 (normal).
• Rated pulse voltage: 4,000 V
• Ambient temperature during transport: -25°C +60°C.
• Operating temperature: T40 (0°C +40°C).
• Software class: A
8. Regulatory compliance
LV directive
EMC directive
Standards EN 60730-1, EN 60730-2-9.
Page 18

02950 user 01 1406
VIMAR - Marostica - Italy
Viale Vicenza, 14 - 36063 Marostica VI - Italy
Tel. +39 0424 488 600 - Fax (Italy) +39 0424 488 188
Fax (Export) +39 0424 488 709
www.vimar.com
 Loading...