

Viking Range vcwb300 Installation Instructions Manual
INSTALLATION
INSTRUCTIONS
BUILT-IN FULL HEIGHT WINE CELLAR
(VCWB300 PROFESSIONAL MODEL)
Retain for Future Reference
VIKING RANGE CORPORATION
111 Front Street
Greenwood, Mississippi 38930 USA
(662) 455-1200
IMPORTANT - PLEASE READ AND FOLLOW
Make sure that incoming voltage is the same as unit rating. An electric rating plate specifying voltage, frequency, wattage,
amperage, and phase is attached to the product.
To reduce the risk of fire, electric shock, or injury to persons, installation work and electrical wiring must be done by qualified
people in accordance with all applicable codes and standards, including fire-rated construction.
The installer should leave these instructions with the consumer who should retain them for local inspector’s use and for
future reference.
GENERAL INFORMATION
It is your responsibility to :
-comply with installation specifications and dimensions
-properly install wine cellar
-remove any moldings or decorative panels that prevent the wine cellar
from being serviced
-assure that floor will support wine cellar, door panels and contents
(approximately 1200 lbs. [540 kg]).
-provide a properly grounded electrical outlet
-assure that location will permit appliance doors to open 90
o
minimum
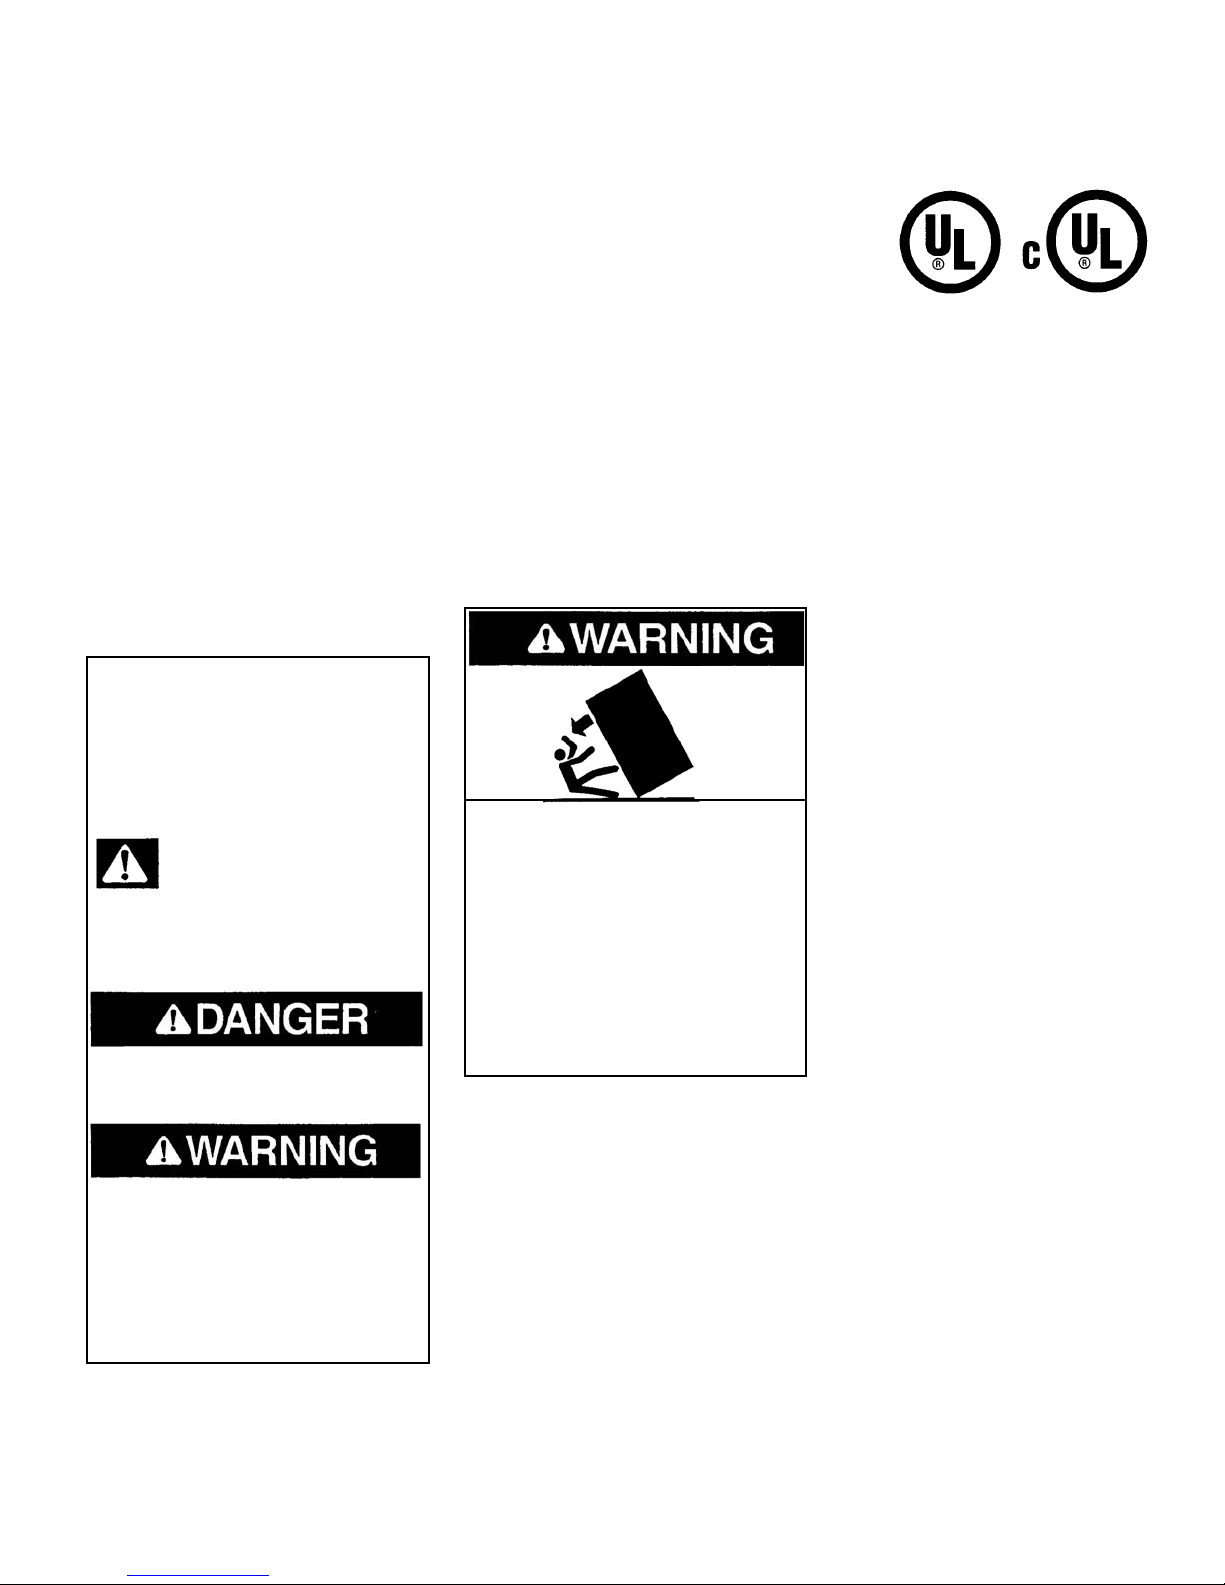
TTIIPP OOVVEERR HHAAZZAARRDD
WWiinnee cceellllaarr iiss ttoopp hheeaavvyy aanndd ttiippss eeaassiillyy
wwhheenn nnoott ccoommpplleetteellyy iinnssttaalllleedd..
KKeeeepp ddoooorr ccl
loosseedd aanndd sshheellvveess iinn ppllaaccee
uunnttiill wwiinnee cceellllaarr iiss ccoommpplleetteellyy iinnssttaalllleedd
ppeerr iinnssttaallllaattiioonn iinnssttrruuccttiioonnss..
UU
ssee ttwwoo oorr mmoorree ppeeooppllee ttoo mmoovvee aanndd
iinnssttaallll wwiinnee cceellllaarr..
FFaaiilluurree ttoo ddoo ssoo ccaann rreessuulltt iinn ddeeaatthh oorr
sseerriioou
uss iinnjjuurryy..
MMoosstt ooff tthhee wwiinnee cceellllaarr’’ss wweeiigghhtt iiss aatt tthhee
ttoopp.. EExxttrraa ccaarree iiss nneeeeddeedd wwhheenn mmoovviinngg
tthhee wwiinnee cceellllaarr ttoo
pprreevveenntt ttiippppiinngg..
UUssee ccaarrddbbooaarrdd sshhiippppiinngg mmaatteerriiaall oorr
ppllyywwoooodd uunnddeerr wwiinnee cceellllaarr uunnttiill iitt iiss
iinnssttaalllleedd
iinn tthhee ooppeerraattiinngg ppoossiittiioonn ttoo
pprrootteecctt fflloooorr ssuurrffaaccee..
YYoouurr ssaaffeettyy aanndd tthhee ssaaffeettyy ooff ootthheerrss
iiss vveerryy iimmppoorrttaanntt..
We have provided many important safety
messages in this manual and on your
appliance. Always read and obey all
safety messages.
This is the safety alert symbol. This
symbol alerts you to hazards that
can kill or hurt you and others.
All safety messages will be
preceded by the safety alert symbol and
the word “DANGER” or “WARNING”.
These words mean:
YYoouu wwiillll bbee kkiilllleedd oorr sseerriioouussllyy iinnjjuurre
edd iiff yyoouu
ddoonn’’tt ffoollllooww iinnssttrruuccttiioonnss..
YYoouu ccaann bbee kkiilllleedd oorr sseerriioouussllyy iinnjjuurreedd iiff
yyoouu ddoonn’’tt ffoollllooww iinnssttr
ruuccttiioonnss..
All safety messages will identify the
hazard, tell you how to reduce the chance
of injury, and tell you what can happen if
the instructions are not followed.

2
BASIC SPECIFICATIONS AND DIMENSIONS
DDEESSCCRRIIPPTTIIOONN VVCCWWBB330000
Overall Width 30” (76.2 cm)
Overall Height from Bottom Min. 82 3/4” (210.2 cm) to Max. 84 1/16” (213.5 cm)
Overall Depth from Rear To rear edge of side trim 22 3/16” (56.4 cm)
To front of top grille 24 1/2” (62.2 cm)
To end of handle bracket 27” (68.6 cm)
Cutout Width 29 1/2” (74.9 cm)
Cutout Height 82 7/8” (210.5 cm) min.; 84 1/16” (213.5 cm) max.
Cutout Depth 24” (61.0 cm) min.
Electrical Requirements 115 volt, 60 Hz, 15 amp dedicated circuit; 3-wire cord with grounded
3-prong plug attached to product.
Maximum Amp Usage 2.0 amps
Overall Capacity 150 bottles
Approximate Shipping Weight 560 lbs. (252 kg)
3
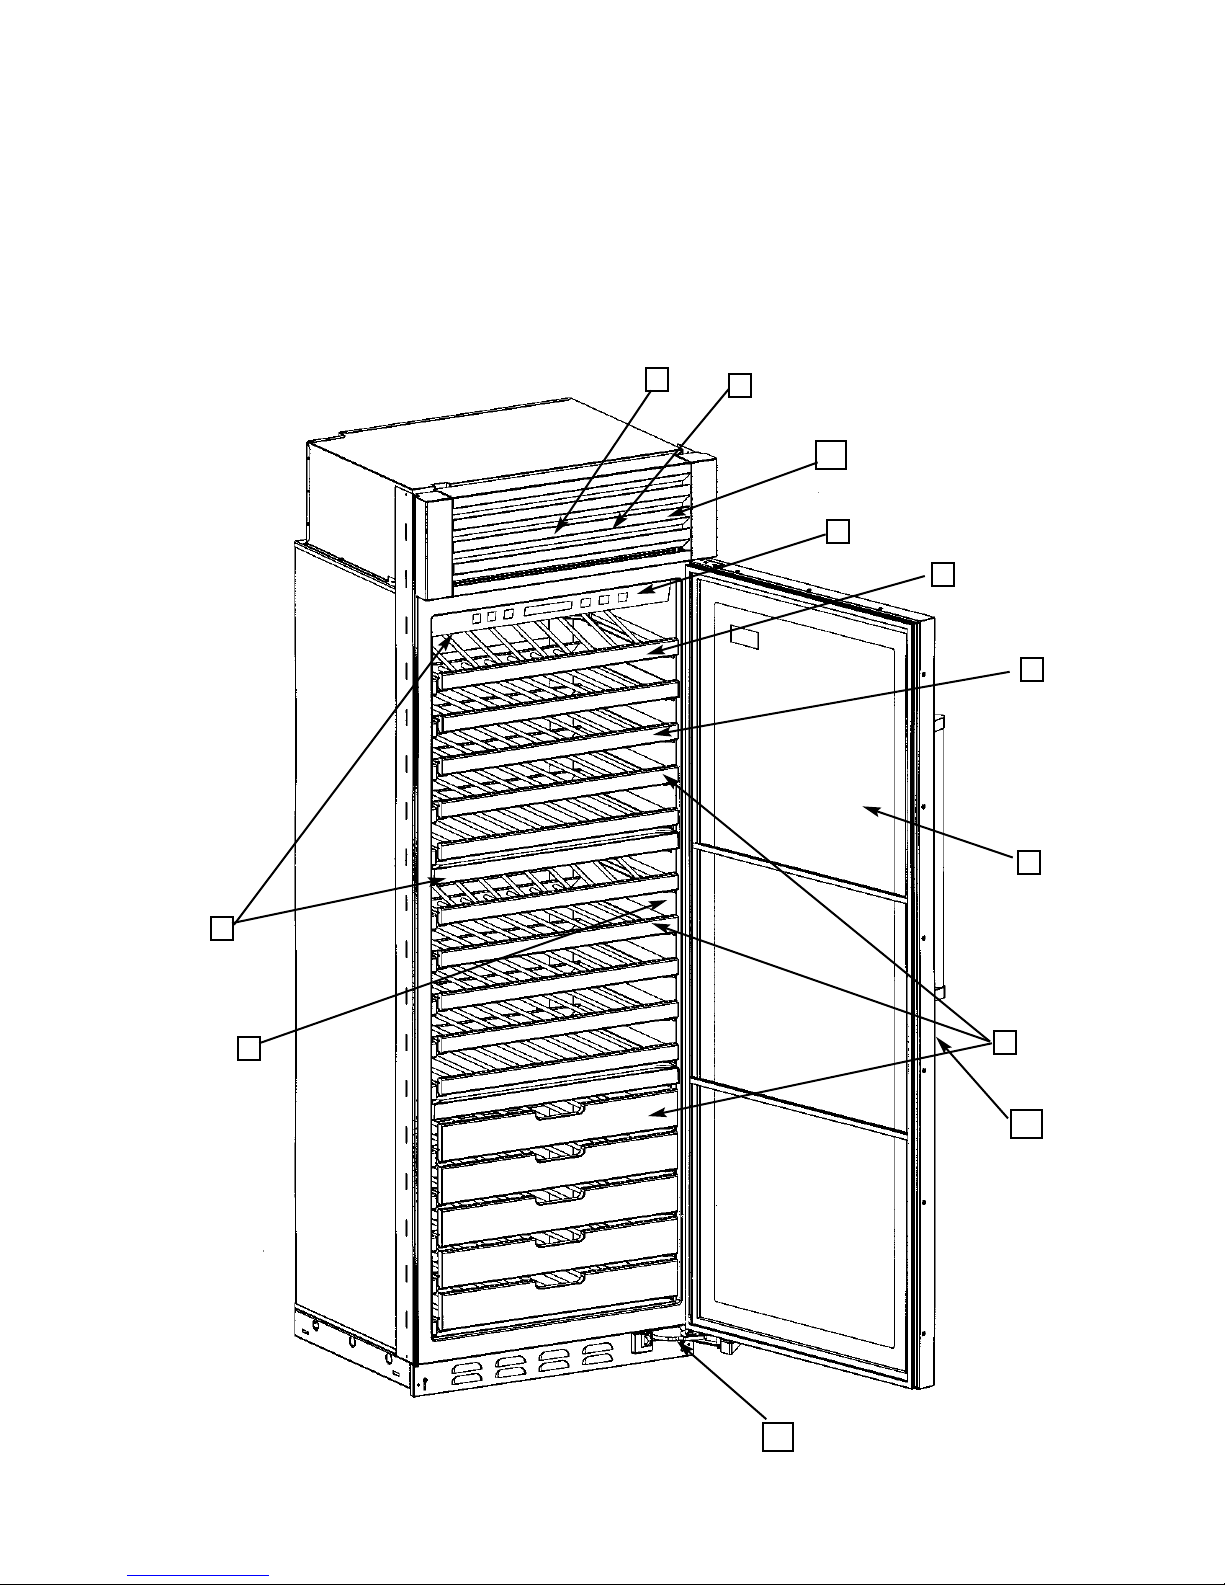
1. TriTempTMstorage system
2. Electronic control center
3. Convertible display shelves (2)
4. Extendable shelves (13)
5. Energy efficient and UV resistant glass doors
6. Low intensity lighting
7. Black interior
8. High temperature alarm (behind grille)
9. Door alarm (behind grille)
10. Connection to home security system (behind grille)
11. Door stop settings - 90
o
, 110o, 120
o
12. Keyed door lock - (on front of door)
FEATURES OF YOUR WINE
CELLAR
1
12
2
3
4
5
6
7
8
9
10
11
4
SITE PREPARATIONS AND CONSIDERATIONS
PROFESSIONAL MODEL 30” W. FULL HEIGHT WINE CELLAR
CABINET OPENING DIMENSIONS
8844 11//1166 ((221133..55)) ccmm mmaaxx..
aannttii--ttiipp bbooaarrdd aanndd ooppeenniinngg hheeiigghhtt
8822 77//88 mmiinn.. ((221100..55 ccmm))
aannttii--ttiipp bbooaarrdd aanndd ooppeenniinngg hheeiigghhtt
5
ELECTRICAL REQUIREMENTS
AREA REQUIREMENTS
IItt iiss tthhee ccuussttoommeerr’’ss rreessppoonnssiibbiilliittyy ttoo::
•contact a qualified electrical installer.
•assure that the electrical installation is adequate and in conformance with the
National Electrical Code, ANSI/NFPA 70-latest edition or Canadian Electrical
Code C22.1-1998 and C22.2 No. 0-M91 (or latest edition), and all local
codes and ordinances. (115 volt, 60-Hz, 15 amp, fused, electrical supply is
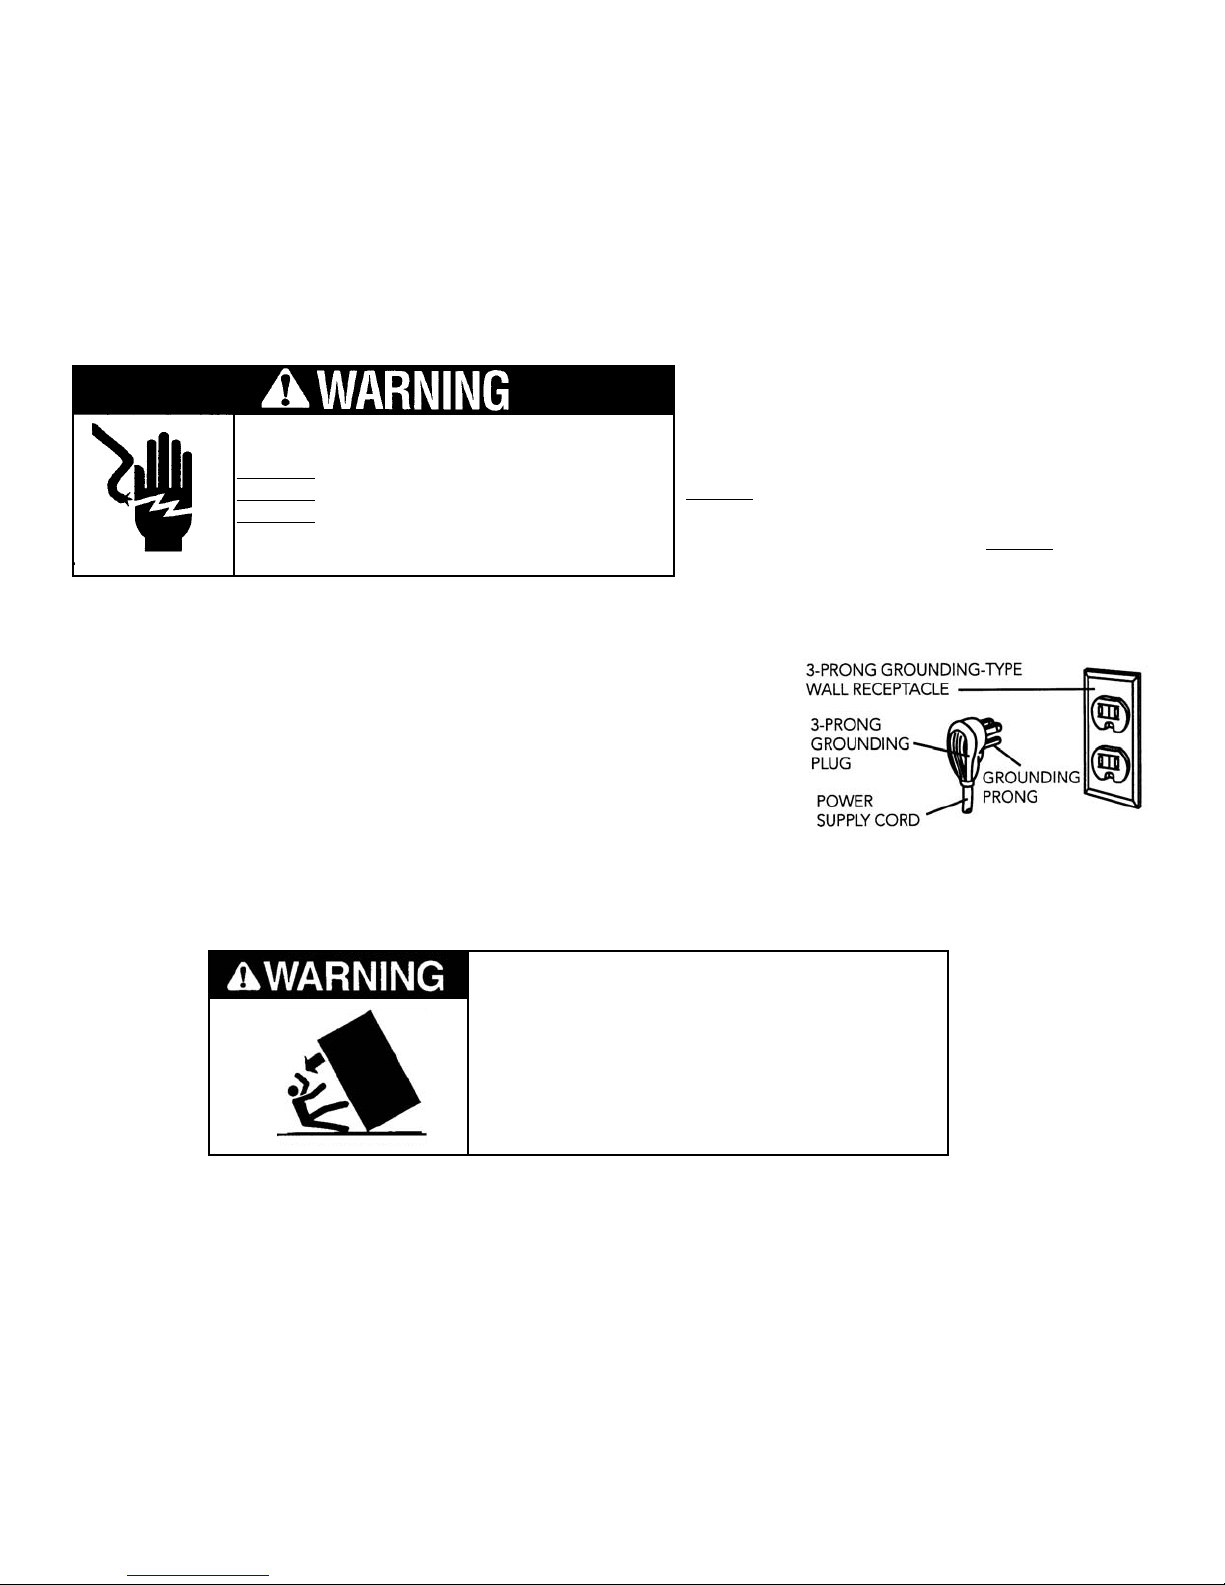
required. It is required that a separate circuit serving only this appliance be
provided. This appliance is equipped with a power supply cord having a 3prong grounding plug. To minimize possible shock hazard, the cord must be
plugged into a mating 3-prong, grounding-type wall receptacle. Do not use
an extension cord.)
IIff ccooddeess ppeerrmmiitt aa sseeppaarraattee ggrroouunnddiinngg wwiirree ttoo bbee
uusseedd,, iitt iiss rreeccoommmmeennddeedd tthhaatt aa qquuaalliiffiieedd eelleeccttrriicciiaan
n
ddeetteerrmmiinnee tthhaatt tthhee ggrroouunnddiinngg ppaatthh iiss aaddeeqquuaattee..
DDoo NNoott
ggrroouunndd ttoo aa ggaass ppiippee.. CChheecckk wwiitthh aa
qquuaalliiffiieedd eelleeccttrriicciiaann iiff yyoouu aarree nnoott ssuurree tthhee
aapppplliiaannccee iiss pprrooppeer
rllyy ggrroouunnddeedd.. DDoo NNoott hhaavvee aa
ffuussee iinn tthhee nneeuuttrraall oorr ggrroouunnddiinngg cciirrccuuiitt..
EELLEECCTTRRIICCAALL SSHHOOCCKK HHAAZZAARRDD
PPlluugg iinnttoo aa ggrroouunnddeedd 33--pprroonngg oouuttlleett..
DDOO NNOOTT rreemmoovvee ggrroouunndd pplluugg..
DDOO NNOOTT uussee aann aaddaapptteerr..
DDOO NNOOTT
uussee aann eexxtteennssiioonn ccoorrdd..
FFaaiilluurree ttoo ffoollllooww tthheessee iinnssttrruuccttiioonnss ccoouulldd rreessuulltt iinn
ffiirree oorr eelleeccttrriiccaall sshhoocckk.
.
VVeerriiffyy tthhee ffoolllloowwiinngg::
•Wine cellar can fit into residence and can be moved around corners and through doorways.
•Floors can support wine cellar’s weight plus wine weight (approximately 1200 pounds total).
•Remove anything attached to rear or side walls that can obstruct wine cellar installation.
•Cutout dimensions are accurate.
•Electrical outlet is in correct location.
Anti-Tip Requirements
The anti-tip boards should be fastened into position prior to moving the unit into the opening. Additional boards
may be required if wine cellar does not touch the back wall of the enclosure. To prevent wine cellar from tipping
forward, it must be secured in place with a solid soffit or wood block.
TTIIPP OOVVEERR HHAAZZAARRDD
WWiinnee cceellllaarr iiss ttoopp hheeaavvyy aanndd ttiippss eeaassiillyy wwhheenn nnoott
ccoommpplleetteellyy iinnssttaalllleedd..
KKeeeepp ddoooorr ccl
loosseedd aanndd sshheellvveess iinn ppllaaccee uunnttiill wwiinnee cceellllaarr
iiss ccoommpplleetteellyy iinnssttaalllleedd aanndd sseeccuurreedd ppeerr iinnssttaallllaattiioonn
iinns
sttrruuccttiioonnss.. UUssee ttwwoo oorr mmoorree ppeeooppllee ttoo mmoovvee aanndd
iinnssttaallll wwiinnee cceellllaarr.. FFaaiilluurree ttoo ddoo ssoo ccaann rreessuulltt iinn
ddeeaatthh
oorr sseerriioouuss iinnjjuurryy..
6
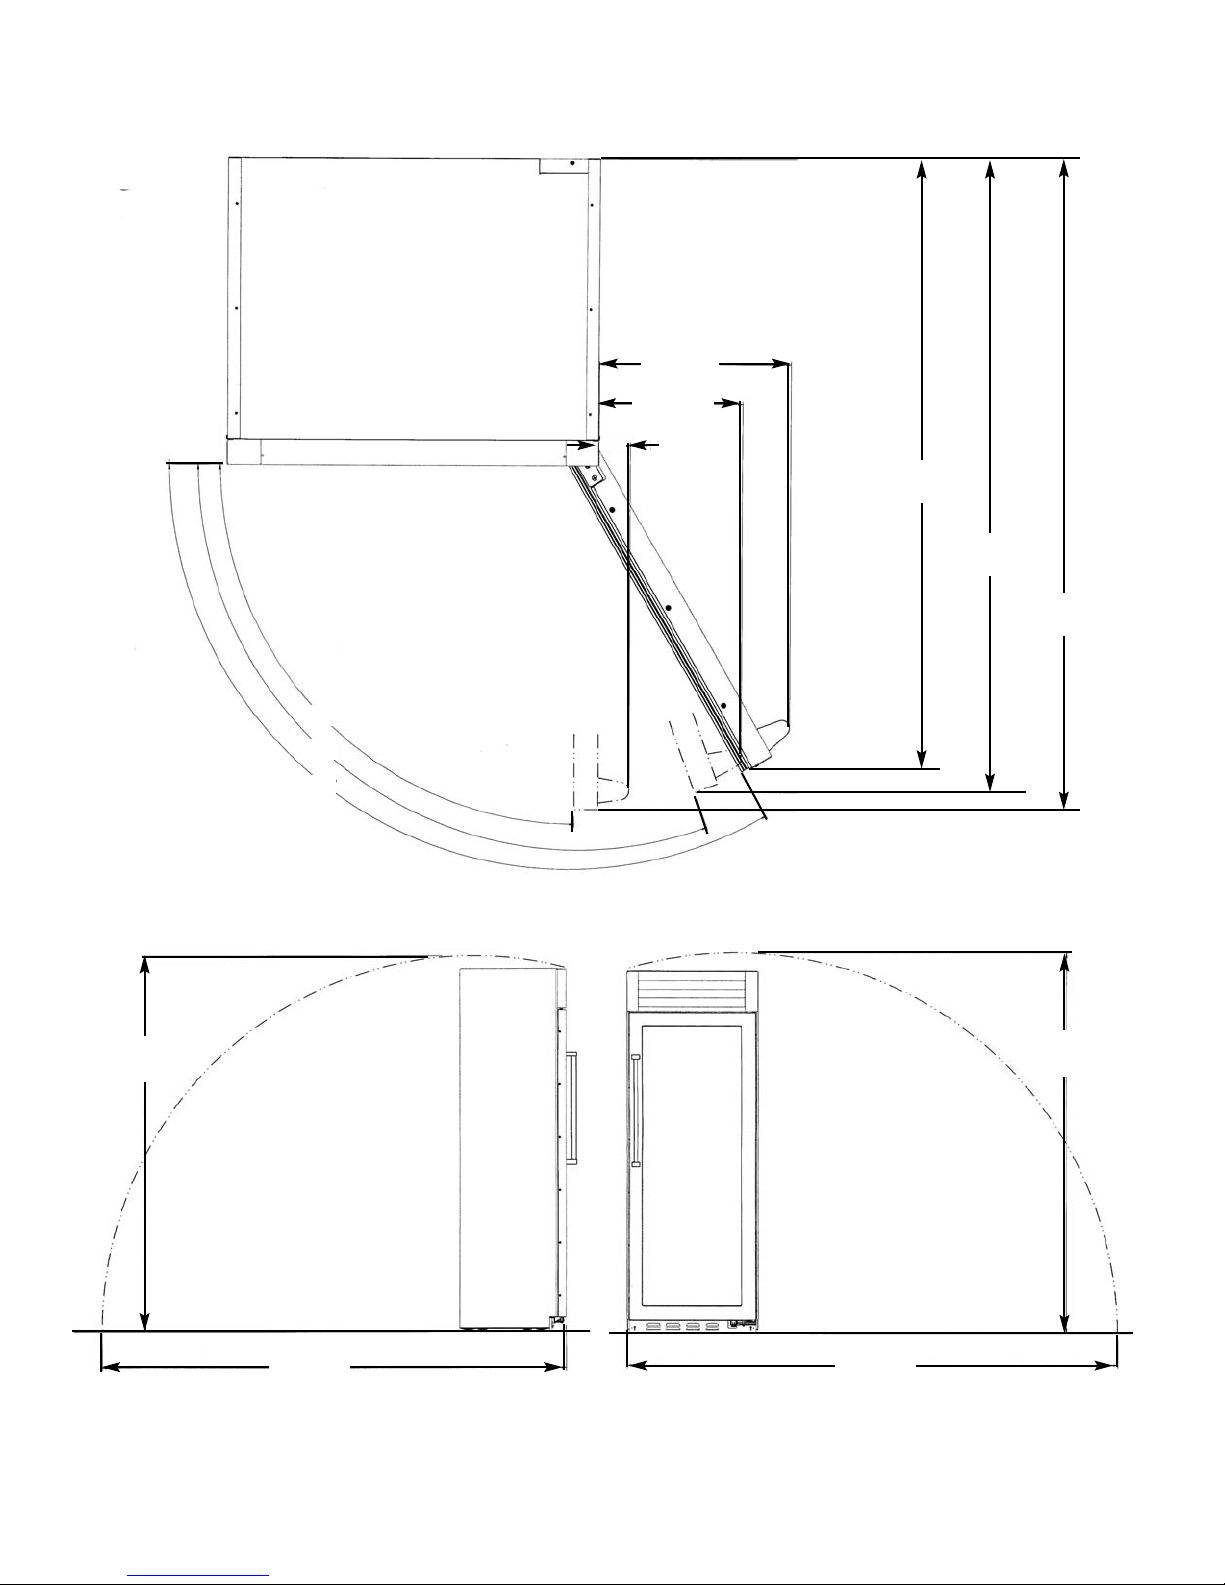
DOOR SWING AND TIPPING CONSIDERATIONS
2 1/2”
(6.4 cm)
90
o
110
o
120
o
BBAACCKKWWAARRDD
TTIIPPPPIINNGG RRAADDIIUUSS
51 7/8”
(131.8 cm)
50 1/2”
(128.2 cm)
48 5/8”
(123.5 cm)
11 1/2”
(29.2 cm)
15 1/2”
(39.4 cm)
SSIIDDEE
TTIIPPPPIINNGG RRAADDIIUUSS
85 1/2
(217.1 cm)
106 1/2
(270.5 cm)
112 1/2
(285.7 cm)
87 1/2
(222.2 cm)
 Loading...