

Viking Installation Guide
Viking Range Corporation
111 Front Street
Greenwood, Mississippi 38930 USA
(662) 455-1200
For product information,
call 1-888-VIKING1 (845-4641)
or visit the Viking Web site at
vikingrange.com
F20531 EN
PURHK23BR Professional Brass Handle Kit
For Use with VURD Refrigerated Drawer
(062708J)
IMPORTANT–Please Read and Follow!
2-3/4”
(7.0 cm)
3”
(7.6 cm)
3
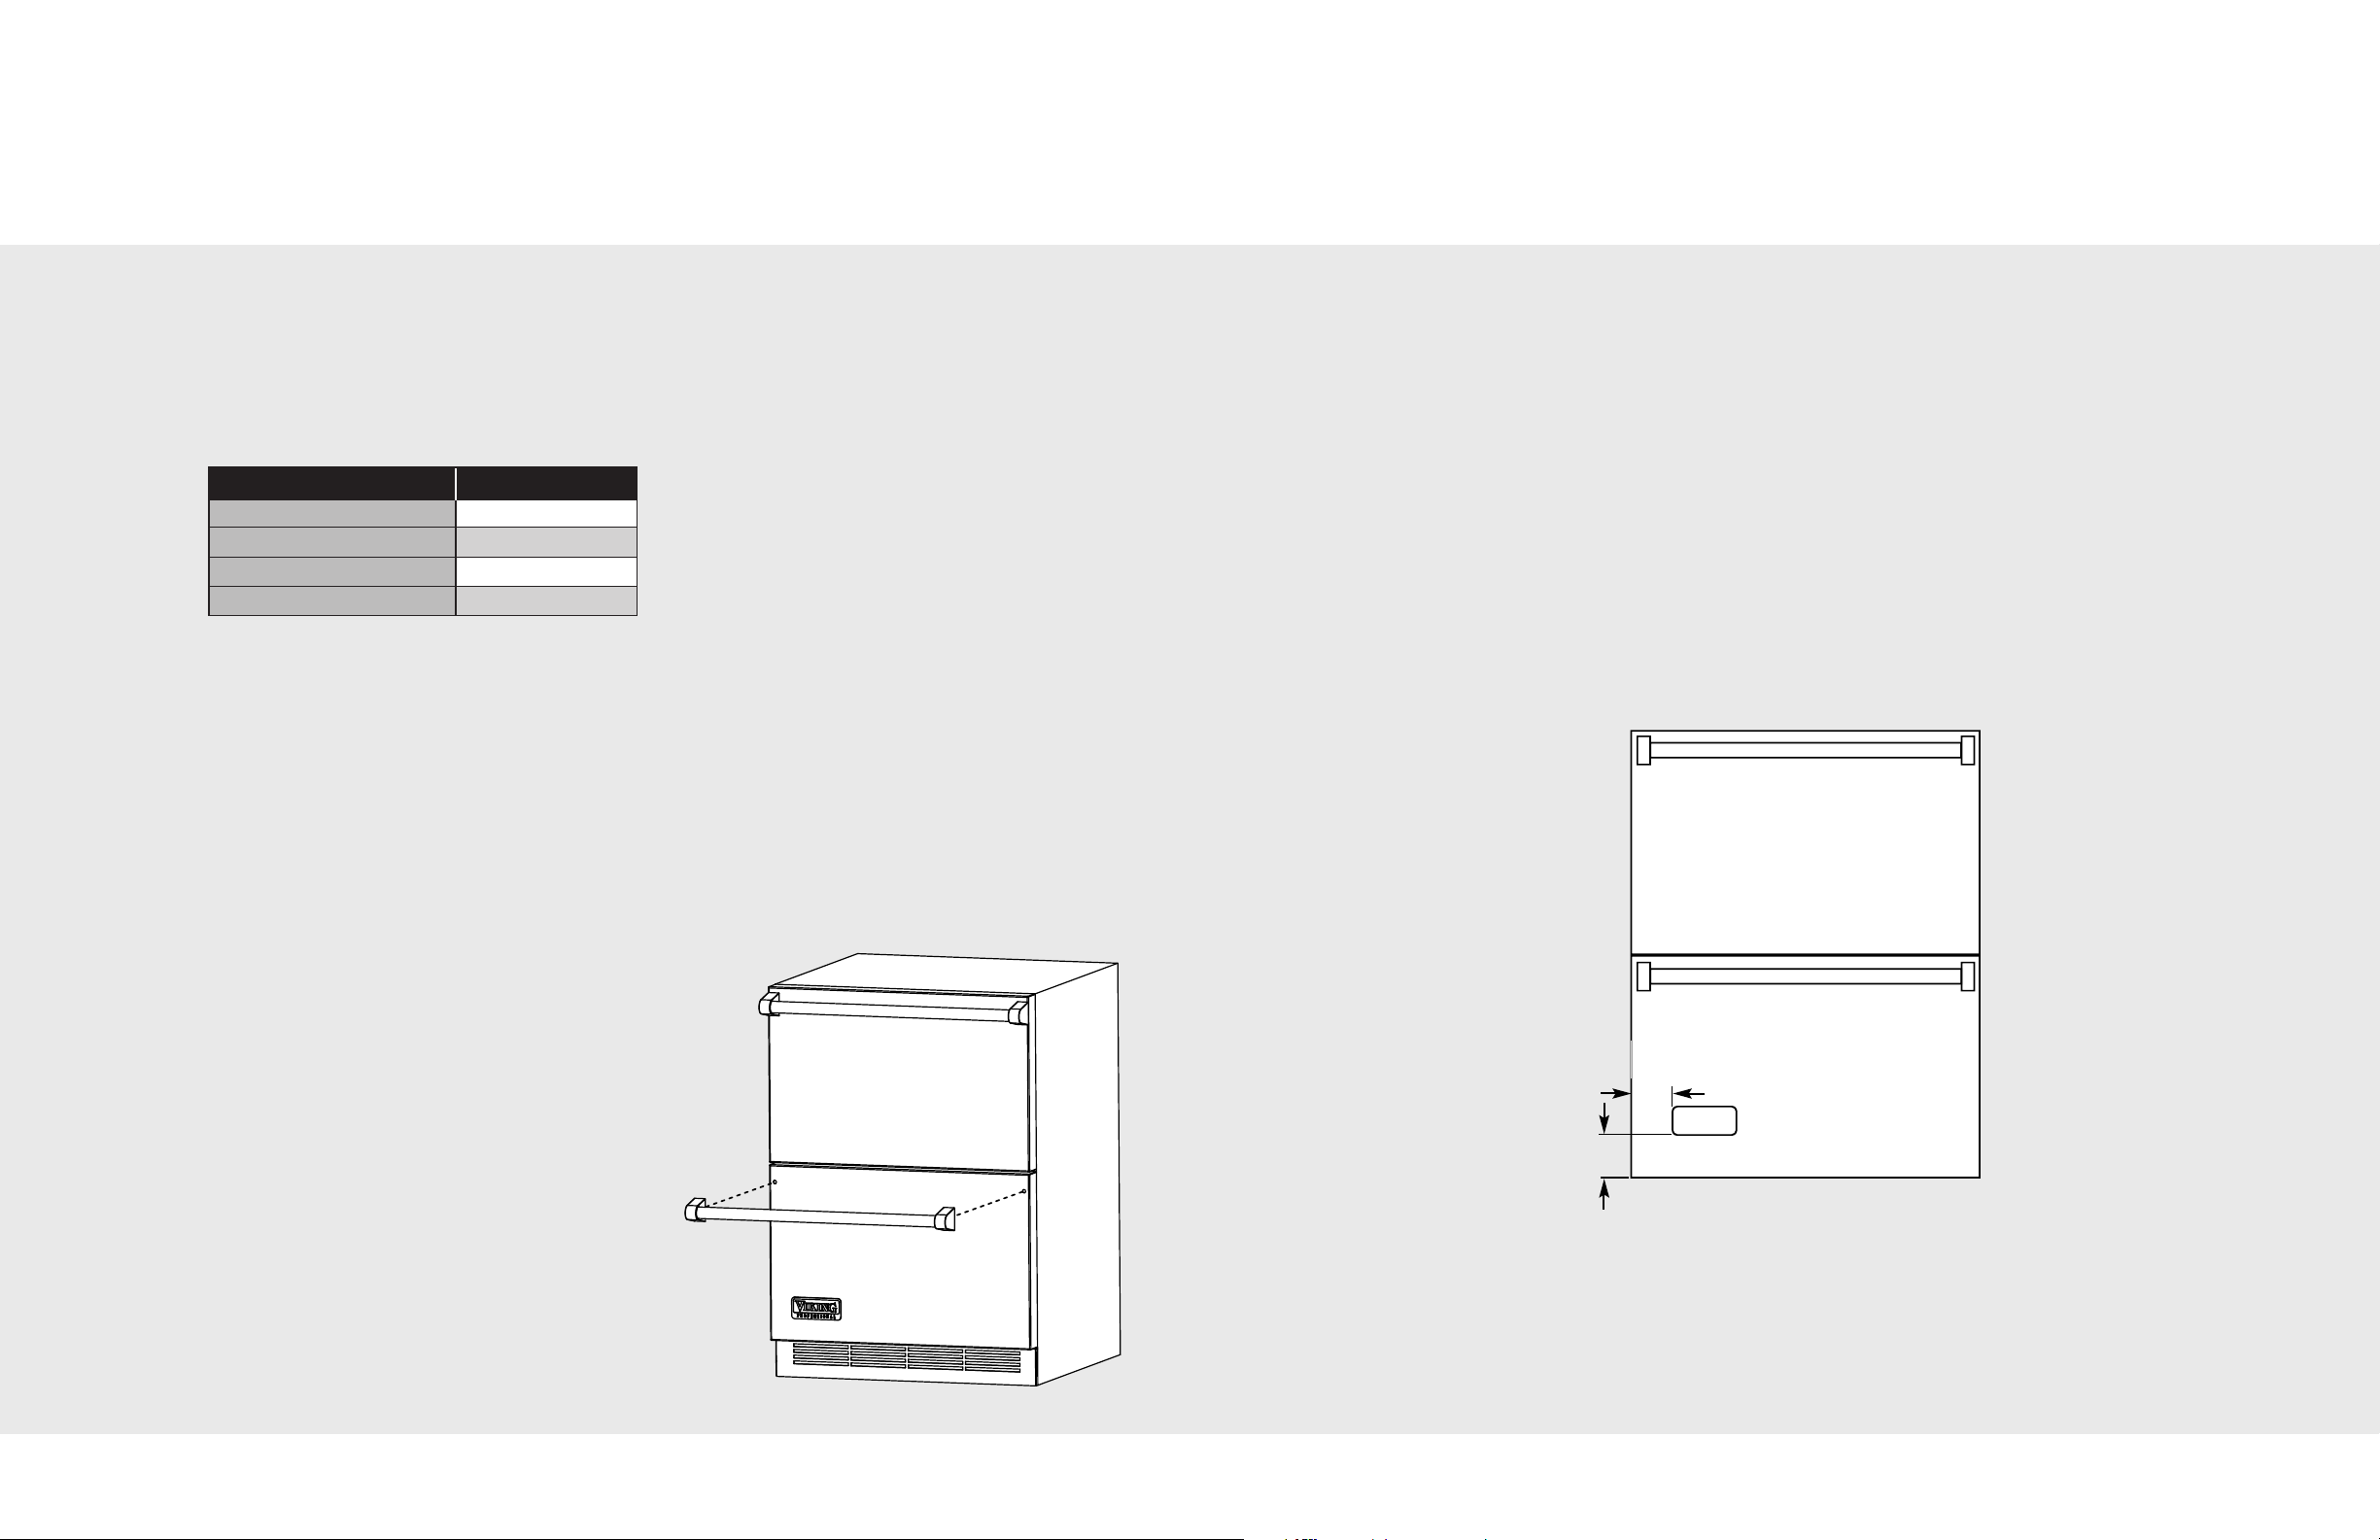
Handle & Logo Installation
• Before beginning, please read these instructions completely and carefully.
• Use caution during assembly to minimize scratches.
• The installer should leave instructions with the customer who should retain for future
reference.
Parts Included
Part Quantity
Professional Series Handle
Handle End Caps
Viking Self-Adhesive Logo
Installation Instructions
Note: Two (2) kits are required to complete one refrigerated drawer unit. Follow same installation
steps to install handle on top drawer, minus removal and application of the logo.
(1)
(2)
(1)
Required Tools
3/32 Allen Wrench
2” Plastic Putty Knife
Handle & Logo Removal
To install brass handle assembly:
1. Assemble the handle and end caps as shown. The handle will fit tightly, but is not
intended to form permanent bond.
2. Position the handle assembly over the mounting studs.
3. Secure the end caps to the mounting studs by turning the set screw; do
not tighten.
4. Ensure that the door, end caps and handle are properly aligned.
5. Tighten set screws.
To apply the brass logo:
1. Mark the location of the new logo as shown.
2. Wipe the surface with alcohol and allow to dry.
3. Remove protective backing and apply the logo.
To remove factory-installed handle:
1. Locate and loosen set screws located on
each end cap. Set screws need only be
loosened and do not have to be removed
completely.
2. Carefully remove the handle assembly to
expose mounting studs.
To remove factory-installed logo:
1. Apply acetone cleaner around the perimeter
of the logo. Wait 1 to 3 minutes to allow
the cleaner to penetrate the adhesive.
2. Slowly pry the logo away from the door with
the plastic putty knife. Do not use metal
objects or excessive force as this could
damage the surface of the door.
3. Once the logo and adhesive are removed,
clean the surface with mild soap and water
and dry thoroughly.
2 3
 Loading...