

Page 1

Use & Care
MANUAL
5 SERIES
Built-In Gas Rangetops
VRT530/CVRT530
VRT536 / CVRT536
VRT548 / CVRT548
Page 2

Congratulations
Congratulations and welcome to an elite world of ownership. We hope you will enjoy and appreciate the care and attention we
have put into every detail of your rangetop.
Your appliance is designed to o er years of reliable service. This Use and Care Manual will provide you with the information you
need to become familiar with your appliance’s care and operation.
Your complete satisfaction is our ultimate goal. If you have any questions or comments about this product, please contact the
dealer from whom you purchased it, or contact our Consumer Support Center at 1-888-845-4641.
We appreciate your choice of our product and hope that you will again select our products for your other major appliance needs.
For more information about the complete and growing selection of products, visit us online at vikingrange.com in the US or
brigade.ca in Canada
Table of Contents
Warnings ................................................................................................................................................................................................................................3
Before Using Rangetop ....................................................................................................................................................................................................6
Cooking Vessels...................................................................................................................................................................................................................6
Product Controls
Rangetop Features ...........................................................................................................................................................................................................6
Operation
Lighting Burners .................................................................................................................................................................................................................7
Surface Burners-Automatic Reignition .......................................................................................................................................................................7
VariSimmer™ ........................................................................................................................................................................................................................7
TruPower Plus™ Burner (where applicable) ..............................................................................................................................................................7
Surface Cooking Tips .........................................................................................................................................................................................................7
Griddle/Simmer Plate Operation ..................................................................................................................................................................................8
Griddle/Simmer Plate Clean Up & Care ......................................................................................................................................................................8
Product Care
Cleaning and Maintenance .............................................................................................................................................................................................9
Troubleshooting .................................................................................................................................................................................................................10
Service Information ...........................................................................................................................................................................................................10
Warranty ................................................................................................................................................................................................................................11
2
Page 3
Warnings
Warning and Important Safety Instructions appearing in this manual are not meant to cover all possible conditions and situations
that may occur. Common sense, caution, and care must be exercised when installing, maintaining, or operating the appliance.
ALWAYS contact the manufacturer about problems or conditions you do not understand.
Recognize Safety Symbols, Words, Labels
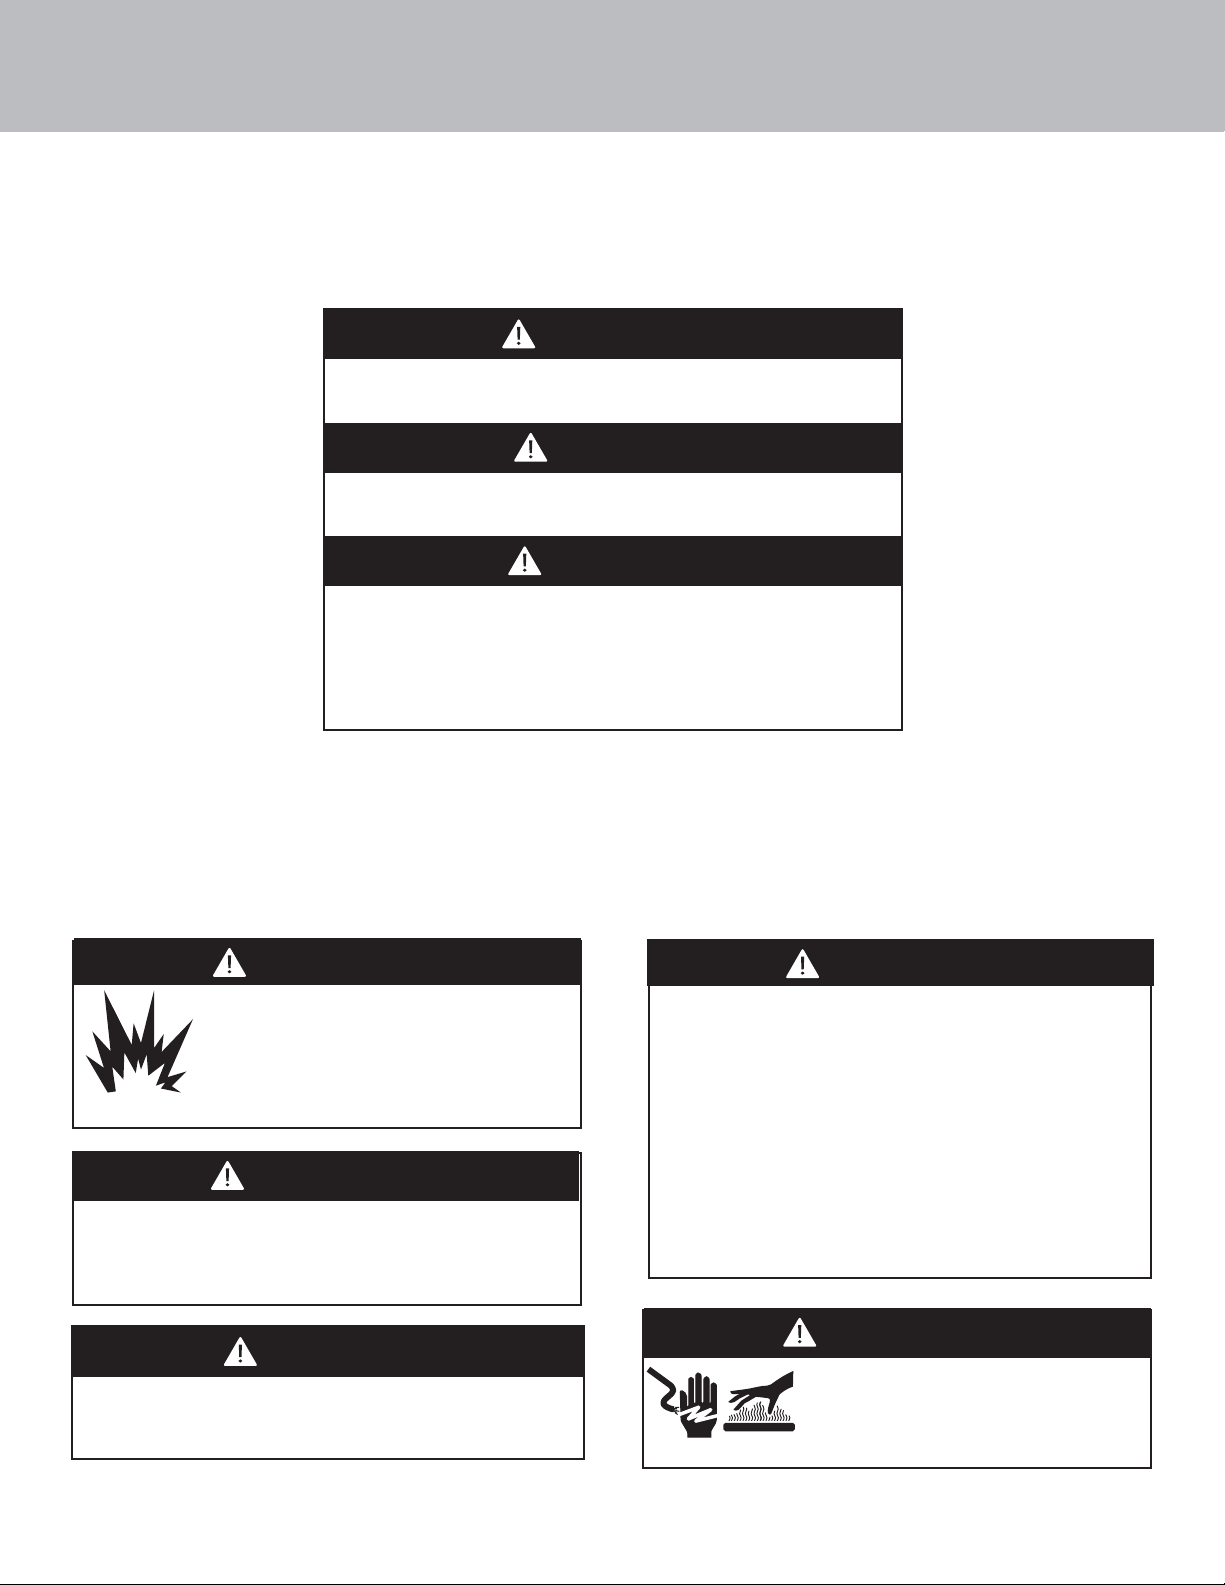
DANGER
Hazards or unsafe practices which WILL result in
severe personal injury or death
WARNING
Hazards or unsafe practices which COULD result in death or
severe personal injury
CAUTION
Hazards or unsafe practices which COULD result in minor
personal injury.
All safety messages will identify the hazard, tell you how
to reduce the chance of injury, and tell you what can happen if
the instructions are not followed.
Read and follow all instructions before using this appliance to prevent the potential risk of re, electric shock, personal injury or
damage to the appliance as a result of improper usage of the appliance. Use appliance only for its intended purpose as described
in this manual.
To ensure proper and safe operation: Appliance must be properly installed and grounded by a quali ed technician. DO NOT
attempt to adjust, repair, service, or replace any part of your appliance unless it is speci cally recommended in this manual. All
other servicing should be referred to a quali ed servicer.
WARNING
To avoid risk of property damage, personal
injury or death; follow information in
this manual exactly to prevent a re or
explosion. DO NOT store or use gasoline or
other ammable vapors and liquids in the
vicinity of this or any appliance.
WARNING
NEVER use appliance as a space heater to heat or warm a
room to prevent potential hazard to the user and damage
to the appliance. Also, DO NOT use the rangetop as a
storage area for food or cooking utensils.
I f the information in this manual is not
followed exactly, a re or explosion may result causing
property damage, personal injury or death.
WHAT TO DO IF YOU SMELL GAS:
• DO NOT try to light any appliance.
• DO NOT touch any electrical switch.
• DO NOT use any phone in your building.
• Immediately call your gas supplier from a neighbor’s phone.
Follow the gas supplier’s instructions.
• If you cannot reach your gas supplier, call the re
department.
Installation and service must be performed by a quali ed
installer, service agency or the gas supplier.
WARNING
CAUTION
DO NOT store items of interest to children over the unit.
Children climbing to reach items could be seriously
injured.
WARNING
BURN OR ELECTRICAL SHOCK HAZARD
Make sure all controls are OFF and unit
is COOL before cleaning. Failure to do so
can result in burns or electrical shock.
3
Page 4

Warnings
To Prevent Fire or Smoke Damage
•Be sure all packing materials are removed from the appliance before operating it.
•Keep area around appliance clear and free from combustible materials, gasoline, and other ammable vapors and materials.
• If appliance is installed near a window, proper precautions should be taken to prevent curtains from blowing over burners.
• NEVER leave any items on the rangetop. The hot air from the vent may ignite ammable items and may increase pressure in
closed containers which may cause them to burst.
• Many aerosol-type spray cans are EXPLOSIVE when exposed to heat and may be highly ammable. Avoid their use or storage
near an appliance.
• Many plastics are vulnerable to heat. Keep plastics away from parts of the appliance that may become warm or hot. DO NOT leave
plastic items on the rangetop as they may melt or soften if left too close to the vent or a lighted surface burner.
• Combustible items (paper, plastic, etc.) may ignite and metallic items may become hot and cause burns. DO NOT pour spirits over
hot foods.
In Case of Fire
Turn o appliance and ventilating hood to avoid spreading the ame. Extinguish ame then turn on hood to remove smoke and
odor.
• Smother re or ame in a pan with a lid or cookie sheet. DO NOT use water on grease res. Use baking soda, a multipurpose dry
chemical or foam-type extinguisher to smother re or ame Let fat cool before attempting to handle it. DO NOT allow grease to
collect in vents. Wipe up spillovers immediately.
•NEVER pick up or move a aming pan.
• GREASE–Grease is ammable and should be handled carefully. DO NOT use water on grease res. Flaming grease can be
extinguished with baking soda or, if available, a multipurpose dry chemical or foam type extinguisher. Let fat cool before
attempting to handle it. Wipe up spillovers immediately.
Child Safety
•NEVER leave children alone or unsupervised near the appliance when it is in use or is still hot.
•NEVER allow children to sit or stand on any part of the appliance as they could be injured or burned.
•DO NOT store items of interest to children over the unit. Children climbing to reach items could be seriously injured.
• Children must be taught that the appliance and utensils in it can be hot. Let hot utensils cool in a safe place, out of reach of small
children. Children should be taught that an appliance is not a toy. Children should not be allowed to play with controls or other
parts of the appliance.
Cooking Safety
• To eliminate the hazard of reaching over hot surface burners, cabinet storage should not be provided directly above a unit. If
storage is provided, it should be limited to items which are used infrequently and which are safely stored in an area subjected to
heat from an appliance. Temperatures may be unsafe for some items, such as volatile liquids, cleaners or aerosol sprays.
• ALWAYS place a pan on a surface burner before turning it on. Be sure you know which knob controls which surface burner. Make
sure the correct burner is turned on and that the burner has ignited. When cooking is completed, turn burner o before removing
pan to prevent exposure to burner ame.
• ALWAYS adjust surface burner ame so that it does not extend beyond the bottom edge of the pan. An excessive ame is
hazardous, wastes energy and may damage the appliance, pan or cabinets above the appliance. This is based on safety
considerations.
• NEVER leave a cooking operation unattended especially when using a high heat setting or when deep fat frying. Boil overs cause
smoking and greasy spillovers may ignite. Clean up greasy spills as soon as possible. DO NOT use high heat for extended cooking
operations.
• DO NOT heat unopened food containers, build up of pressure may cause the container to explode and result in injury.
• Use dry, sturdy pot-holders. Damp pot-holders may cause burns from steam. Dishtowels or other substitutes should NEVER be
used as potholders because they can trail across hot surface burners and ignite or get caught on appliance parts.
• ALWAYS let quantities of hot fat used for deep fat frying cool before attempting to move or handle.
• DO NOT let cooking grease or other ammable materials accumulate in or near the appliance, hood or vent fan. Clean hood
frequently to prevent grease from accumulating on hood or lter. When aming foods under the hood, turn the fan o .
• NEVER wear garments made of ammable material or loose tting or long-sleeved apparel while cooking. Clothing may ignite or
catch utensil handles.
• PREPARED FOOD WARNING: Follow food manufacturer’s instructions. If a plastic frozen food container and/or its cover distorts,
warps, or is otherwise damaged during cooking, immediately discard the food and its container. The food could be contaminated.
4
Page 5

Warnings
Cooking Safety (cont.)
• If you are “ aming” liquor or other spirits under an exhaust, TURN THE FAN OFF. The draft could cause the ames to spread out of
control.
• Once the unit has been installed as outlined in the Installation Instructions, it is important that the fresh air supply is not
obstructed. The use of a gas cooking appliance results in the production of heat and moisture in the room in which it is installed.
Ensure that the kitchen is well-ventilated. Keep natural venting holes open or install a mechanical ventilation device. Prolonged
or continuous use of the appliance may call for additional (such as opening a window) or more e ective ventilation (such as
increasing the level of a mechanical ventilation if present).
Cookware Safety
• Use pans with at bottoms and handles that are easily grasped and stay cool. Avoid using unstable, warped, easily tipped or
loose-handled pans. Also avoid using pans, especially small pans, with heavy handles as they could be unstable and easily tip.
Pans that are heavy to move when lled with food may also be hazardous.
• Be sure utensil is large enough to properly contain food and avoid boil overs. Pan size is particularly important in deep fat frying.
Be sure pan will accommodate the volume of food that is to be added as well as the bubble action of fat.
• To minimize burns, ignition of ammable materials and spillage due to unintentional contact with the utensil, DO NOT extend
handles over adjacent surface burners. ALWAYS turn pan handles toward the side or back of the appliance, not out into the room
where they are easily hit or reached by small children.
• NEVER let a pan boil dry as this could damage the utensil and the appliance.
• Only certain types of glass, glass/ceramic, ceramic or glazed utensils are suitable for rangetop surface usage without breaking
due to the sudden change in temperature. Follow manufacturer's instructions when using glass.
• This appliance has been tested for safe performance using conventional cookware. DO NOT use any devices or accessories that
are not speci cally recommended in this guide. DO NOT use eyelid covers for the surface units, stovetop grills, or add-on oven
convection systems. The use of devices or accessories that are not expressly recommended in this manual can create serious
safety hazards, result in performance problems, and reduce the life of the components of the appliance.
• The ame of the burner should be adjusted to just cover the bottom of the pan or pot. Excessive burner setting may cause
scorching of adjacent countertop surfaces, as well as the outside of the utensil. This is based on safety considerations.
Heating Elements
•Burners may be hot even though they are dark in color. Areas near burners may become hot enough to cause burns.
• During and after use, DO NOT touch or let clothing or other ammable materials contact heating elements, or areas near
elements, until they have had su cient time to cool.
Cleaning Safety
• Turn o all controls and wait for appliance parts to cool before touching or cleaning them. DO NOT touch the burner grates or
surrounding areas until they have had su cient time to cool.
• Clean appliance with caution. Use care to avoid steam burns if a wet sponge or cloth is used to wipe spills on a hot surface. Some
cleaners can produce noxious fumes if applied to a hot surface.
Important notice regarding pet birds:
NEVER keep pet birds in the kitchen or in rooms where the fumes from the kitchen could reach. Birds have a very sensitive
respiratory system. Fumes released due to overheated cooking oil, fat, margarine and overheated non-stick cookware may be may
be harmful or fatal to birds.
Power Failure
If power failure occurs, the electric igniters will not work. No attempt should be made to operate the appliance during a power
failure. Make sure the burner control is in the “OFF” position.
Momentary power failure can occur unnoticed. The rangetop is a ected only when the power is interrupted. When it comes
back on, the rangetop will function properly without any adjustments. A “brown-out” may or may not a ect rangetop operation,
depending on how severe the power loss is.
5
Page 6

Before Using the Rangetop
All products are wiped clean with solvents at the factory to remove any visible signs of dirt, oil, and grease which may have
remained from the manufacturing process. Before cooking, clean the rangetop thoroughly with a hot, soapy damp cloth. There
may be some burn o and odors on rst use of the appliance—this is normal.
All models include:
• Exclusive VSH™ Pro Sealed Burner System (Vari Simmer™ to High)—combination of patented burner and top design provide
cleanability plus superior performance at simmer and high.
•Exclusive one-piece tooled and porcelainized cooking surface contains spills for easy cleaning.
•Removable knobs, grates, and burner ports/caps for easy cleaning.
Cooking Vessels
Each cook has his or her own preference for the particular cooking vessels that are most appropriate for the type of cooking being
done. Any and all cooking vessels are suitable for use in the range and it is not necessary to replace your present domestic vessels
with commercial cookware. This is a matter of personal choice. As with any cookware, yours should be in good condition and free
from excessive dents on the bottom to provide maximum performance and convenience.
Note: When using big pots and/or high ames, it is recommended to use the front burners. There is more room in the front and
potential cleanup at rear of appliance due to staining or discoloration will be minimized.
Rangetop Features
Left Rear Burner
Control Knob
(15,000 BTU)
4
Left Front Burner
Control Knob
(15,000 BTU)
1
48” Six-Burner/Griddle model shown
Griddle
Griddle
Control
Knob
3
2
1
Indicator
Light
GRIDDLE
Center Rear Burner
Control Knob
(15,000 BTU)
Denotes models
which have a
TruPower Plus™
18,500 BTU Burner
Center Front Burner
Control Knob
(15,000 BTU)
30” Four-Burner
48” Eight Burner
Right Rear Burner
Control Knob
(15,000 BTU)
36” Six-Burner
Right Front Burner
Control Knob
(18,500 BTU)
36” Four-Burner/Griddle
48” Six-Burner/Griddle
1. 15,000 BTU sealed burners/ Right Front 18,500 sealed burner
2. Stainless steel island trim
3. Griddle (Optional)
4. Identi cation plate
6
Page 7

Operation
Lighting Burners
All burners are ignited by electric ignition. There are no open- ame, “standing” pilots.
Surface Burners/Automatic Re-Ignition
To light the surface burners, push and turn the appropriate control knob counter clockwise to any position.
This control is both a gas valve and an electric switch. Each burner will ignite at any “ON” position with the
automatic re-ignition system. If the ame goes out for any reason, the burner will automatically re-ignite if the gas is still owing.
When gas is permitted to ow to the burners, the electric igniters start sparking. You should hear a “clicking” sound. If you do not,
turn o the control and check that the unit is plugged in and that the fuse or circuit breaker is not blown or tripped.
Within a few moments, enough gas will have traveled to the burner to light. When the burner lights, turn the burner control to
any position to adjust the ame size. Setting the proper ame height for the desired cooking process and selecting the correct
cooking vessel will result in superior cooking performance, while also saving time and energy.
VariSimmer™
Simmering is a cooking technique in which foods are cooked in hot liquids kept at or just barely below the boiling point of water.
Simmering ensures gentle treatment than boiling to prevent food from toughening and/or breaking up. The size of the pan
and the volume of food can have a signi cant e ect on how high or low a ame is needed for simmering. For this reason, Viking
range and rangetop burners are engineered with a VariSimmer setting. The VariSimmer setting is not just one simmer setting,
but provides a variable range of simmer settings. This variable range of simmer settings allows you to adjust the ame height to
achieve the best simmer depending on the type and quantity of food being simmered. It is this ability that makes the VariSimmer
setting the most accurate and trustworthy simmer on the market.
TruPower Plus™ Burner
All models are equipped with a TruPower Plus 18,500 BTU burner in the front right burner position. This burner is designed to
provide extra-high heat output, especially when using large pans, and should be used for boiling large quantities or if you need to
bring something to a boil quickly. While the TruPower Plus burner has the extra power needed to bring large quantities of liquid to
a boil rapidly, it is also able to be turned down low enough to provide a very low and delicate simmer making this burner the most
versatile on the market.
Surface Cooking Tips
• Use low or medium ame heights when cooking in
vessels that are poor conductors of heat, such as glass,
ceramic, and cast-iron. Reduce the ame height until
it covers approximately 1/3 of the cooking vessel
diameter. This will ensure more even heating within the
cooking vessel and reduce the likelihood of burning or
scorching the food.
• Reduce the ame if it is extending beyond the bottom
of the cooking vessel. A ame that extends along the
sides of the vessel is potentially dangerous, heats the
utensil handle and kitchen instead of the food, and
wastes energy.
• Reduce the ame height to the minimum level
necessary to perform the desired cooking process.
Remember that food cooks just as quickly at a gentle
boil as it does at a rolling boil. Maintaining a higher boil
than is necessary wastes energy, cooks away moisture,
and causes a loss in food avor and nutrient level.
• The minimum pot or pan (vessel) diameter
recommended is 6” (15 cm). Use of pots or pans as small
as 4” (10 cm) is possible but not recommended.
Heat Setting Use
Simmer Melting small quantities
Low Melting large quantities
Med Low Low-temperature (eggs, etc.)
Med Sauteing and browning, braising, and pan-frying
Med High High-temperature frying
High Boiling water quickly]
*Note: This information is given as a guide only. You may need to vary the heat
settings to suit your personal requirements.
Surface Heat Settings*
Steaming rice
Simmering sauces
Simmering large quantities
Heating milk, cream sauce, gravies and puddings
Maintaining slow boil on large quantities
Pan broiling
Maintaining fast boil on large quantities
Deep-fat frying in large utensil
7
Page 8

Operation
Griddle
Griddle/Simmer Plate (on applicable models)
The optional 15,000 BTU griddle is constructed of machined steel with a blanchard nisih and is uniquely designed to o er
excellent cooking performance as well as easy cleanup. The griddle is equipped with an electronic thermostat to maintain an
even temperature across the griddle once the desired temperature has been set. The griddle has a power “ON” indicator light
which glows when the griddle thermostat has been turned on. This will cycle on and o as needed to indicate the thermostat
is maintaining the selected temperature. Before the griddle is used it is important to season the griddle. This seasoning process
will change the appearance of the griddle plate. However, it will also prevent food from sticking and protect the surface from
moisture.
Seasoning the Griddle Before the First Use
• Scrub the griddle plate with a mixture of one quart warm water and 1/4 cup white vinegar, using a blue Scotch-Brite™ pad. Dry
thoroughly.
•Wash griddle with warm, soapy water. Rinse o and dry thoroughly.
• Season griddle by thinly coating the surface with approximately 1⁄2 to 1 teaspoon
unsalted vegetable oil. Apply to entire griddle using a paper towel or clean cloth.
Let oil sit on griddle for approximately 1 hour and then wipe with a clean cloth or
paper towel to absorb any residual oil. The griddle is now ready to be used.
Food Temp (ºF) Temp (ºC)
Griddle Cooking Chart
Griddle/Simmer Plate Operation
• Turn the griddle control knob counterclockwise to the desired temperature
setting. The power “ON” indicator light will glow indicating the griddle
thermostat is on.
Eggs 250-300 121-149
Bacon 300-325 149-163
Pancakes 375-400 191-205
• When the griddle has reached the desired temperature, the power “ON” indicator
light will turn o , indicating the griddle is preheated to the selected temperature.
•Use liquid cooking oil or butter for eggs, pancakes, French toast, sh and
French toast 400 205
Fish Fillets 300 149
sandwiches to prevent sticking.
• Routinely scrape loose food particles with a metal spatula during cooking to
make the cleanup easier and to avoid the particles mixing with the food.
• To turn the griddle o , turn the thermostat knob clockwise to the “OFF” position.
• ALWAYS turn to the“OFF” position when not in use and lower the heat between
cooking loads.
Hamburgers 350 177
Steaks 350 177
*Note: This information is given as a guide only. You
may need to vary the heat settings to suit your personal
requirements.
Griddle/Simmer Plate Clean Up & Care
• It is not necessary to wash the griddle after every use. When light cooking is performed and
Griddle Assembly
AFTER the griddle has cooled, simply wipe down the surface with a clean cloth or paper towel.
The oils in the food which cooked on the griddle surface will naturally season the griddle
Grease trough
providing a “natural” non-stick surface.
• After heavy cooking is completed and the griddle is still warm enough to create steam, pour a
Griddle
small amount of club soda at room temperature directly on the griddle. Using a metal spatula,
Griddle
pull oils and food particles toward the trough in front. After the griddle has cooled, wipe entire
surface with a paper towel. Follow with the seasoning process of applying oil.
• Keeping the griddle well-seasoned will prevent the griddle from developing surface rust. If
the griddle is not used for a period of time, it must be re-seasoned. The griddle must be reseasoned each time after it is washed.
• Non-stick cooking spray is not recommended as it contains a high water content that has a tendency to burn quickly.
• Corn oil is not recommended as it has a high sugar level. It will caramelize and burn on the surface making it very di cult to remove.
• After using the griddle, always remove the grease trough located in the front. Simply pull the trough towards you and lift out. The
trough or tray trap needs to be cleaned after each use. A re hazard may occur if grease is accumulated in the trough.
Note: It is normal for the griddle to darken over time. This is the sign of a well-seasoned griddle.
• Important: Never ood a hot griddle with cold water. This thermal shock promotes griddle warping and can cause the griddle to
crack if continued over a period of time.
• For heavy duty cleaning, Viking Range, LLC o ers a Griddle Cleaning Kit (model #GCK). This fast and e ective commercial grade
cleaning system will clean your griddle in a matter of minutes. To order, contact your local dealer or order on our website at www.
vikingrange.com in the US or www.brigade.ca in Canada
8
Page 9

Cleaning and Maintenance
Any piece of equipment works better and lasts longer when
maintained properly and kept clean. Cooking equipment is no
exception. Your rangetop must be kept clean and maintained
properly. Before cleaning, make sure all controls are in the “OFF”
position. Disconnect power if you are going to clean thoroughly with
water.
Surface Burners
*Note: When replacing burner head, arrow must be pointing towards back of rangetop.
Wipe up spillovers as soon as possible after they occur and before they get a chance to
burn in and cook solid. In the event of a spill-over, follow these steps:
•Allow the burner and grate to cool to a safe temperature level.
•Lift o the burner grate. Wash in warm soapy water.
•Remove the burner cap and burner head and clean.
Burner Caps
The surface burner caps should be routinely removed and cleaned. ALWAYS clean the
burner caps after a spill-over. Keeping the burner caps clean will prevent improper
ignition and uneven ames. To clean, pull burner cap straight up from the burner base.
Wipe o surface burner caps with warm, soapy water and a soft cloth after each use.
Use a non-abrasive cleanser such as Bon Ami™ and a soft brush or soft Scotch Brite™
pad for cooked-on foods. Dry thoroughly after cleaning. For best cleaning and to avoid
possible rusting, DO NOT clean in dishwasher or self-cleaning oven.
WARNING
BURN OR ELECTRICAL SHOCK HAZARD
Make sure all controls are OFF and unit
is COOL before cleaning. Failure to do so
can result in burns or electrical shock.
Burner
grate
Burner
cap
Burner
head
Burner
base*
Igniter
Burner Head
If ports on burner head are clogged, clean with a straight pin. DO NOT enlarge or distort the ports. DO NOT use a toothpick to
clean the ports. When replacing burner head, carefully align the 2 tabs underneath the burner head with the outside edge of
burner base. Make sure the tabs are not aligned with the igniter and the burner cap is level.
Note: For stubborn stains, use a non abrasive cleanser such as Bon Ami™ and a soft brush or soft Scotch Brite™ pad.
Cleaning Tip: For di cult to clean burner caps and heads, place parts in a zip seal bag with ammonia.
Burner Base
The base should be wiped regularly with hot soapy water at the end of each cooling period. DO NOT use steel wool, abrasive
cloths, cleanser, or powders. To remove encrusted materials, soak the area with a hot towel to loosen the material, then use a
wooden or nylon spatula. DO NOT use a metal knife, spatula, or any other metal tool to scrape the aluminum base.
• Wipe up any spills which remain on the sealed top surface.
• Replace burner cap, burner head, and grates after drying thoroughly.
Control Panel
DO NOT use any cleaners containing ammonia or abrasives. They could remove the graphics from the control panel. Use hot,
soapy water and a soft clean cloth.
Control Knobs
MAKE SURE ALL THE CONTROL KNOBS POINT TO THE OFF POSITION BEFORE REMOVING. Pull the knobs straight o . Wash in
detergent and warm water. Dry completely and replace by pushing rmly onto stem. DO NOT use any cleaners containing
ammonia or abrasives. They could remove the graphics from the knob.
Stainless Steel Parts
Some stainless steel parts may have a protective wrap, which must be peeled o . All stainless steel body parts should be wiped
regularly with hot, soapy water at the end of each cooling period and with liquid cleaner designed for this material when soapy
water will not do the job. If build-up occurs, DO NOT use steel wool, or abrasive cloths, cleaners, or powders. If it is necessary to
scrape stainless steel surface to remove encrusted material, soak area with hot, wet towels to loosen the material, then use a
wooden or nylon spatula or scraper. DO NOT use a metal knife, spatula, or any other metal tool to scrape stainless steel surfaces.
Scratches are almost impossible to remove. DO NOT permit citrus or tomato juice to remain on stainless steel surface, as citric acid
will permanently discolor stainless steel. Wipe up any spills immediately.
9
Page 10

Troubleshooting
Power Failure
If power failure occurs, the electric igniters will not work. No attempt should be made to operate appliance during a power failure.
Make sure surface controls are in “OFF” position.
Problem Possible Cause and/or Problem
Igniters will not work Circuit is tripped
Fuse is blown
Rangetop is not connected to power
Igniters sparking but no
ame ignition
Igniters sparking
continuously after ame
ignition
Burner ignites byt ame
is large, distorted or
yellow
Gas supply valve is in “OFF” position
Gas supply is interrupted
Power supply is not grounded
Power supply polarity is reversed
Igniters are wet or dirty
Burner ports are clogged
Unit is being operated on wrong type of gas
Air shutters not properly adjusted
Service Information
If service is required, call your authorized service agency.
Have the following information readily available.
• Model number
• Serial number
• Date purchased
• Name of dealer from whom purchased
Clearly describe the problem that you are having. If you are unable to obtain the name of an authorized service agency, or if you
continue to have service problems, contact Viking Range, LLC at1-888-845-4641, or write to:
Viking Range, LLC
PREFERRED SERVICE
111 Front Street
Greenwood, Mississippi 38930 USA
Record the information indicated below. You will need it if service is ever required. The model and serial number
label for your rangetop can be found by lifting up the front of the unit and looking underneath the base..
Model no. _________________________________________Serial no. __________________________________________
Date of purchase ___________________________________Date Installed ______________________________________
Dealer’s name ________________________________________________________________________________________
Address _____________________________________________________________________________________________
____________________________________________________________________________________________________
If service requires installation of parts, use only authorized parts to insure protection under the warranty.
10
Page 11

Warranty
BUILT-IN GAS RANGETOPS WARRANTY
TWO YEAR FULL WARRANTY
Gas rangetops and all of their component parts, except as detailed below*†, are warranted to be free from defective materials or workmanship
in normal residential use for a period of two (2) years from the date of original retail purchase or closing date for new construction, whichever
period is longer. Viking Range, LLC, warrantor, agrees to repair or replace, at its option, any part which fails or is found to be defective during the
warranty period.
* FULL NINETY (90) DAY COSMETIC WARRANTY: Product is warranted to be free from cosmetic defects in materials or workmanship
† FULL NINETY (90) DAY WARRANTY IN "RESIDENTIAL PLUS" APPLICATIONS: This full warranty applies to applications where use of
Any surface burner, griddle burner, or grill burner which fails due to defective materials or workmanship (excluding cosmetic failures) in normal
household use during the third through fth year from the date of original retail purchase will be repaired or replaced, free of charge for the part
itself, with the owner paying all other costs, including labor. This does not include ignition systems, burner bases, etc.
This warranty extends to the original purchaser of the product warranted hereunder and to each transferee owner of the product during the
term of the warranty and applies to products purchased and located in the United States and Canada. Products must be purchased in the
country where service is requested. If the product or one of its component parts contains a defect or malfunction during the full warranty
period after a reasonable number of attempts by the warrantor to remedy the defect or malfunction, the owner is entitled to either a refund or
replacement of the product or its component part or parts. Replacement of a component part includes its free installation, except as speci ed
under the limited warranty. Under the terms of this warranty, service must be performed by a factory authorized Viking Range, LLC service
agent or representative. Service will be provided during normal business hours, and labor performed at overtime or premium rates shall not be
covered by this warranty.
(such as scratches on stainless steel, paint/porcelain blemishes, etc.) for a period of ninety (90) days from the date of original retail
purchase or closing date for new construction, whichever period is longer. Any defects must be reported to the selling dealer within
ninety (90) days from date of original retail purchase. Viking Range, LLC uses high quality processes and materials available to produce
all color nishes. However, slight color variation may be noticed because of the inherent di erences in painted parts and porcelain
parts as well as di erences in kitchen lighting, product locations, and other factors. Therefore, this warranty does not apply to color
variation attributable to such factors.
the product extends beyond normal residential use, but the warranty period for products used in such applications is ninety (90) days.
Examples of applications covered by this warranty are bed and breakfasts, re stations, private clubs, churches, yachts, etc. Under
this "Residential Plus" warranty, the product, its components and accessories are warranted to be free from defective material or
workmanship for a period of ninety (90) days from the date of original retail purchase. This warranty excludes use of the product in all
commercial locations such as restaurants, food service locations and institutional food service locations.
FIVE YEAR LIMITED WARRANTY ON BURNERS
TERMS AND CONDITIONS
Owner shall be responsible for proper installation, providing reasonable and necessary maintenance, providing proof of purchase upon request,
and making the appliance reasonably accessible for service. The return of the Owner Registration Card is not a condition of warranty coverage.
You should, however, return the Owner Registration Card so that Viking Range, LLC can contact you should any question of safety arise which
could a ect you.
This warranty gives you speci c legal rights, and you may also have other rights which may vary from jurisdiction to jurisdiction.
WHAT IS NOT COVERED BY THIS WARRANTY: This warranty shall not apply to damage resulting from abuse, failure to provide reasonable and
necessary maintenance, accident, delivery, negligence, natural disaster, loss of electrical power to the product for any reason, alteration, outdoor
use, improper installation, improper operation, or repair or service of the product by anyone other than an authorized Viking Range, LLC service
agency or representative. This warranty does not apply to commercial usage.
OWNER’S SOLE AND EXCLUSIVE REMEDY FOR A CLAIM OF ANY KIND WITH RESPECT TO THIS PRODUCT SHALL BE THE REMEDIES SET FORTH
ABOVE.VIKING RANGE, LLC IS NOT RESPONSIBLE FOR CONSEQUENTIAL OR INCIDENTAL DAMAGE, INCLUDING BUT NOT LIMITED TO FOOD
OR MEDICINE LOSS, DUE TO PRODUCT FAILURE, WHETHER ARISING OUT OF BREACH OF WARRANTY, BREACH OF CONTRACT OR OTHERWISE.
Some jurisdictions do not allow the exclusion or limitation of incidental or consequential damages, so the above limitation or exclusions may not
apply to you. Any implied warranties of merchantability or tness for a particular purpose applicable to this product are limited in duration to
the period of coverage of the applicable express written limited warranties set forth above. Some states do not allow limitations on how long an
implied warranty lasts, so the above limitation may not apply to you.
To obtain warranty service, contact an authorized Viking Range, LLC service agent, or Viking Range, LLC, 111 Front Street, Greenwood, Mississippi
38930, (888) 845-4641. Provide model and serial number and date of original purchase or closing date for a new construction. For the name of
your nearest authorized Viking Range, LLC service agency, call Viking Range, LLC.
IMPORTANT: Retain proof of original purchase to establish warranty period.
LIMITATION OF REMEDIES AND DURATION OF IMPLIED WARRANTY
WARRANTY SERVICE
Speci cations subject to change without notice.
11
Page 12

Viking Range, LLC
111 Front Street
Greenwood, Mississippi 38930 USA
(662) 455-1200
For product information,
call 1-888-845-4641
or visit our web site at www.vikingrange.com in the US or
www.brigade.ca in Canada
064095-000 EN (080117)
 Loading...