

Viking VGSC4876GSS, VGSC4876G Use And Care Manual

VIKING
USE AND CARE MANUAL
Freestanding Gas Self-clean Ranges

Congratulations...
Your purchase of this product attests to the importance you
place upon the quality and performance of the major appliances you
use. With minimal care, as outlined in this guide, this product is
designed to provide you with years of dependable service. Please take
the few minutes necessary to learn the proper and efficient use and
care of this quality product.
We appreciate your choosing a Viking Range Corporation
product, and hope that you will again select our products for your
other major appliance needs.
Table of Contents
Warnings ......................................... 3
Important Safety Instructions ......................... 4
Cooking Utensils ................................... 6
Before Your Use Your New Range ..................... 7
Basic Functions of Your Oven ......................... 7
Using Your Range .................................. 8
Oven Operations .................................. 17
Cleaning and Maintenance .......................... 29
Self-Clean Cycle ................................... 35
Power Failure ..................................... 37
Service Information ................................. 38
Warranty ......................................... 39
WARNING
_ tTHIS RANGE CAN TIP
tIN JURY TO PERSONS COULD RESULT
tlNSTALL ANTI-TIP DEVICE PACED
W TH RANGE
•SEE INSTALLATION INSTRUCTIONS
WARNING
If the information in this manual is not followed exactly, a fire
or explosion may result causing property damage, personal
injury or death.
-Do not store or use gasoline or other flammable vapors and
liquids in the vicinity of this or any other appliance.
WHAT TO DO IF YOU SMELL GAS
-Do not try to light any appliance
-Do not touch any electrical switch; do not use any phone in
your building.
-Immediately call your gas supplier from a neighbor's phone.
Follow the gas supplier's instructions.
-If you cannot reach your gas supplier, call the fire department.
-Installation and service must be performed by a qualified
installer, service agency, or the gas supplier.
WARNING
Read all instructions before using the product.
Install or locate the product only in accordance with the
provided Installation Instructions.
WARNING
NEVER use this appliance as a space heater to heat or to warm the
room. Doing so may result in carbon monoxide poisoning and
overheating of the oven.
WARNING
NEVER cover any slots, holes or passages in the oven bottom or
cover an entire rack with materials such as aluminum foil. Doing
so blocks air flow through the oven and may cause carbon
monoxide poisoning. Aluminum foil linings may also trap heat,
causing a fire hazard. This is based on safety considerations.
2 3
Important Safety Instructions
WARNING I
To reduce the risk of fire, electrical shock, injury to persons, or damage
when using the oven, fo ow basic precautions, inc uding the fo owing:
1. Your unit should be installed by a qualified technician. The
appliance must be installed and electrically grounded according to
local codes. Have the technician show the location of the gas
shut-off valve on the range so you know where and how to turn off
the gas if necessary.
2. Do not attempt to repair or replace any part of this appliance
unless specifically recommended in this manual. All servicing
should be referred to a qualified technician. Warranty service must
be performed by an authorized service agency.
3. The "push-to-turn" knobs of this range are designed to be child-
safe. However, children should not be left alone in the kitchen
while the range is in use. Do not store items of interest to children
over the unit. CAUTION: Children climbing to reach items could
be seriously injured.
4. GREASE is flammable and should be handled carefully. Do not
use water on grease fires. Never pick up a flaming pan. Smother
flaming pan by covering utensil completely with well-fitting lid,
cookie sheet or flat tray. Flaming grease outside of utensil can be
extinguished with baking soda or, if available, a multipurpose dry
chemical or foam type extinguisher.
5. Never leave the surface area unattended at high heat setting.
Boil-overs cause smoking and greasy spill-overs which may ignite.
6. If you are "flaming" liquor or other spirits under an exhaust, TURN
THE FAN OFF. The draft could cause the flames to spread out of
control.
7. Wear proper apparel. Loose-fitting or hanging garments should
never be worn while using the appliance.
8. Never use your range for warming or heating a room. This is
based on safety considerations.
9. Use proper pan size. Select utensils having flat bottoms large
enough to cover the burner. Using undersized utensils allows the
flame to come up the side of the utensil, scorching the outside of
the utensil and making cleanup harder.
10. The flame of the open-top burner should be adjusted to just cover
the bottom of the pan or pot. Excessive burner setting may cause
scorching of adjacent countertop surfaces, as well as the outside of
the utensil. This is based on safety considerations.
11. Use dry pot holders. Moist or damp pot holders on hot surfaces
may result in burns from steam. Do not let potholder touch hot
surface areas. Do not use a towel or other bulky cloth.
12. To reduce the risk of burns, ignition of flammable materials, and
spillage due to unintentional contact with the utensil, the handle of
a utensil should be positioned so that it is turned inward toward
the center of the range, and so that it does not extend over
adjacent burners.
13. Surface areas near burners may become hot enough to cause
burns. During and after use, do not touch areas near burners until
they have had sufficient time to cool.
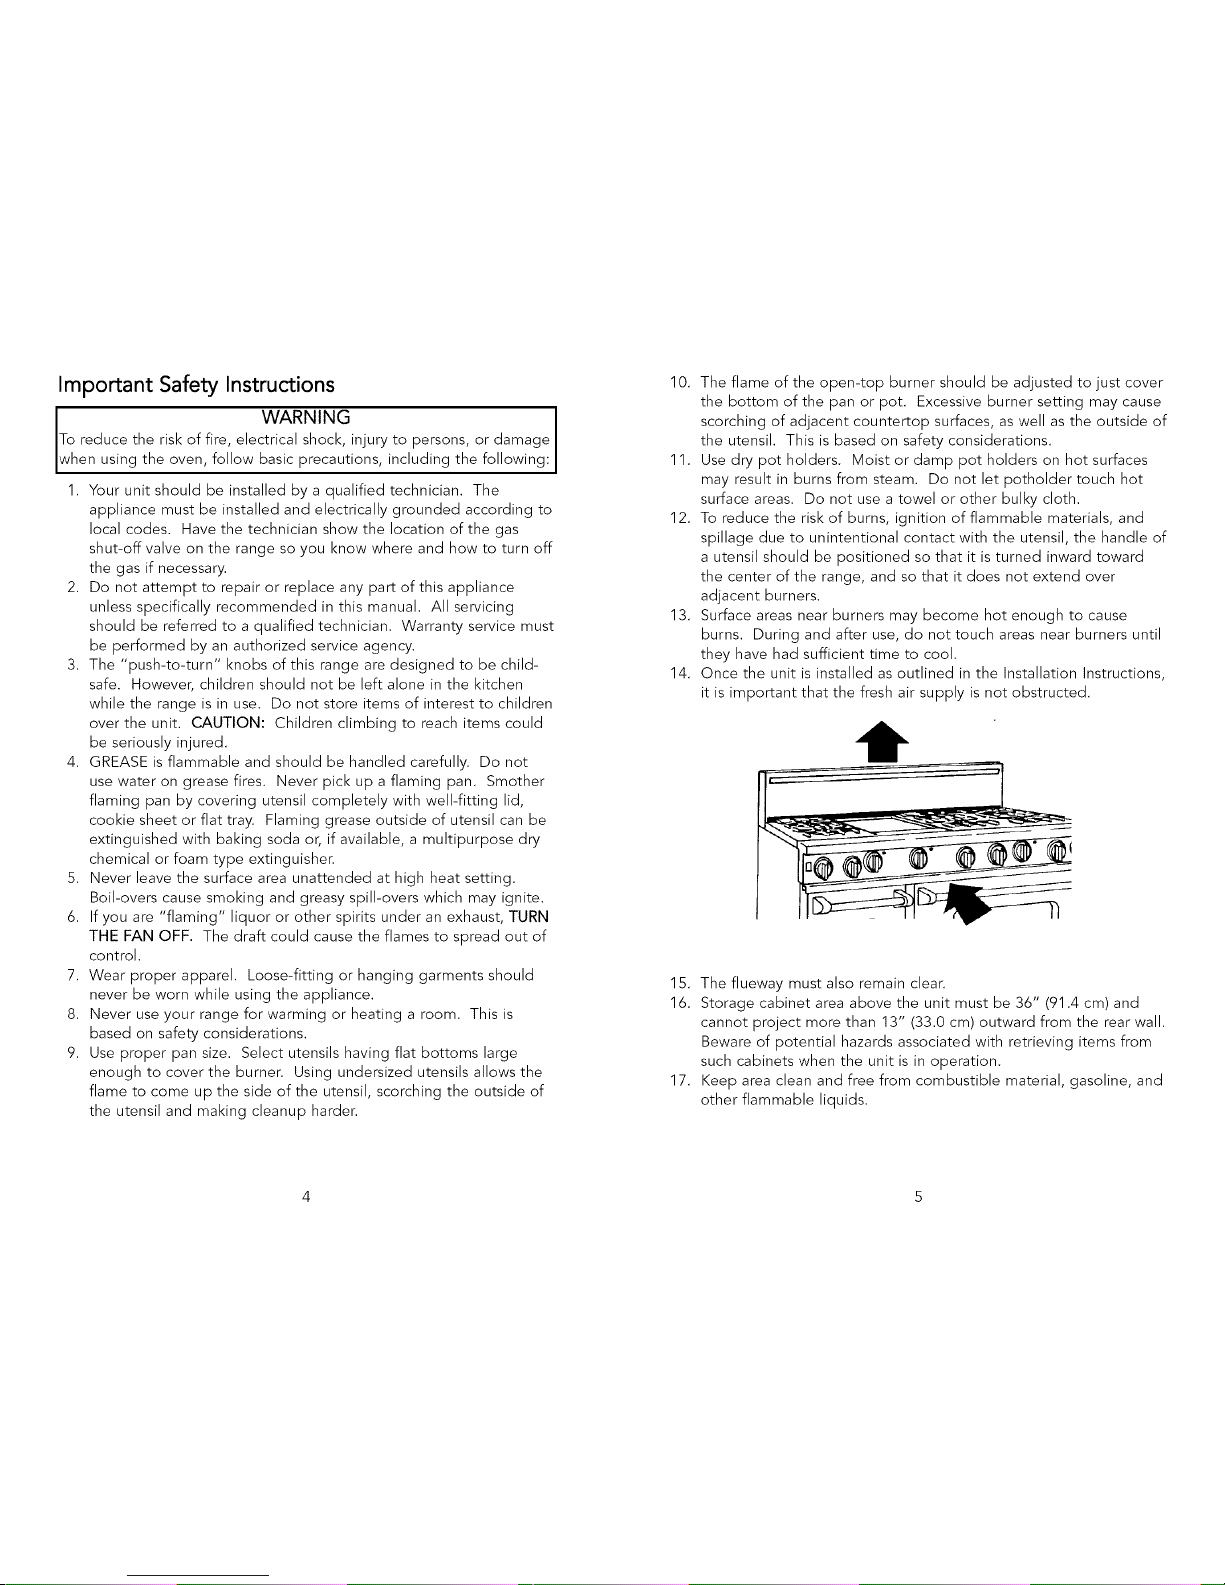
14. Once the unit is installed as outlined in the Installation Instructions,
it is important that the fresh air supply is not obstructed.
t
15. The flueway must also remain clear.
16. Storage cabinet area above the unit must be 36" (91.4 cm) and
cannot project more than 13" (33.0 cm) outward from the rear wall.
Beware of potential hazards associated with retrieving items from
such cabinets when the unit is in operation.
17. Keep area clean and free from combustible material, gasoline, and
other flammable liquids.
4 5
18. Noattemptshouldbemadeto operatetheapplianceduring
poweroutage.
1?. Ariskoftip-overmayresultiftheapplianceisnotinstalledin
accordancewithinstallationinstructionsincludingexcessive
loadingoftheovendoororfromabnormalusage.
20. Donotattemptto operatetheapplianceduringpowerfailure.
21. Donotheatunopenedfoodcontainers;buildupofpressuremay
causethecontainerto explodeandresultininjury.
22. Neversit,step,stand,orleanonanypartoftheoven,orinjury
mayresult.
23. Usecarewhenopeningovendoor.Lethotairorsteamescape
beforeremovingorreplacingfood.
24. Donotcleandoorgasket.Itisessentialforagood,tightseal.
Careshouldbetakennotto rub,damage,or movethegasket.
25. Nocommercialovencleaneror ovenlinerprotectivecoatingof
anykindshouldbeusedinor aroundanypartoftheoven.
26. Beforeself-cleaningtheoven,removebroilerpan,broilergrid,
ovenracks,racksupports,andotherutensils.Donotuseyour
oventocleanotherparts.Afannoiseshouldbehearsometime
duringthecleaningcycle.Ifnot,callservicebeforeself-cleaning
again.
Cooking Utensils
Each cook has his or her own preference for the particular
cooking utensils that are most appropriate for the type cooking being
done. Any and all cooking utensils are suitable for use in the range
and it is not necessary to replace your present domestic utensils with
commercial cookware. This a matter of personal choice. As with any
cookware, yours should be in good condition and free from excessive
dents on the bottom to provide maximum performance and
convenience. NOTE: WHEN USING BIG POTS AND/OR HIGH
FLAMES, IT IS RECOMMENDED TO USE THE FRONT BURNERS.
THERE IS MORE ROOM IN THE FRONT AND POTENTIAL CLEANUP
OF REAR OR APPLIANCE DUE TO STAINING OR DISCOLORATION
WILL BE MINIMIZED.
Before You Use Your New Range
All products are wiped clean with solvents at the factory to
remove any visible signs of dirt, oil, and grease which may have
remained from the manufacturing process. Before starting to cook,
clean the range thoroughly with hot, soapy water.
Steel Griddle/Simmer Plate
The griddle is a heavy-weight, polished steel griddle that has a
USDA authorized protective coating. No additional seasoning is
needed for efficient use. Before using, remove protective coating with
vinegar and water and rinse well. After rinsing, coat griddle well with
an unsalted cooking oil or spray.
Grill (If applicable)
The grates should be removed and washed in hot soapy water,
rinsed and then replaced prior to use. Other grill parts should be
removed, dusted, and replaced making sure that no flammable
materials have been accidentally placed in the grill.
Drip Tray/Pan
The drip tray should be pulled out and checked for flammable
materials. Make sure to unwrap the drip pan and replace it in its
proper place under the griddle or grill (if applicable).
Oven
Before first use, wipe interior with soapy water and dry thoroughly.
Then set the oven thermostat to 250°F and operate for an hour.
Basic Functions of Your Oven
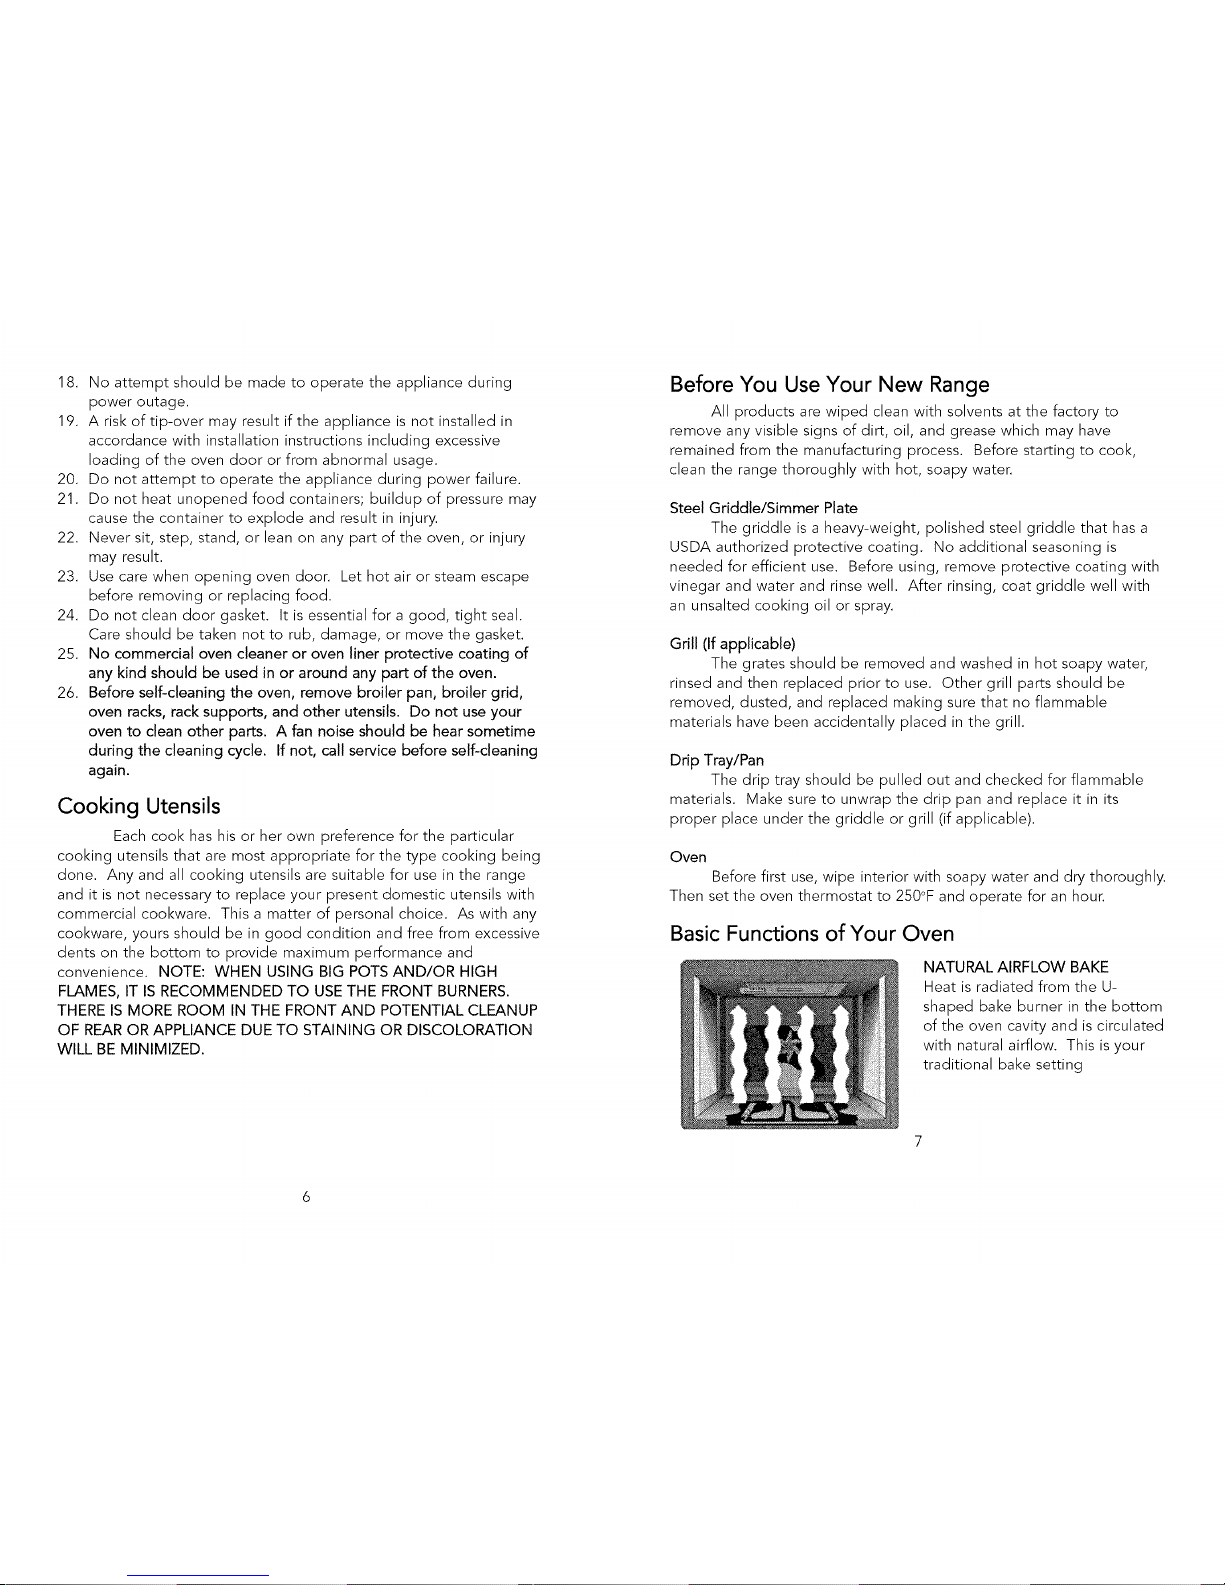
NATURAL AIRFLOW BAKE
Heat is radiated from the U-
shaped bake burner in the bottom
of the oven cavity and is circulated
with natural airflow. This is your
traditional bake setting
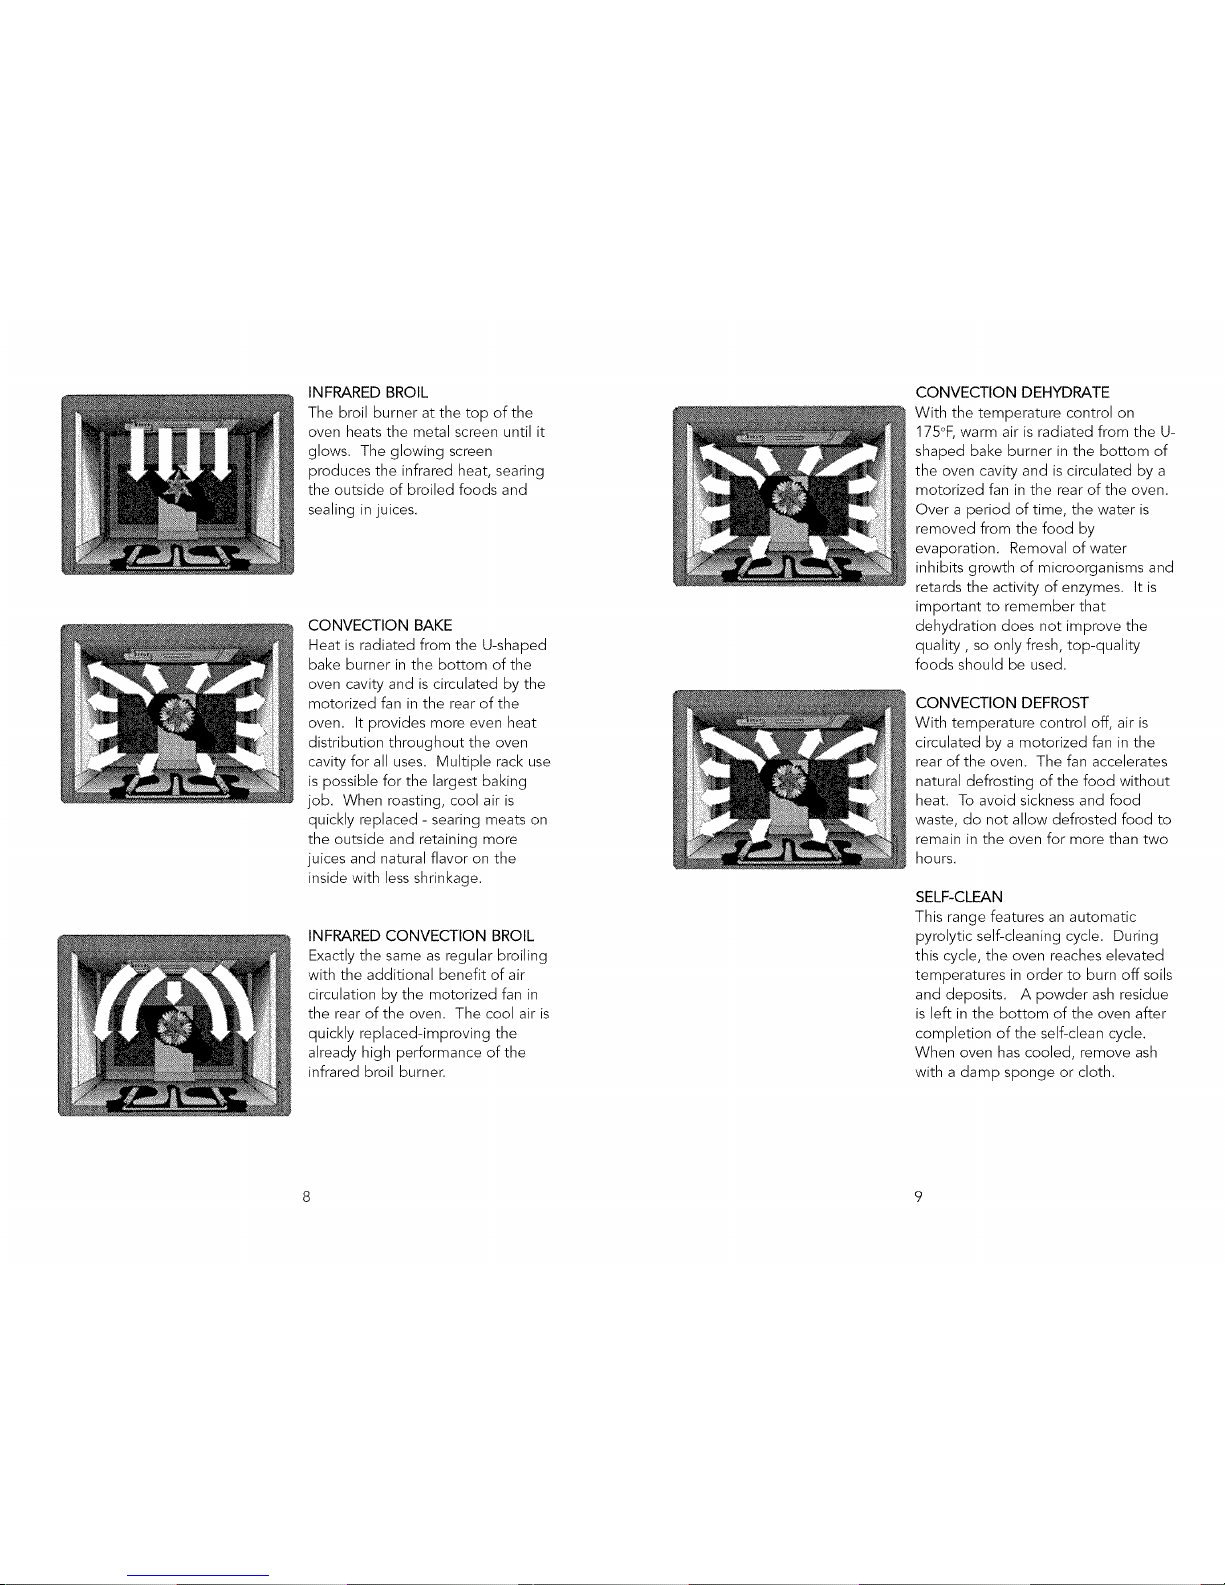
INFRAREDBROIL
Thebroilburneratthetopofthe
ovenheatsthemetalscreenuntilit
glows.Theglowingscreen
producestheinfraredheat,searing
theoutsideof broiledfoodsand
sealinginjuices.
CONVECTIONBAKE
HeatisradiatedfromtheU-shaped
bakeburnerinthebottomof the
ovencavityandiscirculatedbythe
motorizedfanintherearofthe
oven.Itprovidesmoreevenheat
distributionthroughouttheoven
cavityforalluses.Multiplerackuse
ispossibleforthelargestbaking
job. Whenroasting,coolairis
quicklyreplaced-searingmeatson
theoutsideandretainingmore
juicesandnaturalflavoronthe
insidewithlessshrinkage.
INFRAREDCONVECTIONBROIL
Exactlythesameasregularbroiling
withtheadditionalbenefitofair
circulationbythemotorizedfanin
therearoftheoven.Thecoolairis
quicklyreplaced-improvingthe
alreadyhighperformanceofthe
infraredbroilburner.
CONVECTION DEHYDRATE
With the temperature control on
17S°F, warm air is radiated from the U-
shaped bake burner in the bottom of
the oven cavity and is circulated by a
motorized fan in the rear of the oven.
Over a period of time, the water is
removed from the food by
evaporation. Removal of water
inhibits growth of microorganisms and
retards the activity of enzymes. It is
important to remember that
dehydration does not improve the
quality, so only fresh, top-quality
foods should be used.
CONVECTION DEFROST
With temperature control off, air is
circulated by a motorized fan inthe
rear of the oven. The fan accelerates
natural defrosting of the food without
heat. To avoid sickness and food
waste, do not allow defrosted food to
remain in the oven for more than two
hours.
SELF-CLEAN
This range features an automatic
pyrolytic self-cleaning cycle. During
this cycle, the oven reaches elevated
temperatures in order to burn off soils
and deposits. A powder ash residue
is left in the bottom of the oven after
completion of the self-clean cycle.
When oven has cooled, remove ash
with a damp sponge or cloth.
8 9
Using Your Range
Lighting the Burners
Sur[ace Burners-Automatic Reignition
To light the surface burners, turn the appropriate control knob
counter clockwise to any position. This control is both a gas valve and
an electric switch. Burners will ignite at any "on" position with the
automatic reignition system. If the flame goes out for any reason, the
burners will automatically reignite if the gas is still flowing. When gas is
permitted to flow to the burners, the electric igniters start sparking.
On all surface igniters you should hear a "clicking" sound. If you do
not, turn off the control and check that the unit is plugged in and that
the fuse or circuit breaker is not blown or
tripped.
Within a few moments, enough
gas will have traveled to the burner to
light. When the burner lights, turn the
burner control to any position to adjust the
flame size. Setting the proper height for
the desired cooking process and selected
utensil will result in superior cooking
performance, while also saving time and
energy.
Sur[ace Cooking Tips
*Use low or medium flame heights when cooking in utensils that are
poor conductors of heat, such as glass, ceramic, and cast-iron.
Reduce the flame height until it covers approximately 1/3 of the
utensil diameter. This will ensure more even heating within the utensil
and reduce the likelihood of burning or scorching the food.
*Reduce the flame if it is extending beyond the bottom of the utensil.
A flame that extends along the sides of the utensil is potentially
dangerous, heats the utensil handle and kitchen instead of the food,
and wastes energy.
*Reduce the flame height to the minimum level necessary to perform
the desired cooking process. Remember that food cooks just as
quickly at a gentle boil as it does at a rolling boil. Maintaining a
higher boil than is necessary wastes energy, cooks away moisture, and
causes a loss in food flavor and nutrient level.
TEMPERATURE SETTING GUIDELINES*
HEAT SETTING
Simmer
HI-Simmer
Low
Low- Med
Med
Me(I-HI
HI
*NOTE:
USE
Melting small quantities.
Steaming rice.
Simmering small quantities, sauces.
Melting large quantities
Low-temperature frying. (eggs, etc.)
Simmering large quantities
Heating milk, cream sauces, gravies, puddings.
Sauteing and browning
Braising, pan-frying
Maintaining slow boil on large quantities.
High-temperature frying.
Pan broiling
Maintaining fast boil on large quantities
Boiling water quickly.
Deep-fat frying in large utensil
The above information is given as a guide only. You may
need to vary the heat settings to suit your personal
requirements.
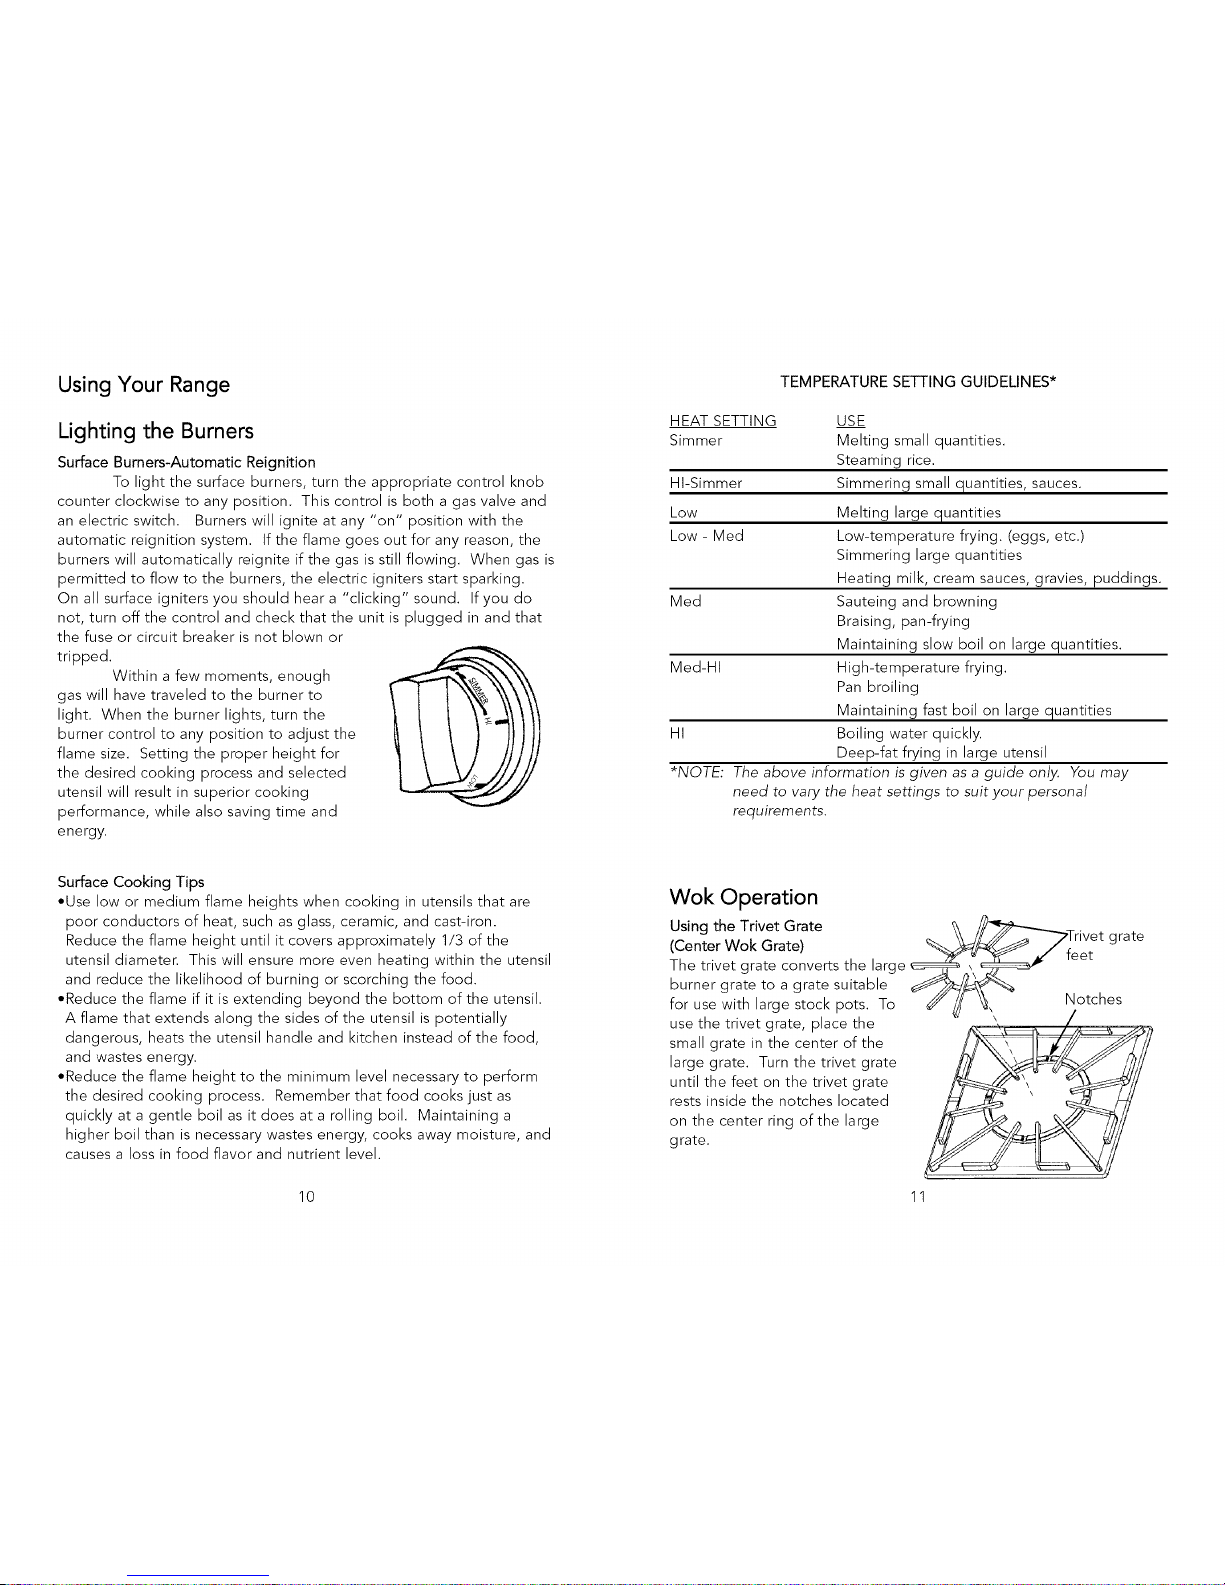
Wok Operation
Using the Trivet Grate _/,_T
(Center Wok Grate) _,_ _,_ rivet grate
The trivet grate converts the large _;z__ feet
burner grate to a grate suitable
for use with large stock pots. To _" !J \'_ Notches
use the trivet grate, place the
small grate in the center of the
large grate. Turn the trivet grate
until the feet on the trivet grate
rests inside the notches located
on the center ring of the large
grate.
10 11
Griddle/Simmer Plate, Bake Burner, Infrared Burner
Turning the thermostat counter clockwise to any "on" position
activates a glo-bar igniter and opens an electromechanical valve in the
system to start the gas valve. The griddle has a power "ON" light
which glows when the griddle thermostat is turned on. the light cycles
on and off with the burner, it is not possible to use both the infrared
burner and the bake burners at the same time. The design of the
system will not permit this, both for control of bake/broiler and for
safety of use.
Griddle/Simmer Plate Operation
•Turn the griddle control knob to desired temperature setting.
•Always turn off when not in use, or lower the heat between cooking
loads.
Cooking Tips
*Preheat griddle to the desired temperature. Wait until light cycles off
for indication that the desired temperature has been reached and the
griddle is preheated.
.Use liquid cooking oil, cooking sprays, or butter for eggs, pancakes,
French toast, fish and sandwiches. This will help to reduce sticking.
Meats usually have enough natural oils.
*Remove food particles with a metal spatula during cooking to make
the cleanup easier and to avoid including those particles in the food.
.Do not overheat the griddle. Turn off when not in use, or lower heat
between cooking loads.
*After using and cleaning the griddle, the surface should be wiped with
a light film of cooking oil to protect the finish from rust and corrosion.
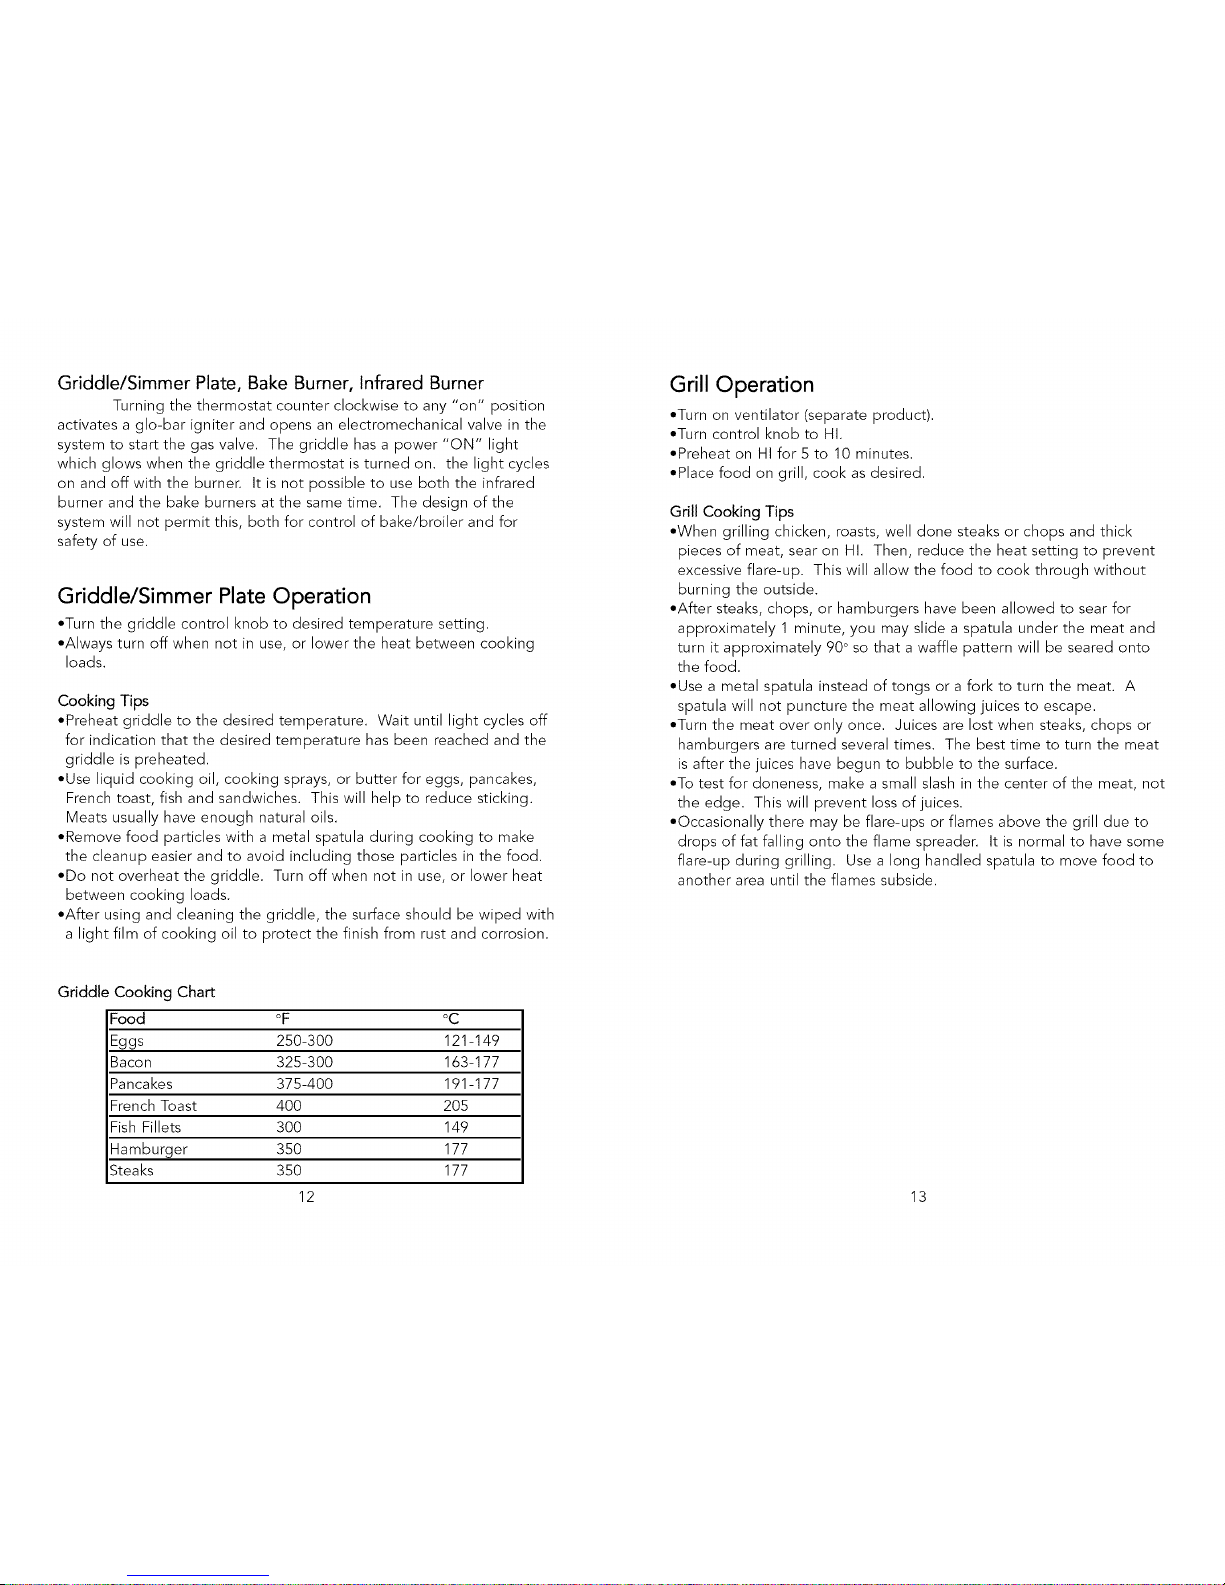
Griddle Cooking Chart
Food
Eggs
Bacon
Pancakes
French Toast
Fish Fillets
Hamburger
Steaks
°F °C
250-300 121-149
325-300 163-177
375-400 191-177
400 205
300 149
350 177
350 177
12
Grill Operation
•Turn on ventilator (separate product).
•Turn control knob to HI.
•Preheat on HI for 5 to 10 minutes.
•Place food on grill, cook as desired.
Grill Cooking Tips
*When grilling chicken, roasts, well done steaks or chops and thick
pieces of meat, sear on HI. Then, reduce the heat setting to prevent
excessive flare-up. This will allow the food to cook through without
burning the outside.
*After steaks, chops, or hamburgers have been allowed to sear for
approximately 1 minute, you may slide a spatula under the meat and
turn it approximately 90° so that a waffle pattern will be seared onto
the food.
*Use a metal spatula instead of tongs or a fork to turn the meat. A
spatula will not puncture the meat allowing juices to escape.
*Turn the meat over only once. Juices are lost when steaks, chops or
hamburgers are turned several times. The best time to turn the meat
is after the juices have begun to bubble to the surface.
*To test for doneness, make a small slash in the center of the meat, not
the edge. This will prevent loss of juices.
*Occasionally there may be flare-ups or flames above the grill due to
drops of fat falling onto the flame spreader. It is normal to have some
flare-up during grilling. Use a long handled spatula to move food to
another area until the flames subside.
13
 Loading...