

Viking VEDO5302TBK, VEDO5302TWH, VESO5302TBK, VESO5302TWH, VESO5302TSS Quick Reference Guide
...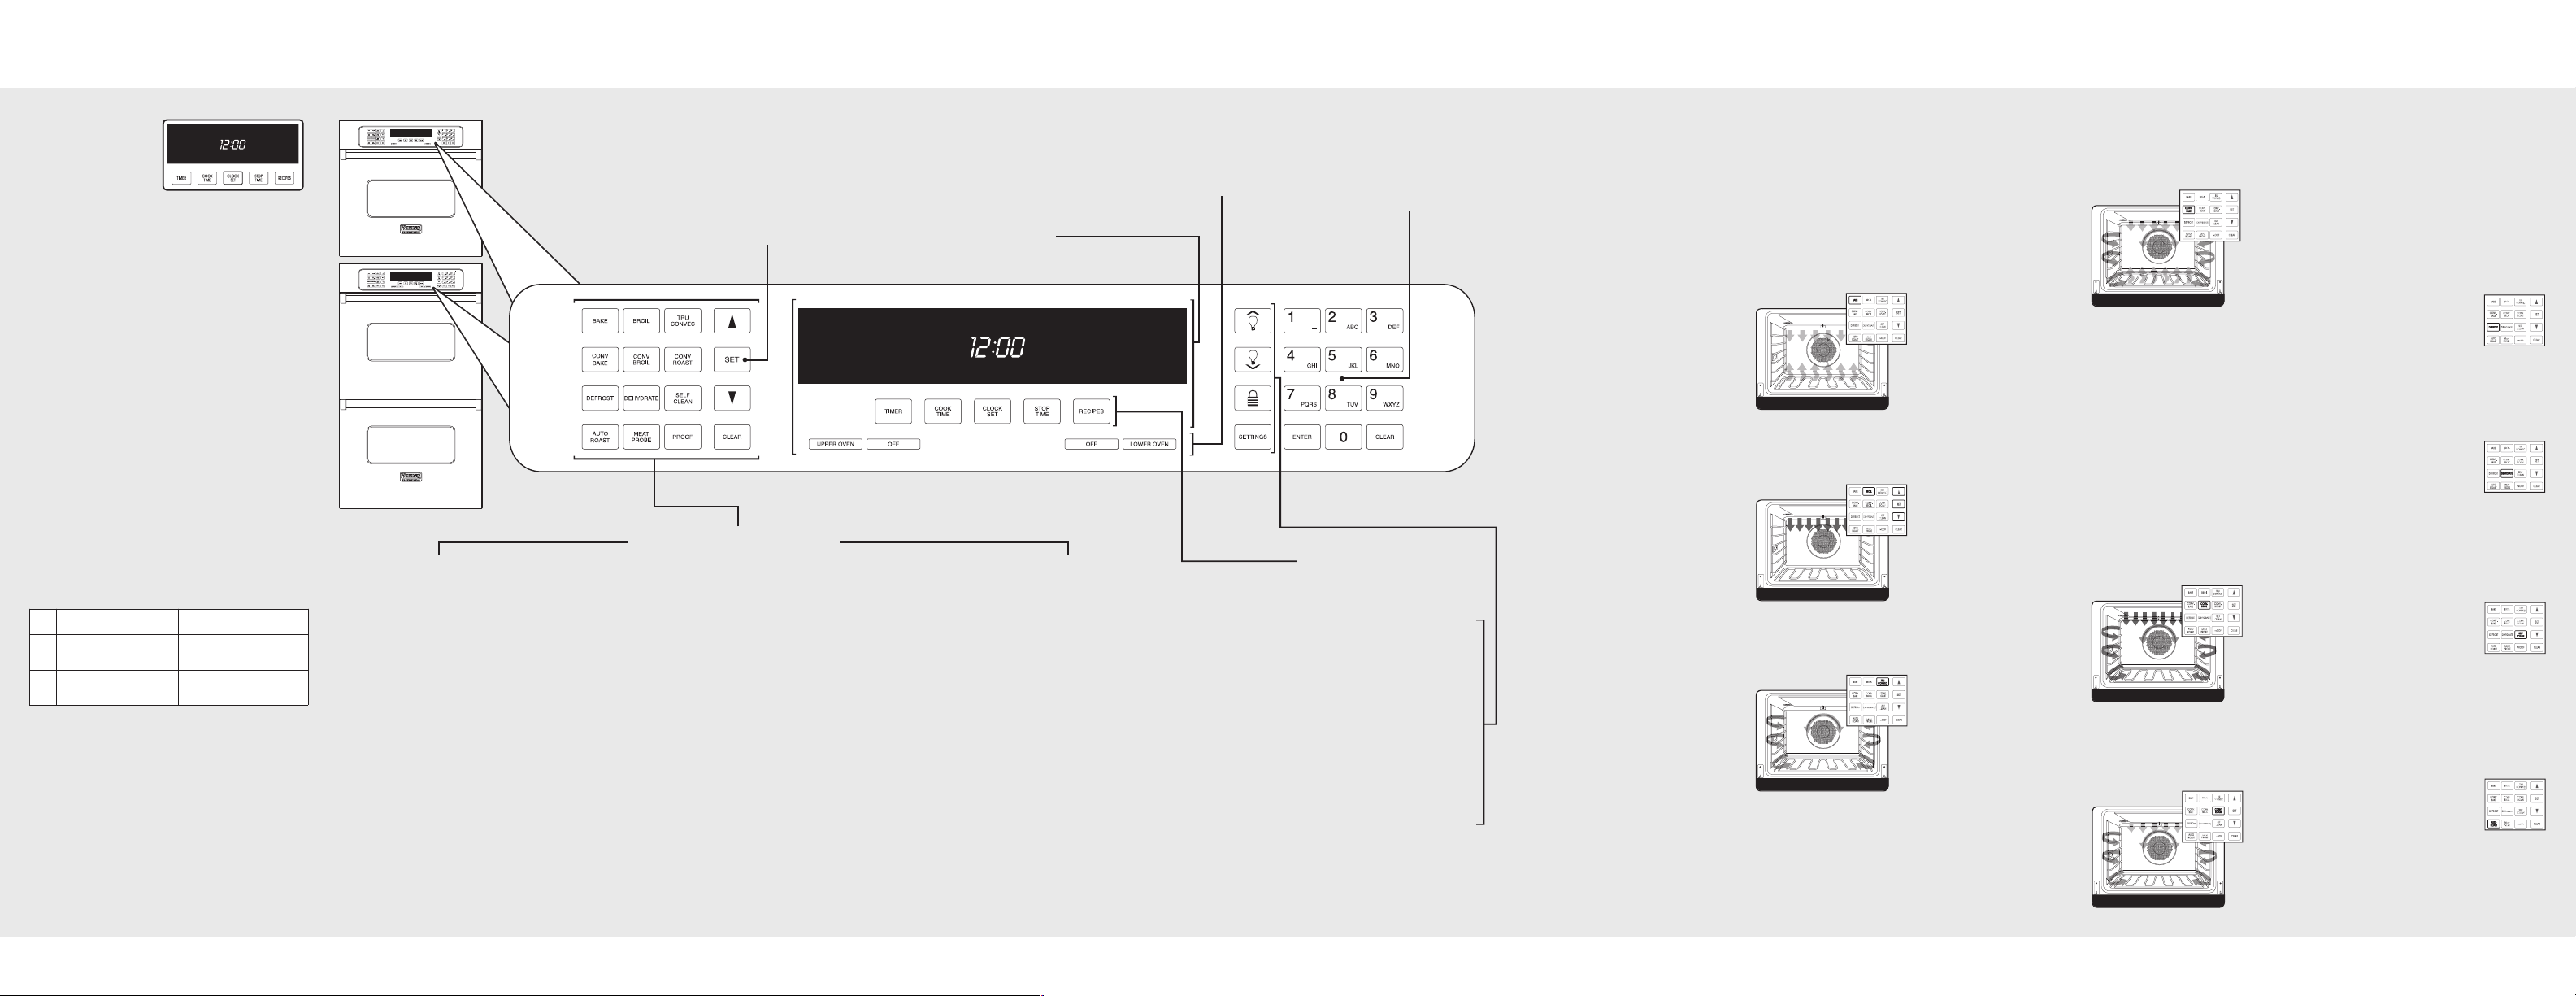
Setting the Clock
Broil
TruConvec
TM
convection bake
convection broil
convection roast
Bake
Oven Control Panel
Oven Settings and Functions
Digital Display
he time-of-day must
T
e set before any other
b
program can be used.
When your oven is first
connected to the power
in your home, the timer display will show 12:00.
o program the time-of-day:
T
. Press either the “UPPER OVEN” or “LOWER
1
OVEN” button.
2. Press the “CLOCK SET” button. The clock will
begin to flash. The word “CLOCK” will be lit on
the display.
3. Type in the correct time on the electronic number
keypad.
4. Press the “CLOCK SET” button again. The clock is
now set.
Alternate method:
1. Press either the “UPPER OVEN” or “LOWER
OVEN” button.
2. Press the “CLOCK SET” button. The clock will
begin to flash. The word “CLOCK” will be lit on
the display.
3. Use the up and down arrows to change the
current time.
Press and Release Press and Hold
Time increases by
s
one minute
Time decreases by
t
one minute
4. Press the “SET” button on the temperature control
or the “CLOCK SET” button on the electronic
timing center. The clock is now set.
Note: The time-of-day cannot be changed while there
is a Bake Hours or Start Time cycle programmed into
the timer.
Time increases by
10 minutes
Time decreases by
10 minutes
Bake
Conventional, single-rack baking
(breads, cakes, cookies, pastry,
pies, entrees, vegetables)
Convection Bake
Multi-rack baking for heavier or
frozen foods (e.g., frozen pies,
pizzas, entrees, vegetables)
Defrost
Natural defrosting of the food
using fan without heat
Auto Roast*
Automatic searing the outside of
roasts; simplifies roasting
Oven Function and
Temperature Controls
Each oven function has a separate setting.
(See descriptions)
The SET control up and down arrows can be used
to set any temperature from
150°F (65.6°C) to 550°F (287.8°C).
Oven Function Options
Broil
Three conventional broil settings for cuts of
flat pieces of meat or meat 1-2 inches thick
Convection Broil
Faster than regular broiling with less smoke
generation for thicker meats
Dehydrate
Using the convection fan over a period of
time, water is removed from the food by
evaporation
Meat Probe*
Automatically turns the oven off when the
internal temperature of the meat being
roasted is reached
*Note: Professional Series Premiere model features and control panel are shown.
Electronic Timing Center
The Electronic Timing Center is
used to program and control all
timing functions.
IMPORTANT: The time-of-day
must be set before any other
program can be used.
TruConvec
Multi-rack baking for breads, cakes,
cookies (up to 6 racks of cookies at once)
Convection Roast
Roasting whole turkeys, whole chickens,
hams, etc.
Self-Clean
A self-cleaning cycle using high heat to
burn off soils and deposits
Proof*
Creates an optimal environment for the
rising of yeast in many kinds of dough
Oven Selector Controls
The Oven Selector Controls
are used to turn the upper or
lower oven on and off.
TM
Accesses, programs, and saves cooking
Controls the interior lights in the upper and
Childproofing feature preventing
the controls from being activated when the
Accesses custom features such as display
brightness, Sabbath mode, and tones
Electronic Keypad Entry
Both ovens share the electronic
keypad entry. The alphanumeric keys
can be used to program and control
all oven functions.
Recipes*
cycles from favorite recipes
Oven Light Controls
lower ovens
Oven Lock
oven is not in use
Settings
Temperature Control
oth ovens share the temperature control. To use this
B
eature, select the upper or lower oven, and then set
f
the desired temperature. The controls can be set at
any temperature from 150°F (65.6°C) to 550°F
(287.8°C).
Oven Function Selector Control
oth ovens offer 11 separate cooking modes from
B
hich you can choose the one that best meets your
w
cooking needs.
Bake
When using this
function, full-power
heat is radiated from
the bake element in the
bottom of the oven
cavity, while
supplemental heat is
radiated from the broil
element. This function is recommended for single-rack
baking. Use this setting for baking, roasting, and
casseroles.
Broil
This function is a dryheat cooking method,
using direct or radiant
heat on three different
settings: low, medium
and high. The distance
between the foods and
the broil elements
determines broiling speed. This function is
recommended for small, individualized cuts, such as
steaks, chops, and patties.
TruConvec™
With this function, only
the rear element
operates at full power.
There is no direct heat
from the bottom or
top elements, and the
motorized fan in the
rear of the oven
circulates for even heating. Use this setting for foods
that require gentle cooking, such as pastries, soufflés,
yeast breads, quick breads, and cakes. This setting
produces breads, cookies, and other baked goods
with an even texture and golden crusts. No special
bakeware is required. Use this function for single-rack
baking, multiple-rack baking, roasting, and
TruConvec™ (cont.)
reparation of complete meals. This setting is also
p
ecommended when preparing large quantities of
r
baked goods at one time.
Convection Bake
With this function, the
ottom element
b
perates at full power,
o
nd the top broil
a
element operates at
supplemental power.
The motorized fan in
the rear of the oven
circulates heated air, providing a more even heat
distribution. This even circulation of air equalizes the
temperature throughout the oven cavity and
eliminates the hot and cold spots found in
conventional ovens.
A major benefit of convection baking is the ability to
prepare food in larger quantities using multiple racks.
When roasting using this setting, cool air is quickly
replaced, searing meats on the outside and retaining
more juices and natural flavor on the inside, with less
shrinkage. With this heating method, foods can be
baked and roasted at the same time with minimal
taste transfer, even when different dishes are involved,
such as cakes, fish, or meat. The hot air system is
especially economical when thawing frozen food. Use
this setting for baking and roasting.
Convection Broil
Using this function, the
top element operates
at full power. This
function is exactly the
same as regular
broiling with the
additional benefit of air
circulation by the
motorized fan in the rear of the oven. Smoke is
reduced since the airflow also reduces the peak
temperatures on the food. Use this setting for broiling
thick cuts of meat.
Convection Roast
With this function, the
convection element
runs in conjunction with
the inner and outer
broil elements. The
reversible convection
fan runs at a higher
Convection Roast (cont.)
peed in each direction, allowing the moisture to be
s
sealed inside large cuts of meat, such as roasts. This
saves time when compared with single fan convection
roast modes. Use this setting for whole turkeys, whole
chickens, and roasts.
ote: Because this function uses a high-speed
N
onvection fan for optimum cooking performance,
c
some noise may be noticed from the high fan speed.
This is normal.
Defrost
With the temperature control off, a
motorized fan in the rear of the oven
circulates air. This fan accelerates natural defrosting of
the food without heat.
Note: To avoid sickness and food waste, DO NOT
allow defrosted food to remain in the oven for more
than two hours.
Dehydrate
With this function, a motorized fan in
the rear of the oven circulates warm air.
Over a period of time, the water is
removed from the food by evaporation. Removal of
water inhibits growth of microorganisms and retards
the activity of enzymes. It is important to remember
that dehydration does not improve quality; only fresh,
top-quality foods should be dehydrated in your oven.
Self-Clean
The self-cleaning cycle is designed to
eliminate the need for scrubbing and
scouring food baked onto the oven
interior. During this cycle, the oven uses high
temperatures to burn off soils and deposits. An
integral smoke eliminator reduces odors associated
with the soil burn off. A powder ash residue is left in
the bottom of the oven after completion of the selfclean cycle. When the oven has cooled, remove any
ash from oven surfaces with a damp sponge or cloth.
Auto Roast*
This function further simplifies roasting
by automatically searing the outside of
meats, raising the pre-set temperature
by 100°F for a short time to sear the outside of the
meat. The temperature then returns to the pre-set
temperature in the standard convection roast mode.
Oven Settings (cont.)
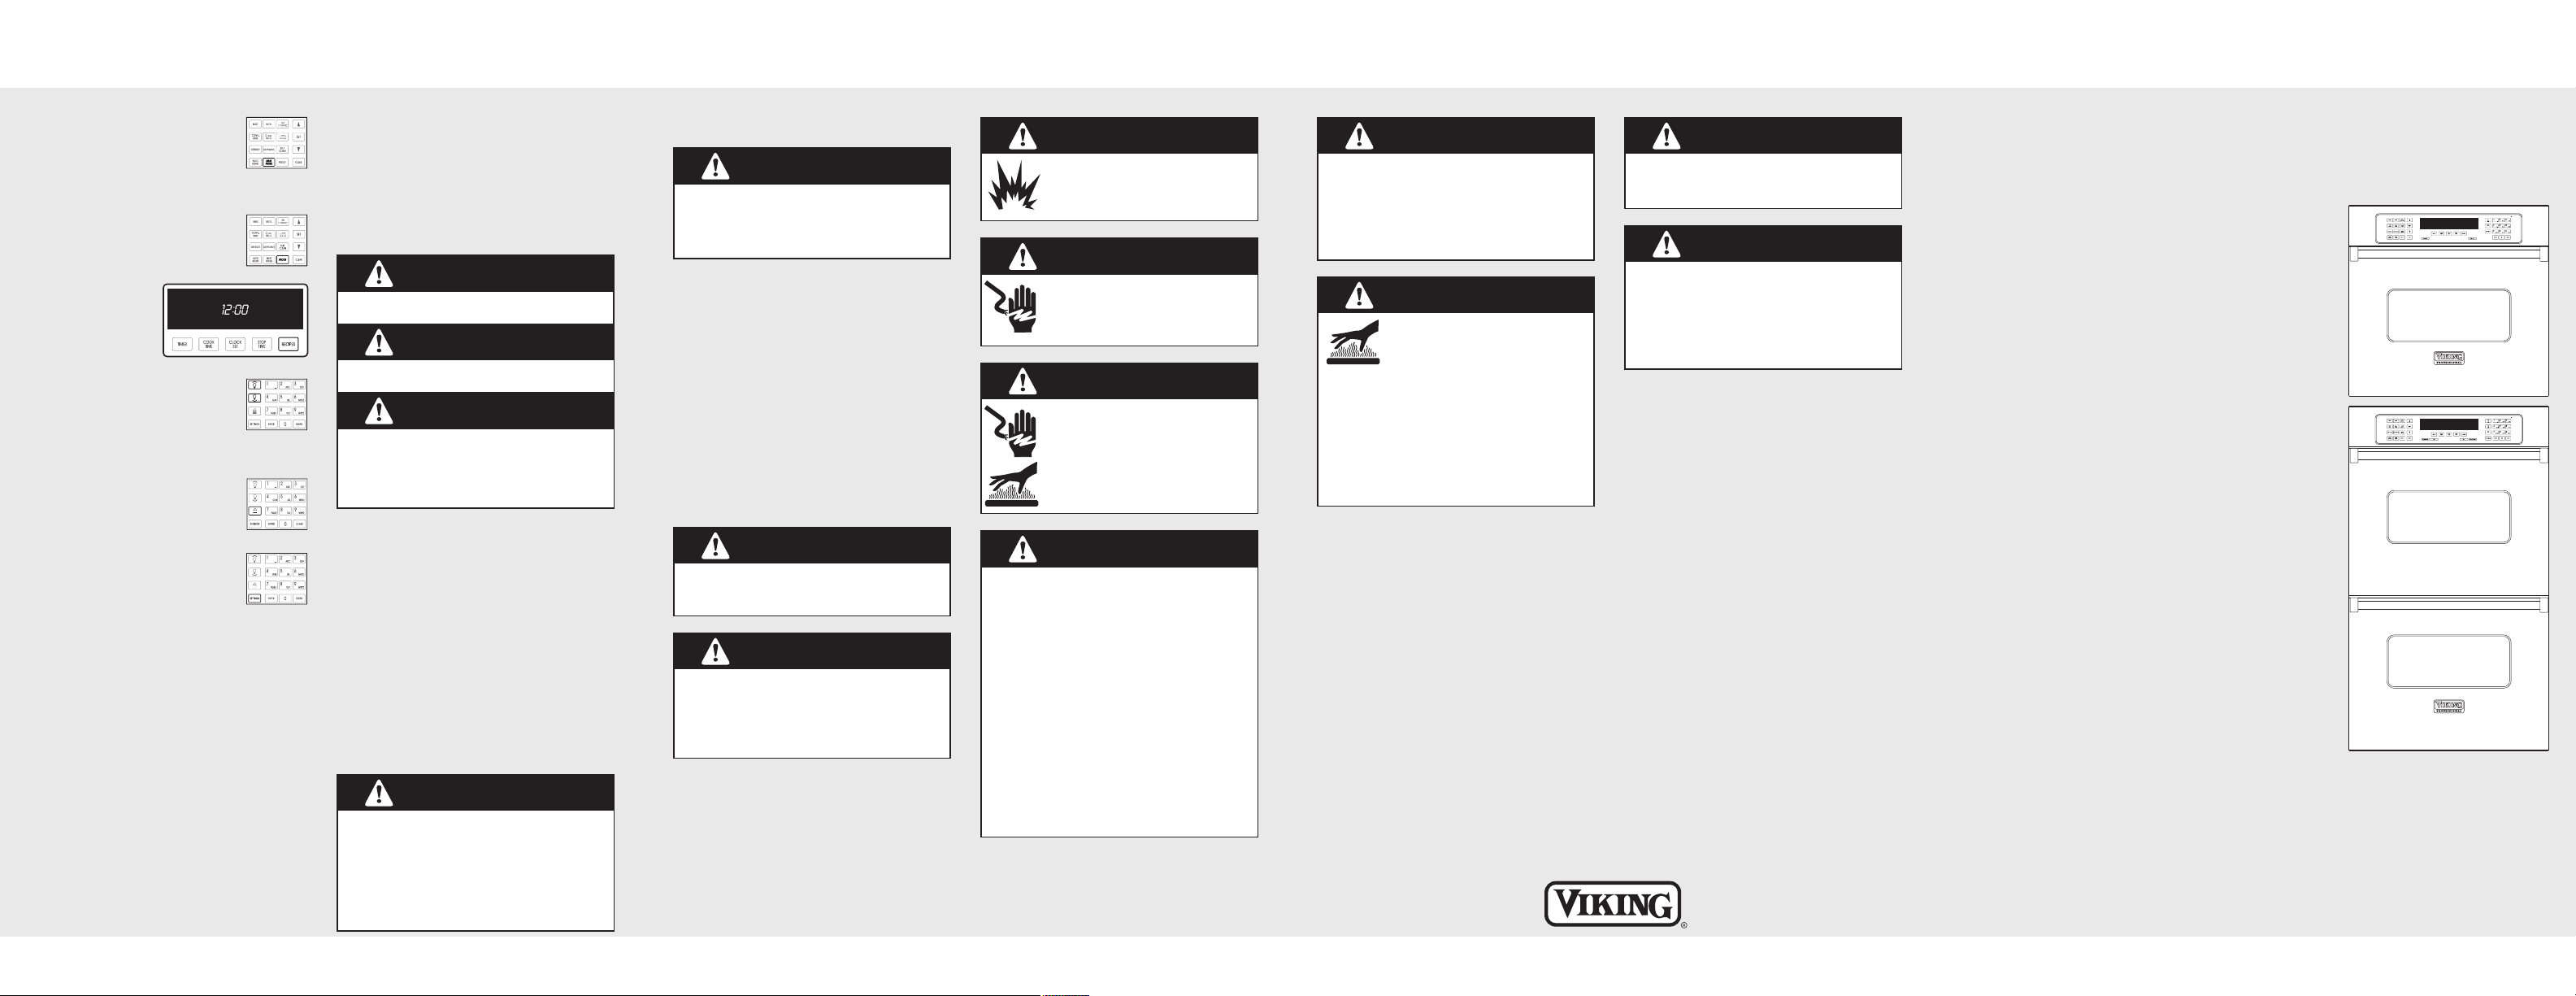
Warnings
Warnings (cont.)
Warnings (cont.)
Viking Quick Reference Guide
Meat Probe*
he probe temperature function is used to
T
automatically turn the oven off when
he internal temperature of meat being
t
ooked is reached.
c
Proof*
This function uses a low temperature to
create an optimal environment for the
yeast to rise in many types of dough.
Recipes*
This setting accesses,
programs, and saves
cooking cycles from
favorite recipes.
Interior Oven
Light Controls
The upper and lower ovens have
interior oven lights controlled by the
right touch pad. Push the light
button to turn the interior oven lights on and off.
Oven Lock
This child protection function prevents
the oven controls from being activated
when the oven is not in use.
Settings
Use this function to access, program,
and customize timeouts, display
brightness, and the Sabbath mode.
*Note: The AUTO-ROAST, PROOF, RECIPE and PROBE
functions are included on the Premiere models.
Warning and Important Safety Instructions appearing
n this manual are not meant to cover all possible
i
onditions and situations that may occur. Common
c
ense, caution, and care must be exercised when
s
installing, maintaining, or operating the appliance.
ALWAYS contact the manufacturer about problems or
conditions you do not understand.
Recognize Safety Symbols,Words, Labels
D A N G E R
Hazards or unsafe practices which WILL result in
severe personal injury or death
W A R N I N G
Hazards or unsafe practices which COULD result
in death severe personal injury or death
C A U T I O N
Hazards or unsafe practices which COULD
result in minor personal injury.
All safety messages will identify the hazard, tell you
how to reduce the chance of injury, and tell you what
can happen if the instructions are not followed.
Read and follow all instructions before using this
appliance to prevent the potential risk of fire, electric
shock, personal injury or damage to the appliance as
a result of improper usage of the appliance. Use
appliance only for its intended purpose as described
in this manual.
To ensure proper and safe operation: Appliance
must be properly installed and grounded by a
qualified technician. DO NOT attempt to adjust,
repair, service, or replace any part of your appliance
unless it is specifically recommended in this manual.
All other servicing should be referred to a qualified
servicer. Have the installer show you the location of
the gas shutoff valve and how to shut it off in an
emergency. A certified technician is required for any
adjustments or conversions to Natural or LP gas.
C A U T I O N
To prevent possible damage to cabinets and
cabinet finishes, use only materials and finishes
that will not discolor or delaminate and will
withstand temperatures up to 194° F (90° C). Heat
and moisture resistant adhesive must be used if the
product is to be installed in laminated cabinetry.
Check with your builder or cabinet supplier to make
sure that the materials meet these requirements.
bout Your Appliance
A
C A U T I O N
NEVER use appliance as a space heater to heat or
arm a room to prevent potential hazard to the
w
user and damage to the appliance. Also, DO NOT
use the oven as a storage area for food or cooking
utensils.
• For proper oven performance and operation,
DO NOT block or obstruct the oven vent duct
located on the right side of the air grille.
• Avoid touching oven vent area while oven is on and
for several minutes after oven is turned off. When
the oven is in use, the vent and surrounding area
become hot enough to cause burns. After oven is
turned off, DO NOT touch the oven vent or
surrounding areas until they have had sufficient time
to cool.
• Other potentially hot surfaces include rangetop,
areas facing the rangetop, oven vent, surfaces near
the vent opening, oven door, areas around the oven
door and oven window.
• The misuse of oven doors (e.g. stepping, sitting,
or leaning on them) can result in potential hazards
and/or injuries.
W A R N I N G
DO NOT use commercial oven cleaners inside the
oven. Use of these cleaners can produce hazardous
fumes or can damage the porcelain finishes.
W A R N I N G
NEVER cover any slots, holes or passages in the
oven bottom or cover an entire rack with materials
such as aluminum foil. Doing so blocks air flow
through the oven and may cause carbon monoxide
poisoning. Aluminum foil linings may also trap heat,
causing a fire hazard.
W A R N I N G
f the information in this manual is not
I
followed exactly, a fire or explosion
may result causing property damage,
personal injury, or death.
W A R N I N G
ELECTRICAL SHOCK HAZARD
Disconnect the electric power at the
main fuse or circuit breaker before
replacing bulb.
W A R N I N G
BURN OR ELECTRICAL
SHOCK HAZARD
Make sure all controls are OFF and oven
is COOL before cleaning. Failure to do
so can result in burns or electrical shock.
W A R N I N G
To avoid sickness and food waste when using
automatic time baking:
• DO NOT use foods that will spoil while waiting for
cooking to start, such as dishes with milk or eggs,
cream soups, custards, fish, pork, poultry, or
foods with stuffing.
• Any food that has to wait for cooking to start
should be very cold or frozen before it is placed in
the oven.
• DO NOT use foods containing baking powder or
yeast when automatic time baking. They will not
rise properly.
• DO NOT allow food to remain in the oven for
more than two hours after the end of the cooking
cycle.
• To avoid sickness and food waste, DO NOT allow
defrosted food to remain in the oven for more
than two hours.
C A U T I O N
ll special ordered brass parts are coated with an
A
epoxy coating. DO NOT USE BRASS CLEANERS
OR ABRASIVE CLEANERS ON ANY BRASS
PARTS. All brass body parts should be wiped
egularly with hot, soapy water. When hot, soapy
r
water will not do the job, use everyday household
cleaners that are not abrasive.
C A U T I O N
BURN HAZARD
DO NOT touch the exterior portions of
the oven after self-cleaning cycle has
extremely hot to the touch! During the first few
times the self-cleaning feature is used, there may
be some odor and smoking from the curing of the
binder in the high-density insulation used in the
oven. When the insulation is thoroughly cured, this
odor will disappear. During subsequent selfcleaning cycles, you may sense an odor
characteristic of high temperatures. Keep the
kitchen well-vented during the self-cleaning cycle.
begun, since some parts become
N O T I C E
void any damage to oven vents. The vents need
A
to be unobstructed and open to provide proper
airflow for optimal oven performance.
N O T I C E
The Cooling Fan should be operating when the
unit is in operation. If you notice the cooling fan is
not operating or you observe unusual or excessive
noise coming from the cooling fan, contact a Viking
Authorized Service Center before continuing
operation. Failure to do so can result in damage to
the oven or surrounding cabinets.
Professional Custom Built-In Electric Touch
Control Single and Double Ovens
F20816 EN (022211)
VIKING RANGE CORPORATION
111 Front Street • Greenwood, Mississippi
38930 USA • (662) 455-1200
 Loading...