

Viking VSMFG, VSMPM, VSMDSS, VSMJE, VBL5CS User Manual
...
Viking Range Corporation
111 Front Street
Greenwood, Mississippi (MS) 38930 USA
(662) 455-1200
For product information
call 1-888-VIKING1 (845-4641)
or visit the Viking web site at
www.vikingrange.com
©2003 Viking Range Corporation
Specifications subject to change without notice
®
F20259
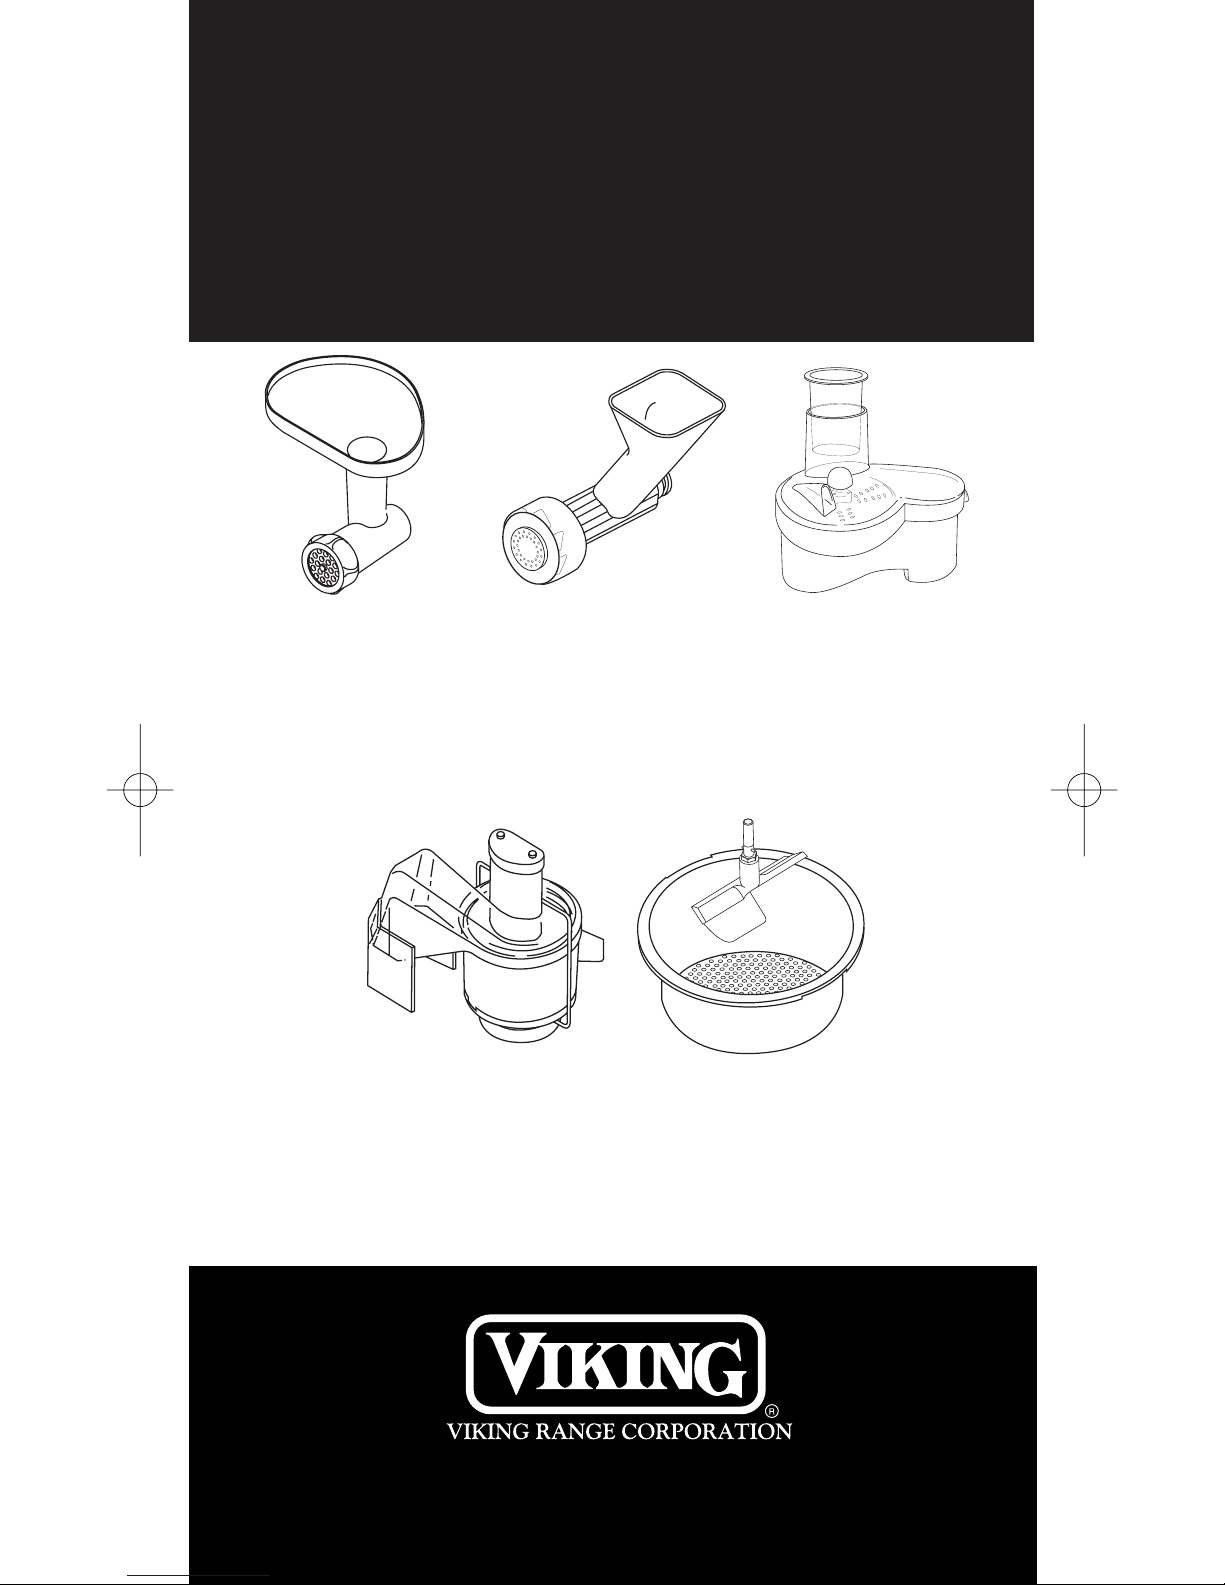
Viking Professional
Stand Mixer Attachments
www.vikingrange.com
VSMFG
Food
Grinder/Stuffer
Page 1
VSMPM
Pasta
Maker
Page 5
VSMDSS
High-Speed Disc
Slicer/Shredder
Page 9
VSMJE
High-Speed
Juice Extractor
Page 13
VBL5CS/VBL7CS
5 qt / 7 qt
Colander/Sieve
Page 17

a
b
c
d
e
f
g
h
i
j
1
2
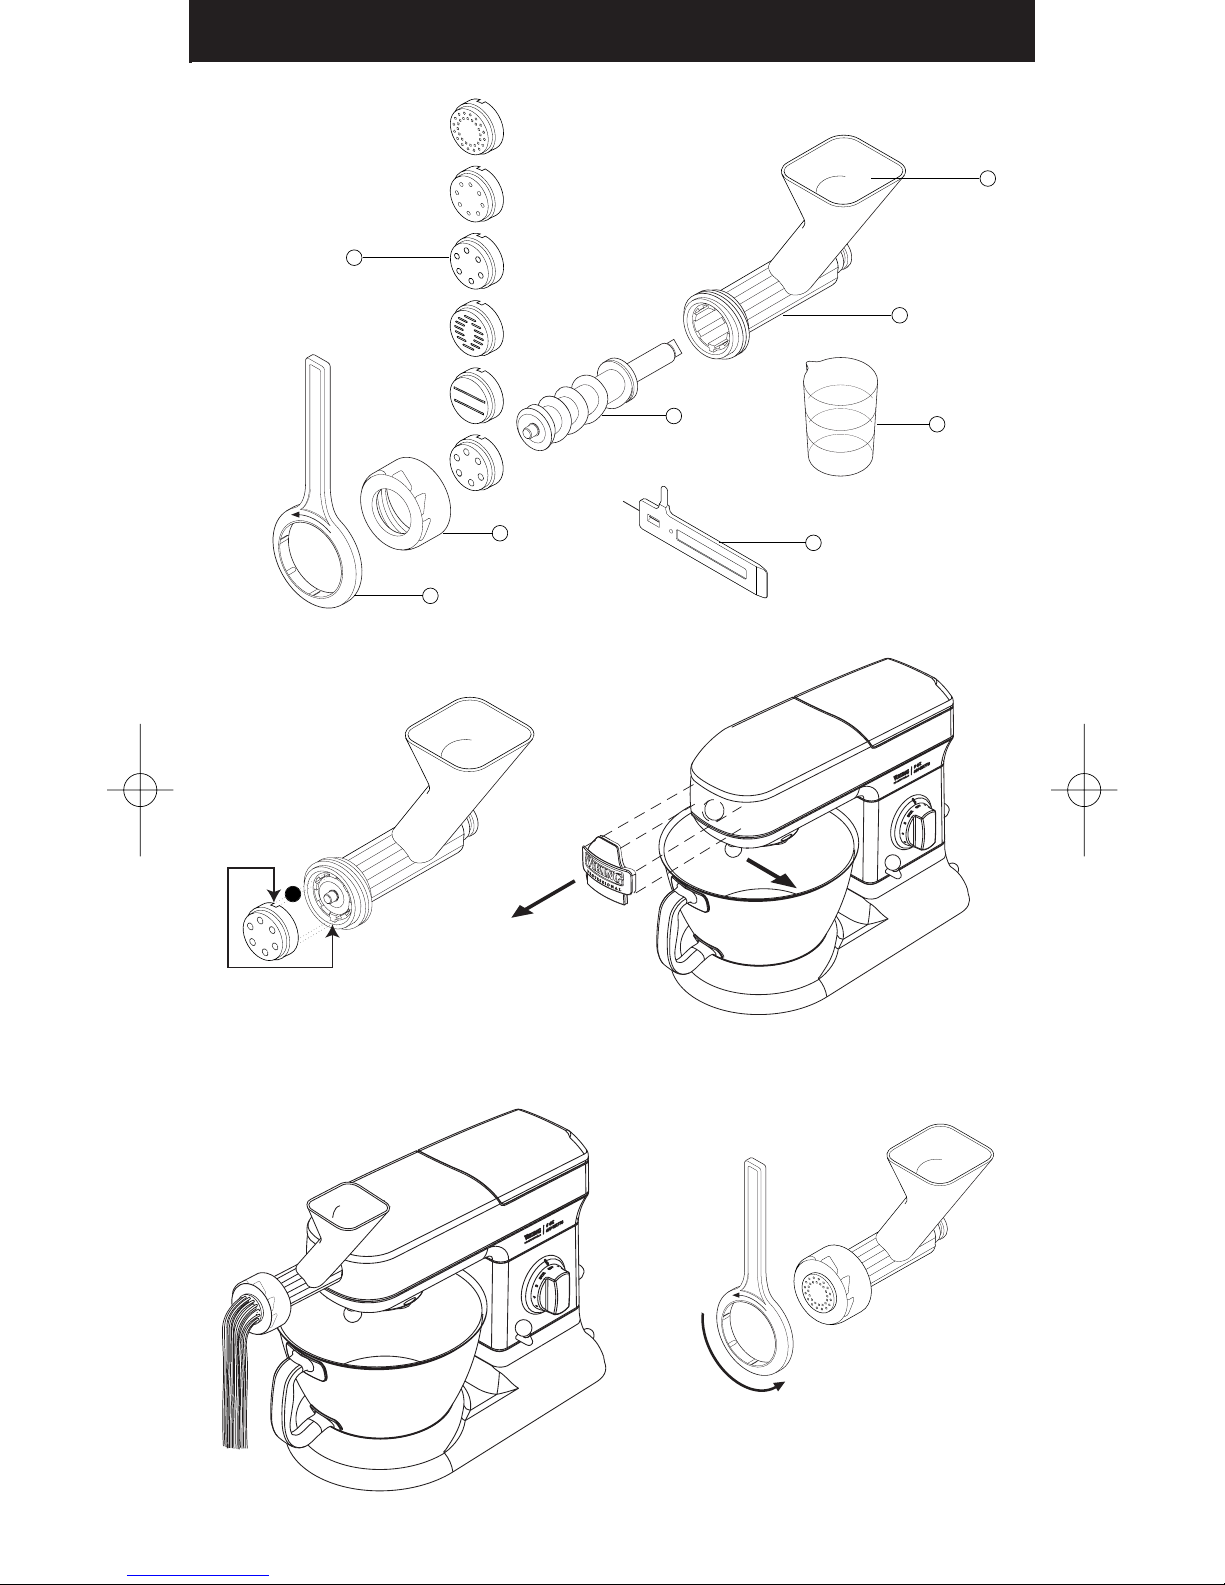
VSMFG – Food Grinder
f
l
m
n
b

IMPORTANT SAFEGUARDS
When using electrical appliances, basic safety precautions should
always be followed including the following:
1. Read all instructions.
2. Close supervision is necessary when any appliance is used by
or near children.
3. Unplug from outlet when not in use before putting on or
taking off parts and before cleaning.
4. Do not use more than one attachment at a time.
5. Never leave your Viking Professional stand mixer unattended
while it is operating
6. For household use only.
7. Avoid contacting moving parts. Keep fingers out of discharge
opening,
8. Never feed food by hand. Always use food pusher.
9. Blades are sharp. Handle carefully.
10. The use of attachments not recommended or sold by the
manufacturer may cause fire, electric shock or injury.
SAVE THESE INSTRUCTIONS
Parts of the Food Grinder/Stuffer
a. Wrench
b. Ring nut
c. Food grinder plates: fine, medium, coarse
d. Knife
e. Worm
f. Grinder body
g. Tray
h. Pusher
i Pusher lid
j Dish/cover
1
2
Before using for the first time:
Wash all parts. See “cleaning”
To assemble your food grinder/stuffer:
1. Fit the worm e inside the grinder body f .
2. Fit the knife – cutting side outward 1 . Ensure that it’s fitted
properly or otherwise this may damage your food
grinder/stuffer.
3. Fit a food grinder plate 2 . Put the notch over the pin.
Use the fine plate for raw meat, fish, small nuts, or cooked
meat for meat loaves. Use the medium and coarse plates for
raw meat, fish, nuts, vegetables, hard cheese, or peeled or
dried fruit for puddings and jams.
4. Loosely fit the ring nut.
To use the food grinder:
1. Pull the cover release to the right and remove the slow speed
outlet cover.
2. Hold the cover release to the right and insert the grinder. Turn
it both ways until it locks into place.
3. Tighten the ring nut manually.
4. Fit the tray
g
on to grinder body f . Put the dish/cover
under the grinder to catch the food.
5. Make sure you thaw frozen food THOROUGHLY before
grinding. Cut meat into 1” wide strips.
6. Switch to speed 8. Using the pusher, gently push the food
through, one piece at a time. Remember not to push hard—
you can damage your grinder.
Parts of the Stuffer:
f Grinder body
l Large nozzle (for thicker sausages)
m Small nozzle (for thinner sausages)
Ask your butcher for natural casings or buy synthetic casings at
your local market or gourmet store.
n Shaper
b Ring nut

To use your stuffer:
*Note: Meat must be ground prior to putting into stuffer.
1. If you’re using natural, skin casings, first soak in cold water for
30 minutes.
2. Pull the cover release, and remove the slow speed outlet
cover.
3. Hold the lever back and insert the grinder body f . Turn it
both ways until it locks into place.
4. Fit the worm inside the grinder body f .
5. Fit the grinder body f – putting the notch over the pin.
6. If you’re using casings, open it up with a jet of water. Next put
the nozzle you have chosen under a running tap and pull the
casing onto the nozzle.
7. Hold the nozzle on the grinder and screw the ring nut on.
8. Fit the tray onto the grinder body f .
9. Switch to speed 6 or 8. Using the pusher, push the food
through. Remember not to push hard, you can damage your
food grinder/stuffer. Ease the casing off the nozzle as it fills.
Do NOT overfill.
10. Twist the casings to form sausage links.
To make smaller breakfast link sausages:
*Note Meat must be ground prior to putting into stuffer.
1. Pull the cover release, and remove the slow speed outlet
cover.
2. Hold the lever back and insert the grinder body f . Turn it
both ways until it locks into place.
3. Fit the worm e inside the grinder body f .
4. Fit the shaper n – putting the notch over the pin.
5. Fit the cone m .
6. Hold the nozzle on the grinder and screw the ring nut on.
7. Fit the tray onto the grinder body f .
8. Switch to speed 6. Using the pusher, gently push the food
through. Remember not to push hard, you can damage your
food grinder/stuffer. Ease the casing off the nozzle as it fills.
Do NOT overfill.
9. Cut into links.
3

Care and Cleaning:
1. Loosen the ring nut manually or with the wrench a and
disassemble. Wash all the parts in hot, soapy water, then dry.
Dry thoroughly to prevent rusting and discoloration.
Do not wash any parts in the dishwasher. Never use a baking
soda solution.
2. Reassemble.
3. Wipe the plates with vegetable or olive oil, then wrap in paper
to prevent discolouring or rusting.
4. If you keep the food grinder/stuffer on the machine, put the
dish/cover on the tray as a dust cover.
5. You can pull the lid off the pusher and store the stuffer
attachments inside.
4
4
a
1
2
3
8
VSMPM – Pasta Maker
5
5
6
7
1
2
3
4
5
6
6
 Loading...