

Page 1
Stack-Rack
Vertical Receiver Mounted Cargo Rack
Assembly and Use Instructions
Assembly Tools Required:
Adjustable Crescent Wrench
13mm Box Wrench or Socket
16mm Box Wrench or Socket
18mm Box Wrench or Socket
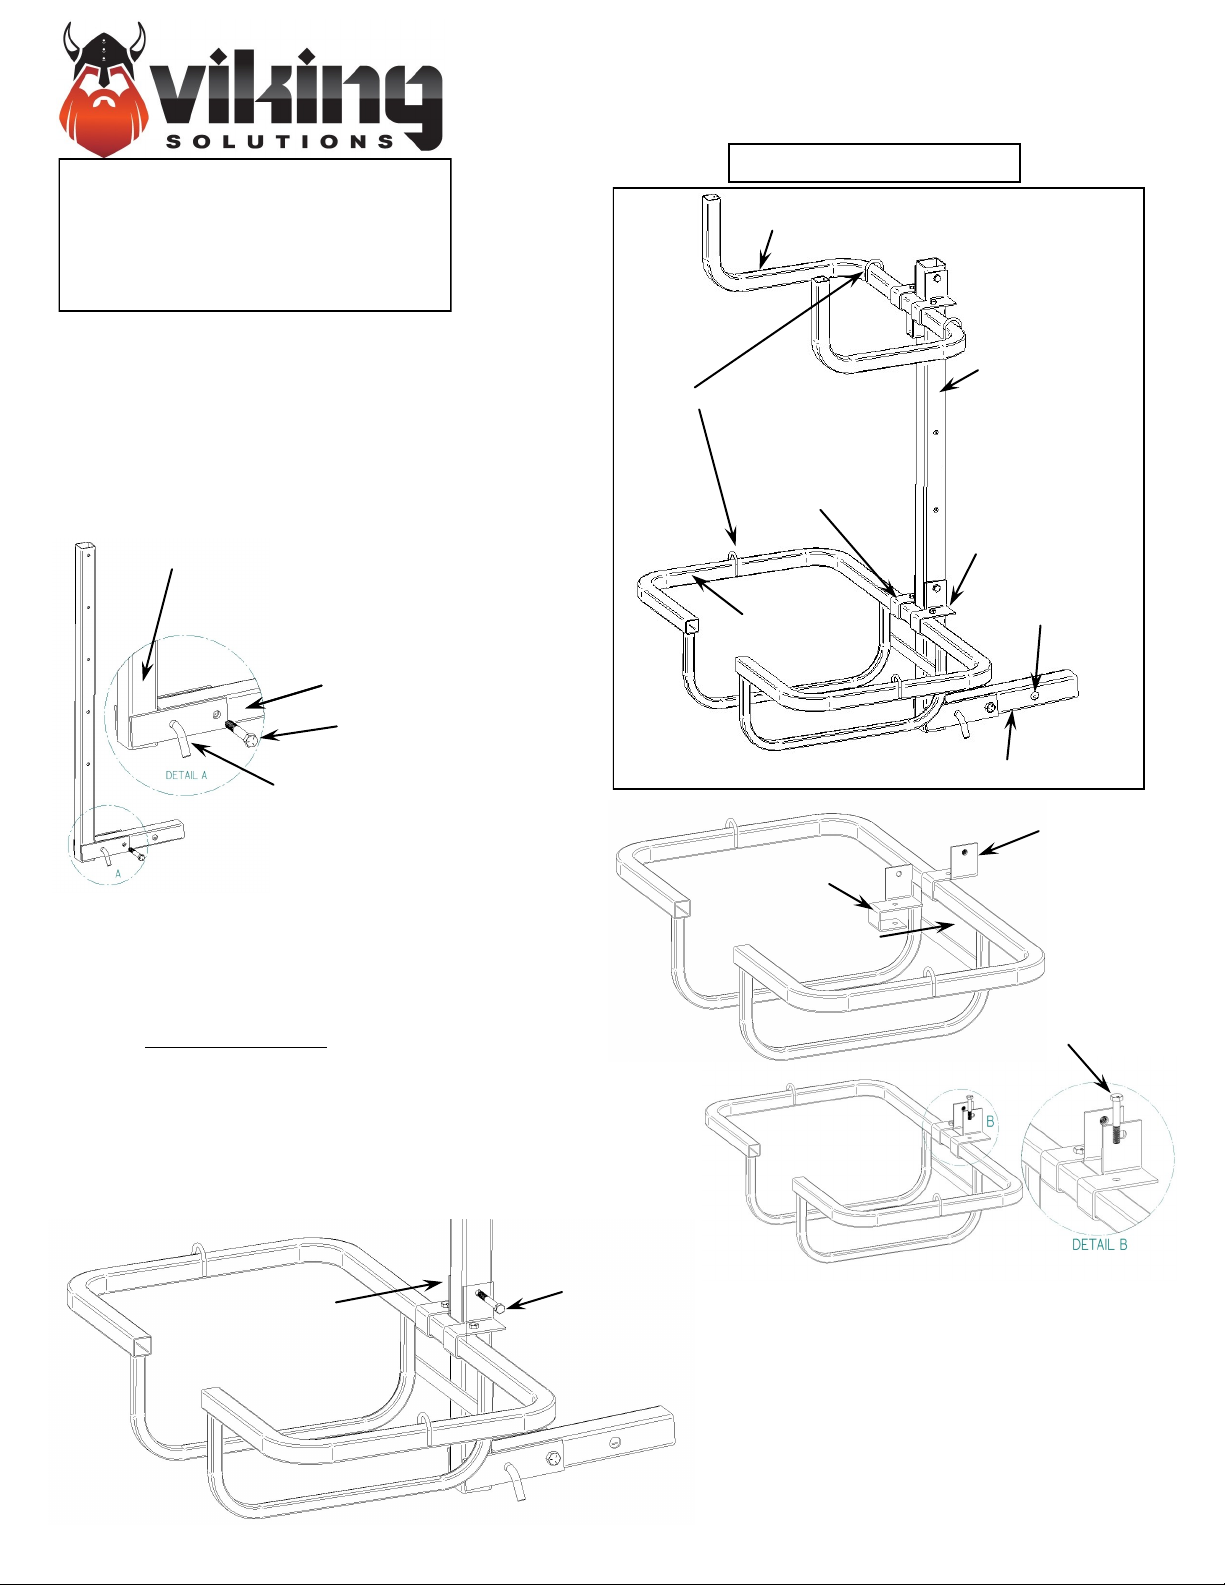
Step 1: Attaching Column Tube to the Receiver Tube
The Column Tube is attached to the Receiver Tube
using one 12mm x 80mm hex bolt, flat washer and
locknut, and the 12mm curved clevis pin. Attach the
Column Tube as shown in figure 1. Tighten the
12mm hex bolt securely, then reverse the nut until
the column tube is free to rotate.
Column Tube
12mm Washer and
Locknut this side
Receiver Tube
12mm x 80mm Hex Bolt
Stack-Rack Parts Overview
General Purpose
Rack
Column Tube
Tie-Down Rings
Port Mounting
Bracket (2)
Starboard Mounting
Bracket (2)
Receiver Clevis
Pin Hole
Cooler Rack
12mm Clevis Pin & Cotter Pin
Figure 1
Step 2: Rack Assembly
Position the port and starboard brackets onto the center of
the cooler rack rear tube as shown in figure 2. Attach the
brackets using two 8mm x 55mm hex bolts, washers and
locknuts. Finger tighten only. Attach this assembly to the
column tube at the desired position and secure using one
10mm x 70mm hex bolt, washer and locknut as shown in
Figure 3. Tighten securely, then reverse the nut until the
brackets rotate freely on the column tube. Now securely
tighten the two 8mm x 55mm bracket bolts.
10mm x 70mm
10mm Washer and
Locknut this side
Hex Bolt
Figure 3
Receiver Tube
Port Bracket
Starboard Bracket
8mm x 55 mm
Hex Bolt
Figure 2
Step 3: Repeat Step 2 for the general
purpose rack. Position the general purpose
rack at the desired location on the column
tube and secure using the same procedure in
Step 2.
Page 2
Instructions for using the Viking Stack-Rack
Failure to read and follow all instructions may result in property damage, serious
injury or death.
Never exceed the total maximum load capacity of 300 Lbs. (150 lbs. maximum each frame).
Use appropriate tie-down straps to secure the load and always assure the load is balanced on the rack system.
Always use caution to avoid pinch points during assembly, loading or use of the rack system.
Never allow any cargo to extend beyond 36 inches from the tail lights of the vehicle.
Never begin transporting any object until you are certain it is secured to the cargo frame(s).
Never use for transportation of pets or live animals.
Never load an object that is not fully contained within the rack frame(s).
Always use additional caution during reverse operation of the vehicle.
Always inspect for damage during storage, missing parts, etc. before each use.
Store the Stack-Rack appropriately when not in use to provide years of trouble-free use.
Set-up and Operation of the Stack-Rack
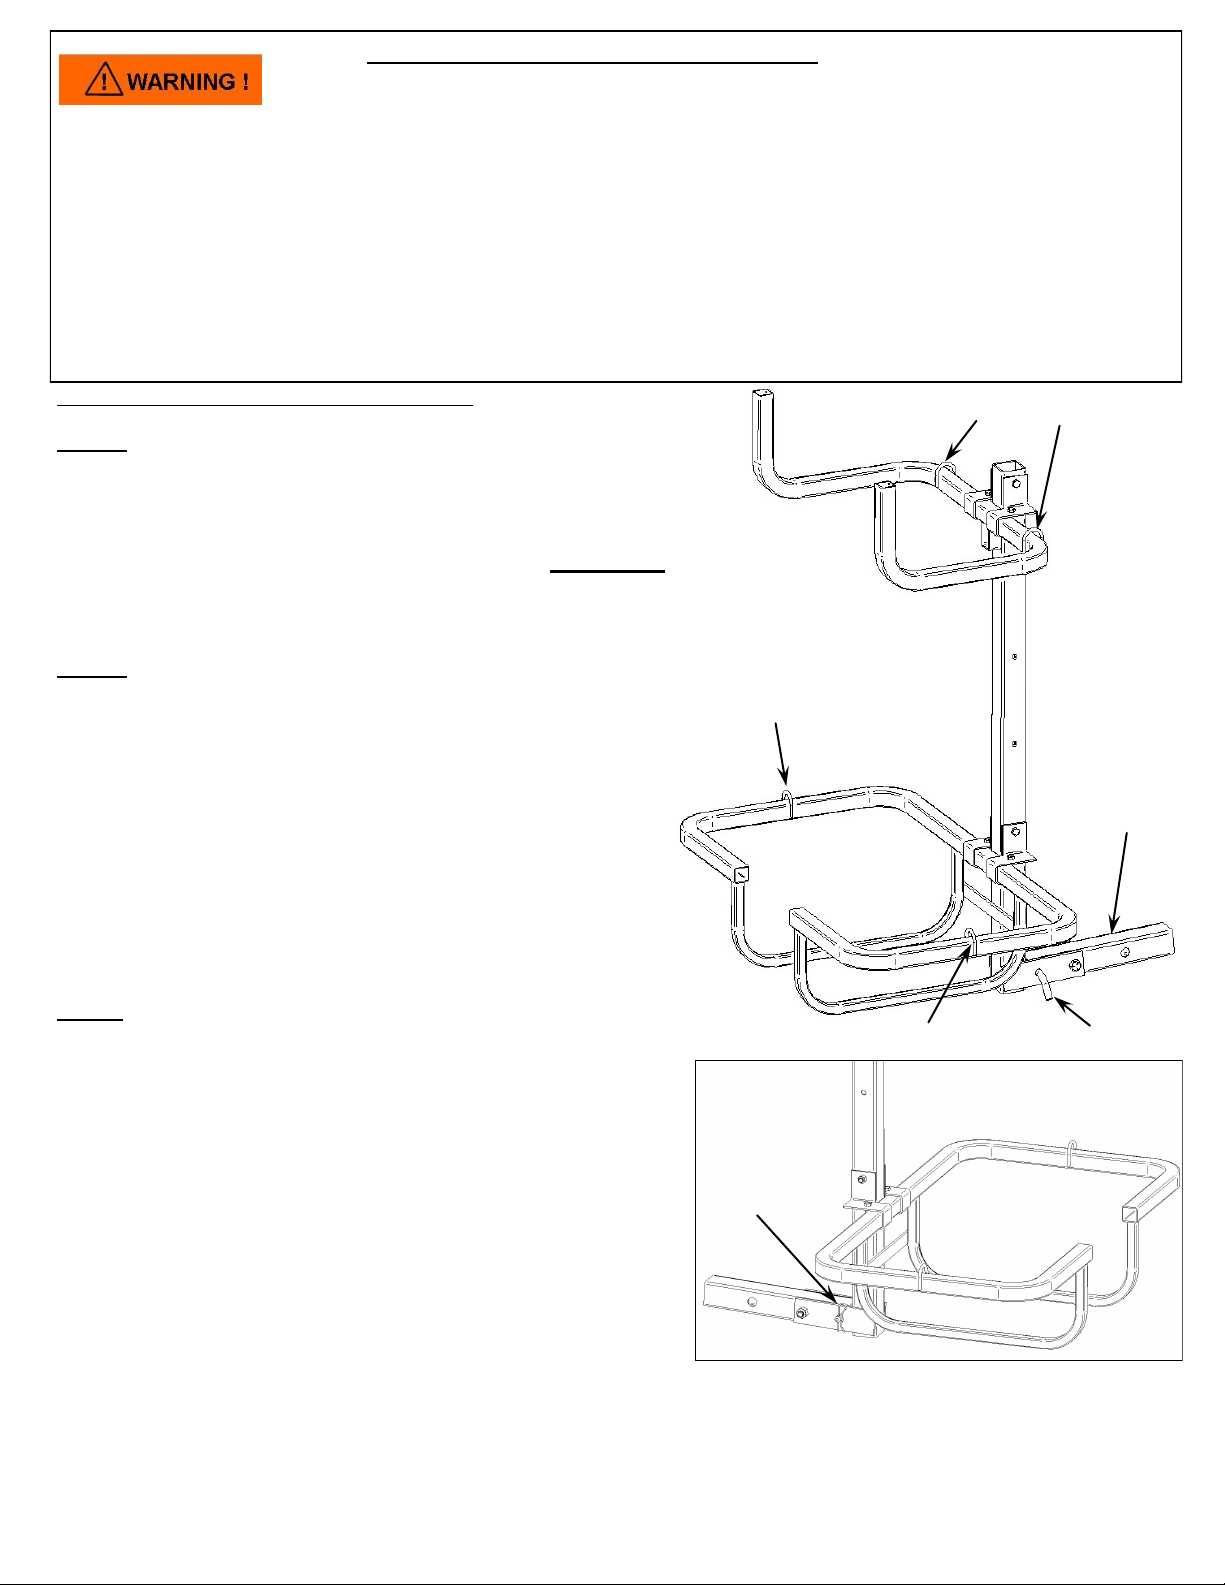
Step 1: Insert the receiver tube into a 2” Class III or Class IV
receiver hitch (300 Lb. minimum tongue weight capacity)
making sure to align the clevis pin hole with the mating hole
on the receiver hitch. Secure with an appropriate locking
clevis pin and cotter pin (not included). Important: Do not use
the Stack-Rack before securing the receiver tube into the
receiver with a locking pin.
Step 2: You may place a cooler, storage trunk, tool box, etc.
in the cooler rack assembly. Always be sure the size of the
item is appropriately secured by the frame size. Do not use
for cargo transport if your item is not secured within the frame
assembly. Next, use an appropriately rated tie-down or
ratchet strap to restrain the cargo from movement during
transportation. The same applies to the general purpose rack
for transporting items like step-ladders, tailgate canopies,
tents, camping gear (bag chairs, sleeping cots) etc. As
before, always bind the items securely to the frame
assemblies.
Tie-Down Ring
Tie-down Ring
Figure 4
Receiver Tube
Step 3: Folding access to the cargo/truck bed area
Tie-Down Ring
Curved Clevis Pin
If you need to lower the Stack-Rack to gain access to the
cargo area of a SUV or the bed of a pickup, it is necessary to
pivot the Stack-Rack away from the vehicle. This is conveniently done by first removing the re-usable cotter pin from the
curved clevis pin. Next, push the column tube toward the vehicle to remove the load on the clevis pin, and remove the
clevis pin while securely holding the top of the column tube.
Re-usable Cotter
pin
The column tube may be rotated slowly away from the vehicle
until the lower frame is supported on the ground. Reverse
this procedure to re-install the clevis pin and re-usable cotter
pin. Always verify the pin is secure before proceeding with the
vehicle.
If there are any questions concerning the assembly and/or operation of the Stack-Rack, please call
or email immediately for assistance.
©2015 Viking Solutions, LLC 919 Church St. NE Decatur, AL 35601
WWW.VIKINGSL.COM email: [email protected] Phone 256-686-3268
 Loading...