

Page 1
Viking Use & Care Manual
Viking Range Corporation
111 Front Street
Greenwood, Mississippi 38930 USA
(662) 455-1200
For product information
call 1-888-VIKING1 (845-4641)
or visit the Viking Web Site at
vikingrange.com
F20366B
Built-In Electric
Touch Control Ovens
(102407J)
Page 2
Congratulations
WARNING
WARNING
WARNING
WARNING
WARNING
WARNING
Your purchase of this product attests to the importance you
place upon the quality and performance of the major
appliances you use. With minimal care, as outlined in this
guide, this product is designed to provide you with years of
dependable service. Please take the few minutes necessary to
learn the proper and efficient use and care of this quality
product.
Warnings
Ifthe informationinthis manualis not followedexactly, a fire or
explosionmay resultcausing propertydamage,personalinjury
or death.
Some key features of this appliance include:
• 14 different cooking modes to make even your most
challenging baking projects a success.
• Split baking and broiling elements, reducing your
preheating time and heating your food more evenly.
• An extra-large reversing fan, allowing you to cook even
large quantities of food more quickly and evenly.
• Four convection modes, offering greater air circulation to
shorten cooking times and cook foods more evenly.
• Dual broiling elements, producing intense radiant heat for
faster broiling and a larger coverage area.
• Three broiling modes, including a special low-broil mode for
delicate broiling and top-browning.
• A profiled, hidden bake element for easier cleaning.
• Six adjustable rack positions with the largest usable baking
space available in this class.
Your complete satisfaction is our ultimate goal. If you have
any questions or comments about this product, please
contact the dealer from whom you purchased this product, or
contact our consumer support center at 1-888-VIKING1.
We appreciate your choosing a Viking® Range Corporation
product and hope that you will again select our products for
your other major appliance needs. For more information
about the complete selection of Viking products, contact your
dealer or go to www.vikingrange.com.
NEVER use this appliance as a space heater to heat or warm
the room. Doing so may result in carbon monoxide poisoning
and overheating of the oven.
Do not use commercial oven cleaners inside the oven. Use of
these cleaners can produce hazardous fumes or can damage
the porcelain finishes.
NEVER cover any slots, holes or passages in the oven bottom
or cover an entire rack with materials such as aluminum foil.
Doing so blocks air flow through the oven and may cause
carbon monoxide poisoning. Aluminum foil linings may also
trap heat, causing a fire hazard.
To avoid sickness and food waste when using automatic time
baking:
• Do not use foods that will spoil while waiting for cooking to
start, suchas disheswithmilk or eggs,cream soups, custards,
fish,pork, poultry, or foods with stuffing.
• Any food that has to wait for cooking to start should be very
cold or frozen before it is placed in the oven.
• Do not use foods containing baking powder or yeast when
automatic time baking.They will not rise properly.
• Do not allow food to remain in the oven for more than two
hours after the end of the cooking cycle.
To avoid sickness and food waste,do not allowdefrosted food
to remain in the oven for more than two hours.
2
3
Page 3

Table of Contents Table of Contents
Getting Started
Important Safety Instrutions ________________________6
Product Controls
Oven Control Panel________________________________8
Built-In Electric Oven Features______________________10
Touch Pad Functions_______________________________11
Programming Modes
Clocksand Timers
SettingtheClock _____________________________16
SettingtheTimer _____________________________17
Cook Time andStopTime ____________________18
Oven Settings
Brightness____________________________________20
DegreeFormat (Fahrenheit or Celsius) _________20
Tones ________________________________________21
Tone Volume _________________________________23
Timeouts ____________________________________23
Clock Format(12-houror 24-hour) _____________24
SabbathMode _______________________________25
Cooking Tips
Rack Positions ______________________________________39
PanPlacement Tips_________________________________40
BakingTips ________________________________________40
Multiple Rack Baking _______________________________41
Conventional BakingChart __________________________42
ConvectionBaking Chart____________________________43
SolvingBaking Problems____________________________44
Broiling Tips________________________________________45
Broiling Chart ______________________________________46
Roasting Tips_______________________________________47
Conventional Roasting Chart ________________________48
ConvectionRoastingChart __________________________49
Product Care
Cleaning andMaintenance__________________________50
Self-CleanCycle _______________________________53
Replacing Light_____________________________________54
Trouble Shooting ___________________________________55
Error Handling______________________________________55
ServiceInformation _________________________________56
Warranty ___________________________________________57
Showroom Mode __________________________________25
Lock andUnlock ______________________________26
Interior Oven Lights___________________________26
RecipeFunction ___________________________________27
Warming Modes __________________________________29
Bake Modes ______________________________________30
Broil Modes ______________________________________33
Roast Modes______________________________________35
Meat Probe _______________________________________37
4 5
Page 4

Getting Started
Important Safety Instructions
• Use this appliance only for its intended use as described in
this manual. Never use your appliance for warming or
Getting Started
heating the room. This is based on safety considerations.
• Your unit should be installed by a qualified technician. The
appliance must be installed and electrically grounded
according to local codes.
• Do not attempt to repair or replace any part of this
appliance unless specifically recommended in this manual.
All servicing should be referred to a qualified technician.
Warranty service must be performed by an authorized
service agency.
• Children should not be left alone in the kitchen while the
oven is in use.
CAUTION: Do not store items of interest to children over
the unit. Children climbing to reach items could be seriously
injured.
• GREASE - Grease is flammable and should be handled
carefully. Do not use water on grease fires. Flaming grease
can be extinguished with baking soda or, if available, a
multipurpose dry chemical or foam-type extinguisher. Let fat
cool before attempting to handle it. Do not allow grease to
collect around the oven or in vents. Wipe up spillovers
immediately.
• Loose-fitting or hanging garments should never be worn
while using the appliance. Do not drape towels or materials
on oven door handles. These items could ignite and cause
burns.
• Use only dry potholders. Moist or damp potholders on
hot surfaces may result in burns from steam. Do not let
potholder touch hot surface areas. Do not use a towel or
other bulky cloth.
• Keep area clean and free from combustible materials,
gasoline, and other flammable liquids. Never use your oven
as a storage space. Combustible items (paper, plastic, etc.)
may ignite, and metallic items may become hot and cause
burns.
Important Safety Instructions
• Do not heat unopened food containers; build-up of pressure
may cause the container to explode and result in injury.
• Always position oven racks in desired location while oven is
cool. If rack must be moved while oven is hot, do not let
potholder contact hot heating element in oven.
• Use care when opening oven door. Let hot air or steam
escape before removing or replacing food. Hot air or steam
can cause burns to hands, face and/or eyes.
• Keep oven vents unobstructed. The oven vent is located at
the front of the oven and vents into the room.
• Do not clean door gasket. It is essential for a good tight
seal. Care should be taken not to rub, damage, or move
the gasket.
• No commercial oven cleaner or oven liner protective
coating such as aluminum foil should be used in or around
any part of the oven. Improper oven liners may result in a
risk of electric shock or fire. Keep oven free from grease
buildup.
• Before self-cleaning the oven, remove broiler pan, broiler
grid, oven racks, and other utensils. Do not use your oven
to clean other parts. A fan noise should be heard during
the cleaning cycle. If not, call service before self-cleaning
again.
• DO NOT TOUCH HEATING ELEMENTS OR INTERIOR
SURFACES OF OVEN. Heating elements may be hot even
though they are dark in color. Interior surfaces of an oven
become hot enough to cause burns. During and after use,
do not touch or let clothing or other flammable materials
contact heating elements or interior surfaces of oven until
they have had sufficient time to cool. Other surfaces of the
oven may become hot enough to cause burns, such as the
oven vent opening, the surface near the vent opening, and
the oven door window.
6 7
Page 5
Oven Control Panel
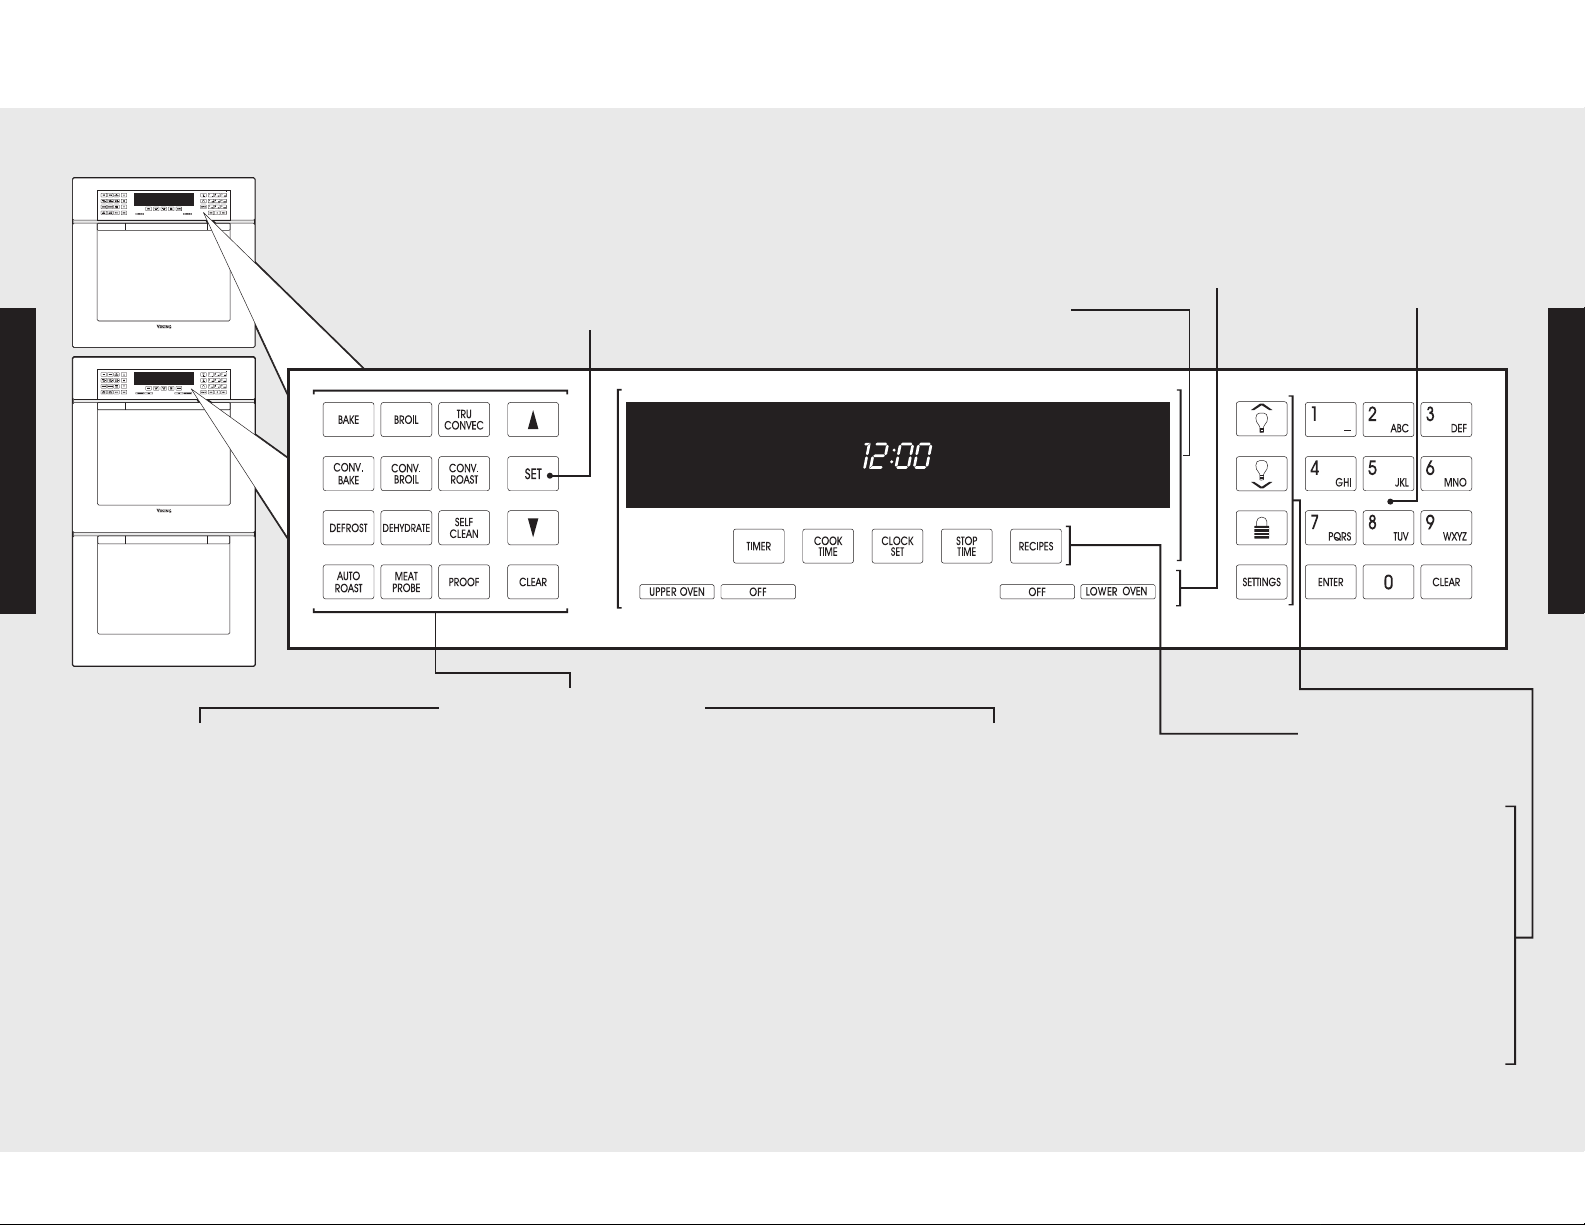
Oven Control Panel
Product Controls
Bake
Conventional, single-rack baking
(breads, cakes, cookies, pastry,pies,
entrees, vegetables)
Convection Bake
Multi-rackbaking for heavieror frozen
foods (e.g.,frozenpies, pizzas,entrees,
vegetables)
Defrost
Naturaldefrostingof food usingfan
withoutheat
Auto Roast*
Automatic searing of the outside of
meats;simplifies roasting
Oven Function and
Temperature Controls
Each ovenfunction hasa separatesetting.
(See descriptions)
TheSET controlup anddownarrows can be
used to set anytemperaturefrom
150° F (65.6° C) to 550° F (287.8° C).
Oven Selector Options
Broil
Three conventionalbroil settings for cuts of
flat pieces of meator meat 1-2 inchesthick
Convection Broil
Fasterthanregularbroiling with lesssmoke
generationfor thicker meats
Dehydrate
Using the convectionfan over a
periodof time, water is removed
from food by evaporation
Meat Probe*
Automatically turnsthe oven off when the
internal temperature of the meat being
roasted is reached
Electronic Timing Center
TheElectronicTiming Center is
used to program and control all
timingfunctions.
IMPORTANT–The time-of-day
must be set beforeany other
program canbe used.
TruConvec
Multi-rackbaking for breads, cakes,
cookies(upto 6 racks of cookies at
once)
TM
Convection Roast
Roasting whole turkeys, wholechickens,
hams, etc.
Self-Clean
A self-cleaningcycleusing high heat to
burnoffsoils anddeposits
Proof*
Creates an optimal environment for the
risingof yeast in manykindsof dough
*Note: Premieremodelcontrol paneland featuresare shown.
Oven Selector
Controls
TheOvenSelector Controls
areused to turn theupper or
lower oven on and off.
Accesses, programs, andsaves cooking
cyclesfromfavorite recipes
Oven Light Controls
Controls the interior lights in theupper
andlower ovens
Oven Lock
Childproofingfeaturepreventingthe
controls from beingactivated when the
oven is not in use
Accesses customfeatures suchas display
brightness, Sabbath/Showroom modes,
Electronic Keypad
Entry
TheElectronicKeypad
Entry is usedto program
andcontrolalloven
functions.
Product Controls
Recipes*
Settings
andtones
98
Page 6
Built-In Electric Oven Features
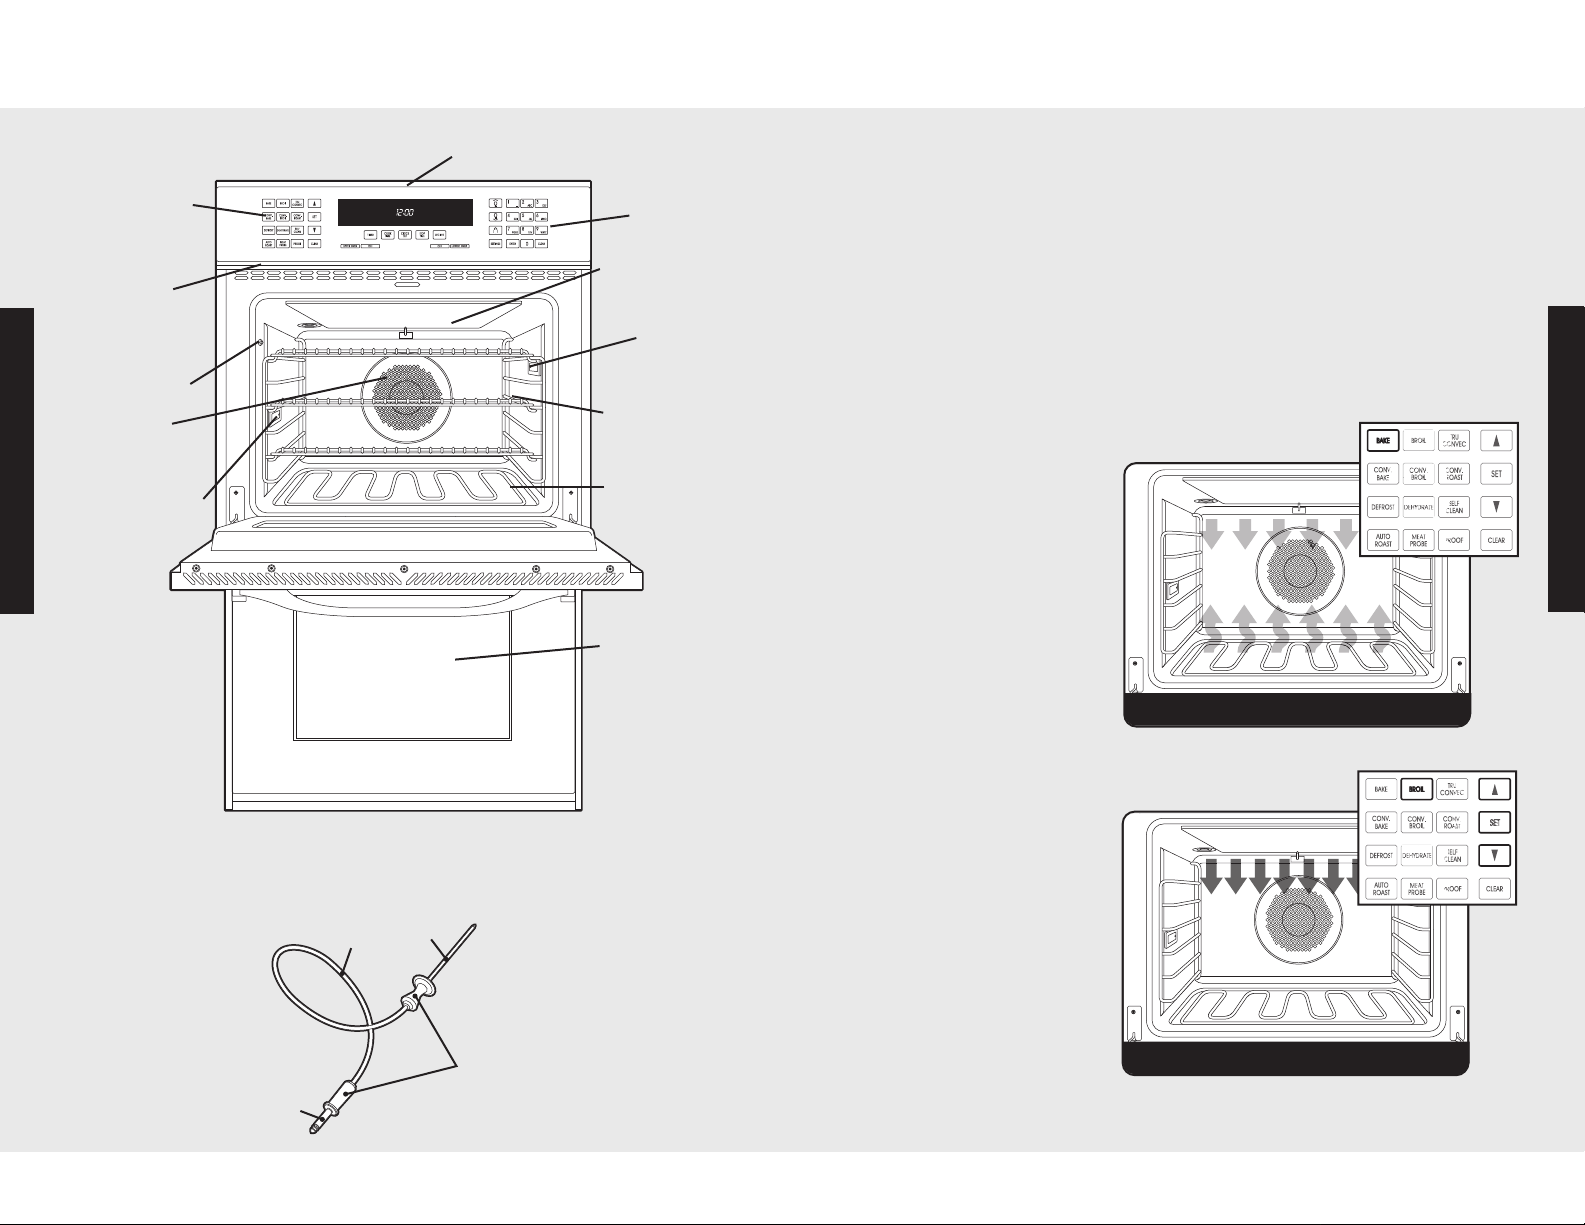
Bake
Broil
Plug
Cable
Probe
Handles
Touch Pad Functions
Oven Function
and Temperature
Controls
Model/Serial
Number Plate
(under control
panel)
Meat Probe Jack
TruConvec™
Element
(behind baffle)
Interior Oven Light
Product Controls
Oven Control Panel
Electronic Key
Pad Entry
Broil Element
Interior
Oven Light
Oven Racks
(3/upper oven;
3/lower oven)
Bake Element
Lower Oven
Temperature Control
Both ovens share the temperature control.To use this feature, selectthe
upper or lower oven, andthenset the desired temperature.Thecontrols
canbe setat any temperature from 150° F (65.6° C) to 550° F (287.8° C).
Electronic Keypad Entry
Both ovens share the electronic keypadentry. Thealphanumeric keys can
be used to programandcontrolall oven functions.
Oven Function SelectorControl
Both ovens offer 14 separate cookingmodes from which you canchoose
theone that bestmeets yourcookingneeds.
Bake
When using this function,
full-powerheatis radiated
from thebakeelementin
thebottom of the oven
cavity, whilesupplemental
heat is radiated fromthe
broil element.Thisfunction
is recommendedfor singlerack baking.Use this setting
forbaking,roasting, and
casseroles.
Product Controls
Premiere Designerdouble oven is shown above.
Meat Probe (available on Premieremodels)
10
Broil
This function is a dry-heat
cookingmethod,using
director radiant heat on
three different settings:low,
mediumand high.The
distance betweenthe
foods and thebroil
elements determines
broiling speed. This
function is recommended
forsmall, individualized
cuts, such as steaks, chops,
andpatties.
11
Page 7
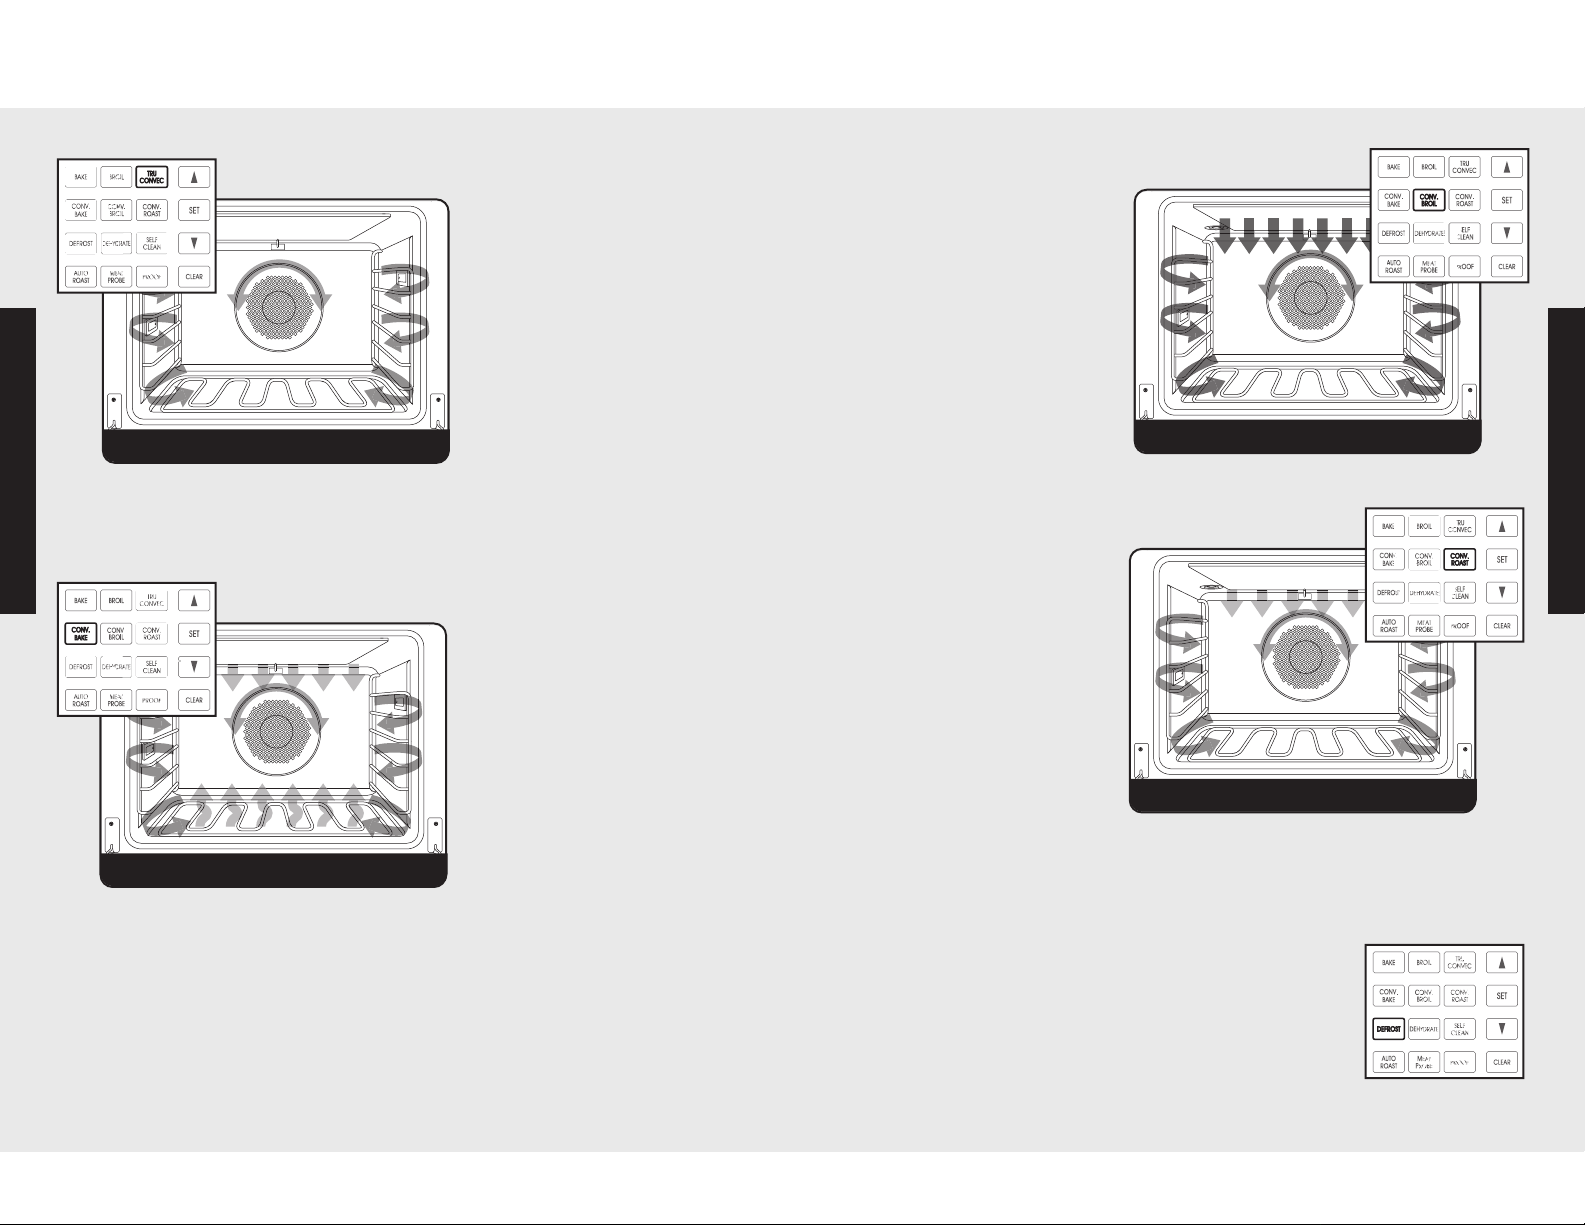
Touch Pad Functions Touch Pad Functions
TruConvec
T
M
convection bake
convection broil
convection roast
Convection Broil
Using this function,the top
TruConvec™
Withthisfunction, onlythe rear
element operates at full power.
Thereis nodirect heatfromthe
bottom or top elements, and
themotorized fan in the rear of
the oven circulates for even
heating. Use this setting for
foods that require gentle
cooking, such as pastries,
soufflés, yeast breads, quick
breads, and cakes. This setting
produces breads, cookies, and
other baked goods with an even texture and golden crusts. No special
Product Controls
bakeware is required. Use this function for single-rack baking, multiple-rack
baking, roasting, and preparation of complete meals. This setting is also
recommended when preparing large quantitiesof baked goods at one time.
Convection Bake
With this function, the bottom
element operates at full power,
and the top broil element
operates at supplemental
power.Themotorized faninthe
rear of the oven circulates
heated air, providing a more
even heat distribution. This
even circulation of air equalizes
the temperature throughout
the oven cavity and eliminates
thehotandcoldspots found in
conventional ovens. A major benefit of convection baking is the ability to
prepare foodin larger quantities usingmultipleracks. Whenroasting usingthis
setting, coolairis quickly replaced, searing meats on theoutside andretaining
more juices and natural flavor on the inside with less shrinkage. With this
heating method, foods can be baked and roasted at the same time with
minimaltaste transfer, even when different dishes are involved, such as cakes,
fish, or meat. Thehot air systemis especiallyeconomical whenthawing frozen
food. Use this settingfor baking androasting.
elementoperates at full
power. This functionis
exactlythesameas regular
broiling with the additional
benefitof air circulation by
themotorized fanin the
rear of the oven.Smoke is
reduced since theairflow
also reduces peak
temperatures on the food.
Usethissettingfor broiling
thick cuts of meat.
Convection Roast
Withthisfunction, the
convectionelementrunsin
conjunction withtheinner
andouter broil elements.
Thereversibleconvection
fanrunsat a higherspeed
in each direction, allowing
themoisture to be sealed
insidelarge cuts of meat,
such as roasts. This saves
time whencompared with
singlefan convection roast
modes.Use this setting for
whole turkeys, whole
chickens, and roasts.
NOTE: Because this function uses a high-speed convection fan for
optimum cooking performance, some noise may be noticed from this
high fan speed. This is normal.
Defrost
Withthe temperaturecontroloff, a motorized fan in the
rear of the oven circulates air. This fanacceleratesnatural
defrostingof the food withoutheat.
NOTE: To avoid sickness and food waste, do not allow
defrosted food to remain in the oven for more than
two hours.
Product Controls
12
13
Page 8
Touch Pad Functions
Touch Pad Functions
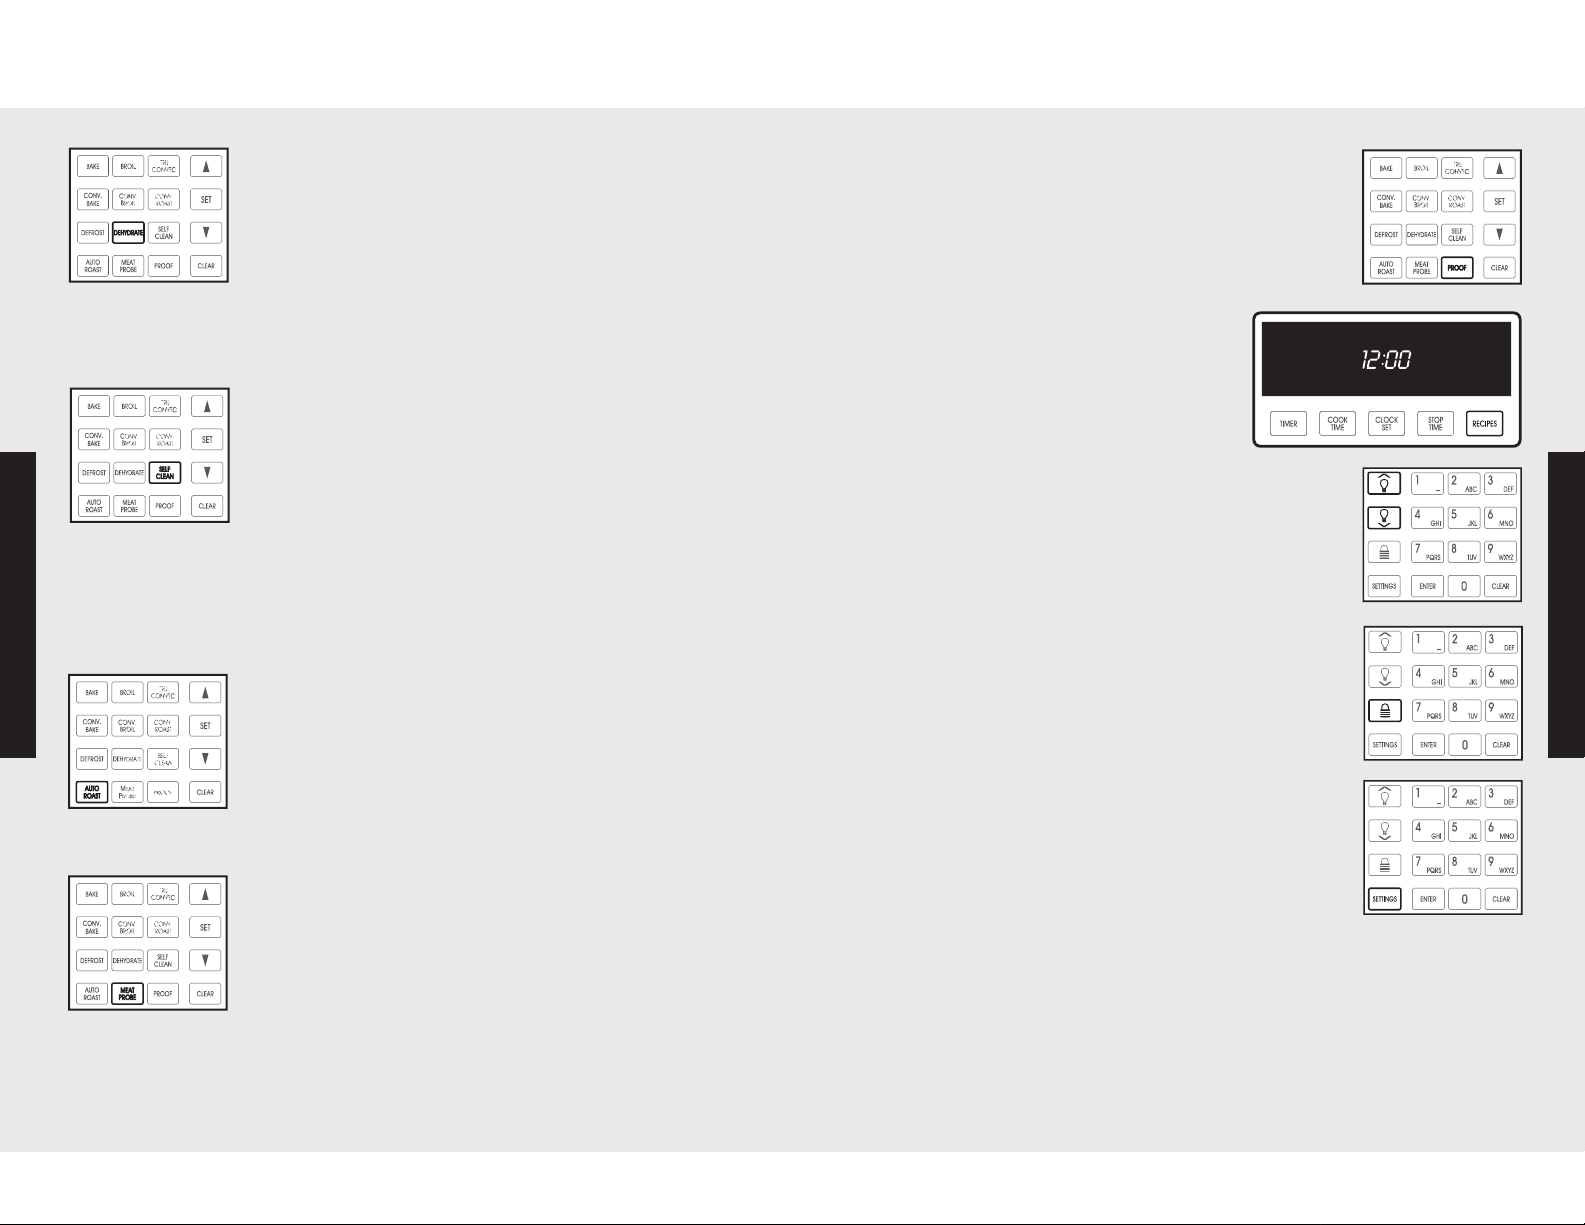
Dehydrate
Withthisfunction, a motorizedfan in therearof the oven
circulateswarmair. Over a period of time,the wateris
removed from thefoodby evaporation. Removal of water
inhibits growthof microorganisms and retards the activity
of enzymes.It is importantto rememberthatdehydration
does notimprovequality;onlyfresh,top-qualityfoods
shouldbe dehydratedin your oven.
Proof*
This function usesa lowtemperatureto create an optimal
environment forthe yeastto rise in manytypes of dough.
Recipes*
This settingaccesses, programs,and saves
cookingcycles fromfavoriterecipes.
Self-Clean
Theself-cleaning cycleis designed to eliminatetheneed
forscrubbing andscouring foodbaked onto theoven
interior. During thiscycle, the oven uses high
temperatures to burnoffsoilsanddeposits. An integral
smoke eliminator reduces odors associatedwiththe soil
burn-off. A powder ashresidueis left in the bottomof the
oven after completionof the self-cleancycle. When the
oven hascooled, remove any ashfromoven surfaces with
a damp sponge or cloth.
Interior Oven Light Controls
Theupper andlower ovens have interior ovenlights
controlledby the right touchpad.Pushthe lightbutton to
turntheinteriorovenlights on and off.
Product Controls
Oven Lock
Product Controls
Auto Roast*
This function furthersimplifies roastingby automatically
searingtheoutside of meats, raising the pre-set
temperature by 100° F for a shorttimeto sear the outside
of the meat. The temperature then returnsto the pre-set
temperature in the standardconvection roastmode.
Meat Probe*
Theprobe temperature functionis used to automatically
turntheovenoffwhenthe internal temperatureof meat
being cookedis reached.
This child protection function prevents theovencontrols
from being activatedwhentheovenis notin use.
Settings
Usethisfunction to access, program, and customize
specialfeatures of youroven.Specialfeatures include
tones,timeouts, displaybrightness,and the Sabbath
mode.
*Note:The AUTO-ROAST, PROOF, RECIPEand PROBEfunctions are
included on the Premieremodels.
1514
Page 9
Clocks and Timers
Clocks and Timers
Electronic
Timing Center
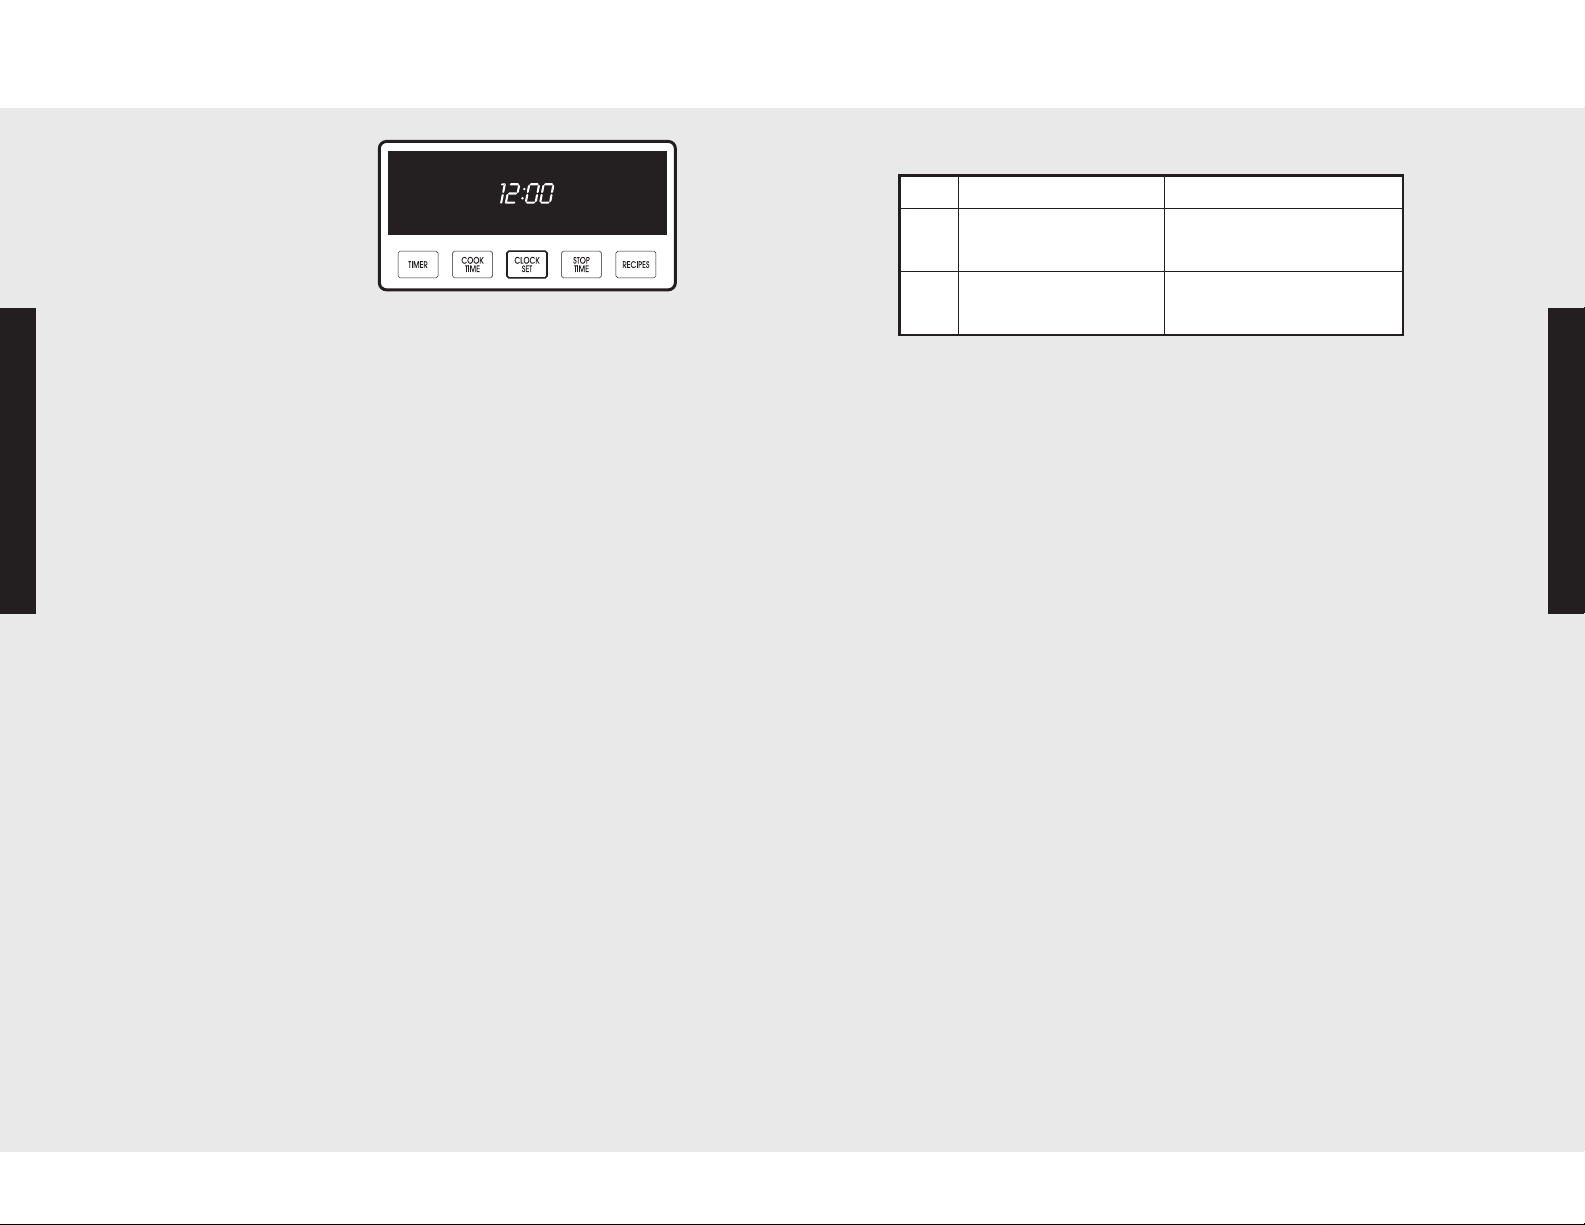
TheElectronicTiming
Centeris used to
program andcontrol
alltiming functionson
your Viking appliance.
It has four displayandprogrammingmodes that areactivated by
thefourpushbuttons. Both the Timer and theCookTime/Stop
Time Modes can be used to timecookingperiods. These
features can even be used at the same time whenbothovens are
in use. For example, youcan time-bake a casserole in theupper
oven using theCookTime/Stop Time Mode,while broiling in the
lower oven usingthe Timer. Oneovencanalsobe cleanedwhile
timingfoodsin the other oven usingthe timer.
3. Use the up and down arrowsto change the current time.
Press and Release Press and Hold
Time increases by one
s
minute
Time decreases by one
t
minute
4. Press the“SET”button on thetemperaturecontrolor the
“CLOCKSET”button on the electronic timingcenter. The
clock is now set.
Note: The time-of-day cannot be changed while there is a
Bake Hours or Start Time cycle programmed into the timer.
Time increases by 10
minutes
Time decreases by
10 minutes
Programming Modes
Timer Alarm
Programming Modes
• At the end of a program,the alarmwillconsistof three beeps,
followed by two beeps every10 seconds until the“CLEAR”
buttonis pressed.
• Whenever a valid function key is pressedor when a control
function startsautomatically, one beep willsound.
• When an invalid function key is pressed,twobeeps willsound.
Setting the Clock
Thetime-of-daymustbe set beforeany otherprogramcanbe
used. When yourovenis first connectedto the power in your
home, the timer display will show12:00.
To Program the Time-Of-Day:
1. Presseither the “UPPEROVEN”or “LOWEROVEN” button.
2. Pressthe“CLOCK SET” button. Theclock will begin to flash.
Theword “CLOCK”willbe liton the display.
3. Type in thecorrecttimeon theelectronicnumber keypad.
4. Pressthe“CLOCK SET” button again. The clock is now set.
Setting the Timer
Thetimer is designed for accurate timing andis ideal for baking
delicate items such as biscuits, cookies, andpopovers, andfor
precise broiling. The timercan be usedfor timing up to 12 hours.
When settingthe timer, the time displayedwill decrease in 1
minuteincrements.Whenthetimercounts downto 1 minute,the
timer alarm will give one shortbeepand the display willchange
to seconds.Whenthe timerreaches0:00, thealarmwill giveone
long beep.
To Set the Timer:
1. Press the“TIMER” button. The timer will display “0:00”and
theword “TIMER.”
2. Typein thedesiredduration timeon the electronicnumber
keypad.
3. The timerwillstart automatically. (To cancel theentry, press the
“CLEAR”button on the leftsideof thecontrolpanel before
thecount down begins and thetimeis stillflashing.)
4. The timer is now set.
Alternate Method:
1. Presseither the “UPPEROVEN” or “LOWER OVEN”button.
2. Press the“CLOCK SET” button.Theclockwill begin to flash.
Theword “CLOCK”willbe liton the display.
16
Alternate Method:
1. Press the“TIMER” button. The timer will display“0:00” and
theword “TIMER”willbe liton the display.
17
Page 10
Clocks and Timers
Clocks and Timers
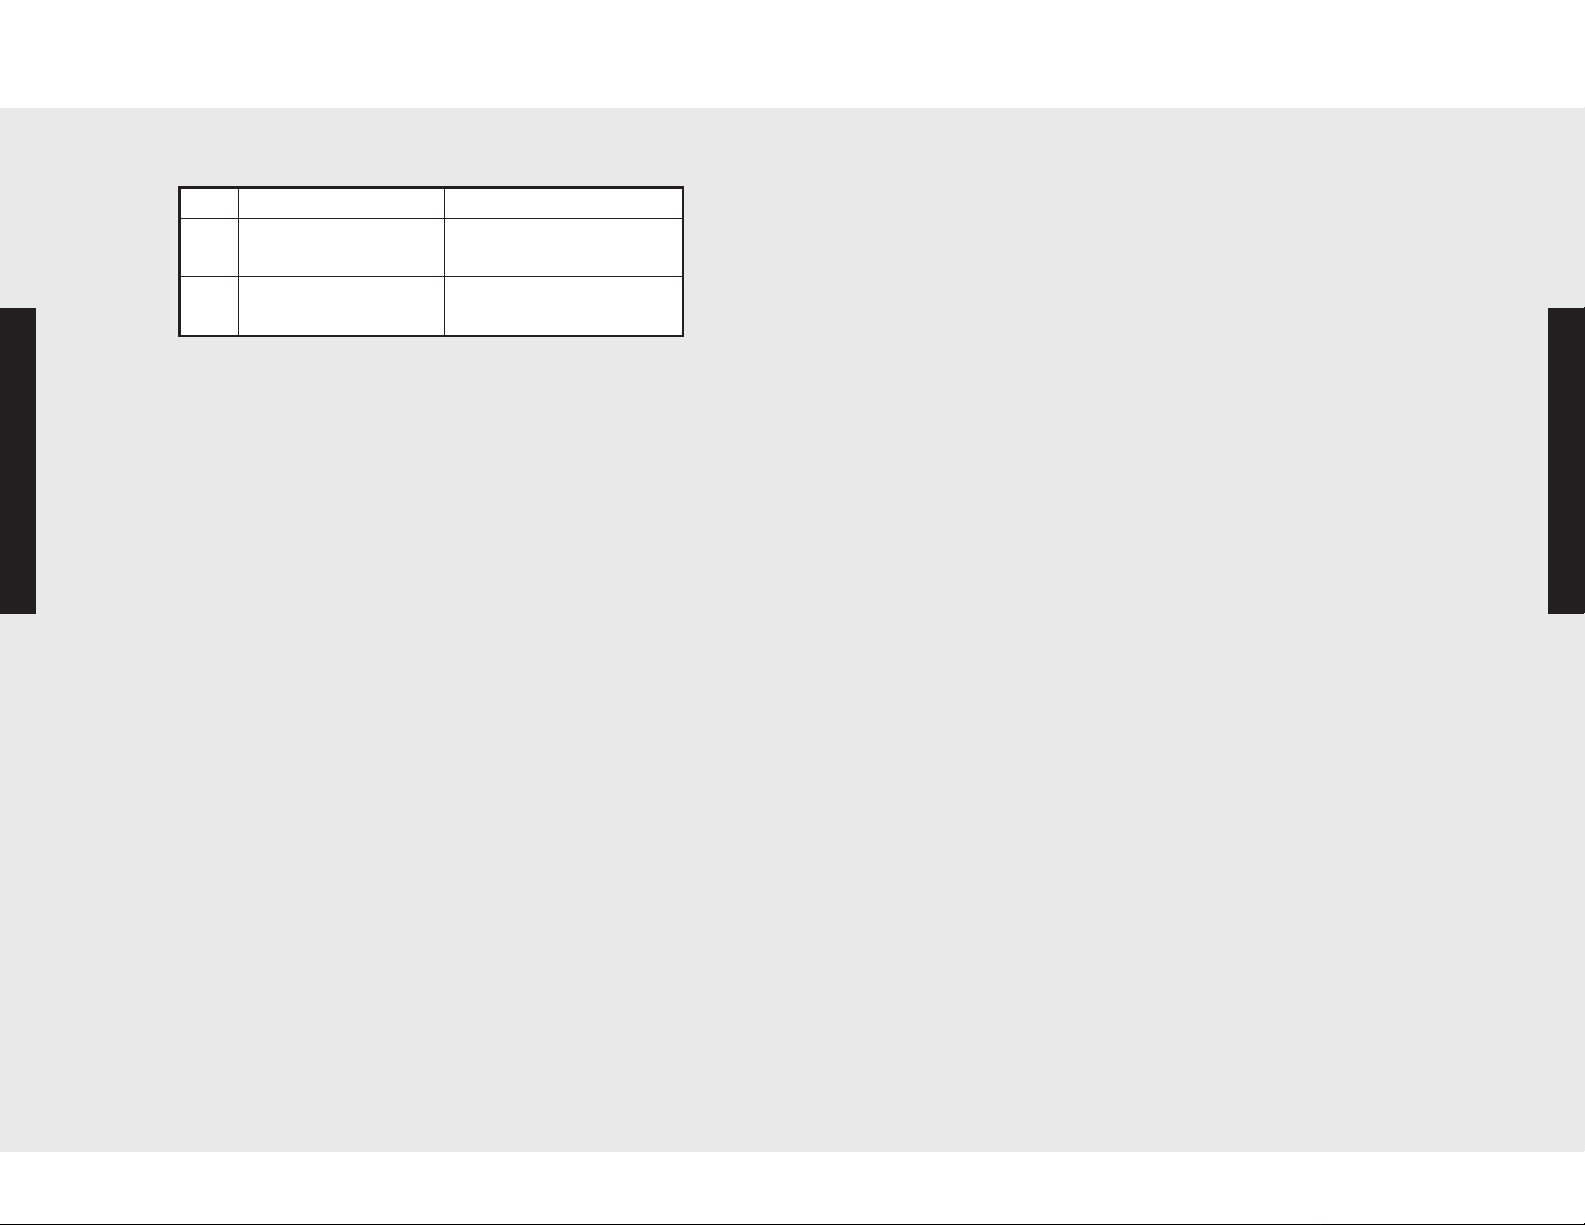
2. Use the up and down arrowsto setthe timer.
Press and Release Press and Hold
Time increases by one
s
minute
Time decreases by one
t
minute
3. Press “SET” or “TIMER” to programthe timer. (To cancel the
entry, press the“CLEAR” button on the left side of the control
panel.)
4. The timeris nowset.
Time increases by 10
minutes
Time decreases by
10 minutes
Cook Time and Stop Time
Withthe Viking oven, you canchoose what times you needto
start and stop cookingyourfood. TheCookTimeandStopTime
Programming Modes
functions allowyou to programyour preferences.
Here’s how it works:
It is 2:00PM and youwould liketo have your dinner ready at 6:00
PM.By programming your oven with a two-hourcooktimeand a
6:00 PM stop time,yourovenwilldelay cookinguntil 3:50 PM.At
3:50, the oven willbegin preheating. At 4:00 PM, the oven will
begin its two-hour cook time.
Cook Timeand Stop Time Facts:
Both ovens canbe set individually forCookTime and StopTime
functions.
To Set Cook Time:
1. Select UPPER OVEN or LOWEROVEN.
2. Select an oven function and temperature before setting Cook
Time andStopTimefunctions.
3. Press“COOK TIME” and the displaywillflash “0:00”and
“COOK TIME”willbe litbelow.
4. Use numerickeyboard to entertheamount of timeneeded for
cooking.
5. Afterthe time is entered, thedisplaywillshow“COOK TIME”
under the timer field.(To cancel theentry, pressthe “CLEAR”
buttonon theleftsideof the controlpanel.)
6. Press “SET” or “ENTER” if the cook time is correct. Cook time
is set.
NOTE: Tocancel cook timeduring itscycle, press“COOK TIME”
andthenpress the “CLEAR” button on the left side of the oven
control. Cooking will continue if the oven is on.
To Set Stop Time:
1. Set Cook Time,following thesteps provided in the previous
section.
2. Press “STOP TIME” and “STOP TIME”willbe liton thedisplay.
3. Use numeric keyboard to enter thetimeyou want to stopfor
cooking.
4. Afterthetimeis entered, the displaywillflash thetime. (To
cancelstoptime, press the “CLEAR”button on the left sideof
thecontrolpanel.)
5.Press “SET” or “STOPTIME” if the stop time is correct. Stop
time is set andwillbegin when the ovenis preheated.
NOTE: Display will show Cook Time and Stop Time. If you
have entered a time incorrectly, you will hear a long beep
and the display will not change.
NOTE: Tocancel stop timeduring itscycle, press“STOP TIME”
andthenpress the “CLEAR”button on the left sideof theoven
control. Cooking will continue if the oven is on.
When StopTime hasbeenreached:
1. Your oven will soundthree beeps, and“HOLD” will appear on
thedisplay.
• The oven willstay at 150º F in holdmodefor two hours.
• Aftertwo hours, theovenwillsound four longbeeps and
shut off.
2. Press “OFF” to turn off the oven manually.
Programming Modes
18
19
Page 11

Oven Settings
Oven Settings
These functionsallow youto customize controlsto suit your
specific tastes.
Brightness
This modeoffersusers theability to decrease or increasethe
intensity of the brightness of the electronic display panel. Users
maychoose between four levelsof brightness: 25%, 50%, 75%,
and100%.
Tocustomize brightnesslevel:
1. Press “SETTINGS.”Settings menuwill appear in display.
2. Press theup or down arrows until“BRIGHTNESS:100%”
appearsin the display. (The% shown is the current
brightnesslevel.)
3. Press “ENTER”to changebrightness level. Currentvalue
will flash.
4. Move up anddownarrows to select desired brightness
level.
5. Press “ENTER”to confirmbrightness level.
6. To exit theSettingsmenu, press “SETTINGS.”
Programming Modes
Degree Format
Theovenhas beenpreset to the Fahrenheit temperaturescale.
Withthisfeature, users can switch to theCelsius temperature
scale.
Tochange degreeformat to Celsius:
1. Press “SETTINGS.”Settings menuwill appear in display.
2. Press theup or down arrows until“DEGREES:
FAHRENHEIT” appears in the display.
3. Press “ENTER”to changedegree format. Current value
will flash.
4. Use arrowkeysto select“CELSIUS.”
5. Press “ENTER”again to set degreeformat.
6. To exit theSettingsmenu, press “SETTINGS.”
Tones
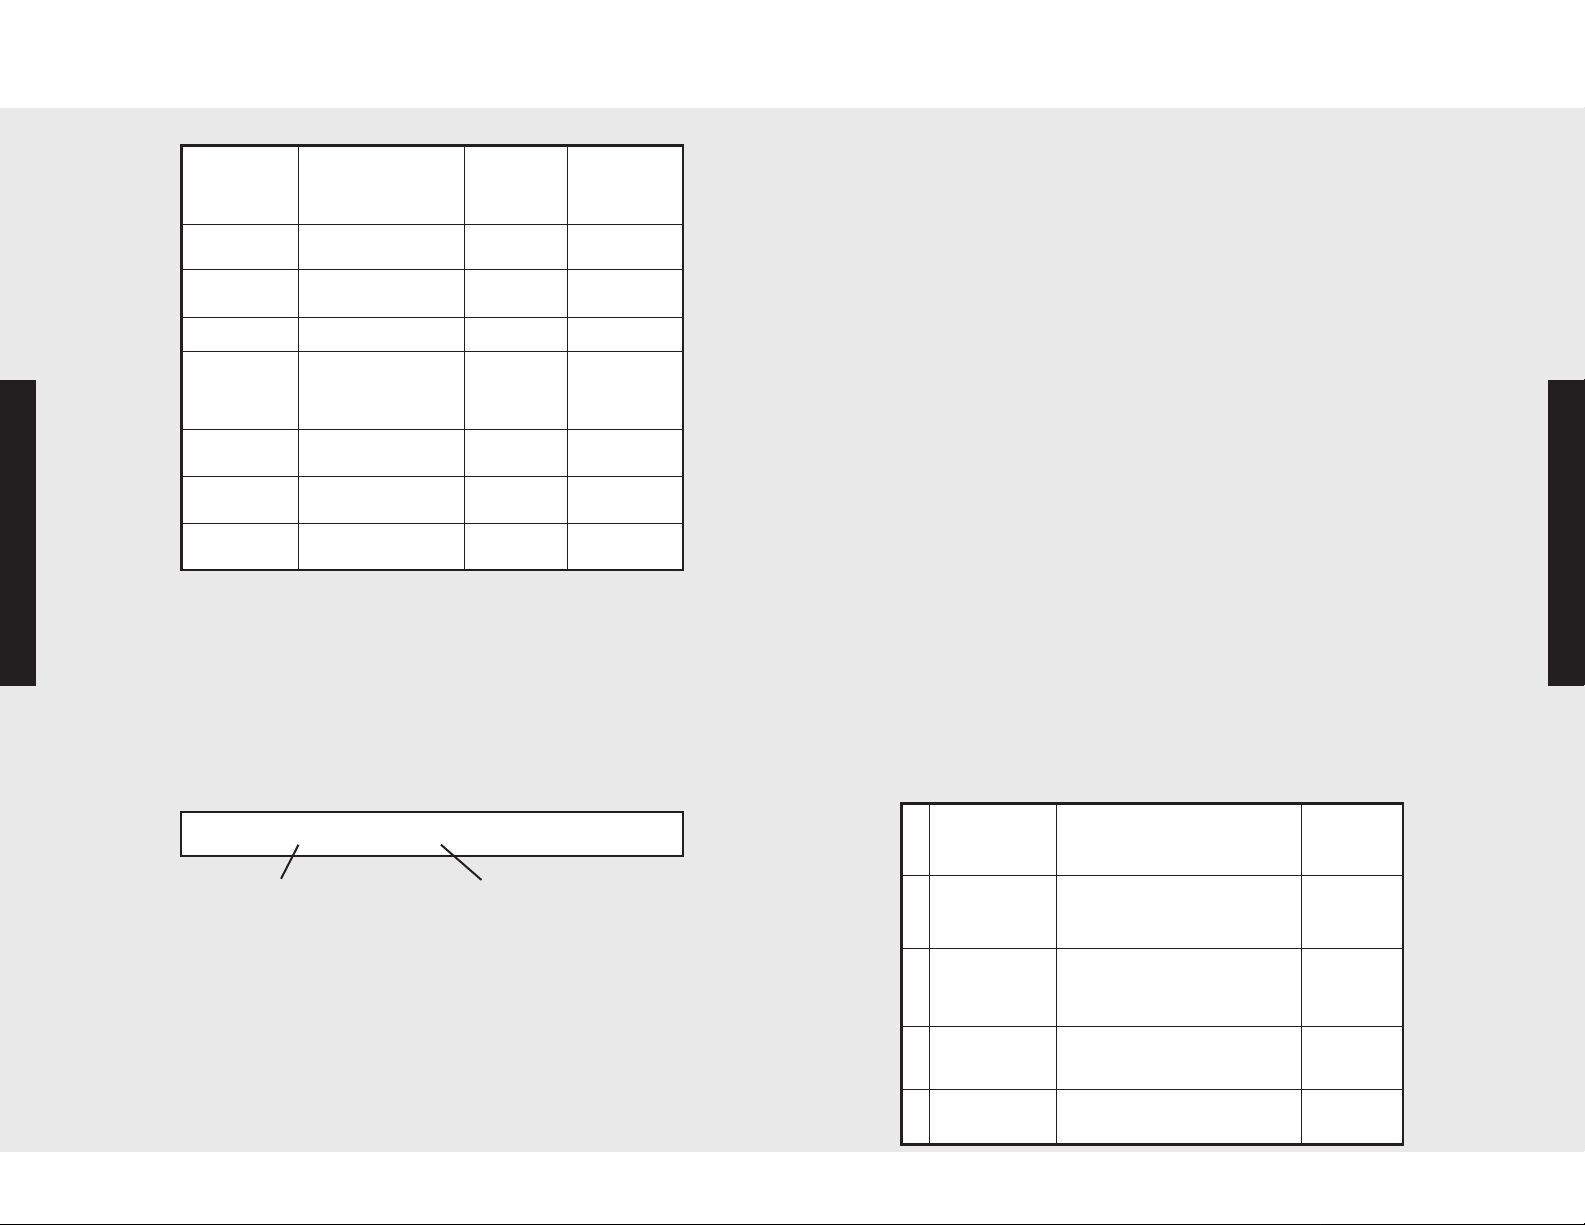
This function allows you to define theduration of tonesand the
numberof tones for differentevents. Your oven is programmed
with differentaudible tonesas demonstratedby thefollowing
chart:
Description
of Tone
1 Minute Left
Autostart
End of Hold
Timer Expired
Failure
Invalid Entry
Periodic
Reminder
Key Press Information Entry 1 0.1
Invalid Key Information Entry 3 0.1
Repeat Key Information Entry 0 0
Used in…
Min/Sec or Cook
Timer
Cooking mode or
timer starts without
pressing Set or
Enter
Cook Time/Stop
Time
Min/Sec or Cook
Timer
RTD error/Latch
error
Error in
programming
After cooking mode
finishes or during
programming to
prompt action by
user
Number
of Tones
1 1
2 0.1
4 1
3 1
5 1
3 0.1
1 0.1
Duration
(measured
in seconds)
Programming Modes
Oven Light
Off
Oven Light
On
Turning light off 2 0.1
Turning light on 1 0.1
2120
Page 12
Oven Settings
Oven Settings
Description
of Tone
Panel is
Locked
Setpoint
Reached
Meat Probe Roasting Modes 3 1
Meat Probe
within 10
degrees
Searing Time
Reached
Start Time
Reached
Panel is
Unlocked
Tochange thefrequency and/or duration of any of the above
Programming Modes
tone signals:
1. Press “SETTINGS.”Settings menu willappear in display.
2. Press theup or down arrows until“TONES…”appearsin the
display.
3. Press “ENTER,” and“RESTOREFACTORY DEFAULTS: NO”
appearson the display.
4. Scroll up or down using thearrow keys to findthe Toneyou
would like to change and press “ENTER.” Display will flash
andappear as follows:
Used in…
Information Entry 3 0.1
Cooking Modes 1 1
Roasting Modes 2 1
Roasting Modes 3 1
Various Cooking
Modes
Information Entry 2 0.1
Number
of Tones
1 1
Duration
(measured
in seconds)
“Short Key Entry: 5 sec”
Timeout
Name
5. Press “ENTER,” andthe “1 x 1 SEC”value will flash.
6. Usingthenumeric keyboard, enter the number and the
duration of tonesdesired. Thenumber of tones canbe a
value from 0 to 9. The duration of tonesis measuredin tenths
of a second. You canenter a number from0.0 to 9.0.
7. Press “ENTER”whenfinished. The toneis customized to your
preference. At thispoint theovenplays thenew tone.If you
do not like it,return to Step10 to adjust thetone.
8. To exit theSettingsmenu, press “SETTINGS.”
Duration of
Timeout
Tone Volume
To change the TONE volume setting,
1. Press "SETTINGS." Settings menu will appear on display.
2. Press the up or down arrows until "TONES ..." appears on
the display.
3. Press "ENTER," and "RESTORE FACTORY DEFAULTS:
NO" appears on the display.
4. Press the down arrow until "VOLUME: HIGH" appears on
the display.
5. Press "ENTER" to change volume level. The current value
will flash.
6. Use up and down arrows to select the desired volume
level. Setting options are “HIGH”, “LOW” and “OFF.”
7. Press "ENTER" to confirm volume level setting.
8. To exit the Settings menu, press "SETTINGS.”
Timeouts
Your ovenis programmed with 4 presettimeouts thatallow the
user varyingamountsof time to key in entries to the oven control
display. The amount of time allowed the user to respond to a
programming promptis calleda timeout. If the user fails to make
an entryduring the timeoutperiod,the ovenwilldefault to its
previous mode.
If you find that theamount of timeallowed for programming does
notmeetyourneeds, you canredefine thelimits of any of the
four timeouts. The chart belowdefines the 4 timeouts,their
duration, and when they’re used:
Description
of Timeout
1 Short Entry
2 Medium Entry
3 Long Entry
Lock Key
4
Hold Time
Used in…
Cycle setpoint, meat probe
setpoint, and setting the
minute/second timer
Entering cook/stop times,
setting time, selecting
functions and settings
Selecting, editing, and
entering Recipes
Locking the Oven 3 seconds
Duration
of
Timeout
5 seconds
10 seconds
30 seconds
Programming Modes
22
23
Page 13
Oven Settings
Oven Settings
To change the duration of a Timeout:
1. Press “SETTINGS”. Settings menu will appear in display.
2. Press the up or down arrows until “TIMEOUTS…” appears
in the display.
3. Press “ENTER” and “RESTORE FACTORY DEFAULTS”:
NO” will appear on the display.
4. Scroll up or down using the arrow keys to find the timeout
you would like to change and press “ENTER.” Display will
flash and appear as follows:
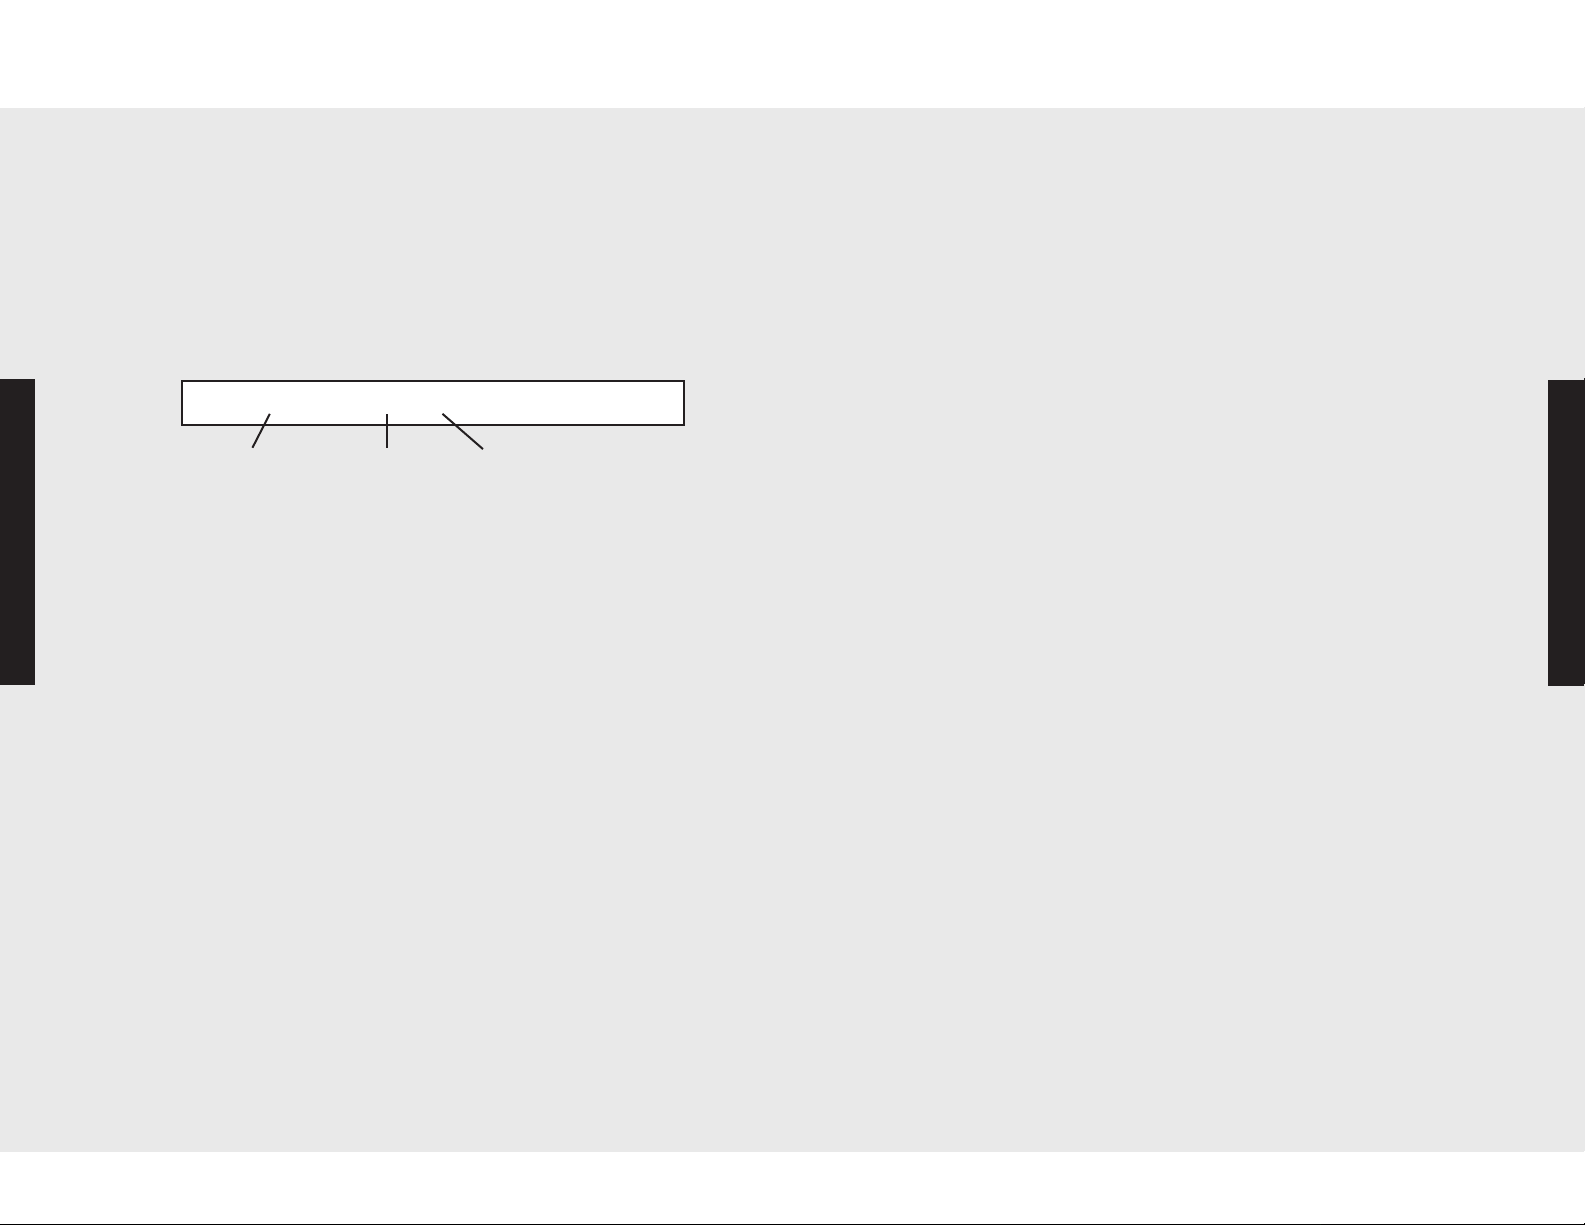
“1 Minute Left: 1 X 1 sec”
Tone Name
5. Using the numeric keyboard, enter the number of seconds
desired.
6. Press “ENTER” when finished. Timeout is customized to
your preference.
Programming Modes
7. To exit the Settings menu, press “SETTINGS.”
Number of
Tones
Clock Format
This feature allows users to choose a 12-hour or 24-hour
format for the clock display.
To program the clock format:
1. Press “SETTINGS.” Settings menu will appear in
display.
2. Press up and down arrows until “12 or 24 HOURS: 12”
appears in the display.
3. Press “ENTER” and the current setting will flash in the
display.
4. Use arrow keys to choose “12” or “24.”
5. Press “ENTER” again to accept desired clock format.
6. To exit the Settings menu, press “SETTINGS.”
5. Push “SET” button.
6. Use the up arrow to toggle between “YES” and “NO”.
7. Select “YES” and push “SET” button.
8
. To exit the “SETTINGS” menu, press “SETTINGS”.
Duration of Tones
(in seconds)
Sabbath Mode
This mode offers users belonging to religions with “no work”
restrictions to program their ovens to comply with the Sabbath
requirement. When the oven door is opened in Sabbath mode,
the oven light stays off while the convection fan and heating
elements remain on.
To program the Sabbath mode:
1. Press “SETTINGS”. Settings menu will appear in display.
2. Press up or down arrows until “SABBATH: NO” appears
in the display.
3. Press “ENTER,” and “NO” will flash on display.
4. Use arrow keys to choose “YES” or “NO.”
5. Press “ENTER” again to accept Sabbath mode.
6. To exit the Settings menu, press “SETTINGS.”
Showroom Mode
This mode allows the oven to be hooked up to a 120 volt
electrical supply for display or showroom mode purposes. In this
mode, the electronic display/controls and oven lights will function
but the heating elements and convection fan will NOT function.
To program the Showroom mode:
1. Press “SETTINGS”. Settings menu will appear in display.
2 Use the down arrow to scroll to “TIMEOUTS”.
3. At “TIMEOUTS” mode, hold the down arrow for 5 seconds.
4. Use the down arrow to scroll to “SHOWROOM”.
5. Push “SET” button.
6. Use the up arrow to toggle between “YES” and “NO”.
7. Select “YES” and push “SET” button.
8
. To exit the “SETTINGS” menu, press “SETTINGS”.
Programming Modes
24
25
Page 14
Oven Settings
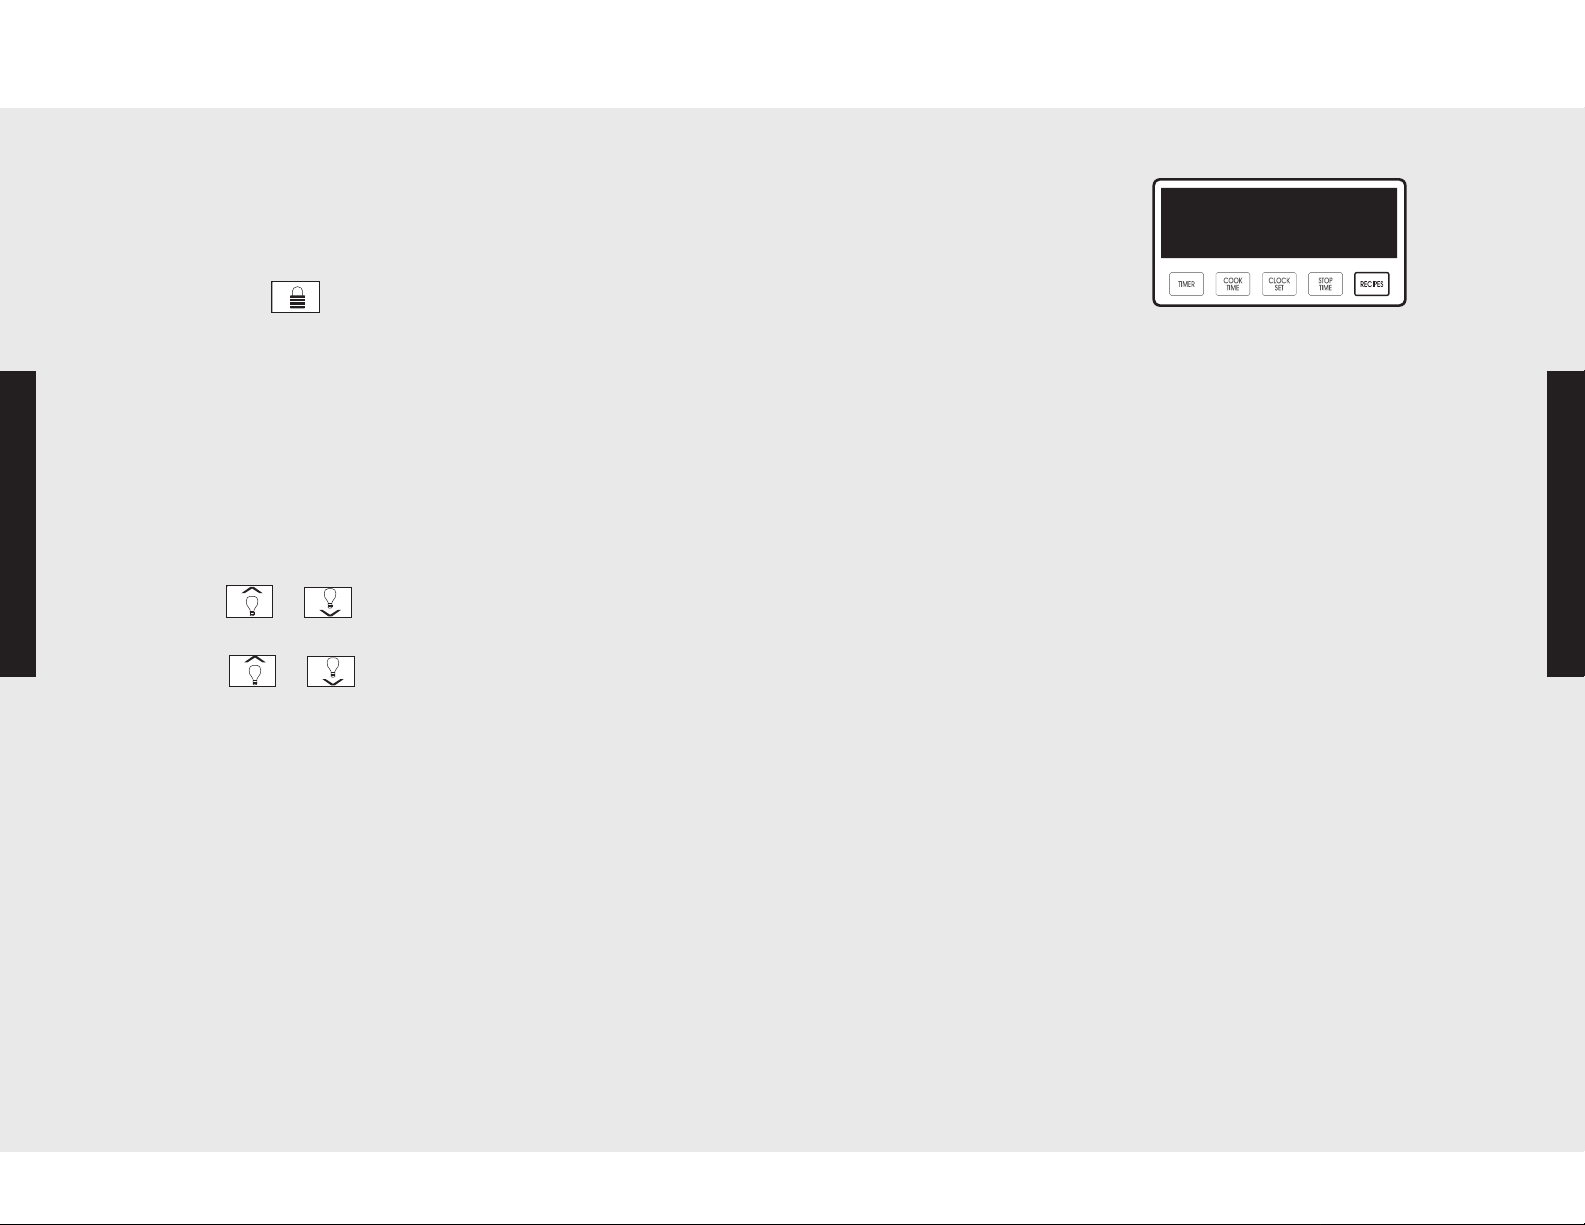
“Amy’sOatmeal Cookies”
Recipe Function
(PremiereModel Only)
Lock and Unlock
This feature prevents thecontrolpadsfrom being activated while
theovens arenotbeing used.
Tolockthe ovens:
1. Press on the right side of yourovencontrol
panel.Display shows“HOLD FORLOCK.”
2. Whenlocked, three short beeps will soundand the display
will show“PANEL IS LOCKED.”
3. To unlock the oven, pressand hold“UPPER OVEN”or
“LOWEROVEN” for3 seconds. Whenunlocked, two short
beeps will soundand the display willshow“PANEL IS
UNLOCKED.”
Interior Oven Lights (Two Pads)
Each ovenhasan interior light that can be turnedoffandon
using the designatedbuttons on theovencontrolpanel.
Programming Modes
Press or to turn on the lightin theupper or lower
oven. (You will hear a beep to signal that the light is on.)
Press or again to turn off the light in the upperor
lower oven.(Youwillheartwo beepsto signalthatthelight is off.)
Entering Recipe Name
This function programs and
saves up to 100 cooking
cycles from favorite recipes.
Recipe names are entered on
the numeric keypad on the
right side of the keyboard.
When a key with several letters is pressed for the first time, the
first letter is entered. If the same key is pressed a second time,
the second letter is entered, and so on. For example, if the key
“2 ABC” is pressed once, the letter ‘A’ is entered. If the key is
pressed 2 times, the letter ‘B’ is entered. If the key is pressed 3
times, the letter ‘C’ is entered. If the key is pressed 4 times, the
digit ‘2’ is entered. Then lower case ‘a’, then ‘b’, then ‘c’, then
‘A’ again, and so on.
If nothing is pressed within 2 seconds, the cursor moves to the
next position. To return to the previous position use the right
“CLEAR” key. Pressing the ‘1’ key will also move the cursor to
the next position as well as entering a space.
When subsequent characters are entered, the case and type of
the character matches the previous character. For example, if
the previous character is a digit, then pressing the “2 ABC” key
once would result in the digit ‘2’. If the previous character is a
lower case letter, then pressing the “2 ABC” key once would
result in the letter ‘a’.
Programming Modes
2726
Page 15
Recipe Function(Premiere Model Only)
WARNING
Warming Modes
Entering a new recipe
1. Hit “RECIPES” twice.
2. “NAME” shouldbe flashing.
3. Enter a recipename using numeric keypad.
4. Hit a Bake functionkey.
5. Use arrowor numeric keypad to set thetemperature.
6. If needed,hit “COOK TIME” key to entercook time.
7. Hit “SET” or “ENTER” to save the recipe.
Editing a recipe
1. In the recipe list mode, hit “RECIPES.”
2. Recipe name should be flashing.
3. Use the following instructions to make changes:
• To change recipe name,use numerickeypad.
• To change cycle,press a Cyclekey.
• To change temperature, press an arrowkey.
• To change cook time, press the “COOK TIME”key.
4. Hit “SET”or “ENTER” to save therecipe.
Using a recipe
Programming Modes
1. Touse a programmed recipe, scroll through the list and press
“ENTER” or “SET”to select and start the program.
Deleting a recipe
1. In the recipe list mode, hit “RECIPES.”
2. Recipe name should be flashing.
3. Use right“CLEAR” key to erasethe name.
4. Hit “SET”or “ENTER.”
Dehydrate
This ovenis designed not only to cook, butalsoto dehydrate
fruitsand vegetables. Hereare sometipsfor usingyourViking
oven’s dehydratefeature:
1. Preparethe food as recommended.
2. Choose andpress “UPPEROVEN” or “LOWEROVEN.”
3.Arrange the food on drying racks (not includedwiththe oven,
butavailable from specialtycookingdealers).
4. Select“DEHYDRATE”fromtheovenfunctioncontrolpanel.
5. Press “SET” or “ENTER.”Dehydrate mode willbegin
immediately.
Defrost
This ovencandefrostfrozen food.To use thedefrostfunction,
take thefollowing steps:
1. Placethe frozen food on a baking sheet.
2. Choose and press “UPPER OVEN”or “LOWEROVEN.”
3. Select“DEFROST” fromthe oven functioncontrolpanel.
4. Press “SET” or “ENTER” to begin defrosting. Thedefrost
mode willbegin andthedefrosttemperaturewillbe displayed.
To avoid sickness and food waste,do not allowdefrosted food
to remain in the oven for more than two hours.
Proof
This function usesa lowtemperaturebetween90º and 110º F to
createan optimal environment forthe yeastto rise in manytypes
of dough. To use the proof function,takethefollowing steps:
Programming Modes
28
1. Placethe doughon a bakingsheet.
2. Choose and press “UPPER OVEN”or “LOWEROVEN.”
3. Select“PROOF”from theovenfunctioncontrolpanel.
4. Press “SET” or “ENTER” to begin proofing.
Oven Off
Theovenwillcontinue operating untilyou pressthe“OFF”
buttonfor the oven youare using. Forexample,if you are
cookingin the “UPPER OVEN,” press the “OFF”button nearest
this button on the controlpanel.
29
Page 16
Bake Modes
Bake Modes
Bake
This function is recommended for single-rack baking. Usethis
settingforbaking, roasting, andcasseroles. To bake,follow these
steps:
1. Arrangethe oven racksin the desired positions beforeheating
theoven.
2. Select “UPPER OVEN” or “LOWER OVEN.”
3. Set the Oven Function Selectorto “BAKE.”Temperature
displayflashesa presettemperatureof 350º F.
4. Set the temperature usingoneof thefollowing twomethods:
a. Confirm presettemperature and press “SET” or “ENTER.”
Theovenwillbegin Bake Preheat immediately.
OR
b. Change thetemperatureby typing thedesiredtemperature
on the numeric keypad or using theup anddownarrow
keys. Press“SET” or “ENTER” when finished.Theovenwill
begin Bake Preheat immediately.
Programming Modes
Convection Bake
This function is recommended for multi-rack baking.Foods canbe
baked and roasted at the same timewithminimaltaste transfer,
even whendifferentdishes are involved,suchas cakes,fish, or
meat. Touseconvection bake,takethe following steps:
1. Arrangethe oven racksin the desired positions beforeheating
theoven.
2. Select “UPPER OVEN” or “LOWER OVEN.”
3. Set the Oven Function Selectorto “CONV. BAKE.”
Temperature display flashesa presettemperatureof 325º F.
4. Set the temperature usingoneof thefollowing twomethods:
a. Confirm presettemperature andpress “SET” or “ENTER.”
Theovenwillbegin Conv. Bake Preheatimmediately.
OR
b. Change thetemperatureby typing thedesiredtemperature
on the numeric keypad or using theup anddownarrow
keys. Press“SET” or “ENTER” when finished.Theovenwill
begin Conv. Bake Preheat immediately.
Programming Modes
During Bake Preheat
Thedisplaywillalternate betweenshowing the set baking
temperature andthe actual preheat temperature every 5 seconds.
When theset baking temperature is reached,one long beep will
sound and thedisplay willshow“BAKE.” Open oven doorand
putfoodin oven.
During Convection BakePreheat
Thedisplaywillalternate betweenshowing the set baking
temperature andthe actual preheat temperature every 5 seconds.
When theset baking temperature is reached,one long beep will
sound and thedisplay willshow“CONV. BAKE.” Open oven
door andput food in oven.
Tochange settemperature during preheat stage:
Press and Release
s
t
Temperature increases by 5º F (or 2º C)
Temperature decreases by 5º F (or 2º C)
Tochange settemperature during preheat stage:
Press and Release
s
t
Temperature increases by 5º F (or 2º C)
Temperature decreases by 5º F (or 2º C)
3130
Page 17
Bake Modes
Broil Modes
TruConvec™
This function is idealfor foodsthatrequire gentle cooking,singlerack baking,multiple-rack baking, roasting,and preparationof
complete meals.Thissetting is alsorecommended when
preparinglarge quantitiesof baked goodsat onetime. To use
TruConvec™,take the following steps:
1. Arrangethe oven racksin the desired positions beforeheating
theoven.
2. Select “UPPER OVEN” or “LOWER OVEN.”
3. Set the Oven Function Selectorto “TRUCONVEC.”
Temperature display flashesa presettemperatureof 325º F.
4. Set the temperature usingoneof thefollowing twomethods:
a. Confirm presettemperature and press “SET” or “ENTER.”
Theovenwillbegin TruConvec™Preheatimmediately.
OR
b. Change thetemperatureby typing thedesiredtemperature
on the numeric keypad or using theup anddownarrow
Programming Modes
keys. Press“SET” or “ENTER” when finished.Theovenwill
begin TruConvec™ Preheatimmediately.
Conventional broilingis most successful for cuts of meatone to
twoinches thick, and is alsosuitable forflatpieces of meat.
High Broil
Withthissetting, heatradiates at full powerfrom bothbroil
elements, located in the top of the oven cavity. The distance
betweenthefoods and the broilelements determines broiling
speed.For fast broiling, place food as closeas twoinches from
thebroil element, or on thetoprack. Fastbroiling is bestfor
meats where"rare to medium" donenessis desired. Use this
settingforbroiling small andaveragecutsof meat.
Medium Broil
Withthissetting, inner andouter broil elementspulseon and off
to produce lessheatfor slow broiling. Forslowbroiling, allow
about four inches betweenthe top surface of your food and the
broil element.Slowbroiling is best for chickenandham.Use this
settingforbroiling small andaveragecutsof meat.
LowBroil
This modeuses onlya fraction of the oven’s availablepower to
theinner broil element to producedelicatetop-browning in only
three to fourminuteson items such as meringue.
Programming Modes
To Use Broil:
During TruConvec™ Preheat
Thedisplaywillalternate betweenshowing the set baking
temperature andthe actual preheat temperature every 5 seconds.
When theset baking temperature is reached,one long beep will
sound and thedisplay willshow“TRUCONVEC.” Open oven
door andput food in oven.
Tochange settemperature during preheat stage:
Press and Release
s
t
Temperature increases by 5º F (or 2º C)
Temperature decreases by 5º F (or 2º C)
1.Arrange the oven rack in the desired position before
turningthe broiler on.
2.Placethefoodin thecenter of the cold broilerpan and grid
supplied with youroven, andthenplace thebroilerpanin the
oven.
3.Select “UPPEROVEN” or “LOWEROVEN.”
4.Set the Oven Function Selector to “BROIL.” Display will show
“BROILHIGH”and“ON”willflash. Medium andlow displays
will show“CONV BROILM” and“CONV BROILL.”
5.Choose power levelfor BROIL:
a. For“HIGH BROIL,” press“SET.”
b. For “MEDIUM BROIL,” press down arrow keyonce. Display
will change to MED,thenpress “SET.”
c. For “LOW BROIL,” pressdownarrow key twice. Display will
changeto LO,thenpress “SET.”
6.Closethedoorto theoven. Withclosed-doorbroiling, the broil
elementmight cycle on and off if an extended broiling time is
required.A built-in smoke "eliminator" in the top of the oven
will helpreducesmoke andodors.
7.Whencooking is complete, pressthe “OFF”button for the
selected oven.
3332
Page 18
Broil Modes (cont.)
Roast Modes
Convection Broil
Convectionbroiling hasthe advantageof broilingfoodslightly
more quicklythan conventional. Convection broiling of meats also
produces better results, especiallyfor thickcuts. This is because
meat sears on the outside andretainsmore juices and natural
flavorinside with less shrinkage.
To Use Convection Broil:
1.Arrange the oven rack in the desired position beforeturning
thebroileron.
2.Placethefoodin thecenter of the cold broilerpan and grid
supplied with youroven, andthenplace thebroilerpanin the
oven.
3.Select “UPPEROVEN” or “LOWEROVEN.”
4.Set the Oven Function Selector to “CONV. BROIL.”Displaywill
show “CONV BROILH” and “ON” will flash. Medium and low
displays will show“CONV BROILM” and “CONVBROILL.”
5.Choose power levelfor CONVECTION BROIL:
a. For“HIGH CONVECTION BROIL,” press“SET.”
b. For “MEDIUM CONVECTION BROIL,” press downarrow
Programming Modes
keyonce. Displaywillchange to MED,thenpress “SET.”
c. For “LOW CONVECTION BROIL,” pressdownarrow key
twice.
d. Display will change to LO, then press “SET.”
6.Closethedoorto theoven. Withclosed-doorbroiling, the broil
elementmight cycle on and off if an extended broiling time is
required.A built-in smoke "eliminator" in the top of the oven
will helpreducesmoke andodors.
7.Whencooking is complete, pressthe “OFF”button for the
selected oven.
Convection Roast
Usethisfunction whenroasting tendercutsof meat or poultry of
anysize. To use Convection Roast, follow these steps:
1.Arrange the oven racks in the desired positionsbeforeheating
theoven.
2.Select “UPPEROVEN” or “LOWEROVEN.”
3.Set the Oven Function Selector to “CONV. ROAST.”
Temperature display flashesa presettemperatureof 325º F.
4.Set the temperature using one of the following two methods:
a.Confirm preset temperature andpress “SET”or “ENTER.”
Theovenwillbegin ConvectionRoast Preheat immediately.
OR
b. Change thetemperatureby typing thedesiredtemperature
on the numeric keypad or using theup anddownarrow
keys. Press“SET” or “ENTER” when finished.Theovenwill
begin Convection Roast Preheat immediately.
During Convection Roast Preheat
Thedisplaywillalternate betweenshowing the set temperature
andthe actual preheat temperature every 5 seconds. When the
settemperature is reached,one long beep will soundandthe
displaywillshow “CONV. ROAST.” Open oven door and put
food in oven.
Tochange settemperature during preheat stage:
Programming Modes
Oven Off
Theovenwillcontinue operating untilyou pressthe“OFF”
buttonfor the oven youare using. Forexample, if you are
cookingin the “UPPER OVEN,” press the “OFF”button
nearest this button on the control panel.
34
Press and Release
s
t
Temperature increases by 5º F (or 2º C)
Temperature decreases by 5º F (or 2º C)
35
Page 19

Plug
Cable
Probe
Handles
Roast Modes
Meat Probe(Available on Premiere Models)
Auto Roast
Usethisfunction to simplify roastingby automaticallysearingthe
outsideof roasts. To useAutoRoast:
1.Arrange the oven racks in the desired positionsbeforeheating
theoven.
2.Select “UPPEROVEN” or “LOWEROVEN.”
3.Set the Oven Function Selector to “AUTOROAST.”
Temperature display flashesa presettemperatureof 325º F.
4.Set the temperature using one of the following two methods:
a. Confirm preset temperature,press “SET”or
“ENTER.” Theovenwillbegin TruConvec™Preheat
immediately.
OR
b. Change the temperature by typing the desired
temperature on the numeric keypador using theup
anddownarrow keys.Press “SET” or “ENTER” when
Programming Modes
finished. The oven will begin TruConvec™Preheat
immediately.
During Auto Roast Preheat
Thedisplaywillalternate betweenshowing the set roasting
temperature andthe actual preheat temperature every 5 seconds.
When Set Auto Roast TemperatureIs Reached
Onelongbeepwillsound andthedisplay will show “SEARING.”
Theovenwillremainat searingtemperature (settemperature plus
100º F) for 30 minutes.If set, theCookTimetimer will begin.
To TurnOff Oven:
Press the “OFF”button on the control paneldisplay for the oven
youareusing. One beep willsound andthe oven willturn off.
The meat probe takes the guesswork out
of roasting by cooking foods to the ideal
internal temperature. Theprobe settingis
used to automatically turn the oven off
when meat reaches its optimal internal
temperature. Your Viking oven’s built-in
probewillhelpyoupreparemeats exactly
as you want them.
Meat Probe Use and Care
• Use of probes otherthan the one providedwithyouroven
mayresult in damage to the probe.
• Use the handles of the probe and plug wheninserting and
removing them fromthe meat and outlet.
• To avoiddamagingyourprobe,never use tongsto pull on the
cable when removing.
• To avoidbreaking the probe, make surefoodis completely
defrostedbefore inserting.
• To prevent possible burns, do not unplug the probefrom the
outletuntiltheovenhas cooled.
• Never leave theprobe insidetheovenduring a self-cleaning
cycle.
• Never store the probe inside theoven.
To Insert the Meat Probe:
After preparing the meatand placing it on thebroilerpan,follow
these stepsfor proper probe placement:
1.Lay the probe on the outside of the meat alongthetop or
side anduse your finger to mark wheretheedgeof themeat
meets the probe.The pointwhere they meet should rest in
thecenter of the thickest,meatiest part of the roast.
2.Insert theprobe completely intothemeat. It shouldnottouch
thebone, fat, or gristle.
Programming Modes
• Forroastswithno bone, insert the probe into the meatiest
part of the roast.
• Forbone-inham or lamb, insertthe probeinto the center
of the lowestlarge muscleor joint.
• Witha whole turkey, insert the probe into the meatiest part
of the inner thighfrom below andparallelto the leg.
3736
Page 20
SETSET
Meat Probe(Available on Premiere Models)
Cooking Tips
To Set the Meat ProbeFunction:
• A cookingmodemustbe selected beforesettingmeatprobe.
• Bake, ConvectionBake,ConvectionRoast, TruConvec™, and
ConvectionBroil are thecooking modesthatcanbe used with
themeatprobe function.
• Set the internal temperature about 10°F lower than the
actualdesiredinternaltemperature. The meat willcontinue to
cook whenremoved from theovenand will reach desired
internal temperature while “standing.”
1.Insert probe intothe meat and slide into oven.Double oven
modelshavea meatprobe in the upperovenonly.
2.Plugthe probeinto the outlet locatedon the left interior wallof
theovenand closetheovendoor.
3.Press the“MEAT PROBE”button on thecontrolpanel. The
displaywillshow “SETPROBE”andflashingpreset
temperature.
4.The preset temperature of 160º F or a storedtemperaturewill
be displayedon the electronictiming center. If you desire this
temperature, the probe modewillbegin after 10 seconds.
Programming Modes
5.To setanothertemperature, usethe keypad to enterthe
desired temperature andpress “SET” or “ENTER.”
• The temperaturemust bewithintherange of 120º to 190ºF.
• Display alternates between cook mode and probe
temperature.
• Probetemperaturedisplays LO until100ºF is reached, then
displays actualtemperature.
6.Whenthe probeis within 10ºF of setpoint, two long beeps will
sound.Whenthe setpointis reached, threelongbeeps will
sound and theovenwillturnoff.Thedisplay will alternate
betweencookmode and “DONE.” One short beep will sound
every minuteuntil the probe function is closed.
7.Press anykey to close theprobe function.
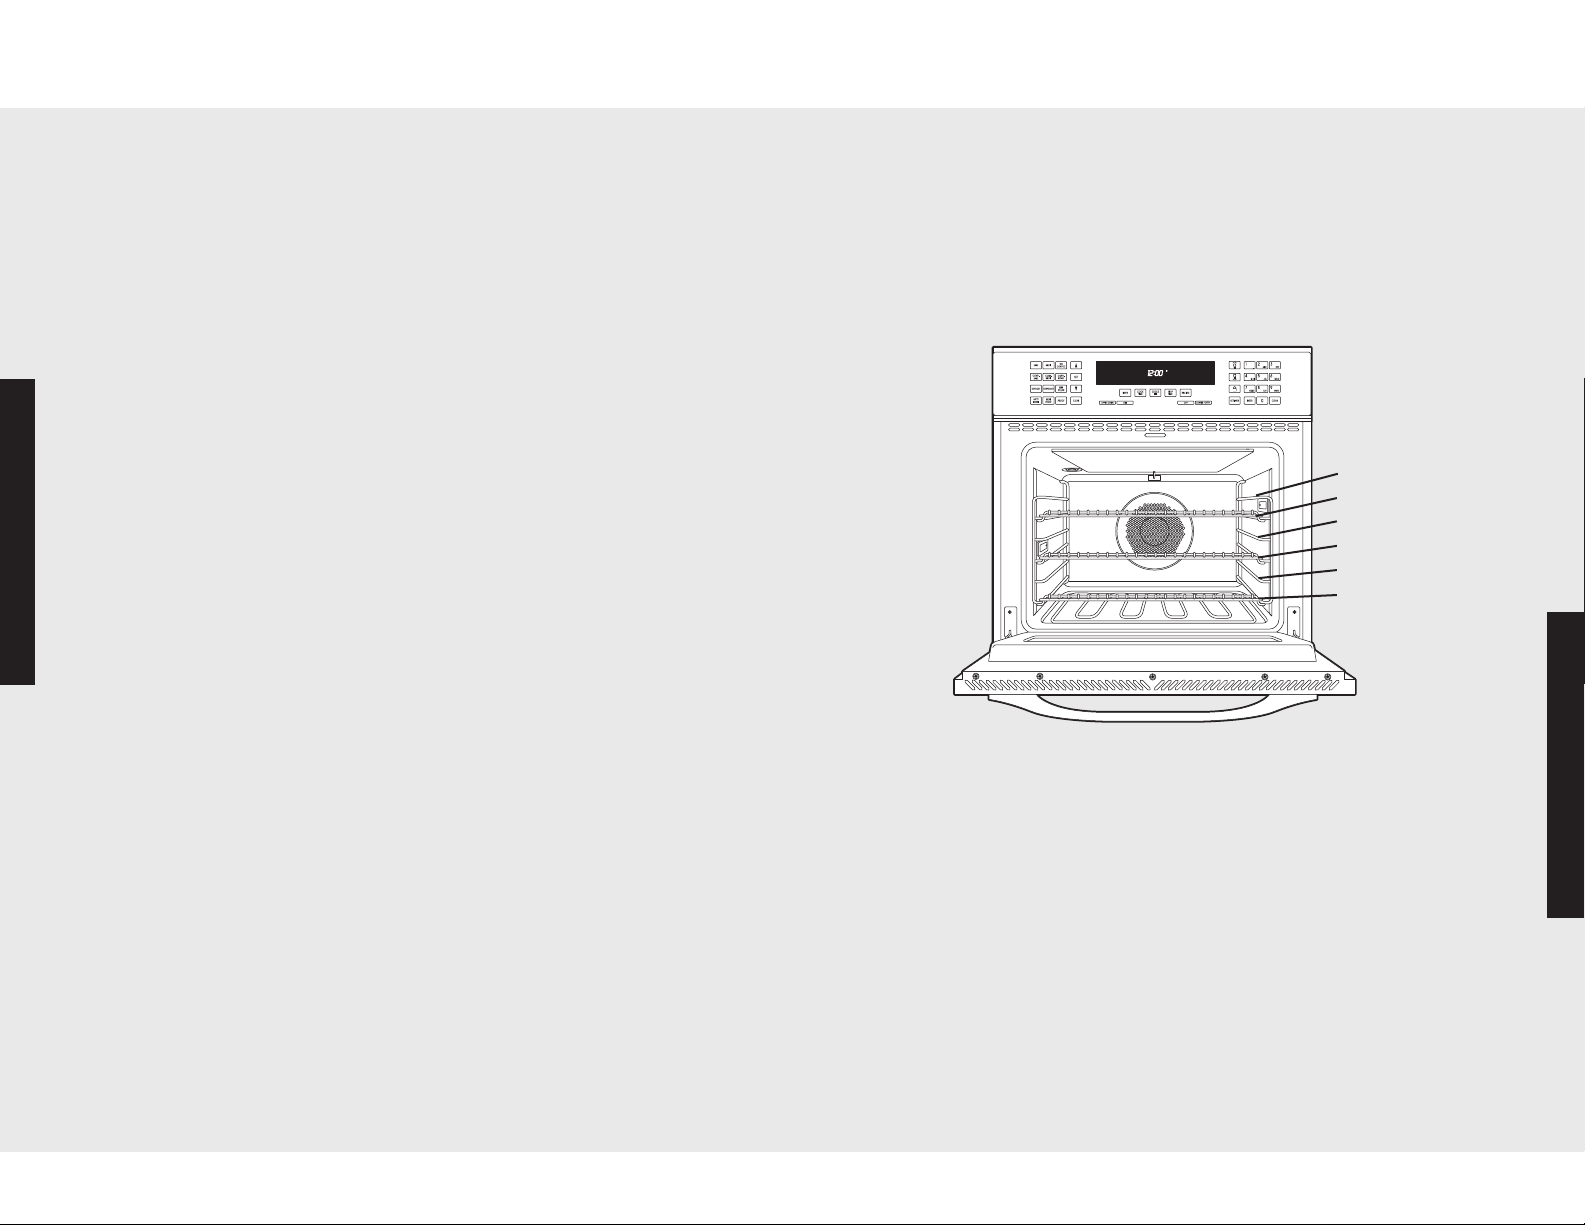
Rack Positions
Each ovenis equipped withthree tilt-proofracks. Premiere
modelshavetwo standardtilt-proofracks andone TruGlide™
rack. With theTruGlide™ rack, the bottom section remains in the
oven andthe top sectionsmoothly glides outward whenpulled.
This reducesthechancesof spills fromitems that containjuice or
liquid.Thisrack can be usedin any of the six rackpositions.
Position 6
Position 5
Position 4
Position 3
Position 2
Position 1
Cooking Tips
Allovens have six rackpositions. Position 6 is thefarthestfrom the
oven bottom.Position1 is the closest to the ovenbottom.The
racks can be easily removedandarrangedat various levels. For
best results withconventional baking,do not usemorethan one
rack at a time.It is alsorecommended, whenusing two racks, to
bake withtheracks in positions2 and4 or positions 3 and 5.
1. Arrange the oven racks in the desired positions BEFORE
heatingtheoven. If cooking on two racksat thesametime,
userackpositions 2 and 4 or positions3 and5.
2. Turn theOvenFunction selector to desired function.Cooking
startsimmediatelyand stopswhenthe Oven Functionselector
is turnedto OFF.
3. Set theTemperature Control to the desired temperature.
4. Placefoodin the ovenafter theOvenindicator lightgoesout.
3938
Page 21
Cooking Tips
Cooking Tips
PanPlacement Tips
• When using large(15"x 13")flatpansor traysthatcover
most of the rack, rack positions2 or 3 produce the best
results.
• When baking on more than one rack,we recommend using
oneof theconvection modesandthe 2nd and4th position
or the 3rd and5th position for more evenbaking. When
bakingon three racks, useany combination of positions 2, 3,
4, and 5 for more consistentresults.
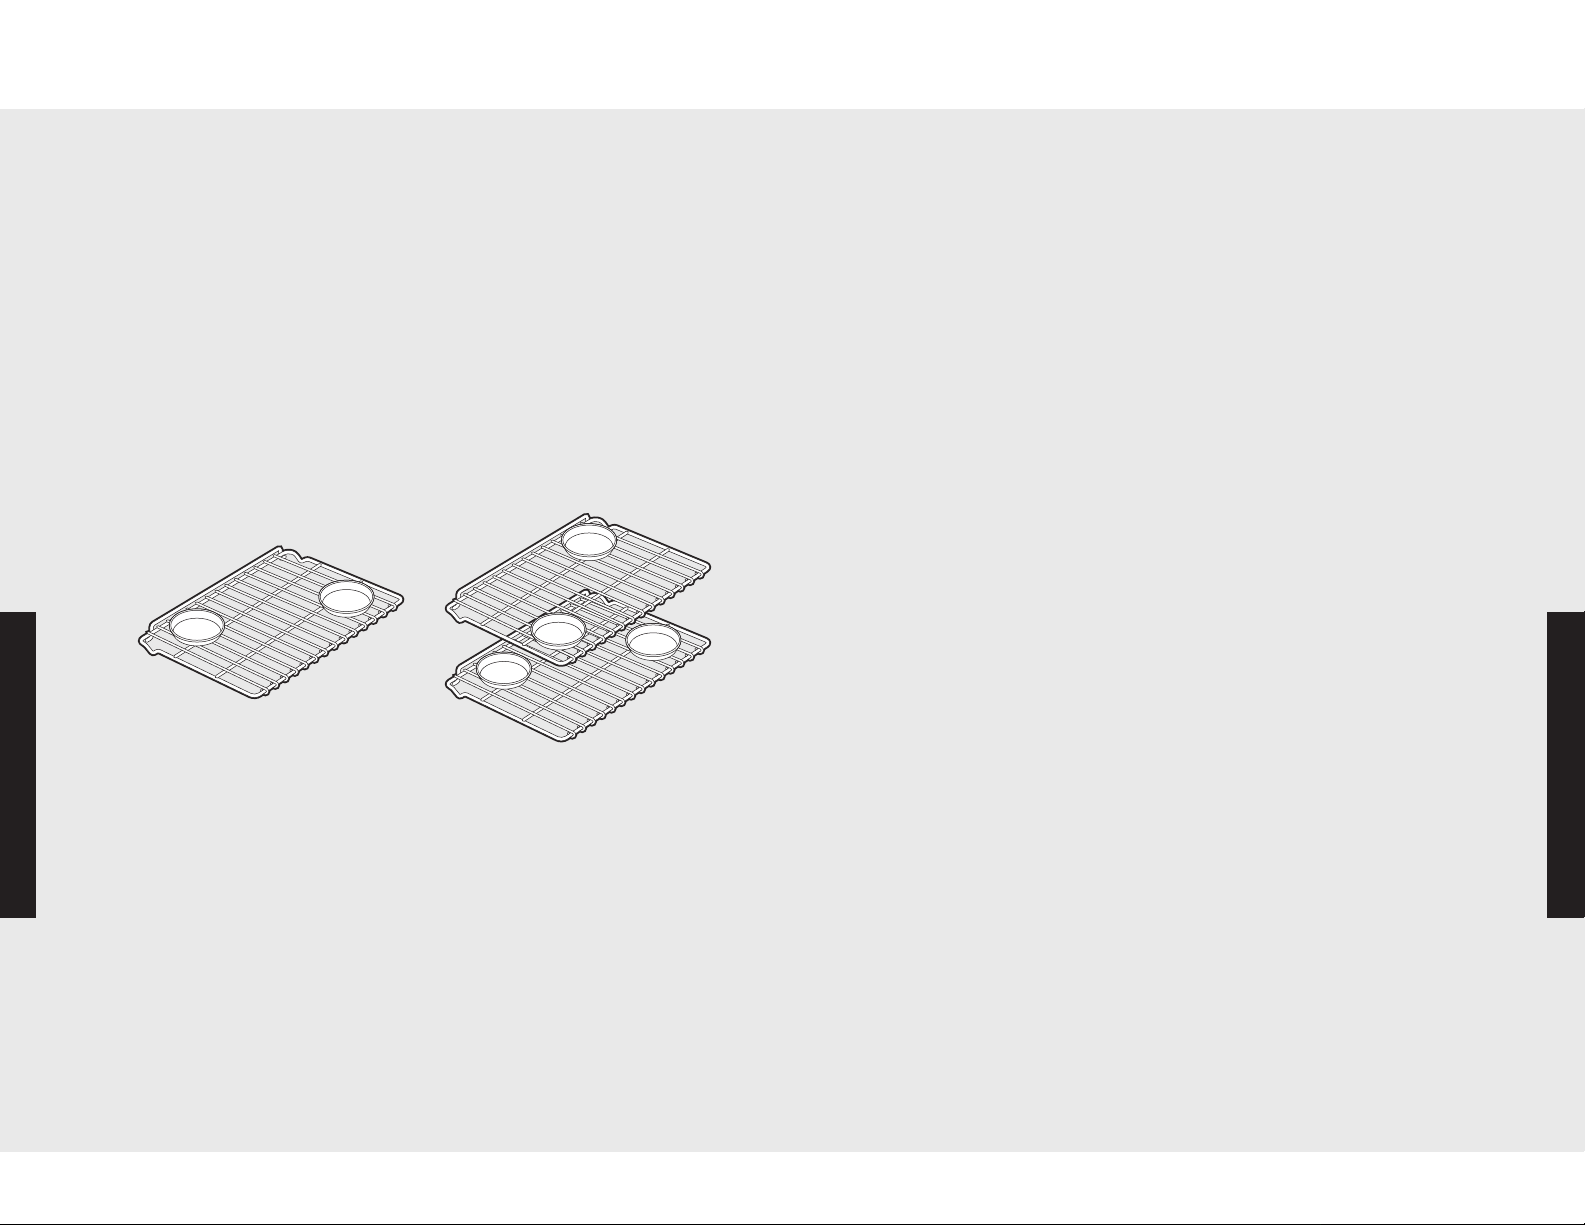
• Staggerpans in opposite directions when two racks and
severalpansareusedin ConventionalBakeMode. If
possible, no pan should be directlyabove another.
• Allow 1 to 2 inches of air spacearound all sidesof each pan
forevenair circulation.
Multiple Rack Pan Placement
Single Rack Pan Placement
• Some recipes mayrequireadjustment and testing when
convertingfrom standard to convection modes. If unsurehow
to convert a recipe, beginby preparingtherecipe in
Conventional Bake. Afterachieving acceptable results, follow
theconvection guidelines listedfor the similarfood type. Ifthe
food is not prepared to yoursatisfaction duringthisfirst
convectiontrial, adjustonly onerecipe variable at a time
(cooking time, rack position,or temperature)and repeat the
convectiontest. Continue adjustingonerecipe variableat a
time until youachievethe results you are looking for.
• Make sure theovenracks arein the desired position beforeyou
turnon the oven.
• Do not open the door frequentlyduring baking. Look through
thedoorwindow to check doneness whenever possible. If you
must openthedoor, the best time is during the last quarterof
thebaking time.
• Bake to the shortest time suggested and check for doneness
beforeadding moretime. Forbakedgoods, a stainless steel
knife placedin the centerof theproductshould come out clean
when thebaked itemis done.
• Usethe pan size and type recommended by the recipeto
ensurebestresults. Cakes, quick breads, muffins, andcookies
shouldbe baked in shiny, reflectivepansfor light, golden crusts.
Avoid the use of old, darkened pans. Warped, dented,stainless
steel and tin-coatedpansheatunevenlyandwillnot give
uniformbaking results.
Cooking Tips
Multiple Rack Baking
Onemajor benefitof convection cookingis theabilityto prepare
Baking Tips
Cooking Tips
Becauseof variations in food density, surface texture,and
consistency, some foods may be preparedmore successfully using
theConventional Bakesetting. For this reason,conventional
bakingis recommended when preparing bakedgoods, such as
custard. You mayfindthatother foods also turnout bestwhen
cookedin Conventional Bake Mode.
• As a general rule,to convert conventional recipes to convection
recipes, reduce thetemperatureby 25° F (-3.9°C) andthe
cookingtimeby approximately 10 to 15%.
foods in larger quantities. The uniformair circulationmakes this
possible. Foodsthatcan be prepared on two or three racks at
thesametimeinclude: pizza, cakes, cookies, biscuits, muffins,
rolls,and frozen convenience foods.
Forthree-rackbaking, use any combinationof rack positionstwo,
three,four, and five. For two-rack baking, use rack positions two
andfouror positionsthree and five. Remember thatthe racksare
numbered from bottom to top.
4140
Page 22
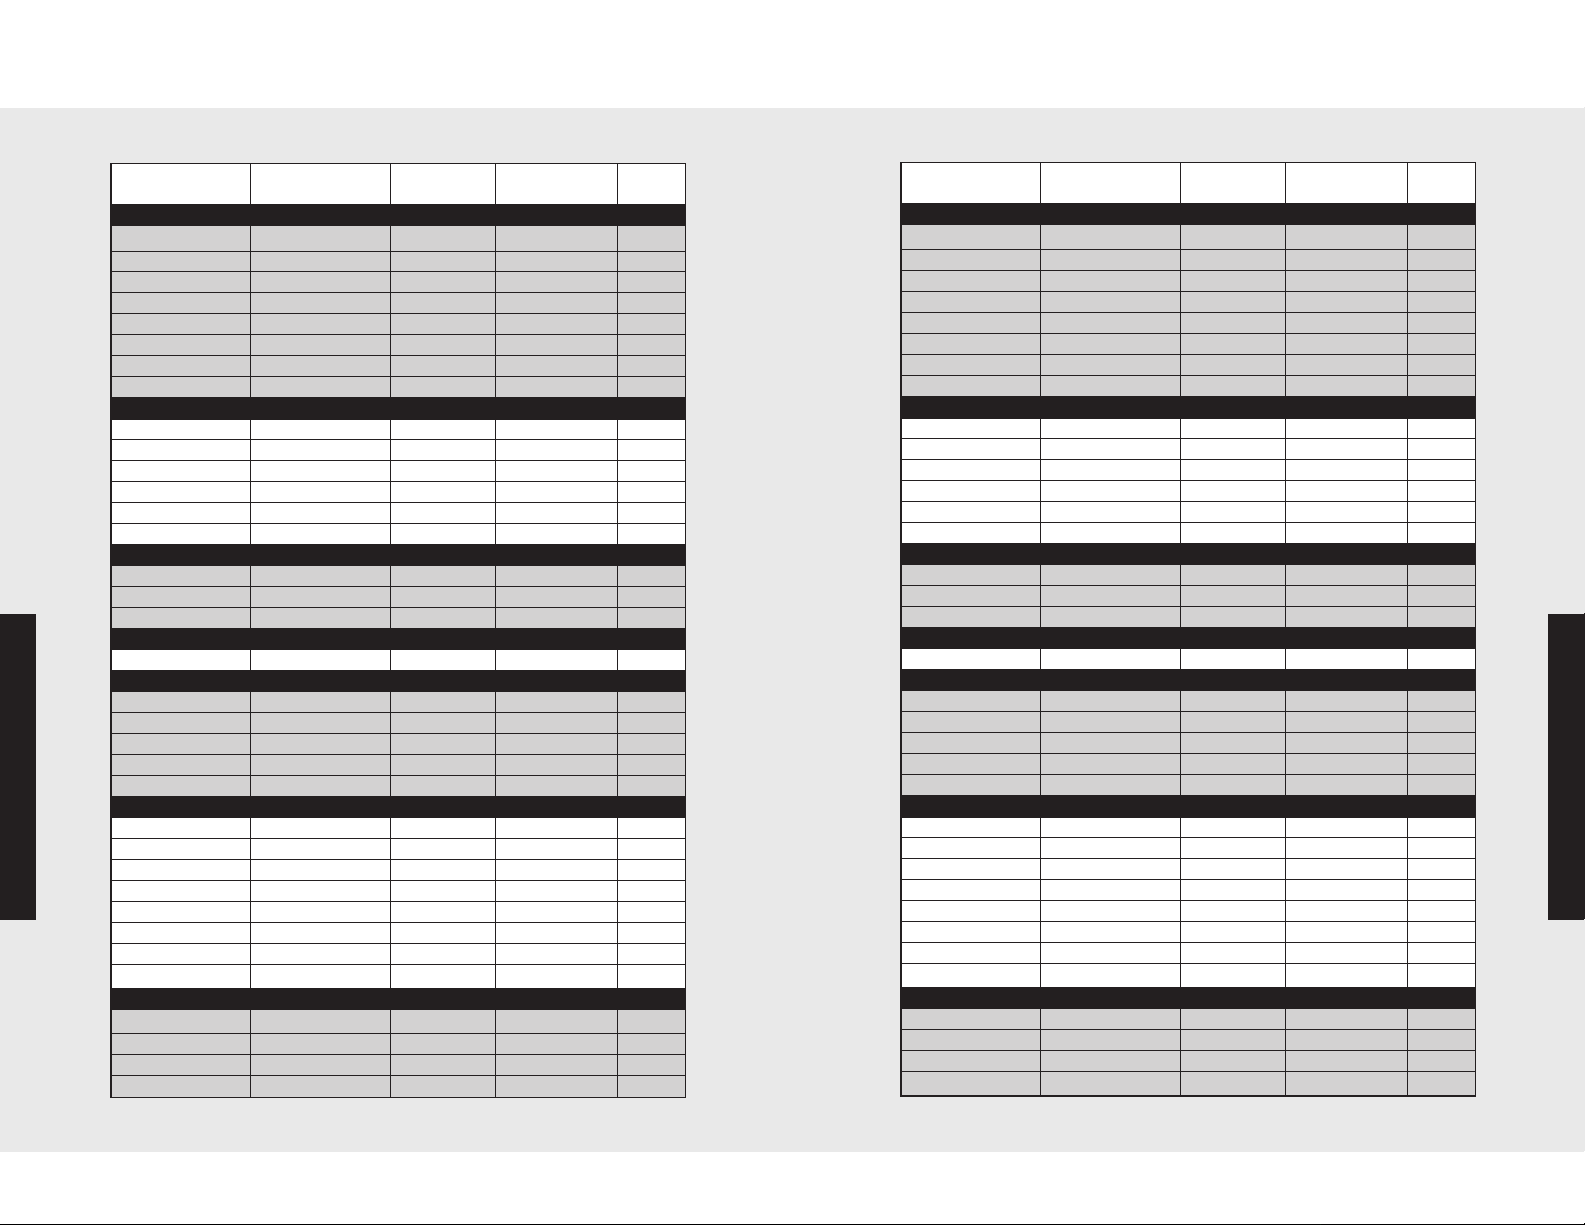
Conventional Baking Chart
Convection Baking Chart
Food Pan Size Position Temp
Single Rack Time
(minutes)
BREADS
Biscuits Cookie Sheet 3 or 4 400° F (204.4° C) 8 - 10
Yeast Loaf Loaf Pan 3 or 4 375°
Yeast Rolls Cookie Sheet 3 or 4 400°
NutBread Loaf Pan 3 or 4 375°F(
Cornbread 8" x 8" 3 or 4 400°
Gingerbread 8" x 8" 3 or 4 350°
Muffins MuffinTin 3 or 4 375°
CornMuffins Muffin Tin 3 or 4 375
CAKES
Angel food Tubepan 3 or 4 375°
Bundt Tubepan 3 or 4 350°
Cupcakes Muffinpan 3or 4 350°
Layer, Sheet 13"x 9" 3or 4 350°
Layer, Two 9" round 3 or 4 350°
Pound Loaf pan 3 or 4 350°
COOKIES
Brownies 13" x 9" 3 or 4 350°
Choc. Chip Cookie Sheet 3 or 4 375°
Sugar Cookie Sheet 3 or 4 350°
PASTRY
Cream Puffs Cookie Sheet 3 or 4 400°
PIES
Crust, Unfilled 9" Round 3 or 4 425°
Crust, Filled 9" Round 3 or 4 375°
Lemon Meringue 9" Round 3 or 4 350°
Pumpkin 9" Round 3 or 4 350°
Custard 6 - 4 oz cups 3 or 4 350°
Cooking Tips
ENTREES
EggRolls CookieSheet 3 or 4 400°
Fish Sticks Cookie Sheet 3 or 4 425°
Lasagna, frz Cookie Sheet 3 or 4 375°
PotPie Cookie Sheet 3 or 4 400°
Gr. Peppers Stuffed
Quiche 9" Round 3 or 4 400°
Pizza, 12" Cookie Sheet 3 or 4 400°
Mac. & Cheese, frz
VEGETABLES
Baked Potatoes On Rack 3 or 4 375°
SpinachSouffle 1 qt. Casserole 3 or 4 350°
Squash Cookie Sheet 3 or 4 375°
FrenchFries CookieSheet 3 or 4 425°
13"x 9" 3 or 4 375°
Cookie Sheet 3 or 4 375°
F (190.6° C)
F (204.4° C)
190.6° C)
F (204.4° C)
F (176.7° C)
F (190.6° C)
° F (190.6°C)
F (190.6° C)
F (176.7° C)
F (176.7° C)
F (176.7° C)
F (176.7° C)
F (176.7° C)
F (176.7° C)
F (190.6° C)
F (176.7° C)
F (204.4° C)
F (218.3° C)
F (190.6° C)
F (176.7° C)
F (176.7° C)
F (176.7° C)
F (204.4° C)
F (218.3° C)
F (190.6° C)
F (204.4° C)
F (190.6° C)
F (204.4° C)
F (204.4° C)
F (190.6° C)
F (190.6° C)
F (176.7° C)
F (190.6° C)
F (218.3° C)
30 - 35
12 - 15
30 - 35
20 - 25
35 - 40
15 - 20
15 - 20
35 - 45
45 - 55
16 - 20
40 - 50
30 - 35
60 - 65
25 - 30
12 - 15
10 - 12
30 - 35
10 - 12
55 - 60
12 - 15
40 - 45
35 - 40
12 - 15
18 - 21
65 - 70
35 - 40
65 - 70
25 - 30
15 - 20
60 - 65
60 - 65
45 - 50
50 - 55
15 - 20
Food Pan Size Position Temp
BREADS
Biscuits Cookie Sheet 2 & 4
Yeast Loaf Loaf Pan 2 & 4
Yeast Rolls Cookie Sheet 2 & 4
NutBread Loaf Pan 2 & 4
Cornbread 8" x 8" 2 & 4
Gingerbread 8" x 8" 2 & 4
Muffins MuffinTin 2& 4
CornMuffins MuffinTin 2 & 4
CAKES
Angel food Tubepan 3 or 4 325°
Bundt Tubepan 3 or 4 325°
Cupcakes Muffinpan 2 & 4 325°
Layer, Sheet 13"x 9" 2 & 4 325°
Layer, Two 9" round 2 & 4 325°
Pound Loaf pan 2 & 4 325°
COOKIES
Brownies 13" x 9" 2& 4 325°
Choc. Chip Cookie Sheet 2,3,& 4 350°
Sugar Cookie Sheet 2,3,& 4 325°
PASTRY
Cream Puffs Cookie Sheet 2 & 4 375°
PIES
Crust, Unfilled 9" Round 2 & 4 400°
Crust, Filled 9" Round 2 & 4 350°
Lemon Meringue 9" Round 2 & 4 325°
Pumpkin 9" Round 2 & 4 325°
Custard 6 - 4oz cups 2& 4 325°
ENTREES
EggRolls CookieSheet 2 & 4 375°
Fish Sticks Cookie Sheet 2 & 4 400°
Lasagna, frz Cookie Sheet 2 & 4 350°
PotPie Cookie Sheet 2 & 4 375°
Gr. Peppers Stuffed
Quiche 9" Round 2 & 4 375°
Pizza, 12" Cookie Sheet 2 & 4 375°
Mac. & Cheese, frz
VEGETABLES
Baked Potatoes On Rack 3 or 4 350°
SpinachSouffle 1 qt.Casserole 3 or 4 325°
Squash Cookie Sheet 3 or 4 350°
FrenchFries CookieSheet 3 or 4 400°
13"x 9" 2 & 4 350°
Cookie Sheet 3 or 4 350°
Single Rack Time
(minutes)
375°
F (190.6 C) 7 - 9
350°
F (176.7° C) 20 - 25
375°
F (190.6° C) 11 - 13
350°
F (176.7° C) 20 - 25
375°
F (190.6° C) 15 - 20
325°
F (162.8° C) 30 - 35
350°
F (176.7° C) 12 - 15
350°
F (176.7° C) 0 - 12
F (162.8° C)
F (162.8° C)
F (162.8° C)
F (162.8° C)
F (162.8° C)
F (162.8° C)
F (162.8° C)
F (176.7° C)
F (162.8° C)
F (190.6° C)
F (204.4° C)
F (176.7° C)
F (162.8° C)
F (162.8° C)
F (162.8° C)
F (190.6° C)
F (204.4° C)
F (176.7° C)
F (190.6° C)
F (176.7° C)
F (190.6° C)
F (190.6° C)
F (176.7° C)
F (176.7° C)
F (162.8° C)
F (176.7° C)
F (204.4° C)
30 - 35
35 - 40
15 - 17
30 - 32
25 - 30
5 - 50
20 -25
7 -10
9-10
4 - 27
7 - 9
50 - 55
4 - 5
35 - 45
30 - 35
8 - 10
13 -16
60 - 65
10 - 12
45 - 50
20 - 25
10 - 12
45 - 50
45 - 50
35 - 40
40 - 45
10 - 15
Cooking Tips
4342
Page 23
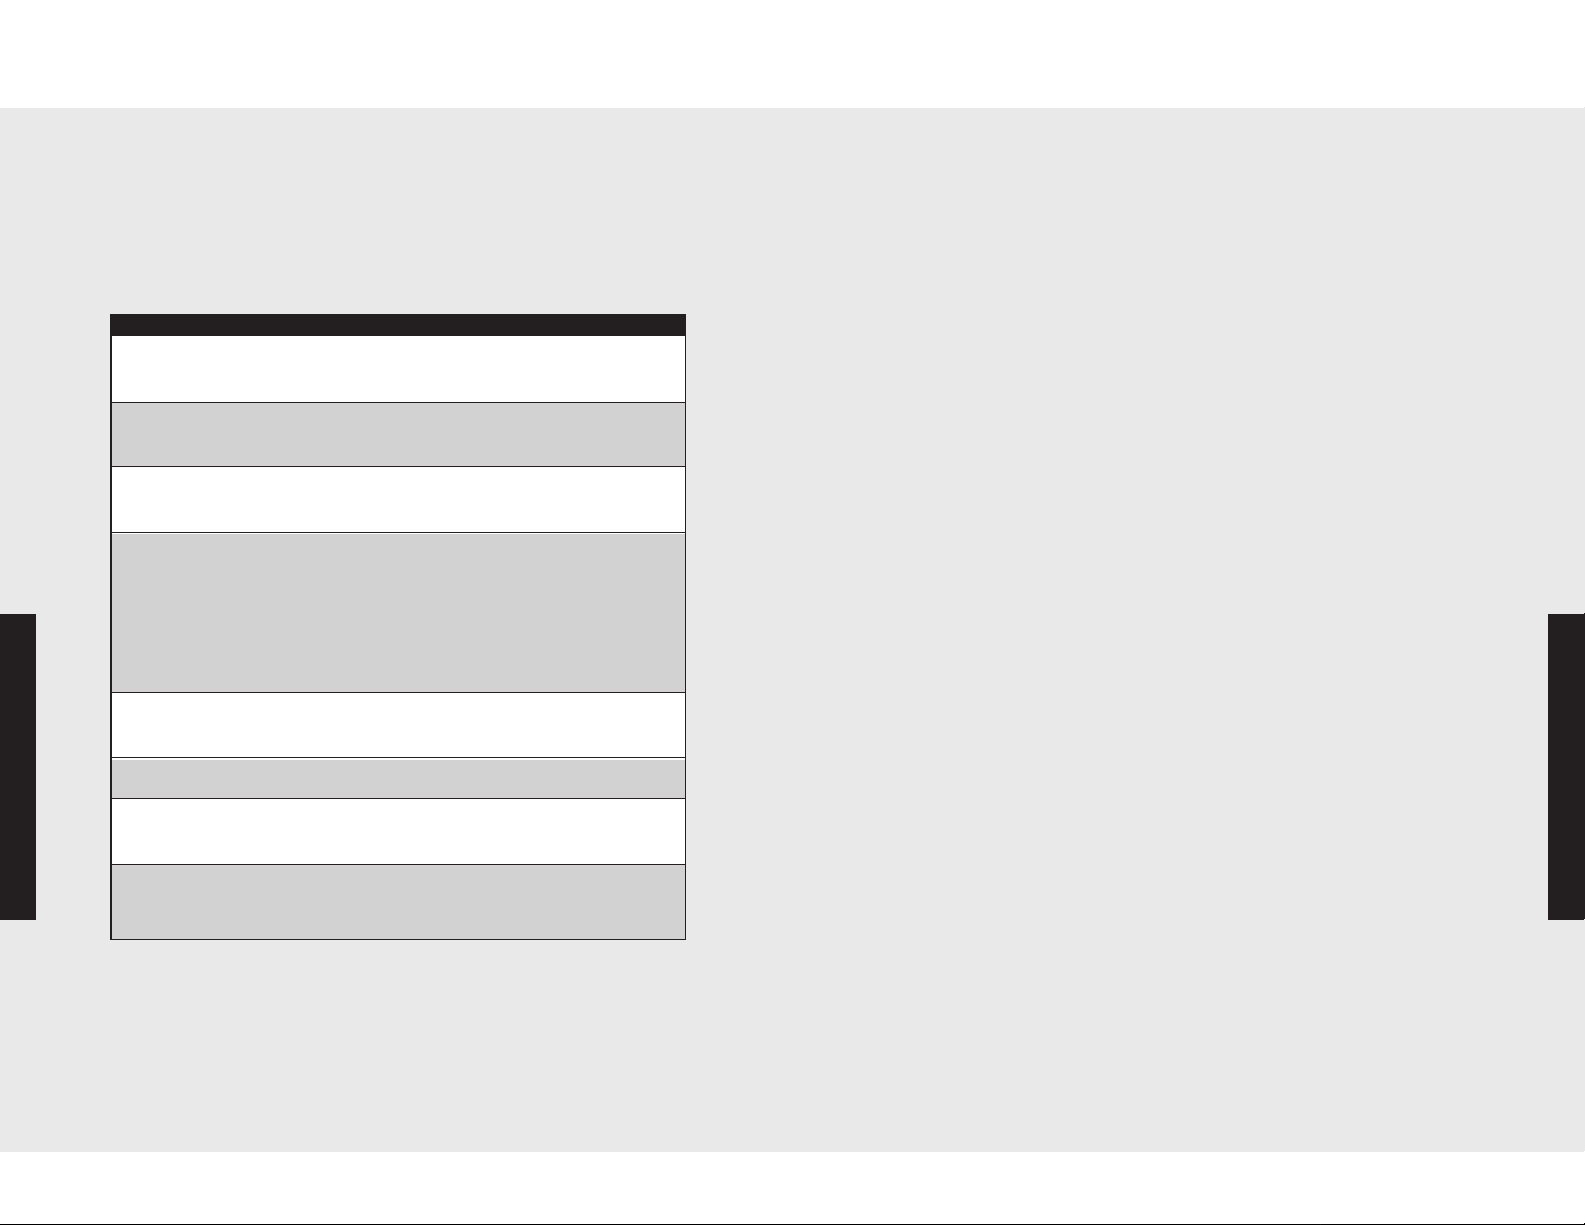
Solving Baking Problems
Broiling Tips
Bakingproblems can occurformanyreasons. Itis important to remember
that thetemperaturesettingand cooking timesyou are accustomed to
using with your previousovenmay varyslightlyfrom those required with
your newViking oven. You mayfindthatyou need to makesome
adjustments.
• Always use a broiler pan andgridforbroiling. They are
designed to provide drainageof excessliquid and fataway
from thecookingsurfaceto help preventsplatter, smoke,and
fire.
• To keepmeatfromcurling, slitfatty edges.
• Brush chicken andfishwithbutter several timesas they broil to
COMMON BAKING PROBLEMS AND REMEDIES
PROBLEM CAUSE REMEDY
Cakes burnedon the 1. Ovenwas too hot 1. Reduce temperature
sides or notdone
in center
Cakes crackon top 1. Batter too thick 1. Followrecipe; Add liquid
Cakes are not level 1. Batteruneven 1. Distribute batter evenly
Food toobrown on 1. Oven door opened 1. Use door window to
bottom toooften check food
Food toobrown on 1. Rackposition too high 1. Use recom. rack position
top
Cookiestooflat 1. Hotcookie sheet 1. Allow sheetto cool
Cooking Tips
Pies burned around 1. Oven too hot 1. Reduce temperature
edges
Pies toolight on top 1. Ovennothotenough 1. Increasetemperature
2. Wrong pan size 2. Userecommendedpansize
3. Toomanypans 3. Reduce numberof pans
2. Oventoo hot 2. Reduce temperature
3. Wrong pan size 3. Use recom. pan size
2. Ovenor racknot level 2. Level oven or rack
3. Panwaswarped 3. Use properpan
2. Darkpans beingused 2. Useshiny pans
3.
Incorrect rackposition3.Userecom.rackposition
4. Wrong bakesetting 4. Adjustto conventional
5. Pantoolarge 5. Use proper pan
2. Ovennot preheated 2. Allowoven to preheat
3. Sides of pantoohigh 3. Use proper pans
2. Toomanypans used 2. Reduce no.of pans
3. Ovennot preheated 3. Allowovento preheat
2. Toomanypans used 2. Reduce no.of pans
3.
Oven notpreheated
or convection setting
as needed
betweenbatches
3.
Allow oven to preheat
prevent drying out.
• To preventsticking, lightlygrease broilertray.
• Broil on first side forslightlymore thanhalftherecommended
time, season, andthenturn. Season the secondsidejustbefore
removing from the oven.
• Always pullthe rack out to “STOP” position beforeturning or
removing food.
• Usetongs or a spatula to turn meats. Never pierce meatwith a
fork, as thisallows the juices to escape.
• Remove the broiler pan from theovenwhenyouremove the
food. Otherwise, drippings will bake onto the pan.
• Whilethe pan is hot,place a damppaper towel over the
grid. Drizzle with liquid dishwashing detergent andpour
water over the grid. This will make cleaningeasier.
• You can also line the broiler pan with aluminum foilto
make cleaning easier. Be surethefoilextends up the
side of the pan.
• Although it isn’t recommended, the grid canalsobe covered
with foil. Be sureto slit openings to conform with theopenings
in the grid so that melted fatcan drainthrough. This willprevent
spattering, smoking, or the possibility of grease fire.
Cooking Tips
4544
Page 24
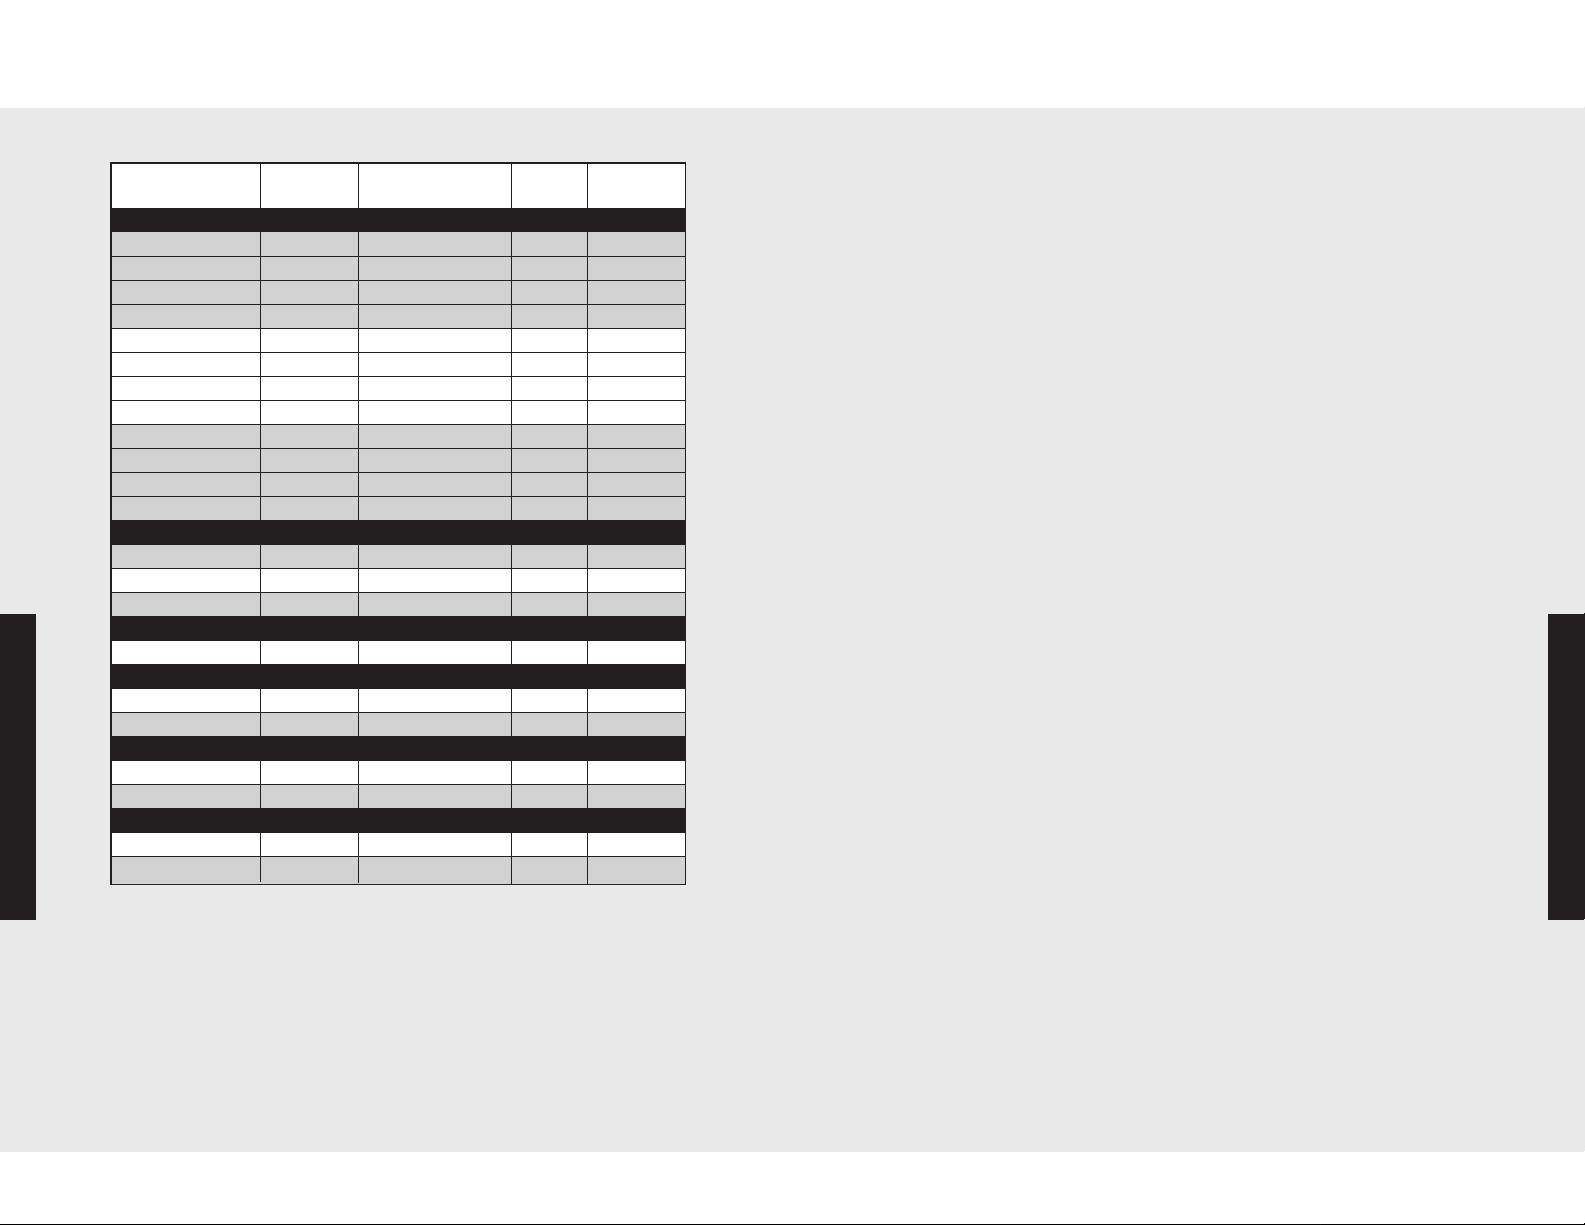
Broiling Chart
Type and Time
Cut of Meat Weight Setting Rack (minutes)
Te
BEEF
Sirloin, 1"
Rare 12 oz Conventional Broil 57
Medium 12 oz Conventional Broil 59
Well done 12 oz Conventional Broil 5 11
T-Bone,3/4"
Rare 10 oz Conventional Broil 55
Medium 10 oz Conventional Broil 57
Well done 10 oz Conventional Broil 59
Hamburger, 1/2"
Rare 1/4 lb. ConvectionBroil 54
Medium 1/4 lb. Convection Broil 57
Well done 1/4 lb. Convection Broil 59
CHICKEN
Bnls Breast 1 lb. ConvectionBroil 4 18
Bone-inBreast 2 - 2 1/2lb. ConventionalBroil 4 20
Chickenpieces 2 -2 1/2 lb. Convection Broil 4 18 (min/lb)
HAM
Hamslice, 1" 1 lb. Conventional Broil 4 22
LAMB
RibChops, 1" 12 oz. ConvectionBroil 57
Shoulder 1 lb. Convection Broil 56
PORK
Loin Chops, 3/4" 1 lb. Convection Broil 4 14
Cooking Tips
Bacon Conventional Broil 4 6
FISH
Salmon Steak 1 lb. Convection Broil 57
Fillets 1 lb. Convection Broil 56
Roasting Tips
• Alwaysuse the broiler panand grid suppliedwitheachoven,
becausethehot air must be allowed to circulate aroundthe
item being roasted.
• Do not coverwhatis being roasted;convection roastingseals in
juicesquickly for a moist,tender product. Poultrywillhavea
light,crispy skin andmeats willbe browned,not dry or burned.
• Cook meats and poultrydirectly from therefrigerator. Thereis
no need for meat or poultry to stand at roomtemperature.
• As a general rule,to convert conventional recipes to convection
recipes, reduce thetemperatureby 25° F (-3.9°C) andthe
cookingtimeby approximately 10 to 15%.
• Alwaysroast meats fat side up in a shallow pan,usinga roasting
rack. No bastingis requiredwhenthe fat side is up.
• Do not add water to the pan, as thiswillcause a steamed
effect. Roasting is a dry-heat process.
• Poultry should be placed breast side up on a rackin a shallow
pan. Brushpoultry with melted butter, margarine, or oil before
andduring roasting.
• Forconvection roasting, do not use panswith tallsides, as this
will interfere with the circulation of heated air over thefood.
• When using a meat thermometer, insert theprobe halfwayinto
thecenter of the thickestportion of themeat. (Forpoultry,
insertthe thermometer probe between the body andleg into
thethickestpart of the inner thigh.) To ensure an accurate
reading, the tipof theprobe shouldnottouch bone, fat, or
gristle.
• Check themeattemperature halfway throughtherecommended
roasting time.
• After reading the thermometeronce, insertit 1¼ to 2 inches
(1.3 cm)further into the meat,thentakea second reading. If
thesecond temperature registers below the first, continue
cookingthemeat.
• Roasting times always varyaccording to the size,shape, and
qualityof meatsand poultry. Less tender cuts of meat are best
prepared in theconventionalbake settingand may require
moist cooking techniques.
• Removeroastedmeats from theovenwhenthe thermometer
registers5° F (-15° C) to 10°F (-12.2°C) lower than the desired
doneness. This is becausethe meat will continueto cook after
removal from theoven.
• Allow roasts to stand15 to 20 minutesafter takingthemout of
theovento make carving easier.
• If usinga cookingbag,foiltent, or othercover, use the
conventional bake setting ratherthaneither convection setting.
Cooking Tips
46 47
Page 25
Conventional Roasting Chart
Convection Roasting Chart
Food Weight Temp (min/lb) Temp
Time
BEEF
RibRoast
Rare 4 - 6 lbs 325°F (162.8°C) 25 140°F (60.0° C)
Medium 4 - 6 lbs 325°F (162.8° C) 30 155°F (68.3°C)
Well done 4 - 6 lbs 325° F (162.8° C) 40 170°F (76.7°C)
Rump Roast
Medium 4 - 6 lbs 325°F (162.8° C) 25 155°F (68.3°C)
Well done 4 - 6 lbs 325° F (162.8° C) 30 170°F (76.7°C)
TipRoast
Medium 3 - 4 lbs 325°F (162.8° C) 35 155°F (68.3°C)
Well done 3 - 4 lbs 325° F (162.8° C) 40 170°F (76.7°C)
LAMB
Lamb Leg 3 - 5 lbs 325° F (162.8°C) 30 180°F (82.2°C)
PORK
Pork Loin 3 - 5 lbs 325° F (162.8° C) 35 180°F (82.2°C)
Pork Chops 1 -11/4lbs 350° F (176.7°C) 55 - 60 N/A
1" thick
Ham, fully 5 lbs 325° F (162.8° C) 18 130° F (54.4°C)
Cooked
POULTRY
Chicken, Whole 3 - 4 lbs 375°F (190.6° C) 30 180°F (82.2°C)
Turkey, 12 - 16 lbs 325° F (162.8° C) 16 - 20 180° F (82.2° C)
Unstuffed
Turkey 20 - 24 lbs 325° F (162.8° C) 16 - 20 180° F (82.2°C)
Turkey, Stuffed 12 - 16 lbs 325° F (162.8°C) 17 - 21 180° F (82.2°C)
Cooking Tips
Turkey, Stuffed 20 - 24 lbs 325° F (162.8°C) 17 - 21 180° F (82.2°C)
Turkey Breast 4- 6 lbs 325° F (162.8° C) 20 180°F (82.2°C)
total time
Internal
Food Weight Temp (min/lb) Temp
BEEF
RibRoast
Rare 4 - 6 lbs 325° F (162.8° C) 25 140°F (60.0° C)
Medium 4 - 6 lbs 325° F (162.8°C) 24 155°F (68.3°C)
Well done 4 - 6 lbs 325°F (162.8°C) 30 170° F (76.7° C)
Rump Roast
Medium 4 - 6 lbs 325° F (162.8°C) 20 155°F (68.3°C)
Well done 4 - 6 lbs 325°F (162.8°C) 24 170° F (76.7° C)
TipRoast
Medium 3 - 4 lbs 325° F (162.8°C) 30 155°F (68.3°C)
Well done 3 - 4 lbs 325°F (162.8°C) 35 170° F (76.7° C)
LAMB
Lamb Leg 3 - 5 lbs 325° F (162.8° C) 30 180° F (82.2° C)
PORK
Pork Loin 3 - 5 lbs 325°F (162.8°C) 30 180° F (82.2° C)
Pork Chops 1 -11/4lbs 325°F (162.8° C) 45 - 50 N/A
1" thick
Ham, fully 5 lbs 325° F (162.8° C) 15 130° F (54.4°C)
Cooked
POULTRY
Chicken, Whole 3-4 lbs 350°F (176.7° C) 25 180° F (82.2°C)
Turkey, 12 - 16lbs 325° F (162.8° C) 11 180° F (82.2° C)
Unstuffed
Turkey 20 - 24 lbs 325°F (162.8°C) 11 180° F (82.2° C)
Turkey, Stuffed 12 - 16 lbs 325° F (162.8° C) 9 - 10 180° F (82.2° C)
Turkey, Stuffed 20 - 24 lbs 325° F (162.8° C) 9 - 10 180° F (82.2° C)
Turkey Breast 4 - 6 lbs 325° F (162.8° C) 20 180°F (82.2°C)
Time
total time
Internal
Cooking Tips
48 49
Page 26
Cleaning and Maintenance
CAUTION
Cleaning and Maintenance
Anypiece of equipmentworks betterand lastslonger when
maintainedproperly andkeptclean. Cooking equipment is no
exception.Yournew Viking ovenmustbe kept cleanand
maintainedproperly in orderto give you theyears of cooking
enjoyment for which it is designed.
Severaldifferentfinisheshavebeen usedin your electric oven.
Cleaning instructions for eachsurfacearegiven below. (Your oven
features a Self-Clean cycle for theoveninterior. See page 50 for
complete interior cleaning instructions.)
General Cleaning
NOTE: NEVERUSE AMMONIA,STEELWOOL PADSOR
ABRASIVE CLOTHS,CLEANSERS,OVENCLEANERS, OR
ABRASIVE POWDERSON ANY PART OF YOUR VIKINGOVEN.
THEY CANCAUSE PERMANENT DAMAGE.
Surface or
Feature
Brass Parts • Clean the broiler pan and grid with detergent
• Clean the oven racks with detergent and hot
Broiler Pan
and Grid
• Clean the broiler pan and grid with detergent
• Scour stubborn spots with a soap-filled, steel
Cleaning Recommendation
and hot water. For stubborn spots, use a
soap-filled, steel wool pad.
water. Stubborn spots can be scoured with a
soap-filled, steel wool pad.
and hot water.
wool pad.
Surface or
Feature
Meat Probe
Oven Control
Panel
Stainless
Steel Parts
Cleaning Recommendation
• Cool the probe before cleaning.
• The meat probe may be cleaned with soap
and water or with a soap-filled scouring pad.
• Scour stubborn spots with the soap-filled
scouring pad. Rinse and dry.
• Do not immerse the meat probe in water.
• Do not store the probe inside the oven.
• The panel and its individual TouchSensor™
panels should be cleaned regularly.
• Wipe clean with a soft cloth and any glass
cleaner or mild detergent.
• All stainless steel body parts should be wiped
regularly with hot, soapy water at the end of
each cooling period, and with a liquid cleaner
designed for steel when soapy water will not
do the job.
• Do not use steel wool, abrasive cloths,
cleansers, or powders.
• If necessary, soak the area with hot towels to
loosen encrusted material, then use a wooden
or nylon spatula or scraper. Do not use a
metal knife, spatula, or any other metal tool to
scrape stainless steel.
• Do not permit citrus or tomato juice to remain
on any stainless steel surface, because citric
acid will permanently discolor stainless steel.
Wipe up any spills.
Allspecialordered brasspartsarecoatedwith an epoxycoating.
DONOTUSEBRASSCLEANERSOR ABRASIVECLEANERSON
ANY BRASS PARTS. All brass body parts should be wiped
Product Care
regularly with hot soapy water. When hot soapy water will not
do the job, use every day household cleaners that are not
abrasive.
Product Care
50 51
Page 27
Cleaning and Maintenance
CAUTION
WARNING
Cleaning and Maintenance
Cleaning the Interior Oven
Your Viking oven featuresan automatic,self-cleaning cycle.
Duringthiscycle, theovenreaches elevated temperatures in
order to burnoffsoiland deposits.An integral smokeeliminator
helps reduce odors associated withthesoilburn-off. A powder
ashresidueis left in the bottom of the oven after completionof
theSelf-Clean Cycle.
Thedoorlatch is automatically activated afterselecting theSelfClean setting. The latch ensuresthatthe door cannot be opened
while the oven interior is at cleantemperatures.
Before Using theSelf-Clean Cycle:
• Remove theovenracks and any otheritems/utensils from
theoven. Thehighheatgenerated duringthe cleaningcycle
candiscolor, warp, anddamage theseitems.
• Do not use foil or liners in the oven during the Self-Clean
Cycle.
• Wipe off any large spills fromthe oven bottom andsides.
• Neveruse oven cleanersinside a self-cleaningoven or on
raisedportionsof the ovendoor.
• Some areas of the ovenmust be cleaned by hand before the
cycle begins. Soils in these areas will be baked on and very
difficultto clean if not removed first.
• Cleanthe door up to the gasket,thedoorframe, and up to
twoinches inside the framewith detergent and hotwater.
Rinse thoroughly anddry.
Burnor Electrical Shock Hazard
Make sure all controls are OFF and oven is COOL before
cleaning. Failure to do so can result in burnsor electricalshock.
Using the Self-Clean Cycle
1. Closethe door completely.
2. Select “UPPER OVEN”or “LOWEROVEN.” “SELECT
MODE” will appear in the displayfor the selected oven.
3. Press“SELF CLEAN”fromtheovenfunctioncontrol panel.
4. Press“SET” or “ENTER.”At this time, “SELF CLEAN” will
appearin thedisplay. The door lockindicator lightwill
remainon untilthe Self-Clean is completedor interrupted
andthe oven temperaturedrops to a safetemperature.
A complete cycle takesapproximately 3 1/2 hours,withan
additional30 minutesneeded for the oven to cool down
enoughfor the door latch to disengage.
NOTE: A whirring fan noisewillbe heard during theSelfClean Cycleand will continueto runfor the 3 1/2 hour
duration of the Self-CleanCycle.
5. The timer will countdownfrom4 hours. Whenthe cycleis
completed,press the“OFF” buttonfor the selected oven.
6. When the oven hascompletely cooled, open the door and
removeany ash from the oven surfaces with a dampcloth.
7. Tocancel or interrupt the self-cleaning cycle, press the
“OFF” buttonforthe selectedoven.
Donottouchtheexteriorportionsoftheovenafterself-cleaning
cycle has begun,since someparts becomeextremely hot to the
touch!Duringthefirstfew timesthe self-cleaning featureisused,
there may be some odor and smoking from the curing of the
binderin the high-densityinsulationusedin the oven.When the
insulation is thoroughly cured, this odor will disappear. During
subsequent self-cleaning cycles, you may sense an odor
characteristic of high temperatures. Keep the kitchen wellventedduring theself-cleaning cycle.
Product Care
Product Care
5352
Page 28
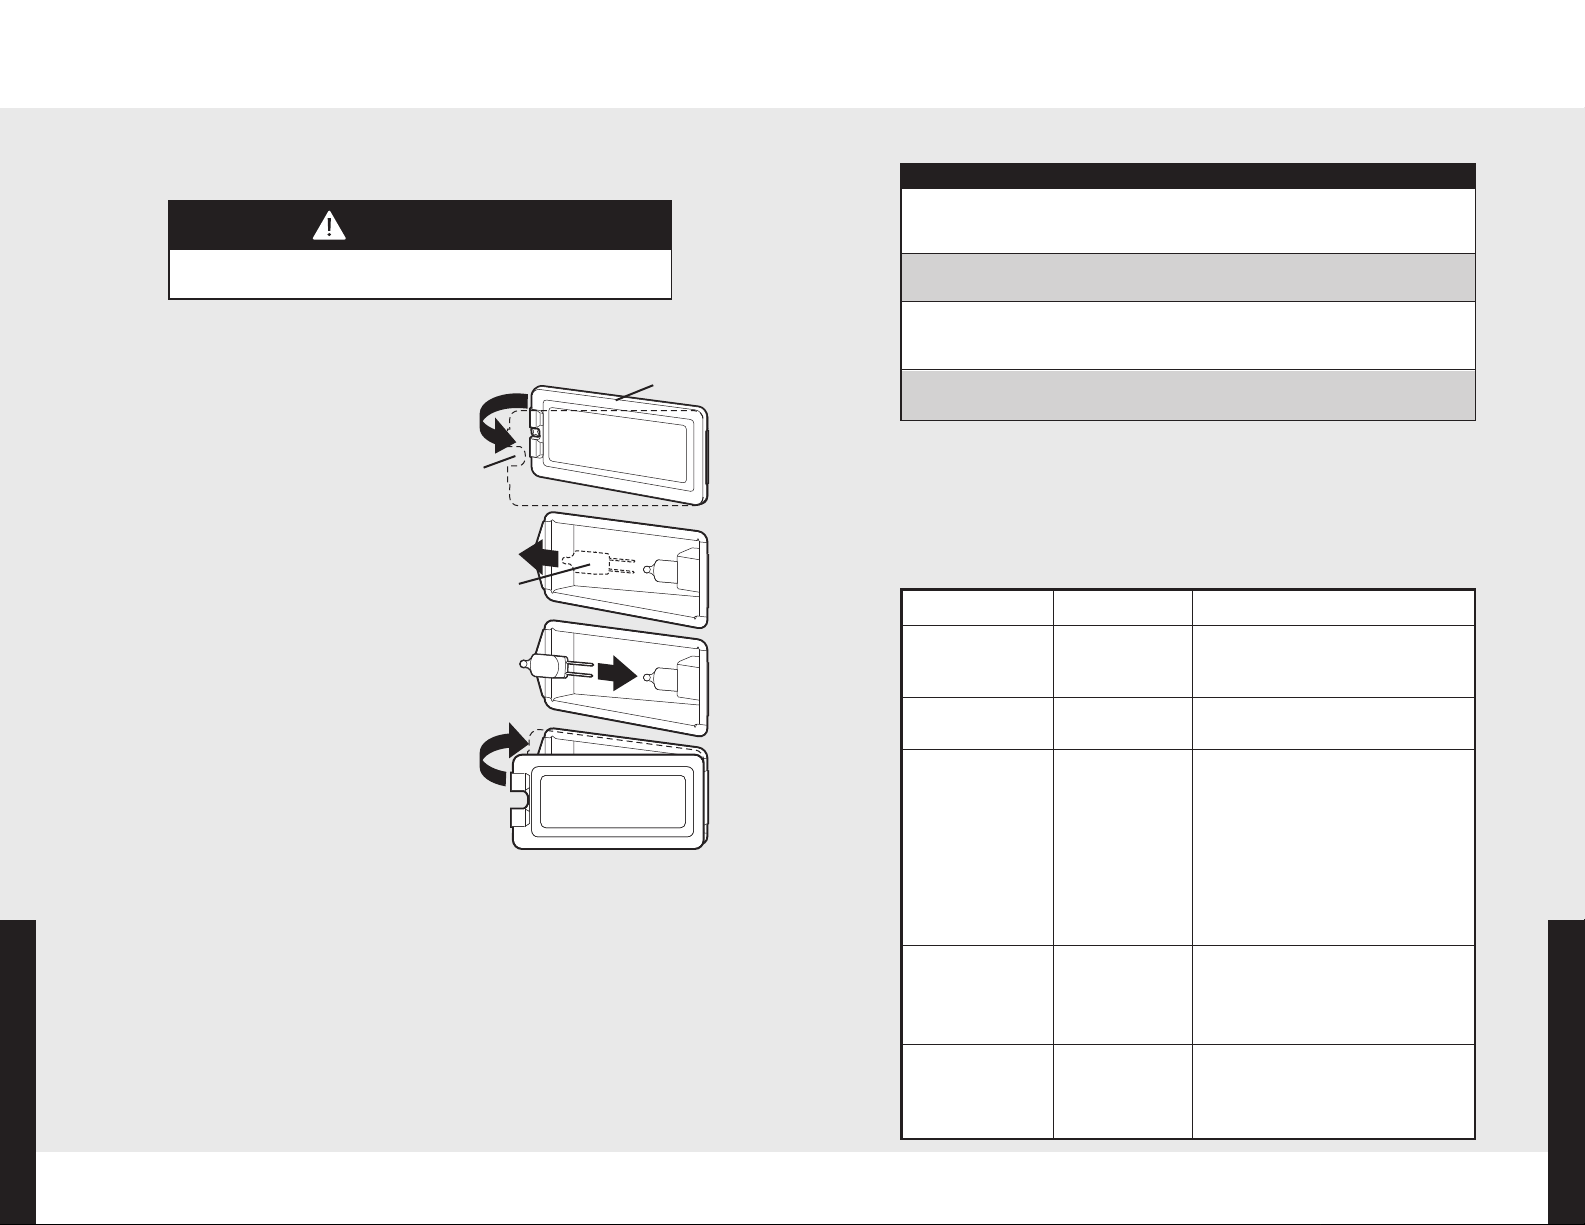
Replacing Light
CAUTION
Trouble Shooting
Replacing Interior Halogen Oven Lights
DISCONNECTTHEELECTRIC POWERATTHEMAINFUSE OR
CIRCUITBREAKERBEFORE REPLACINGBULB.
Do not touch bulb with bare hands. Clean off any signs of oil
from the bulb and handle with a soft cloth.
1. Unsnap glass light cover
using a screwdriver in the
access groove.
2. Firmly grasp light bulb and
pull out.
3. Replace with halogen bulb
using volt and wattage
requirements listed on glass
cover.
4. Replace the light cover by
snapping glass cover onto
metal box.
5. Reconnect power at the main
fuse or circuit breaker.
access
groove
light
bulb
glass light
cover
PROBLEM POSSIBLE CAUSE AND/OR REMEDY
1. Ovenwill not function. Oven is not connected to electricalpower.
Have electriciancheck powercircuitbreaker,
wiring and fuses.
2. Ovendoes not Door is not shut tightenough for
operatein self-clean mode. automatic door latchto lock.
3. Doorwill not open. Ovenis stillin Self-Clean Mode. If ovenis
4. Ovenlightwillnot work. Lightbulb is burnedout.
hot, door latch willreleasewhen a safe
temperatureis reached.
Oven is not connected to power.
Error Handling
In the event that you make an errorwhile programming your Viking oven,
youwillheara longbeep followed by the appearanceof an error message
on the display. Usethe following keyto help you correctthese common
programming errors:
ErrorMessage Problem Correction
Anincorrect
MODEL ERROR
RTDERROR
PROBE ERROR The meat
modelnumberhas
beeninstalled.
RTDis open or
shorted.
probe is open
or shorted.
Call yourViking dealer or
authorizedserviceagency.
Call yourViking dealer or
authorizedserviceagency.
Themeatprobe may notbe
pluggedin.If it isn't, plugit in to
theoven. Press the OFFkey to
exit andclear the error message.
Power Failure
Do not attempt to use during a power failure. Unit will not
function.
Thecontrolis
LATCH ERROR
KEYBOARD
ERROR
Product Care
unableto lock
or unlock the
door latch.
No connection
existsbetween
thekeyboard
andcontrol.
If the meat probe is plugged
in and theError message is still
displayed,callyourViking dealer
or authorized serviceagency.
Call yourViking dealer or
authorizedserviceagency.
Call yourViking dealer or
authorizedserviceagency.
Product Care
5554
Page 29

Service Information
If your oven should fail to operate, checkto see whetherthe
circuit breaker is open or the fuse is blown.
If service is required, call yourViking dealer or authorizedservice
agency. The name of the authorizedserviceagency canbe
obtained from theViking dealer or distributor in yourarea.
When youcallfor service,havethe followinginformationreadily
available:
• Modelnumber
• Serial number
• Date of purchase
• Name of dealer fromwhompurchased
Be ready to clearly describe theproblemthatyouarehaving with
your Viking oven.
If you are unable to obtain the name of an authorized service
agency, or if youcontinue to have service problems,contact
Viking at (888) 845-4641 or writeto:
VIKING PREFERRED SERVICE
111Front Street
Greenwood,Mississippi38930 USA
Recordthe following informationindicated below. You willneed
it if serviceis ever required. The serial number and model
numberfor your oven are located on the identification plate
mountedon the bottomleftsideof theovendooropening.
Model Number_______________ Serial Number____________
Date of Purchase______________ DateInstalled ____________
Dealer's Name _________________________________________
Address _______________________________________________
_______________________________________________________
If service requiresinstallation of parts, useonlyauthorized partsto
ensureprotectionunder thewarranty.
This manual should remainwiththe oven for future reference.
Warranty
UILT-INELECTRIC OVENS WARRANTY
B
Built-in electricovensand all of their component parts and accessories, except as detailed below*, are warranted
tobefreefromdefectivematerials or workmanshipin normalhouseholdusefora periodoftwelve(12)monthsfrom
thedate of original retailpurchase. Viking Range Corporation,warrantor, agreesto repair or replace, atits option,
ny part which failsor is found to be defectiveduringthe warrantyperiod.
a
Glass (including light bulbs), painted and decorative items are warranted to be free from defective materials or
*
workmanship for a period of ninety (90)days fromthe date of original retail purchase. ANY DEFECTS MUST BE
REPORTED TO THE SELLING DEALER WITHIN NINETY (90) DAYS FROM DATE OF ORIGINAL RETAIL
URCHASE.
P
iking Range Corporation uses the most up-to-date processes and best materials available to produce all color
V
finishes. However, slightcolor variation may be noticedbecause of the inherent differences in painted parts and
porcelainpartsas wellas differencesin kitchen lighting,product locations,andotherfactors.
nybakeelement,broil element, or convectioncookelement whichfailsdue to defectivematerialsor workmanship
A
in normal household use during the second through fifth year from the date of original retail purchase will be
repairedor replaced,freeof charge for the part itself, with the owner payingall other costs, includinglabor.
nyporcelainovenor porcelain innerdoorpanelwhichruststhroughdueto defectivematerialsor workmanshipin
A
normal household use duringthe secondthrough the tenth year from the date of original retail purchase will be
repairedor replaced,freeof charge for the part itself, with the owner payingall other costs, includinglabor.
NINETY (90)DAY RESIDENTIALPLUSWARRANTY This warrantyapplies to applicationswhere useof theproduct
extends beyondnormalresidentialuse. Examples are,but not limited to,bed andbreakfasts,firestations,private
clubs, churches,etc. Thiswarrantyexcludes all commercial locations suchasrestaurants, foodservicelocationsand
institiutionalfood servicelocations.
Thiswarranty extends to the original purchaserof the productwarrantedhereunder and to each transferee owner
of the product during the termof the warranty.
Thiswarranty shallapply to products purchased and located in the United States and Canada. Products mustbe
purchasedin the country whereserviceis requested. Warranty labor shallbe performed by an authorizedViking
Range Corporation service agency or representative. Warranty shall not apply to damage resulting from abuse,
accident,naturaldisaster, lossof electrical power to the product for any reason,alteration,outdoor use, improper
installation,improperoperation,or repairorserviceoftheproductby anyoneotherthananauthorizedVikingRange
Corporation serviceagency or representative. Thiswarrantydoesnotapplytocommercialusage. Warrantoris not
responsible for consequentialor incidental damage whetherarisingout of breach of warranty, breach of contract,
or otherwise. Some jurisdictions do not allowthe exclusion or limitation of incidentalor consequential damages,
so the abovelimitationor exclusionmay not applyto you.
Owner shall be responsible for proper installation, providing normal care and maintenance, providing proof of
purchase upon request, and makingthe appliance reasonably accessible for service. If the product or one of its
component parts contains a defect or malfunction during the warranty period, after a reasonable number of
attempts by the warrantor to remedy the defects or malfunctions, the owner is entitled to either a refund or
replacementoftheproductor itscomponentpartorparts. Warrantor’s liabilityonanyclaim of any kind,withrespect
tothegoodsorservicescoveredhereunder,shallinno caseexceedthepriceof thegoodsor serviceor partthereof
which givesriseto the claim.
WARRANTYSERVICE: Underthetermsofthiswarranty,servicemustbeperformed by a factoryauthorizedViking
Range Corporation service agent or representative. Service will be provided during normal business hours, and
labor performed at overtime or premium rates shall not be covered by this warranty. Toobtain warranty service,
contact the dealer fromwhomthe productwaspurchased,an authorizedViking RangeCorporation service agent,
or Viking Range Corporation. Provide model and serial number and date of original purchase. For the name of
your nearest authorized Viking Range Corporation service agency, call the dealer from whom the product was
purchased or Viking Range Corporation. IMPORTANT: Retain proof of original purchase to establish warranty
period.
Thereturn of theOwnerRegistration Cardis not a condition of warrantycoverage. Youshould,however, returnthe
Owner Registration Card so that Viking Range Corporation can contact you should any question of safety arise
which couldaffect you.
Any implied warranties of merchantability and fitness applicable to the above described bake element, broil
element, convection cook element, porcelain oven, or porcelain inner door panel are limited in duration to the
period of coverageof the applicableexpress written limited warranties setforthabove. Some jurisdictionsdo not
allow limitations on howlonganimpliedwarrantylasts,so theabovelimitation may notapplytoyou. Thiswarranty
gives you specificlegalrights, and you may alsohave other rights which may varyfromjurisdictionto jurisdiction.
ONEYEAR FULLWARRANTY
FIVEYEAR LIMITEDWARRANTY
TENYEAR LIMITED WARRANTY
Product Care
5756
Page 30

5958
 Loading...