

Viking DSCD130 Service Manual
Service
Manual
This manual is to be used by qualifi ed appliance technicians only. Viking
does not assume any responsibility for property damage or personal
injury for improper service procedures done by an unqualifi ed person.
®
Preferred Service
30 Inch Dual
Fuel Range
This Base Manual covers general and
specifi c information including, but not
limited to the following models:
DSCD130
SMC-0014
May 2010

Table of Contents
Important Information ..................................................... 3
Safety Information .................................................... 3
General Information ........................................................ 5
Serial Number .......................................................... 5
Dimensions .............................................................. 5
Specifi cations ........................................................... 6
Warnings .................................................................. 7
To Prevent Fire or Smoke Damage ...................... 7
In Case of Fire ...................................................... 7
Heating Elements ................................................. 7
Cleaning Safety .................................................... 7
Self-Clean Oven ................................................... 8
Important Safety Notice and Warning ................... 8
Important Notice Regarding Pet Birds: ................. 8
About Your Appliance ............................................ 8
Electrical & Gas Requirements ................................ 9
Electrical Requirements ........................................ 9
Gas Connection .................................................... 9
Manual Shut-Off Valve .......................................... 9
Connecting Gas & Electric .................................... 9
In Massachusetts ................................................ 10
Pressure Regulator ............................................. 10
Flexible Connections .......................................... 10
In Canada ........................................................... 10
In Massachusetts ................................................ 10
Performance Checklist ........................................... 10
Before Using Range ................................................11
Oven ....................................................................11
Range Features ......................................................11
Troubleshooting ............................................................ 12
LED Error Codes .................................................... 12
Oven Control Board Connections .......................... 12
Oven Components ................................................. 13
Selector and Thermostat Characteristics ............... 16
Component Characteristics .................................... 17
Checking Oven Bake Element Operation ........... 18
Checking Oven Broil Element Operation ............ 19
Checking Convection Element Operation ........... 20
Spark Module Test ................................................. 21
Surface Burner Igniter Will Not Spark ................. 21
RTD Characteristics ............................................... 21
Disassembly ................................................................. 22
Access Control Board Assembly ............................ 22
Control Board Removal .......................................... 22
Motor Capacitor Removal ...................................... 23
Door Assembly Removal ........................................ 23
Door Gasket Removal ............................................ 23
Outer Door Panel Assembly Removal ................... 24
Door Handle Removal ............................................ 24
Inner Door Glass Removal ..................................... 24
Door Hinge Removal .............................................. 25
Temperature Sensor (RTD) Removal..................... 25
Bake Element Removal ......................................... 25
Rack Support Removal .......................................... 26
Convection Fan Cover Removal ............................ 26
Smoke Eliminator Removal .................................... 26
Convection Fan Assembly Removal ...................... 26
Convection Bake Element Removal ...................... 27
Broil Element Removal .......................................... 27
Control Components Accessed .............................. 27
Control Panel Assembly Removal .......................... 27
Oven Function Selector Removal .......................... 28
Oven Thermostat Removal .................................... 28
Indicator Light Removal ......................................... 28
Oven Light Switch Removal ................................... 28
Door Switch Removal ............................................ 28
Oven Light Bulb Removal ...................................... 29
Top Light Housing Removal ................................... 29
Door Lock Assembly Removal ............................... 29
IRIS Module Removal ............................................ 30
Burner Base Assembly Removal ........................... 30
Island Trim Removal .............................................. 30
Surface Burner Valve Removal .............................. 30
Main Top Removal ................................................. 31
Jet Holder Removal ............................................... 31
Pressure Regulator Removal ................................. 32
Side Trim and Side Panel Removal
(Right Side Shown) ................................................ 32
Hinge Receiver Removal ....................................... 33
Back Panel Removal .............................................. 33
Cooling Blower Motor Removal ............................. 34
Terminal Block Removal ........................................ 34
Orifi ce Removal ..................................................... 34
Wiring Diagrams ........................................................... 35
Oven Control Board Schematic ............................. 35
Strip Circuits ........................................................... 36
Wiring Diagrams .................................................... 38
2 ©2010 Viking Preferred Service
Important Information
SAVE THESE INSTRUCTIONS
REVIEW ALL SERVICE INFORMATION IN THE APPROPRIATE SERVICE MANUAL AND TECHNICAL SHEETS
BEFORE BEGINNING REPAIRS.
Pride and workmanship go into every product to provide our customers with quality products. It is possible, however,
that during its lifetime, a product may require service. Products should be serviced only by a qualified service
technician that is familiar with the safety procedures required in the repair and who is equipped with the proper tools,
parts, testing instruments, and the appropriate service manual.
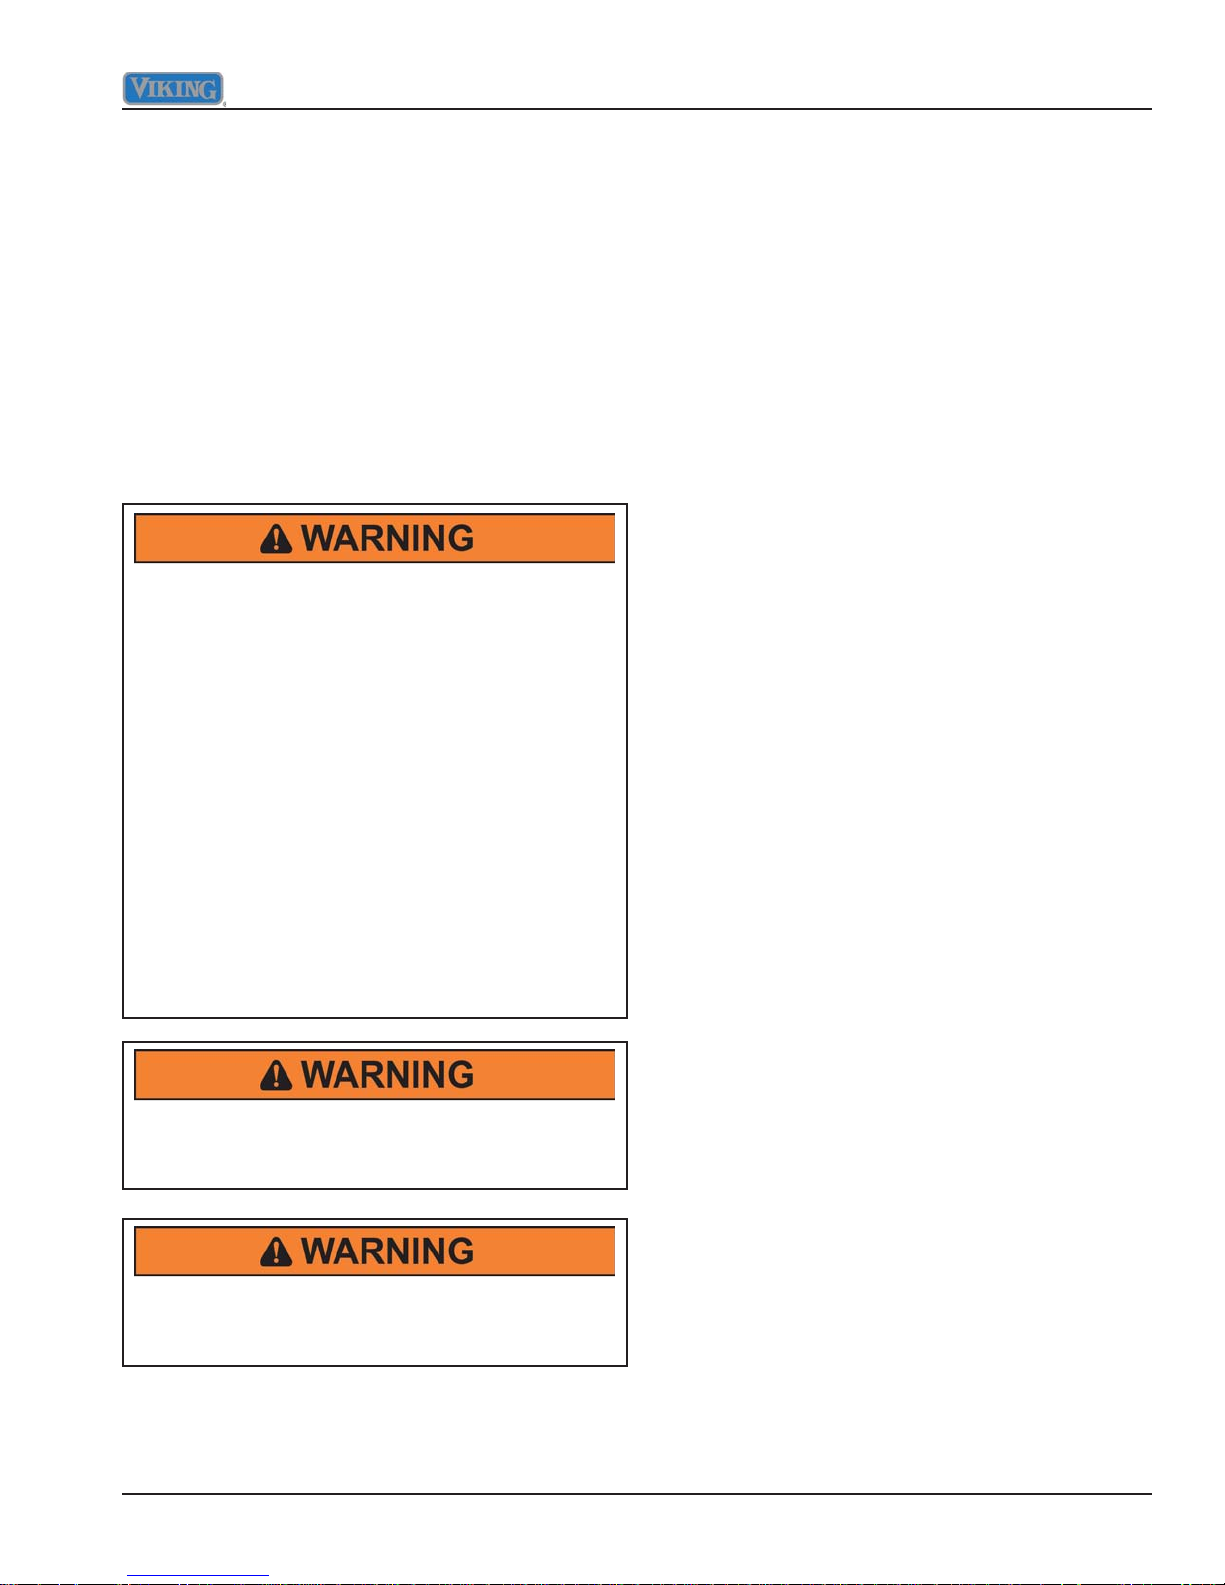
Safety Information
We have provided many important safety messages in
this manual and on the appliance. Always read and obey
all safety messages. This is the safety alert symbol.
This symbol alerts you to hazards that can kill or hurt
you and others. All safety messages will be preceded
by the safety alert symbol and the word “DANGER”,
“WARNING”, or “CAUTION”. These words mean:
IMMEDIATE HAZARDS WHICH WILL RESULT IN
SEVERE PERSONAL INJURY OR DEATH.
Hazards or unsafe practices which COULD result in
severe personal injury or death.
All safety messages will identify the hazard, tell you how
to reduce the chance of injury, and tell you what can
happen if the instructions are not followed.
To avoid risk of serious injury or death, repairs should
not be attempted by unauthorized personnel.
VIKING will not be responsible for any injury or
property damage from improper service procedures.
If performing service on your own product, you must
assume responsibility for any personal injury or
property damage which may result.
Technical support for authorized servicers:
1-800-914-4799
Address your written correspondence to:
Viking Preferred Service
1803 HWY 82 West
Greenwood, MS 38930
Hazards or unsafe practices which COULD result in
minor personal injury or product or property damage.
©2010 Viking Preferred Service 3
Important Information
DESIGNER FREESTANDING 30" DUAL FUEL RANGES WARRANTY
ONE YEAR FULL WARRANTY
Freestanding gas ranges and all of their component parts, except as detailed below*, are warranted to be free from defective materials or
workmanship in normal household use for a period of twelve (12) months from the date of original retail purchase. Viking Range Corporation,
warrantor, agrees to repair or replace, at its option, any part which fails or is found to be defective during the warranty period.
*Glass (including light bulbs), painted and decorative items are warranted to be free from defective materials or workmanship for a period
of ninety (90) days from the date of original retail purchase. ANY DEFECTS MUST BE REPORTED TO THE SELLING DEALER WITHIN
NINETY (90) DAYS FROM DATE OF ORIGINAL RETAIL PURCHASE.
Viking Range Corporation uses the most up-to-date processes and best materials available to produce all color finishes. However, slight color
variation may be noticed because of the inherent differences in painted parts and porcelain parts as well as differences in kitchen lighting,
product locations, and other factors.
FIVE YEAR LIMITED WARRANTY
Any surface burner, griddle burner, grill burner, or oven burner which fails due to defective materials or workmanship in normal household use
during the second through fifth year from the date of original retail purchase will be repaired or replaced, free of charge for the part itself, with
the owner paying all other costs, including labor.
TEN YEAR LIMITED WARRANTY
Any porcelain oven or porcelain inner door panel which rusts through due to defective materials or workmanship in normal household use
during the second through the tenth year from the date of original retail purchase will be repaired or replaced, free of charge for the part itself,
with the owner paying all other costs, including labor.
NINETY (90) DAY RESIDENTIAL PLUS WARRANTY
This warranty applies to applications where use of the product extends beyond normal residential use. Examples are, but not limited to, bed
and breakfasts, fire stations, private clubs, churches, etc. This warranty excludes all commercial locations such as restaurants, food service
locations and institutional food service locations.
This warranty extends to the original purchaser of the product warranted hereunder and to each transferee owner of the product during the
term of the warranty.
This warranty shall apply to products purchased and located in the United States and Canada. Products must be purchased in the country
where service is requested. Warranty labor shall be performed by an authorized Viking Range Corporation service agency or representative.
Warranty shall not apply to damage resulting from abuse, accident, natural disaster, loss of electrical power to the product for any reason,
alteration, outdoor use, improper installation, improper operation, or repair or service of the product by anyone other than an authorized Viking
Range Corporation service agency or representative. This warranty does not apply to commercial usage. Warrantor is not responsible for consequential or incidental damage whether arising out of breach of warranty, breach of contract, or otherwise. Some jurisdictions DO NOT allow
the exclusion or limitation of incidental of consequential damages, so the above limitation or exclusion may not apply to you.
Owner shall be responsible for proper installation, providing normal care and maintenance, providing proof of purchase upon request, and
making the appliance reasonably accessible for service. If the product or one of its component parts contains a defect or malfunction during
the warranty period, after a reasonable number of attempts by the warrantor to remedy the defects or malfunctions, the owner is entitled to
either a refund or replacement of the product or its component part or parts. Warrantor’s liability on any claim of any kind, with respect to the
goods or services covered hereunder, shall in no case exceed the price of the goods or service or part thereof which gives rise to the claim.
WARRANTY SERVICE
Under the terms of this warranty, service must be performed by a factory authorized Viking Range Corporation service agent or representative. Service will be provided during normal business hours, and labor performed at overtime or premium rates shall not be covered by this
warranty. To obtain warranty service, contact the dealer from whom the product was purchased, an authorized Viking Range Corporation
service agent, or Viking Range Corporation. Provide model and serial number and date of original purchase. For the name of your nearest
authorized Viking Range Corporation service agency, call the dealer from whom the product was purchased or Viking Range Corporation.
IMPORTANT: Retain proof of original purchase to establish warranty period.
The return of the Owner Registration Card is not a condition of warranty coverage. You should, however, return the Owner Registration Card
so that Viking Range Corporation can contact you should any question of safety arise which could affect you.
Any implied warranties of merchantability and fitness applicable to the above described surface burner, griddle burner, grill burner, oven
burner, porcelain oven, or porcelain inner door panel are limited in duration to the period of coverage of the applicable express written limited
warranties set forth above. Some jurisdictions DO NOT allow limitations on how long an implied warranty lasts, so the above limitation may
not apply to you. This warranty gives you specific legal rights, and you may also have other rights which may vary from jurisdiction to jurisdiction.
For more product information, call 1-888-VIKING1 (845-4641), or visit our web
4 ©2010 Viking Preferred Service
Specifications subject to change without notice.
site at http://www.vikingrange.com
General Information
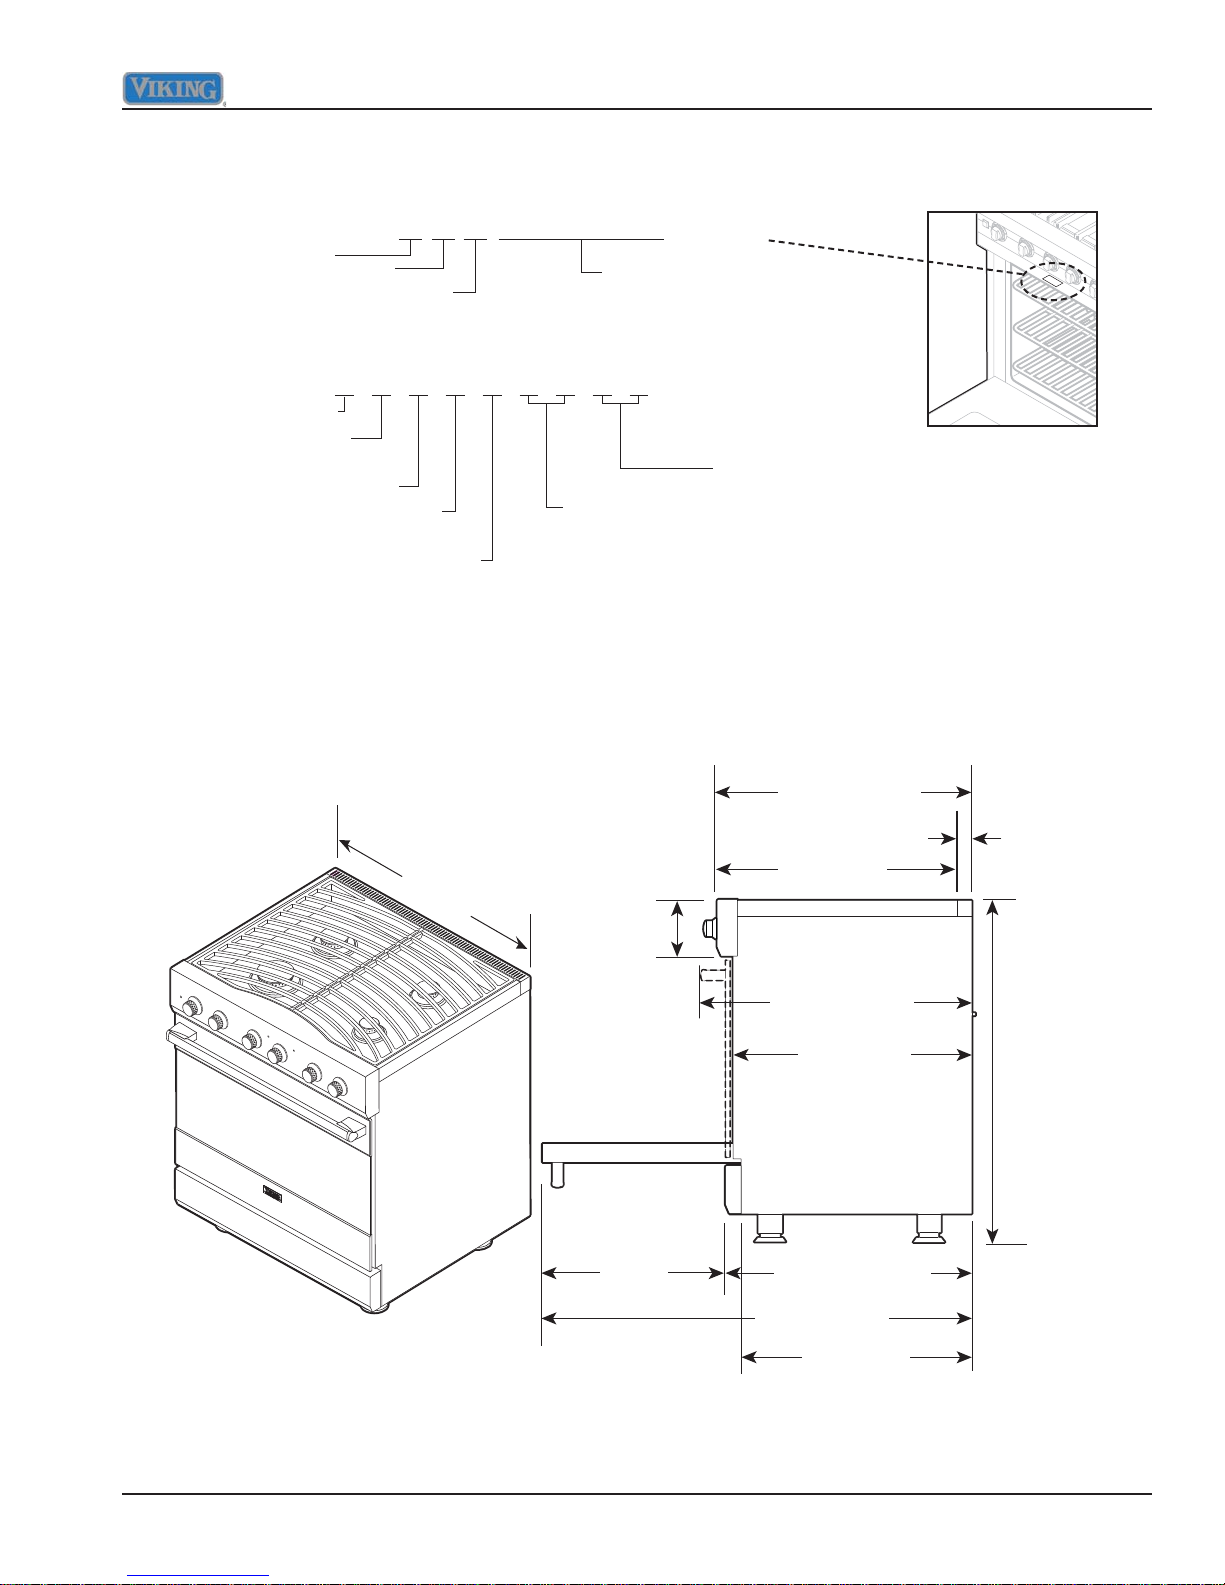
Serial Number
The serial number and model number for your appliance can be found by opening the door and looking under the
control panel. It may also be under the base.
Serial Number 011810C0000000001
Month
Year of Manufacture
Model Number
D = Designer
C = Custom
S = Self-Cleaning
C = Convection
Dimensions
Day
D
S CD1 3 0
D = Dual Fuel
G = Gas
1 = Series
Serial Number
4 B
4B = 4 Burners
30 = 30" Wide
29-7/8”
(75.9 cm)
6”
(15.2 cm)
19-1/4”
(48.9 cm)
26-1/2” (67.3 cm)
25” (63.5 cm)
28-1/4” (71.8 cm)
25” (63.5 cm)
25-3/4” (65.4 cm)
45” (114.3 cm)
24” (61.0 cm)
1-1/2”
(3.8 cm)
35-7/8”
(91.1 cm) min.
to
37”
(94 cm) max.
©2010 Viking Preferred Service 5
General Information
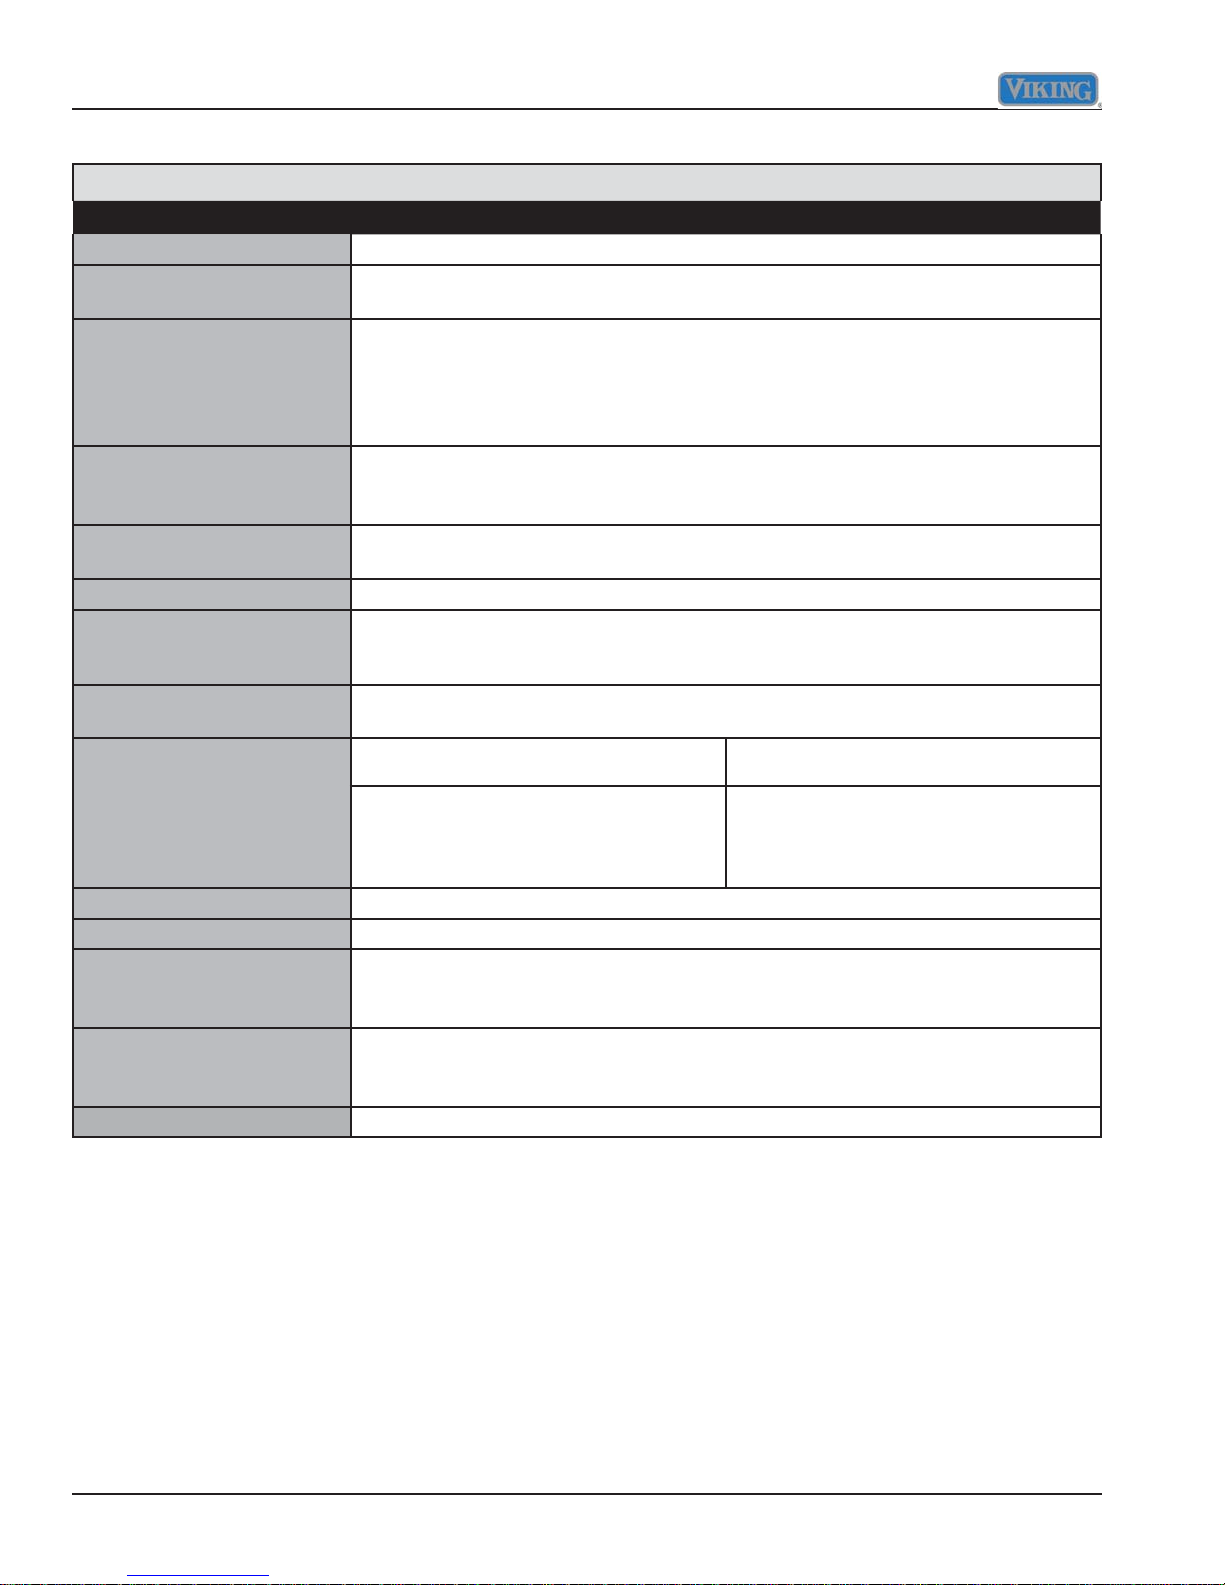
Specifications
Dual Fuel 30" Range
Description DSCD130
Overall width 297/8" (75.9 cm)
Overall height To top of side trim — 35
Legs adjust 11/8" (2.9 cm)
Overall depth from rear* To front of side panel — 25" (63.5 cm)
To front of door — 253/4" (65.4 cm)
To front of landing ledge — 261/2" (67.3 cm)
To front of door handle — 281/4" (71.8 cm)
* Add 3/8" (0.95 cm) to overall depth of ranges installed against a combustible wall.
Additions to overall height To top of island trim — add 0" (0.0 cm)
To top of backguard — add 6" (15.2 cm)
To top of high shelf — add 183/16" (46.2 cm)
Gas requirements Shipped natural or LP/Propane; field convertible with conversion kit (purchased
separately); accepts standard residential 1/2" (1.3 cm) ID gas service line.
Gas manifold pressure Natural 5.0" W.C.P. / Liquid propane LP 10.0" W.C.P.
Electrical requirements
Maximum amp usage
Surface burner rating
Natural gas/LP
Left front
Left rear
Right rear
Right front
Oven interior width 255/16" (64.6 cm)
Oven interior height 161/2" (41.9 cm)
Oven interior depth:
Overall
AHAM
Oven volume:
Overall
AHAM
Approximate shipping weight 410 lbs. (184.5 kg)
240-208 VAC, 60 Hz electrical connection box on product, connect with locally supplied
3-wire, flexible cord or “pigtail” rated 40 amp 125-250 VAC minimum. Cord must be
agency approved for use with household electric ranges.
Natural Gas LP/Propane
16,000 BTU (4.7 kW)
12,000 BTU (3.5 kW)
8,000 BTU (2.3 kW)
6,000 BTU (1.8 kW)
7
/8" (91.1 cm) min. 37" (94 cm) max.
240V—25.4 amps
208V—22.9 amps
12,500 BTU (3.7 kW)
11,500 BTU (3.5 kW)
7,500 BTU (2.2 kW)
5,500 BTU (1.6 kW)
191/2" (49.5 cm)
1613/16" (42.7 cm)
4.7 cu. ft.
4.1 cu. ft.
Minimum clearances from adjacent combustible construction:
Below cooking surface (36" [91.4 cm] and below)
• Sides - 0"
• Top grate support - 36" (91.4 cm)
Above cooking surface (above 36" [91.4 cm])
• Sides - 6" (15.2 cm)
• Within 6" (15.2 cm) side clearance, wall cabinets no deeper than 13" (33.0 cm) must be
minimum 18" (45.7 cm) above cooking surface
• Wall cabinets directly above product must be a minimum of 42" (106.7 cm) above cooking surface
• Rear - 0" with 6" backguard or high shelf; 0" with island trim and noncombustible rear wall
• 6" (15.2 cm) with island trim and combustible rear wall
6 ©2010 Viking Preferred Service
General Information
Warnings
Read and follow all instructions before using this
appliance to prevent the potential risk of fire, electric
shock, personal injury, or damage to the appliance as a
result of improper usage of the appliance. Use appliance
only for its intended purpose as described in this manual.
To ensure proper and safe operation: Appliance must
be properly installed and grounded by a qualified
technician. DO NOT attempt to adjust, repair, service, or
replace any part of your appliance unless it is specifically
recommended in this manual. All other servicing should
be referred to a qualified servicer. Have the installer
show you the location of the gas shutoff valve and how
to shut it off in an emergency.
If the information in this manual is not followed
exactly, a fire or explosion may result causing
property damage, personal injury or death. DO NOT
store or use gasoline or other flammable vapors and
liquids in the vicinity of this or any appliance.
WHAT TO DO IF YOU SMELL GAS:
• DO NOT try to light any appliance.
• DO NOT touch any electrical switch.
• DO NOT use any phone in your building.
• Immediately call your gas supplier from a neighbor’s
phone. Follow the gas supplier’s instructions.
• If you cannot reach your gas supplier, call the fire
department.
• Keep area around appliance clear and free from
combustible materials, gasoline, and other flammable
vapors and materials.
• If appliance is installed near a window, proper
precautions should be taken to prevent curtains from
blowing over burners.
• NEVER leave any items on the rangetop. The hot air
from the vent may ignite flammable items and may
increase pressure in closed containers, which may
cause them to burst.
• Many aerosol-type spray cans are EXPLOSIVE when
exposed to heat and may be highly flammable. Avoid
their use or storage near an appliance.
• Many plastics are vulnerable to heat. Keep plastics
away from parts of the appliance that may become
warm or hot. DO NOT leave plastic items on the
rangetop as they may melt or soften if left too close to
the vent or a lighted surface burner.
• Combustible items (paper, plastic, etc.) may ignite and
metallic items may become hot and cause burns. DO
NOT pour spirits over hot foods. DO NOT leave oven
unsupervised when drying herbs, breads, mushrooms,
etc; fire hazard.
In Case of Fire
Turn off appliance and ventilating hood to avoid
spreading the flame. Extinguish flame, then turn on hood
to remove smoke and odor.
• Cooktop: Smother fire or flame in a pan with a lid or
cookie sheet.
• NEVER pick up or move a flaming pan.
• Oven: Smother fire or flame by closing the oven door.
DO NOT use water on grease fires. Use baking soda,
a dry chemical, or foam-type extinguisher to smother
fire or flame.
Installation and service must be performed by a
qualified installer, service agency or the gas supplier.
• THIS RANGE CAN TIP
• INJURIES TO PERSONS CAN RESULT
• INSTALL ANTI-TIP DEVICE PACKED WITH RANGE
To avoid risk of property damage, personal injury or
death; follow information in this manual exactly to
prevent a fire or explosion.
To Prevent Fire or Smoke Damage
• Be sure all packing materials are removed from the
appliance before operating it.
©2010 Viking Preferred Service 7
Heating Elements
• NEVER touch oven bake and broil burner area or
interior surfaces of oven.
• Bake and broil burners may be hot even though they
are dark in color. Areas near burners and interior
surfaces of an oven may become hot enough to cause
burns.
• During and after use, DO NOT touch or let clothing or
other flammable materials contact heating elements,
areas near elements, or interior surfaces of oven until
they have had sufficient time to cool.
Cleaning Safety
• Turn off all controls and wait for appliance parts to cool
before touching or cleaning them. DO NOT touch the
burner grates or surrounding areas until they have had
sufficient time to cool.
• Clean appliance with caution. Use care to avoid steam
burns if a wet sponge or cloth is used to wipe spills on
a hot surface. Some cleaners can produce noxious
fumes if applied to a hot surface.
General Information
Self-Clean Oven
• Clean only parts listed in this guide. DO NOT clean
door gasket. The door gasket is essential for a good
seal. Care should be taken not to rub, damage, or
move the gasket. DO NOT use oven cleaners of any
kind in or around any part of the self-clean oven.
• Before self-cleaning the oven, remove broiler pan,
racks, and other utensils and wipe up excessive
spillovers to prevent excessive smoke or flaming.
• This range features a cooling fan, which operates
automatically during a clean cycle. If the fan does not
turn on, cancel the clean operation and contact an
authorized servicer.
• It is normal for the rangetop cooking surface of
the range to become hot during a self-clean cycle.
Therefore, touching the rangetop cooking surface
during a clean cycle should be avoided.
Important Safety Notice and Warning
The California Safe Drinking Water and Toxic
Enforcement Act of 1986 (Proposition 65) requires the
Governor of California to publish a list of substances
known to the State of California to cause cancer or
reproductive harm and requires businesses to warn
customers of potential exposures to such substances.
Users of this appliance are hereby warned that when
the oven is engaged in the self-clean cycle, there may
be some low-level exposure to some of the listed
substances, including carbon monoxide. Exposure to
these substances can be minimized by properly venting
the oven to the outdoors by opening the windows and/or
door in the room where the appliance is located during
the self-clean cycle.
• Avoid touching oven vent area while oven is on and
for several minutes after oven is turned off. When the
oven is in use, the vent and surrounding area become
hot enough to cause burns. After oven is turned off,
DO NOT touch the oven vent or surrounding areas
until they have had sufficient time to cool.
• Other potentially hot surfaces include rangetop, areas
facing the rangetop, oven vent, surfaces near the vent
opening, oven door, areas around the oven door and
oven window.
• The misuse of oven doors (e.g., stepping, sitting, or
leaning on them) can result in potential hazards and/or
injuries.
ELECTRICAL SHOCK HAZARD. DO NOT touch
a hot oven light bulb with a damp cloth as the bulb
could break. Should the bulb break, disconnect
power to the appliance before removing bulb to avoid
electrical shock.
ELECTRICAL SHOCK HAZARD. Disconnect the
electric power at the main fuse or circuit breaker
before replacing bulb.
Important Notice Regarding Pet Birds:
NEVER keep pet birds in the kitchen or in rooms where
the fumes from the kitchen could reach. Birds have
a very sensitive respiratory system. Fumes released
during an oven self-cleaning cycle may be harmful or
fatal to birds. Fumes released due to overheated cooking
oil, fat, margarine and overheated non-stick cookware
may be equally harmful.
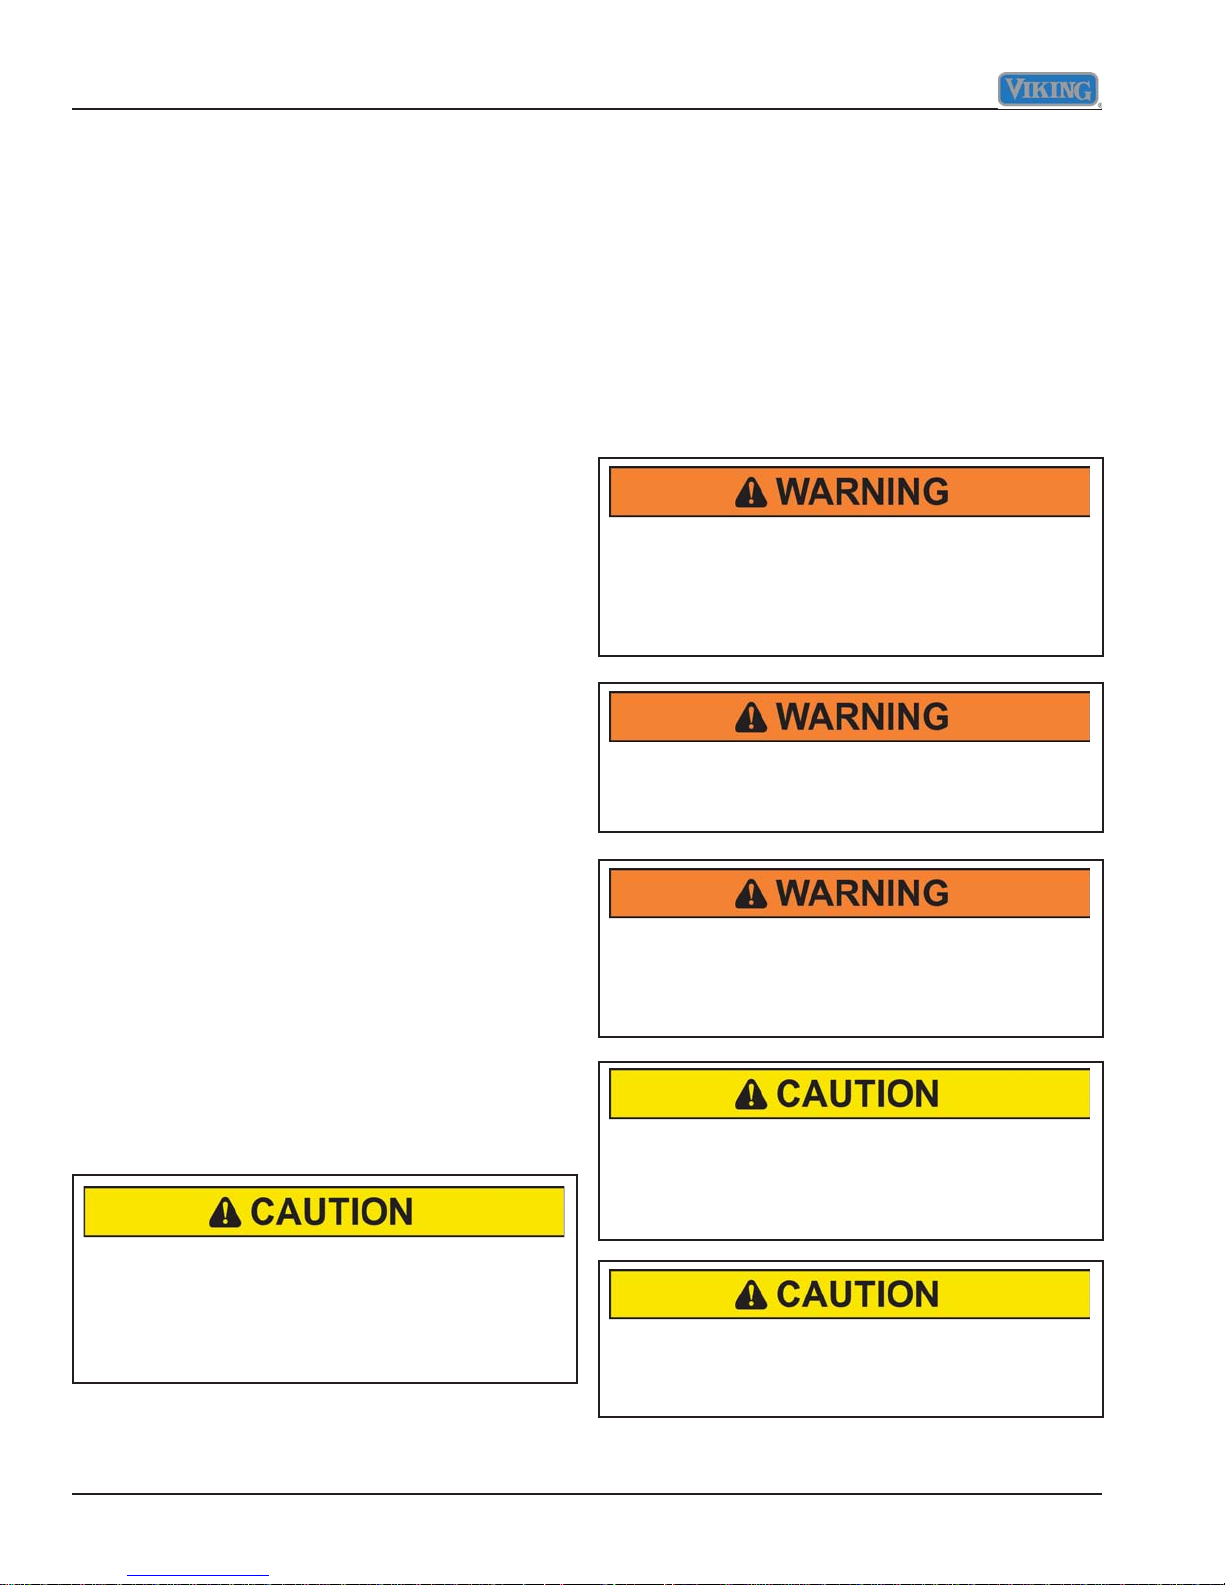
About Y our Appliance
NEVER use appliance as a space heater to heat
or warm a room to prevent potential hazard to the
user and damage to the appliance. DO NOT use
the rangetop or oven as a storage area for food or
cooking utensils.
• For proper oven performance and operation, DO NOT
block or obstruct the oven vent duct located on the
right side of the air grille.
BURN OR ELECTRICAL SHOCK HAZARD. Make
sure all controls are OFF and oven is COOL before
cleaning. Failure to do so can result in burns or
electrical shock.
DO NOT turn the temperature control on during
defrosting. Turning the convection fan on will
accelerate the natural defrosting of the food without
the heat.
BURN HAZARD. The oven door, especially the glass,
can get hot. Danger of burning: DO NOT touch the
glass!
8 ©2010 Viking Preferred Service
This range features a self-cleaning cycle. During
this cycle, the oven reaches elevated temperatures
in order to burn off soil and deposits. A powder
ash residue is left in the bottom of the oven after
completion of the self-clean cycle.
General Information
Electrical & Gas Requirements
Electrical Requirements
Check your national and local codes regarding this unit.
This range requires 3 wire or 4 wire, 240-208 VAC/60
Hz. Unit must be fused separately from any other circuit.
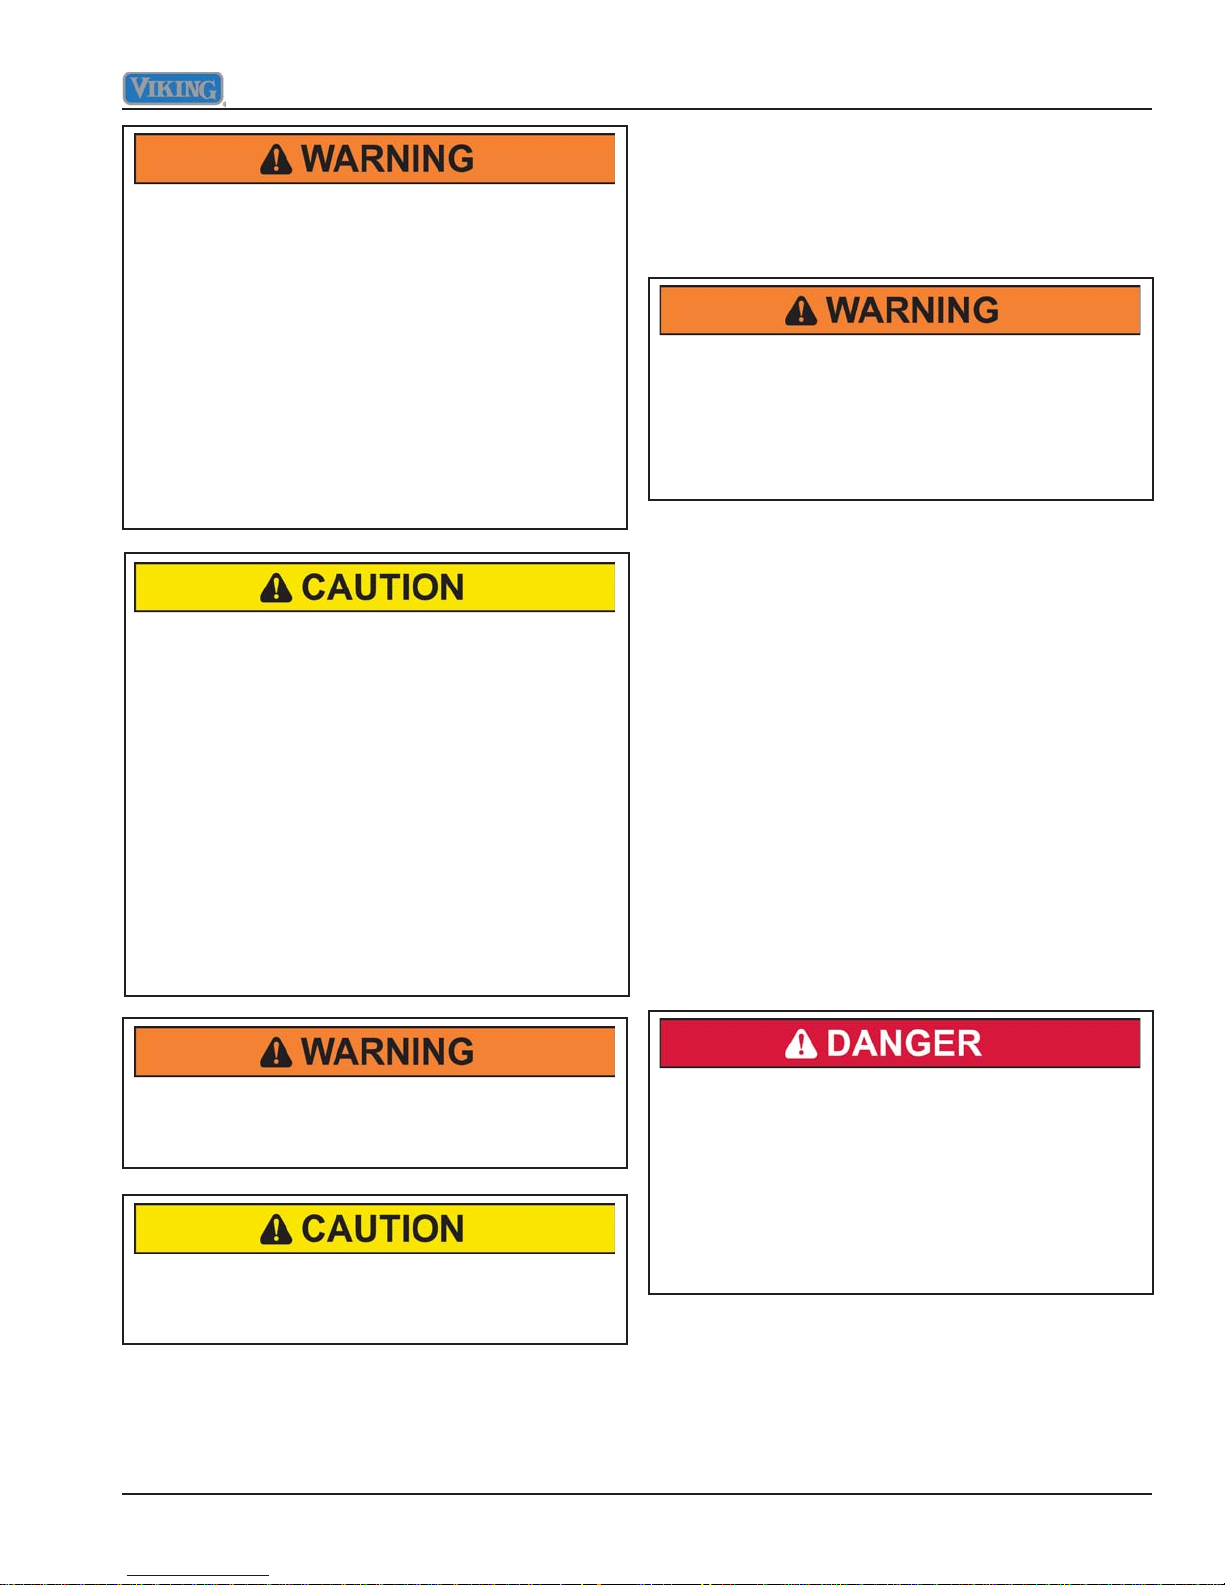
NOTE: DO NOT use commercial oven cleaners
inside the oven. Use of these cleaners can produce
hazardous fumes or can damage the porcelain
fi nishes. DO NOT line the oven with aluminum foil or
other materials. These items can melt or burn during
a self-clean cycle, causing permanent damage to the
oven.
DO NOT touch the exterior portions of the oven after
self-cleaning cycle has begun, since some parts
become extremely hot to the touch!
During the fi rst few times the self-cleaning feature is
used, there may be some odor and smoking from the
“curing” of the binder in the high-density insulation
used in the oven. When the insulation is thoroughly
cured, this odor will disappear. During subsequent
self-cleaning cycles, you may sense an odor
characteristic of high temperatures.
KEEP THE KITCHEN WELL-VENTED DURING THE
SELF-CLEAN CYCLE.
Electrical shock hazard. To avoid the risk of
electrical shock, personal injury or death; verify
electrical power is turned off at the breaker box and
gas supply is turned off until the range is installed
and ready to operate, installation by an authorized
installer only.
Gas Connection
The gas supply (service) line must be the same size or
greater than the inlet line of the appliance. This range
uses a 1/2" (1.3 cm) ID NPT (Sch40) inlet. Sealant on all
pipe joints must be resistive to LP gas. Failure to do so
may result in less than optimal performance.
The range is designed specifically for natural gas or
liquid propane (LP) gas. Before beginning installation,
verify that the model is compatible with the intended gas
supply.
Manual Shut-Off Valve
This installer-supplied valve must be installed in the gas
service line before the appliance in the gas stream and
in a location where it can be reached quickly in the event
of an emergency.
Connecting Gas & Electric
BURN HAZARD. When self-cleaning, surfaces may
get hotter than usual, therefore, children should be
kept away.
DO NOT store items of interest to children over
the unit. Children climbing to reach items could be
seriously injured.
©2010 Viking Preferred Service 9
Gas leak hazard. To avoid risk of personal injury
or death; leak testing of the appliance must
be conducted according to the manufacturer’s
instructions. Before placing appliance in operation,
always check for gas leaks with soapy water solution.
DO NOT USE AN OPEN FLAME TO CHECK FOR
GAS LEAKS.
Connect gas and electric. Before placing appliance in
operation, always check for gas leaks. This must be
performed by your dealer, a qualified licensed plumber,
or gas service company.
General Information
In Massachusetts
A “T” handle type manual valve must be installed in the
gas supply line to the appliance.
IMPORTANT: Any conversion required must be
performed by your dealer or a qualified licensed plumber
or gas service company. Please provide the service
person with this manual before work begins.
Pressure Regulator
• All heavy-duty, commercial type cooking equipment
must have a pressure regulator on the incoming
service line for safe and efficient operation, since
service pressure may fluctuate with local demand.
External regulators are not required on this range
since a regulator is built into each unit at the factory.
Under no condition bypass this built-in regulator.
• Manifold pressure should be checked with a
manometer, natural gas requires 5.0" W.C.P. and LP
gas requires 10.0" W.C.P. Incoming line pressure
upstream from the regulator must be 1" W.C.P.
higher than the manifold pressure in order to check
the regulator. The regulator used on this range can
withstand a maximum input pressure of
(14.0" W.C.P.). If the line pressure is in excess of that
amount, a step down regulator will be required.
• The appliance must be disconnected from the gas
supply piping system during any pressure testing of
that system.
Flexible Connections
If the unit is to be installed with flexible couplings and/
or quick-disconnect fittings, the installer must use a
heavy-duty AGA design-certified flexible connector of at
least 1/2" (1.3 cm) ID NPT (with suitable strain reliefs) in
compliance with ANSI Z21.41 and Z21.69.
1
/2" PSI
Performance Checklist
A qualified installer should carry out the following checks:
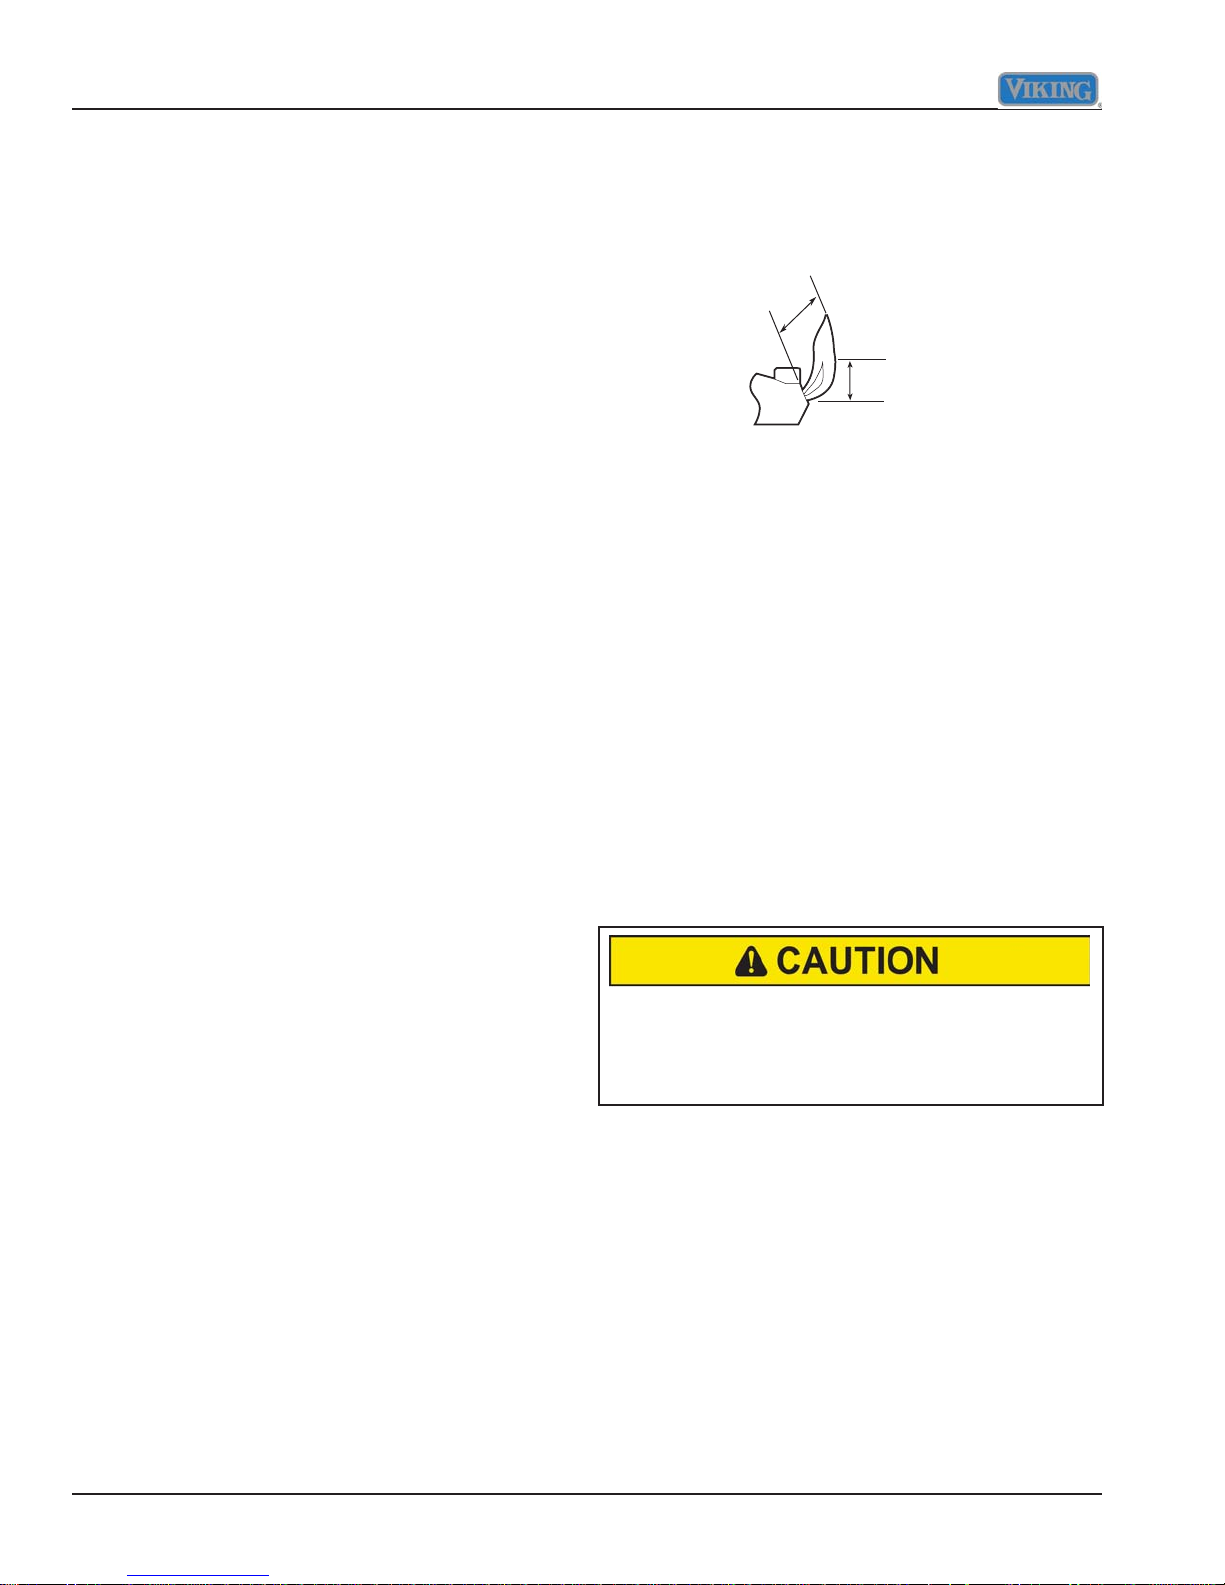
• Check top burner ignition. See drawing for proper
flame height on HI. The low flame should light at every
port.
1-1/2”
(3.8 cm)
3/8”
(0.95 cm)
• Check oven bake function—bake element on full
power, center and outside broil elements at partial
power.
• Convection bake function—bake and broil elements
the same with the convection fan on.
• Check TruConvec™ function—TruConvec element
(behind convection fan cover) on and convection fan
on.
• Check HI broil function–both broil elements at full
power.
• Check LOW broil function—inner broil element only.
• Check convection broil function—both broil elements
at full power with convection fan on.
• Check self-clean function—door will lock in
approximately 30 seconds, the center and outside broil
elements will turn on and the bake element will turn on
at partial power. Check broil elements through window
to make sure they are on, then abort self-clean cycle
to unlock door.
In Canada
CAN 1-6, 10-88 metal connectors for gas appliances and
CAN 1-6.9 M79 quick disconnect devices for use with
gas fuel.
In Massachusetts
This appliance must be installed with a 36" (3-foot) long
flexible gas connector.
10 ©2010 Viking Preferred Service
When conducting performance test, DO NOT run selfclean cycle for more than 10 minutes with oven racks
inside oven. This could cause them to discolor due to
the high temperature required for self-cleaning.
General Information
Before Using Range
All products are wiped clean with solvents at the factory
to remove any visible signs of dirt, oil, and grease which
may have remained from the manufacturing process.
Before starting to cook, clean the range thoroughly with
hot, soapy water. There may be some burn off and odors
on first use of the appliance–this is normal.
Oven
Important: Before first use, wipe interior with soapy
water and dry thoroughly. Then, set the oven selector to
bake, the thermostat to 450°F, and operate for an hour.
Model includes:
• A broad range of baking and broiling modes—up to
eight cooking modes in all—to make even your most
challenging baking projects a success.
• Exclusive one-piece tooled and porcelainized cooking
surface contains spills for easy cleaning.
• Split baking and broiling elements—which reduces
preheating time and provides greater control and more
even heating.
• A reversing convection fan which is two times larger
than most on the market—this allows you to cook
foods more thoroughly and evenly—even when baking
large quantities.
• Four convection modes offering greater air circulation
to shorten cooking times and cook foods more evenly.
• Three broiling modes including a new low-broil mode
for delicate broiling and top-browning.
• A profiled, concealed bake element for easier cleaning.
• One light illuminates the oven cavity with less glare.
• Six rack positions and three racks provide ample space
for your baking needs.
• This appliance is certified by Star-K to meet strict
regulations in conjunction with specific instructions
found on www.star-k.org.
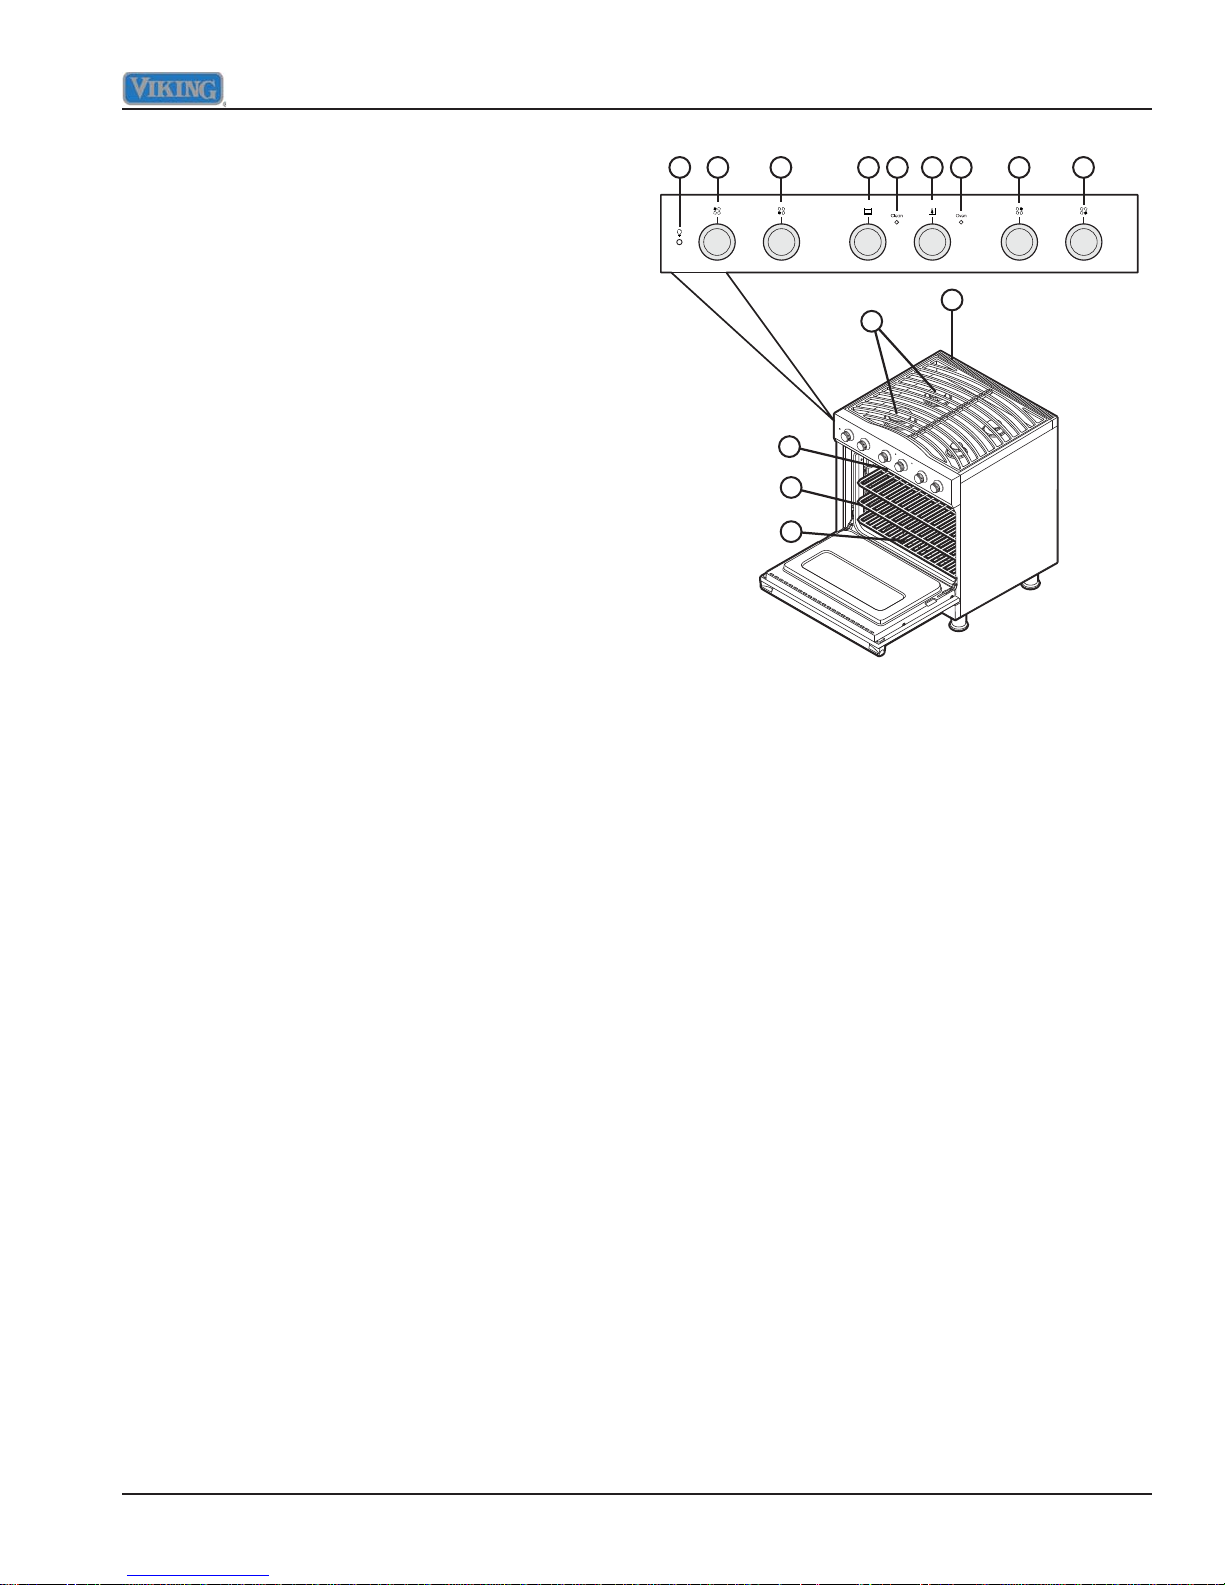
Range Features
2134 85 6 79
10
11
12
13
14
1. Interior oven light switch
2. Left rear burner control knob (12,000 BTU)
3. Left front burner control knob (16,000 BTU)
4. Oven function selector knob
5. Self-clean indicator light
6. Oven temperature control knob
7. Oven temperature indicator light
8. Right rear burner control knob (8,000 BTU)
9. Right front burner control knob (6,000 BTU)
10. Island trim
11. Four sealed burners with porcelain/cast iron caps and
automatic ignition/re-ignition
12. Identification plate (or located under base)
13. Three standard, heavy-duty, tilt-proof racks. Six rack
positions
14. Broiler pan–located inside oven
©2010 Viking Preferred Service 11
Troubleshooting
LED Error Codes
The LED error codes are displayed on the control panel using the cycle and clean lights. Refer to the chart below to
determine the type of error that is being displayed.
LED Error Codes
Type of error Cycle Light Clean Light
Latch OFF 1 second ON, 1 second OFF
RTD
(Oven Probe)
Model 1 second ON, 1 second OFF, 1 second ON, 4 seconds OFF ON
Cooling Fan 3 fl ashes ON
High Limit 4 fl ashes ON
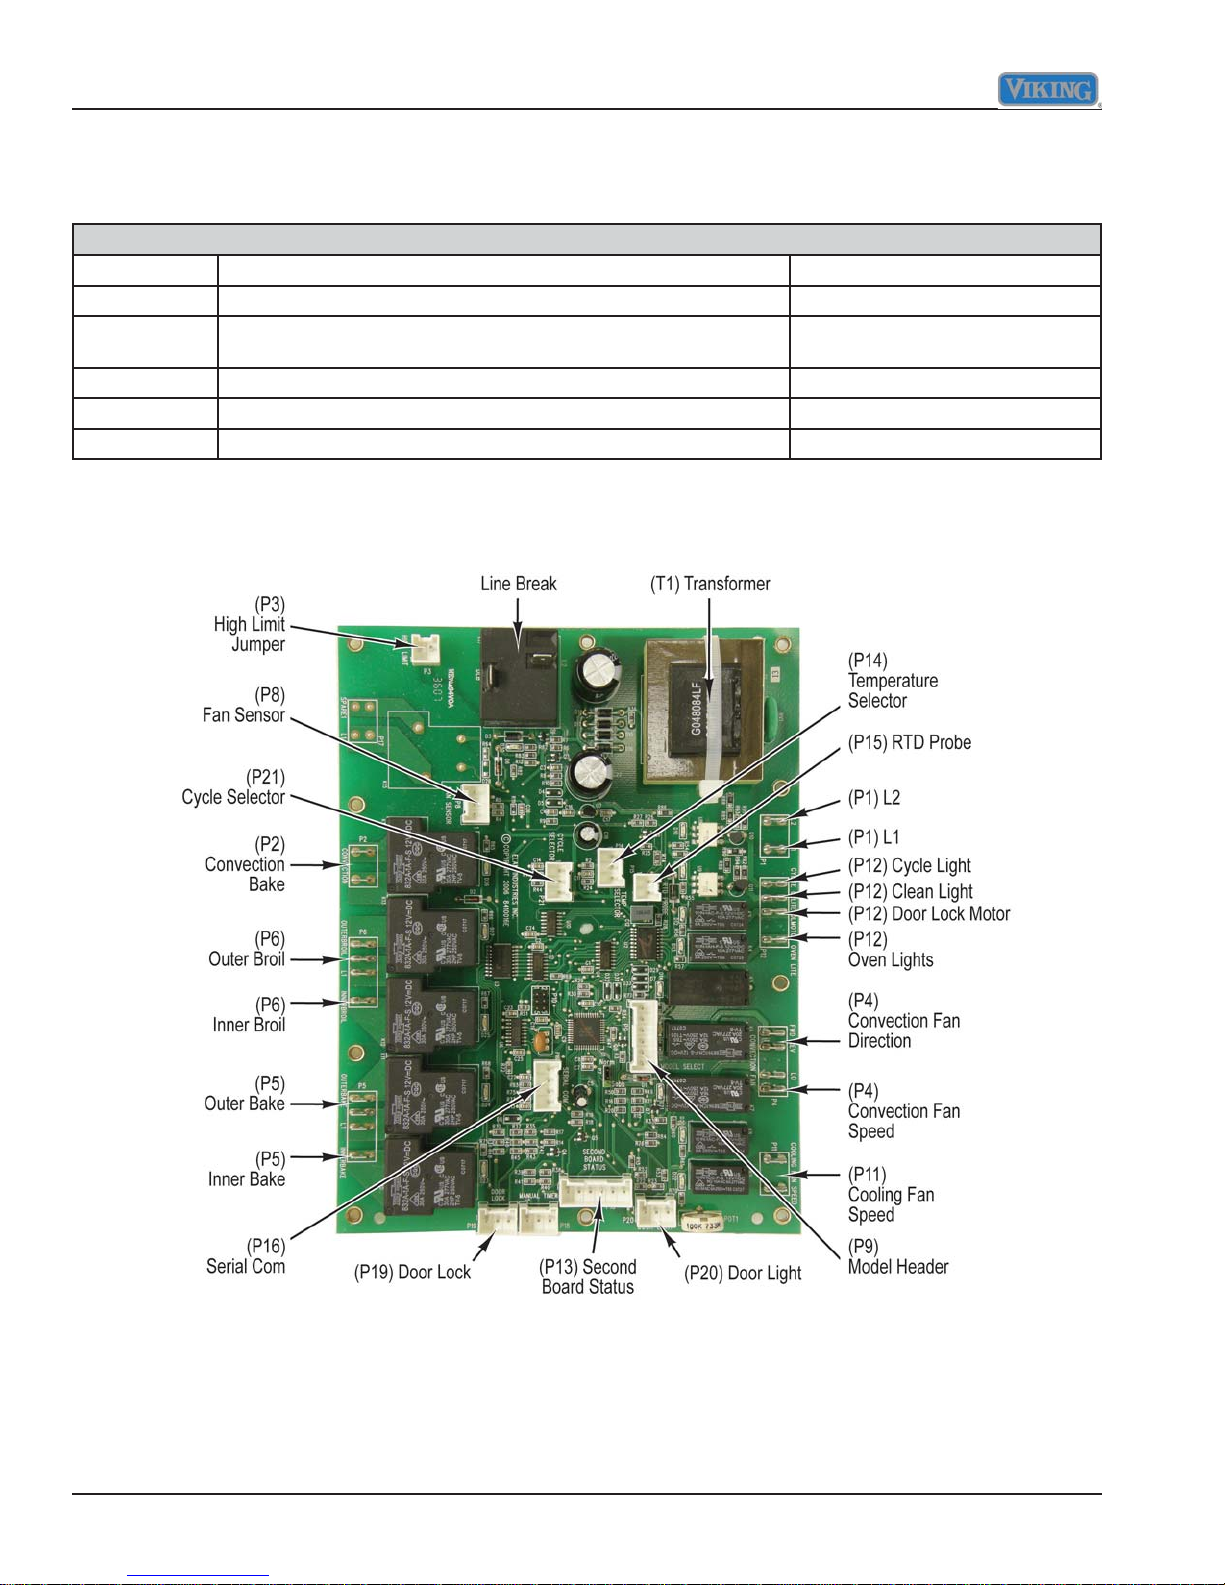
Oven Control Board Connections
1 second ON, 1 second OFF OFF
12 ©2010 Viking Preferred Service
 Loading...