

Page 1

Viking Range Corporation
111 Front Street
Greenwood, Mississippi 38930 USA
(662) 455-1200
For product information,
call 1-888-VIKING1 (845-4641)
or visit the Viking Web site at
vikingrange.com
F20754 EN
(060910)
Viking Installation Guide
Professional & Designer Freestanding
Refrigeration Side Trim, Side Panel,
Top Panel & Grille Installation-
French Door Bottom Mount with Dispenser
Page 2

3
3
4
B
Apply adhesive tape to grille assembly.
2
Remove and discard screw.
Remove edge and top ofcorner cover.
1
2
Installation - Side Trim and Grille
(Built-In Installation)
Attach brackets and spacers, included in the kit, to the
grille assembly with four B screws.
5
1
2
Remove adhesive backing. Firmly press the grille
assembly down so the adhesive adheres to the cabinet.
Align grille assembly to front door and position grille
on top of unit.
Professional & Designer Freestanding Refrigerators
Description VCFF/DDFF136D with side panels/tops/grilles
Overall width withside panels 35-7/8” (91.1 cm)
Overall height withtops/grilles 71-7/8” (182.6 cm)
Cutout width withside panels 36” (91.4 cm)
Cutout height withtops/grilles 72” (182.9 cm)
Specifications
Required Components - Built-In Installation
AB
Left Shim
Trim
Left Side
Trim
Right Shim
Trim
Right Side
Trim
Front Grille
Adhesive
Tape
Screws
Spacers
L-Bracket
Right
L-Bracket
Left
Spacer
Bushing
6
A
Secure the grille brackets to the holes in the hinge
plate with two A screws.
Page 3
54
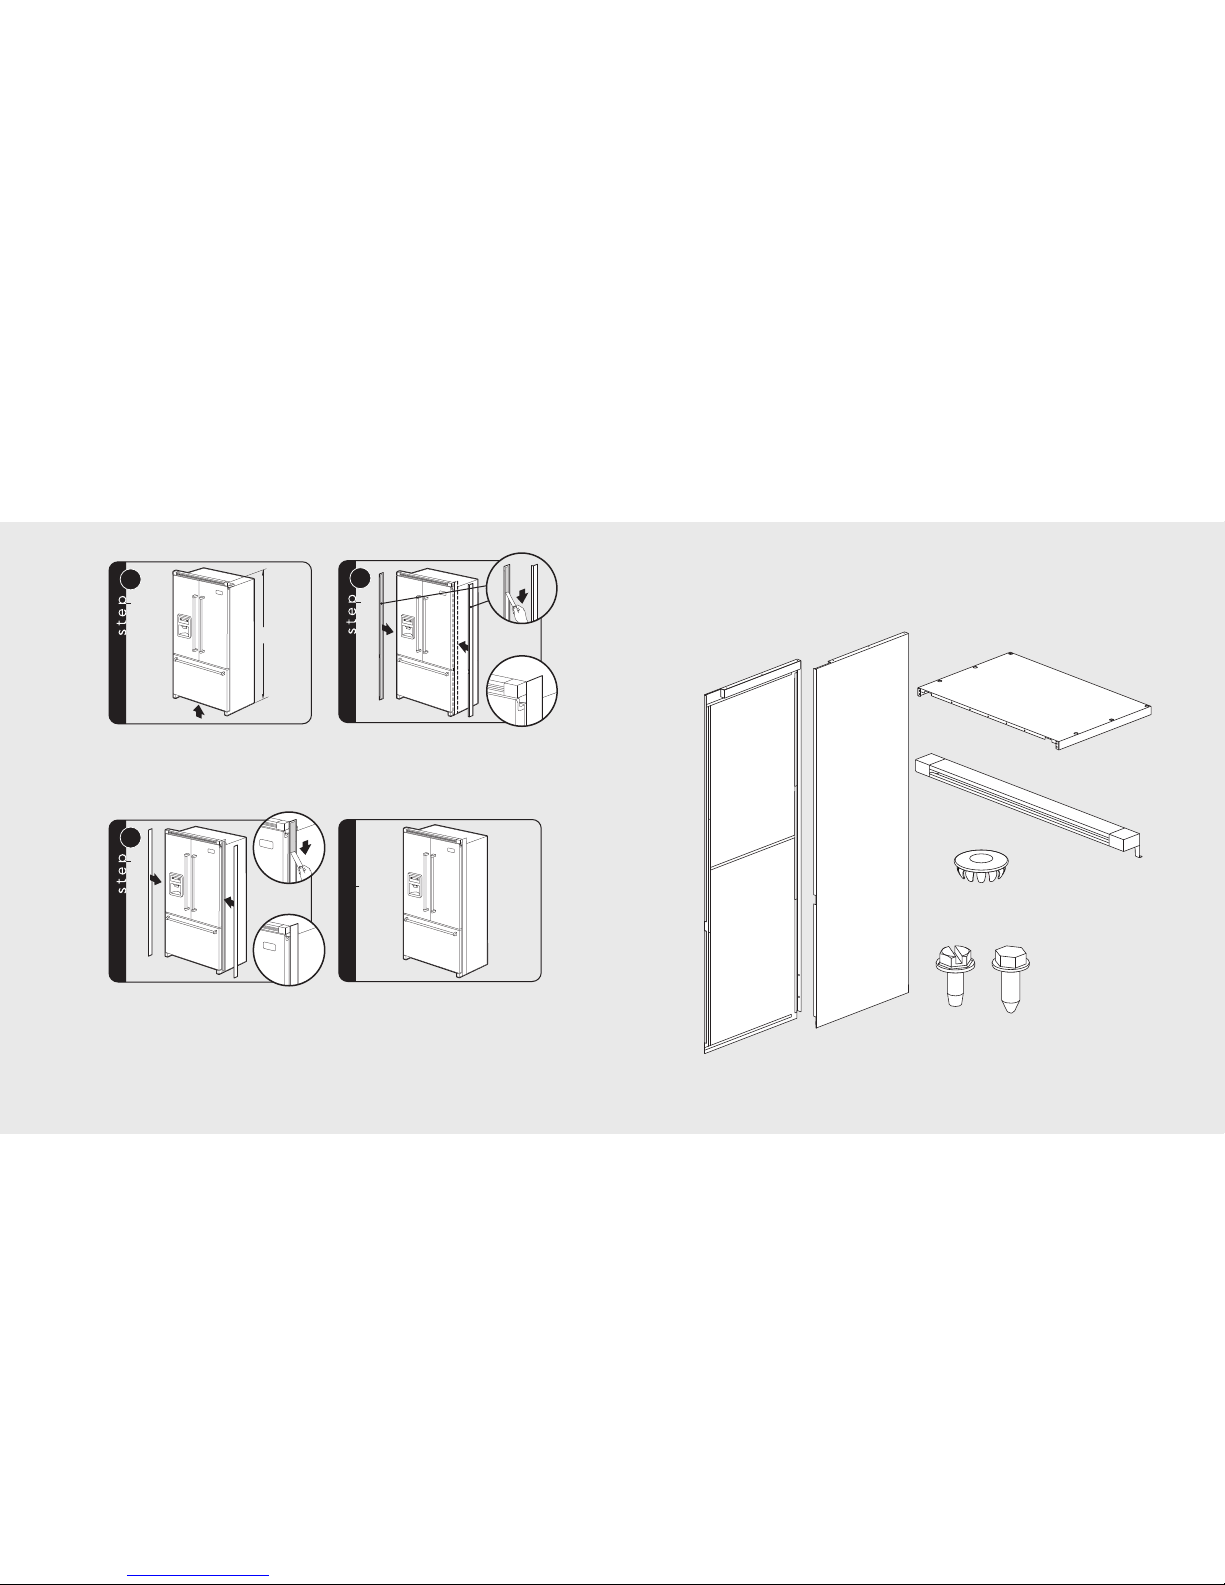
Installation - Side Trim and Grille
(Built-In Installation) (cont.)
Raise the unit up untilthe measurement from the floor
to the topof the grille assembly is 72 inches or 6 feet.
7
7
2
”
Shim trim has adhesive backing on bothsides. Remove
adhesive backing on refrigerator side only. Fit the shim
trim to the front of the unit first. W ith center hinge, the
shim trim will have acutout. Use the cutout to locate
the height of the shimtrim.
8
2
2
1
Remove adhesive backing for the side trim. Locate the
top of the side trimwith the top of the grille assembly.
Press the side trim into the refrigerator cabinet at the
center location.
9
2
2
1
complete
Installation - Side Panel, Top Panel and Grille
(Wrapped Installation)
Required Components - Wrapped Installation
Front Grille
B
A
Cap Cover
Left Side
Panel
Right Side
Panel
Top
Panel
Screws
Page 4
76
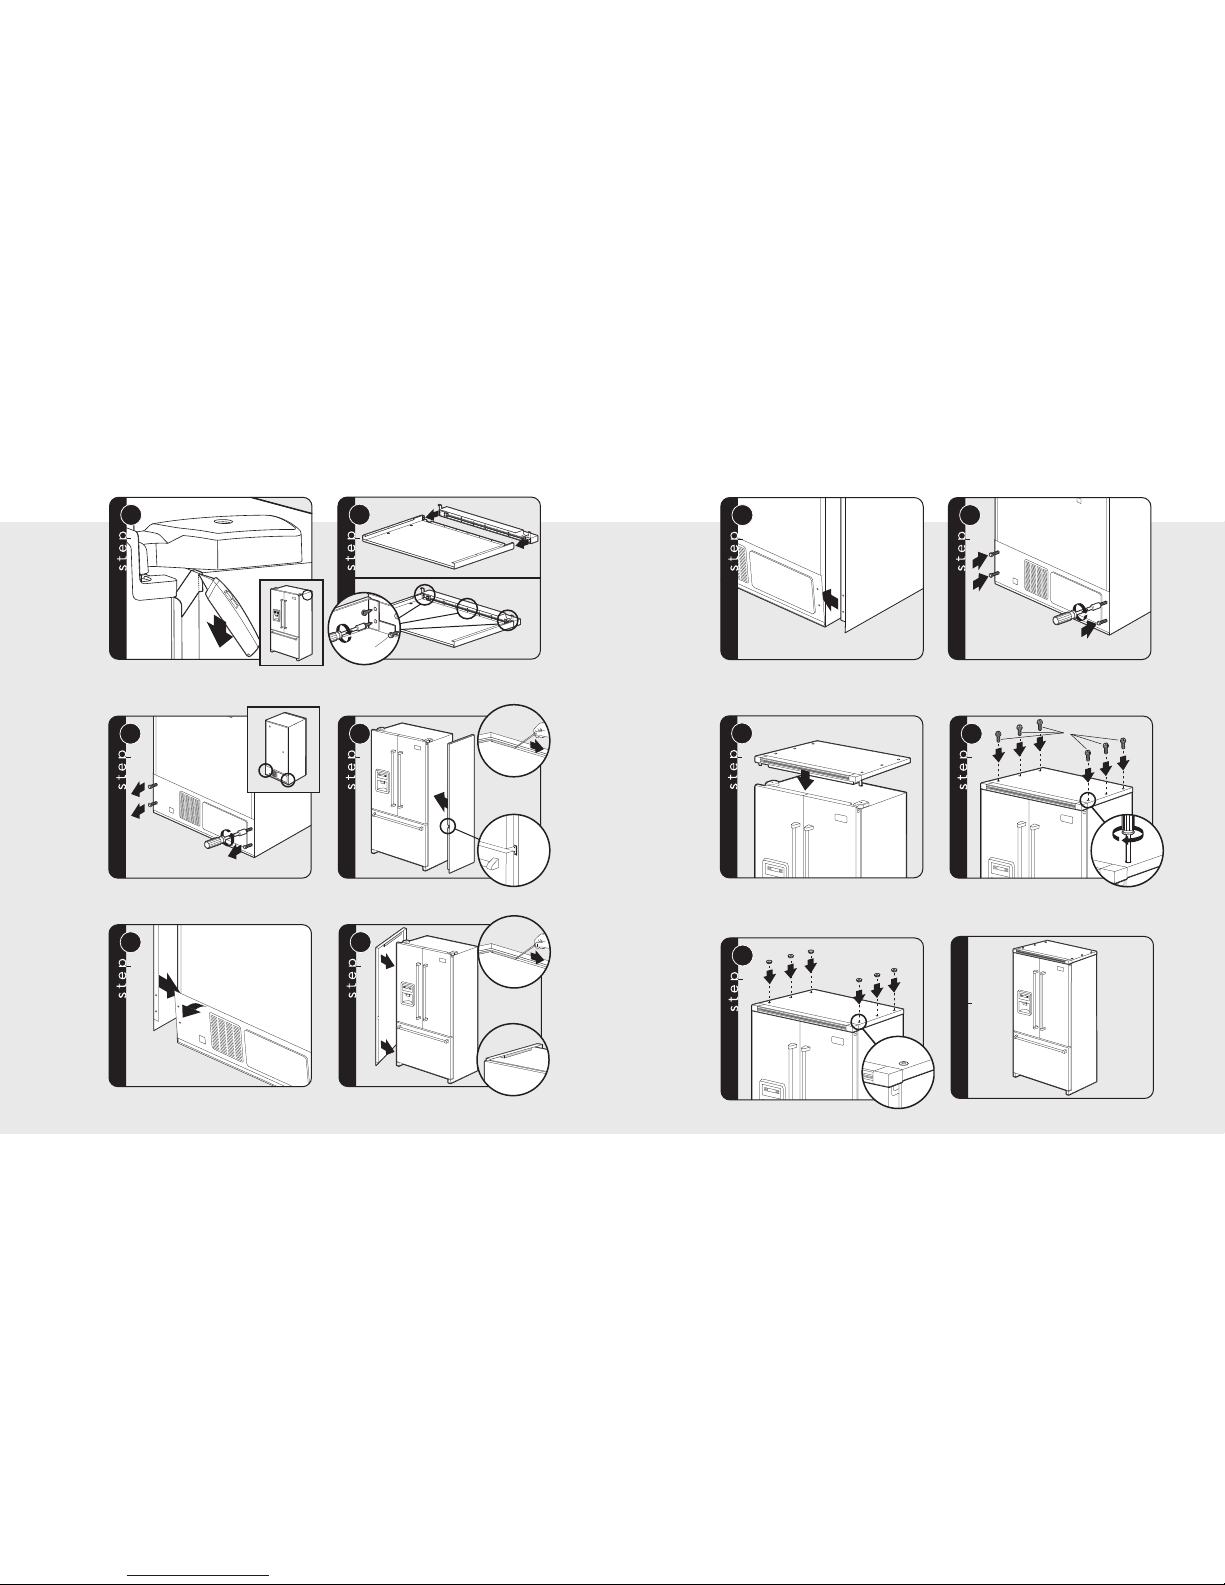
Installation - Side Panel, Top Panel and Grille
(Wrapped Installation) (cont.)
Remove adhesive backing from other sidepanel. Fitthe
side panel to the front of the unit first. Spacer ontop of
side panel needs to sit on top of refrigerator cabinet.
6
1
2
2
Pull the machinecover and slip back of side panel
between refrigerator cabinet and machine cover. Install
machine cover screws back into refrigerator cabinet.
NOTE: The holeson the side panel are clearance holes.
7
8
Install machine cover screws back into
refrigerator cabinet.
NOTE: The holeson the side panel are clearance holes.
A
10
11
Insert six A screws through holes of top panel into side
panel.
Insert cap covers into holes.
complete
9
Align top panel and grilleassembly to front door and
position top panel and grille on topof unit.
Pull the machinecover off and slip back of side panel
between refrigerator cabinet and machine cover. Install
machine cover screws back into refrigerator cabinet.
NOTE: The holeson the side panel are clearance holes.
5
Remove adhesive backing from the side panel. Fit the
side panel to the front of the unit first. With acenter
hinge, the side panel willhave a cutout.
4
2
1
3
Removescrews on lower back machine cover.
Hold for replacement.
A
A - Designer Series
B - Pro Series
2
With toppanel and grilleupside down, position grille
assembly in frontof top panel. Secure top panelto grille
assembly via fourouter holes (A screws) and three inner
holes(A screw for Designer and B for Professional).
Remove edge and top of corner cover.
1
 Loading...