

Page 1

F20702B EN
(020113)
Viking Range Corporation
111 Front Street
Greenwood, Mississippi 38930 USA
(662) 455-1200
For product information,
call 1-888-845-4641
Installation Guide
D30FTW - Warming Drawer
Accessory Flush Mount Kit
Page 2
2 3
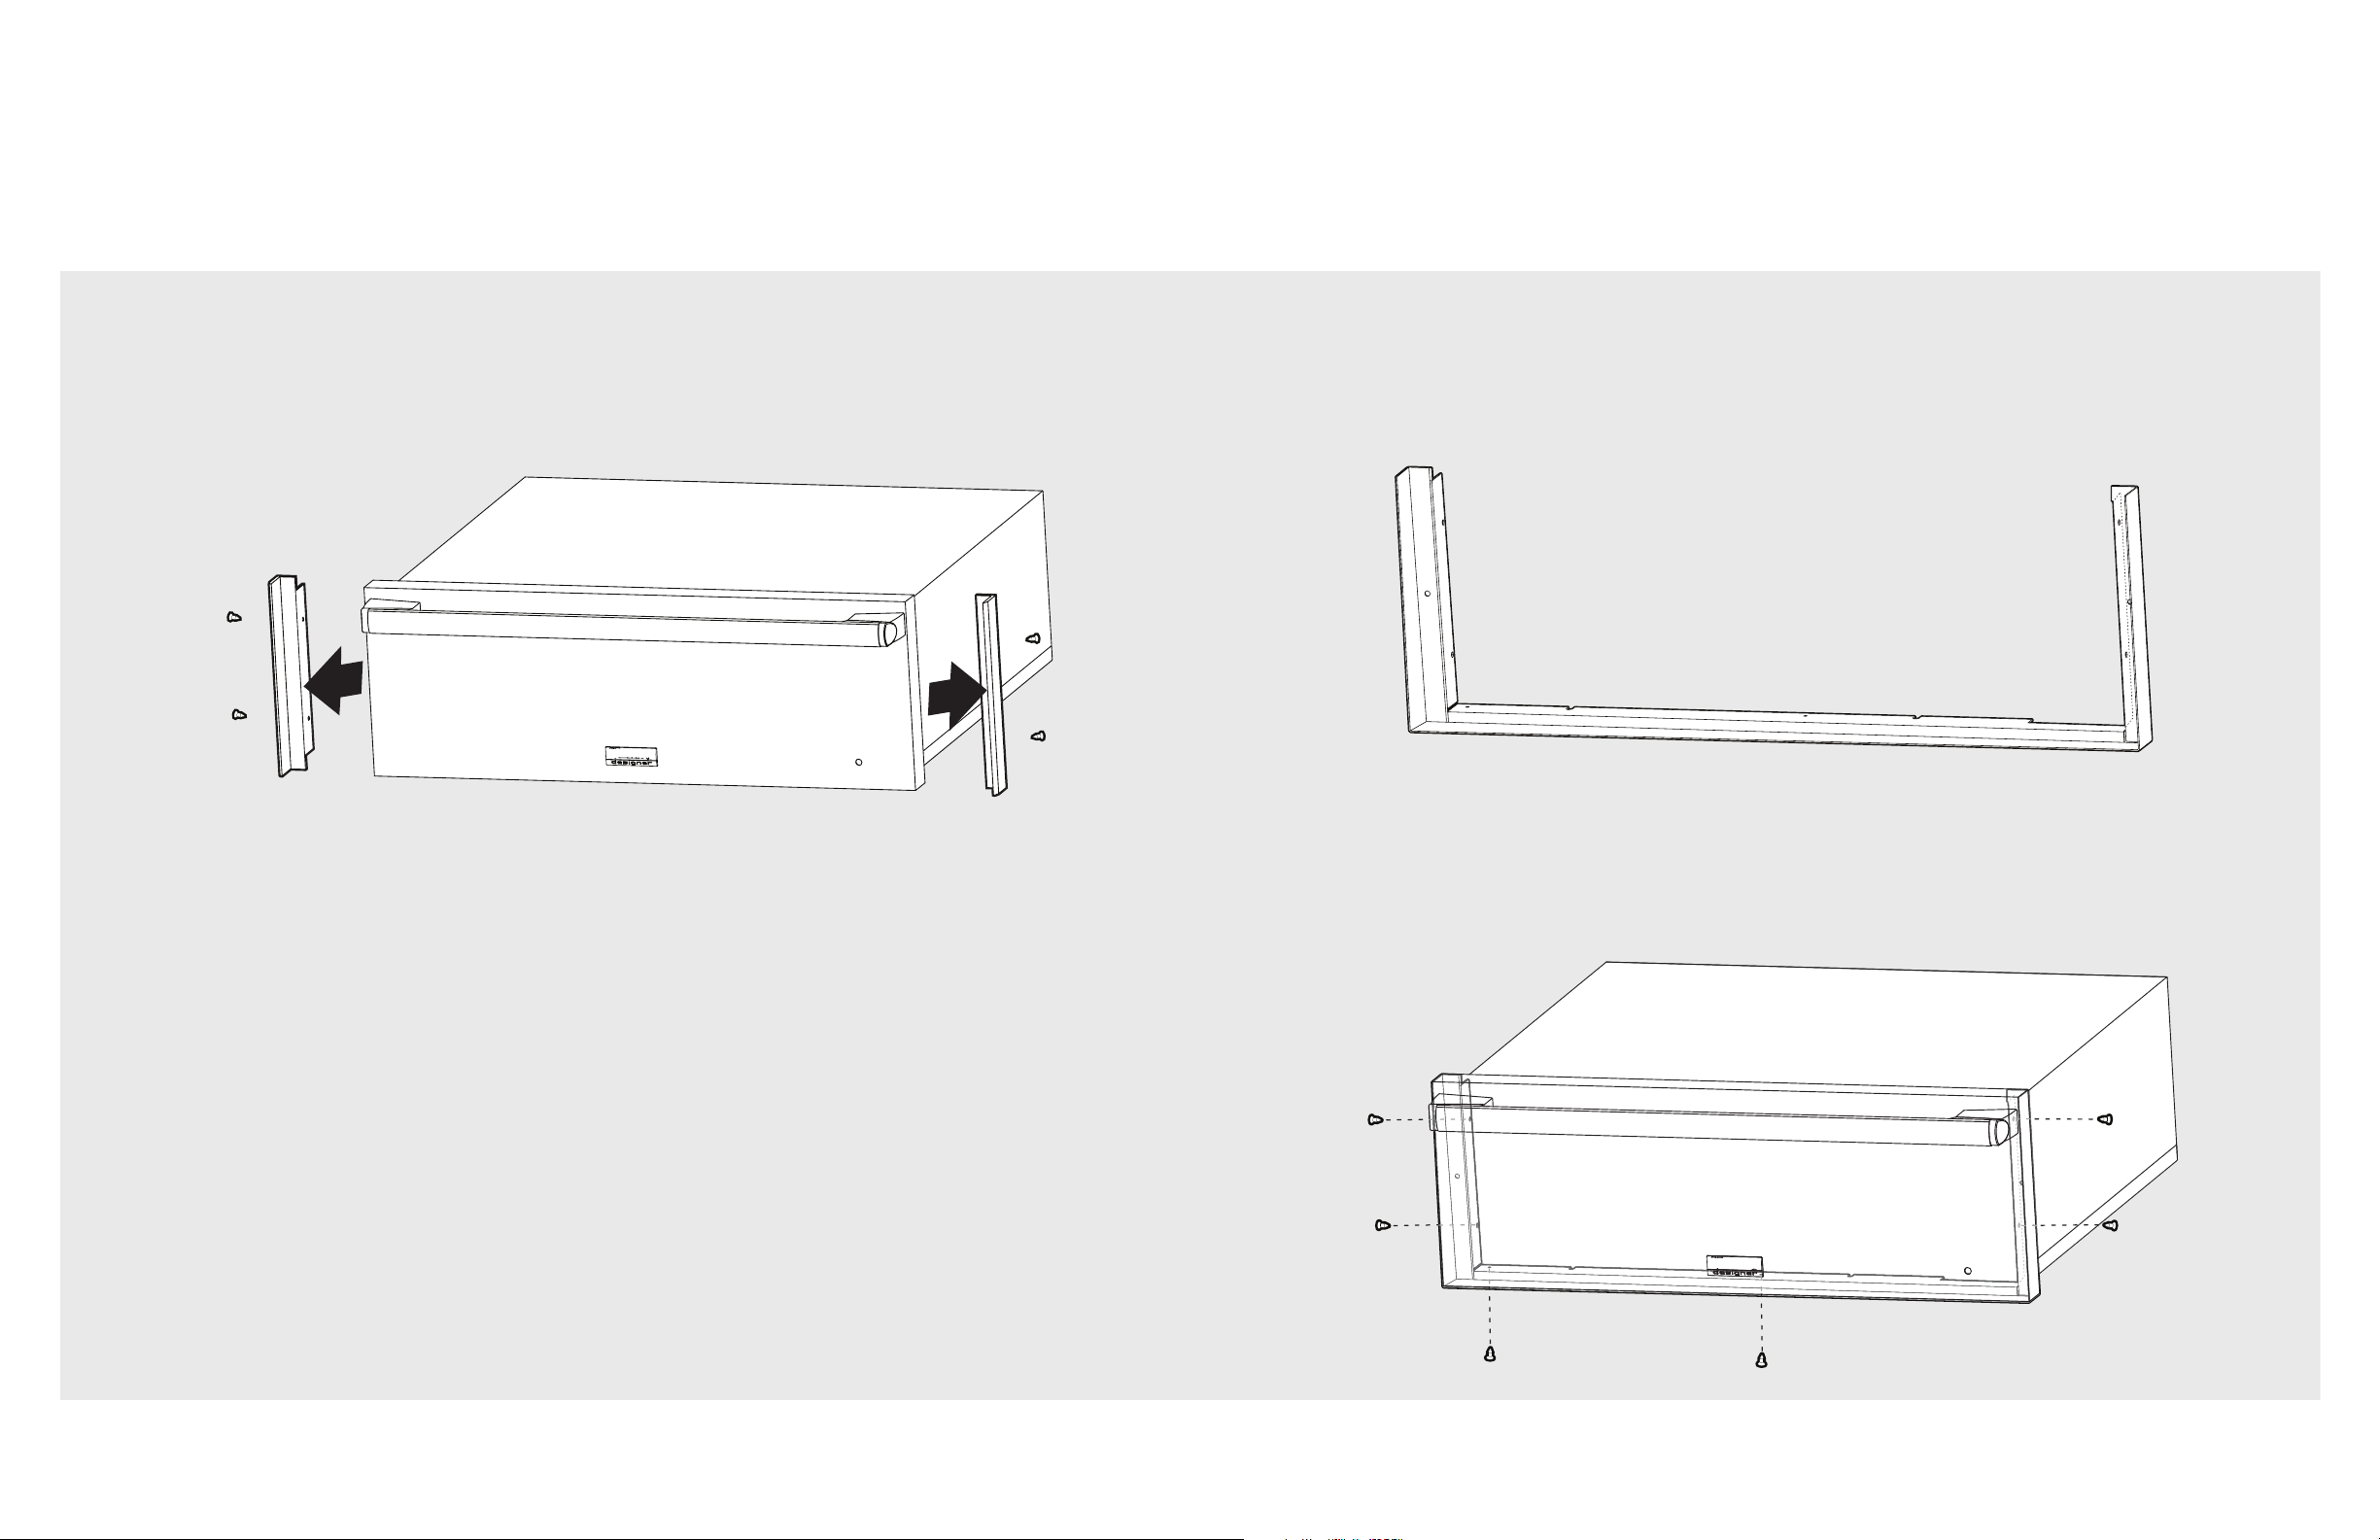
Removing Existing Trim
Remove the two existing side trim pieces from the warming drawer. There should be one trim
piece on each side of the drawer.
Installing Flush Mount Trim
After removing the existing side trim pieces, install the flush mount trim piece to the warming
drawer.
1. Remove the protective plastic from the flush mount trim piece.
2. Install the flush mount trim piece to the unit with screws provided.
3. After installing the flush mount trim piece, the warming drawer can be installed into the
Page 3

4 5
Securing Inside the Cutout
CRITICAL
DIMENSIONS
A 1/2” (1.3 cm)
B 1-3/8” (3.5 cm)
Preparing the Cutout
In order for the unit to sit properly inside the cutout, the bottom must be built-up or “shimmed”
by 1/2” blocking (See illustrations below). This will provide stability for the unit and allow it to sit
upright when pushed back into the wall.
FLUSH CUTOUT
A 29-5/8” (75.2 cm)
B 25-1/8” (63.8 cm)
C 10-1/8” (25.7 cm)
LEGEND
Blocking
Finished
Surfaces
Side View
Vertical Blocking
Finished Surfaces
Screw
Vertical Blocking
Bottom Spacer Blocking
A
B
C
A
B
Bottom Spacer Blocking
Page 4

6
7
Securing Inside the Cutout (cont.)
CRITICAL
DIMENSIONS
A 28-1/2” (72.4 cm)
B 1-1/2” (3.8 cm)
Top View
Distance will
vary depending
on the cabinet
Vertical
Blocking
ScrewScrew
B
A
 Loading...