

VIGORHOOD PHOTOELECTRIC PS970 User Manual

Film & photo scanner
For correct usage please read these instructions carefully
and keep in a safe place for future reference!
CONTENTS
Safety Precautions...........................................................1
Package contents.............................................................2
Description of parts..........................................................3
Loading Slides................................................................. 4
Loading Negatives............................................................5
Loading Photo..................................................................6
General operations...........................................................7
Technical Specifications..................................................26
USER S MANUAL
USER S MANUAL

1.Safety precautions
Important: Do not expose this product to rain or moisture to preserve
the life of your product.
Caution: Do not disassemble this unit. To prevent this risk of electric
shock, do not remove cover.
Ventilation:The device should be situated so that its location or
position does not interfere with its proper ventilation. For
example, the unit should not be situated on a bed, sofa,
rug or similar surface that may block the ventilation openings.
Heat: The device should be situated away from sources of high
heat such as radiators or stoves.
Cleaning: We strongly suggest using a clean, dry, non-alcohol cotton
swab to clean the glass surface periodically to produce a
clear image.
Non use period: The USB cord for the device should be unplugged
from the computer when the unit is left unused for a long
period of time.
USB overloading: Do not overload the USB connections on your
computer. If you have too many devices connected to your
computer such as a wireless mouse, Media player, mobile
phone or other USB powered devices. There may not be
enough power for the film & photo scanner to operate properly.
Servicing: The user should not attempt to service the device beyond
those means described in the operating instructions. All other
servicing should be referred to qualified person.
Film Holder: The design of film holder is follow ISO standard. In some
cases the holes on the film will not match exactly to alignment
of the holder. This is caused by a non-standard camera. In this
case there will be a small black line on the edge of the frame
that can easily be cropped out using the BlazePhoto software.
2.Unpacking your Product
Film & photo scanner
USB cable
Negative Film Holder
Positive Slide Holder
Photo Tray (5 x7 , 4 x6 , 3 x5 )
AC/DC adapter
User's Manual
ISO-- International Organization for Standardization
1 2
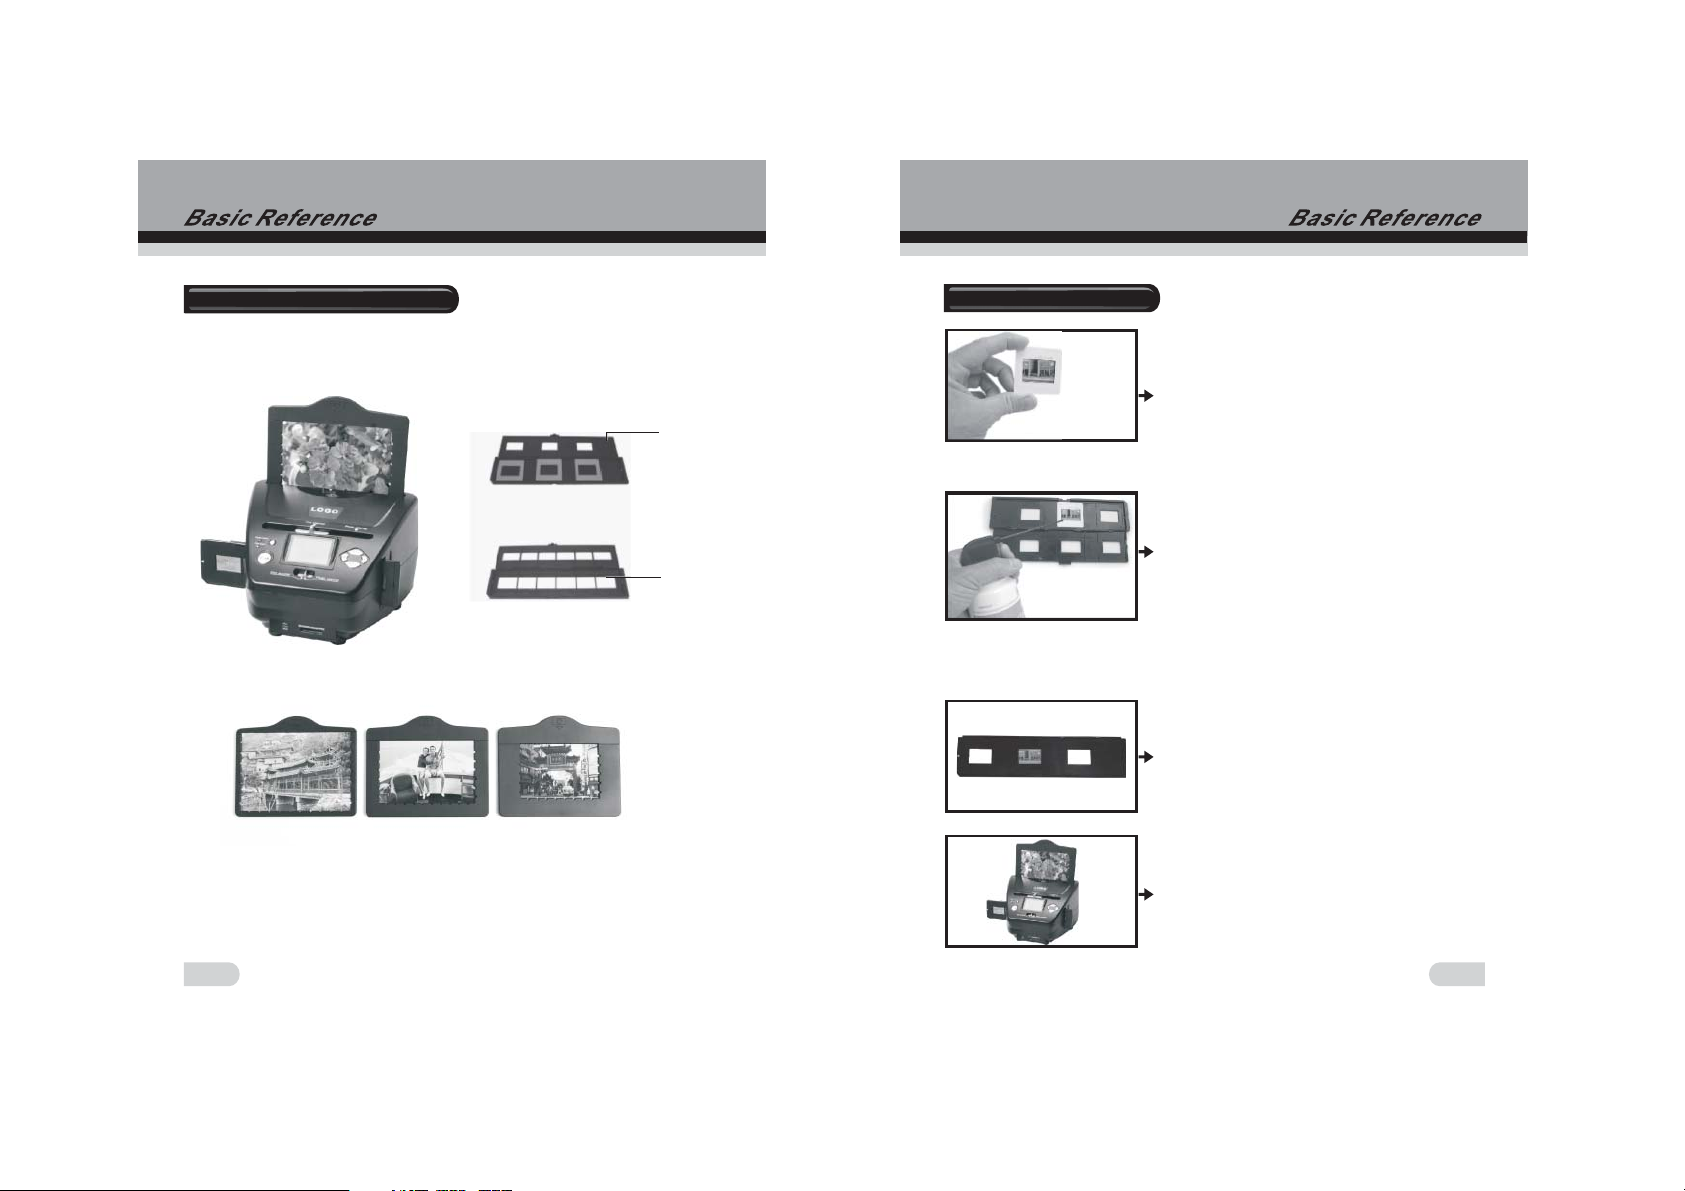
3.Description of parts
Positive
slide Holder
Negative
film Holder
4.Loading Slides
Hold up the slide toward the light. Face the
trademark side of the slide away from you.
Look through the slide and it should appear
normally (not a mirror image).
Now turn the slide so the image is upside
down while looking at the same side.
Open the slide holder at the marked spot
on the top.
With the slide holder laid open place the
slide into recessed area in the holder- the
slide should fit perfectly.
Note: Handle slides with care. Any dust
scratches or fingerprints will show up on
your saved images. If possible use cotton
gloves when handling slides. It is
recommended to use compressed air to
remove any dust on the slides. This is not
included with the film & photo scanner but
can be purchased from an office supply or
electronics retailer.
Close the slide holder and press the
edges so that it locks in place.
Hold it in the position as shown in the
film & photo scanner.
Insert the Slide Holder into the slot on
the right side of the film & photo scanner
as shown.
3 4
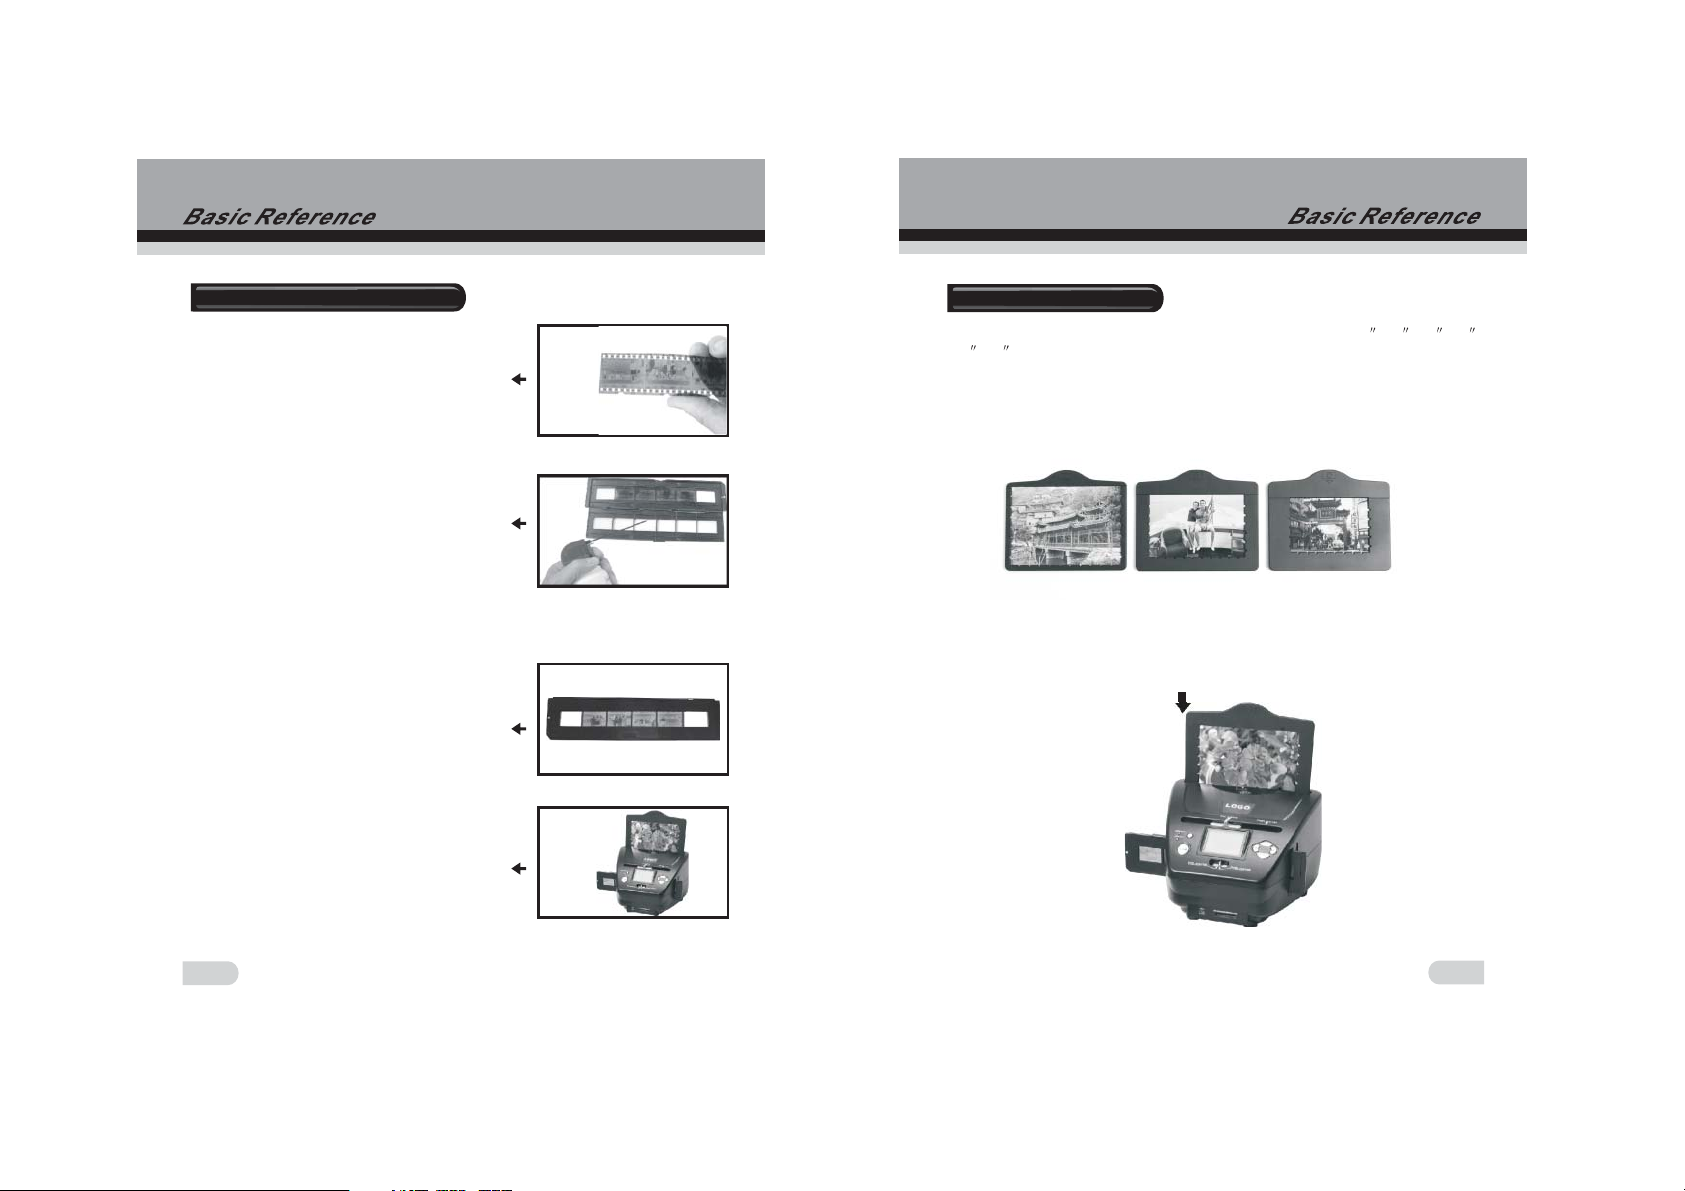
5.Loading Negatives
Hold up the negative toward the light. As you
look through the negative you should be able
to read the small negative numbers normally
(not a mirror image).
Now turn the negative so the image is upside
down while looking at the same side.
Open the negative holder at the marked spot
on the top.
With the negative holder laid open place the
negative into holder so the notches line up with
the notches on the holder.
Note: Handle negatives with care. Any dust,
scratches or fingerprints will show up on your
saved images. If possible use cotton gloves
when handling negatives. It is recommended
to use compressed air to remove any dust on
the negatives. This is not included with the film
& photo scanner but can be purchased from an
office supply or electronics retailer.
Close the negative holder and press the edges
so that it locks in place
Hold it in the position as shown in the film &
photo scanner.
Insert the negative holder into the slot on the
right side of the film & photo scanner as shown.
Film Holder: The design of film holder is follow
ISO standard. In some cases the holes on the
film will not match exactly to alignment of the
holder. This is caused by a non-standard camera.
In this case there will be a small black line on
the edge of the frame that can easily be cropped
out using the BlazePhoto software.
ISO-- International Organization for Standardization
5
6: Loading photo
First insert the photo into appropriately sized photo tray (5 x7 , 4 x6 ,
3x5)
Note: Handle photo with care. Any dust scratches or fingerprints will show
up on your saved images.
Insert the photo tray into the photo tray slot from the top of the film & photo
scanner as shown.
6
7: General operations
Quickstart
1: If you want to scan the films, please switch two switches on the top of
the device to the left side. Otherwise if you want to scan the photos,
please switch to the right side.
2: Put Slide/Negative onto the Slide/Negative Holder or insert photo into
appropriately sized photo tray (5 x7 , 4 x6 , 3 x5 )
3: Insert the Slide/Negative Holder into the slot on the right of the device
or insert photo tray into photo tray slot from the top of the device
4: Apply the power to the film & photo scanner by two ways:
(1)USB: Connect the film & photo scanner to PC with USB cable
(2)5V adapter: Connect the adapter to the device with USB cable
5: Press POWER button to turn on the film & photo scanner.
Note:
(1) When the Film scanner mode is selected, the Film scan indication
LED is on.
(2) When the Photo scanner mode is selected, the Photo scan
indication LED is on
6: Follow the menu on screen for scanning.
7: After finished the scanning, take out the memory card.
Note:
The film & photo scanner has a 32MB built-in memory for recording, when
there is a memory card inserted, it will be the top priority for saving data
8: Or read pictures from PC by USB mode
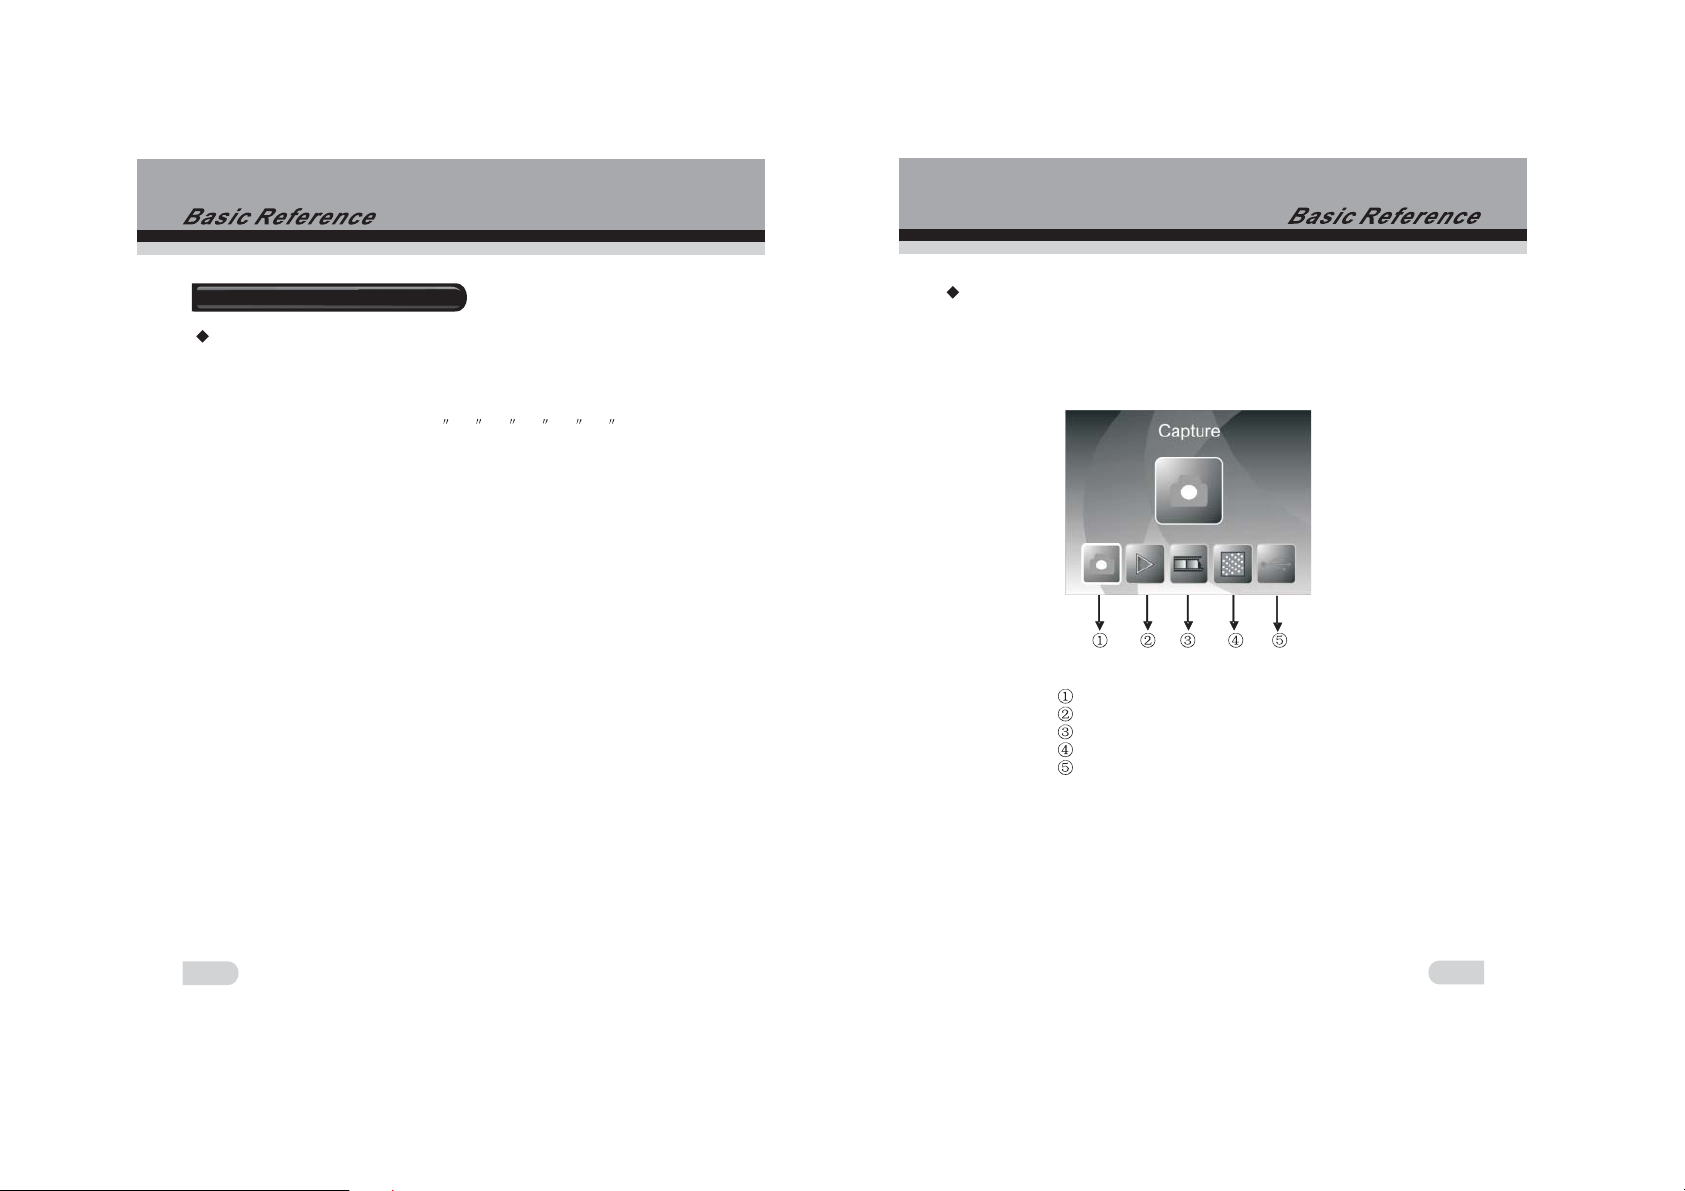
Operation guide
Home/MODE: Main menu
When the Film scanner mode is selected, the following main menu will
be appeared:
Capture mode
Playback mode
Film Type
Resolution
USB mode
7
8
 Loading...