

Page 1
XMA Limited, 7 Handley Page Way, Old Parkbury Lane, Colney Street, St. Albans, Hertfordshire AL2 2DQ
Tel: 01727 201 850 | Fax: 01727 201858 | Email: technical@viglen.co.uk| Web: www.viglen.co.uk
Windows® 7 Installation and PCIE RAID Setup Guide
Operating System(s) Support:
The Vig860S motherboard is officially approved for Windows 10 for 6th and 7th gen Processors.
Windows 7 is supported for 6th gen process only.
Please note, there is no support of windows 7 operating system for 7th Gen Intel(R) Core(TM)
processor family (Codename Kaby Lake).
7th Gen Intel(R) Core(TM) processor family (Codename Kaby Lake)
Microsoft Windows* 10-64
6th Gen Intel(R) Core(TM) processor family (codename Skylake)
Microsoft Windows* 7-64
Microsoft Windows* 8.1-64
Microsoft Windows* 10-64
Microsoft support policies with updated Windows 7 & 8.1 guidelines.
Supported Windows Versions
Kaby Lake (Intel 7th Generation Core processors)
Windows 10 ONLY
Skylake (Intel 6th Generation Core processors)
Windows 7, 8.1,10
Page 2

XMA Limited, 7 Handley Page Way, Old Parkbury Lane, Colney Street, St. Albans, Hertfordshire AL2 2DQ
Tel: 01727 201 850 | Fax: 01727 201858 | Email: technical@viglen.co.uk| Web: www.viglen.co.uk
Windows® 7 and USB driver installation
Based on the chipset specification, the Vig860S motherboard requires USB 3.0 drivers to be preloaded
in order to use USB keyboard/mouse during Windows® 7 installation. This section is a guide on
preloading USB 3.0 drivers and installing Windows® 7.
Method 1: Using SATA ODD & USB devices
Load the USB driver using the ASUS support DVD and install Windows® 7 using a USB device.
Requirement:
• 1 x EZ_Installer_Windows 7_V1.03.10
• 1 x Windows® 7 installation DVD
• 1 x Working system (PC)
• 1 x SATA ODD
• 1 x USB storage device (8 GB or more)
The USB storage device requires 8 GB or more capacity. It is recommended to format the
Storage device before use.
If you want to install Windows® 7 64-bit UEFI mode, use both a USB ODD and a SATA
ODD.
1. Insert the Windows® 7 installation DVD into a USB ODD, or copy all files on the Windows® 7
installation DVD to a USB storage device on a working system.
2. Connect the USB ODD or USB storage device to your system.
3. Insert the ASUS support DVD into a SATA ODD on your system.
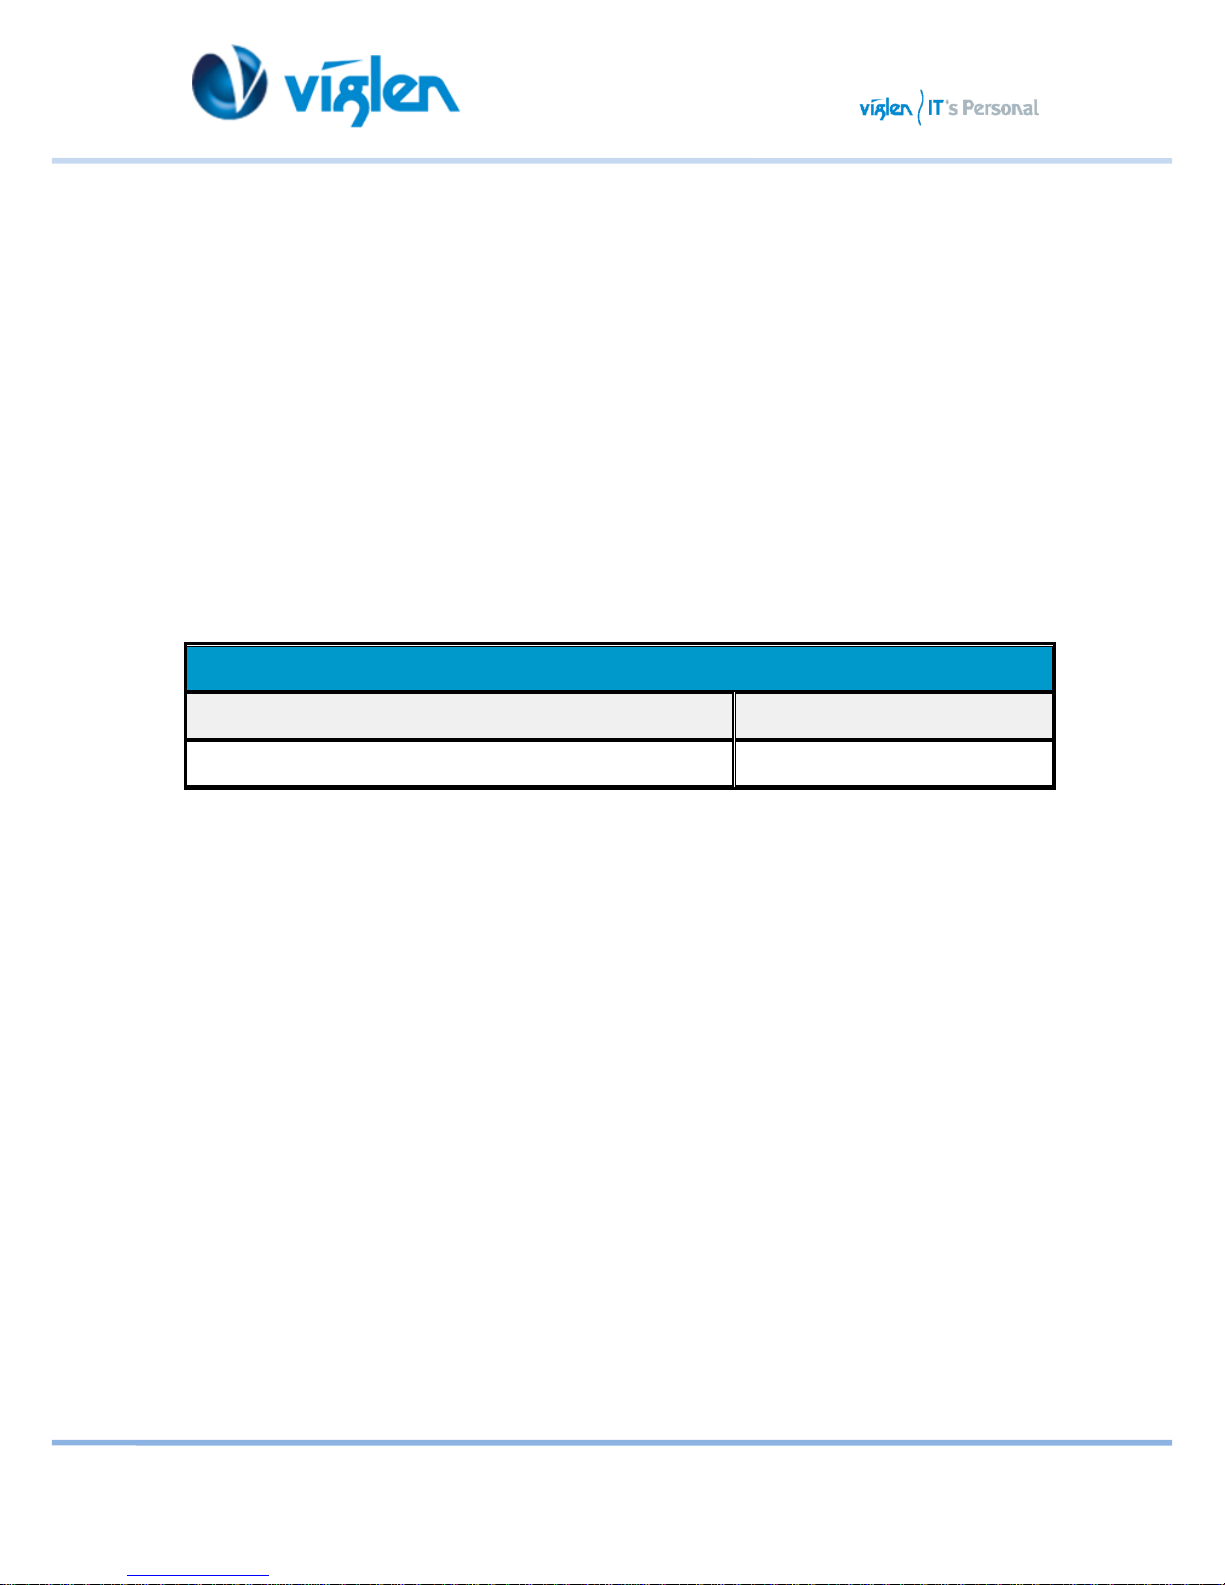
4. Power on your system and press F8 during POST (Power-On Self-Test) to enter the boot
screen.
5. Select the USB ODD or USB storage device as the boot device.
Page 3
XMA Limited, 7 Handley Page Way, Old Parkbury Lane, Colney Street, St. Albans, Hertfordshire AL2 2DQ
Tel: 01727 201 850 | Fax: 01727 201858 | Email: technical@viglen.co.uk| Web: www.viglen.co.uk
Figure 1 – Boot Device Menu
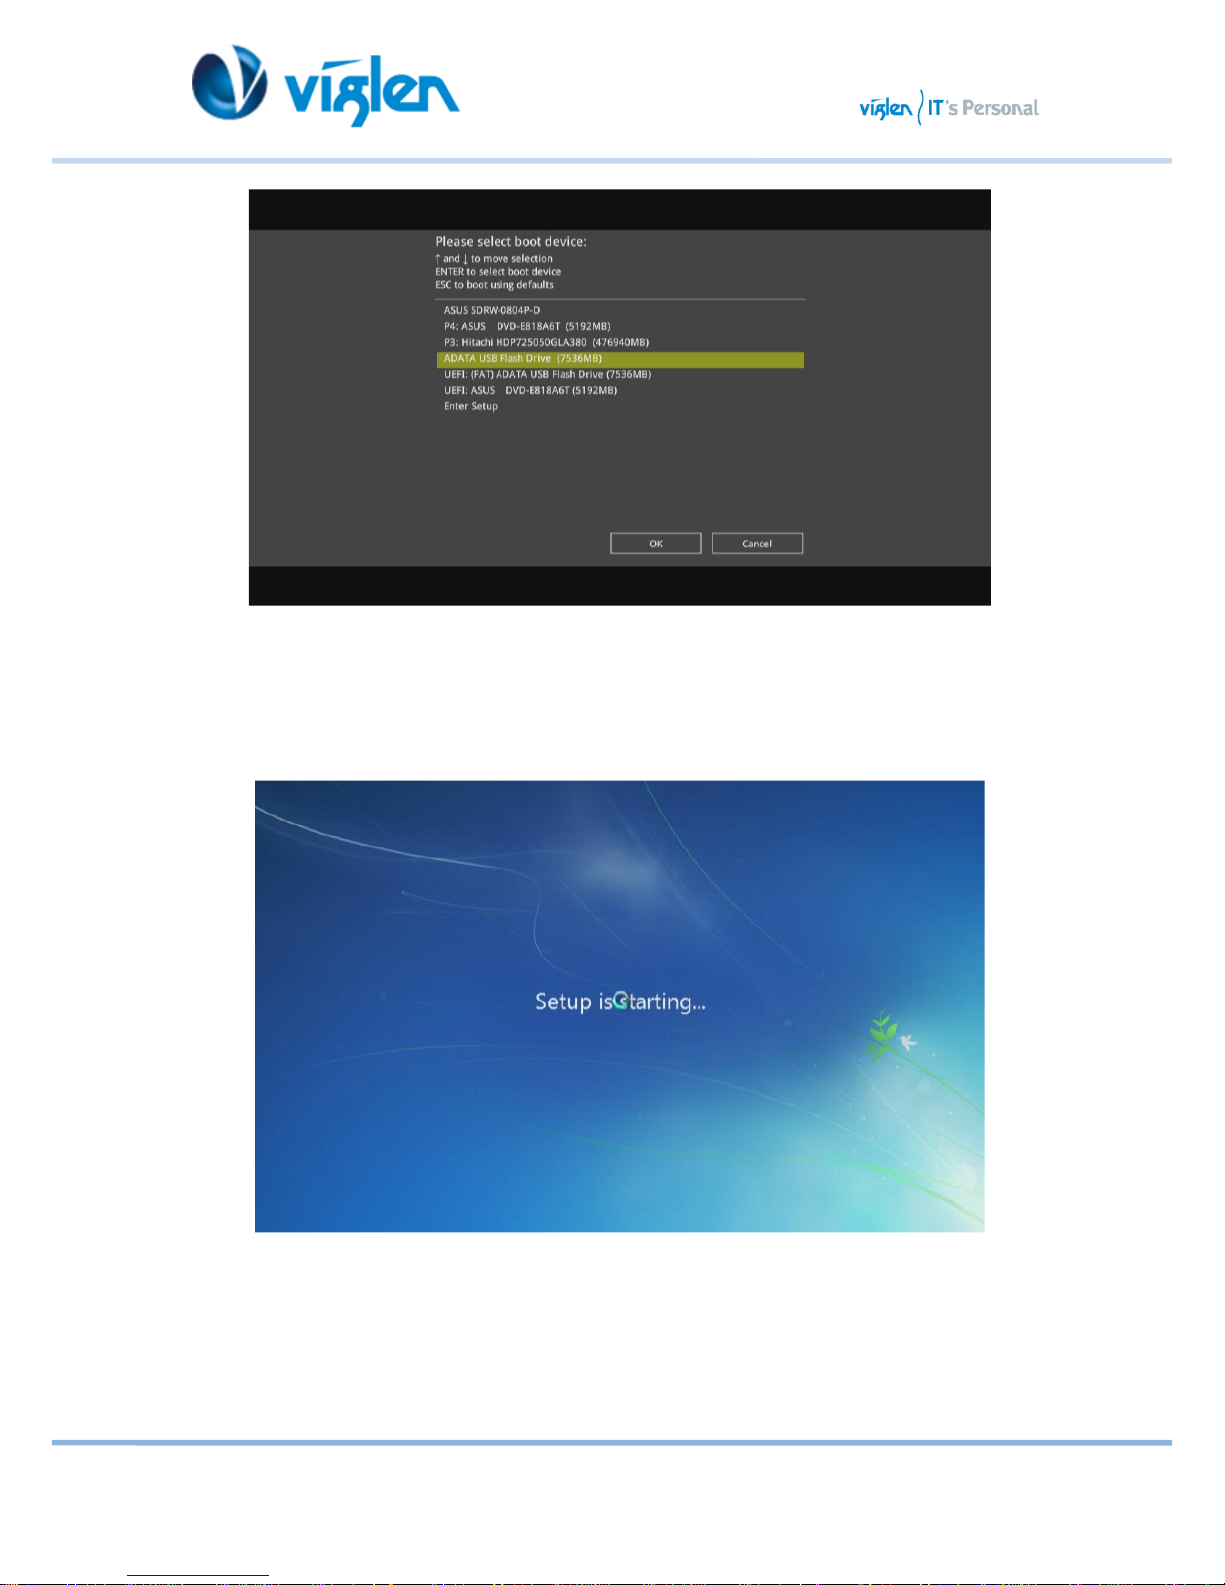
6. The USB driver will be loaded automatically during installation start-up.
Figure 2 – Windows start-up screen
The “Setup is starting...” screen will show up if the USB driver is loaded correctly.
7. Follow the onscreen instructions to complete the Windows® 7 installation.
Page 4

XMA Limited, 7 Handley Page Way, Old Parkbury Lane, Colney Street, St. Albans, Hertfordshire AL2 2DQ
Tel: 01727 201 850 | Fax: 01727 201858 | Email: technical@viglen.co.uk| Web: www.viglen.co.uk
Method 2: Using a modified Windows® 7 ISO
Load the USB driver and install Windows® 7 using a modified Windows® 7 installation DVD.
Requirement:
• 1 x EZ_Installer_Windows 7_V1.03.10
• 1 x Windows® 7 installation source
• 1 x Working system (PC)
• 1 x SATA ODD
1. On your working system, create an ISO image file of the Windows® 7 installation source using a
third-party ISO software.
2. Copy both “Auto_Unattend.xml” and “Auto_Unattend” folder from the root directory of the Driver
DVD to your system.
3. Edit the ISO file and add both “Auto_Unattend.xml” and “Auto_Unattend” folder into the ISO file.
4. Burn this ISO file onto an empty DVD to create a modified Windows® 7 installation DVD.
5. Insert the modified Windows® 7 installation DVD into an ODD on your system.
6. Power on your system and press F8 during POST (Power-On Self-Test) to enter the boot screen.
7. Select the ODD as the boot device.
8. The USB driver will be loaded automatically during installation start-up.
The “Setup is starting...” screen will show up if the USB driver is loaded correctly
Page 5

XMA Limited, 7 Handley Page Way, Old Parkbury Lane, Colney Street, St. Albans, Hertfordshire AL2 2DQ
Tel: 01727 201 850 | Fax: 01727 201858 | Email: technical@viglen.co.uk| Web: www.viglen.co.uk
Method 3: Using ASUS EZ Installer
Use the ASUS EZ Installer Utility to create a modified Windows® 7 installation source.
Requirement:
• 1 x EZ_Installer_Windows 7_V1.03.10
• 1 x Windows® 7 installation DVD
• 1 x Working system (PC)
• 1 x SATA ODD
• 1 x USB storage device (8 GB or more)
1. Insert the Windows® 7 installation DVD.
2. Launch the ASUS EZ Installer located under Drivers\Windows 7 Installation Guide folder on Driver DVD and
FTP link for the drivers.
3. Select a method of creating a modified Windows® 7 installation file:
Windows® 7 OS disk to USB storage device
a) Select Windows 7 OS disk to USB storage device then click Next.
Figure 3
b) Check I agree and then click Next
Figure 4
Page 6

XMA Limited, 7 Handley Page Way, Old Parkbury Lane, Colney Street, St. Albans, Hertfordshire AL2 2DQ
Tel: 01727 201 850 | Fax: 01727 201858 | Email: technical@viglen.co.uk| Web: www.viglen.co.uk
c) Select the source of the Windows® 7 installation disk then click Next.
Figure 5
d) Select the USB storage device and click next. Next.
Figure 6
e) Click the refresh icon if the USB storage device is not displayed.
f) Tick Install NVMe hotfix if needed.
g) Click Yes to clear the contents on the USB storage device and create a bootable USB device.
Make sure to backup contents on the USB storage device, as it will be formatted.
h) Once completed, click OK to finish.
i) Burn this ISO file onto an empty DVD to create a modified Windows® 7 installation DVD.
Page 7

XMA Limited, 7 Handley Page Way, Old Parkbury Lane, Colney Street, St. Albans, Hertfordshire AL2 2DQ
Tel: 01727 201 850 | Fax: 01727 201858 | Email: technical@viglen.co.uk| Web: www.viglen.co.uk
Information:
Before using this method to install Windows® 7:
• If you are using only one SATA HDD, ensure that your SATA HDD has more than twice the storage
space (ISO file size +500MB).
• If you are using two or more SATA HDDs, ensure that at least two of your SATA HDDs have more
than the storage space (ISO file size +500MB).
j) Select Windows 7 OS disk to ISO file then click Next.
Figure 7
k) Check I agree and then click Next.
Figure 8
i) Select the source of the Windows® 7 installation disk then click Next.
Page 8

XMA Limited, 7 Handley Page Way, Old Parkbury Lane, Colney Street, St. Albans, Hertfordshire AL2 2DQ
Tel: 01727 201 850 | Fax: 01727 201858 | Email: technical@viglen.co.uk| Web: www.viglen.co.uk
Figure 9
l) Select the folder to save the modified Windows® 7 installation ISO file and click Next.
Tick Install NVMe hotfix if needed.
m) Once completed, click OK to finish.
n) Burn this ISO file onto an empty DVD to create a modified Windows® 7 installation DVD.
4. Insert the modified Windows® 7 installation DVD into an ODD or connect the USB storage
device with modified Windows® 7 installation files onto your system.
5. Power on your system and press F8 during POST (Power-On Self-Test) to enter the boot
screen.
6. Select the ODD or USB storage device as the boot device.
7. The USB driver and NVMe driver will be loaded automatically during installation start-up.
The “Setup is starting...” screen will show up if the USB driver and NVMe driver are loaded
correctly.
8. Follow the onscreen instructions to complete the Windows® 7 installation.
Page 9

XMA Limited, 7 Handley Page Way, Old Parkbury Lane, Colney Street, St. Albans, Hertfordshire AL2 2DQ
Tel: 01727 201 850 | Fax: 01727 201858 | Email: technical@viglen.co.uk| Web: www.viglen.co.uk
Windows® 7 PCIE RAID Setup
Based on the chipset specification, your system requires USB and RAID drivers to be preloaded in
order to use PCIE RAID during Windows® 7 64-bit UEFI installation. This section is a guide on
preloading USB and RAID drivers and installing Windows® 7.
Ensure that your motherboard supports PCIE RAID setup before doing so.
Requirements:
• 1 x Bootable USB storage device created in the above section Using ASUS EZ Installer
• 1 x Modified Windows® 7 installation DVD created in the above section Using ASUS EZ Installer
• 1 x SATA ODD
• 2 x PCIE SSD
1. Insert the modified Windows® 7 installation DVD into an ODD or connect the USB storage device with
modified Windows® 7 installation files onto your Vig750S/Vig760S/Vig830S series platform.
2. Power on your system and press F2 during POST (Power-On Self Test) to enter the boot screen.
3. Go to Advanced > PCH Storage Configuration > SATA Mode Selection and select RAID.
Figure 10
Page 10

XMA Limited, 7 Handley Page Way, Old Parkbury Lane, Colney Street, St. Albans, Hertfordshire AL2 2DQ
Tel: 01727 201 850 | Fax: 01727 201858 | Email: technical@viglen.co.uk| Web: www.viglen.co.uk
Figure 11
4. Two new PCIE RAID options appear. Select RST Controlled in both options.
Figure 12
Page 11

XMA Limited, 7 Handley Page Way, Old Parkbury Lane, Colney Street, St. Albans, Hertfordshire AL2 2DQ
Tel: 01727 201 850 | Fax: 01727 201858 | Email: technical@viglen.co.uk| Web: www.viglen.co.uk
Figure 13
5. Go to Boot > CSM (Compatibility Support Module) > Boot from Storage Device and select
UEFI driver first.
Figure 14
Page 12

XMA Limited, 7 Handley Page Way, Old Parkbury Lane, Colney Street, St. Albans, Hertfordshire AL2 2DQ
Tel: 01727 201 850 | Fax: 01727 201858 | Email: technical@viglen.co.uk| Web: www.viglen.co.uk
Figure 15
6. Press <F10> to save the changes and reboot the system.
Figure 16
Page 13

XMA Limited, 7 Handley Page Way, Old Parkbury Lane, Colney Street, St. Albans, Hertfordshire AL2 2DQ
Tel: 01727 201 850 | Fax: 01727 201858 | Email: technical@viglen.co.uk| Web: www.viglen.co.uk
7. . Press F2 during POST (Power-On Self Test) to enter BIOS again and go to Advanced to click
Intel(R) Rapid Storage Technology, which is a new option.
Figure 17
8. Click Create RAID Volume.
Figure 18
Page 14

XMA Limited, 7 Handley Page Way, Old Parkbury Lane, Colney Street, St. Albans, Hertfordshire AL2 2DQ
Tel: 01727 201 850 | Fax: 01727 201858 | Email: technical@viglen.co.uk| Web: www.viglen.co.uk
9. Setup the RAID information and click Create Volume.
Figure 19
10. When completed, select the ODD or USB storage device as the boot device.
11. The USB driver will be loaded automatically during installation start-up.
The “Setup is starting...” screen appears when the USB driver is loaded successfully.
Page 15

XMA Limited, 7 Handley Page Way, Old Parkbury Lane, Colney Street, St. Albans, Hertfordshire AL2 2DQ
Tel: 01727 201 850 | Fax: 01727 201858 | Email: technical@viglen.co.uk| Web: www.viglen.co.uk
12. Follow the onscreen instructions to complete the initial configurations of Windows® 7
installation.
13. Click Load Driver.
Figure 20
14. Select KabyLake_RAID and then click OK.
Figure 21
Page 16

XMA Limited, 7 Handley Page Way, Old Parkbury Lane, Colney Street, St. Albans, Hertfordshire AL2 2DQ
Tel: 01727 201 850 | Fax: 01727 201858 | Email: technical@viglen.co.uk| Web: www.viglen.co.uk
15. When the following screen appears, click Next to install RAID driver.
Figure 22
16. Follow the onscreen instructions to complete the Windows® 7 installation.
 Loading...