

Page 1

..
Viglen Getting Started Guide
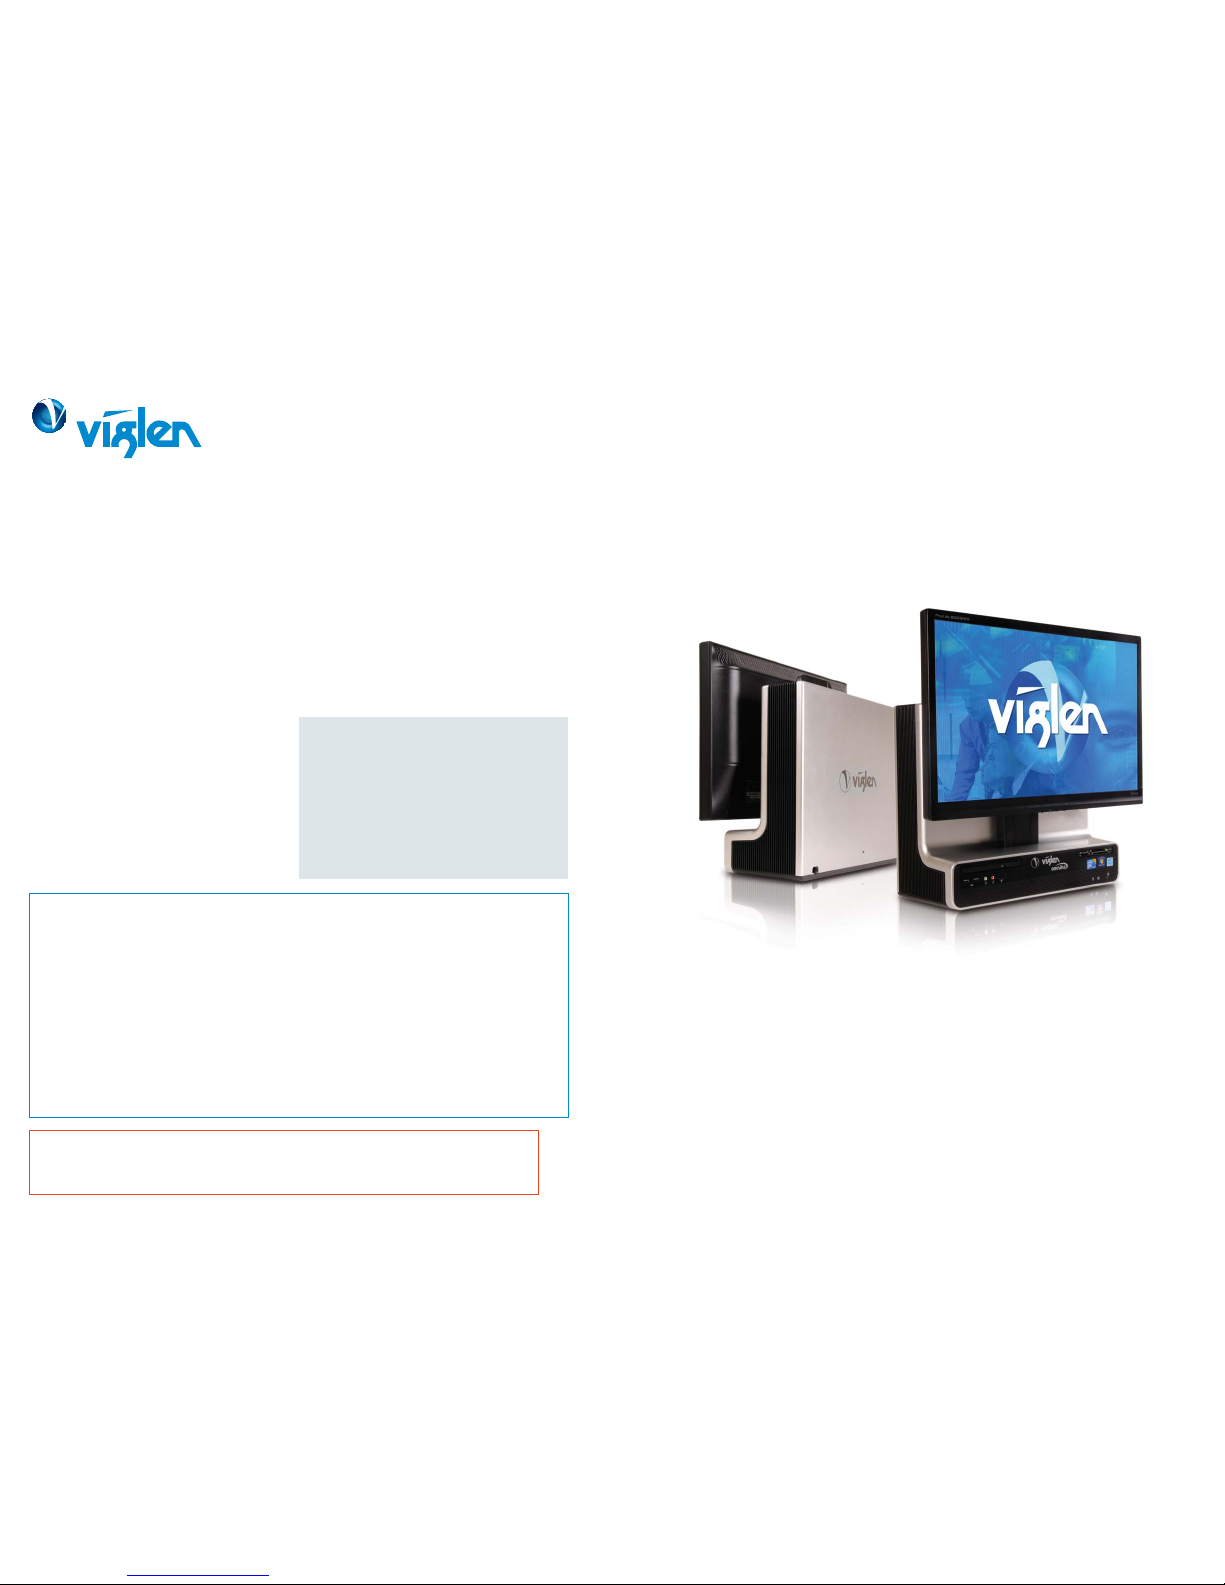
Omnino 4
Included fittings
Your Omnino 4 has been shipped with a multi-purpose screw pack. You will not need to use all the
screws in the pack to complete this assembly. You will require the screws shown below:
Step 2 Attach the Monitor
Step 3 Connect Cables
Screw A Screw B Screw C
( x 1) ( x 2 ) ( x 3 )
Tools required
Cross-head (philips-head) screwdriver
Optional security screwdriver (order EMSECDRV from Viglen)
Included cables
Depending on your configuration you will receive one split
power cable for the base unit and monitor and one or more
of the following cables: video, audio.
Start Guide - Omnino 4 (2010-06)
Slide the locking latch to release the back
cover
Slide the back cover up, then pull it away
from the base unit.
Take care when removing the
monitor stand shipping pin.
The monitor stand contains a strong spring under
pressure. Apply firm pressure to the top of the
monitor bracket before pulling the pin out.
Optional: Fit 1x Screw C in the shipping pin hole
to restrict downward movement of large monitors.
Fix 2x Screw B (lug screw) to the lower VESA
mounting holes in the rear of the monitor. Refer
to your monitor manual for instructions on how to
remove the monitor’s stand.
Unlock the cable window in the base unit and feed
the monitor signal and power cables through.
Place the monitor face down in front of the base
unit and connect the monitor cables.
Lift the monitor onto the monitor stand VESA
bracket and hang the monitor by engaging the lug
screws in the lower holes
Hold the monitor in place and secure it using 2x
Screw C.
CAUTION!
Remove the side panel of the cable bay by
sliding it backwards and lifting it away.
Connect the monitor signal cable, mouse,
keyboard and other accessories.
Secure the mouse, keyboard, power and
other external cables using the cable strap at
the bottom of the cable bay.
Replace the side panel of the cable bay.
Replace the back cover by applying it flat to
the back of the base unit, engaging its lugs
and pushing firmly downwards.
Care should be taken to ensure that all
cables are routed through the cable window
in the bottom of the cover.
Optional: Fit 1x Security Screw A into the
locking clip to deter unauthorised opening.
Optional: Fit a Kensington-style locking cable
or clip to lock the cover and secure the
Omnino 4 to the desktop.
1
2
1
2
1
1
2
3
3
2
4
1
1
2
3
3
1
2
1
2
4
5
5
4
3
3
1
2
1 2
Contents Base Unit Monitor
2
Step 4 Replace the Back Cover
Step 1 Remove the Back Cover
x2
x2
x1
Page 2
Under certain conditions you may need to reset the software
originally installed on your computer to factory conditions, this can
be put down to many different reasons:
●
Accidental deletion of system files.
●
Incompatible software has been installed.
●
Incompatible changes to the system settings.
At Viglen, we understand that unless you have professional
knowledge of computer systems, reinstallation can be a costly and
time-consuming affair, especially for new users. This is why we
have created the Viglen System Recovery Utility (VSRU) – designed
to automatically reinstall your computer software quickly and
efficiently.
Before proceeding with system recovery, please observe the
following recommended guidelines.
●
Back up all personal files to a CD or a suitable backup
device before proceeding with the recovery procedure.
●
Any subsequent software installed by the user must
therefore be manually reinstalled – Please refer to the
manuals that came with your software for installation
instructions.
●
Once initiated, all data stored on the system will be
destroyed and will therefore not be recoverable.
Using the Recovery Utility
Please read the recommended guidelines above before
continuing with the recovery procedures:
1. Shutdown your Viglen PC (if applicable) and switch off.
2. Insert the Viglen Recovery Utility CD into the CD-ROM drive.
3. Switch your computer back on.
4. The Viglen Recovery Utility CD will now load.
5. When prompted, please type ‘factory’ and press the ‘Enter’
key to initiate system recovery.
6. A Windows style screen will now appear with two horizontal
bars showing the status of the recovery sequence. Please
wait while the procedure completes.
7. When prompted, remove the Recovery Utility CD from the
drive and press a key to restart the computer.
Windows will now start up and you will be prompted to enter
you User Information – Please refer to the Software Guide
supplied with your Viglen PC.
Your Viglen Recovery Utility CD….
WARNING
ONLY TO BE USED IF YOUR VIGLEN PC HAS BECOME
UNSTABLE OR YOU HAVE BEEN ADVISED OTHERWISE BY A
MEMBER OF VIGLEN TECHNICAL SUPPORT. ALL PERSONAL
DOCUMENTS WILL BE LOST IF THIS CD IS ACTIVATED.
Hopefully, you should never need to use this utility, but in the
unfortunate event that your system must be reinstalled, please
keep this Getting Started Guide and the Viglen Recovery Utility CD
in a safe place to help ensure a hassle-free recovery.
Viglen System Recovery Utility (Optional)
Technical Support
If you have any queries concerning the following:
1. Hardware configuration problems.
2. You wish to return your hardware for repair or
arrange a service visit (subject to contract).
3. You have installation or set up difficulties.
4. You require additional drivers.
Please call our TECHNICAL SUPPORT department on
01727 201 850
Customer Care
If you have any queries concerning the following:
1. Parts missing or damaged from your Viglen PC order.
2. Incorrect goods supplied against your Viglen PC order.
3. Any complaint with a courier or delivery in general.
4. Collection of any computers or parts.
5. You have ordered or wish to order spare parts.
6. You wish to return your Viglen PC for an upgrade.
7. You wish to know the status of any returned
Viglen PC.
8. You require information on upgrading new or old
systems.
Please call our CUSTOMER CARE department on
01727 201 810
Viglen Getting Started Guide
Omnino 4
Getting Help
at Viglen
Please read this pamphlet before switching on the Viglen PC and
store in a safe place. For further information regarding your Viglen
PC please refer to the Viglen Driver CD which Includes the BIOS,
Drivers and Manual for your motherboard.
Important
Images shown are for illustrative purposes only. Although Viglen endeavours to ensure the accuracy of this information, Viglen cannot be held liable for any damages whatsoever for errors or omissions of fact
herein. Viglen is a trademark of Viglen Ltd, Viglen Ltd is a subsidiary of Viglen Technology Ltd. Viglen, the Viglen V logo, Great Minds Think Viglen, IT’s Personal, Genie, Contender, Envy, Dossier, Futura and Vigstor
are registered trademarks of Viglen Limited. Celeron, Celeron Inside, Centrino, Centrino Logo, Core Inside, Intel, Intel Logo, Intel Core, Intel Inside, Intel Inside Logo, Intel SpeedStep, Intel Viiv, Itanium, Itanium
Inside, Pentium, Pentium Inside, Xeon, Xeon Inside, and vPro are trademarks or registered trademarks of Intel Corporation or its subsidiaries in the United States and other countries. Microsoft and Windows are
registered trademarks of Microsoft Corporation. All other trademarks are acknowledged. Subject to Viglen terms and conditions available on request.
Viglen Limited,
VHQ,
7 Handley Page Way,
Old Parkbury Lane,
Colney Street,
St. Albans, Hertfordshire
AL2 2DQ
Corporate Sales
01727 201 830
Education Sales 01727 201 860
Public Sector Sales 01727 201 830
Schools Sales 01727 201 820
Email sales@viglen.co.uk
Web www.viglen.co.uk
IT’s Personal
 Loading...