

Page 1
Loudspeaker Kit
Assembly Instructions
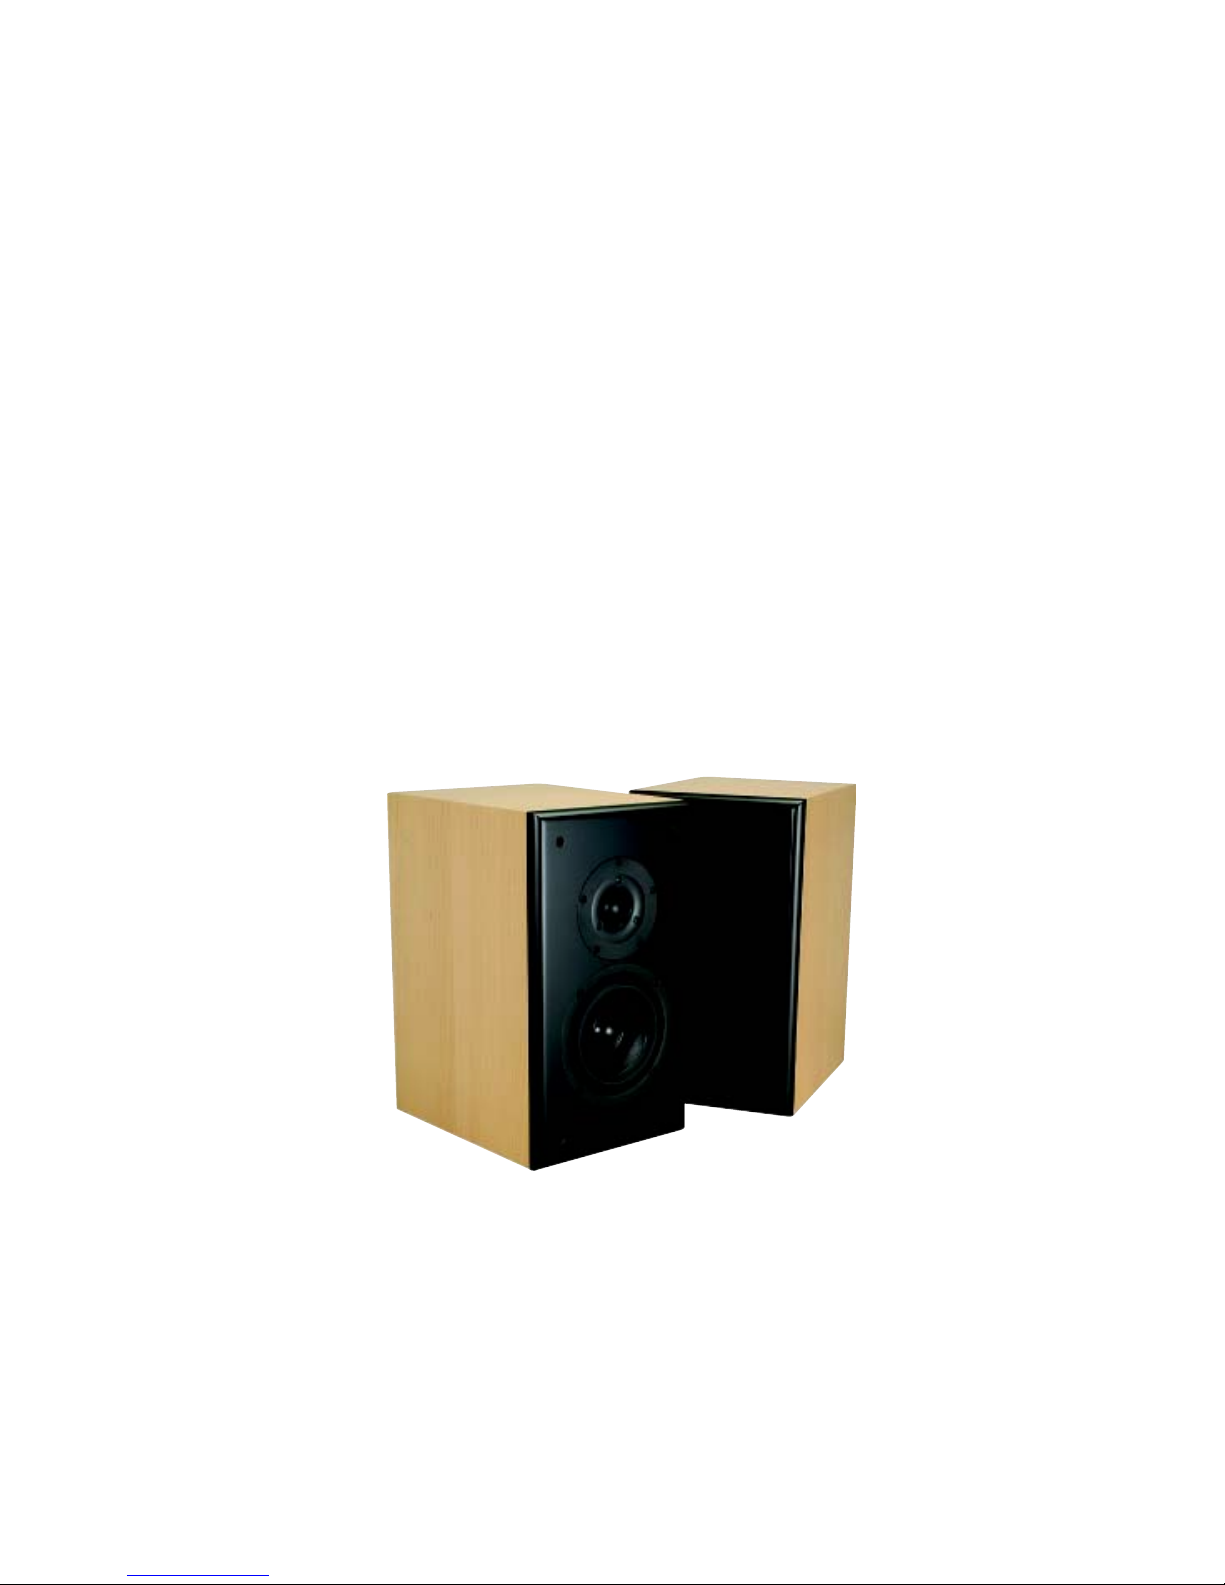
Vifa PL Bookself Speaker Kit
302-910, 302-912, 302-914
Manual # 999-241 © January 2004 Parts Express ®
Page 2

Introduction
The Vifa Premium Line Bookshelf Kit was designed to offer a very rich and warm sound with clear highs. It
excels at producing jazz and classical music, but works well for any type of music where an “easygoing” presentation is desired. The woofer uses a patented paper cone system with rubber surround and cast frame to produce
excellent bass and midrange clarity. The tweeter offers clear and defined high frequencies that are not overly
harsh.
A simple crossover design with a minimum of components inline with the drivers ensures that the great natural
performance of the woofer and tweeter shine through.
Parts Inventory
Before beginning the assembly process, please inspect and confirm that you have all necessary components.
If you appear to be missing any components, please contact Parts Express customer service immediately.
Part# Qty Description
302-710(712,714) 2 .38 cu. ft. two way cabinet
999-231 2 Custom baffles
999-221 2 Crossover boards w/wires
999-241 1 Instruction Manual
091-1245 2 Gold binding post pair
260-388 2 1-3/8" Adjustable port tube
260-516 2 1-1/2" x 24" x 18" Acoustic foam
081-435 20 #6 x 3/4" Phillips pan head screws
264-527 2 Vifa PL27TG35-06 Tweeter
297-322 2 Vifa PL14WJ09-08 Midbass
255-242 2 Jantzen .80 mH 18 ga inductor (L1)
255-266 2 Jantzen 2.00 mH 18 ga inductor (L2)
027-420 2 Dayton 3.3 uF capacitor (C1)
027-423 2 Dayton 5.1 uF capacitor (C2)
027-427 2 Dayton 6.2 uF capacitor (C3)
004-6 2 Dayton 6 ohm Non-Inductive resistor (R1)
004-16 2 Dayton 16 ohm Non-Inductive resistor (R2)
080-817 10 Cable ties
341-882 1 Silicone adhesive
269-300 1 Speaker sealing caulk
Loudspeaker Kit Assembly Instructions
By following these instructions and assembling the speakers in a conscientious manner, you will ensure that you
will be able to enjoy the speakers for many years to come. If there are any questions during the assembly
process, please feel free and contact our Technical Support staff at 1-800-338-0531.
Gather the Necessary Tools
The assembly of your speaker kit requires several basic tools and supplies, though more advanced tools can be
used if desired. The following list represents the most basic list of tools that are required:
Hammer #2 Phillips head screwdriver or power driver
Small wrench or pliers Soldering gun & solder
Silicone adhesive or hot-melt glue gun Electronics cutters
Scissors or utility knife (for cutting foam)
2
Page 3
Workspace Considerations
As with doing any type of kit assembly, it is best to have a large, clean work area with adequate lighting. Taking a
few minutes to establish a good work area will save time by eliminating lost parts and preventing assembly
errors. A heat-resistant work surface is recommended for the crossover assembly portion. When working with the
cabinets, it is important to cover the work surface with a cloth or foam layer to protect the speaker finish. The
foam wrap that is around the speaker cabinets will work well for this, making sure it is free from dust or other
debris.
Getting Organized
To prepare for the kit assembly, you need to do some basic unpacking and organizing first. Open the large
speaker cabinet box(es) and remove the speakers from the packaging. You will need to unwrap the cabinets
themselves, saving the wrap to protect your work surface. Remove the baffles from the cabinet, and place the
baffle screws someplace safe. Proceed to unpack binding posts and other packaged items.
Assembly
1. Install Port Tubes
The port tubes that are included with your kit need to be installed into the cabinet. In this particular kit, the
required port dimensions are 1-3/8" in diameter by 4-1/2" in length. This allows us to use only the main section of
the 1-3/8" adjustable port tube, which is the portion with the mounting flange on it. The secondary adjustable
portion of the tube may be discarded. The main section can be mounted into the cabinet per the instructions
below.
Screw-mount port tubes- The port can simply be set into place and carefully secured with the included #6-3/4"
screws. Be careful not to over-torque the screws, which may result in cracking of the plastic.
2. Install Binding Posts
The posts will need to be “knocked” into place with a hammer and secured from the inside of the cabinet. Start
by placing the cabinets face-down onto the work surface, being sure that the cabinet is firmly supported.
Remove the binding posts from their package, and unscrew all washers and nuts from the shaft. Next, remove
the main nut that is used to hold the speaker wire onto the terminals- this will prevent them from getting damaged while the posts are being inserted.
Insert one of the post shafts into the hole and align it
making sure the wire through-hole is running vertically.
Gently tap into place until the shoulder is snug with the
rear of the cabinet. Excessive hammering is not
necessary and may cause damage to the finish of the
cabinet around posts. Proceed through the same
process with the second post.
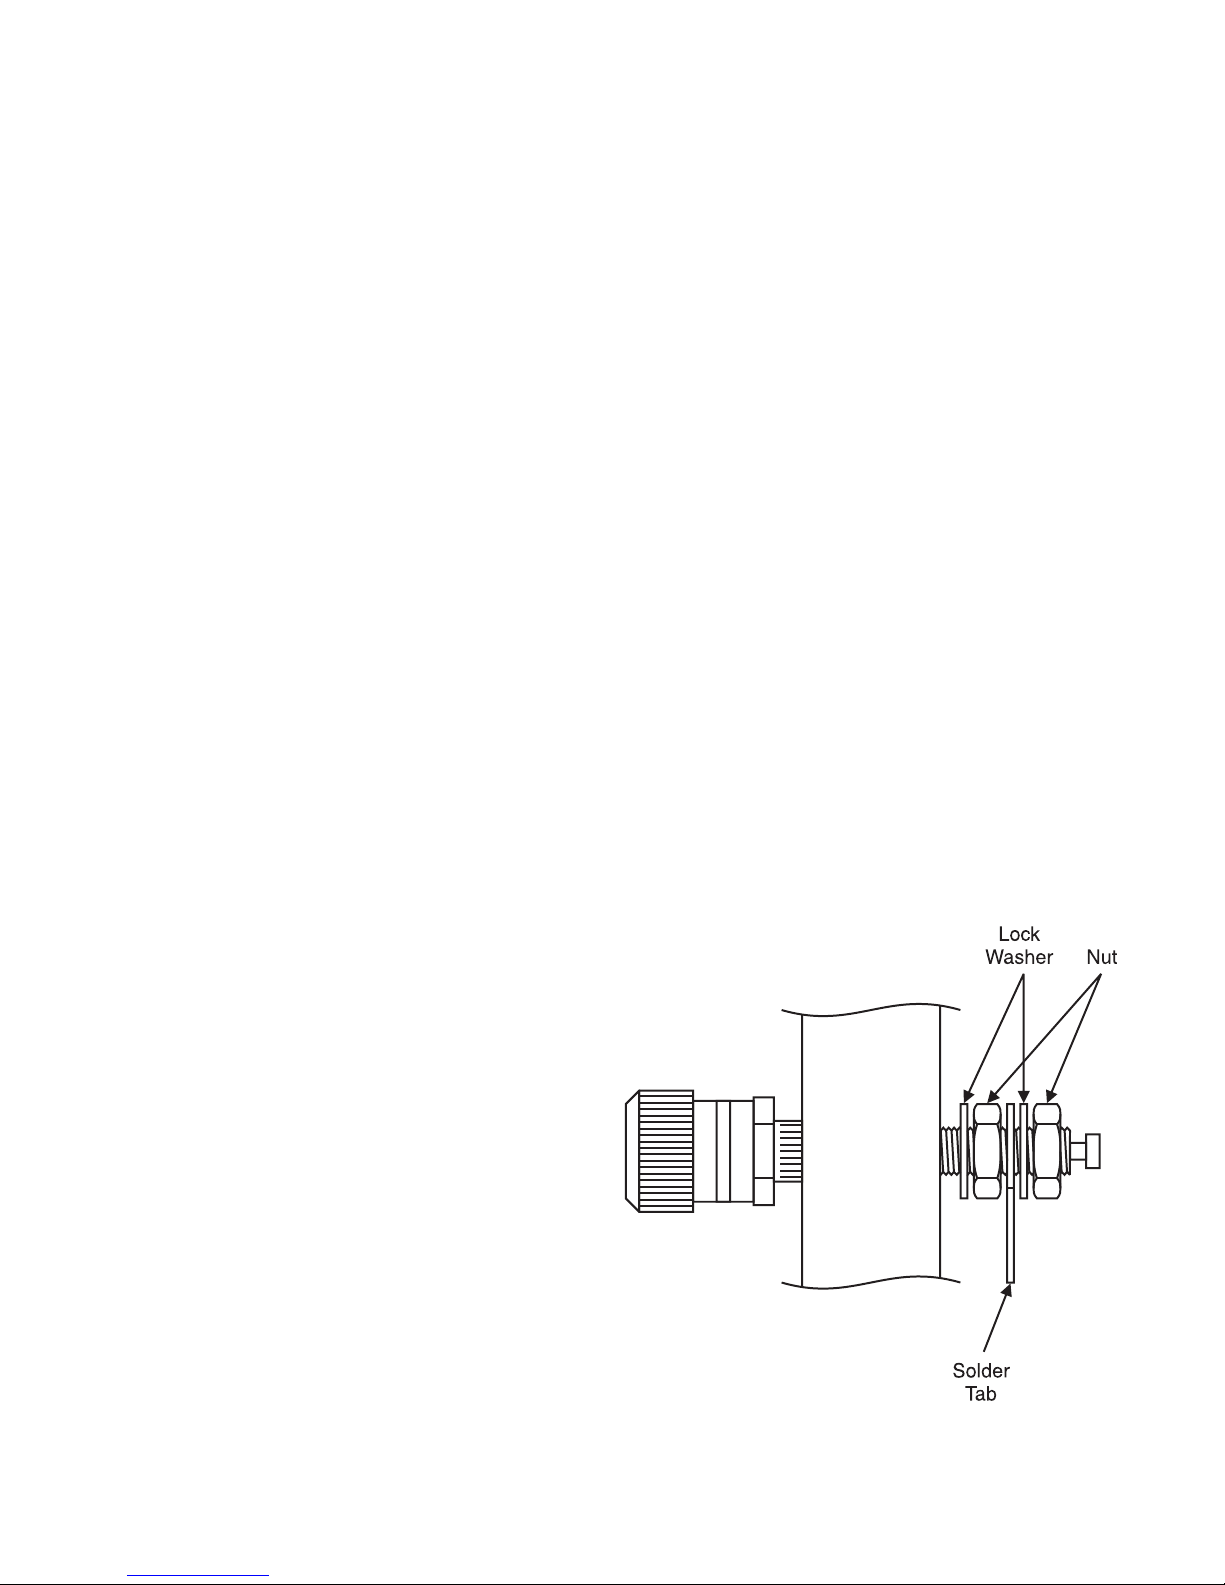
Once the posts have been knocked into place, you will
need to secure them from the inside of the cabinet. A
lock washer followed by a nut need to be installed to
secure the posts to the cabinet. Next, install the
second lock nut, the solder tab, the second nut, and
then tighten into place.
Now that the posts are fully secured, we just need to
reinstall the colored knobs on the outside of the
cabinet. When looking from the rear of the cabinet
(terminals should be closer to the “bottom” of the
cabinet), the “red” terminal will go on the right side.
3
Page 4
3. Install damping material
The damping material included is intended to line the walls of the cabinet to reduce midrange reflections and help
prevent standing waves. The included foam will need to be cut to size and then secured onto the walls of the
cabinet. Note: On most kits there will be excess material available, it is not necessary to use all of it. Do not
place foam directly on top of or underneath the crossover boards.
For this system, we would like to line one of each set of opposing walls, rather than lining the whole cabinet.
Using too much foam (particularly in this small cabinet) can cause an overdamped bass reflex system. This will
result in loose or muddled bass response.
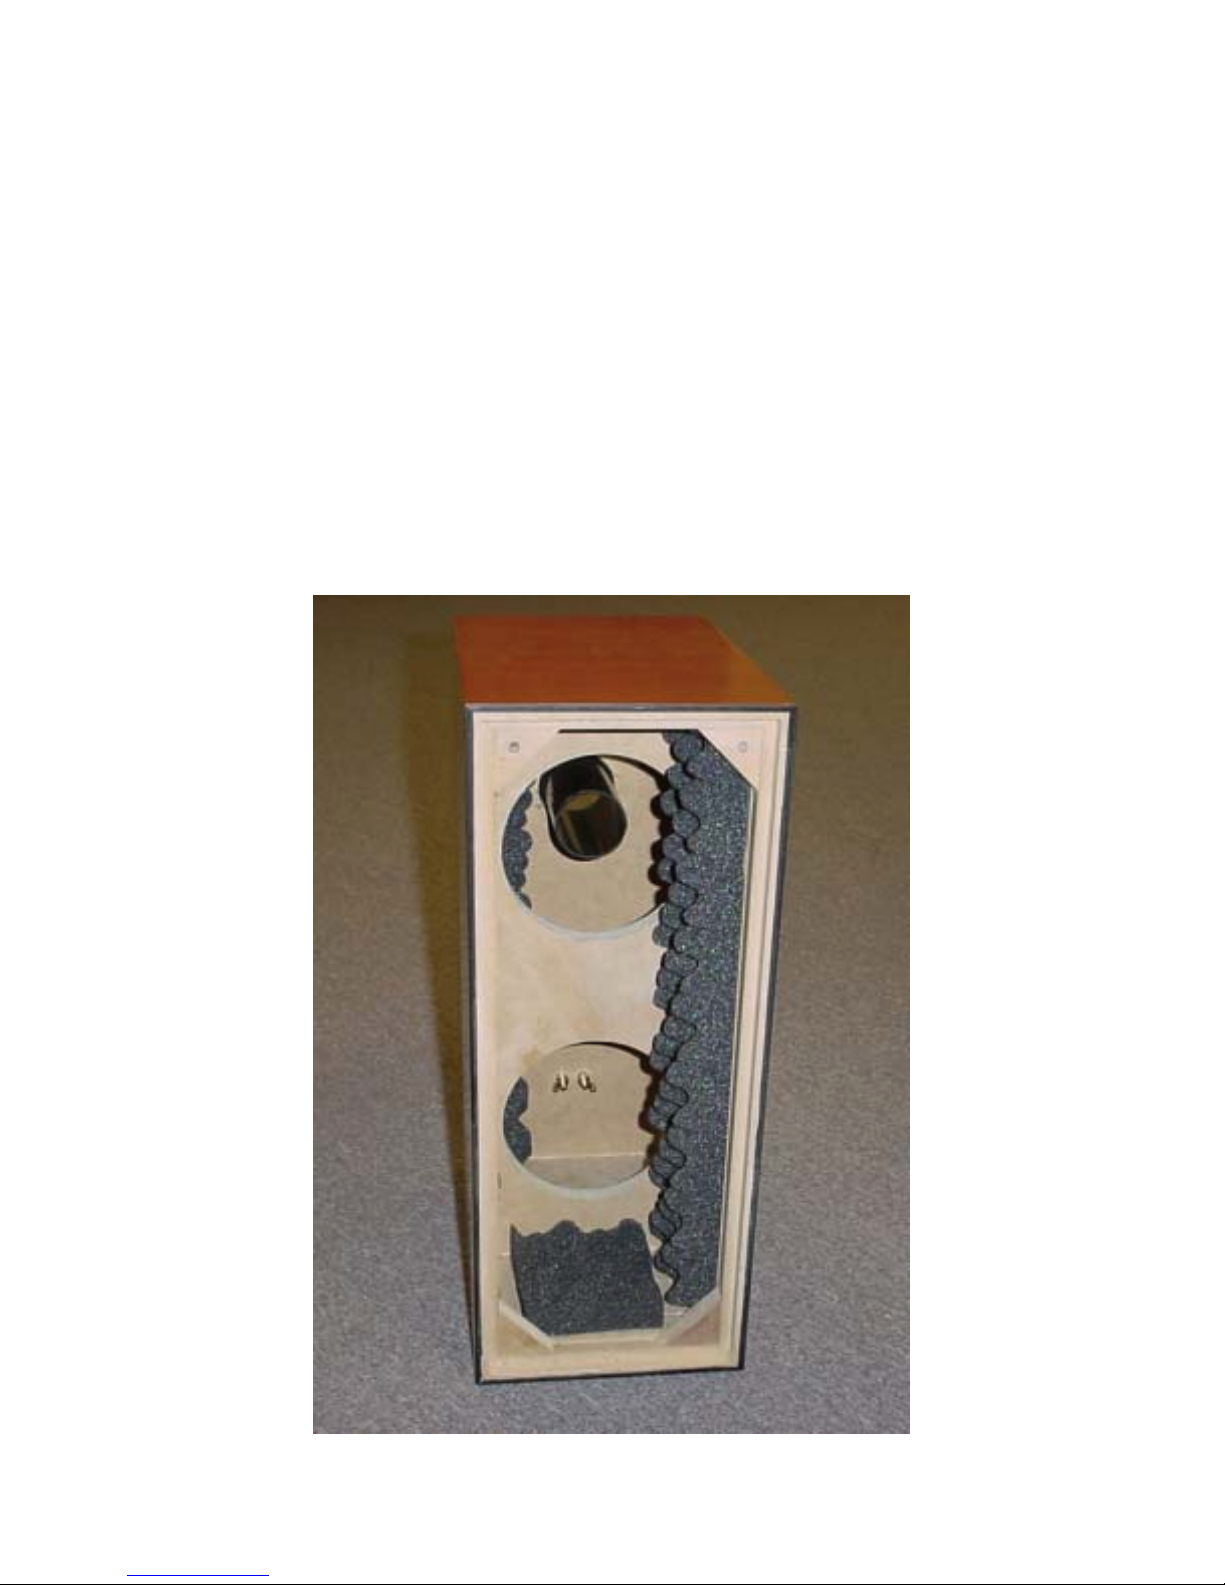
Alternating the foam location between walls is recommended. For example, use one piece of foam on the right
side wall on the front half of the cabinet. Use a second piece on the left wall behind the brace. For the top and
bottom, use one piece of foam on the bottom front half, and one piece on the top rear half above the port. This
will reduce direct reflections between parallel walls on all surfaces without overdamping the system. This configuration also works well by leaving us plenty of room for installing the crossover boards.
The damping material can be secured to the walls with a spray adhesive or with hot-melt glue. When using spray
adhesive, please follow the manufacturer’s instructions. It is best to apply the spray to the foam itself, being sure
to spray away from the cabinet to prevent getting adhesive on the cabinet exterior. When using hot-melt glue,
simply place a few drops of glue at various locations on the rear of the foam and press into place.
Example of finished foam installation
4
Page 5

4. Install drivers in baffle
The drivers need to be secured to their baffles with the included #6 screws. For all driver installations, some form
of gasketing material should be used between the driver frames and the baffles to prevent air leaks and vibrations. In this system, both the woofer and the tweeter will need a bead of speaker sealing caulk.
The caulk needs to be thinned in diameter by working with the fingers into roughly a 1/8" diameter bead. The
bead can be placed around the rear of the driver flange or around the hole in the baffle. Either method can be
used, it is a matter of personal preference. Thinning the bead is important to allow the drivers to sit flush in their
recesses.
Placing a small bead of speaker sealing caulk around the driver frame
Once all drivers have their gaskets, they can be carefully lowered into place on the baffle. Having the terminals
facing towards the bottom of the cabinet is the generally accepted orientation, though it is not a critical matter.
Using the included screws and pre-drilled pilot holes, carefully tighten the drivers down onto the baffle. Pay
particular attention to not over-tighten screws on drivers with stamped steel or polymer frames, which can cause
deformation of the flange.
5
Page 6

5. Crossover Assembly Instructions
For the system to perform properly, it is important that the crossover be assembled correctly. Incorrect assembly
can cause damage to the speaker drivers or your amplifier, so please take time to work carefully and to check
your work as you go.
The crossover boards have a printed pictorial layout on them that includes an outline of the component and a
part label. Please refer to the parts list and schematic for a list of which components go in each location. Match
the component label from the description on the parts list to the label on the PC board.
Note: The following photographs are of a “generic” crossover assembly and will not exactly match the look of
your particular system
Component locations on PC board with labels Insert components into PC board, securing
with silicone or hot melt glue
Each component will have two leads that correspond to holes on the PC boards. Put the components into place
with the leads going through their appropriate holes, following the pictorial on the board. Directionality on the
components is not important; either end of each component can go into either hole. It is recommended that each
component be secured to the board with hot-melt or silicone to prevent any possible vibration of components.
Cable ties are recommended on the inductors to hold them in place more firmly, especially if you are using
silicone.
6
Page 7

Wire tie inductors in place for additional security Completed component installation with glue and
wire ties
Once all of the components have been secured and have their leads going through the board, we can flip it over
and make the solder connections. On the inductors, make sure that the “silver” tinned section of the lead is what
you are soldering to. Attempting to solder to the copper-colored or red insulated portion of the inductor lead will
result in a failed connection.
To solder effectively, place the soldering iron tip so that it is touching both the component lead and the PC board.
This will allow both portions to heat simultaneously, and will ensure a good flow of solder between the two. After
heating the board and leads for several seconds, add solder to the joint to form an effective connection. A good
solder joint will have a conical shape, and will not look “blobby” or “spherical.”
After all connections are made, the remaining component leads on the rear of the board can be trimmed down
with a pair of side cutters or other electrical cutters.
Rear view of all connections Trim component leads with cutters
We can now add the connecting wires for the inputs and drivers. Connect the input, output, and tweeter wires to
the respective terminals on the PC board. The wire with the .25" terminals is the input wire. The longer wires will
be for the tweeters and the shorter wires will be for the woofers. Make sure that the positive terminals are
connected to the positive (red) wires in all locations.
7
Page 8

Final assembled 302-910, 302-912, 302-914 crossover
8
Page 9

6. Test the system
At this point, it is recommended that you take some time to test the speakers before final installation of the
crossovers and baffles. You should already have the cabinet assembled and lined with foam, the drivers should
be in the baffles, and the crossovers should be assembled. We need to connect these three parts together to do
a quick check that everything is working correctly.
Place the crossover board(s) into the cabinet in the approximate final location; they do not need to be secured
right now. Connect the input wires to the binding posts on the rear of the cabinet, making sure the red wire is
going to the red post. Now, attach the output wires from the crossover board to their respective drivers. Insert the
baffle with the drivers on it into the cabinet, and secure with one or two of the baffle machine screws if needed. If
the baffle will stay in place on its own, it is not necessary to secure it.
Now, we need to connect the speakers to your stereo system. At this point we are not worrying about air leaks or
the bass response. We are just doing a quick check that the drivers and crossover are working correctly.
Play music through the speakers, checking that both the woofer and tweeter are working, and that the overall
sound is full and smooth. Even though everything is not completely secured, we should still be able to get a good
idea of what the overall sound will be like. If a driver is not working or the sound is intermittent or distorted,
please see the troubleshooting section for possible remedies. Be sure that you are satisfied that everything is
working correctly before moving on to permanently installing the crossover or baffle.
7. Install the crossovers
Now that we are satisfied that everything is working correctly, we can permanently secure the crossover boards.
The recommended location for the crossover boards is the bottom rear of the cabinet.
Once again, securing with silicone or hot-melt glue is the recommended fastening method. If using hot-melt glue,
it is recommended to place the glue on the surface of the cabinet and then press the board into it. This prevents
the glue from cooling too rapidly or dripping onto the cabinet or the body, causing injury.
If you are using silicone, it is easier to apply the glue to the back of the PC board. Making sure that the mounting
location is horizontal, place the board into its location. You will need to allow the silicone to cure for an hour or so
before you change the orientation of the cabinets.
Once the boards are in place, you can connect the input wires to the speaker binding posts.
Crossover situated in its location within the cabinet
9
Page 10

8. Install the baffle
Now we need to connect the output wires from the crossover to the terminals on the drivers and place the baffle
into the cabinet. With the baffle leaning against the cabinet, make all driver connections, once again paying
attention to the polarity of the connections. The red wires will attach to the terminals that are marked with a red
color or with a + sign.
The baffle can now be installed into the cabinet, working carefully to make sure no wires are trapped between the
baffle and the cabinet. Once the baffle is fully installed, it can be secured via the included machine screws and
glued into place if desired. Using the 4 machine screws by themselves will have adequate holding power to
prevent leaks and vibrations of the baffle. However, for the utmost cabinet strength, the baffle should be glued
into place with polyurethane glue. Note: Once the baffle is glued into place, making any changes to the speaker
becomes very difficult. Please listen to the speakers for a period of time with just the machine screws holding
the baffle in place to make sure everything is working correctly before you secure the baffles permanently.
Note: Makes sure that both baffles are installed in the same oeientation; the 3 holes on the tweeter means the
baffles are not vertically symmetrical
9. Install Grill
Attaching the speaker grills is the last step in the assembly procedure.
The grills themselves should come with the male guides already installed. If they are not installed, they should
be tapped into place with a hammer, using a small socket or similar object placed around the male projection.
The socket will protect the male pin, while applying uniform pressure around the mounting flange. It is best to
install the guides with the grills laying flat on a solid surface to minimize the chance of installing the guide
askew.
The female guides are designed to fit into the recesses where the screws attach the baffle to the cabinet. They
can be tapped into place with a hammer, being careful not to damage the finish on the front baffle. Note: It is
difficult to remove the female socket once it is installed, so all testing should be done before the sockets are
installed. If you need to remove the sockets, they will likely be damaged in the process. Replacement guides are
available if necessary.
Once the guides are in place, the grill can simply be pressed onto the front of the cabinet.
10. Care and cleaning
To protect the finish of your Parts Express speaker system, it is important to use some care when it comes time
to clean them. To remove dust from drivers, grills, or the cabinet tops, a synthetic “feather duster” works well. For
more stubborn dust on the grills or woofers, a vacuum cleaner with gentle brush attachment may be used. It is
not recommended to use any type of cleaning apparatus on tweeter domes; dust will not affect the sound, and
the chance of damaging the dome is high.
For cleaning streaks or fingerprints on the cabinet finishes, an ammonia-based window cleaner is recommended.
It will not affect the finish and will leave a streak-free shine. It is important to use only very soft, clean cloths,
and to wipe gently at the surface. Intense scrubbing or using cloths with debris on them may cause small swirl
marks or scratches. Of course, the best way to maintain the finish on the cabinets is to prevent soiling them in
the first place. Never place drinks or abrasive objects on the top of the speakers.
10
Page 11

Troubleshooting
Problem: No output from woofer in individual speaker
Cause: Bad connection or defective woofer
Solution: Check connections from crossover board to woofer. If this is OK, check solder connections in the
crossover, particularly on inductors. If this is OK, directly test woofer by hooking it up to stereo system at low
volume setting. If sound comes out of the woofer, then go back and check connections. If there is no sound at
all, then woofer is likely defective. Call 1-800-338-0531 for service.
Problem: No output from tweeter in individual speaker
Cause: Bad connection or defective tweeter
Solution: Check connections from crossover board to tweeter. If this is OK, check solder connections in the
crossover. If OK, it is possible to carefully test the tweeter by directly connecting it to your stereo. Test at a very
low volume for a brief period of time, at the level of a loud whisper. If there is high-frequency sound, then go back
and check connections. If no sound at all, then tweeter is likely defective. Call 1-800-338-0531 for service.
Problem: There is sound from the speaker, but it is very quiet and seems to be mostly treble or midrange.
Cause: Woofer and tweeter are wired backwards
Solution: Immediately cease testing to prevent damage to the tweeter. Check connections from crossover board
to woofer and tweeter, making sure the T terminal goes to the tweeter and the W goes to the woofer.
Problem: There is sound from the speaker, but it doesn’t sound normal.
Cause: Crossover board is wired incorrectly
Solution: Double check that the input from the speaker terminals is connecting to the inputs on the crossover
board. If this is correct, check that all components are of the correct value and in the right location.
Problem: Intermittent output of entire speaker, woofer, or tweeter.
Cause: Bad connection in wires or crossover board.
Solution: If entire speaker is intermittent, then check connections between the input terminals and the crossover
board. If just woofer or tweeter is intermittent, check the wires going to the drivers. If these are OK, check the
connections of the components within the appropriate section of the crossover.
Problem: In stereo, speakers lack bass or image is unfocused.
Cause: Speakers are out of phase
Solution: Check connections from amplifier to the speakers. Make sure polarity is the same on both speakers. If
correct, check the polarity of connections going from binding posts to input on crossovers. If this does not
correct the problem, check polarity throughout the rest of the system, looking for one driver that is wired incorrectly.
Problem: One speaker appears louder than the other
Cause: Amplifier settings, environmental factors, psychoacoustics, poor connection in crossover
Solution: Check amplifier that balance is set even. Next, check that one speaker isn’t closer to a wall, window,
couch, or other acoustically important object. This may affect perceived loudness due to the addition or reduction
of extra sound reflections. If this is the case, physically switch the left and right speakers, and re-observe. If the
same location still sounds quieter, then it is the environment. If the quiet speaker moves, then you may have a
problem within the speaker. Often, if you think one speaker is louder than the other, it will appear so. Have
someone help you do a blind test or take a break and allow time for your brain to relax. The next day, if one still
seems louder, investigate all connections within the crossover.
Problem: Speakers play well, but amplifier shuts down.
Cause: Amplifier does not have enough power or cannot handle speaker impedance
Solution: If using 4 ohm speakers, check receiver/amplifier manual to see if it can handle 4 ohm speakers or if
it has a low impedance setting. If not, upgrade amplifier. If receiver/amplifier can safely handle the speaker load,
then it may simply not have enough power.
Parts Express 725 Pleasant Valley Dr Springboro, Ohio 45066-1158
11
 Loading...