

Page 1
2012
Viezu Technologies Limited
www.viezu.com
V-Switch Instruction Manual
Page 2

Page 2
Contents
Important Instructions ................................................................................................................. 3
Operational Instructions ..................................................................................................................... 3
Pre-Service Instructions ...................................................................................................................... 3
Future Use of the Tool ........................................................................................................................ 3
V-Switch User Guide .................................................................................................................... 4
Installing the V-Switch Software ......................................................................................................... 4
Setting up your V-Switch to read your vehicle ................................................................................... 9
Reading your car ............................................................................................................................... 16
Downloading the Original Read from the V-Switch .......................................................................... 20
Uploading Modified Files to the V-Switch ........................................................................................ 24
Writing to the car .............................................................................................................................. 25
Page 3

Page 3
Important Instructions
Operational Instructions
NOTE: When using the V-Switch on your vehicle please ensure the following when reading or
writing from the vehicle
Do not open or close the vehicle’s doors, boot or bonnet.
If the vehicle has an Automatic gearbox ensure that the vehicle is in park.
If the vehicle has a Manual gearbox ensure that the vehicle is in neutral.
Make sure that all ancillaries have been turned off or disconnected from the vehicle.
Ensure that you follow all on-screen instruction from the V-Switch device.
Ensure that ignition stage 2 is properly engaged when prompted by the device.
Ensure that the vehicle’s battery is in good working condition.
Do not remove the V-Switch device from the car when it is performing any operation.
Pre-Service Instructions
NOTE: If your vehicle is to be taken into a main dealer to be worked upon please ensure that
the Original file has been put back on the car. Main dealers may perform an ECU update on the
vehicle which may lock you out of your V-Switch device if the car has not been reverted back to
the Original tune beforehand.
Future Use of the Tool
NOTE: If you plan to use the tool on a different vehicle please ensure that the Original file has
been written back to the car before setting up the tool to use on another vehicle.
Page 4

Page 4
V-Switch User Guide
Inside your V-Switch package should be the following items:
V-Switch Device
USB Cable
OBD Cable
V-Switch introductory letter
Installing the V-Switch Software
The first stage of the V-Switch tuning process is to install the V-Switch software onto your windows
based Computer.
The computer, whether it is a desktop or laptop, will need to be of the following specification:
Windows XP, Vista, Windows 7, Windows 8 or Windows 10
Operate a 32 bit operating system or 64bit.
It is not compatible with MAC computers or any non-windows operating system
Memory and operating speed of at least 2GB
Internet enabled
Download your V-Switch Software by navigating to www.viezu.com . On the homepage navigate to
the ‘Downloads’ drop down, then to “Software’. Once there right click on the ‘V-Switch Software’
link and click “Save link as” to download the software to your computer. The direct link to the Viezu
Software page is:-
http://www.viezu.com/viezu-downloads/software
Page 5
Page 5
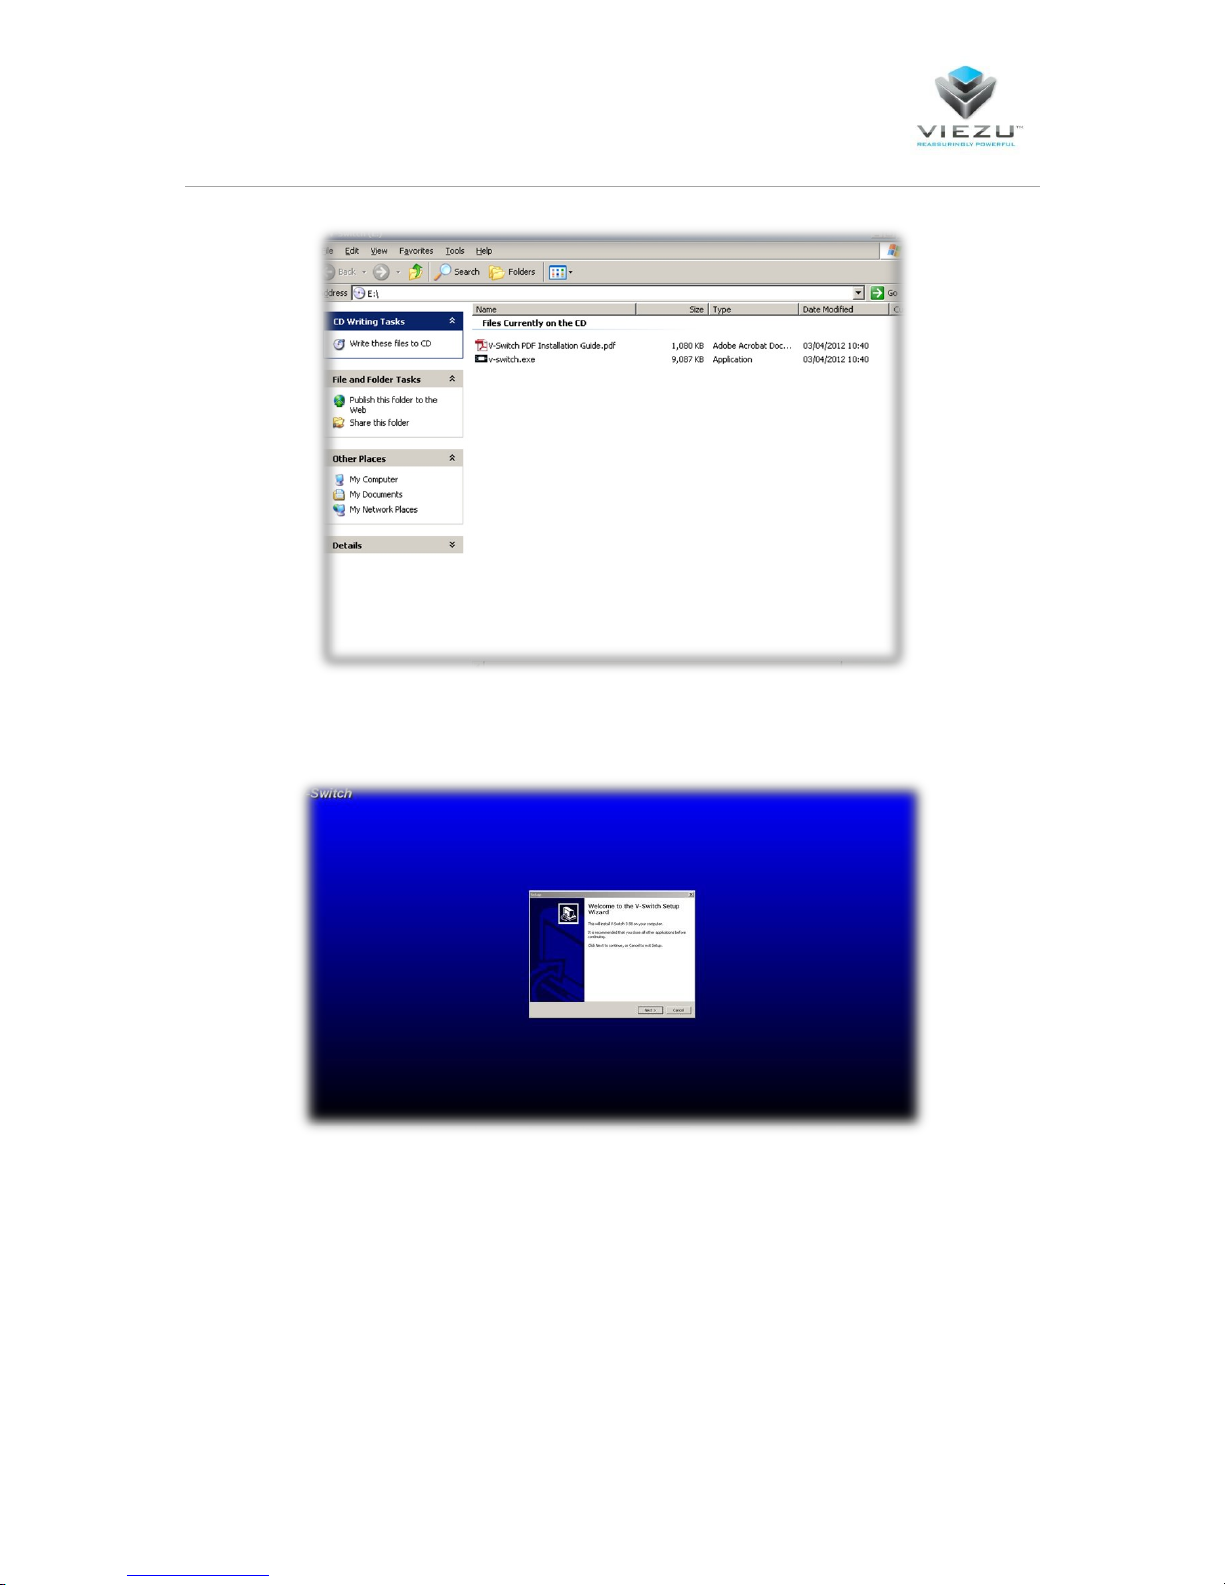
Double click on “v-switch.exe” This will open up the install wizard. (Depending on which version of
windows you are using these screens may look different, Windows XP has been used in this case)
Select “Next”
Page 6
Page 6
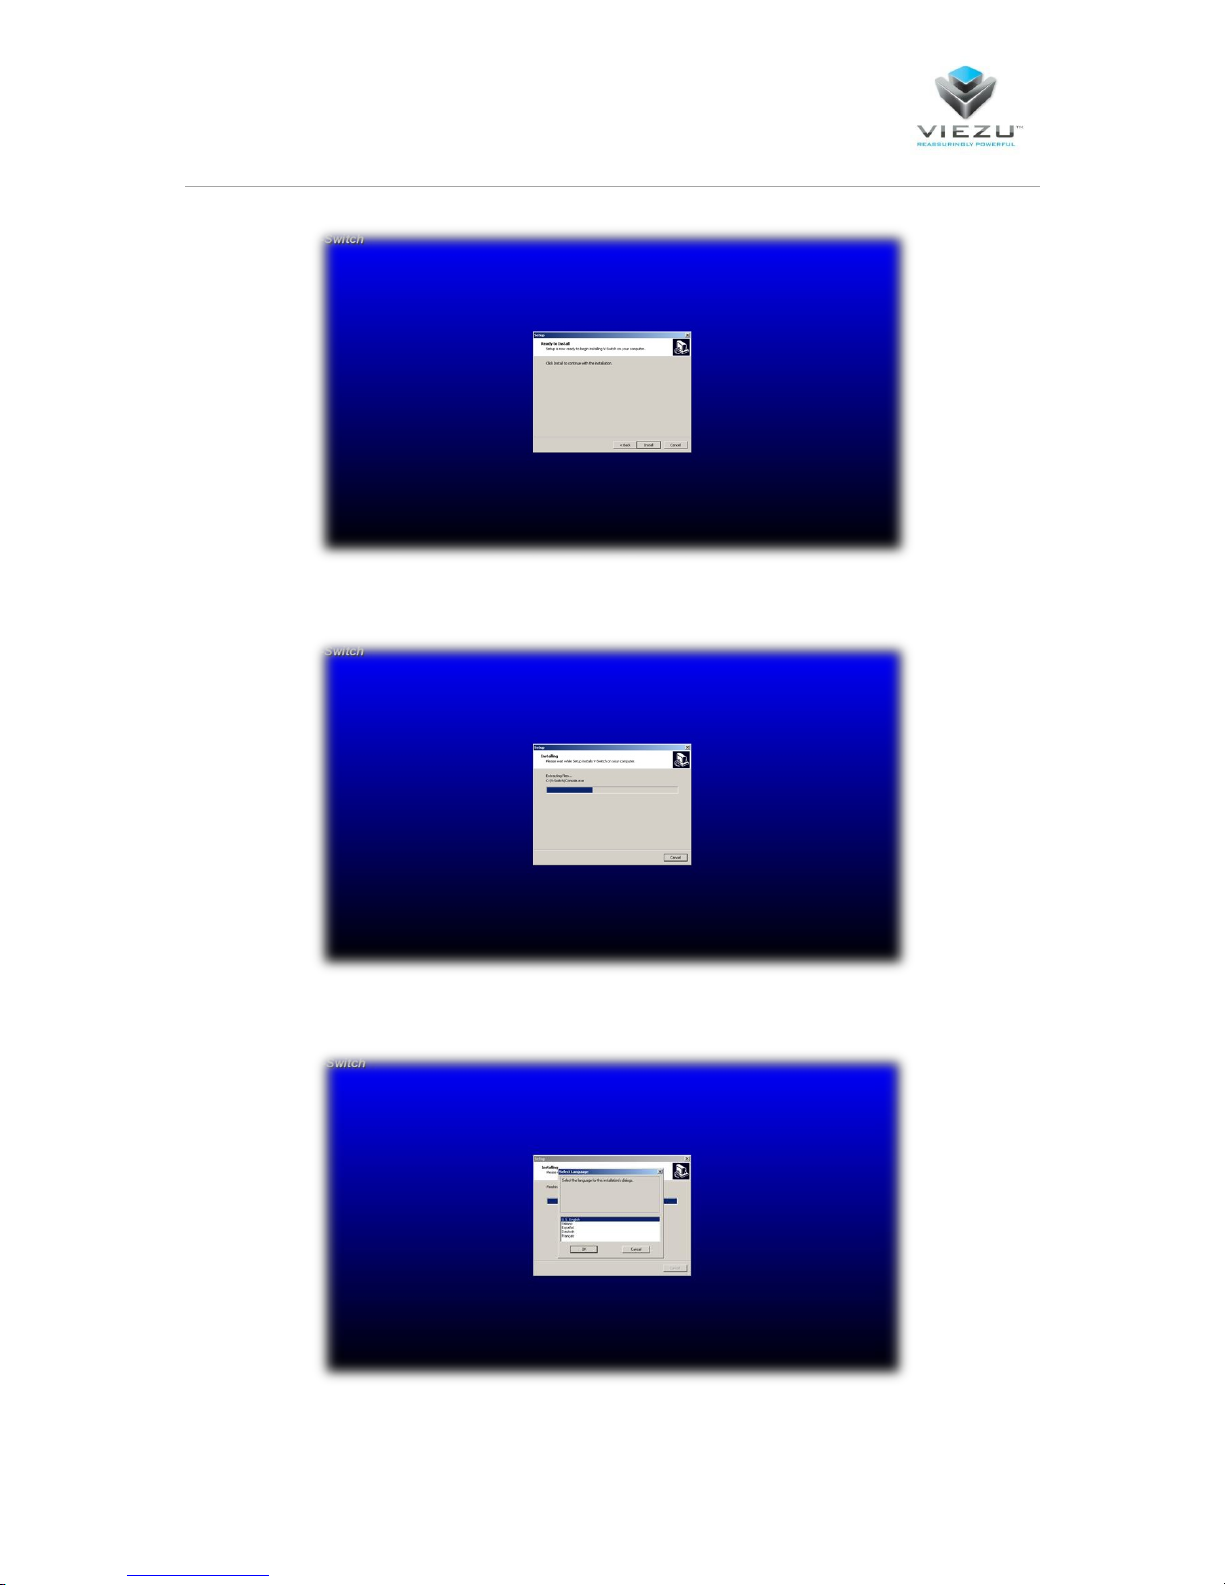
Select “Install” to begin the installation process, this may take several minutes
Once complete you will asked to select the language for the software
In this case we have selected “U.S. English” and you will see the following screen.
Page 7
Page 7
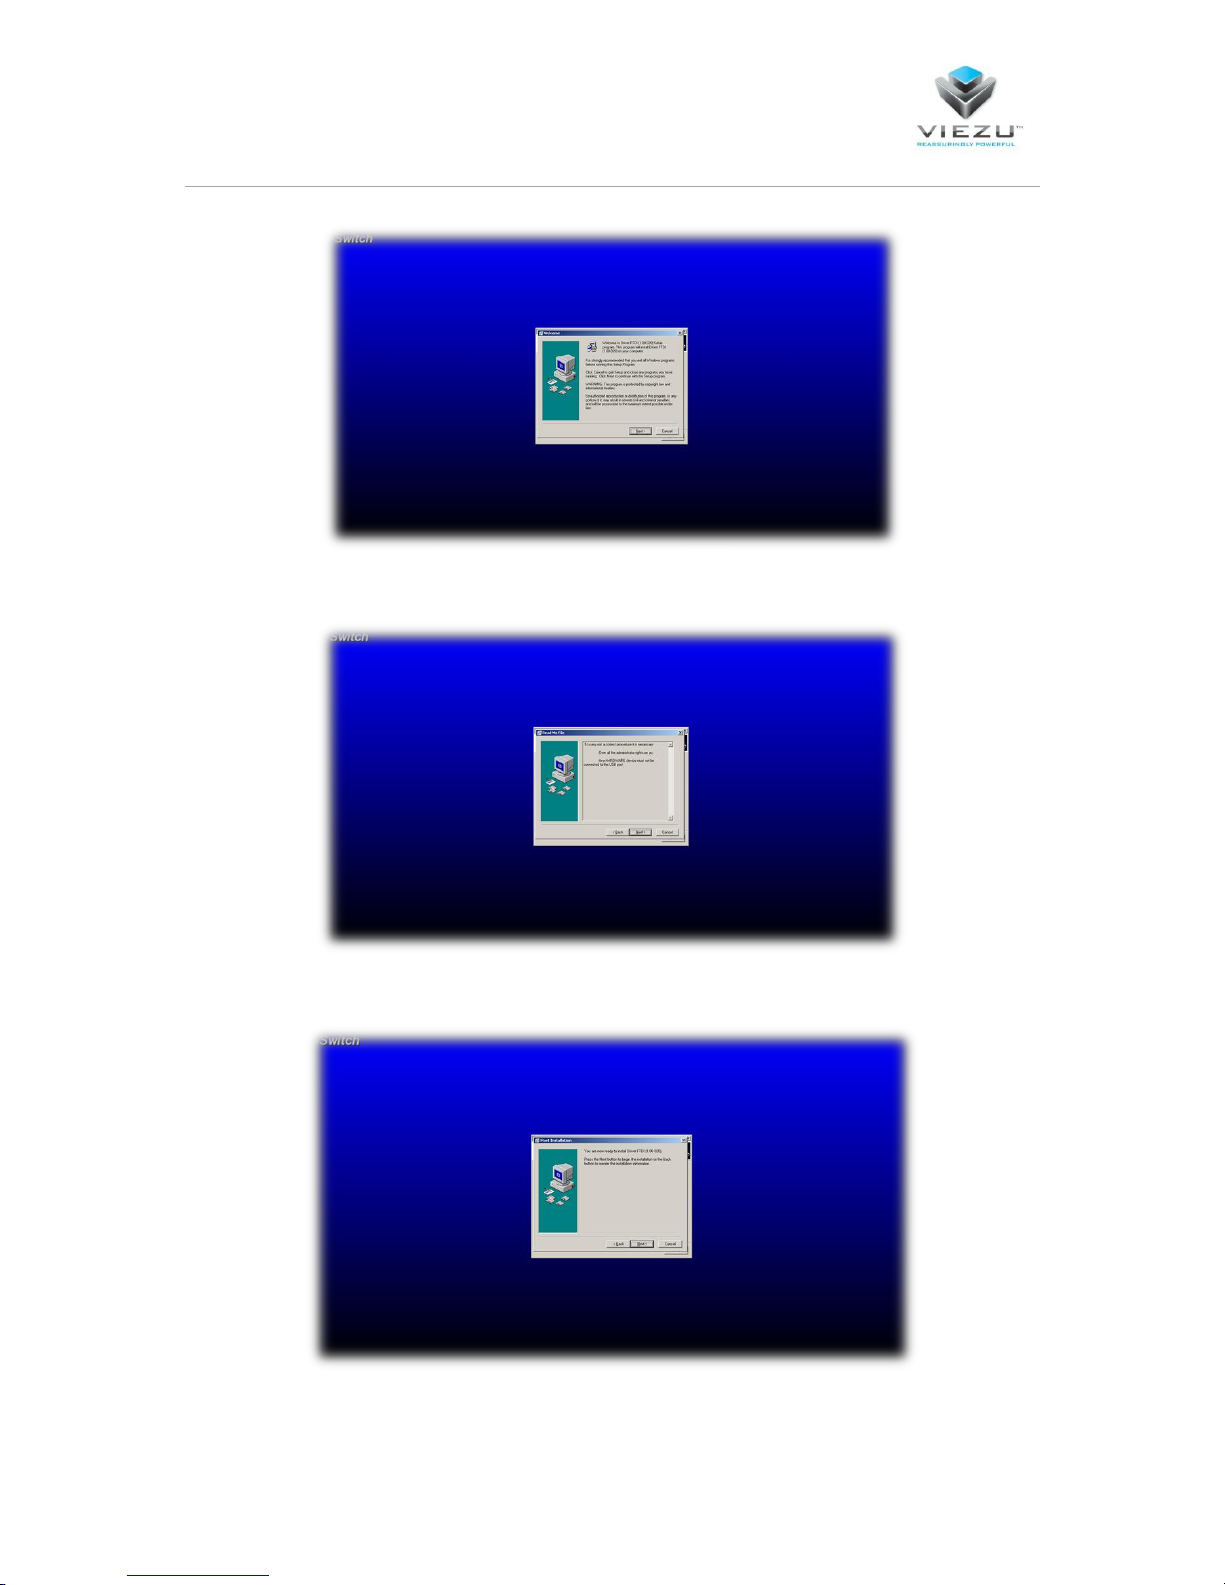
Select “Next” and it will take you to the following screen”
Close all other programs and Select “Next”
Page 8
Page 8
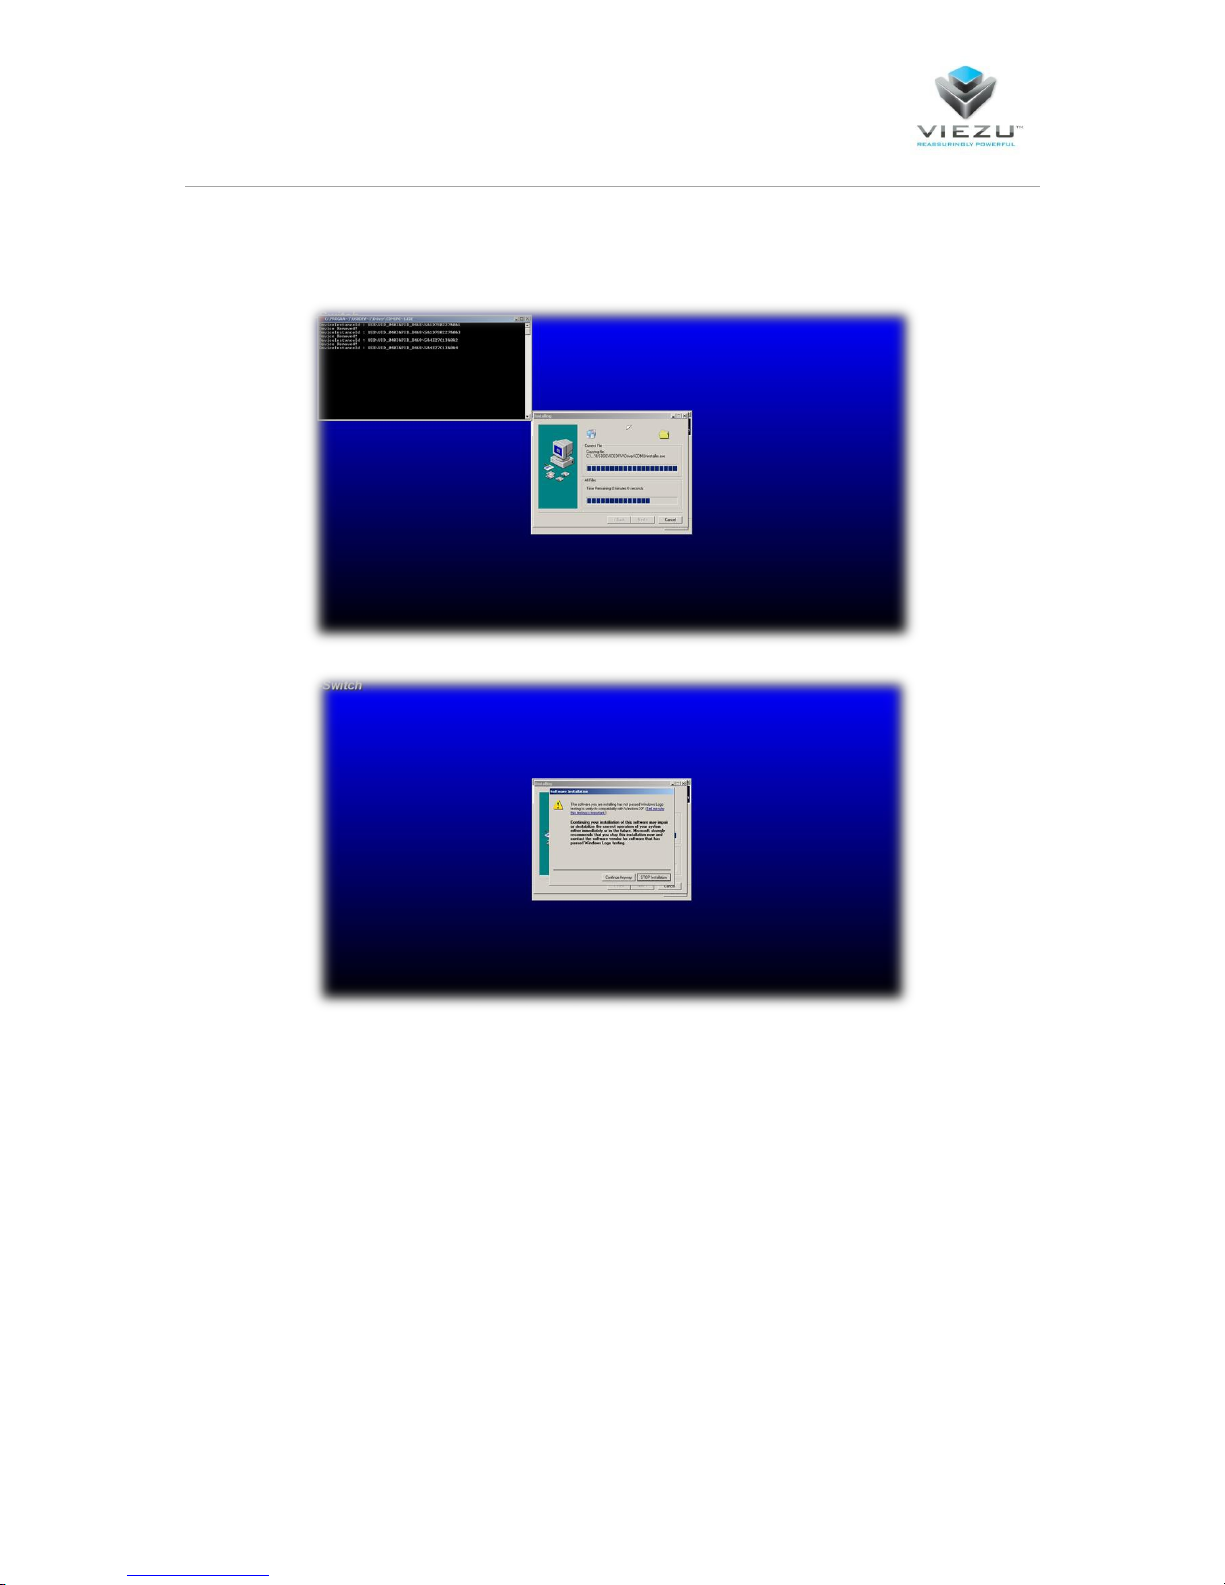
Select next and the drivers for the v-switch will be installed; a terminal box may appear during this
part of the install
A dialogue box will then appear asking you whether you want to continue or not, select continue
anyway
Page 9
Page 9
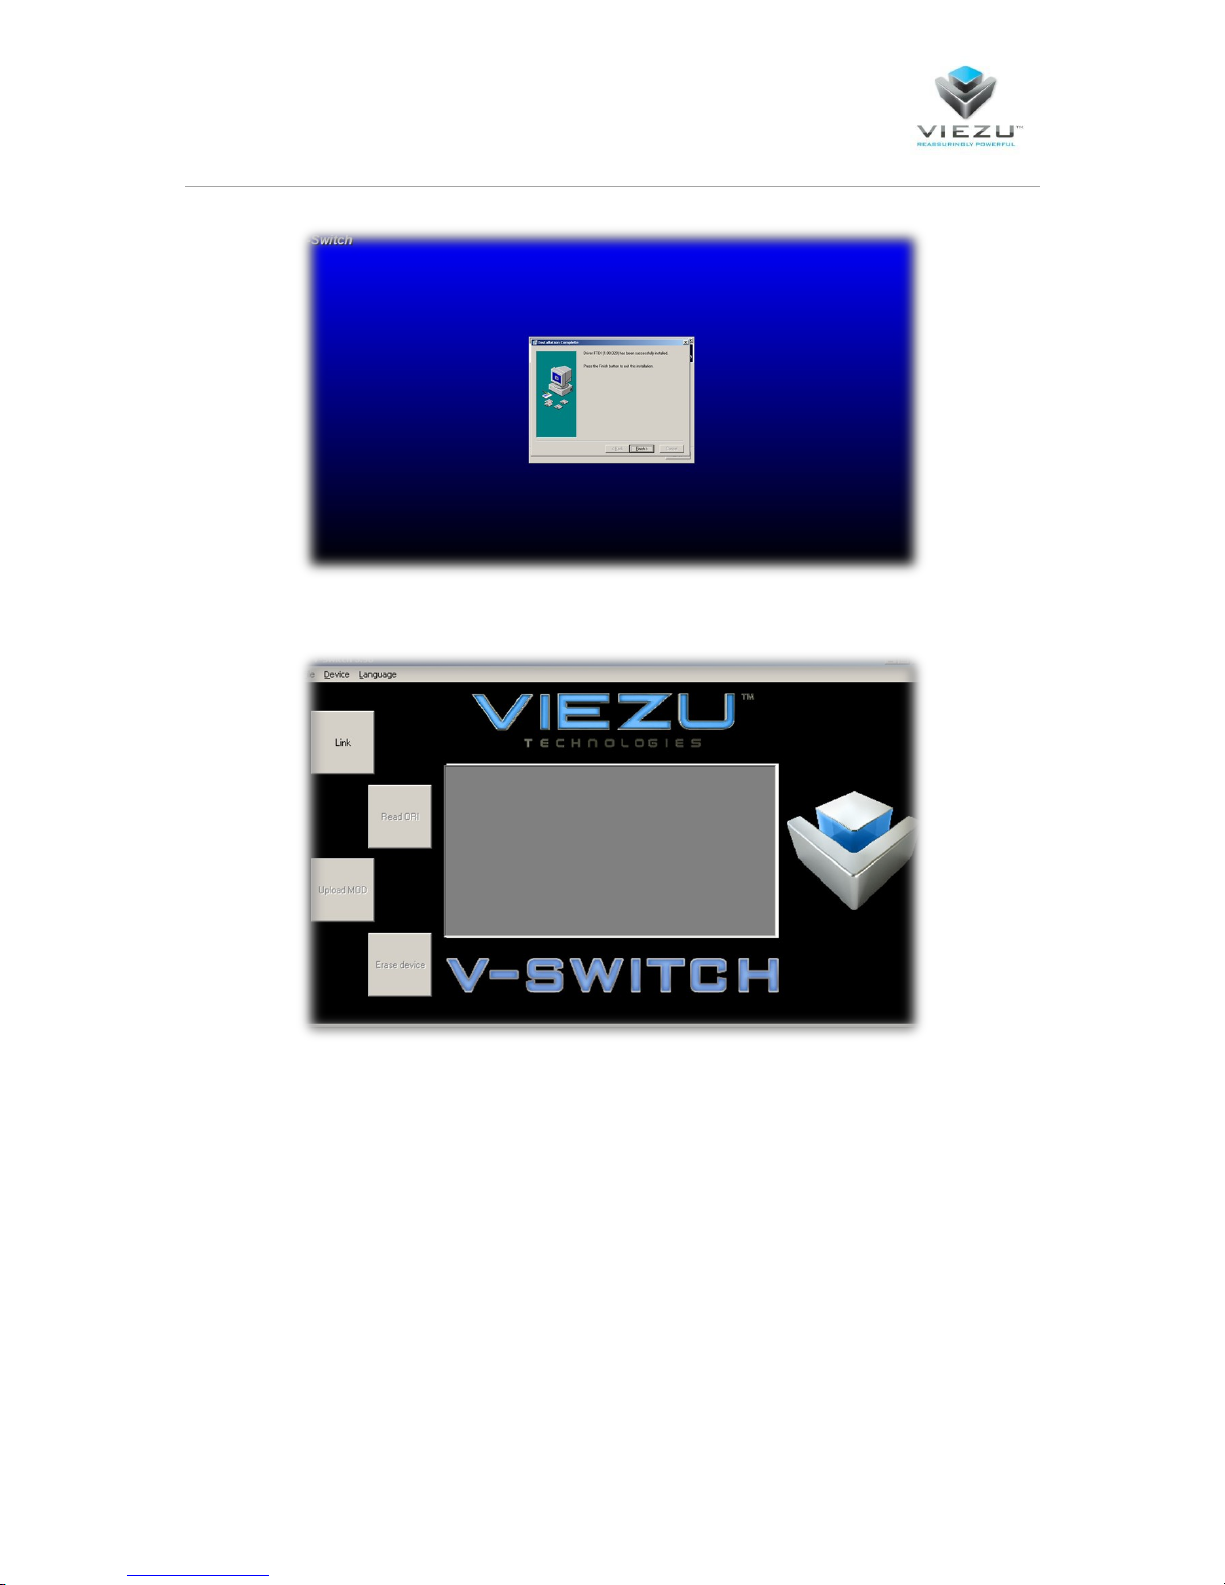
Select “Finish” and the software will automatically open.
Setting up your V-Switch to read your vehicle
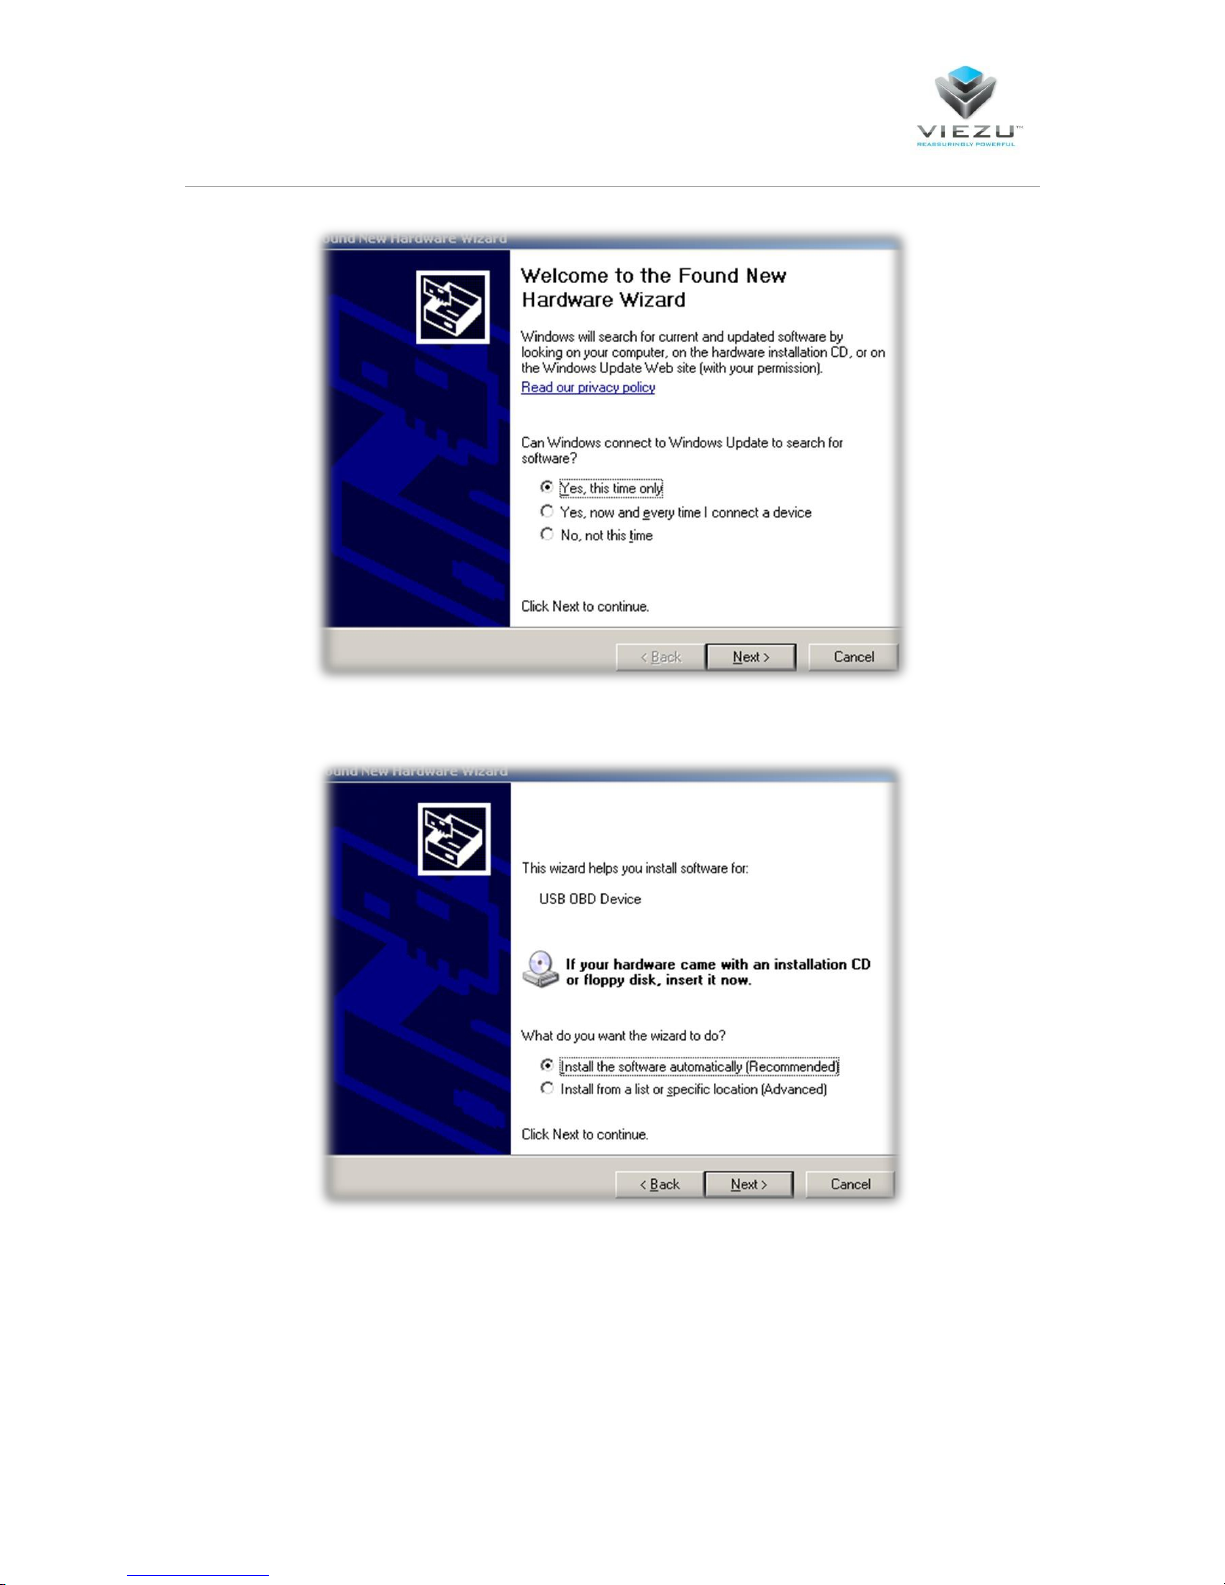
Close the V-Switch software and connect your V-Switch device to your computer, this should
automatically bring up the found new hardware wizard
Page 10
Page 10
Select “Yes this time only”
Select “Install the software automatically”
Page 11
Page 11
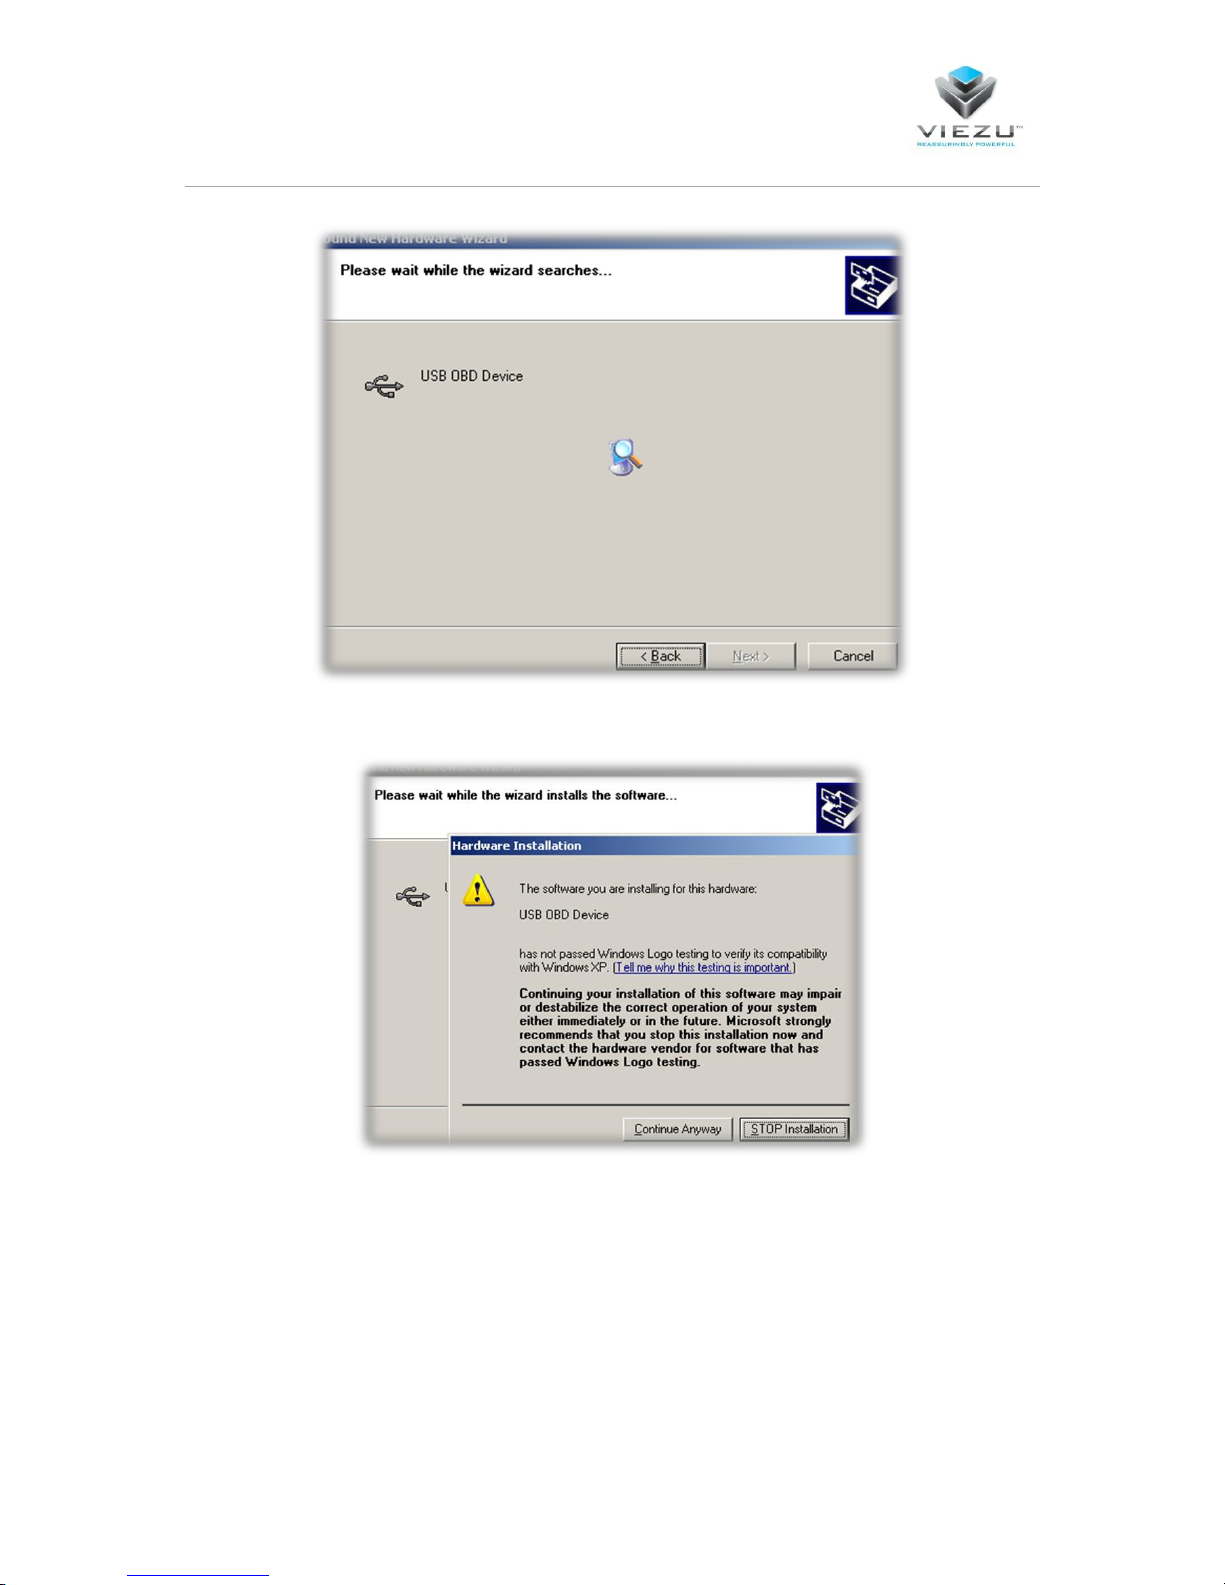
The wizard will now look for the driver we installed earlier
Select continue anyway to continue with the driver install
Page 12
Page 12
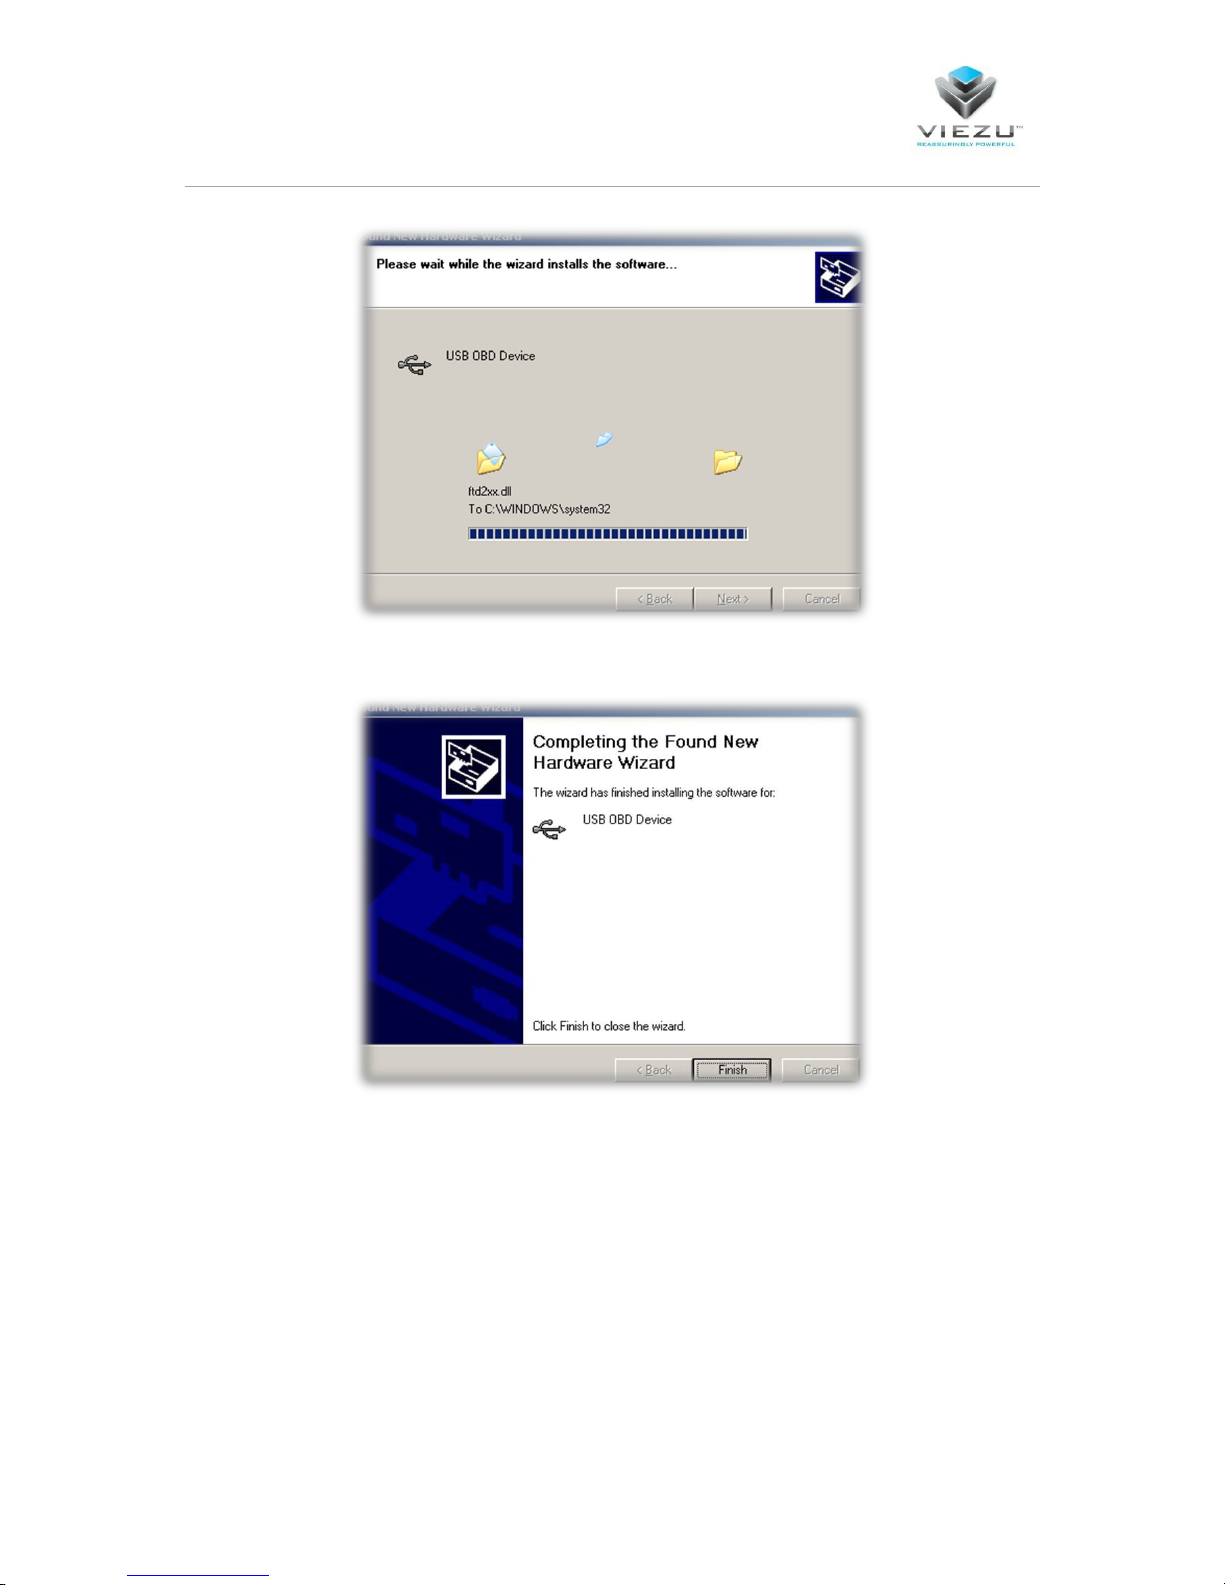
Once complete you will see the following window:
The V-Switch is now ready to use and the screen should be backlit and show the Viezu Logo.
The V-Switch software can now be re-opened.
Page 13
Page 13
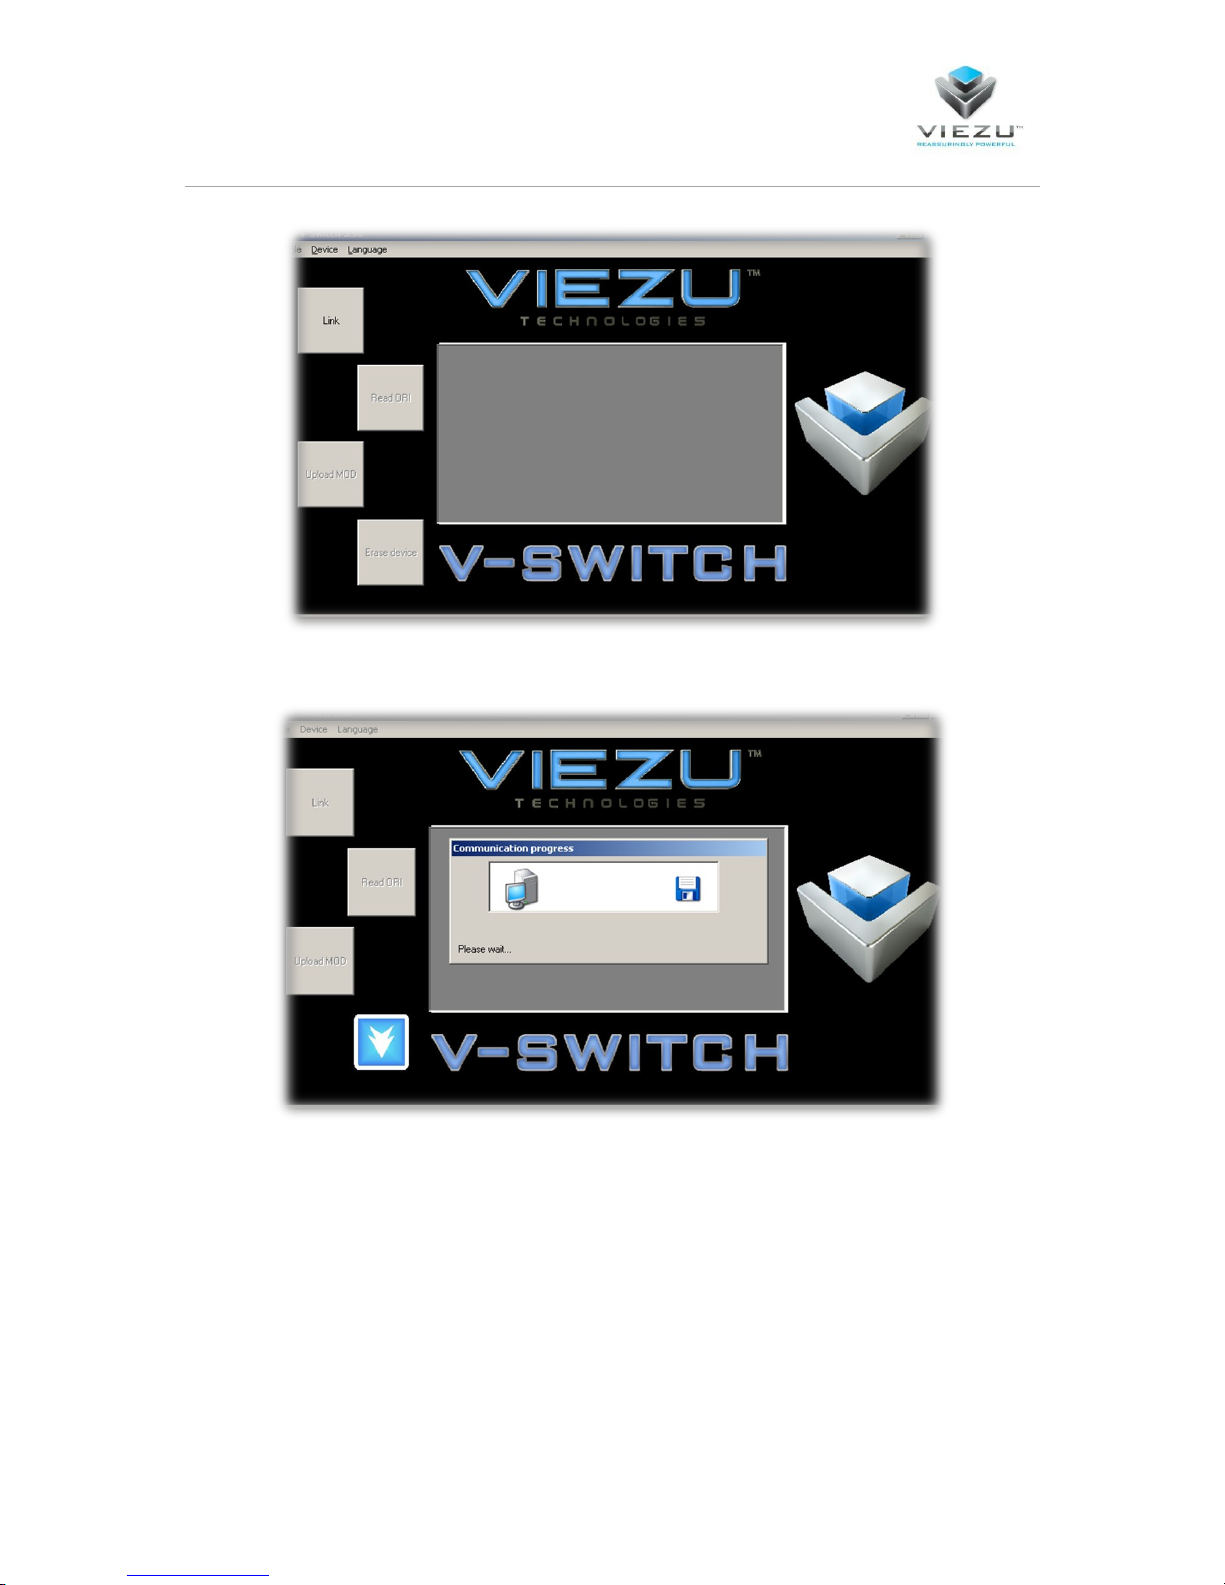
Select link to pair your V-Switch with the computer
Page 14
Page 14
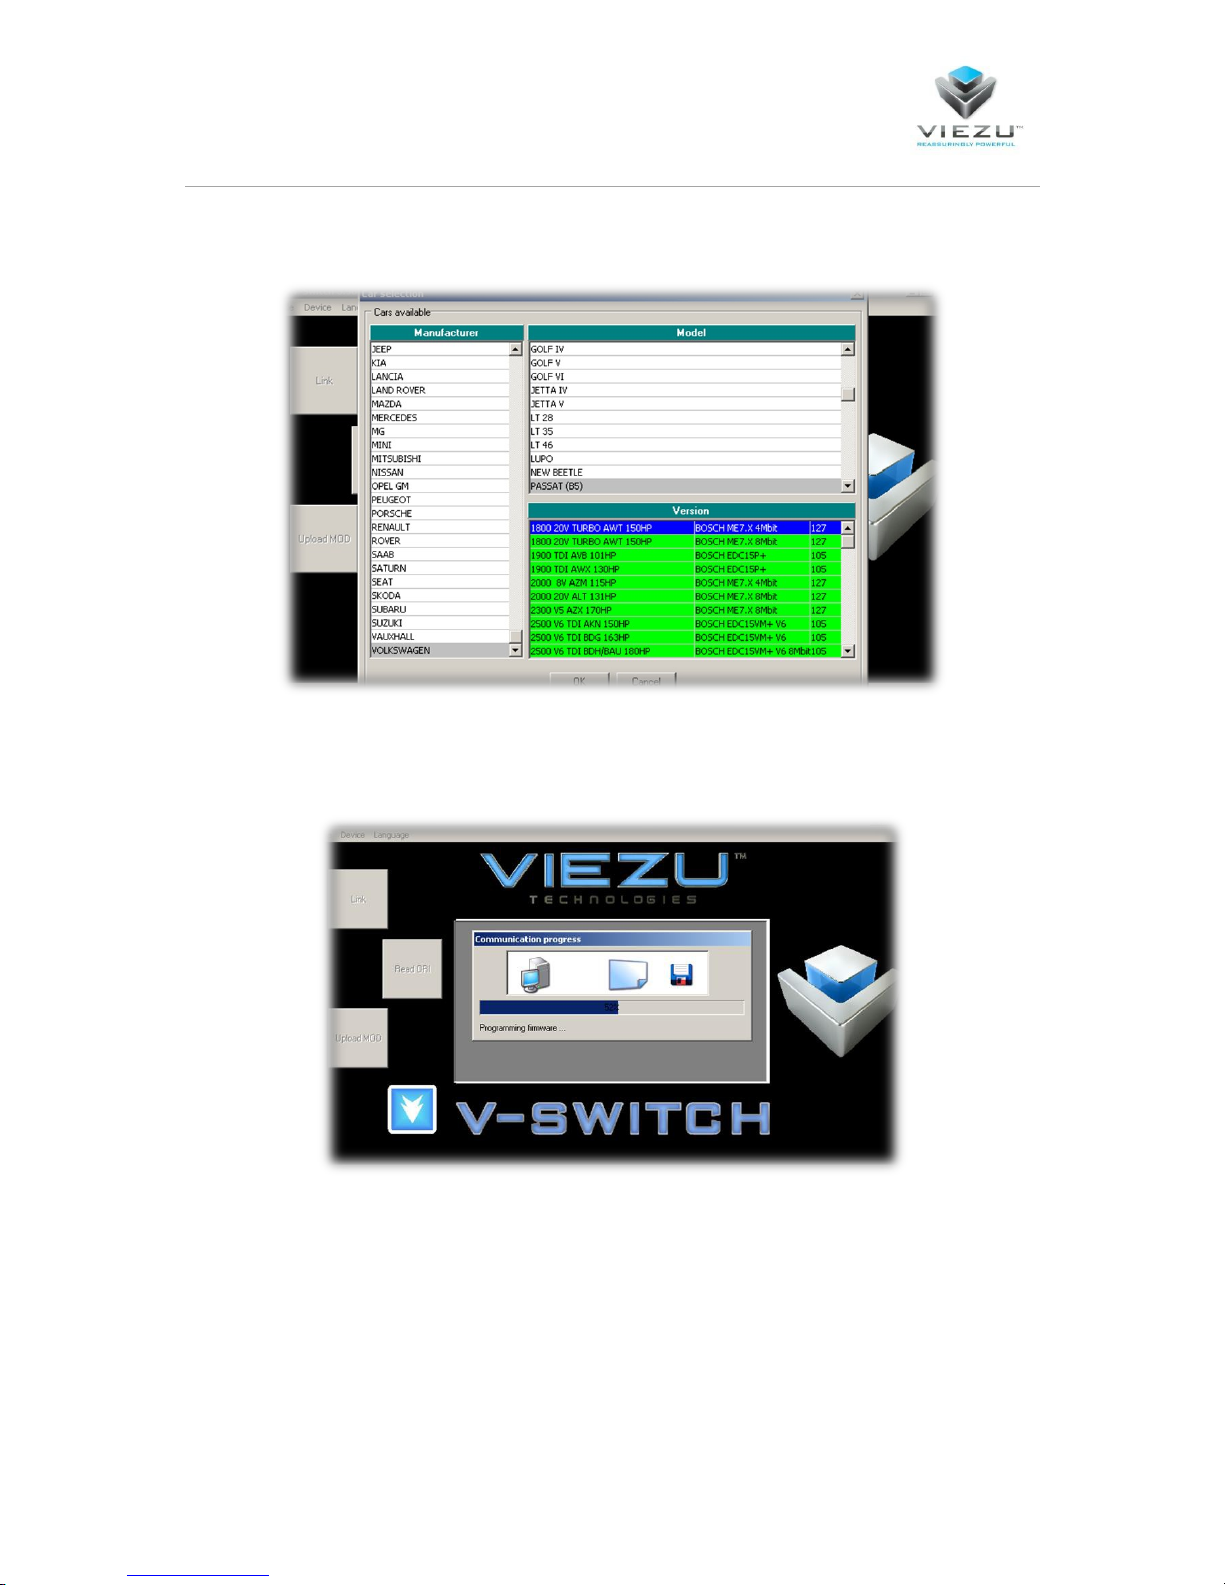
Once linked you need to select the vehicle that you will be tuning. In this case we are tuning a 2002
Volkswagen Passat 1.8 Turbo.
The V-Switch will now be programmed to read the car you select
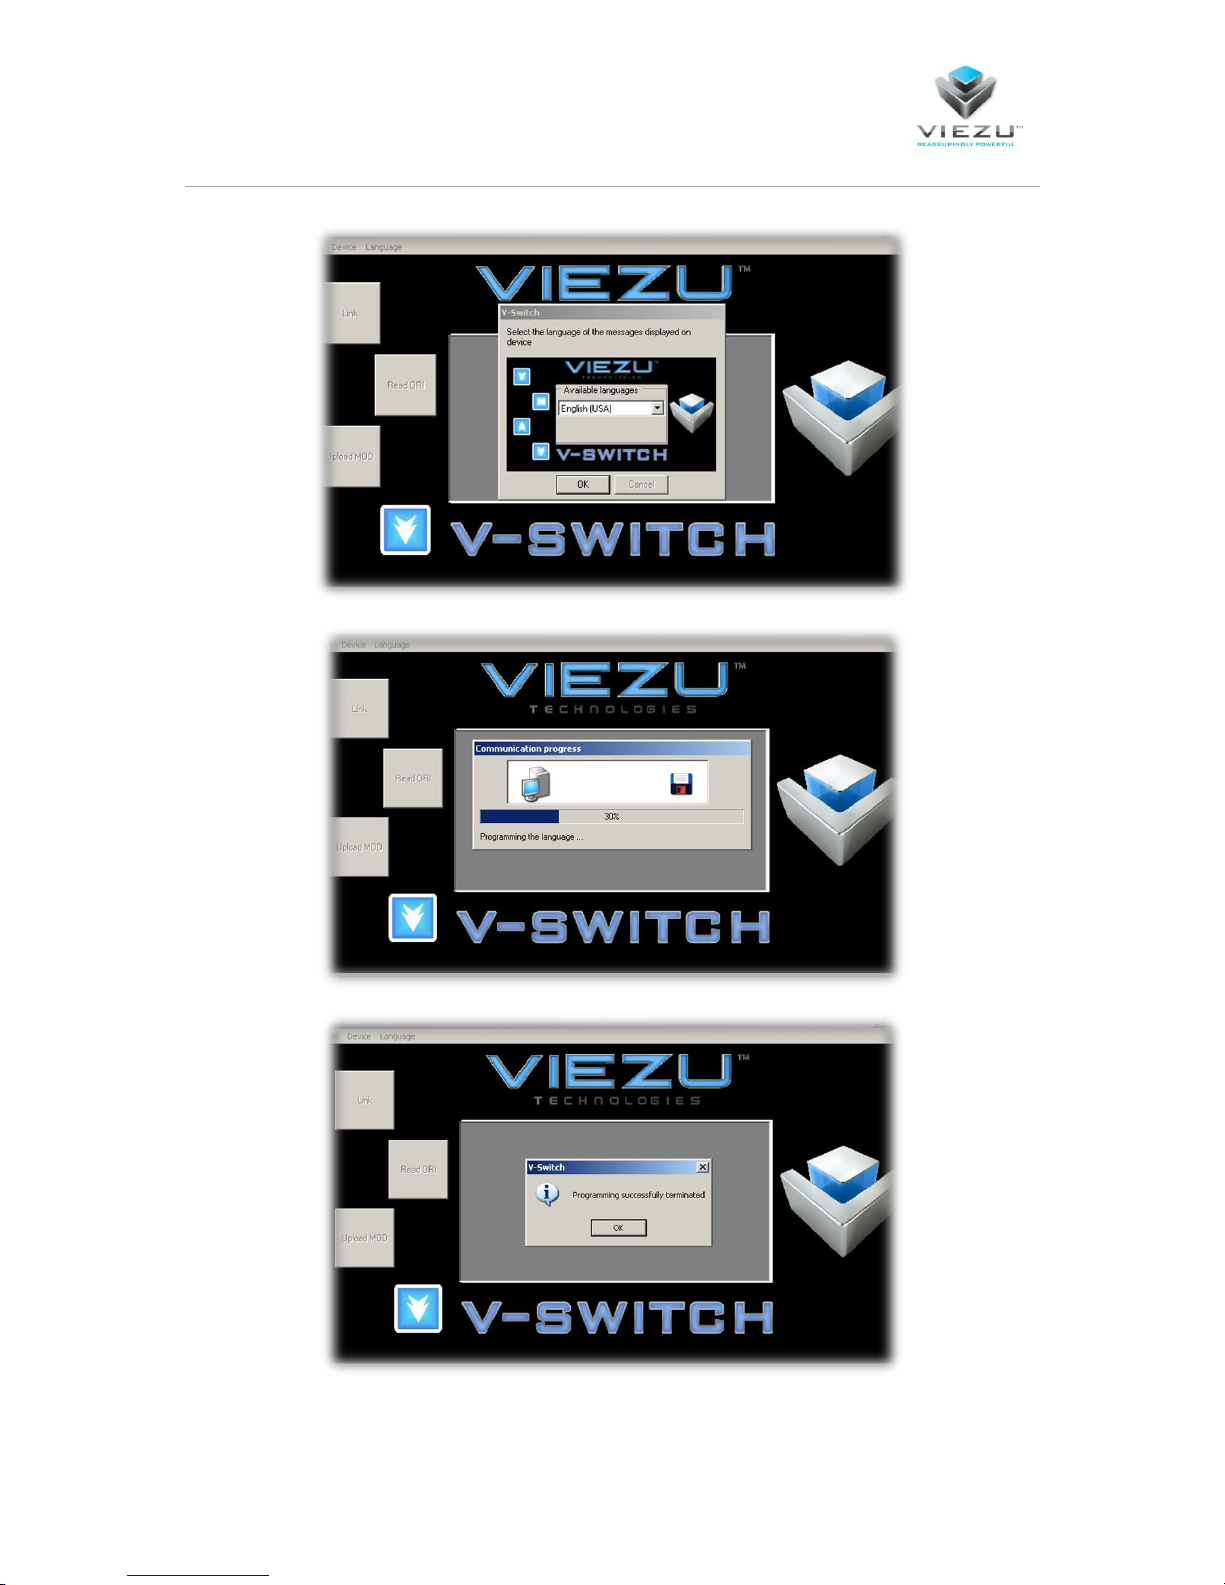
Now you must select the language you require the tool to be in.
Page 15
Page 15
The V-Switch is now programmed to your car and in the language you require
Page 16
Page 16
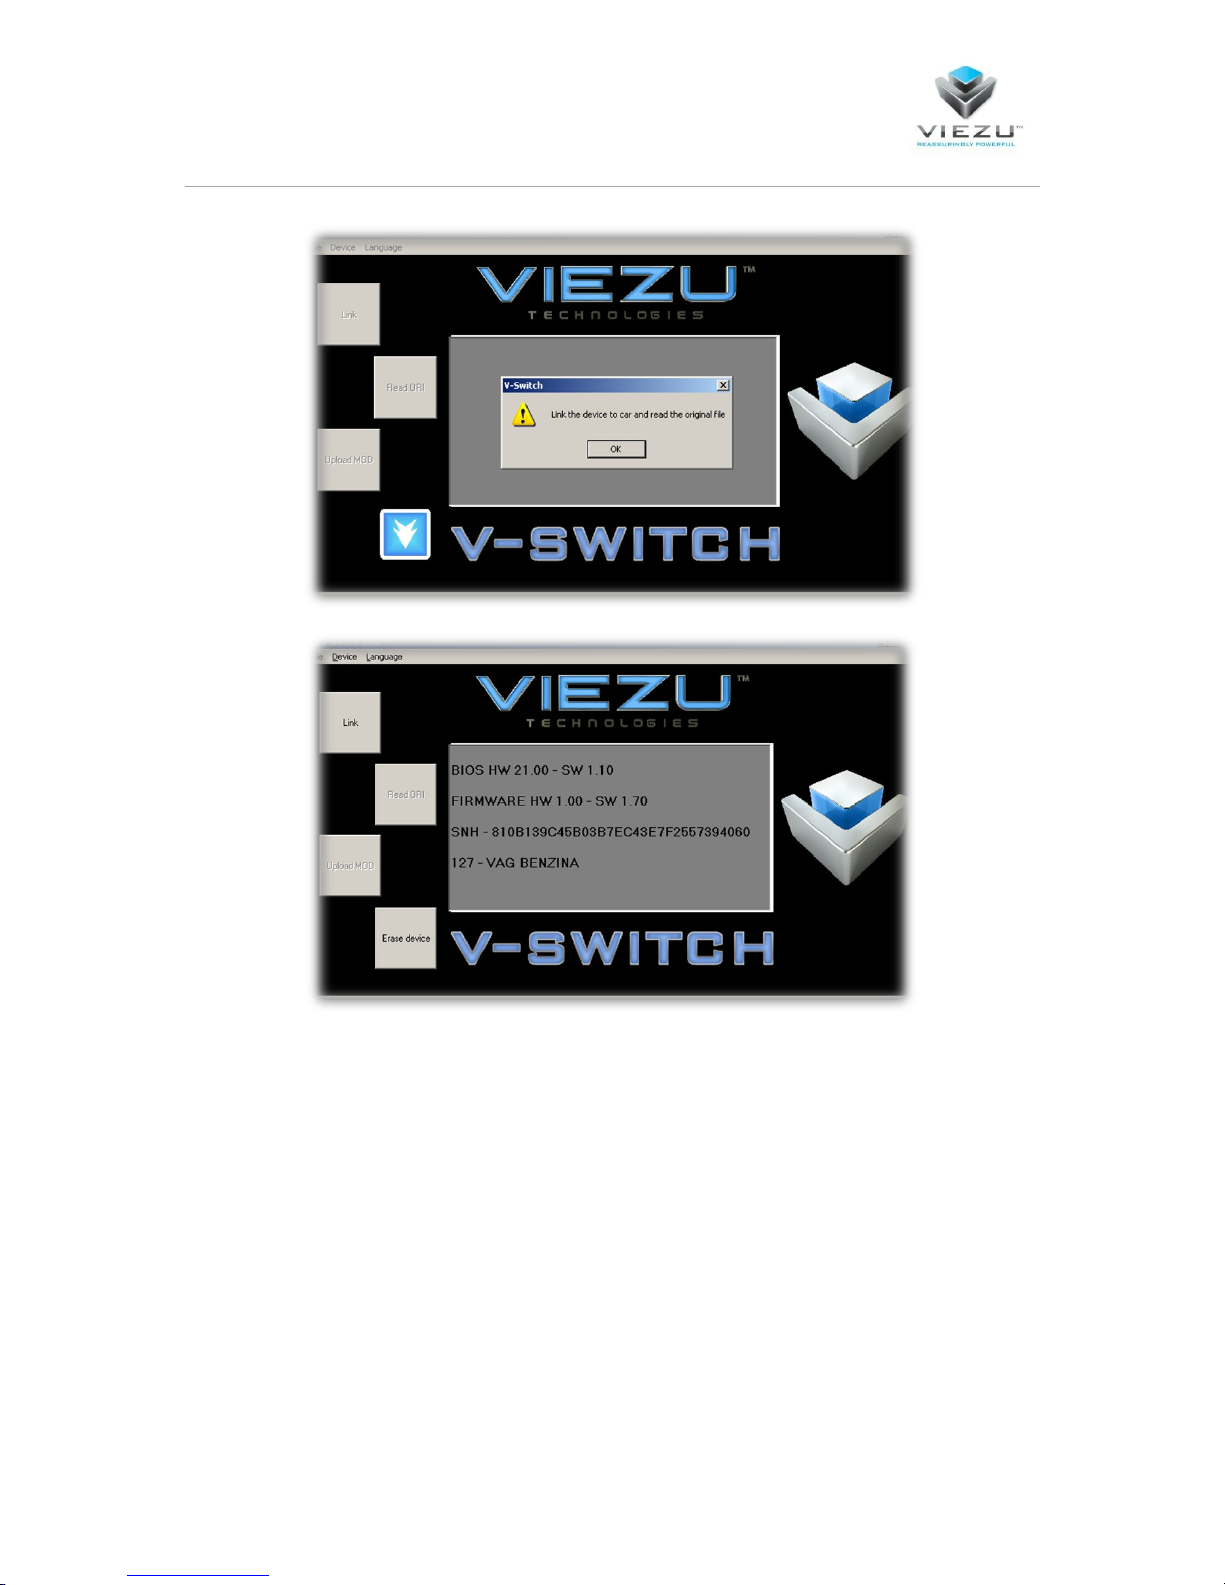
The V-Switch software will now show which car the device is linked to. Now it is time to take the VSwitch to your vehicle and connect via the OBD port
Reading your car
Now that the V-Switch software has been installed and the device linked to your computer and car,
it is time to plug into your vehicle and take a read of the car’s software.
To plug into your vehicle, locate the OBDII Diagnostics port; this is usually located on the driver’s side
of the vehicle, underneath the dashboard above the pedals, to the side of the pedals or under a
panel in the center console.
Page 17
Page 17
PLEASE REFER TO YOUR MANUFACTURES VEHICLE MANUAL TO LOCATE YOUR OBD DIAGNOSTICS
PORT**(Or speak with your local Vehicle Franchised Dealer)
Once located, connect the V-Switch to the car using the OBDII cable that is provided.
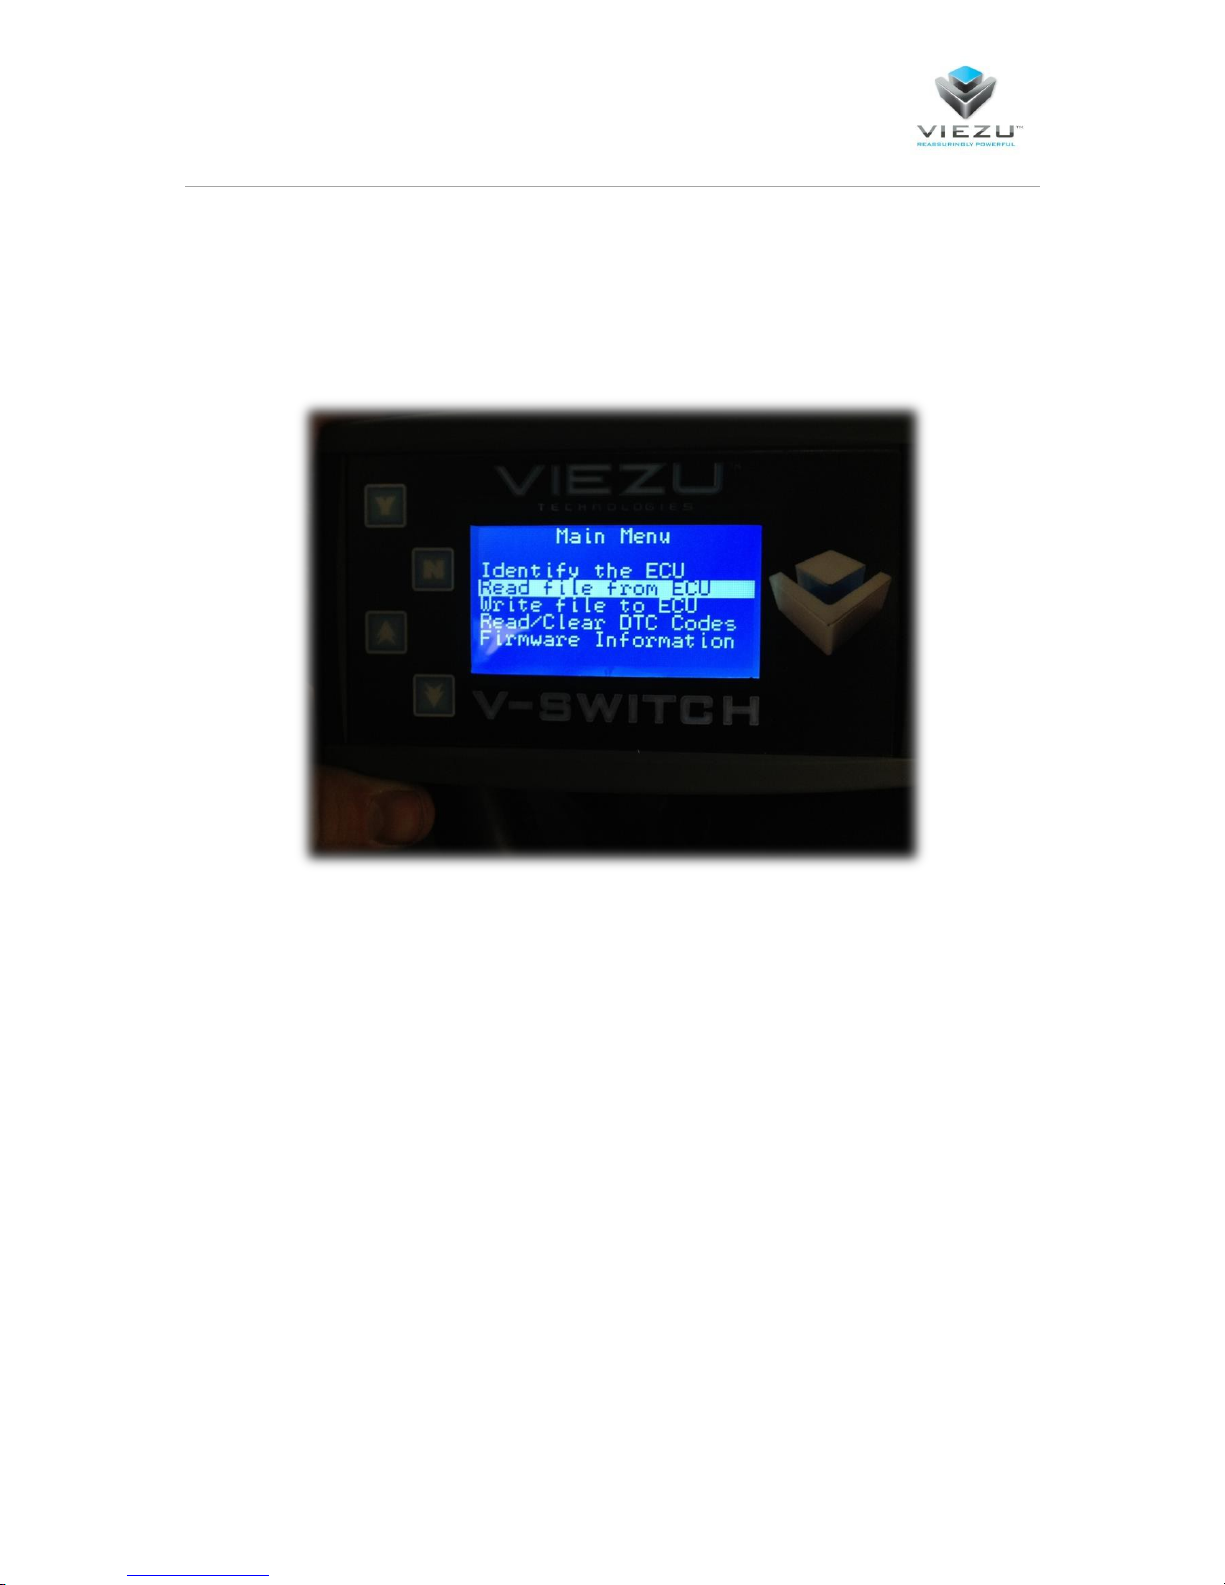
Once plugged in, select “Read file from ECU” and follow the on screen instructions.
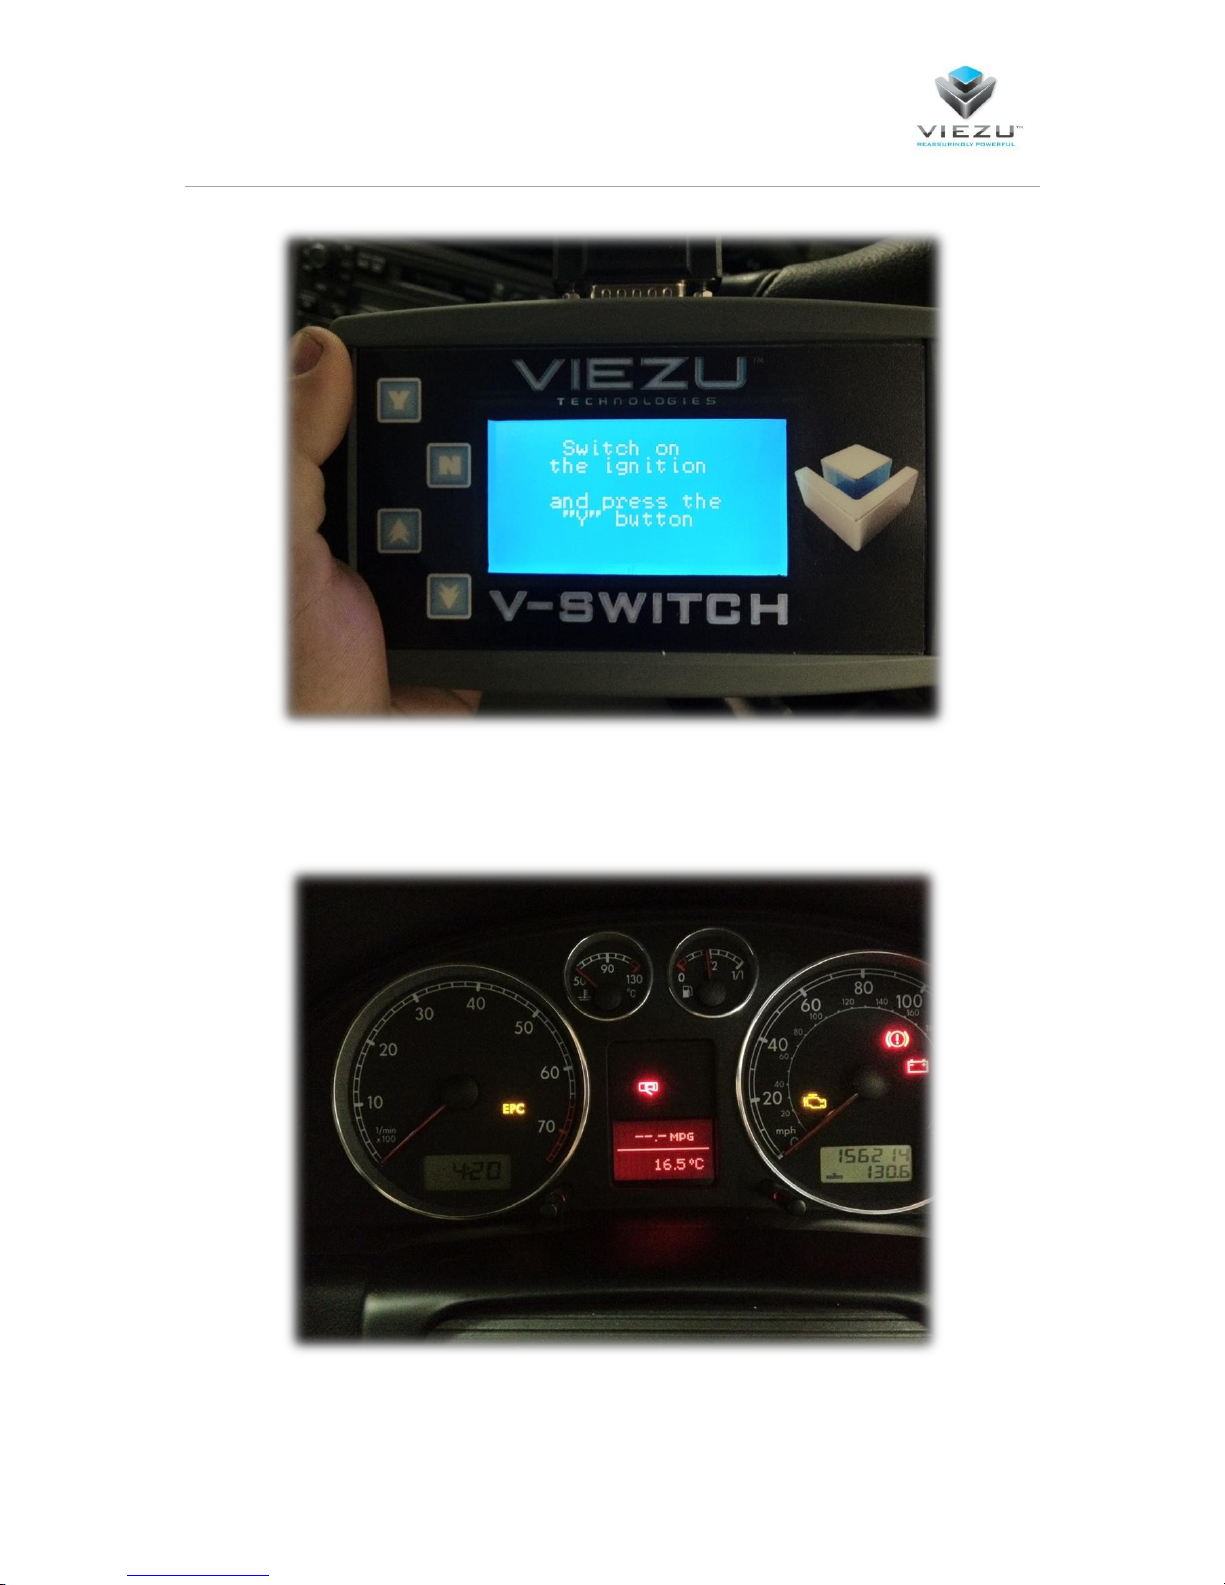
The device will then take you through a number of instructions and options. Most of these are
ignition stages, asking you to turn the ignition on:
Page 18
Page 18
This is to ignition 2. Ignition 2 is the ignition stage just before the engine will turn over, an indication
that you have correctly selected ignition 2 is that the dash lights will turn on and the engine
management light will remain on.
Page 19
Page 19
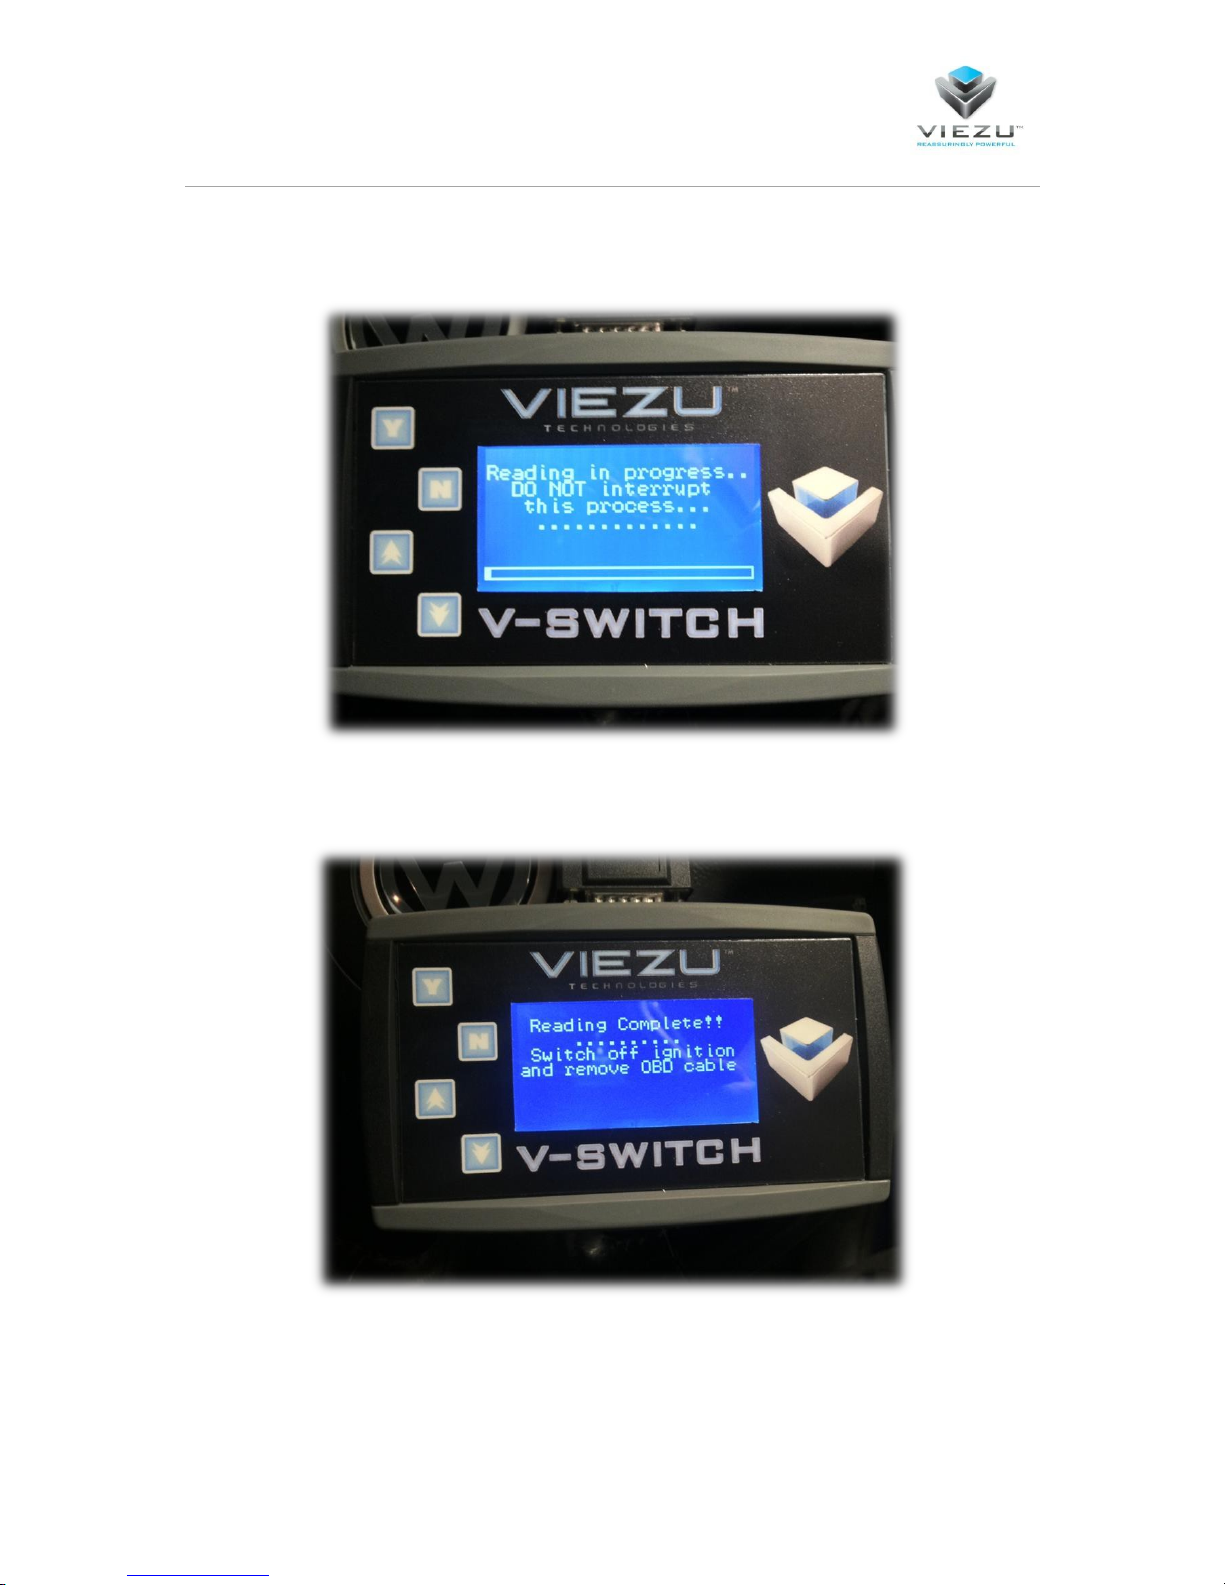
The reading process takes around 15 minutes, however depending on the vehicle can take more or
less time.
Once the read is complete, disconnect the V-Switch from the vehicle and plug it back into your
computer.
Please note*** Taking the read from your ECU will NOT affect the operation of your Vehicle.
Page 20
Page 20
Downloading the Original Read from the V-Switch
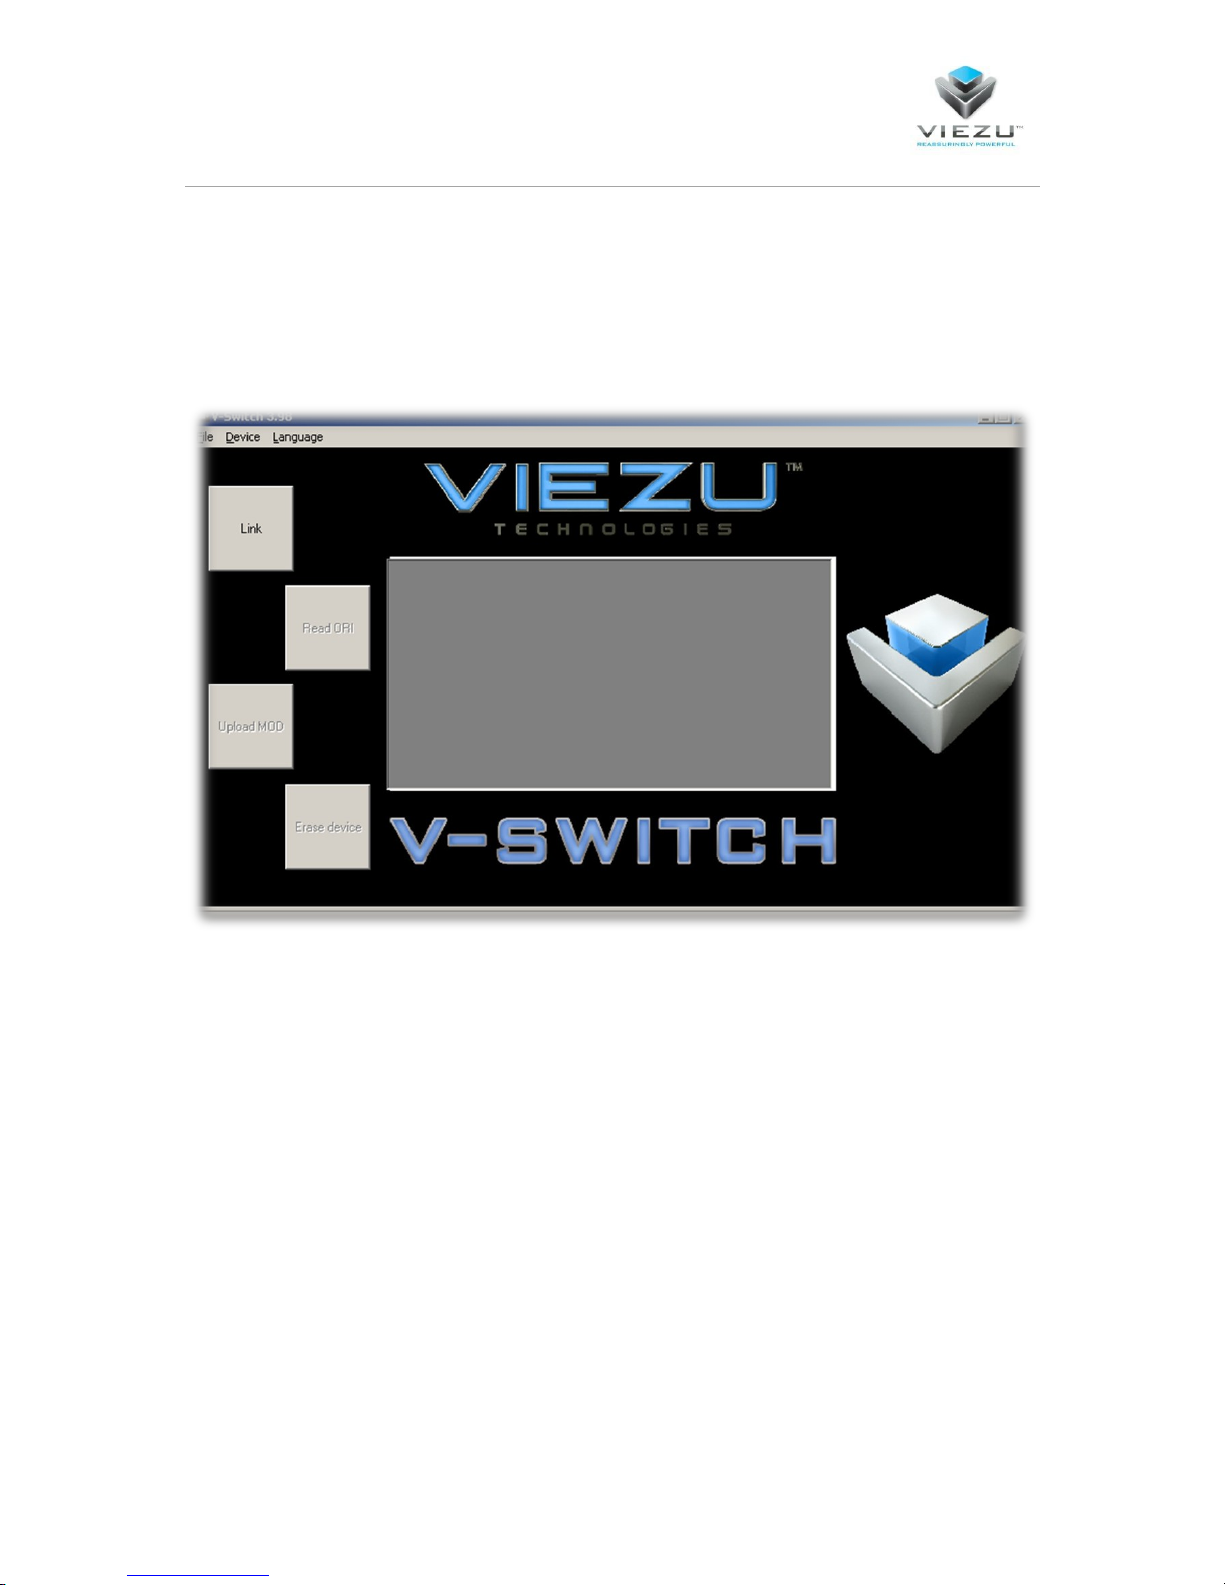
Plug the device into your computer and open the V-Switch software
Select “Link” to pair the device to the computer
Page 21
Page 21
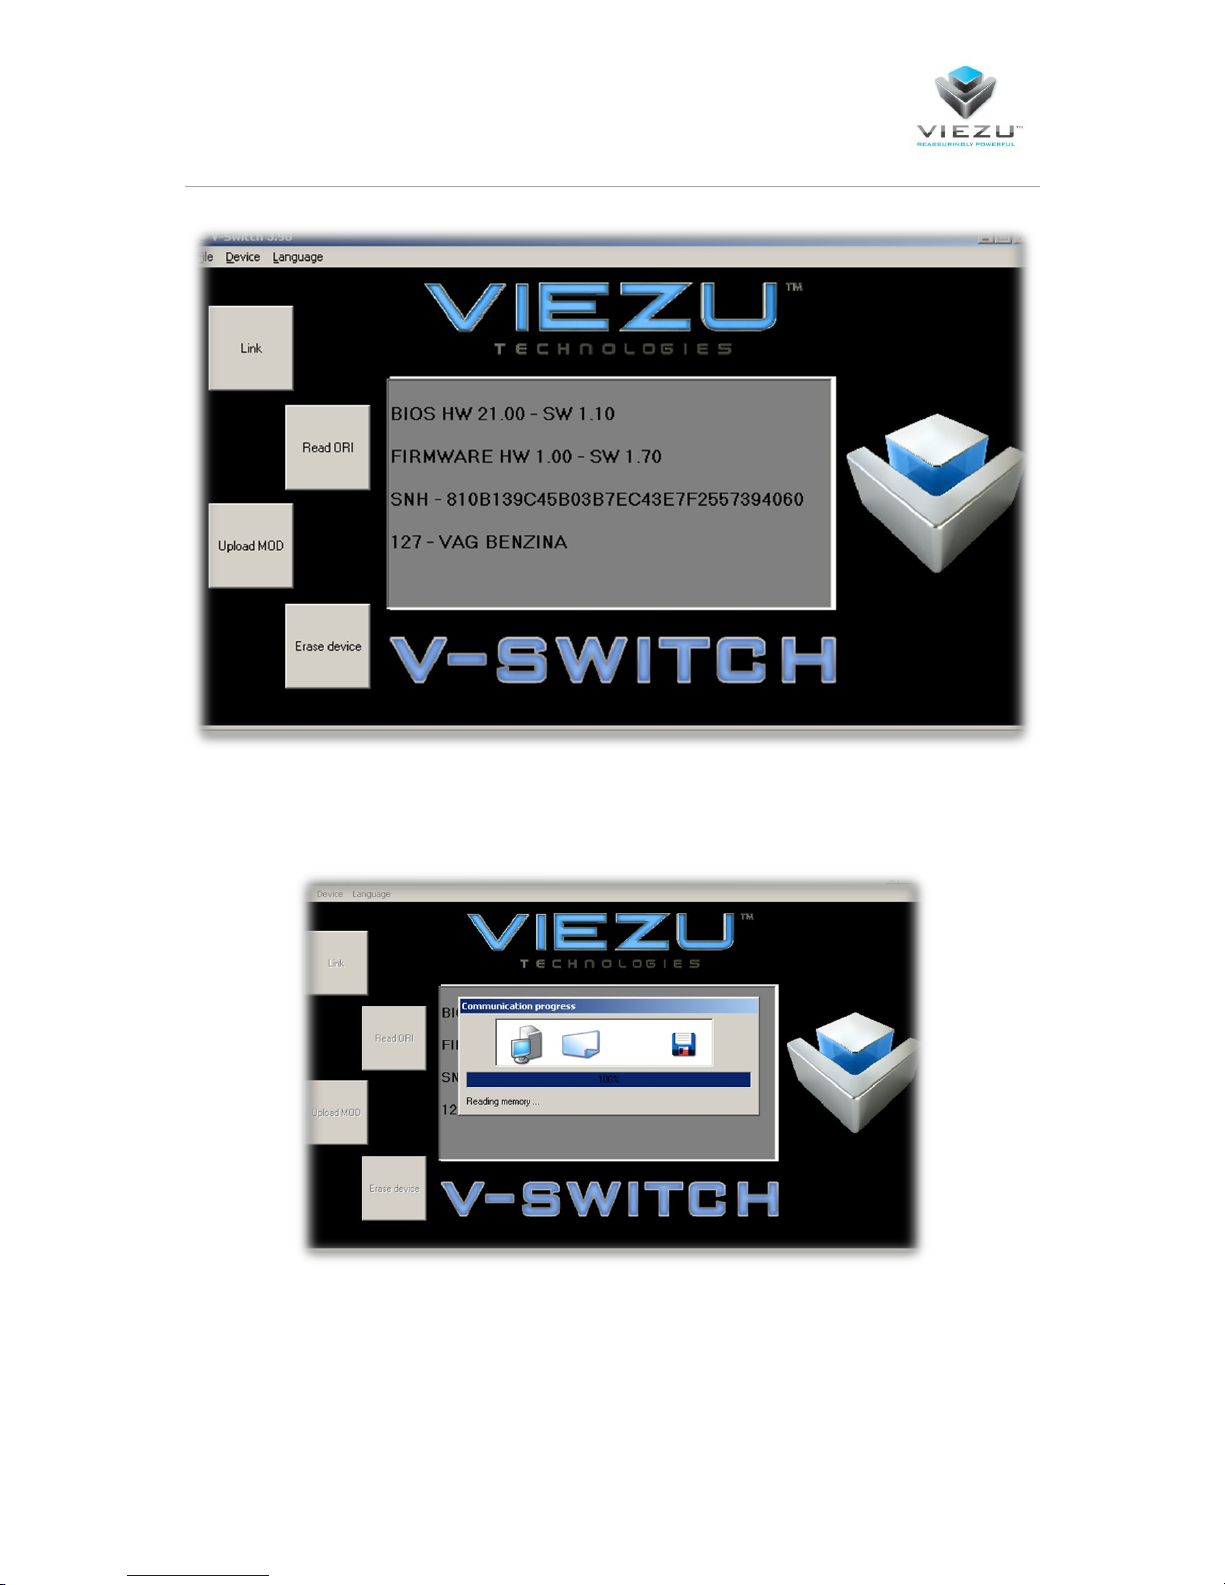
To download the Original read from the device, select “Read ORI”
Select a location to save the Original read.
Page 22
Page 22
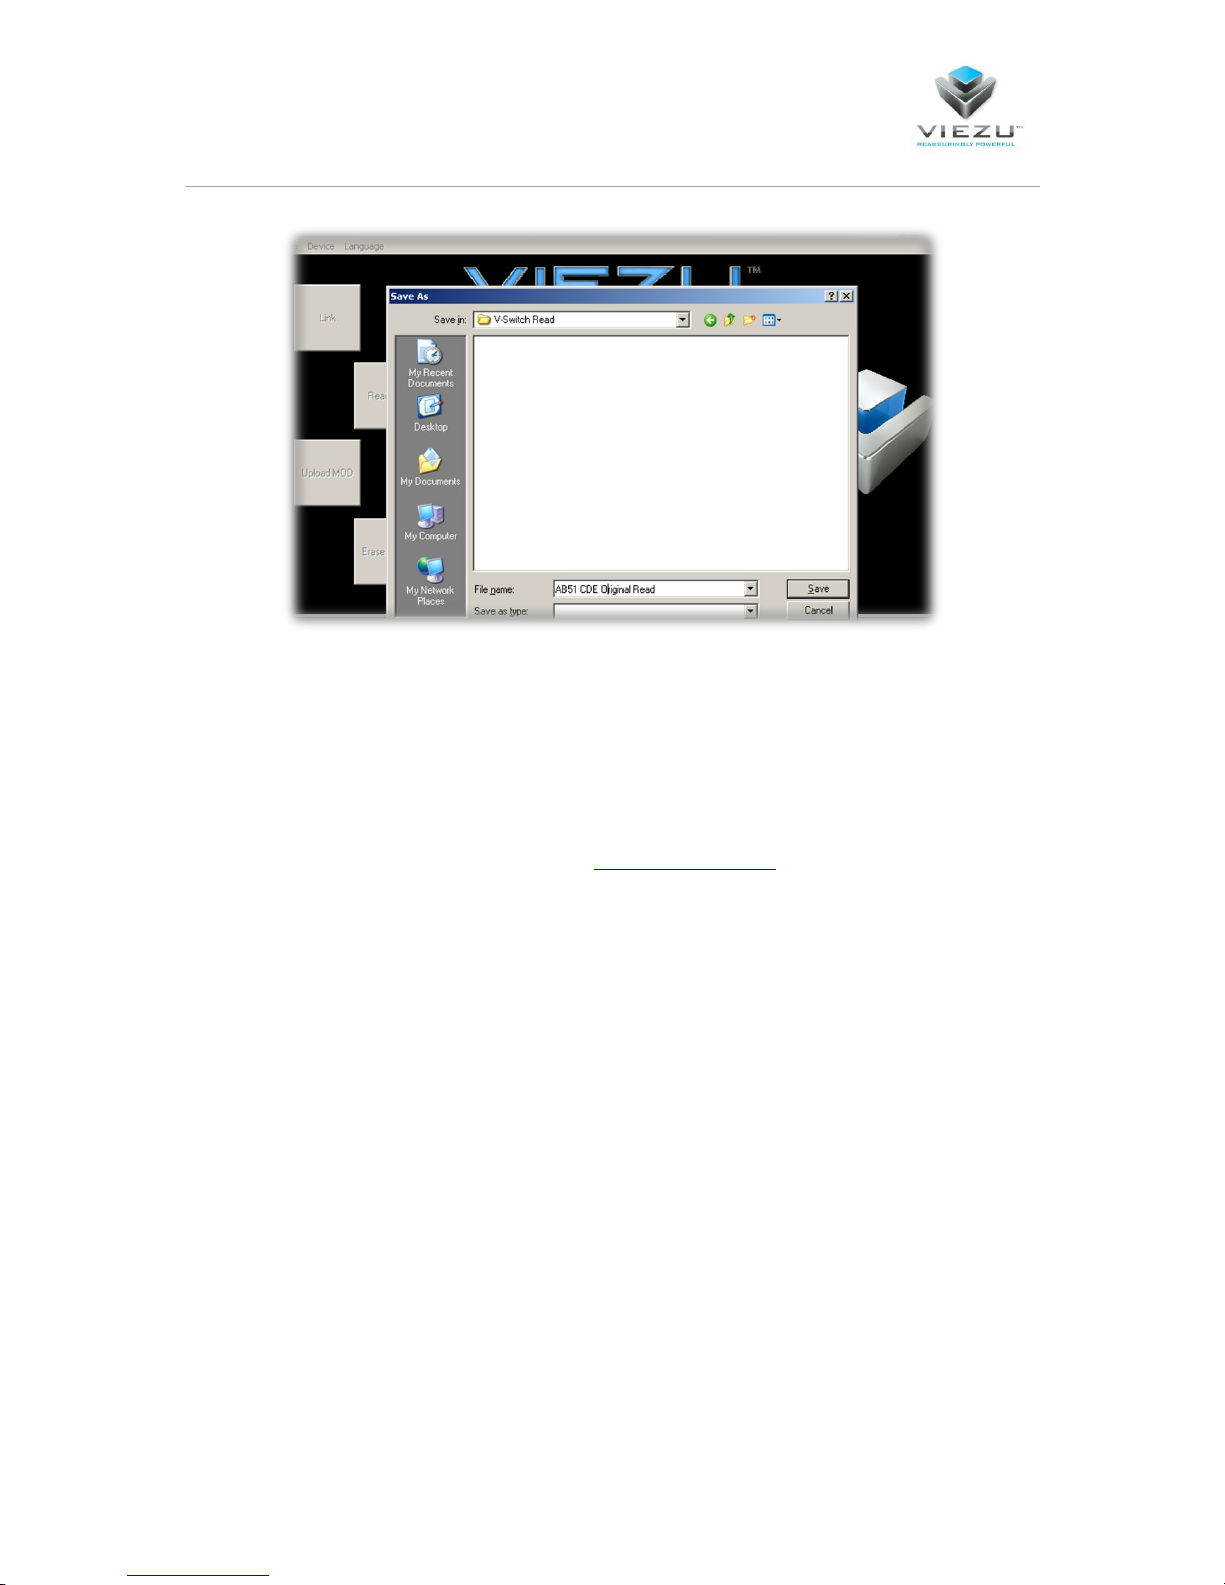
When saving the file, use the following naming structure:
“Your reg” Original Read
For example, a read from a car with the registration “AB51 CDE” would be named:
AB51 CDE Original Read
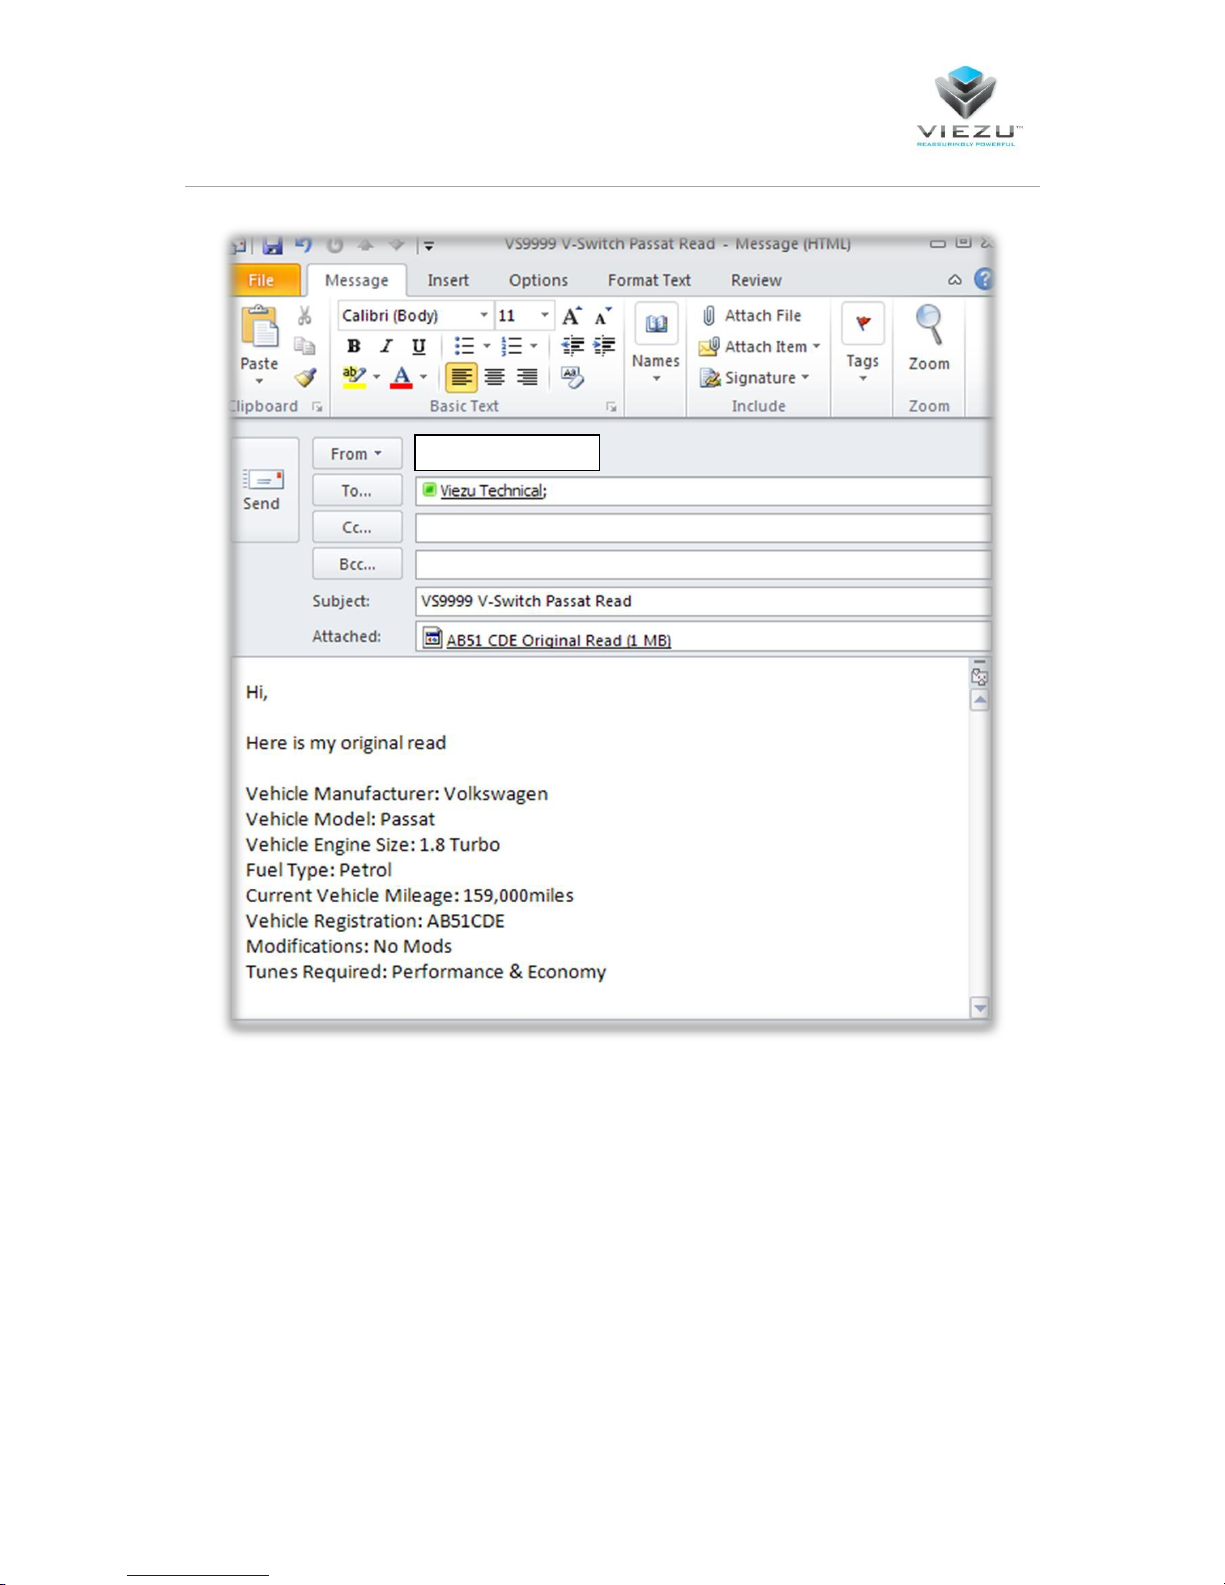
Once the file is saved it needs to be emailed to [email protected], the email must contain the
following information in order for us to be able to make you your bespoke tuned file:
Entitle the email with your V-Switch number and model of car, the email must include:
Manufacturer
Model
Engine Size
Fuel Type
Mileage
Vehicle Registration
Modifications
Required Tune Files
Page 23
Page 23
You will then receive your tuned files within 24hours.
Save these files into the same folder as the file you already saved. The mod files are now ready to be
uploaded to the V-Switch device.
Viezu Technologies can offer a range of different files to ensure you have the perfect file you
And your vehicle. We can offer the following files (dependent on vehicle):
1. CLASSICME – This is your Original file
2. ECOME – Reward yourself by saving on the cost of fuel. Get more miles with less fuel.
3. FUSIONME – Blended – The perfect blend of ECOME and EXCITEME. The best of both worlds
4. EXCITEME – Enhanced performance – More BHP, More Torque
5. THRILLME – Pure Performance unleashed – Track day only for a pure adrenaline rush!
6. PARKME – Reduced Speed – Valet mode.
Page 24
Page 24
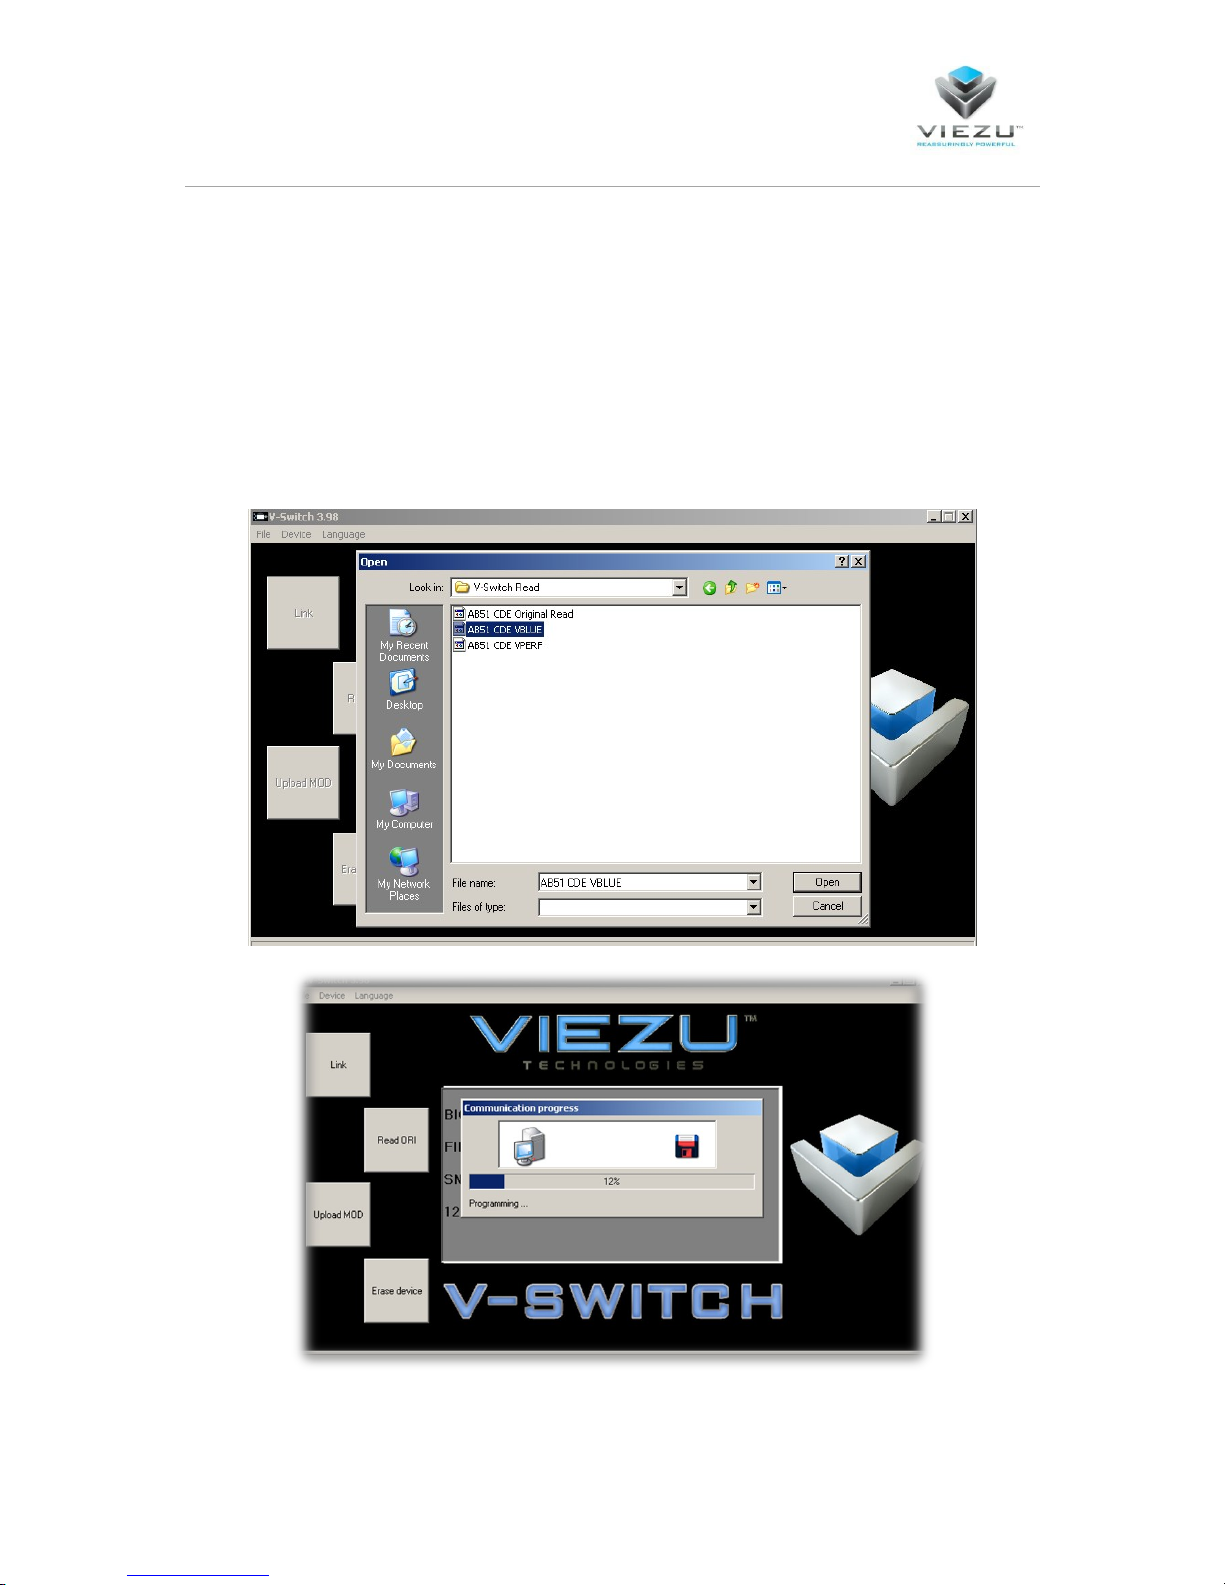
Uploading Modified Files to the V-Switch
To upload modified files onto your V-Switch, plug the device into your computer, open the V-Switch
software and link the device. DO NOT ERASE THE DEVICE BETWEEN READING AND WRITING.
Select Upload mod and select one of the modified files and upload that to the V-Switch. You can only
upload one file at a time to the V-Switch, so ensure you upload both modified files to the device.
Page 25
Page 25
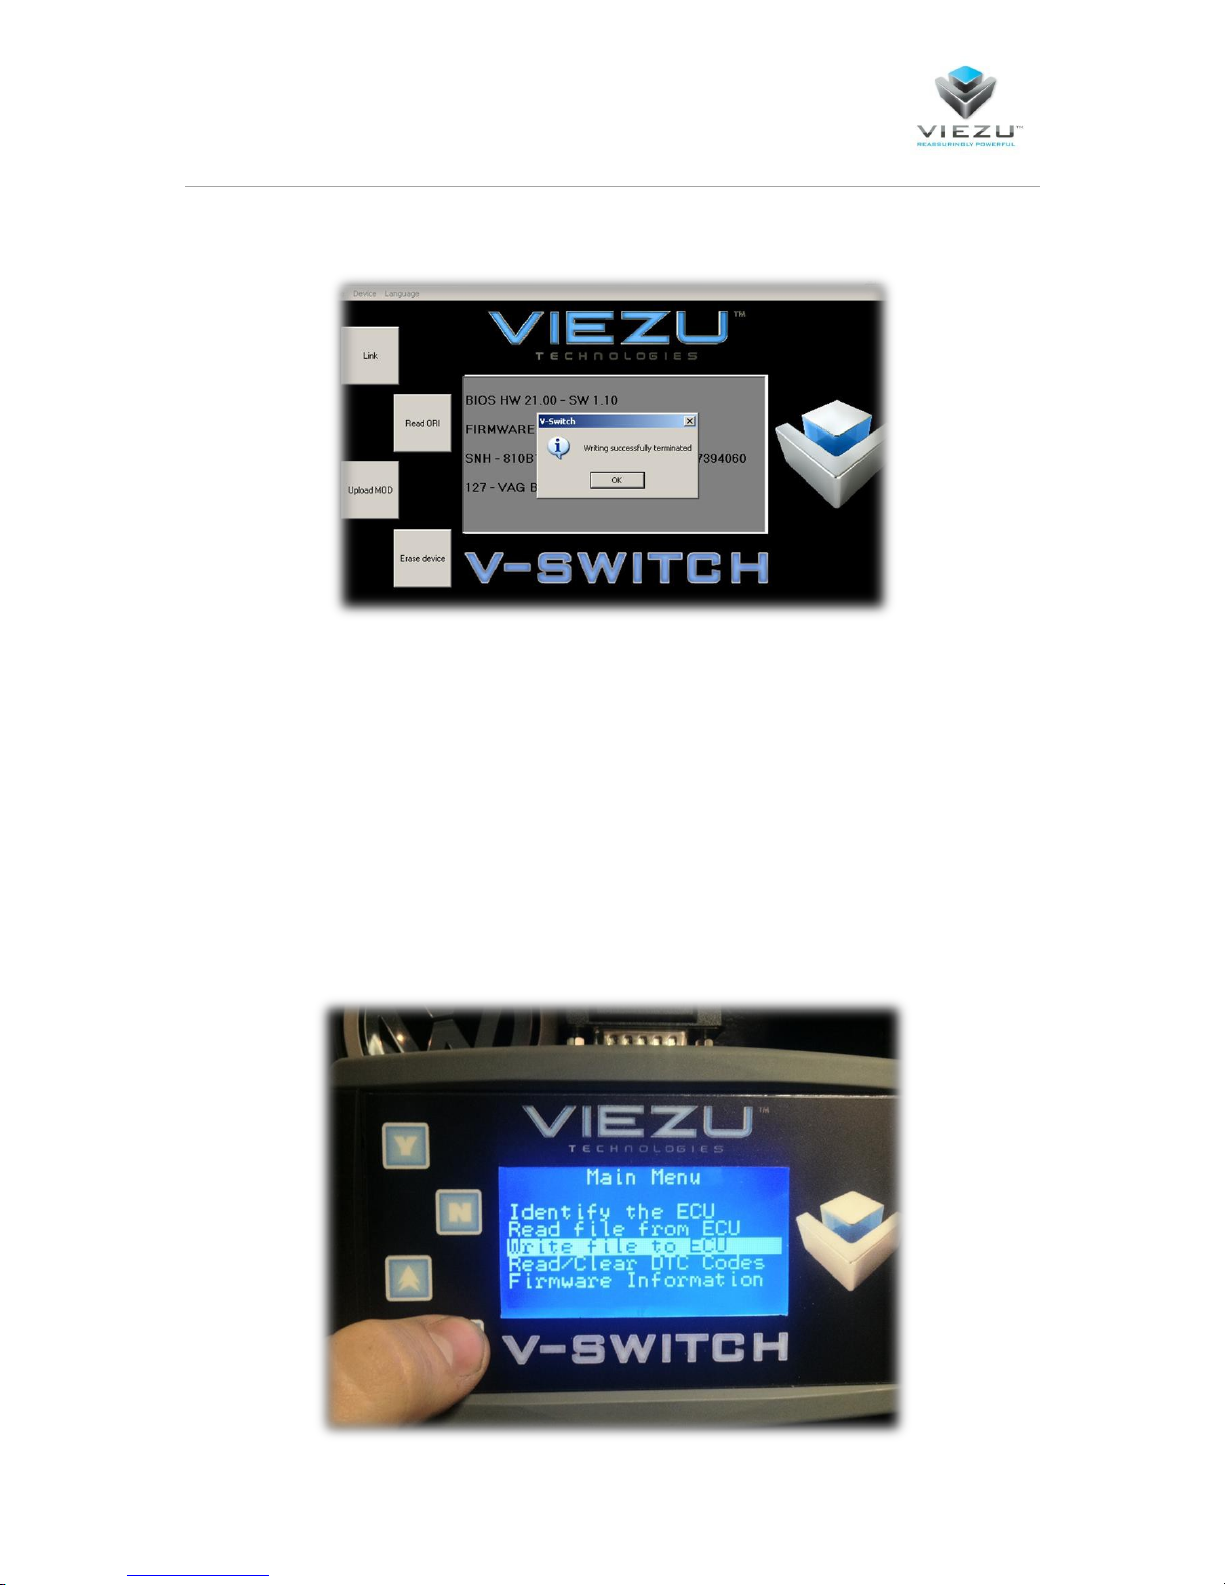
Writing to the car
Note: Ensure you have read the important instructions page in full before continuing.
Now that the modified files have been uploaded to the V-Switch device you are ready to connect
back to the car. In the same way as before connect the V-Switch to the car via the OBD port.
Page 26
Page 26
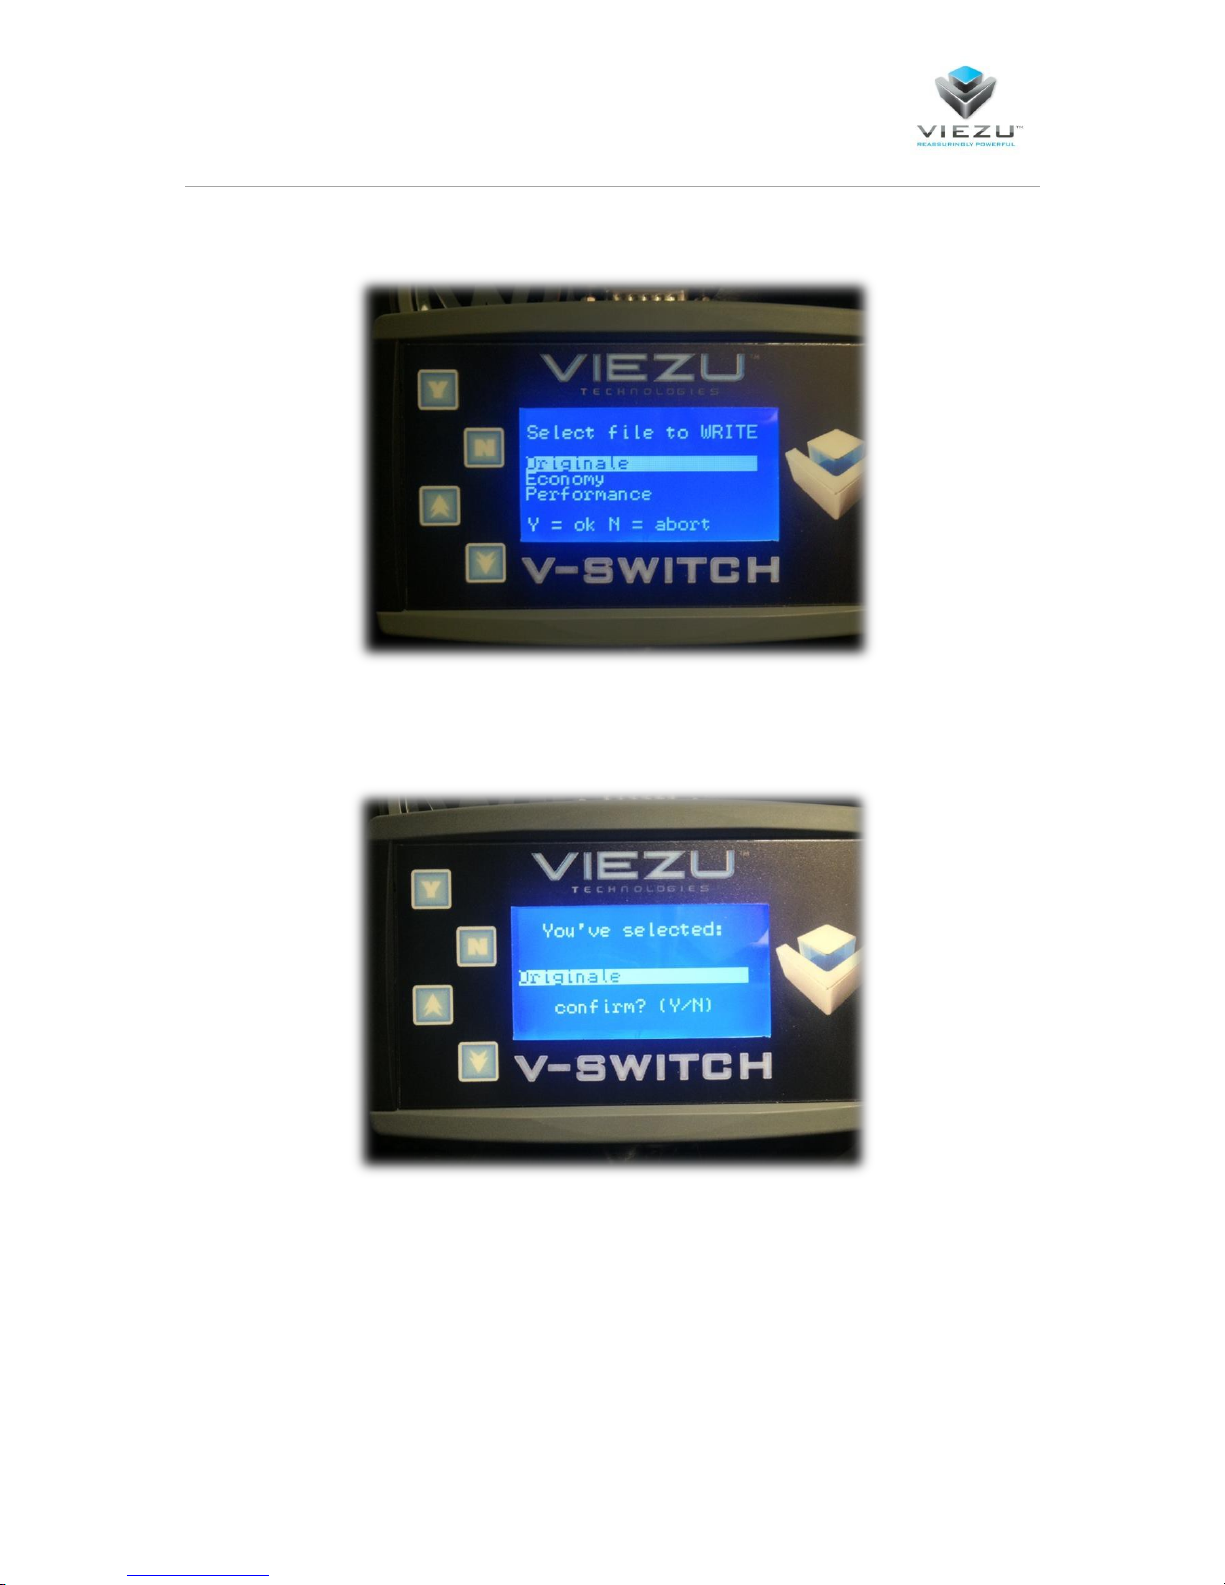
Select “Write file to ECU”
Select the file which you want to upload to the vehicle. In this case we will select the Original file.
Page 27
Page 27
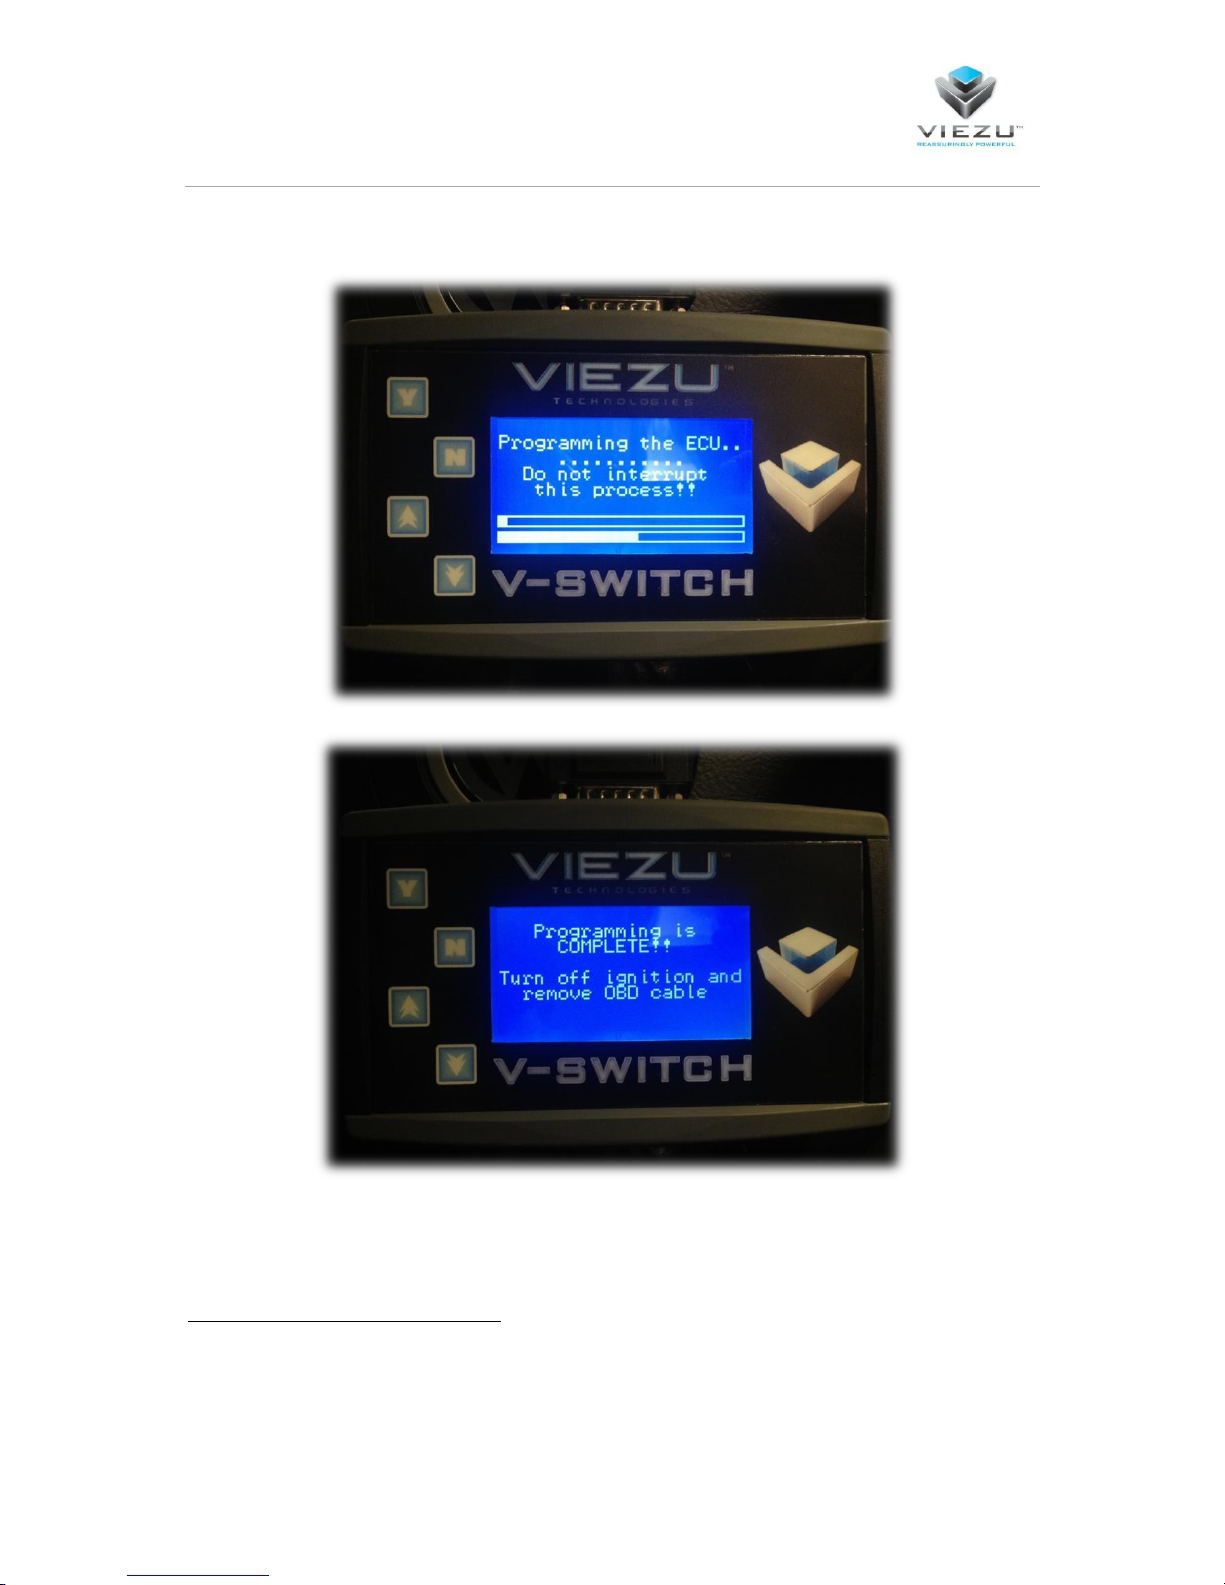
Confirm your selection and the programming process will begin.
The tuning process is now complete, turn off the ignition, remove the OBD cable and enjoy!
Fancy a change?
Writing a different file to the vehicle
Simply start at ‘Writing to the car’ and select which file you wish to upload following the same
process, simple!
Page 28

Page 28
For further information or installation help in regards to your V-Switch please contact us on:
Lines are open: Monday – Friday, 9:00am – 5:00pm, Saturday 9:00am – 13:00pm
+44 (0)1789 774444
We are sure you will be happy with your purchase and wish you many miles of happy motoring.
Warranty: The V-Switch device comes with a 2 Year warranty. This covers against any product defect from the purchase date, all warranty
claims must be accompanied by proof of purchase such as receipt or purchase order. Warranty security tabs should NOT be damaged or
removed as this will result in the warranty being VOID. Viezu Technologies does not take responsibility for the misuse of the V-Switch
resulting in damage to the Vehicle or ECU itself from not following the guide lines provided.
 Loading...