

Page 1
VZ-LED SERIES
21.5" 3G-SDI BROADCAST MONITOR
USER MANUAL
EDITION : May 2019
Please read this manual thoroughly before use, and keep it handy for future reference.
Page 2

CONTENTS
Safety Instrucon
.......................................................................................................................................................................................
1. Important Safety Instrucon
Installaon
1. Package
2. Interface
Funcon
.......................................................................................................................................................................................................
................................................................................................................................................................................................ ..
................................................................................................................................................................................................
..........................................................................................................................................................................................................
1. Monitor Buon Funcon
2. OSD Control and Funcon
Specicaon
Trouble Shoong
...................................................................................................................................................................................................
..........................................................................................................................................................................................
.......................................................................................................................................................
...............................................................................................................................................................
..............................................................................................................................................................
3
3
4
4
5
6
6
8
11
13
2 User ManualVisit the ViewZ USA website at https://www.viewzusa.com
Page 3

SAFETY INSTRUCTION
Important Safety Instruction
1. Read all warnings.
2. Follow all instrucons to ensure longevity of monitor.
3. Do not place the monitor near water.
4. Clean only with dry cloth.
5. Do not block any venlaon openings. Install in accordance with the manufacturer’s instrucons.
6. Do not install near any heat sources such as radiators, heat registers,stoves, or other heat generang
devices.
7. Do not override the safety purpose of the polarized or grounding-type plug.
8. A polarized plug has two blades with one wider than the other.
9. A grounding type plug has two blades and a third grounding prong.
10. The wide blade or the third prong are provided for your safety.
11. If the provided plug does not t into your outlet, consult with electrician for replacement of the outlet.
12. Protect the power cord from being walked on or pinched parcularly at plugs, convenience receptacles
and the point where it connects to the monitor.
13. Only use aachment/accessories specied by the manufacturer.
14. Use only with the cart, stand, tripod, bracket or table specied by the manufacturer or sold with the
monitor. When a cart is used, use cauon when moving the cart & monitor in combinaon to avoid
injuries.
15. Unplug the monitor during lightning storms or when unused for long periods of me.
16. Refer all servicing to qualied service personnel. Servicing is required when the monitor has been
damaged in any way.
The monitor shall not be exposed to dripping or splashing and objects containing liquids, such as vases
shall be placed near the monitor.
The monitor should have ample distance (e.g. 10cm) from the wall for sucient venlaon.
The device has been tested for conformance to safety regulaons and requirements, and has been cered for
internaonal use. However, like all electronic equipment, the device should be used with care. Please read and follow
the safety instrucons to protect yourself from possible injury and to minimize the risk of damage to the unit.
3User Manual Visit the ViewZ USA website at https://www.viewzusa.com
Page 4
INSTALLATION
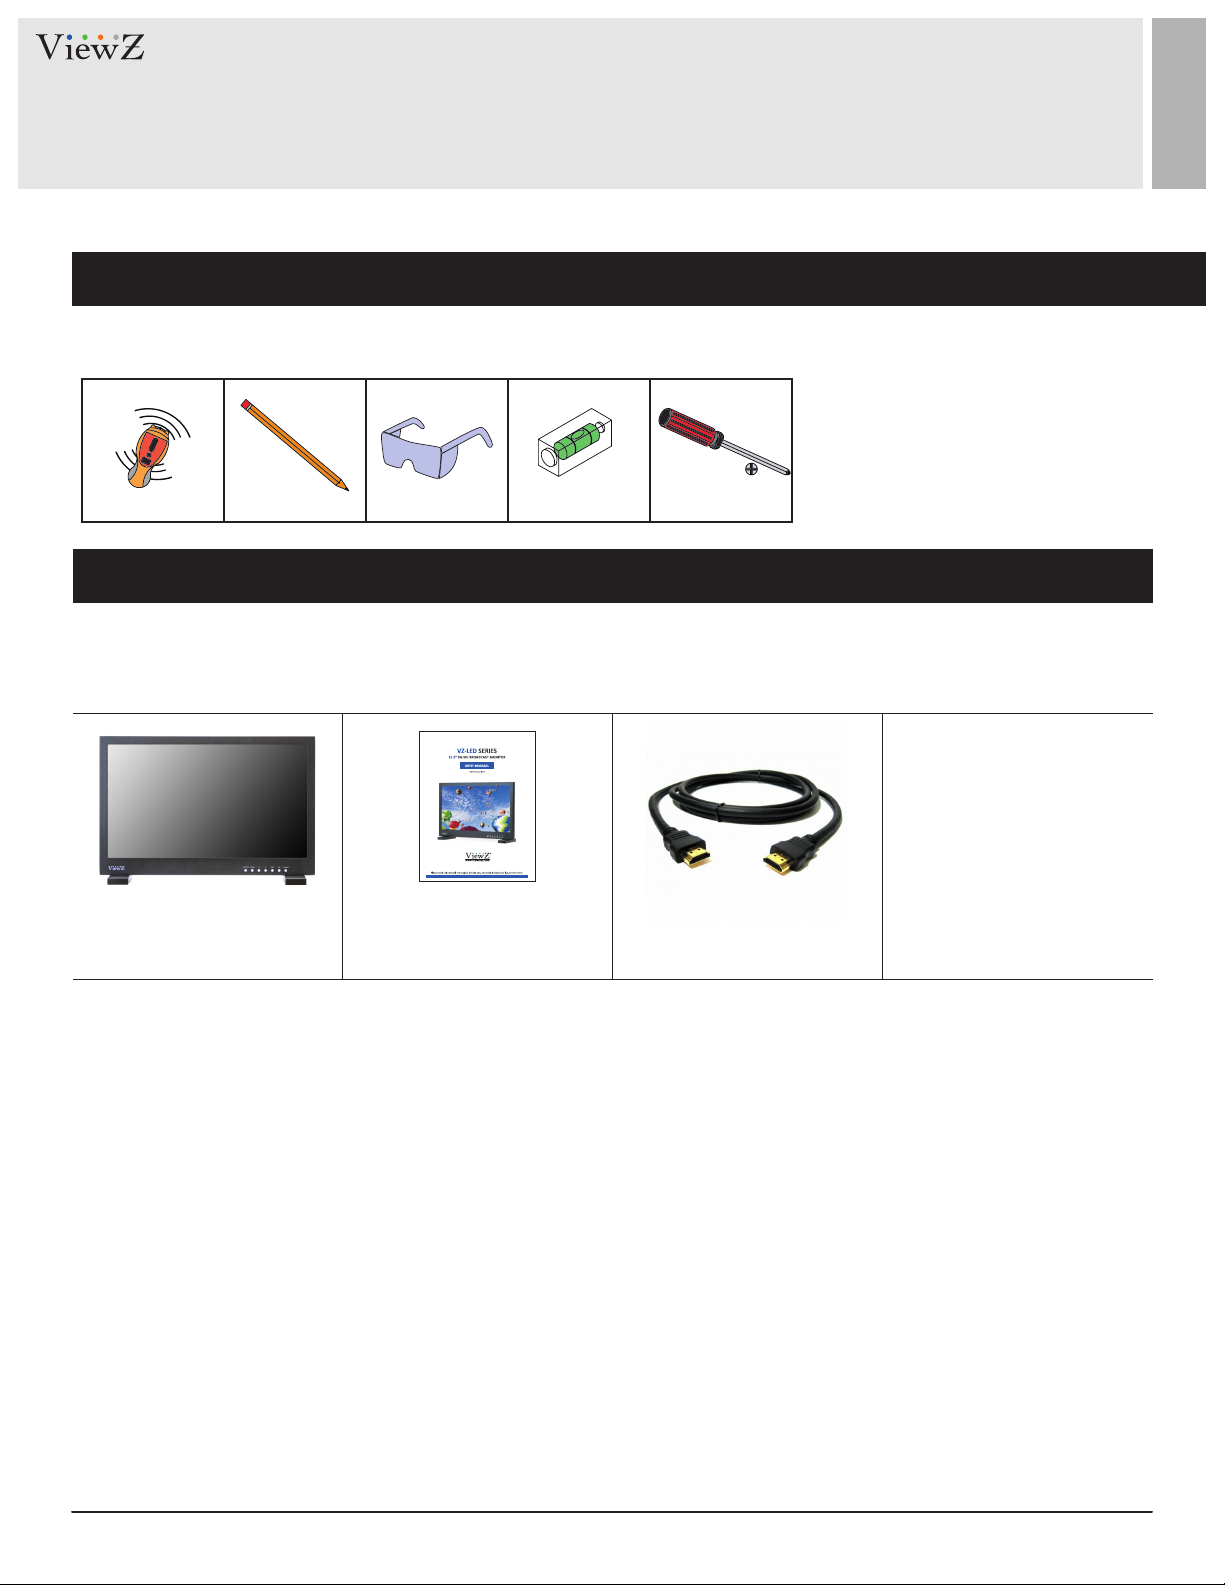
Installation Tools
The following tools may be required depending on your installaon.
Electronic Stud Finder Protecve Eye-wearPencil Level Phillips Screwdriver
Assembly Components - provided
Your ViewZ monitor is shipped with all proper installaon hardware and components. If there are parts missing
and/or damaged, please stop the installaon and contact ViewZ USA at (888)-998-4399.
LED Monitor (Qty 1) &
Base Stand (Qty 1set)
User Manual (Qty 1) HDMI A/A Cable (Qty 1)
4 User ManualVisit the ViewZ USA website at https://www.viewzusa.com
Page 5
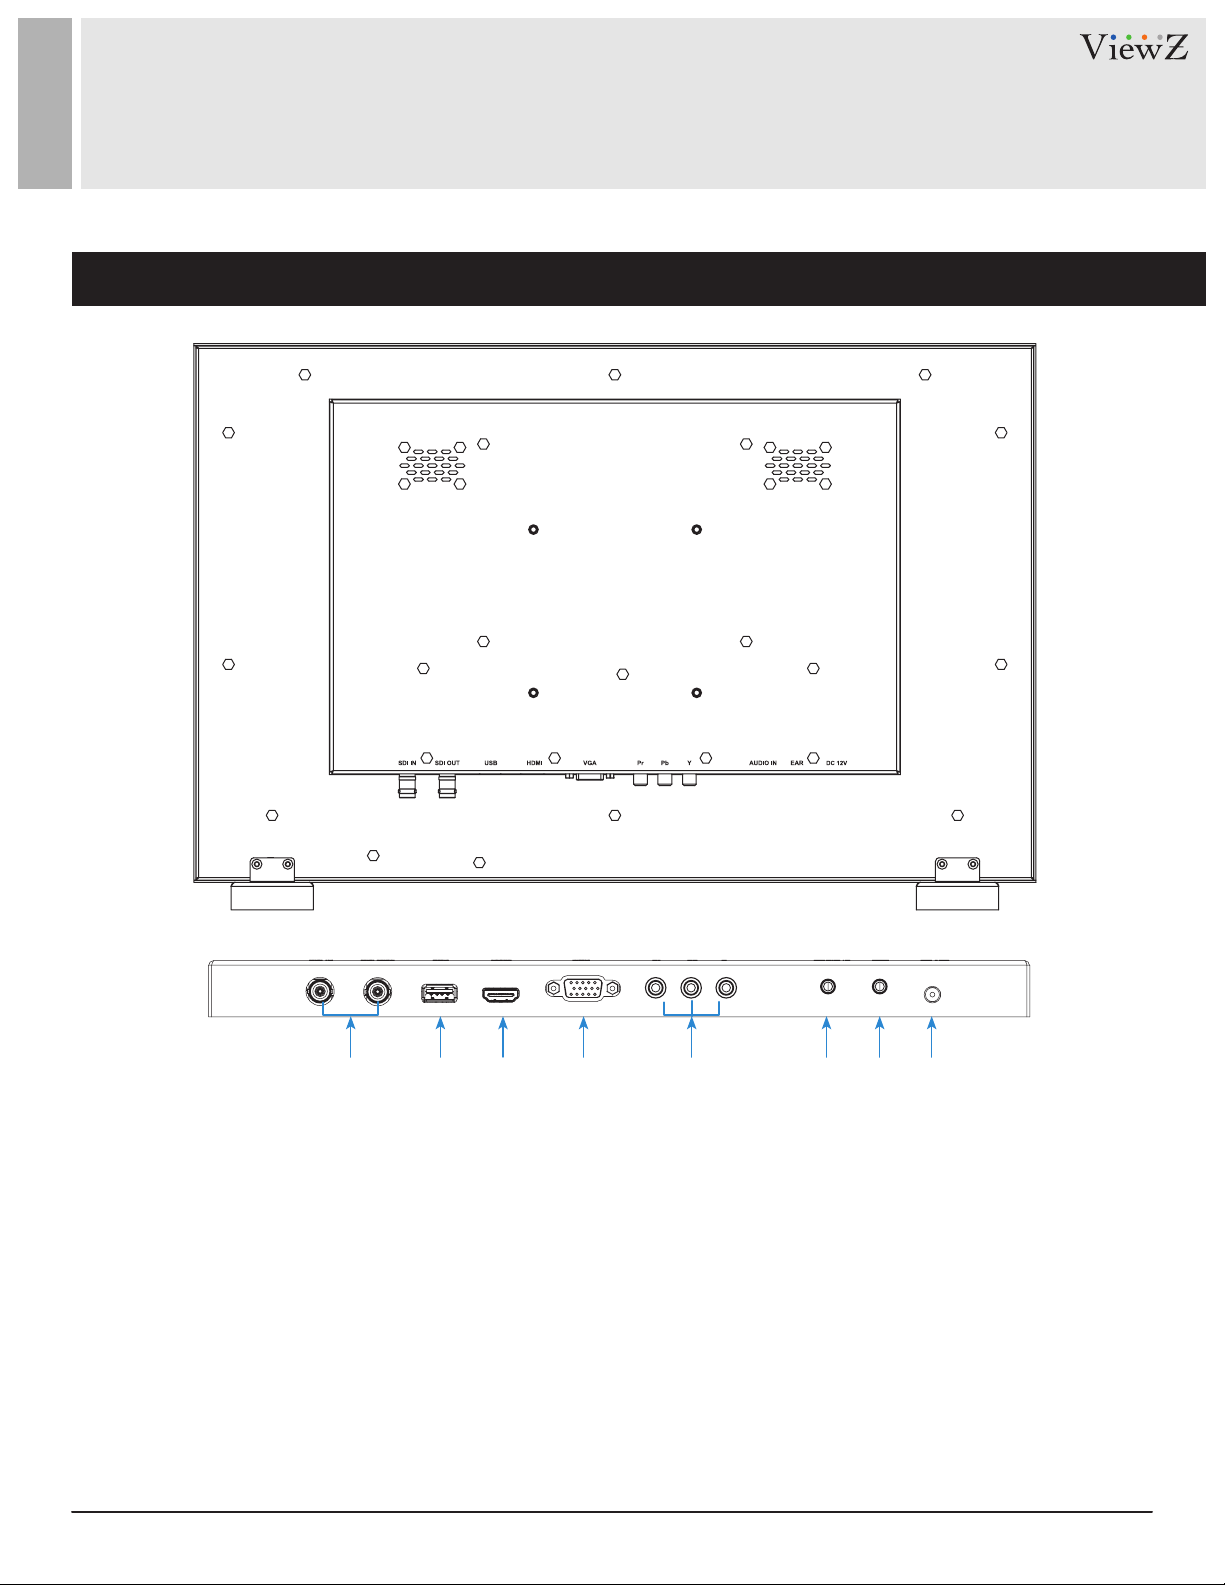
CONNECT EXTERNAL EQUIPMENTS
Interface Input Ports
1. 3G-SDI IN / OUT
2. USB (Upgrade only)
3. HDMI IN
4. VGA
q rw e t y u i
5. YPbPr IN
6. AUDIO IN
7. AUDIO OUT
8. DC 12V IN
5User Manual Visit the ViewZ USA website at https://www.viewzusa.com
Page 6

CONTROL AND FUNCTION
Monitor Button Function
q rw e t y u
1. Source
Select an input source
2. Menu
Enter the MENU, save the adjustment of sub-menu
and exit the OSD
3. Le & Right ◄ ►
Change the value on selected menu
4. Exit
Exit the MENU or go back previous MENU selecon
6 User ManualVisit the ViewZ USA website at https://www.viewzusa.com
5. FN
User denable buon. Default funcon is 'Waveform'
6. Power
Monitor power on / o
7. LED Indicator
Blue color: monitor on
Red color : monitor o
Page 7

CONTROL AND FUNCTION
Monitor Button Function
Shortcut key: F1 user-denable funcon buon
1. Select "MEMU / SYSTEM / F1 Conguraon" to custom F1 shortcut seng. Then press ◄ ► buon to choose opons.
2. Press "MENU" to conrm opon as default, then press EXIT to exit.
Funcon of F1 buon can also be customized: Level Meter, Center Marker, Aspect Marker, Check Filed, Underscan, Scan,
Aspect, Freeze.
Default funcon: Level Meter
◄ ►Buons Operaon
1. Press ◄ ► buon to acvate the Volume bar when not under the menu display.
2. Press again to adjust the value of opon directly.
3. Press 'EXIT' to exit if accidentally enter the menu.
4. Aer enter the Volume menu, press 'MENU' to select among of volume, brightness, contrast, saturaon, nt, sharpness , exit
and 'MENU'.
MENU Operaon
1. When power on, press 'MENU' on the device, The menu of funcon seng will display on the screen.
2. Press buon to choose sub-menu
3. Then press 'MENU' buon to conrm
4. Press 'EXIT' buon to return/exit 'MENU/SUB-MENU'.
7User Manual Visit the ViewZ USA website at https://www.viewzusa.com
Page 8

CONTROL AND FUNCTION
Picture
FUNCTION
Brightness
Contrast
Tint
Sharpness
Color Temperature
Red Gain
Green Gain
Blue Gain
Red Oset
Green Oset
Blue Oset
1) In 'User' mode, users can dene RGB Gain and Bias values for own purpose
1)
1)
1)
1)
1)
Setup the brightness
Setup the contrast
Setup the tint
Setup the sharpness
Setup the color temperature
Setup the Red contrast(gain) level
Setup the Green contrast(gain) level
Setup the Blue contrast(gain) level
Setup the Red brightness(offset) level
Setup the Green brightness(offset) level
Setup the Blue brightness(offset) level
Marker
VALUE
0 ~ 100
0 ~ 100
0 ~ 100
0 ~ 100
6500⁰K, 7500⁰K, 9300⁰K, User
0 ~ 255
0 ~ 255
0 ~ 255
0 ~ 511
0 ~ 511
0 ~ 511
FUNCTION
Center Marker
Aspect Marker
Safety Marker
Marker Color
Grid
Marker Mat
Thickness
8 User ManualVisit the ViewZ USA website at https://www.viewzusa.com
Turn on and off center marker
Setup the marker based on aspect ratio
Setup the marker area based on screen size
Setup the marker color
Turn on and off grid mode
Setup the darkness of areas out of line marker
Setup the marker line thickness
OFF, 1.85:1, 2.35:1, 4:3, 3:2
OFF, 95%, 93%, 90%, 88%, 85%, 80%
Red, Green, Blue, White, Black
VALUE
OFF, ON
OFF, ON
OFF, 1 ~ 7
2, 4, 6, 8
Page 9

CONTROL AND FUNCTION
Function
Scan
Aspect
Display Scan
Check Field
Zoom
Freeze
PC
FUNCTION
Change the scan mod
Setup the display ratio
Display the scan mode
Setup the display color
Display the original image resolution
without scaling to match a certain resolution
or an aspect ratio
Pause the current display image
VALUE
Aspect, Pixel to Pixel, Zoom
Full, 1.85:1, 2.35:1, 4:3, 3:2
Fullscan, Overscan, Underscan
Off, Mono, Red, Green, Blue
×1.5, ×2, ×3, ×4
OFF, ON
Auto
Phase
Clock
H-Posion
V-Posion
Only available in VGA mode
FUNCTION
Fit the image size automatically
Adjust the vertical noise of screen image
Adjust the number of horizontal picture element
Adjust the horizontal position of picture
Adjust the vertical position of picture
VALUE
OFF, ON
0 ~ 100
0 ~ 100
0 ~ 100
0 ~ 100
9User Manual Visit the ViewZ USA website at https://www.viewzusa.com
Page 10

CONTROL AND FUNCTION
Audio
FUNCTION
Volume
Level Meter
Audio Channel
Audio level meter & channel only available in SDI input
Adjust volume on monitor
Turn on/off the embedded audio
Setup the embedded audio channel for
internal speaker or Audio OUT
System
VALUE
0 ~ 100
OFF, ON
Ch 0 / Ch 1, Ch 2 / Ch 3, Ch 4 & Ch 5
Ch 6 / Ch 7, Ch 8 / Ch 9, Ch 10 & Ch 11
Ch 12 / Ch 13, Ch 14 / Ch 15
FUNCTION
Language
OSD Timer
OSD Transparency
FLIP Image
Back Light
F1 Conguraon
Reset
10 User ManualVisit the ViewZ USA website at https://www.viewzusa.com
Set the language of the OSD menu
Set the OSD display time
Set the OSD MENU transparency
Flip the display image
Set the back light level
Set up shortcut functions
Reset the monitor settings to factory default
OFF, LOW, MIDDLE, HIGH
VALUE
English, Chinese
10 , 20, 30 sec
OFF, H/V, HV
0 ~ 100
OFF, 1 ~ 6
OFF, ON
Page 11

SPECIFICATION
Model No. VZ-215LED-L1
Display
Audio
Dimension &
Weight
Interface
Panel Type
Pixel Pitch
Brightness
Contrast Ratio
Viewing Angle
Color Depth
Response Time
Max. Resolution
Aspect Ratio
Speaker
Weight
Dimensions (W x H x D)
3G-SDI In / Out
HDMI In
RGB In
Component In
USB
21.5'' LED Backlit Monitor
0.24825 (H) x 0.24825 (V) mm
250 cd/m²
1000 : 1(Typ.)
R/L : 85°/ 85° U/D : 80°/ 80°
16.7 Million Colors
< 25 ms
1920 (H) x 1080 (V) @60Hz
16 : 9
2 x 2W
8.4 lbs ( 3.8 kg )
20.32 x 13.65 x 1.72” (516.0 x 346.9 x 43.6 mm )
1 / 1 (BNC, 1 input / loop-through out)
1
1
3 ( YCbCr )
1
General
Audio In / Out
Operating Temperature
Electrical Ratings
Case Type
Power Consumption
Accessories
1 / 1
32 - 104°F / 0 - 40°C
DC12V (AC100 ~ 240V[50/60Hz])
Black Metal
≤ 24 W
Monitor x1, Power Adapter x1, HDMI Cable x1, Base Stand x1, Manual x1
11User Manual Visit the ViewZ USA website at https://www.viewzusa.com
Page 12

SPECIFICATION
Model No. VZ-215LED-L1
SDI
Input
Signal
Format
ANALOG
HDMI
VGA
Special Features
SMPTE 425M - A&B (YCbCr 4:2:2)
SMPTE 274M (YCbCr 4:2:2)
SMPTE 296M (YCbCr 4:2:2)
SMPTE 125M (YCbCr 4:2:2)
ITU-R BT.601 (YCbCr 4:2:2)
2K Format (YCbCr 4:2:2)
COMPONENT
Line Marker Option
Safety Area Option
SDI Sound Channel Option
RGB Gain
RGB Bias
1080p ( 60/59.94/50 )
1080i (60/59.94/50), 1080p (30/29.97/25/24/23.98),
1080Psf (30/29.97/25/24/23.98),
1280 x 720p (60,59.94,50)
480i (59.94)
576i (50)
1080P (60/59.94/50, 30/29.97/25/24/23.98)
1080i (60/59.94/50), 720P(60/59.94/50)
480i/480P/576i/576P/1080i/1080P
VGA, SGA, XGA, SXGA, WXGA, WUXGA
3:2, 4:3, 1.85:1, 2.35:1, Off
Off, 80%, 85%, 88%, 90%, 93% and 95%
Two (2) Channels out of sixteen (16) channels.
-128 to +128
-128 to +128
720P(60/59.94/50/30/29.97/25/24/23.98)
12 User ManualVisit the ViewZ USA website at https://www.viewzusa.com
Page 13

TROUBLESHOOTING GUIDE
- Check the following before calling for service.
- If the same problems connue aer checking, contact the reseller you purchased the monitor from.
We recommend that you test with dierent input sources when you have trouble with
At start
the current input source. If symptom persists, follow the instrucons below. Aer
following the instrucons below, please contact us at 1-888-99-VIEWZ.
Only black-and-white
display
Power on but no pictures
Wrong or abnormal colors
When on the picture
shows size error
Other problems
Note: due to constant eort to improve products and product features, specicaons may change without noce.
Check whether the color saturaon is properly setup.
Check whether the cables of Video, HDMI, RGB and SDI are correctly connected. Please use the
standard power adapter coming with the product package. Improper power input may cause
the device.
Check whether the cables are correctly and properly connected. Broken or loose pins of the
cables may cause a bad connecon.
Press “MENU → Function → Underscan” to zoom in/out pictures automatically when receiving
HDMI signals
Please press dial button and choose “MENU→SYSTEM→ Reset →ON”
13User Manual Visit the ViewZ USA website at https://www.viewzusa.com
Page 14

NOTE
14 User ManualVisit the ViewZ USA website at https://www.viewzusa.com
 Loading...