

Page 1
Rear View Camera
Manual
Operation is subject to the following two conditions:
1. This camera may not cause harmful interference.
2. This camera must accept any interference received,
including interference that may cause undesired
operation.
NRC-2100
NRC-5000
NRC-7000
NRC-7100
Safeguards
Viewtech Co., Ltd.
3F, 81-4 Pyeongchon, Dongangu, Anyang, Kyeonggido 431-070, Korea
Phone: +82 31 422 6247 Fax: +82 31 422 6248
E-Mail: viewtech@viewtech.co.kr
http://www.viewtech.co.kr
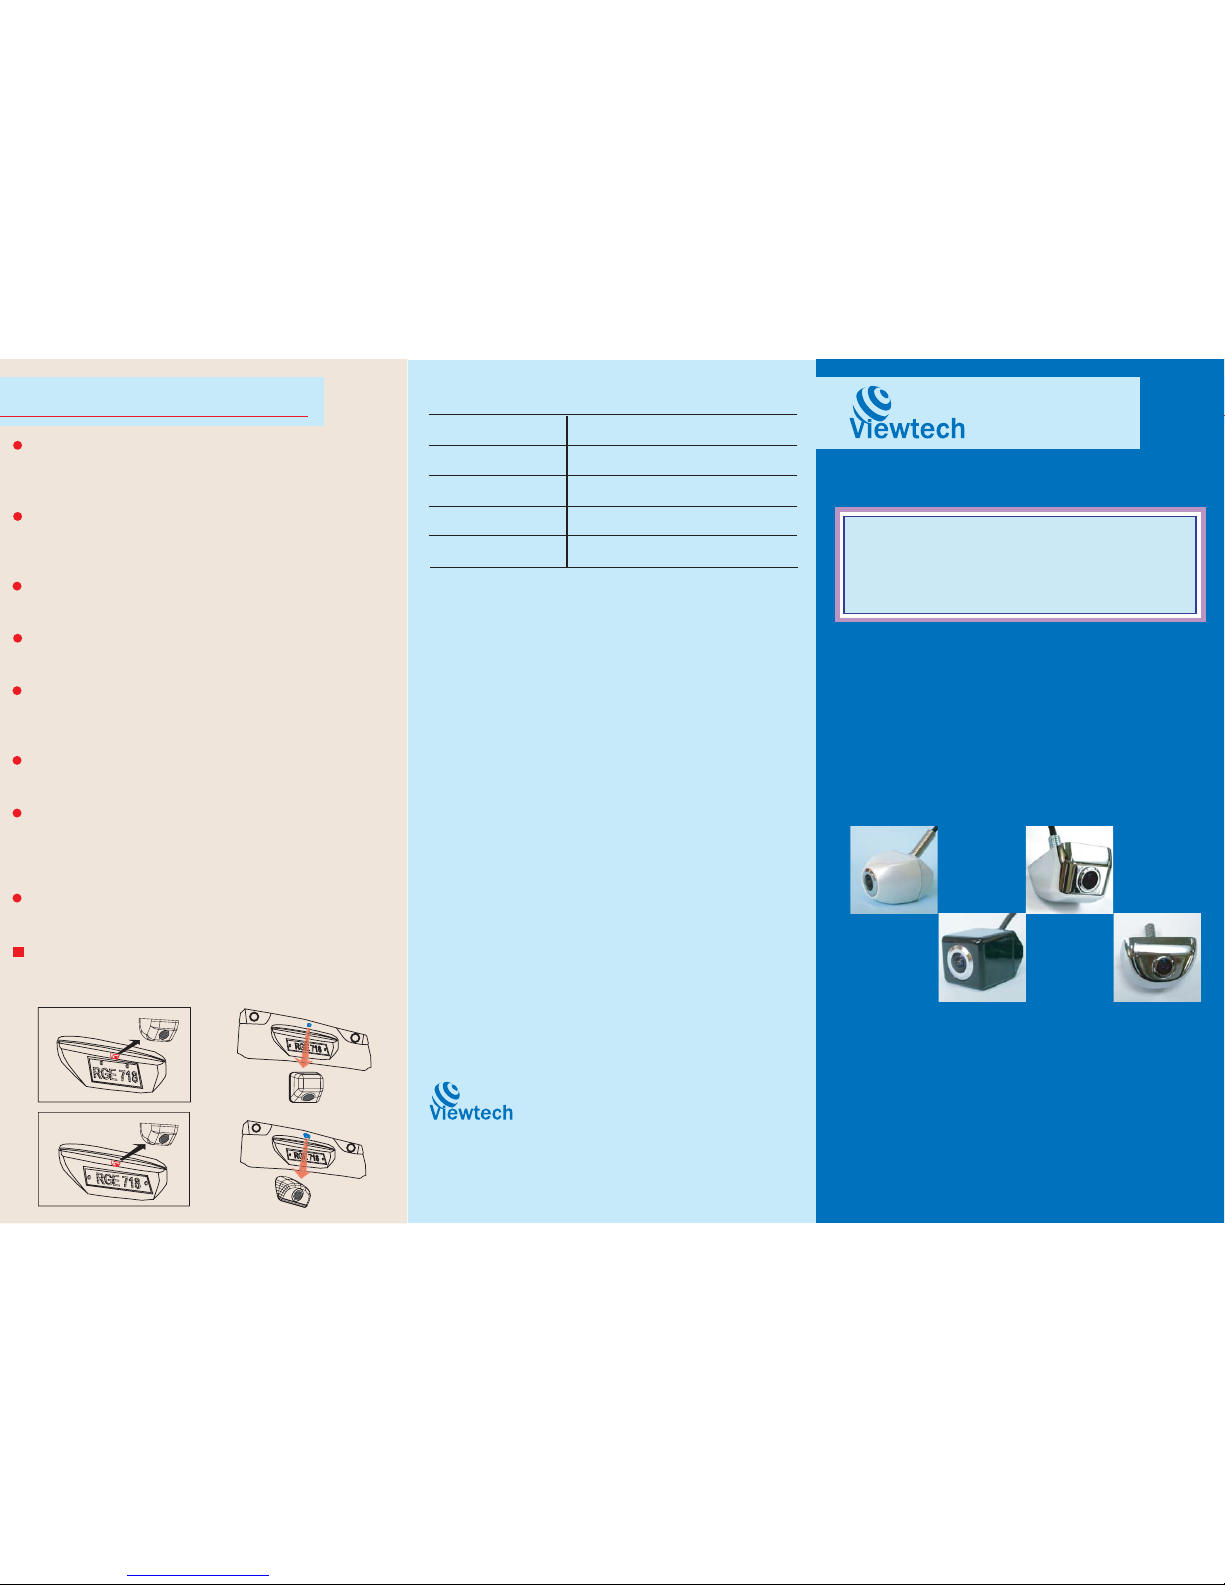
Horizontal Type (Garnish)
Vertical Type (Vehicle Body)
Alteration or modifications carried out without appropriate
authorization may invalidate the user's right to operate the
equipment.
Installation and wiring of this product don't require really
specialist skill and experience. But to assure your safety,
please request a specialist technician to install the unit.
This product is a rear view camera for checking the backup
view of a vehicle.
A rear view camera provides symmetrical images as rear and
side view mirrors. (calling "mirror function")
Connection to a monitor or Navifation with an RCA video input
or a stereo jack is possible, but confirm whether the monitor
or Navigation you use has a reverse detective function.
This product is designed to supplement the driver's rear view,
using a wide angle board lens (horizontal 120 degree)
This product features a wide angle lens, so the near view is
wide and the far view is narrow, which may create a false
sense of distance. Be sure to look behind your vehicle when
backing-up to confirm the view.
Do not loose the screws on the camera body. It makes the
camera be un-waterproof
First of all you have to choose an installation type you want,
among a horizontal type and a vertical type as below.
Warranty
Model No.
Model No.
Serial No.
Serial No.
Purchased Date
Purchased Date
Purchased Place
Purchased Place
Production Date
Production Date
Warranty Period: 1 year 4 months from Production Date
Warranty Conditions: Exchanging 1:1 with new one.
When happenning with our product, please fill in our exchange
form downloaded from our homepage. And send it to our sole
distributor in your country. If you have no such helping body in
your country, please contact us directly, even inconvenient. We
will do our best to help you sincerely.
Exceptional Conditions from Warranty
1. In case of Lens Damage
2. In case of Opening the housing case
We are preparing the Quality Certificates with CE and E mark for our rear view camera.
We are surpposed to obtain them by the end of March.
Quality Certificate
Our Applied Patents for Lens and Camera
Having more than 30 ea patents for 13 years and 1 patent on pending, applied Dec., 08.
Please refer " Company" page at the homepage (http://www.viewtech.co.kr).
Page 2
Specification
Applied Models
Installation
Pick-Up Device
Pick-Up Device
Active Pixel
Active Pixel
TV Resolution
TV Resolution
Video Out
Video Out
Mirror Function
Mirror Function
Operation Temp.
Operation Temp.
Min. Illumination
Min. Illumination
Power Supply
Power Supply
Field of View (D / H / V)
Field of View (D / H / V)
Micron 1/4" SOC VGA
310K (640 (H) x 480 (V ))
330 TV Lines At Center
Composite Signal 1.0 p-p, 75
Included
-40 ~ 85 degree C
0.1 Lux (F=2.5)
DC 6.5V~40V (50mA at DC12V)
160.5 / 121 / 88 (degree)
NTSC
PAL
Parts supplied:
A. Rear View Camera .......................................................... 1 pc
B. Extension Cable ( 7.5 m) ................................................. 1 pc
C. Locking Nut for Installation ......................................... 1 pc
D. Reference Manual
1. Clean the surface on the mark where Camera is installed.
2. Check out whether other electronic harnesses are touched inside of
installation mark.
3. Peel off a sheet of protection tape on the lens of camera.
4. Drilling a hole (diameter 6.5 or 7 mm) at the mark
5. Lock up the rear of camera with the installation screw.
6. Adjust the view angle and connect to extension cable.
7. Wire the extension cable to the monitor and navigation.
Diagram of Locking Up Inside of the Installation
Before finally installing the unit, please connect the wiring
temporarily, making sure it is all connected up properly,
and the unit and the system work properly.
Navigation or Monitor
Power Supply
When No connect to the
Reverse light harness,
please connect this side.
- Rear View Camera
Power Supply
- Connect to Reverse
Light Harness
- Rear View Camera
Ground
- Connect to Vehicle
Body
Wiring System Diagram
1
2
3
Yellow
Black
Red
Video
GND
Power
Camera
REVERSE LIGHT HARNESS CONNECTING
+ GROUND
RCA: YELLOW
POWER + GROUND
NRC-2100
NRC-5000
NRC-7000
NRC-7100
Garnish Type
(Unit: mm)
Locking Nut
 Loading...