

Page 1

PA500S/PA503S/PA503X/
PA503W/PA503SP/PA503XP/
PG603X/PG603W/PG703X/
PG703W/PG707X/PG707W
Lamp Swapping Instruction
Page 2

Replacing the lamp
2-1
2-2
2-1
2-2
Turn the power o and disconnect the projector from the power outlet.
y To reduce the risk of electrical shock, always turn the projector o and disconnect the power cord
before changing the lamp.
y To reduce the risk of severe burns, allow the projector to cool for at least 45 minutes before replac-
ing the lamp.
y To reduce the risk of injuries to ngers and damage to internal components, use caution when re-
moving lamp glass that has shattered into sharp pieces. Before replacing the lamp, clean the lamp
compartment and dispose of cleaning materials. Be careful of sharpedges in the lamp compartment. Wash hands after lamp replacement.
y Only ViewSonic certied lamps are tested with this projector. Use of other lamps may cause electri-
cal shock and re.
y Wear working gloves during lamp replacement.
y Unplug projector power at least 10 minutes before replacing the lamp.
1. Turn the power o and disconnect the projector from the wall socket. If the lamp is hot, avoid burns
by waiting for approximately 45 minutes until the lamp has cooled.
2. Loosen the screw that secures the lamp cover of the
projector until the lamp cover loosens.
3. Remove the lamp cover from the projector.
CAUTION
y Do not turn the power on with the lamp cover
removed.
y Do not insert your ngers between the lamp and the
projector. The sharp edges inside the projector may
cause injuries.
4. Disconnect the lamp connector.
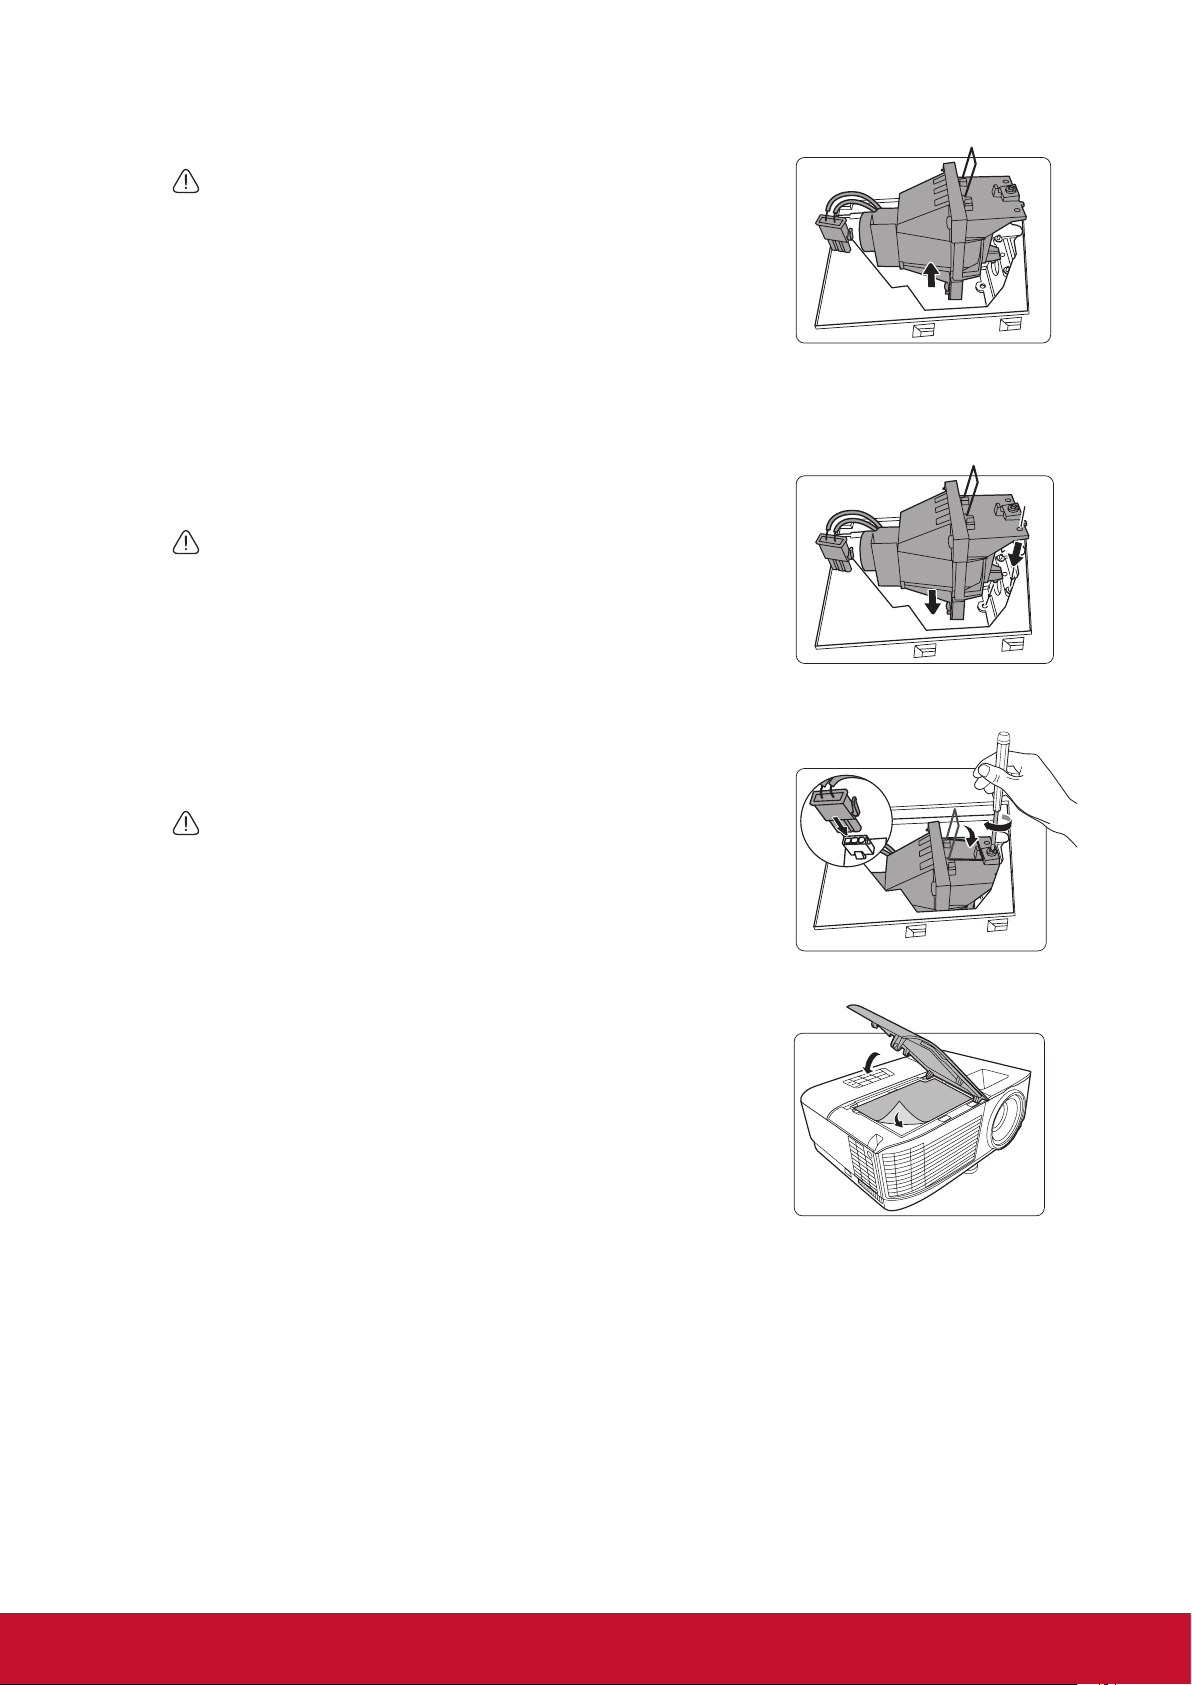
5. Loosen the screw that secures the inner lamp.
6. Lift the handle so that it stands up.
2-1
2-2
4
6
5
1
Page 3
7. Use the handle to slowly pull the lamp out of the projector.
CAUTION
y Pulling it too quickly may cause the lamp to break and scatter
broken glass in the projector.
y Do not place the lamp in locations where water might splash on
it, children can reach it, or near ammable materials.
y Do not insert your hands into the projector after the lamp is
removed. If you touch the optical components inside, it could
cause color unevenness and distortion of the projected images.
8. As show in the gure, insert the new lamp. Align the lamp
using the alignment holes and gently push the lamp into the
locked position
CAUTION
y Do not touch glass of lamp with bare hands. Oils from the skin
can create a hot spot on the lamp and may result with damage to
the lamp.
9. Insert the lamp connector and tighten the screw that secures
the lamp.
CAUTION
y Loosen screw may cause a bad connection, which could result
in malfunction.
y Do not over tighten the screw.
10. Replace the projector’s and lamp cover.
9-1
9-3
9-2
2
Page 4

11. Tighten the screws that secure the lamp cover.
CAUTION
y Loosen screw may cause a bad connection, which could result in
malfunction.
y Do not over tighten the screw.
11-2
11-1
Replacing the lamp
After powering on the projector, open the OSD menu. Go to ADVANCED > Lamp
Settings > Reset Lamp Hours and press Enter. The notication message will be displayed if
you want to reset the lamp hours. Highlight Reset and press Enter. The lamp hours will be reset
to “0”.
CAUTION
y Do not reset if the lamp is not new or replaced as this could cause damage.
3
Page 5

 Loading...