

ViewSonic N2700w User Manual
ViewSonic English- 0 N2700w
English
NextVision™
Wide-Screen
Entertainment
Display
User Guide
Guide de l’utilisateur
Bedienungsanleitung
Guía del usuario
Användarhandbok
N2700w
Full 27.0" Wide-Screen
Entertainment Display

ViewSonic English- 1 N2700w
English
Contents
Installation ............................................................................ 3
Precautions ................................................................................................3
Package Contents......................................................................................3
Quick Installation........................................................................................ 5
Getting Started...................................................................... 12
Initial Setup ................................................................................................ 12
Using the On Screen Display (OSD) ..........................................................15
Remote Controls ........................................................................................17
To adjust the screen image.........................................................................18
Main Menu Controls ............................................................. 19
Picture Adjustment Tab...............................................................................19
Display Adjustment Tab ..............................................................................24
TV Setting Tab (Requires connection of compatible VXP Adapter) ..........26
Audio Settings Tab .....................................................................................30
Parental Lock Tab.......................................................................................32
Set Up Tab ................................................................................................. 37
Input sources..............................................................................................39
Audio Sources............................................................................................ 40
POP Screen ...............................................................................................41
Other Information ................................................................. 42
Specifications .............................................................................................42
Compatibility...............................................................................................43
Troubleshooting..........................................................................................45
Customer Support ......................................................................................46
Cleaning the LCD TV .................................................................................47
Limited Warranty ........................................................................................ 48
Appendix............................................................................... 49
Safety Guidelines.......................................................................................49
Compliance Information for U.S.A. .............................................................49

ViewSonic English- 2 N2700w
English
Copyright © ViewSonic Corporation, 2003. All rights reserved.
Macintosh and Power Macintosh are registered trademarks of Apple Computer, Inc.
Microsoft, Windows, Windows NT, and the Windows logo are registered trademarks of Microsoft
Corporation in the United States and other countries.
ViewSonic, the three birds logo, OnView, ViewMatch, NextVision, and ViewMeter are registered
trademarks of ViewSonic Corporation.
VESA is a registered trademark of the Video Electronics Standards Association. DPMS and DDC
are trademarks of VESA.
Disclaimer: ViewSonic Corporation shall not be liable for technical or editorial errors or omissions
contained herein; nor for incidental or consequential damages resulting from furnishing this material,
or the performance or use of this product.
In the interest of continuing product improvement, ViewSonic Corporation reserves the right to
change product specifications without notice. Information in this document may change without
notice.
No part of this document may be copied, reproduced, or transmitted by any means, for any purpose
without prior written permission from ViewSonic Corporation.
Product Registration
To meet your future needs, and to receive any additional product information as it becomes available, please register
your product on the Internet at: www.viewsonic.com. The ViewSonic® Wizard CDROM also provides an opportunity for
you to print the registration form, which you may mail or fax to ViewSonic.
For Your Records
Product Name: ViewSonic N2700w
Model Number: VSATV27330-1W
Serial Number:
Purchase Date:
Product disposal at end of product life
ViewSonic is concerned about the preservation of our environment. Please dispose of this product
properly at the end of its useful life. Your local waste disposal company may provide information
about proper disposal.

English
Installation
Congratulations on your purchase of a ViewSonic® NextVision ® LCD TV.
Important! Save the original box and all packing material for future shipping needs.
The NextVision line of LCD TV is the next innovation from ViewSonic. Through the use of the new
VXP port (located on the rear of the monitor) numerous expansion options are available for your
NextVision LCD TV.
Precautions
Sit at least 30" from your NextVision LCD TV.
Avoid touching the screen. Skin oils are difficult to remove.
Never remove the rear cover when the LCD TV power on. Your NextVision LCD TV contains
high-voltage parts. Y0ou may be seriously injured if you touch them.
Avoid exposing your NextVision LCD TV to direct sunlight or another heat source. Orient your
NextVision LCD TV away from direct sunlight to reduce glare.
Always handle your NextVision LCD TV with care when moving it.
Place your NextVision LCD TV in a well ventilated area. Do not place anything on your NextVision
LCD TV that prevents heat dissipation.
Ensure the area around the NextVision LCD TV is clean and free of moisture.
Do not place heavy objects on the NextVision LCD TV, video cable, or power cord.
If smoke, abnormal noise, or strange odor is present, immediately switch the NextVision LCD TV
off and call your dealer or ViewSonic. It is dangerous to continue using the NextVision LCD TV.
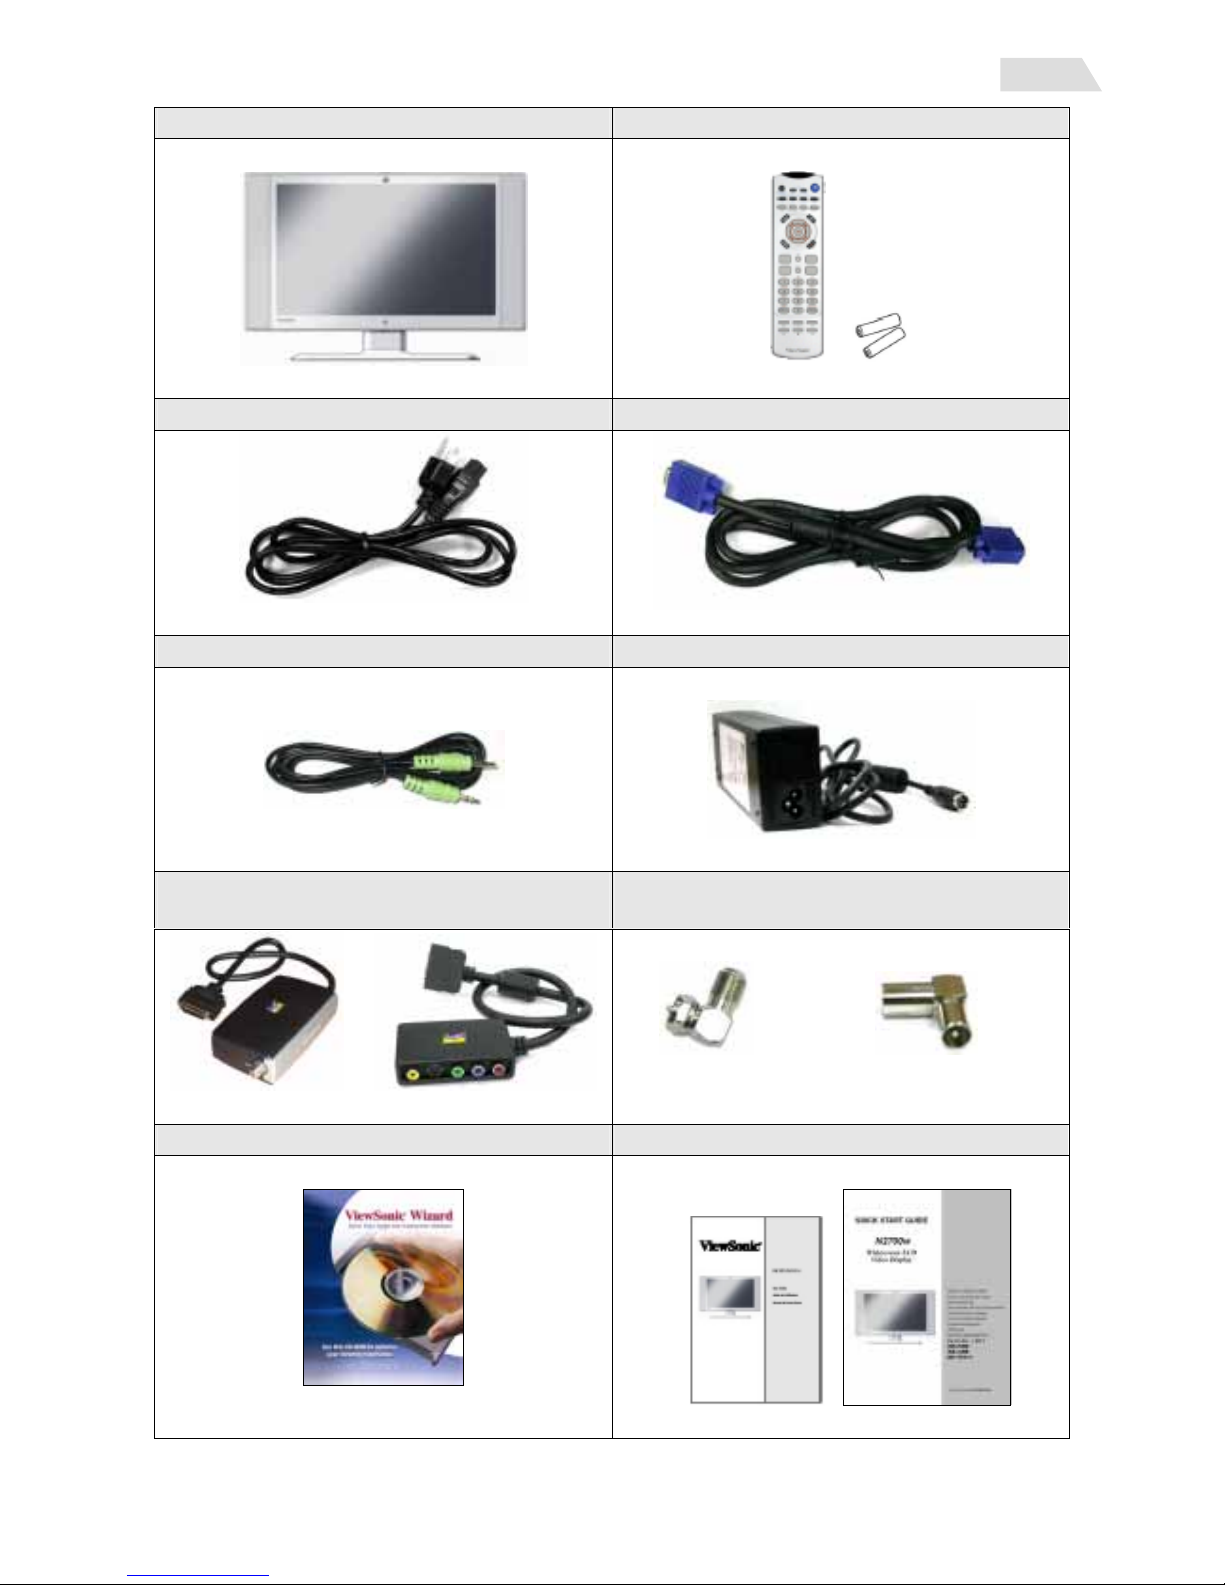
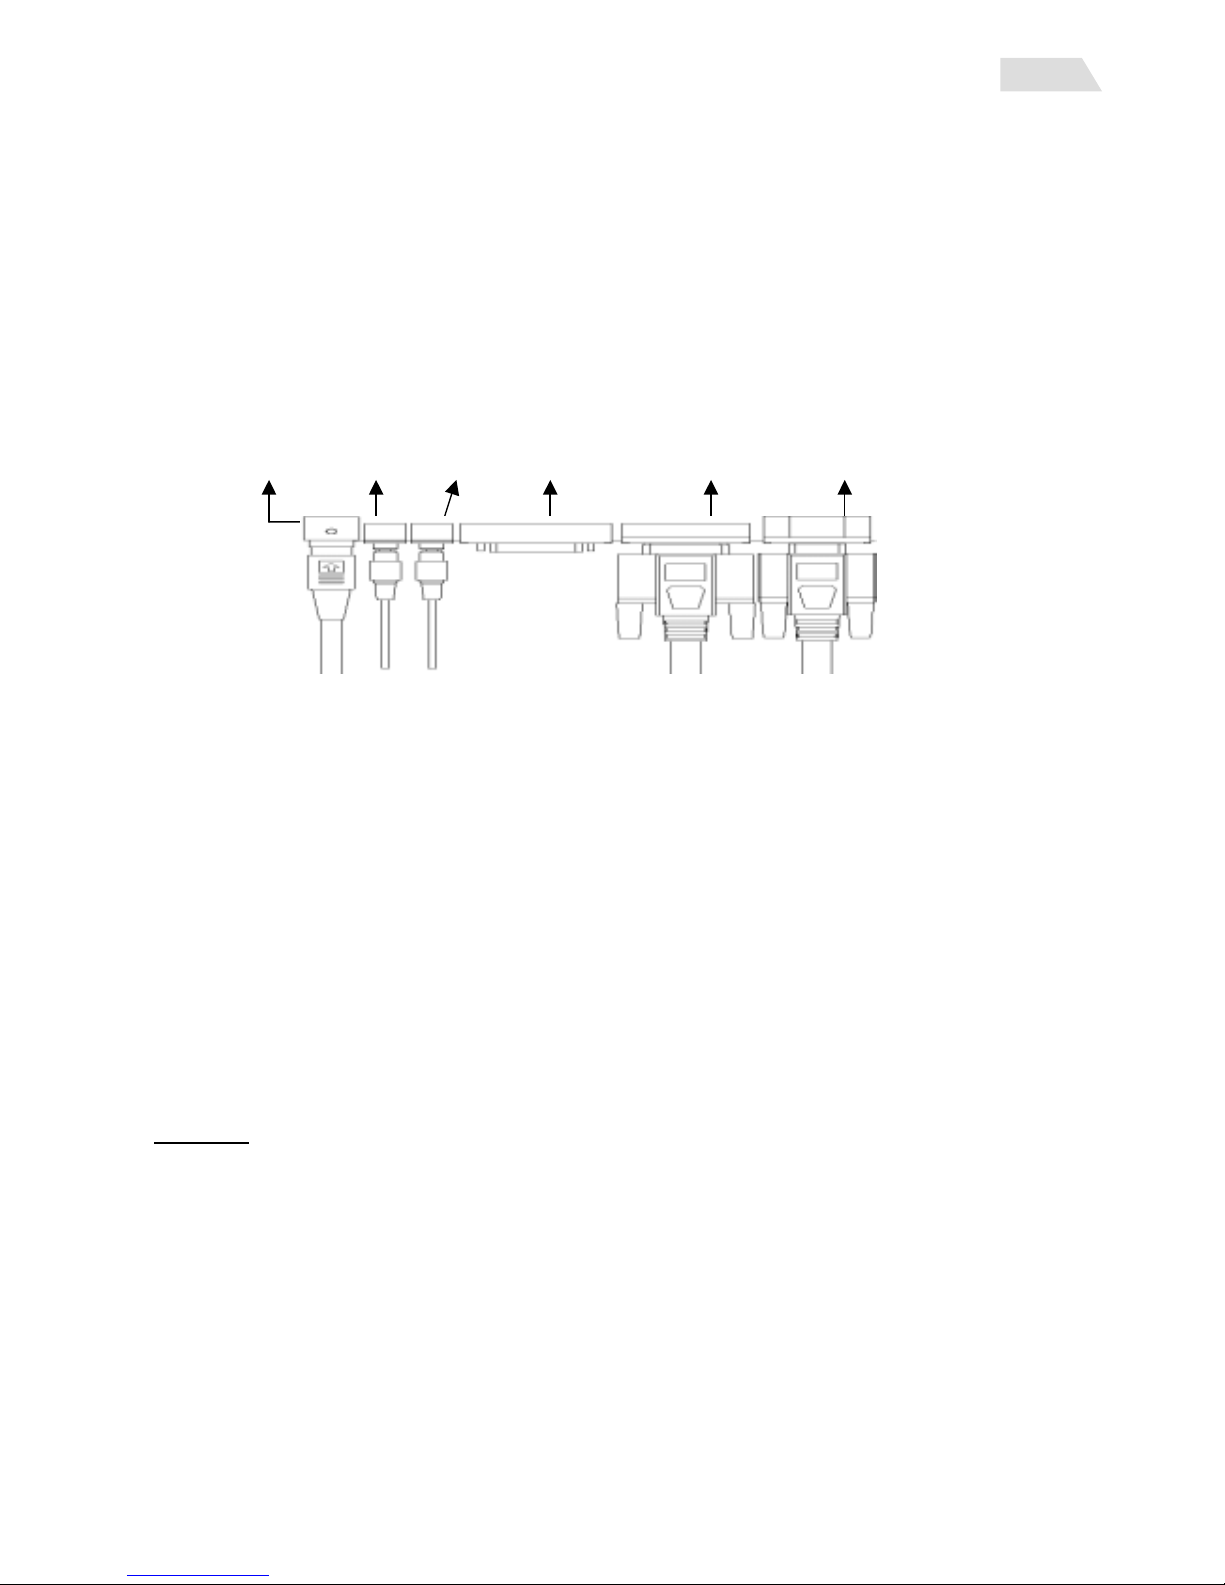
Package Contents
Your NextVision package includes:
1. NextVision N2700w LCD TV
2. Remote Control (included battery)
3. US Power cord or Schuko (Europe) Power Cord
4. Analog VGA Video Cable
5. Audio cable (stereo mini jack)
6. AC/DC Adapter
7. Right Angle F-Connector or Right Angle Europe Connector.
8. ViewSonic Wizard CD-ROM and Quick Start Guide
9. The package may also include a VXP TV or Video Adapter
ViewSonic English- 3 N2700w
ViewSonic English- 4 N2700w
English
N2700w LCD TV Remote Control
Power cord VGA Cable
3.5mm Stereo Audio cable AC/DC Adapter
VXP TV (VXP 25) or
Video Adapter (VXP 10)
Right Angle F-Connector (or Europe
Connector)
(VXP 25) (VXP 10)
OR
(F-Connector) (Europe Connector)
Wizard CD-ROM Quick Start Guide / User Guide
English
Quick Installation
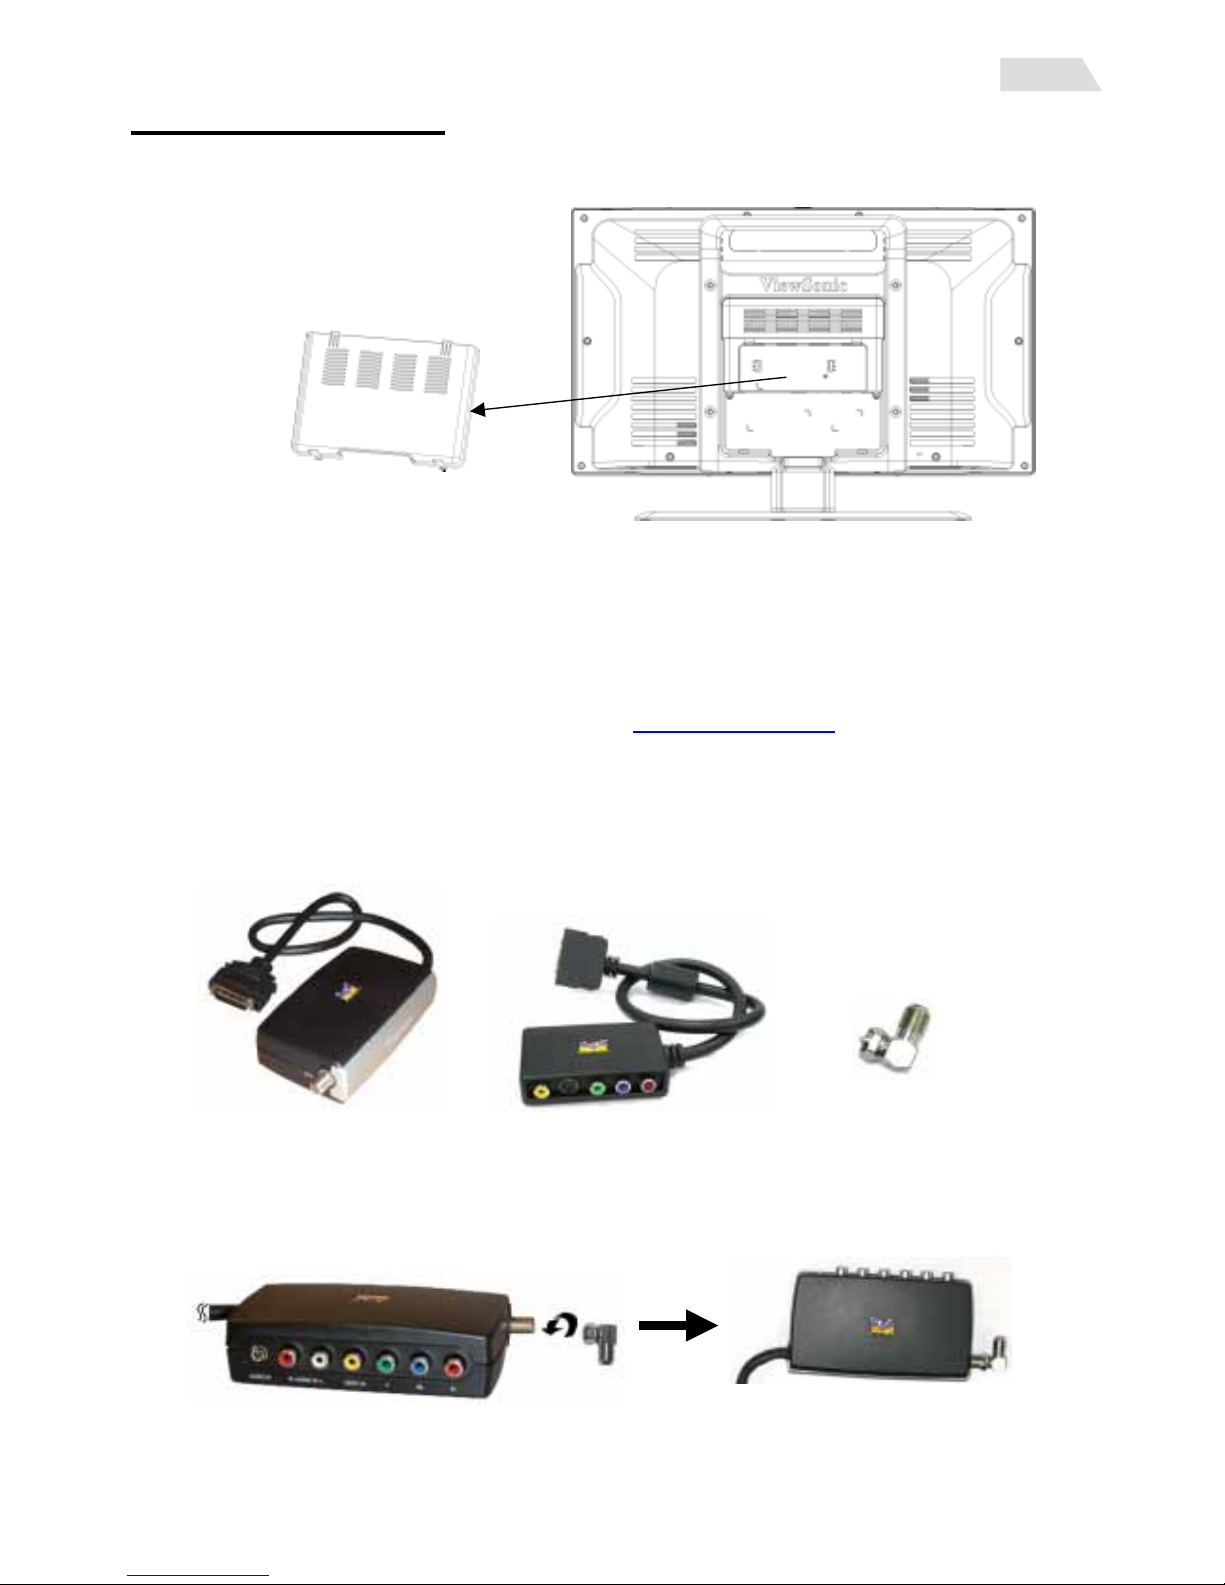
1 Remove one back panel cover
2.Connect a (optional) TV tuner or Video Module.
Depending on where purchased, your LCD TV may already include the VXP-25 TV Module (as
shown below) or VXP 10 Video Adapter Module that allows connection to most AV Devices.
NOTE: The VXP-25 TV and VXP-10 Video Adapter modules may also be purchased separately,
please contact ViewSonic for more information (www.viewsonic.com
). Further detail about AV
connections are included within the VXP Package.
VXP 25: External Box that provides TV Tuner, CVBS, and YPbPr Input functionality.
VXP 10: External Box that provides SVIDEO, CVBS, and YPbPr Inputs only (i.e. No TV Tuner).
Right Angle F-Connector: External connector for VXP 25 may vary by region.
Right Angle Adapter
Figure (NTSC version
shown)
V
XP25 TV Module
VXP10 TV Module
2.1 Connect the right angle F-Connector to the VXP 25 TV module as shown:
ViewSonic English- 5 N2700w
English- 6 w
English
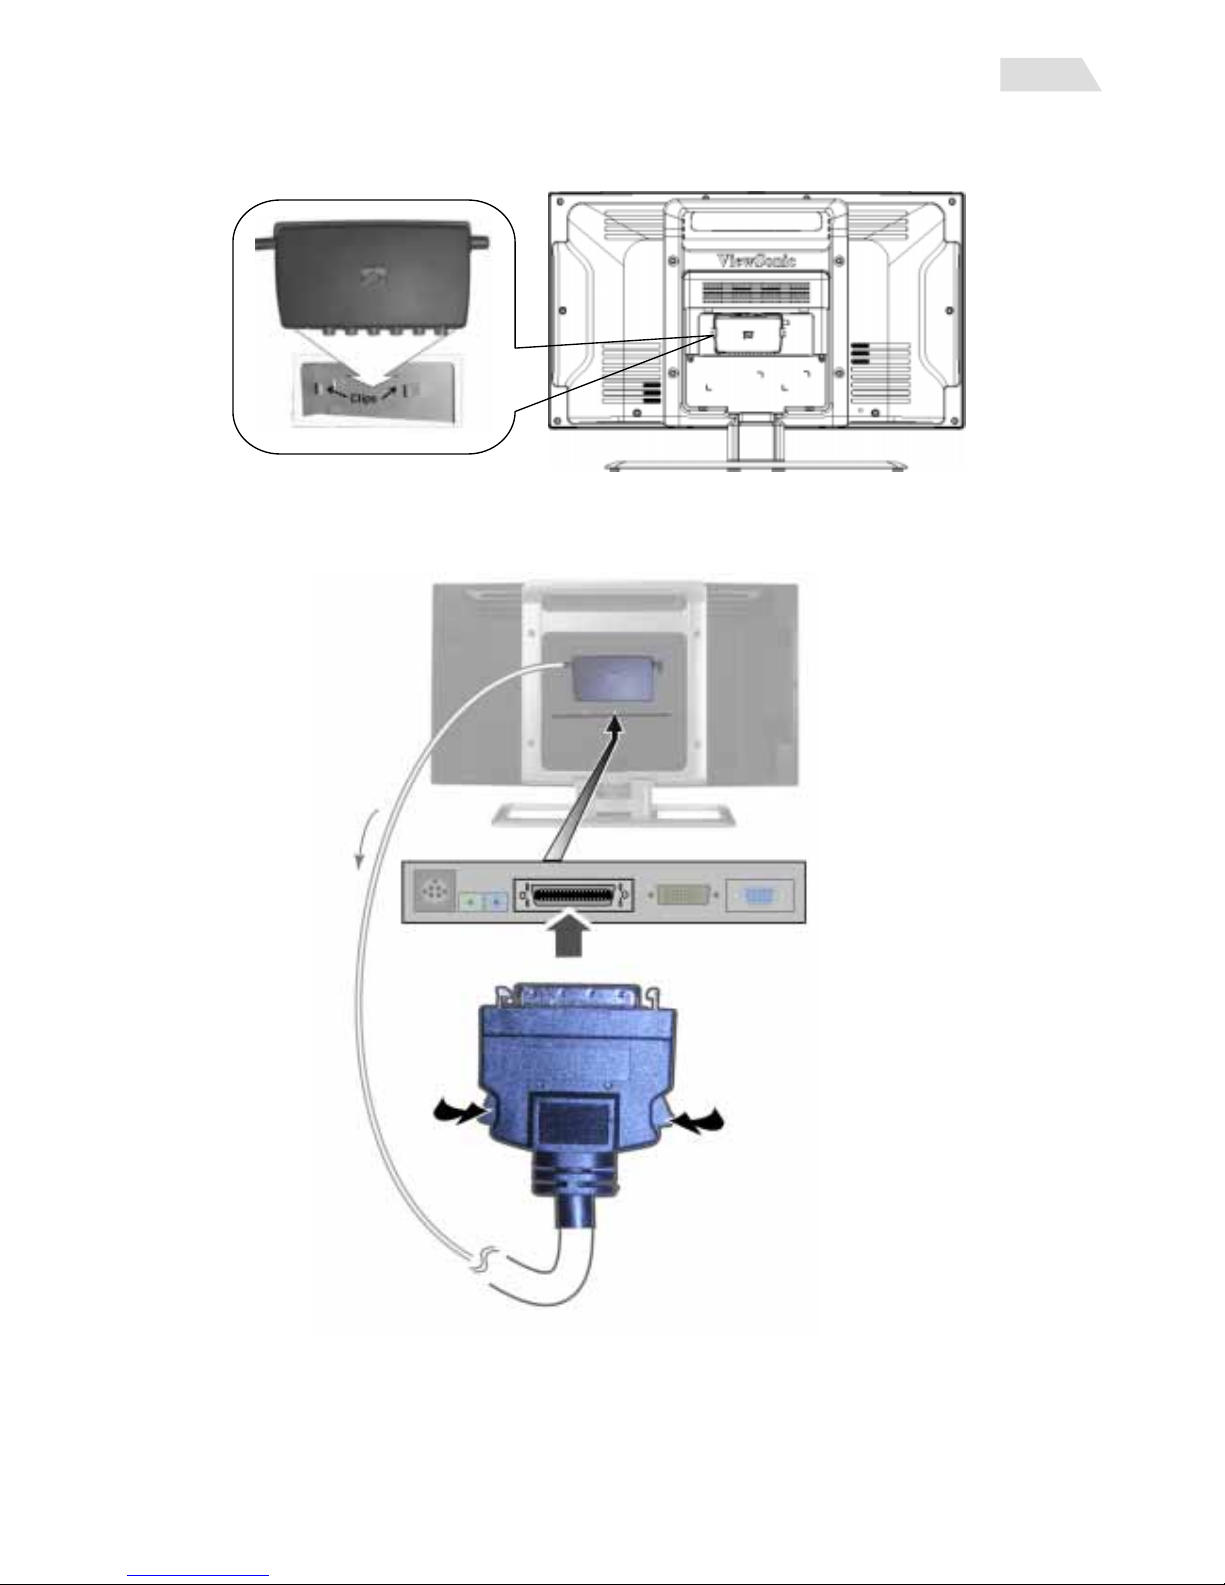
2.2 Mount the VXP 25 TV module under the hood and put the adapter into the clips on the back of
the TV as following picture.
2.3.Connect the output cable of the VXP25 to the VXP input located on the LCD TV monitor.
ViewSonic N2700
Pinch both sides
as you plug in the
connector
ViewSonic English- 7 N2700w
English
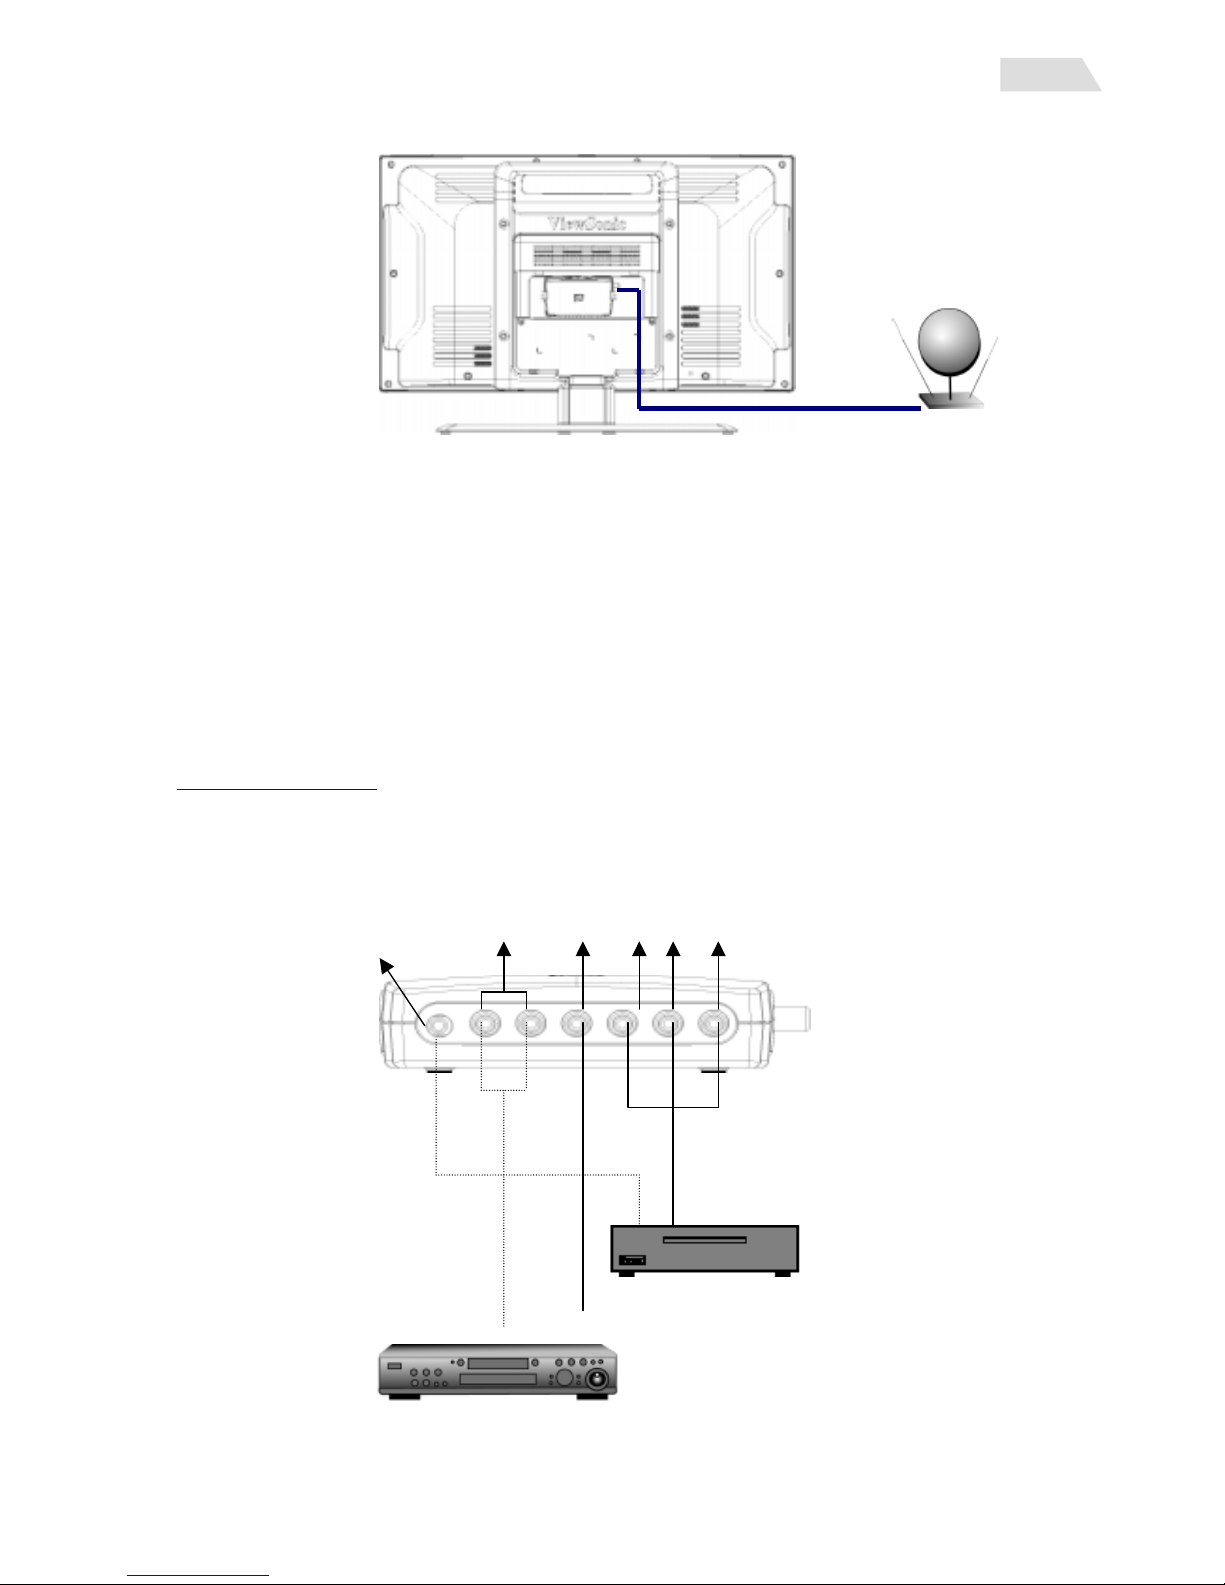
3 Connect VXP adapter to RF
Cable & Antenna
4 Connect AV
To play a video form DVD or VCR, you must connect the correct output ports to the correct input
ports on the VXP adapter.
4.1 Composite video source: Connect with Video-in and R-audio in- L ports. Or connect the
audio-in line with R and L audio-in.
4.2 YPbPr video source: please connect with Y, Pb and Pr Video-in and audio-line in (3.5mm
stereo jack) ports.
(NOTE: If Desired, the RCA L /R Jacks may be used as an audio input corresponding to the
YPbPr input; however a change on the OSD is required. See page 39)
4.3 S-video input. SVIDEO is only available on the optional VXP10 module. Contact ViewSonic at
www.viewsonic.com
for ordering information.
NOTE: “AUDIO IN” Jack requires (optional) Stereo Mini to RCA adapter. If desired, the “R-Audio
In-L” (RCA) jacks may be used instead.
Component video
IN ports
Y
PbVideo inR-audio in-L
A
udio in
P
r
HD receiver/ DVD player
DVD or VCR Player
ViewSonic English- 8 N2700w
English
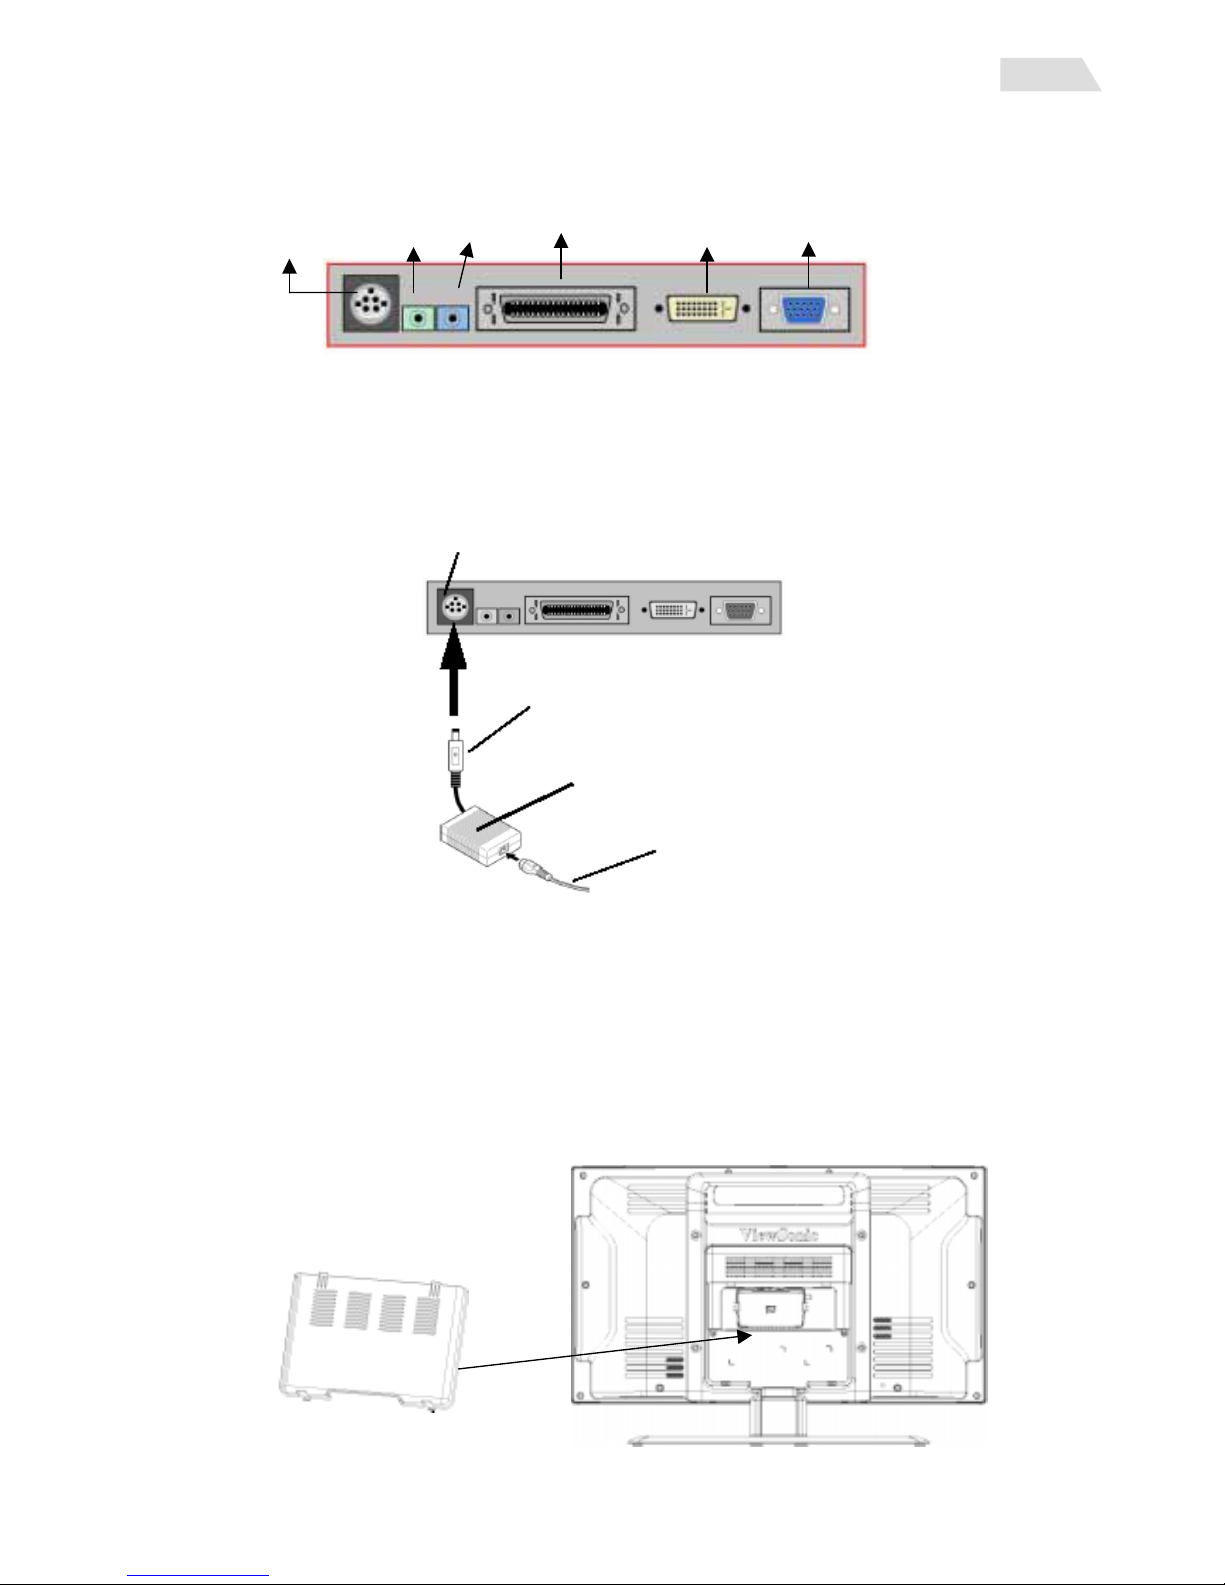
5.Audio Installation (optional)
You can connect speakers or a headphone (3.5 mm ø mini-jack) to back audio-out port for
listening.
Power in
VXP
DVI
VGA
audio out
audio in
6.Connect power cord and AC/DC adapter
Connect the Power Plug form the DC power Supply to the Power Port on the back of the LCD TV.
A
C Power Cord
shown in step 9
DC Power Supply
Power Plu
g
NOTE: always turn off the TV power when connecting the AC cords. Don’t use power supply
voltage other than 100-240 VAC. The violation may cause electric shock or fire.
7.Installation is almost complete, please re-attach the back panel.
And follow the initial setup to get starting to watch TV or Video.
ViewSonic English- 9 N2700w
English
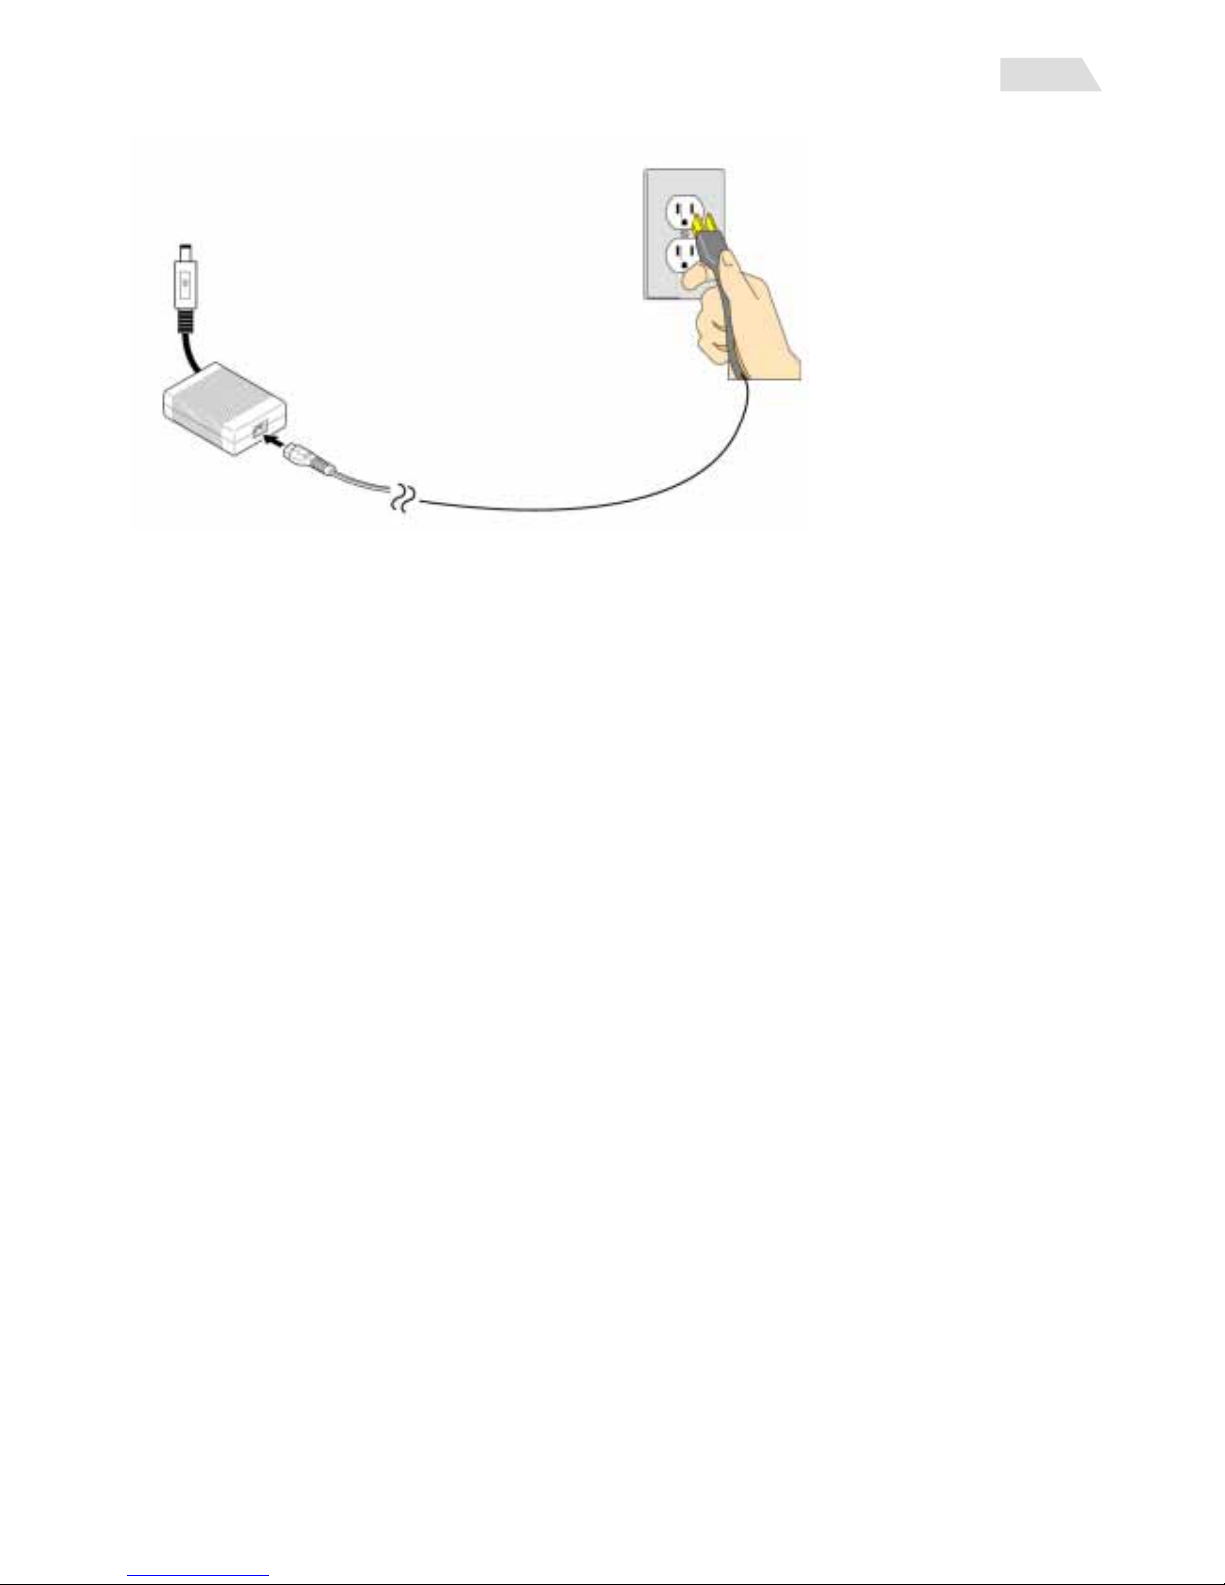
8. Plug into AC power source (wall outlet)
ViewSonic English- 10 N2700w
English
Installation with PC
1 Remove rear panel cover
2 Connect power cord and AC/DC adapter
3 Connect video cable
Make sure both the LCD TV and computer are turned OFF
Connect the video cable (VGA or DVI port) from the LCD TV to the computer
Macintosh users: Models older than G3 require a Macintosh adapter. Attach the adapter to the
computer and plug the video cable into the adapter. To order a ViewSonic® Macintosh adapter,
contact ViewSonic Customer Support.
Note: Only one RGB/DVI device may be connected at a time
Power in audio in audio out VXP DVI VGA
4 Turn ON LCD TV and computer
Turn ON the LCD TV, then turn ON the computer.
NOTE: Windows users may receive a message asking them to install the INF file. This is on the
CD.
5. Insert the ViewSonic Wizard CD into the computer’s CD drive.
Follow the on-screen instructions If your computer does not have a CD-ROM drive, see “Customer
Support."
(1) Wait for the CD-ROM to auto-start.
NOTE: If the CD-ROM does not auto-start: double-click on the CD-ROM icon in the Windows
Explorer, then double-click on viewsonic.exe.
(2) Follow the on-screen instructions.
6.Audio Installation (optional)
Speakers
Connect the audio cable to the AUDIO OUT port of your computer’s sound card, then to
the LCD TV’s AUDIO IN port.
7. Windows users: Set the timing mode to 1280 x 720 @ 60Hz
Example: 1280 x 720 @ 60 Hz.
For instructions on changing the resolution and refresh rate, see the graphic card’s user guide.
NOTE: The N2700w works best with 1280 x720 resolution (supported on many modern video
cards). Most other common PC resolutions will work with reduced results.
8.Setting the Timing Mode (PC RGB Input)
Setting the timing mode is important for maximizing the quality of the screen image and minimizing
eye strain. The timing mode consists of the resolution (example 1280 x 720) and refresh rate (or

ViewSonic English- 11 N2700w
English
vertical frequency; example 60 Hz). After setting the timing mode, use the OSD
controls to adjust the screen image.
NOTE: For the best picture quality set your NextVision
®
LCD TV timing mode to: 1280 x 720 @
60Hz.
To set the Timing Mode:
1. Set the resolution: Right-click on the Windows desktop > Properties >Settings > set the
resolution.
2. Set the refresh rate: See your graphic card's user guide for instructions.
WARNING
: Do not set the graphics card in your computer to exceed the maximum refresh rate of
75Hz; doing so may result in permanent damage to your LCD TV.
9. Choose a suitable video input sources for best image.
Pressing SOURCES button on the top of panel or via remote control to show an Input Sources
menu. Set TV for TV function or set CVBS for AV function. (also see page 39 for the detail)
10.Installation is complete. Enjoy your new ViewSonic, LCD TV.
You can register your product online at the website for your region. See the Customer Support
table in this guide. (page 46)
English
Getting Started
Initial Setup
1. Power on
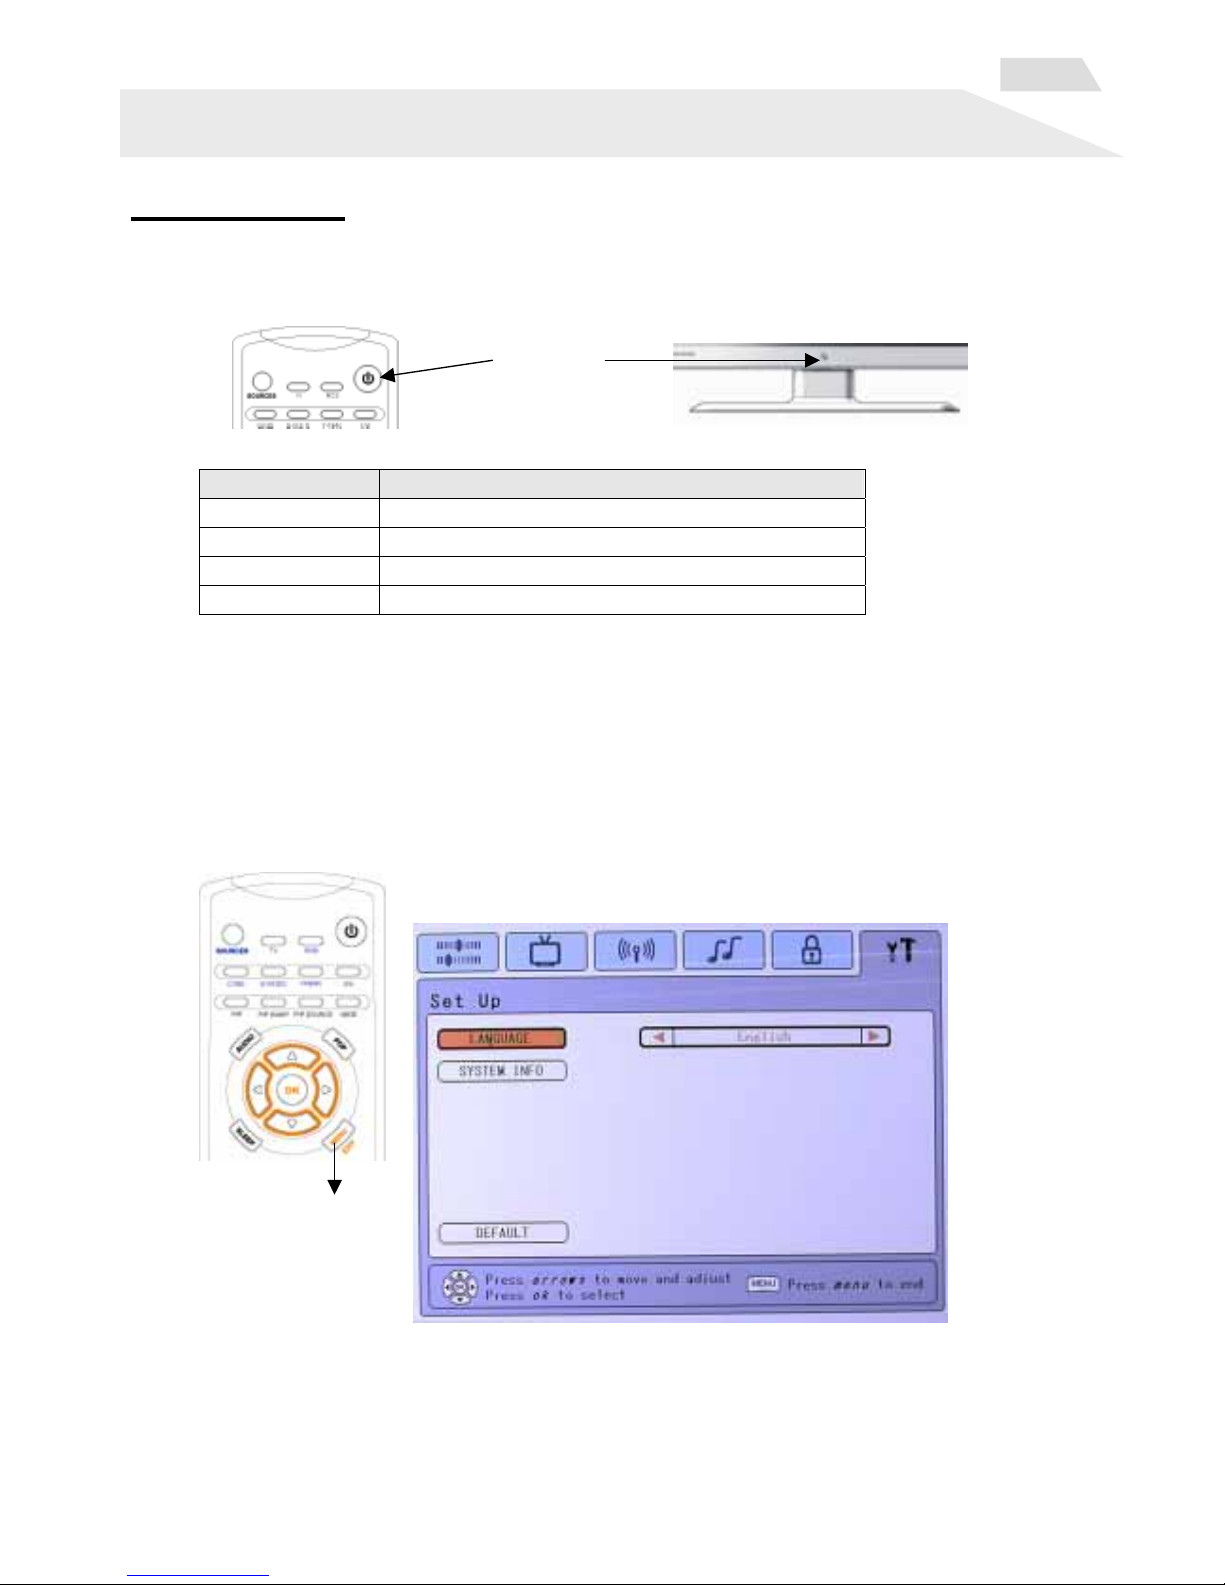
1.1 Switch the POWER button on the front of panel or via remote control to turn on the TV.
Power on
Indicator Explain
Blue blinking The system is ready for Power on
Blue Power on
Amber blinking System reset
Amber No signal detected
1.2 If you want to watch a video from DVD or VCR, please also turn on the AV device.
2. Set a language
Set a language to suit your habit. Languages shall be defined by each region. Pressing MEMU
button on the top of panel or via remote control to show an OSD menu. Choose Set Up tab to
show the Language page and select available languages. (also see page 37 for the detail)
ViewSonic English- 12 N2700w

ViewSonic English- 13 N2700w
English
3. Input sources
Choose a suitable video input sources for best image. Pressing SOURCES button on the top of
panel or via remote control to show an Input Sources menu. Set TV for TV function or set
Composite for AV function. (also see page 39 for the detail) Press the SOURCES button to end.
4.Set Tuner Input
4.1 NTSC system
Before using the built in TV tuner for the first time the following step must be completed. Please set
TUNER INPUT to the appropriate RF system.
Antenna: Select this for off-air use.
CATV/ Japan CABLE: Select this if connected to the cable system.
HRC/IRC: If connected to a cable system, see the documents that came from your service
provider for more information.
NOTE: If you are connecting to an external or internal antenna, “ANTENNA” is the correct choice.
If you are connecting to a cable box “CATV” is the correct choice. Check with your local service
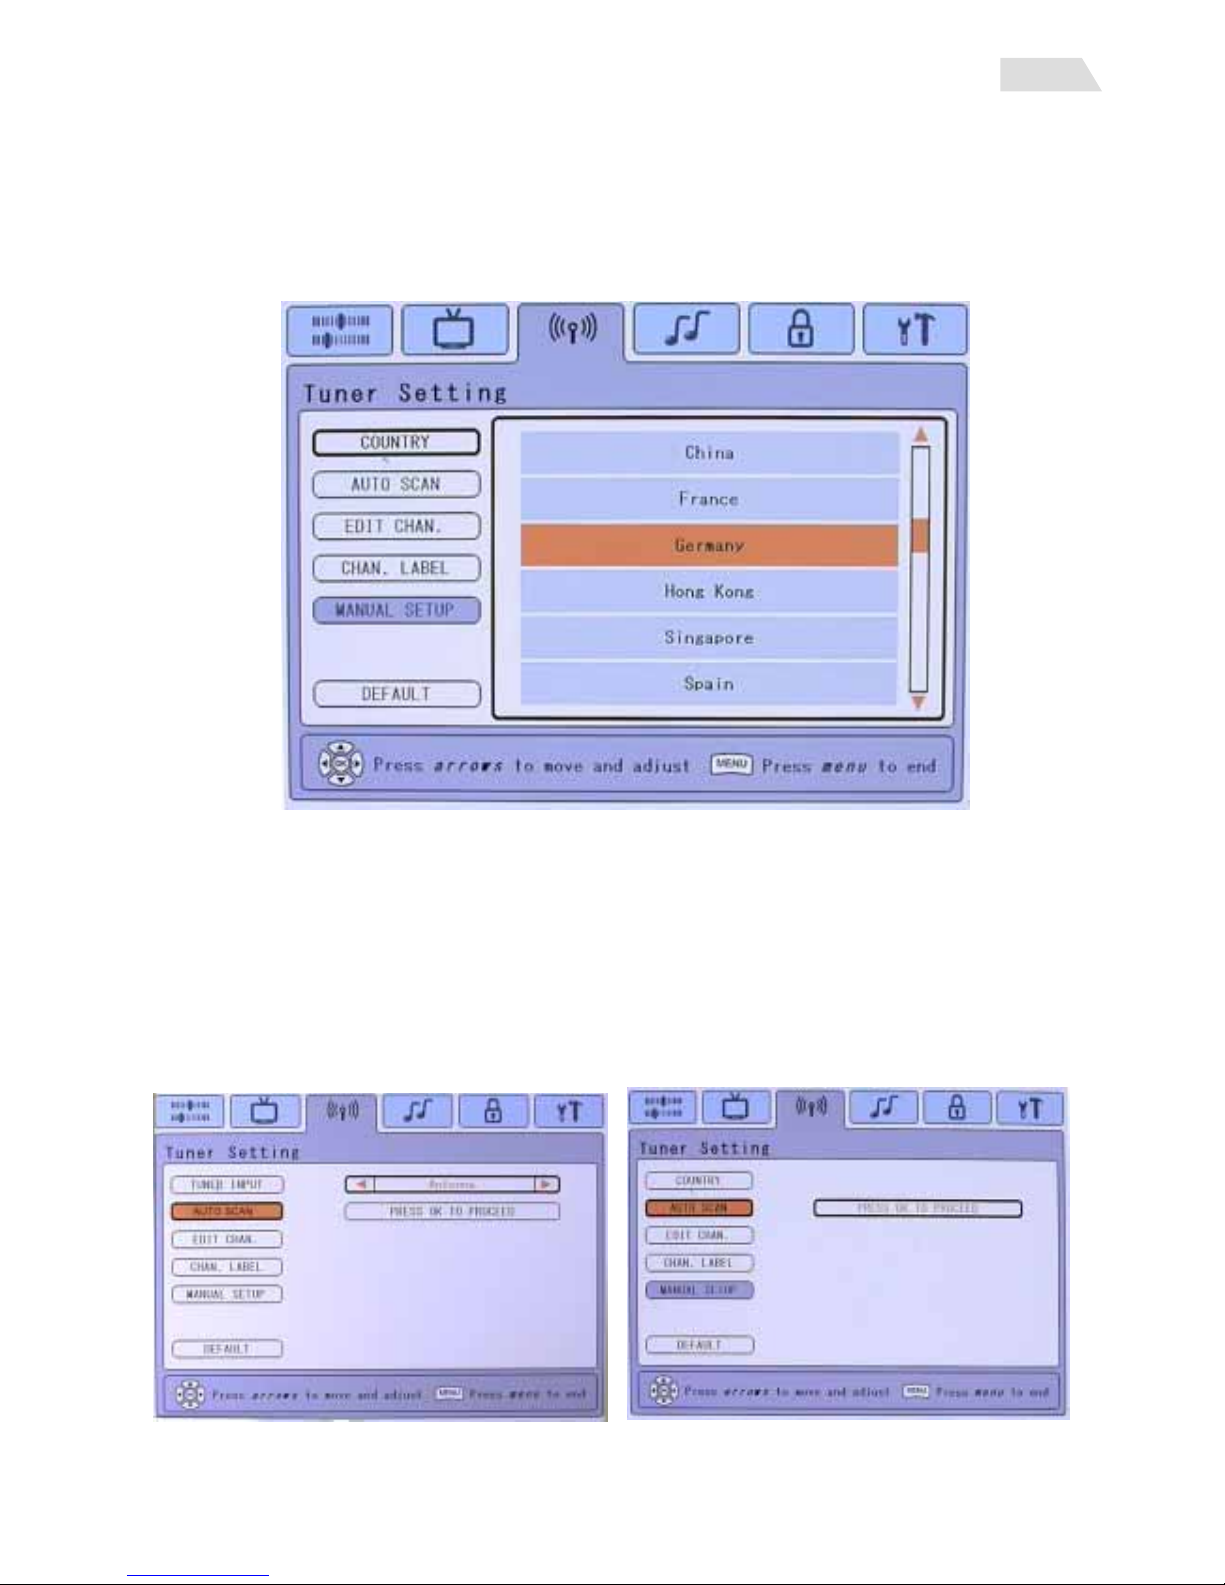
ViewSonic English- 14 N2700w
English
provider for detail. If set incorrectly, not all available channels will be viewable.
4.2 PAL system
The PAL (Phase Alternation Line) is different from NTSC system that most be used in Europe and
some of Asia area.
When you connect the VXP25 of PAL system, the TUNER SETTING Tab will display as following.
Please choose one country that your location.
5. Auto-scan the TV channel
This function searches for and finds all available channels in your area.
First time you turn on the TV, you must automatically search all active channels. Pressing MENU
button on the top of panel or via remote control to show an OSD menu. Choose AUTO SCAN
page of Tuner Setting tab and pressing OK to scan channels.
5.2 PAL system 5.1 NTSC system
English
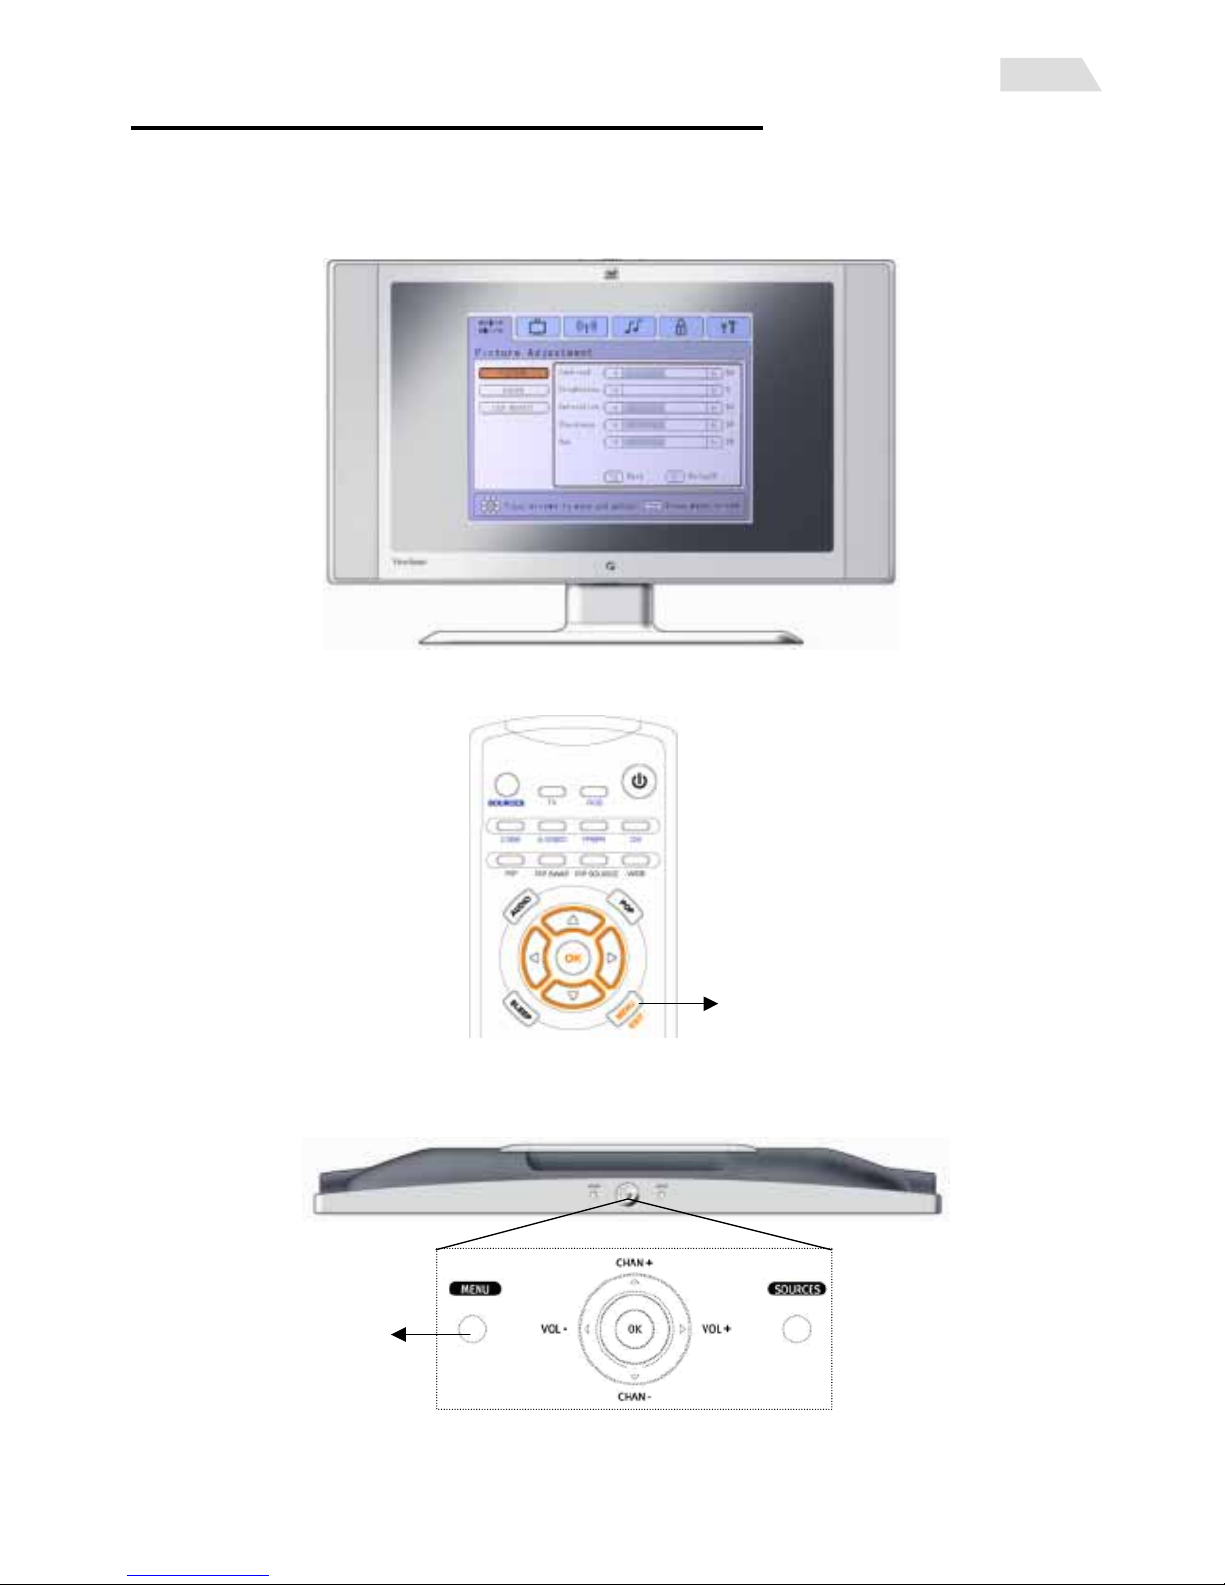
Using the On Screen Display (OSD)
Use the buttons on the top panel or use the remote control to make all adjustments to the On Screen
Display (OSD).The OSD controls are explained at the top of the next page and are defined in “Main
Menu Controls” on page 19.
Remote Control
Top panel
ViewSonic English- 15 N2700w
 Loading...