

Page 1

EP4220
Multimedia Digital Poster
User Guide
IMPORTANT: Please read this User Guide to obtain important information on installing
and using your product in a safe manner, as well as registering your product for future
service. Warranty information contained in this User Guide will describe your limited
coverage from ViewSonic Corporation, which is also found on our web site at http://
www.viewsonic.com in English, or in specic languages using the Regional selection
box in the upper right corner of our website. “Antes de operar su equipo lea cu
idadosamente las instrucciones en este manual”
Model No. VS15186
A
Page 2

Compliance Information
NOTE: This section addresses all connected requirements and statements regarding regulations.
Confirmed corresponding applications shall refer to nameplate labels and relevant markings on unit.
FCC Statement
This device complies with Part 15 of the FCC Rules. Operation is subject to the following two
conditions: (1) this device may not cause harmful interference, and (2) this device must accept any
interference received, including interference that may cause undesired operation.
NOTE: This equipment has been tested and found to comply with the limits for a Class A/Class B
digital device, pursuant to Part 15 of the FCC Rules. These limits are designed to provide reasonable
protection against harmful interference when the equipment is operated in a commercial environment.
This equipment generates, uses, and can radiate radio frequency energy and, if not installed and
used in accordance with the instructions, may cause harmful interference to radio communications.
Operation of this equipment in a residential area is likely to cause harmful interference in which case
the user will be required to correct the interference at his/her own expense.
• Reorient or relocate the receiving antenna.
• Increase the separation between the equipment and receiver.
• Connect the equipment into an outlet on a circuit different from that to which the receiver is
connected.
• Consult the dealer or an experienced radio/TV technician for help.
Warning: To comply with the limits for the Class A/Class B digital device, pursuant to Part 15 of the
FCC Rules, this device must be installed in computer equipment certified to comply with the Class
A/Class B limits. All cables used to connect the computer and peripherals must be shielded and
grounded. Operation with non-certified computers or non-shielded cables may result in interference to
radio or television reception. Changes and modifications not expressly approved by the manufacturer
could void the user’s authority to operate this equipment.
For Canada
CAN ICES-3 (A/B)/NMB-3(A/B)
i
Page 3
CE Conformity for European Countries
The device complies with the EMC Directive 2004/108/EC and Low Voltage Directive
2006/95/EC.
Following information is only for EU-member states:
The mark shown to the right is in compliance with the Waste Electrical and Electronic
Equipment Directive 2012/19/EU (WEEE).
The mark indicates the requirement NOT to dispose of the equipment as unsorted municipal
waste, but use the return and collection systems according to local law.
If the batteries, accumulators and button cells included with this equipment, display the
chemical symbol Hg, Cd, or Pb, then it means that the battery has a heavy metal content of
more than 0.0005% Mercury or more than, 0.002% Cadmium, or more than 0.004% Lead.
Industry Canada Notice
This device complies with Canadian RSS-210.To prevent radio interference to the licensed service,
this device is intended to be operated indoors and away from windows to provide maximum shielding.
Equipment (or its transmitting antenna) that is installed outdoors is subject to licensing. The installer of
this radio equipment must ensure that the antenna is located or pointed such that it does not emit RF
field in excess of Health Canada limits for the general population; consult Safety Code 6, obtainable
from Health Canada’s website www.hc-sc.gc.ca/rpb.
R&TTE Compliance Statement
This device complies with the Essential Requirements of the R&TTE Directive of the European Union
(1999/5/EC). This equipment meets the following conformance standards:
ETSI EN 300 328
EN 301 489-01
EN 301 489-17
EN 62311
Notified Countries: Germany, UK, Netherlands, Belgium, Sweden, Denmark,
Finland, France, Italy, Spain, Austria, Ireland, Portugal, Greece, Luxembourg,
Estonia, Latvia, Lithuania, Czech Republic, Slovakia, Slovenia, Hungary, Poland and Malta.
ii
Page 4
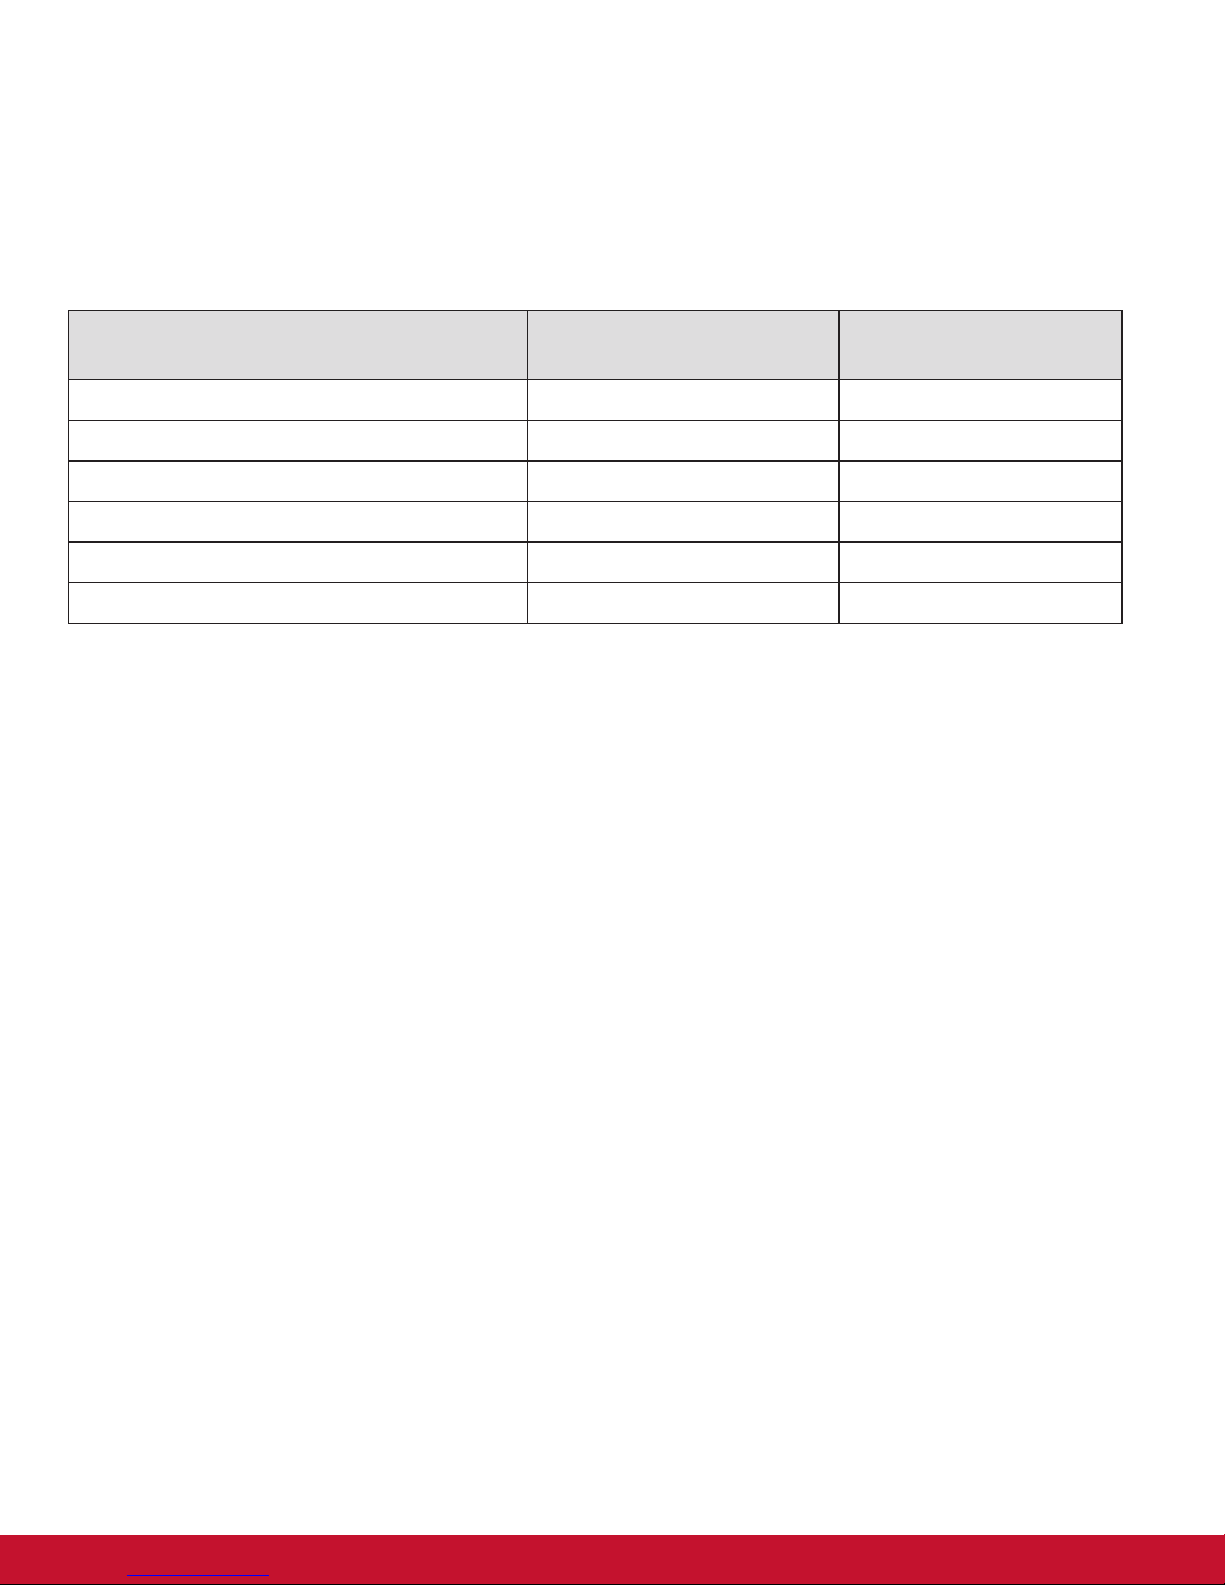
Declaration of RoHS2 Compliance
This product has been designed and manufactured in compliance with Directive 2011/65/EU of the
European Parliament and the Council on restriction of the use of certain hazardous substances in
electrical and electronic equipment (RoHS2 Directive) and is deemed to comply with the maximum
concentration values issued by the European Technical Adaptation Committee (TAC) as shown below:
Substance
Proposed Maximum
Concentration
Actual Concentration
Lead (Pb) 0,1% < 0,1%
Mercury (Hg) 0,1% < 0,1%
Cadmium (Cd) 0,01% < 0,01%
Hexavalent Chromium (Cr
6+
) 0,1% < 0,1%
Polybrominated biphenyls (PBB) 0,1% < 0,1%
Polybrominated diphenyl ethers (PBDE) 0,1% < 0,1%
Certain components of products as stated above are exempted under the Annex III of the RoHS2 Directives as noted below:
Examples of exempted components are:
1. Mercury in cold cathode uorescent lamps and external electrode uorescent lamps (CCFL and
EEFL) for special purposes not exceeding (per lamp):
(1) Short length (≦500 mm): maximum 3.5 mg per lamp.
(2) Medium length (>500 mm and ≦1,500 mm): maximum 5 mg per lamp.
(3) Long length (>1,500 mm): maximum 13 mg per lamp.
2. Lead in glass of cathode ray tubes.
3. Lead in glass of uorescent tubes not exceeding 0.2% by weight.
4. Lead as an alloying element in aluminium containing up to 0.4% lead by weight.
5. Copper alloy containing up to 4% lead by weight.
6. Lead in high melting temperature type solders (i.e. lead-based alloys containing 85% by weight or
more lead).
7. Electrical and electronic components containing lead in a glass or ceramic other than dielectric ceramic in capacitors, e.g. piezoelectronic devices, or in a glass or ceramic matrix compound.
iii
Page 5

Safety Precautions
FOR OPTIMUM PERFORMANCE, PLEASE NOTE THE FOLLOWING WHEN SETTING UP AND
USING THE LCD COLOR MONITOR:
• DO NOT REMOVE MONITOR BACK COVER. There are no user serviceable parts inside and
opening or removing covers may expose you to dangerous shock hazards or other risks. Refer all
servicing to qualied service personnel.
• Do not spill any liquids into the cabinet or use your monitor near water.
• Do not insert objects of any kind into the cabinet slots, as they may touch dangerous voltage
points, which can be harmful or fatal or may cause electric shock, re or equipment failure.
• Do not place any heavy objects on the power cord. Damage to the cord may cause shock or re.
• Do not place this product on a sloping or unstable cart, stand or table, as the monitor may fall,
causing serious damage to the monitor.
• Do not place any objects onto the monitor and do not use the monitor outdoors.
• The inside of the uorescent tube located within the LCD monitor contains mercury. Please follow
the laws or rules of your municipality to dispose of the tube properly.
• Do not bend power cord.
• Do not use monitor in high temperature, humid, dusty, or oily areas.
• If monitor or glass is broken, do not come in contact with the liquid crystal and handle with care.
• Allow adequate ventilation around the monitor, so that heat can properly dissipate. Do not
block ventilated openings or place the monitor near a radiator or other heat sources. Do not put
anything on top of the monitor.
• The power cable connector is the primary means of detaching the system from the power supply.
The monitor should be installed close to a power outlet, which is easily accessible.
• Handle with care when transporting. Save packaging for transporting.
• Please clean the holes of back cabinet to reject dirt and dust at least once a year because of set
reliability.
• If using the cooling fan continuously, it’s recommended to wipe holes a minimum of once a month.
• When installing the remote control batteries;
- Align the batteries according to the (+) and (-) indications inside the case.
- Align the (-) indication of the battery rst inside the case.
WARNING:
Usage of other than specified head- or earphones can result in hearing loss due to excessive sound
pressures.
iv
Page 6

CAUTION:
Immediately unplug your monitor from the wall outlet and refer servicing to qualified service personnel
under the following conditions:
• When the power supply cord or plug is damaged.
• If liquid has been spilled, or objects have fallen into the monitor.
• If the monitor has been exposed to rain or water.
• If the monitor has been dropped or the cabinet damaged.
• If the monitor does not operate normally by following operating instructions.
Recommended Use
CAUTION:
• For optimum performance, allow 20 minutes for warm-up.
• Rest your eyes periodically by focusing on an object at least 5 feet away. Blink often.
• Position the monitor at a 90° angle to windows and other light sources to minimize glare and
reections.
• Clean the LCD monitor surface with a lint-free, nonabrasive cloth. Avoid using any cleaning
solution or glass cleaner!
• Adjust the monitor’s brightness, contrast and sharpness controls to enhance readability.
• Avoid displaying xed patterns on the monitor for long periods of time to avoid image persistence
(after image effects).
• Get regular eye checkups.
Ergonomics
To realize the maximum ergonomic benefits, we recommend the following:
• Use the preset Size and Position controls with standard signals.
• Use the preset Color Setting.
• Use non-interlaced signals.
• Do not use primary color blue on a dark background, as it is difcult to see and may produce eye
fatigue due to insufcient contrast.
v
Page 7

Copyright Information
Copyright© ViewSonic Corporation, 2016. All rights reserved.
ViewSonic© and the three birds logo are registered trademarks of ViewSonic Corporation.
Disclaimer: ViewSonic Corporation shall not be liable for technical or editorial errors or omissions contained
herein; nor for incidental or consequential damages resulting from furnishing this material, or the performance
or use of this product.
In the interest of continuing product improvement, ViewSonic Corporation reserves the right to change product
specications without notice. Information in this document may change without notice.
No part of this document may be copied, reproduced, or transmitted by any means, for any purpose without
prior written permission from ViewSonic Corporation.
Product Registration
To meet your future needs, and to receive any additional product information as it becomes available, please
register your product on the Internet at: www.viewsonic.com.
The ViewSonic
mail or fax to ViewSonic.
®
Wizard CD-ROM also provides an opportunity for you to print the registration form, which you may
For Your Records
Product Name:
Model Number:
Document Number:
Serial Number:
Purchase Date:
Product disposal at end of product life
ViewSonic respects the environment and is committed to working and living green. Thank you for being part of
Smarter, Greener Computing. Please visit ViewSonic website to learn more.
USA & Canada: http://www.viewsonic.com/company/green/recycle-program/
Europe: http://www.viewsoniceurope.com/uk/support/recycling-information/
Taiwan: http://recycle.epa.gov.tw/recycle/index2.aspx
EP4220
ViewSonic Multimedia Digital Poster
VS15186
EP4220_UG_ENG Rev. 1D 02-24-17
vi
Page 8

Table Of Contents
Compliance Information ........................................................................................................................i
Important Safety Instructions ...............................................................................................................ii
Declaration of RoHS2 Compliance .....................................................................................................iii
Copyright Information ..........................................................................................................................iv
Product Registration ............................................................................................................................iv
1. Unpacking and Installation ............................................................................................................1
1.1. Unpacking ................................................................................................................................1
1.2. Package Contents ....................................................................................................................1
2. Parts and Functions .......................................................................................................................1
2.1. Input/Output Terminals .............................................................................................................1
2.2. Remote Control ........................................................................................................................2
3. OSD Menu ........................................................................................................................................3
7.1. Image Section ..........................................................................................................................4
3.1. Preference: ...............................................................................................................................4
3.2. Time Setting .............................................................................................................................6
3.3. Function Set .............................................................................................................................7
3.4. Screen Set ...............................................................................................................................8
4. Make Scrolling Message ................................................................................................................8
5. Auto Copy of Files ..........................................................................................................................9
6. One Key Upgrade............................................................................................................................9
7. Video Format Supported ..............................................................................................................10
8. TechnicalSpecications ..............................................................................................................11
8.1. EP4220 ..................................................................................................................................11
8.2. RS232 Command Table .........................................................................................................12
Customer Support ...............................................................................................................................13
Limited Warranty .................................................................................................................................14
vii
Page 9

1. Unpacking and Installation
1.1. Unpacking
• This product is packed in a carton, together with the standard accessories.
• Any other optional accessories will be packed separately.
• Due to the size and weight of this display it is recommended for two people to move it.
• After opening the carton, ensure that the content is in good condition and complete.
1.2. Package Contents
Please verify that you received the following items with your package content:
• CD ROM
• Remote control with
batteries
• Power cord
• HDMI cable
• Quick Installation Guide
*
For EU For China
For North America For UK
* *
*
CD ROM
HDMI Cable
ViewSonic
Remote Control
and Batteries
* The supplied power cord varies depending on destination.
NOTES:
• Please make sure that for all other regions, apply a power cord that conforms to the AC voltage of the power
socket and has been approved by and complies with the safety regulations of the particular country.
• You might like to save the package box and packing material for shipping the display.
2. Parts and Functions
2.1. Input/Output Terminals
1 2
1
HDMI IN
Connect the HDMI output of an AV device, or the
DVI-D output of a PC by using a DVI-HDMI cable.
2
VGA IN (D-Sub)
Connect the computer VGA output.
3
PC Audio
PC audio input
43
4
USB
USB port
5
SD
SD slot
6
RS232C (IN)
RS232C input connection for the use of RS232
command.
5 6
1
Page 10

2.2. Remote Control
1
2
3
4
5
6
7
8
9
10
11
12
13
14
15
16
1
[POWER] button
Press to switch on the display from standby
mode. Press again to turn it off and back into
standby mode.
2
[ ] button
Switch between play/pause mode.
3
[ ] button
Speed backward.
4
[ ] button
Press to move the selection up in OSD menu.
5
[ ] button
• Press to move the selection left in OSD menu.
• Press to decrease the value in OSD menu.
6
[MENU] button
Press to turn the OSD menu on/off.
7
[ ] button
Press to move the selection down in OSD menu.
8
[VOL UP] button
Press to increase the audio output level.
10
[VOL DOWN] button
Press to decrease the audio output level.
11
[ ] button
Press to next part.
12
[MUTE] button
Press to turn the mute function on/off.
13
[ ] button
Speed forward.
14
[ ] button
• Press to move the selection right in OSD
menu.
• Press to increase the value in OSD menu.
15
[EXIT] button
Exit OSD or playback.
16
[DEL] button
Press to delete when cursor is on the le.
9
[ ] button
Press to previous part.
2
Page 11

3. OSD Menu
The OSD home page
3
Page 12

3.1. Preference:
Preference main page:
OSD Language English
Repeat Mode REPEAT ALL
Play Log Off
Power Resume Off
Photo Slide mode Left -> Right
Photo Show Time 5S
Marquee Off
Marquee Color White
Marquee Back Color Transparent
Play Type ALL
No Device off Off
PREFERENCE
Input Source HDMI
USB COPY Start
All the function below could be reached by Left and Right button:
a. OSD Language
Chinese: Set OSD to Chinese
English: Set OSD to English
b. Repeat Mode
Repeat One: Repeat single le
Repeat All: Repeat all the les under USB or SD card.
Repeat None: stop playback after playback one time of whole contents under root directory.
c. Play Log
Turn this on to record the content name and start time, also on/off time of the display.
d. Power Resume
Auto record le name and playback time, resume playback when it turns on again after power off. (P.S.
Don’t support music le)
e. Photo Slide Mode
Set the animation effect of pictures
f. Photo Show Time
Set the playback time of pictures (5s->7s->10s->15s->30s->60s->90s->120s->150s)
g. Marquee/Scrolling message
Turn on/off scrolling message
h. Marquee Color/Font Color
Set the font color of scrolling message
i. Marquee Back Color
Set the background color of scrolling message
4
Page 13

j. Play Type/Playback Mode
Photo: Only play pictures under the root directory.
Music: Only play audios under the root directory.
Photo + Mp3: Play images with background music and repeat.
Playlist: Play by playlist
Video: Only play videos under the root directory.
All: Play all the readable image,audio and video les under the root directory.
Split Screen: Support max 6 zones(1video and 5 photo zones)
P.S.: Press Exit under the split zone playback mode and press Menu button to go to the OSD. Scrolling
message can’t overlay on the picture, please reserve 100 pixels for message. If the pictures can’t be
switched from the current one, please check the picture is qualied(please refer to the splitting zone tool for
details). If everything is alright, please save the picture as standard mode under Photoshop.
k. No Device Off/Off if there is no storage
On: If there is no storage device, it will turn on auto turn off mode after 20 seconds, and if there is still no
action after 30 seconds, the display will turn off.During this period, the count down will be stopped if there is
storage device inserted or entering the OSD.
Off: Turn off this function
l. Input Source
Input source could be switched between HDMI, VGA and SD card.
M. USB COPY
Copy USB content to SD card.
5
Page 14

3.2. Time Set
The Time Setting page is as following. Press Up/Down key to select and Menu key to enter settings.
Set the clock
Settings of clock include year, month,date,hour,minute, and location of clock.
Year: Set the year, 2000-2099
Month: Set the month, 1-12
Date: Set the date
Hour: Set the hour
Minute: Set the minute
Show Time: Off, Date, Time, All
Time Position: Set the location of the clock (For split screen, it’s better to place the clock on video zone to avoid
covering image.
Timer Setting
Max 5 groups of timers can be supported. Here only take example of just one timer, same applied to the others.
TIMER1 SET
TIMER MODE Off
On Time
Hour 0
Minute 0
Off Time
Hour 0
Minute 0
Volume 30
a. Timer mode
Everyday: Timer works on everyday.
Weekdays: Timer works from Monday to Friday.
Weekend: Timer works on every Saturday and Sunday.
Off: Turn the timer off
b. On Time
Set the turning on time
c. Off Time
Set the turning off time
d. Volume
Set the volume during the timer
Note: The off time must be newer than on time. All the timers must be in right order. Make sure there is not
overlay on each group of timer.
6
Page 15

3.3. Function Set
a. Insert Adv (min)
This is to set the time for inserting each content, it could be from 1 to 60 minutes. Turn this off if there is not
needed.
b. Insert Adv Num
This is to set the number of contents to be inserted for each time, it could be from 1 to 9. After the insert
number is set, it’s better to make the le number to the integer times of the inserting number.
c. Picture Rotate
Rotate the image by 90°, 180°, 270°.
d. Show Logo
On/Off the Logo.
e. Marquee Speed
Set the speed for scrolling message.
f. Subtitle Position
Set the location for scrolling message, on the top or bottom side of screen.
g. Photo Display
Photo aspect ratio: Full Screen, Original Size, Scaling up.
7
Page 16

3.4. Screen Set
Screen set main page is as following:
SCREEN SET
Brightness 50
Contrast 55
Color 50
Sharpness 50
Backlight 10
Noise Reduction Middle
Video Mode Full Screnn
Color Temperature Enter
Auto Adjust Auto Adjust
Brightness: Set the brightness of screen
Contrast: Set the contrast value of screen
Color: Set the color saturation
Sharpness: Set the sharpness of screen
Backlight: Adjust the backlight voltage (0-10), 0 means the lowest voltage (0.16v), 10 means the highest one
(3v).
Noise Reduction: Set the noise reduction mode of video playback.
Video Mode: The display ratio could be Original Size and Scaling up and full screen.
Color Temperature: The color temperature should be Medium, Warm and Cool.
4. Make Scrolling Message
Create a text le with name SCROLL.TXT (all capital), and copy the message inside, set the coding to be
Unicode and save it.
8
Page 17

5. Auto Copy of Files
This version supports auto copying les from one USB drive to another USB drive or SD card. Create a new le
with name COPY.TXT(all capital), and copy all the new les into the USB drive and insert to the USB port of the
display. The new content will be automatically copied to the current storage. You will see image as following:
Format Usb?
Yes NO
Press the Left/Right key to select and press MENU key to conrm selection. If there is no selection within 10
seconds, the system will execute “NO” option to copy the new content to the current storage.
YES: Format the current drive rst, and copy the new contents in.
NO: Copy the contents in without format the current drive. The les with same name will be replaced by new
le.
Note: Folders can not be supported for this auto copy function. Only single les under root directory.
6. One Key Upgrade
Copy the upgrade software to the USB drive and insert the USB drive to the board of display, then press the
MUTE key for about 5 seconds, then it will go to auto-upgrade progress. It will take about 2minutes for the
upgrade, after it is done, the display will reboot automatically.
Note: Please do not power it off during the upgrade. After the upgrade, please reset to factory default setting,
otherwise the panel will be a little bit dark.
9
Page 18

7. Video Format Supported
Sufx Format Coding
Resolution and
PFS
Code Stream
dat,mpg, mpeg MPG, MPEG Mpeg1,2 1920x1080@30P 20Mbit/sec
ts, trp, tp, m2ts MPEG2 -TS
MPEG2 ,H.264 1920x1080@30P 20Mbit/sec
H264-TS
vob MPEG2 -PS MPEG2 1920x1080@ 30P 20Mbit/sec
mp4 AVI, MP4 MPEG4
1920x1080@ 30P 20Mbit/sec
Xvid 1.00,
Xvid1.01,
Xvid 1.02,
Xvid1.03,
Xvid1.10-beta1/2
H.264
rm, rmvb RMVB, RM rm 1920x1080 @
10Mbit/sec
25P
mkv MKV H.264,
MPEG1,2,4
1920x1080 @
30P
20Mbit/sec
divx, avi AVI (1.0, 2.0),
DMF0,1,2
MPEG2, MPEG4
Xvid 1.00,
1920x1080 @
30P
20Mbit/sec
Xvid1.01, Xvid
1.02, Xvid1.03,
Xvid 1.10-beta1/2
H.264
Motion JPEG AVI, MOV JPEG 640x480 @ 30P 10Mbit/sec
asf, wmv ASF
(Revision
VC1 1920x1080 @
30P
20Mbit/sec
01.20.03)
10
Page 19

8. Technical Specifications
8.1. EP4220
Display:
Item Specications
Screen Size (Active Area) 42” ePoster (106.68 cm)
Number of Pixels 1920 (H) × 1080 (V)
Pixel Pitch 0.4845 (H) × 0.4845 (V) [mm]
Displayable Colors 16.7 Million colors
Brightness 350 cd/m²
Contrast Ratio (Typical) 3000:1
Viewing Angle 178 degrees
In/Out Terminals:
Item Specications
Speaker Output Internal Speakers 2.5W + 2.5W
RS232C D-Sub Jack × 1
(9 pin)
HDMI Input HDMI Jack × 1
(Type A) (19 pin)
VGA Input D-Sub Jack × 1
(15 pin)
TXD + RXD (1:1)
Digital RGB: TMDS (Video + Audio)
Video: 720p, 1080p, 1920 × 1080/60 Hz (WUXGA)
MAX:
Audio: 48 KHz / 2 Channel (L+R)
Supports LPCM only
Analog RGB: 0.7V [p-p] (75Ω), H/CS/V: TTL (2.2kΩ), SOG: 1V [p-p]
(75Ω)
MAX: 720p, 1080p, 1920 × 1080/60 Hz (WUXGA)
General:
Item Specications
Power Input 100-240V
50-60Hz, 1A
Power Consumption (Max.) 80 W
Power Consumption (Typical) 70 W
Power Consumption (DC off) < 9W
Dimensions [W × H × D] 685 × 1835 × 450 mm
Weight 57 Kg
Gross Weight 67 Kg
Environmental Condition:
Item Specications
Temperature
Humidity
Operational 0 ~ 50°C
Storage -20 ~ 60°C
Operational 10 ~ 90% (Non-condensation)
Storage 10 ~ 95% (Non-condensation)
11
Page 20

8.2. RS232 Command Table
The PC can control the LCD Monitor for specic actions. The Set-Function command allows you to control the
LCD monitor behavior in a remote sit through the RS232 port.
Communication Setting
- Baud Rate Select: 9600bps (xed)
- Data bits: 8bits (xed)
- Parity: None (xed)
- Stop Bits: 1 (xed)
The Set-Function packet format consists of 5 bytes.
Name Length Command Value1 Value2 Value3 CR
Byte Count 1 Byte 1 Byte 1 Byte 1 Byte 1 Byte 1 Byte
Bytes order 1 2 3 4 5 6
Set-Function description:
Length: Total bytes of message = 5 ASCII (35H) excluding “CR”
Command: Function command code: One byte ASCII code
Value[1~3]: Three bytes ASCII that denes the value
EP4220 set command table
Set Function Length Command Code
(Hex)
Power 5 21 000 : STBY
001 : ON
Input Select 5 22 004 : HDMI
006 : PC
008 : SD Card
Contrast 5 23 000 ~ 100
Brightness 5 24 000 ~ 100
Sharpness 5 25 000 ~ 100
Color 5 26 000 ~ 100
Volume 5 35 000 ~ 100
900:Volume down(-1)
901:Volume up(+1)
Mute 5 36 000: OFF
001: ON (mute)
Restore default 5 7E 000 Rests to factory
EP4220 get command table
Value Range
(Three ASCII bytes)
Comments
Controlled power status:
ON or Standby
setting
Get Function Length Command Code
Get power status 5 6C 000 : STBY
(Hex)
Value Range
(Three ASCII bytes)
001 : ON
12
Comments
Gets the status of the power:
000 = ePoster is in standby
001 = ePoster is ON
Page 21

Customer Support
For technical support or product service, see the table below or contact your reseller.
Note : You will need the product serial number.
Country/Region Website
Australia/New Zealand www.viewsonic.com.au
Canada www.viewsonic.com T= 1-866-463-4775 service.ca@viewsonic.com
Europe www.viewsoniceurope.com www.viewsoniceurope.com/uk/support/call-desk/
Hong Kong ap.viewsonic.com/kr/ T= 852-3102-2900 service@hk.viewsonic.com
India www.in.viewsonic.com T= 1800 266 0101 service@in.viewsonic.com
Korea www.kr.viewsonic.com T= 080 333 2131 service@kr.viewsonic.com
Latin America
(Argentina)
Latin America (Chile) www.viewsonic.com/la/
Latin America
(Columbia)
Latin America (Mexico) www.viewsonic.com/la/
www.viewsonic.com/la/
www.viewsonic.com/la/
T= Telephone
C = CHAT ONLINE
AUS= 1800 880 818
NZ= 0800 008 822
C= http://www.viewsonic.com/la/
soporte/servicio-tecnico
C= http://www.viewsonic.com/la/
soporte/servicio-tecnico
C= http://www.viewsonic.com/la/
soporte/servicio-tecnico
C= http://www.viewsonic.com/la/
soporte/servicio-tecnico
Email
service@au.viewsonic.com
soporte@viewsonic.com
soporte@viewsonic.com
soporte@viewsonic.com
soporte@viewsonic.com
Nexus Hightech Solutions, Cincinnati #40 Desp. 1 Col. De los Deportes Mexico D.F. Tel: 55) 6547-6454 55)6547-6484
Other places please refer to http://www.viewsonic.com/la/soporte/servicio-tecnico#mexico
Latin America (Peru) www.viewsonic.com/la/
Macau www.hk.viewsonic.com T= 853 2870 0303 service@hk.viewsonic.com
Middle East ap.viewsonic.com/me/ Contact your reseller service@ap.viewsonic.com
Puerto Rico & Virgin
Islands
Singapore/Malaysia/
Thailand
South Africa ap.viewsonic.com/za/ Contact your reseller service@ap.viewsonic.com
United States www.viewsonic.com T= 1-800-688-6688 service.us@viewsonic.com
www.viewsonic.com
www.viewsonic.com.sg T= 65 6461 6044 service@sg.viewsonic.com
C= http://www.viewsonic.com/la/
soporte/servicio-tecnico
T= 1-800-688-6688 (English)
C = http://www.viewsonic.com/la/
soporte/servicio-tecnico
soporte@viewsonic.com
service.us@viewsonic.com
soporte@viewsonic.com
13
Page 22

Limited Warranty
VIEWSONIC® Multimedia Digital Poster
What the warranty covers:
ViewSonic warrants its products to be free from defects in material and workmanship, under normal use, during
the warranty period. If a product proves to be defective in material or workmanship during the warranty period,
ViewSonic will, at its sole option, repair or replace the product with a like product. Replacement product or parts
may include remanufactured or refurbished parts or components.
How long the warranty is effective:
ViewSonic Multimedia Digital Poster are warranted for 1 year for all parts excluding the light source and 1 year
for labor from the date of the rst customer purchase.
Who the warranty protects:
This warranty is valid only for the rst consumer purchaser.
What the warranty does not cover:
1. Any product on which the serial number has been defaced, modied or removed.
2. Damage, deterioration or malfunction resulting from:
a. Accident, misuse, neglect, re, water, lightning, or other acts of nature, unauthorized product modication,
or failure to follow instructions supplied with the product.
b. Any damage of the product due to shipment.
c. Removal or installation of the product.
d. Causes external to the product, such as electrical power uctuations or failure.
e. Use of supplies or parts not meeting ViewSonic’s specications.
f. Normal wear and tear.
g. Any other cause which does not relate to a product defect.
3. Any product exhibiting a condition commonly known as “image burn-in” which results when a static image is
displayed on the product for an extended period of time.
4. Removal, installation, one way transportation, insurance, and set-up service charges.
How to get service:
1. For information about receiving service under warranty, contact ViewSonic Customer Support (Please refer
to Customer Support page). You will need to provide your product’s serial number.
2. To obtain warranty service, you will be required to provide (a) the original dated sales slip, (b) your name, (c)
your address, (d) a description of the problem, and (e) the serial number of the product.
3. Take or ship the product freight prepaid in the original container to an authorized ViewSonic service center or
ViewSonic.
4. For additional information or the name of the nearest ViewSonic service center, contact ViewSonic.
4.3: ViewSonic Multimedia Digital Poster Page 1 of 2 EP_LW01 Rev. 1a 02-11-09
14
Page 23

Limitation of implied warranties:
There are no warranties, express or implied, which extend beyond the description contained herein including
the implied warranty of merchantability and tness for a particular purpose.
Exclusion of damages:
ViewSonic’s liability is limited to the cost of repair or replacement of the product. ViewSonic shall not be liable
for:
1. Damage to other property caused by any defects in the product, damages based upon inconvenience, loss
of use of the product, loss of time, loss of prots, loss of business opportunity, loss of goodwill, interference
with business relationships, or other commercial loss, even if advised of the possibility of such damages.
2. Any other damages, whether incidental, consequential or otherwise.
3. Any claim against the customer by any other party.
4. Repair or attempted repair by anyone not authorized by ViewSonic.
Effect of state law:
This warranty gives you specic legal rights, and you may also have other rights which vary from state to state.
Some states do not allow limitations on implied warranties and/or do not allow the exclusion of incidental or
consequential damages, so the above limitations and exclusions may not apply to you.
Sales outside the U.S.A. and Canada:
For warranty information and service on ViewSonic products sold outside of the U.S.A. and Canada, contact
ViewSonic or your local ViewSonic dealer.
The warranty period for this product in mainland China (Hong Kong, Macao and Taiwan Excluded) is subject to
the terms and conditions of the Maintenance Guarantee Card.
For users in Europe and Russia, full details of warranty provided can be found in www.viewsoniceurope.com
under Support/Warranty Information.
4.3: ViewSonic Multimedia Digital Poster Page 2 of 2 EP_LW01 Rev. 1a 02-11-09
15
Page 24

16
 Loading...