

Page 1

CDE6501LED
LED Display
User Guide
IMPORTANT: Please read this User Guide to obtain important information on installing
and using your product in a safe manner, as well as registering your product for future
service. Warranty information contained in this User Guide will describe your limited
coverage from ViewSonic Corporation, which is also found on our web site at http://www.
viewsonic.com in English, or in specic languages using the Regional selection box in the
upper right corner of our website. “Antes de operar su equipo lea cu idadosamente las
instrucciones en este manual”
Model No. VS15026
Page 2

Contents
Compliance Information ............................................................................. i
Copyright Information ................................................................................ii
Important Information ..............................................................................iii
Important Safety Precautions ...................................................................iv
Important Notice .....................................................................................viii
Getting Started
Package contents ............................................................................................1
Installing the stand ..........................................................................................2
Preventing the Display from toppling over ....................................................3
Front view of the Display ...............................................................................4
Back view of the Display ................................................................................5
Remote control ..............................................................................................6
Selecting a location ........................................................................................7
Installing remote control batteries .................................................................7
Aiming the remote control .............................................................................8
Connections ................................................................................................ 9
Basic Operations .......................................................................................13
Adjusting the Picture ................................................................................15
Adjusting the Sound .................................................................................17
Adjusting Basic Settings ...........................................................................18
Setting Clock & Timer ..............................................................................19
Setting Lock Menu ................................................................................... 22
Setting Hotel Mode .................................................................................. 23
Using USB Multi Media Player ................................................................ 24
Other Information
Troubleshooting ...........................................................................................34
Specifications ................................................................................................ 35
RS232 Command Table ................................................................................36
Customer Support .......................................................................................46
Limited Warranty ......................................................................................... 47
Mexico Limited Warranty ............................................................................48
Page 3
i
Compliance Information
FCC Statement
This device complies with part 15 of FCC Rules. Operation is subject to the following
two conditions: (1) this device may not cause harmful interference, and (2) this
device must accept any interference received, including interference that may cause
undesired operation.
This equipment has been tested and found to comply with the limits for a Class B
digital device, pursuant to part 15 of the FCC Rules. These limits are designed to
provide reasonable protection against harmful interference in a residential installation.
This equipment generates, uses, and can radiate radio frequency energy, and if not
installed and used in accordance with the instructions, may cause harmful interference
to radio communications. However, there is no guarantee that interference will not
occur in a particular installation. If this equipment does cause harmful interference to
radio or television reception, which can be determined by turning the equipment off
and on, the user is encouraged to try to correct the interference by one or more of
the following measures:
• Reorient or relocate the receiving antenna.
• Increase the separation between the equipment and receiver.
• Connect the equipment into an outlet on a circuit different from that to which the
receiver is connected.
• Consult the dealer or an experienced radio/TV technician for help.
Warning: You are cautioned that changes or modifications not expressly approved
by the party responsible for compliance could void your authority to operate the
equipment.
Following information is only for EU-member states:
The mark shown to the right is in compliance with the Waste Electrical
and Electronic Equipment Directive 2002/96/EC (WEEE).
The mark indicates the requirement NOT to dispose the equipment
as unsorted municipal waste, but use the return and collection systems
according to local law.
If the batteries, accumulators and button cells included with this
equipment,display the chemical symbol Hg, Cd, or Pb, then it means that
the battery has a heavy metal content of more than 0.0005% Mercury or
more than,0.002% Cadmium, or more than 0.004% Lead.
Page 4

ii
iii
Copyright Information
Copyright © ViewSonic® Corporation, 2012. All rights reserved.
ViewSonic, the three birds logo, OnView, ViewMatch, and ViewMeter are registered trademarks of
ViewSonic Corporation.
Disclaimer: ViewSonic Corporation shall not be liable for technical or editorial errors or omissions
contained herein; nor for incidental or consequential damages resulting from furnishing this material, or
the performance or use of this product.
In the interest of continuing product improvement, ViewSonic Corporation reserves the right to change
product specifications without notice. Information in this document may change without notice.
No part of this document may be copied, reproduced, or transmitted by any means, for any purpose
without prior written permission from ViewSonic Corporation.
Product Registration
To meet your future needs, and to receive any additional product information as it becomes available,
please register your product on the Internet at: www.viewsonic.com.
For Your Records
Product Name: CDE6501LED
ViewSonic LED Display
Model Number: VS15026
Document Number: CDE6501LED_UG_ENG Rev. 1A 09-10-12
Serial Number:
Purchase Date:
Product disposal at end of product life
ViewSonic respects the environment and is committed to working and living green. Thank you for being
part of Smarter, Greener Computing. Please visit ViewSonic website to learn more.
USA & Canada:http://www.viewsonic.com/company/green/recycle-program/
Europe: http://www.viewsoniceurope.com/uk/support/recycling-information/
Taiwan: http://recycle.epa.gov.tw/recycle/index2.aspx
Page 5
iii
Important Information
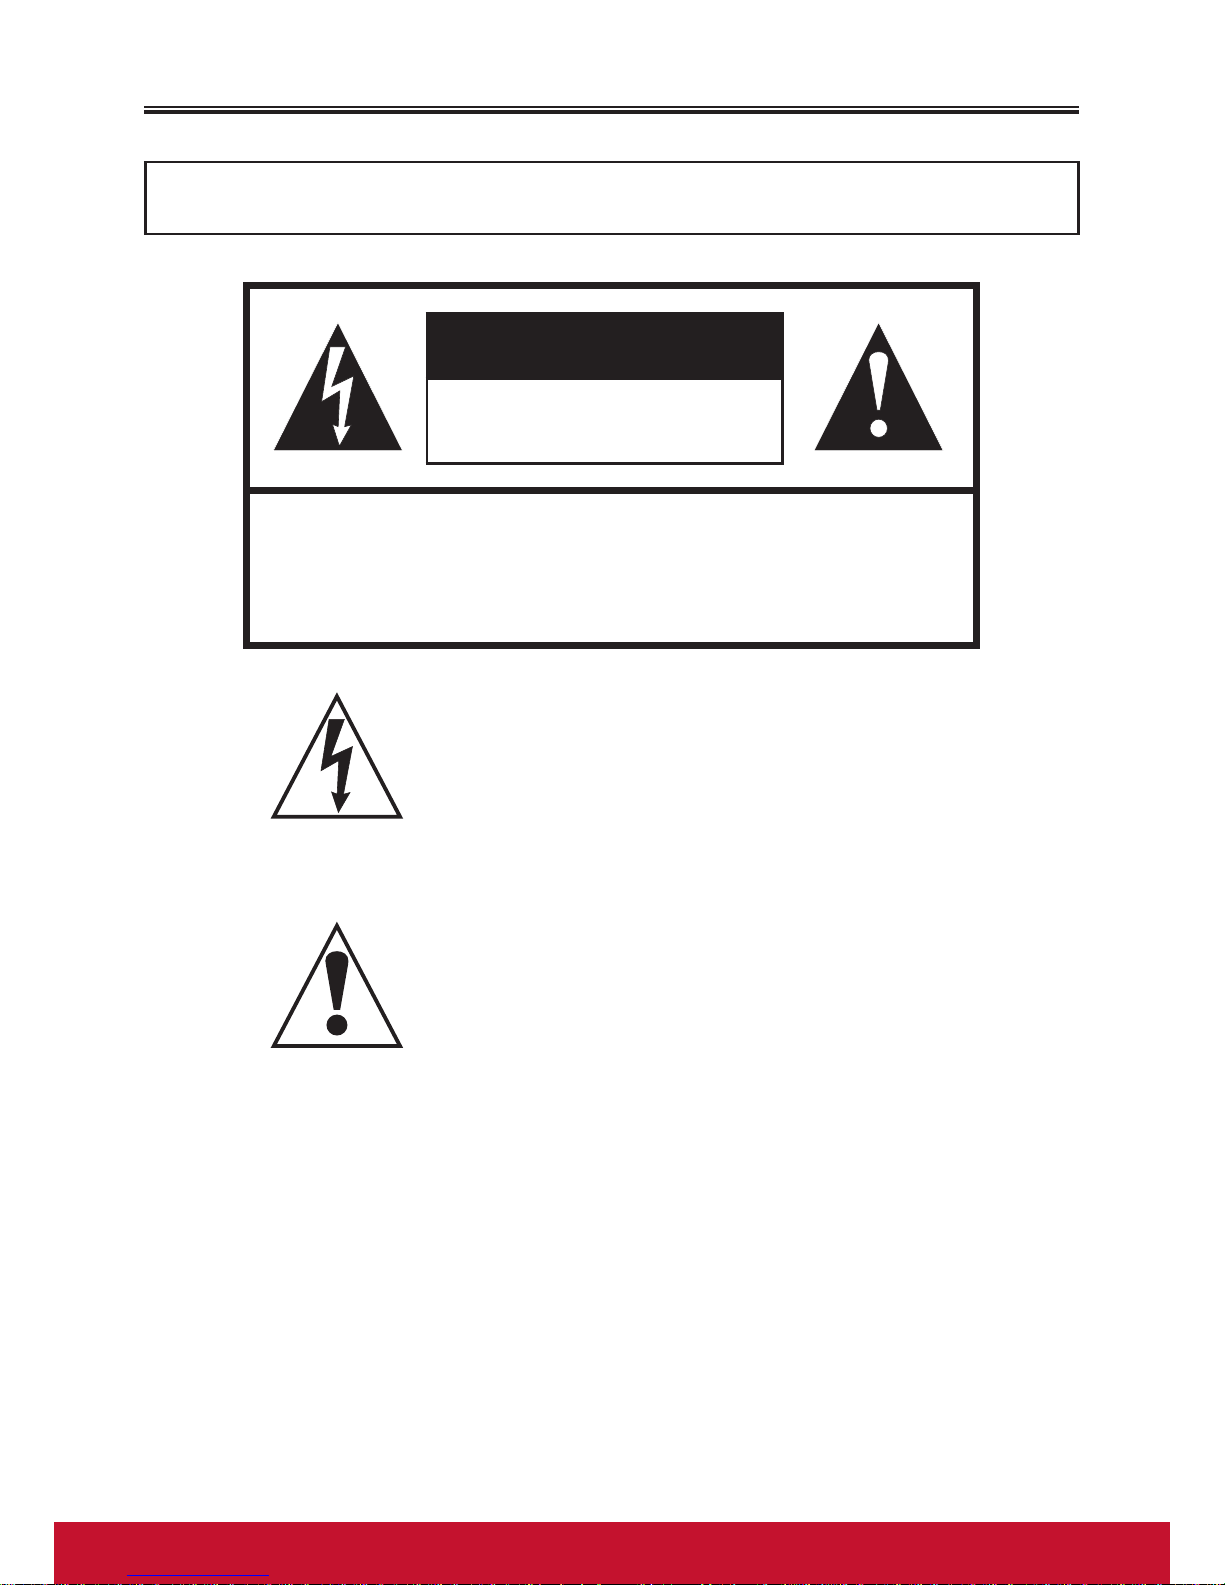
WARNING:
TO REDUCE THE RISK OF FIRE OR ELECTRIC SHOCK, DO
NOT EXPOSE THIS APPARATUS TO RAIN OR MOISTURE.
CAUTION
RISK OF ELECTRIC SHOCK
DO NOT OPEN
CAUTION - To reduce the risk of electric shock, do not
perform any servicing other than that contained in
the operating instructions unless you are qualified
to do so.
The lightning flash with arrowhead symbol,within
an equilateral triangle is intended to
alert the user to the presence of uninsulated
dangerous voltage within the product's enclosure
that may be of sufficient magnitude to constitute a
risk of electric shock to persons.
The exclamation point within an equilateral
triangle is intended to alert the user to the
presence of important operating and maintenance
(servicing) instructions in the literature
accompanying the appliance.
Page 6
iv
v
Important Safety Precautions
Electrical energy can perform many useful functions, but it can also cause personal
injuries and property damage if improperly handled. This product has been
engineered and manufactured with the highest priority on safety. But IMPROPER USE
CAN RESULT IN POTENTIAL ELECTRICAL SHOCK OR FIRE HAZARD. In order
to prevent potential danger, please observe the following instructions when installing,
operating and cleaning the product. To ensure your safety and prolong the service
life of your product, please read the following precautions carefully before using the
product.
1. Read these instructions --- All operating instructions must be read and
understood before the product is operated.
2. Keep these instructions --- These safety and operating instructions must be
kept in a safe place for future reference.
3. Heed all warnings --- All warnings on the product and in the instructions must
be observed closely.
4. Follow all instructions --- All operating instructions must be followed.
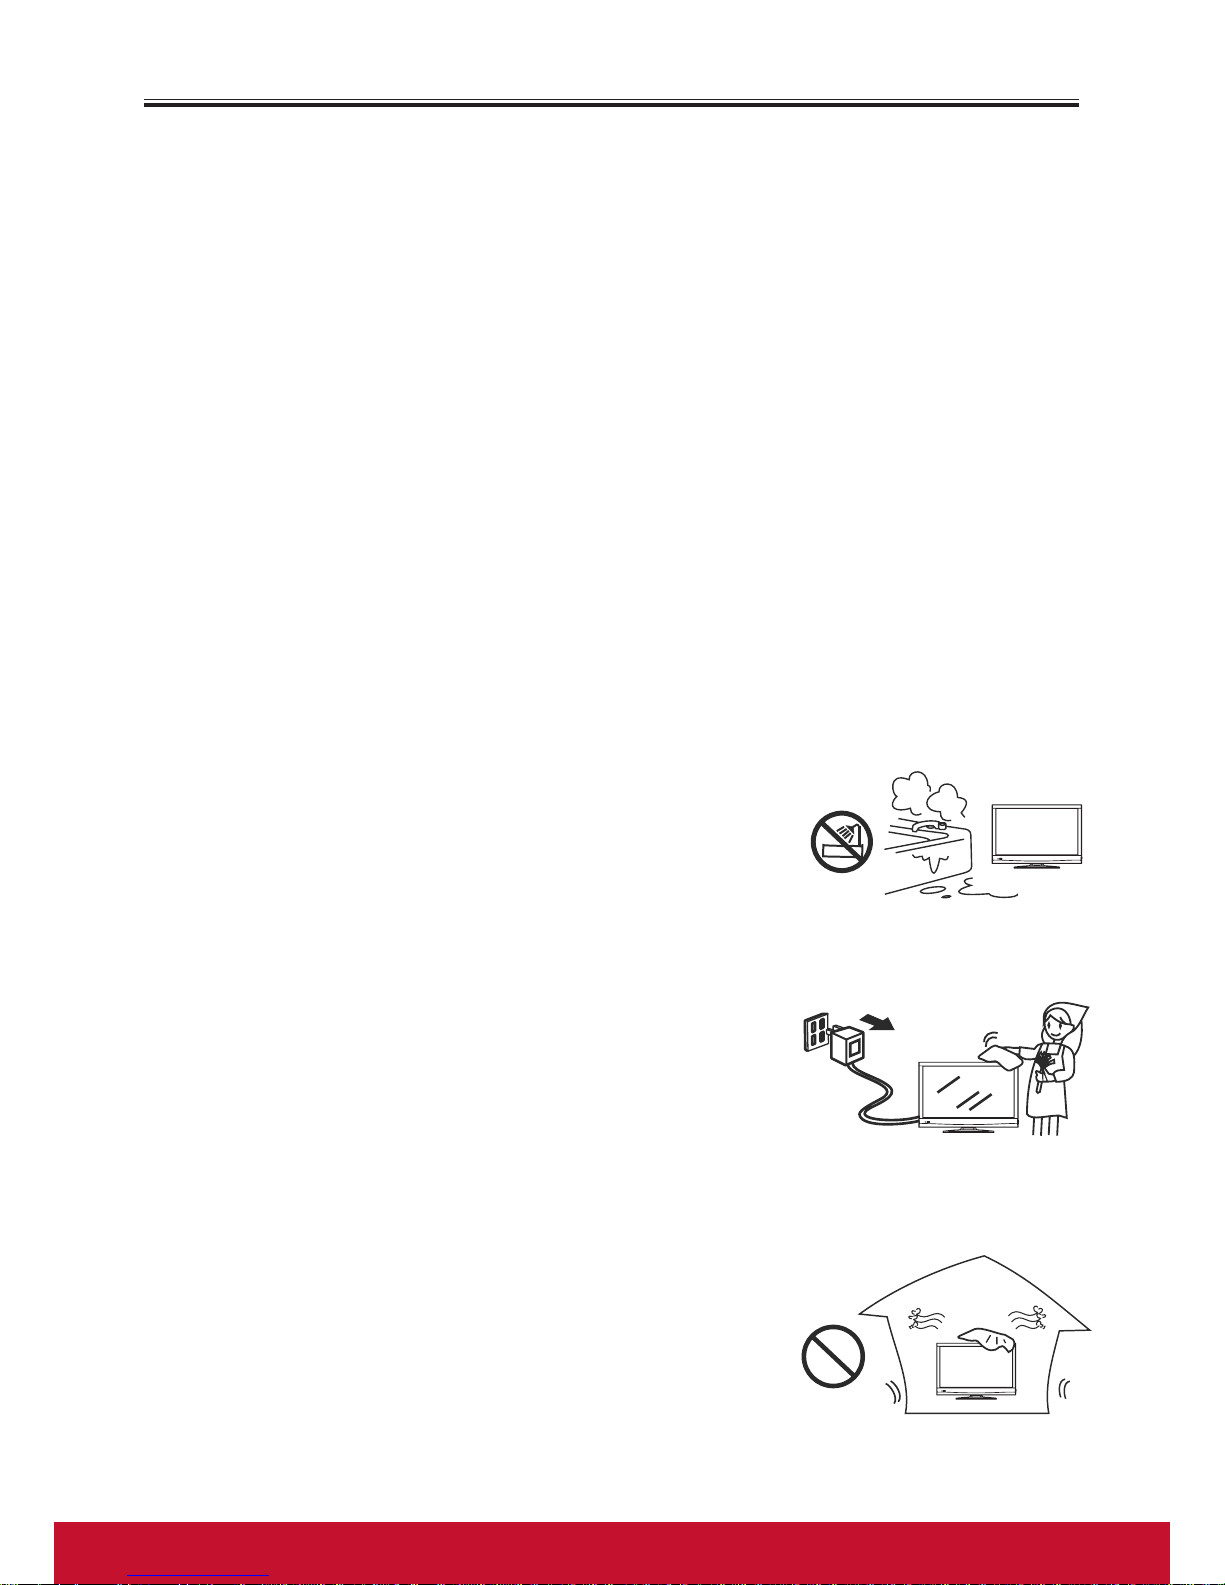
5. Do not use this apparatus near water --- for
example, near a bathtub, washbowl, kitchen sink, or
laundry tub, in a wet basement, or near a swimming
pool, and the like. Do not use immediately after
moving from a low temperature to high temperature
environment, as this causes condensation, which may
result in fire, electric shock, or other hazards.The
apparatus shall not be exposed to dripping or splashing
and that no objects filled with liquids, such as vases, shall
be placed on the apparatus.
6. Clean only with dry cloth --- Unplug this product
from the wall outlet before cleaning. Do not use liquid
cleaners or aerosol cleaners. Use a damp cloth for
cleaning.
7. Ventilation --- Do not block any ventilation openings.
Install in accordance with the manufacturer instructions.
The vents and other openings in the cabinet are
designed for ventilation. Do not cover or block these
vents and openings since insufficient ventilation can
cause overheating and/or shorten the life of the product.
Do not place the product on a bed, sofa, rug or other
similar surface, since they can block ventilation openings.
This product is not designed for built-in installation; do
not place the product in an enclosed place such as a
bookcase or rack, unless proper ventilation is provided
or the manufacturer’s instructions are followed.
Page 7
v
Important Safety Precautions (Continued)
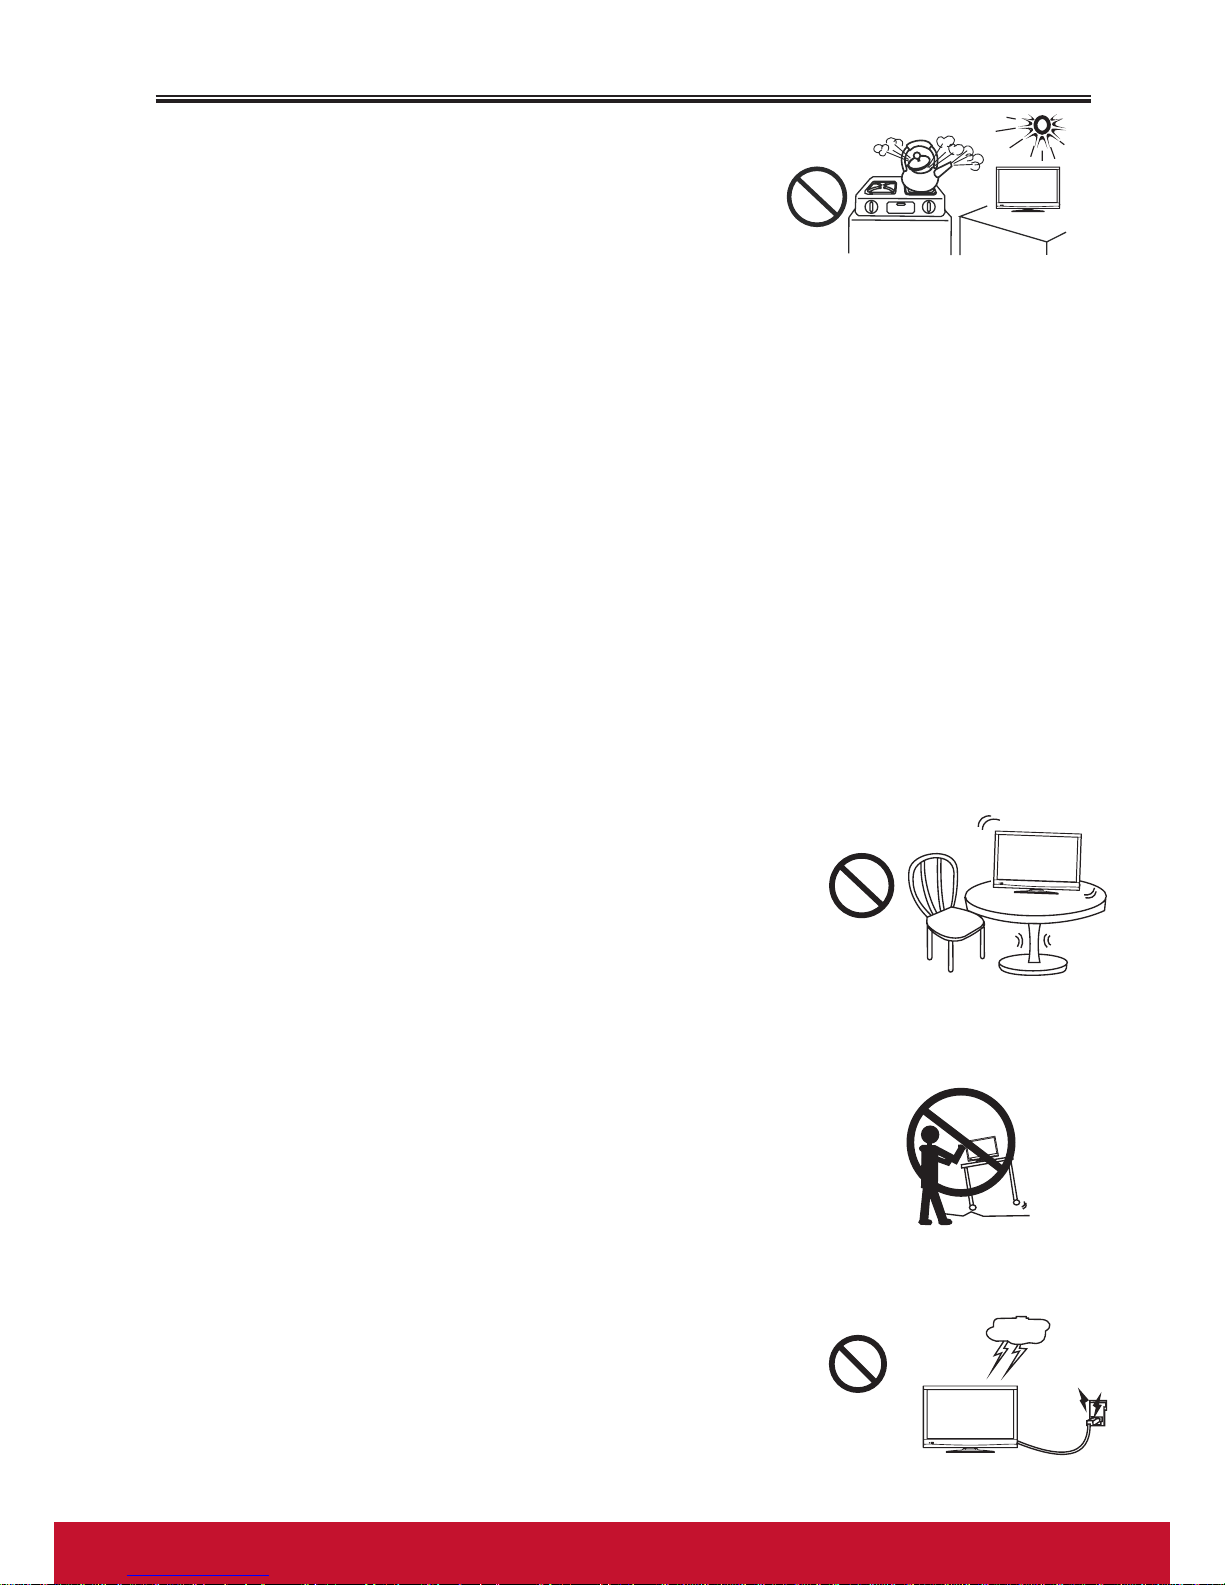
8. Heat sources --- Do not install near any heat sources
such as radiators, heat registers, stoves, or other
apparatus (including amplifiers) that produce heat.
9. Grounding or Polarization --- Do not defeat the safety purpose of the polarized
or grounding-type plug. A polarized plug has two blades with one wider than the
other. A grounding type plug has two blades and a third grounding prong. The
wide blade or the third prong are provided for your safety. If the provided plug
does not fit into your outlet, consult an electrician for replacement of the obsolete
outlet.
10. Power cord protection --- Protect the power cord from being walked on or
pinched particularly at plugs, convenience receptacles, and the point where they
exit from the apparatus.
NOTE: where the mains plug or an appliance coupler is used as the disconnect
device, the disconnect device shall remain readily operable.
11. Attachments --- Only use attachments/accessories specified by the
manufacturer.Do not use attachments not recommended by the manufacturer.
Use of improper attachments can result in accidents.
12. Stand --- Use only with the cart, stand, tripod, bracket,
or table specified by the manufacturer, or sold with the
apparatus. Do not place the product on an unstable
trolley, stand, tripod or table. Placing the product on an
unstable base can cause the product to fall, resulting in
serious personal injuries as well as damage to the product.
When mounting the product on a wall, be sure to follow
the manufacturer’s instructions. Use only the mounting
hardware recommended by the manufacturer.
13. Move carefully --- When a cart is used, use caution when
moving the cart/apparatus combination to avoid injury
from tip-over. Sudden stops, excessive force and uneven
floor surfaces can cause the product to fall from the
trolley.
Never attempt to move the Display unless the AC power
cord has been disconnected.
14. Lightning --- Unplug this equipment during lightning
storms or when unused for long periods of time.For added
protection for this equipment during a lightning storm,
or when it is left unattended and unused for long periods
of time, unplug it from the wall outlet. This will prevent
damage to the equipment due to lightning and power-line
surges.
Page 8

vi
vii
Important Safety Precautions (Continued)
15. Servicing --- Refer all servicing to qualified service personnel. Servicing is
required when the apparatus has been damaged in any way, such as power-supply
cord or plug is damaged, liquid has been spilled or objects have fallen into the
apparatus, the apparatus has been exposed to rain or moisture, does not operate
normally, or has been dropped.
16. Replacement parts --- In case the product needs replacement parts, make sure
that the service person uses replacement parts specified by the manufacturer, or
those with the same characteristics and performance as the original parts. Use of
unauthorized parts can result in fire, electric shock and/or other danger.
17. Overloading --- Do not overload wall outlets, extension cords, or convenience
receptacles on other equipment as this can result in a risk of fire or electric shock.
18. Entering of objects and liquids --- Never insert an object into the product
through vents or openings. High voltage flows in the product, and inserting an
object can cause electric shock and/or short internal parts. For the same reason,
do not spill water or liquid on the product.
19. Damage requiring service --- If any of the following conditions occurs, unplug
the power cord from the AC outlet, and request a qualified service person to
perform repairs.
a. When the power cord or plug is damaged.
b. When a liquid is spilled on the product or when objects have fallen into the
product.
c. When the product has been exposed to rain or water.
d. When the product does not operate properly as described in the operating
instructions.
Do not touch the controls other than those described in the operating
instructions.Improper adjustment of controls not described in the instructions
can cause damage,which often requires extensive adjustment work by a qualified
technician.
e. If the product has been dropped or the cabinet has been damaged in any way.
f. When the product displays an abnormal condition or exhibits a distinct change
in performance. Any noticeable abnormality in the product indicates that the
product needs servicing.
20. Safety checks --- Upon completion of service or repair work, request the
service technician to perform safety checks to ensure that the product is in proper
operating condition.
21. Wall or ceiling mounting --- When mounting the product on a wall or ceiling,
be sure to install the product according to the method recommended by the
manufacturer. This is a safety feature.
Note: Before mounting the product on the wall or ceiling, connect the cables
between the corresponding jacks on the product and the external device first.
Page 9
vii
Important Safety Precautions (Continued)
22. Power source --- This product is intended to be supplied by a listed power
supply indicated on the marking label. If you are not sure of the type of power
supply to your home, consult your product dealer or local power company. For
added protection for this product during a lightning storm, or when it is left
unattended and unused for long periods of time, unplug it from the wall outlet
and disconnect the cable system. This will prevent damage to the product due to
lightning and power line surges. When the Display has to be used with another
power supply voltage, the power cable must be changed. Consult your product
dealer. The socket outlet should be installed near the equipment and easily
accessible. Use only the power cord designated by our dealer to ensure safety and
EMC. When connecting other products such as VCRs and personal computers,
you should turn off the power of the Display for protection against electric shock.
23. Panel protection --- The display panel used in this
product is made of glass. Therefore, it can break when
the product is dropped or impacted upon by other
objects. Be careful not to be injured by broken glass
pieces in case the display panel breaks.
24. Pixel defect --- The display panel is a very high technology product, giving you
finely detailed pictures. Occasionally, a few non-active pixels may appear on the
screen as a fixed point of blue, green or red. Please note that this does not affect
the performance of your product.
WARNING:
• For continued safety, apparatus with class I construction shall be connected to a
mains socket outlet with a protective earthing connection.
• To prevent the spread of fire, keep candles or other open flames away from this
product at all times.
Page 10

viii
ix
Important Notice
About Location/
Environment
Do not use in hot and cold rooms (locations)
• When the Display is used in rooms (locations) with low
temperature, the picture may leave trails or appear
slightly delayed. This is not a malfunction, and the Display
will recover when the temperature returns to normal.
• Do not leave the Display in a hot or cold location. Also,
do not leave the Display in a location exposed to direct
sunlight or near a heater, or in high humidity, as this
may cause the cabinet to deform and the screen to
malfunction, and affect the Display’s performance .
• Environment condition:
Operating temperature: 5°C – 35°C
Operating humidity: 20 – 80 % ( no moisture
condensation )
Storage temperature: 0°C – 45°C
Storage humidity: 10 – 80 %
Atmospheric pressure: 86 kPa ~106 kPa
About After-Image
The extended use of fixed image programme material can
cause a permanent after-image on the screen.
This background image is viewable on normal programs
in the form of a stationary fixed image. This type of
irreversible screen deterioration can be limited by
observing the following steps:
A. Reduce the brightness/contrast setting to a minimum
viewing level.
B. Do not display the fixed image for extended periods of
time.
C. Turn the power off when not in actual use.
Important Information Regarding Use of Video
Games, Computers, Captions or Other Fixed Image
Displays.
• Do not allow a still picture to be displayed for an
extended period, as this can cause a permanent
afterimage to remain on the screen.Examples of still
pictures include logos, video games, computer images
and images displayed in 4:3 mode.
CAUTIONS:
• The permanent after-image on the screen resulting
from fixed image use is not an operating defect and as
such is not covered by the warranty.
• This product is not designed to display fixed images for
extended periods of time.
Page 11

ix
Important Notice (Continued)
Cleaning and
Maintenance
To clean this Display, wipe with a soft, dry cloth.
If the surfaces are extremely dirty, use a soft cloth
dipped in a soap and water solution or a weak detergent
solution.
• Use eyeglass cleaner to remove stubborn dirt from the
screen.
• Never use alcohol, paint thinner or benzine to clean
this Display.
• Before using a chemically treated cloth, read the
instructions that came with the cloth carefully.
Page 12
1
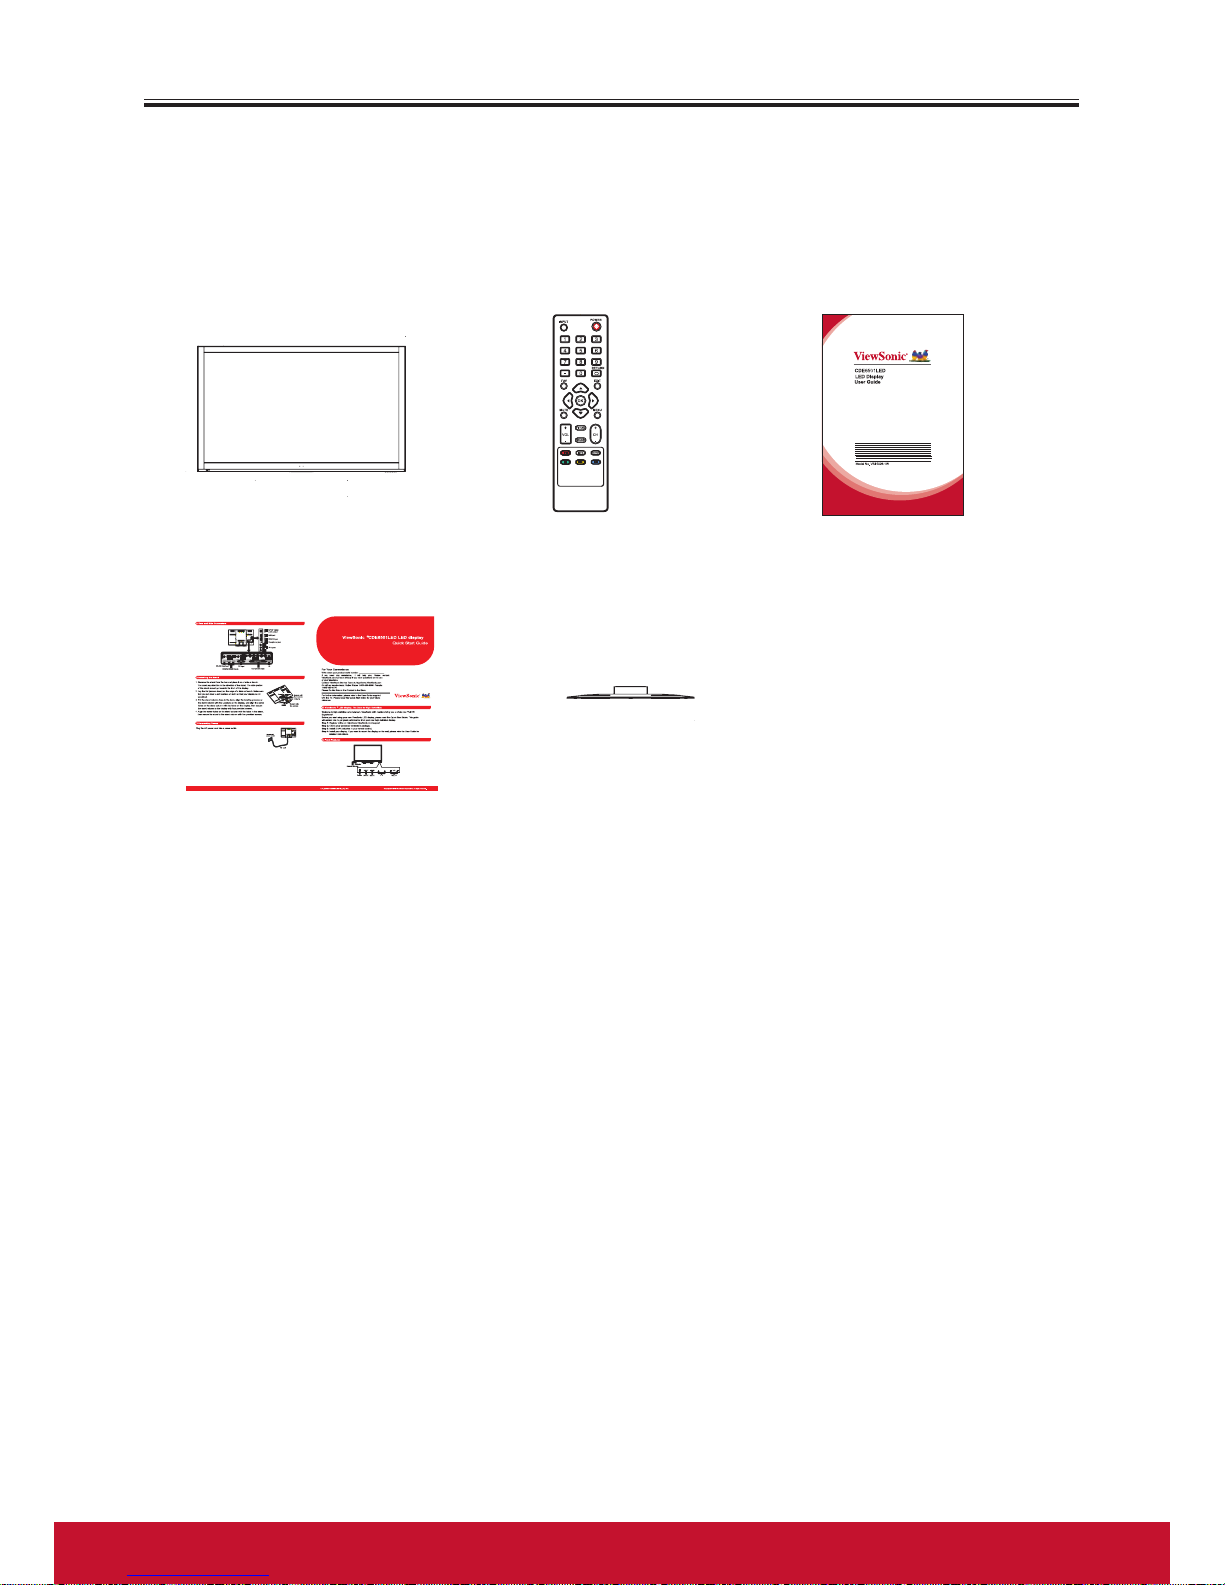
Getting Started
Package contents
1. The Display 2. Remote control and
two AAA batteries
3. User Guide
4. Quick Setup Guide 5.Stand
Page 13
2
3
Getting Started (Continued)
Installing the stand
If the stand is provided, please read these instructions thoroughly before
attempting this installation.
You must install your Display into the stand in order for it to stand upright on a
cabinet or other flat surface. If you intend to mount your Display on a wall or other
vertical surface, you must remove the stand column.
Cautions:
• Make sure that you handle your Display very carefully when attempting assembly or
removal of the stand. If you are not sure of your ability to do this, or of your ability
to use the tools necessary to complete this job, refer to a professional installer or
service personnel. The manufacturer is not responsible for any damages or injuries
that occur due to mishandling or improper assembly.
• When using a table or bench as an aid to assembly, make sure that you put down
a soft cushion or covering to prevent accidental scratching or damage to your
Display’s finish.
• The speaker is not intended to support the weight of your Display. Do not move or
handle your Display by the speaker. This can cause damage to your Display that is
not covered by the manufacturer’s warranty.
• Before attempting assembly or removal of the stand, unplug the AC power cord.
Locating grooves
Secure with
four screws
Stand Column
Locators
Stand
Secure with
five screws
To install the stand:
1. Remove the stand from the box and place
it on a table or bench.
You must pay attention to the direction
of the stand. The wide portion of the
stand should go towards the front of the
Display.
2. Lay your Display flat (screen down) on
the edge of a table or bench. Make sure
that you put down a soft cushion or cloth
so that yourDisplay is not scratched.
3. Put the stand column close to the back of the Display, align the locating grooves on
the stand column with the Locators on the Display, and align the screw holes on
the stand column with the holes on the Display, then secure the stand column to
the Display with four provided screws.
4. Align the screw holes on the stand column with the holes in the stand, then secure
the stand to the Stand column with five provided screws.
After stand installation, if you find the stand is not stable horizontally,please
do the following:
Place the Display face-down on a cushioned surface, loosen the four screws securing
the set to its stand column (note that only loosen a little, not detach the screws),then
tilt the column toward lower position, then tighten these screws again.
Note: 1. The appearance of this product in these illustrations may differ from your
actual product,and is for comparative purposes only.
2. We may change the design and specifications without notice.
Page 14
3
Getting Started (Continued)
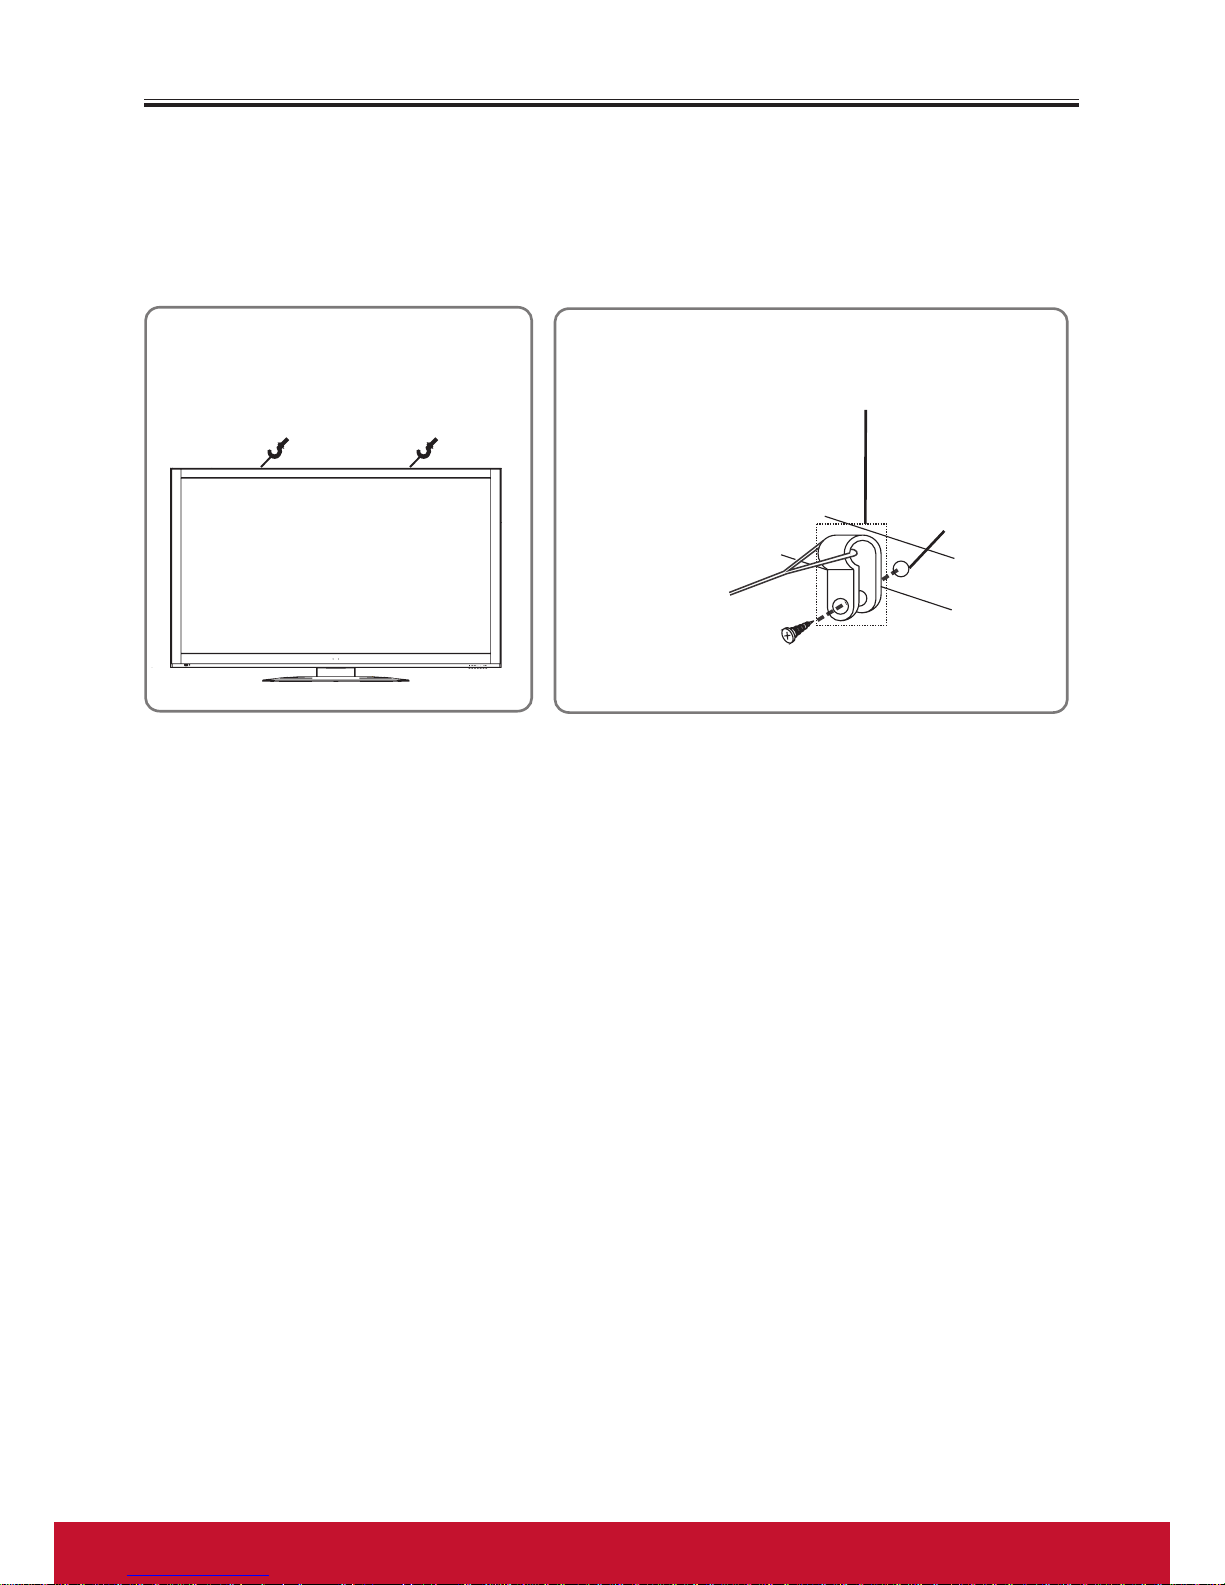
Preventing the Display from toppling over
There is a chance that the Display may topple over in the event of an earthquake or
child climbing, etc. Take measures to prevent it from toppling over for safety's sake.
For example, secure the Display to the wall or pillar as shown at below figures.
Fig.1
Secure the Display to the wall
by string, etc.
Fig.2
Pass the string
through the
retaining ring.
retaining ring
wall mounting
hole on the
Display’s back
Use screw to fix.
Note: The parts such as string, retaining ring, screws used to secure the Display to
the wall or pillar are not provided. You may purchase them from sales store.
The parts may differ from actual ones, and are for comparative purposes only.
Page 15
4
5
Getting Started (Continued)
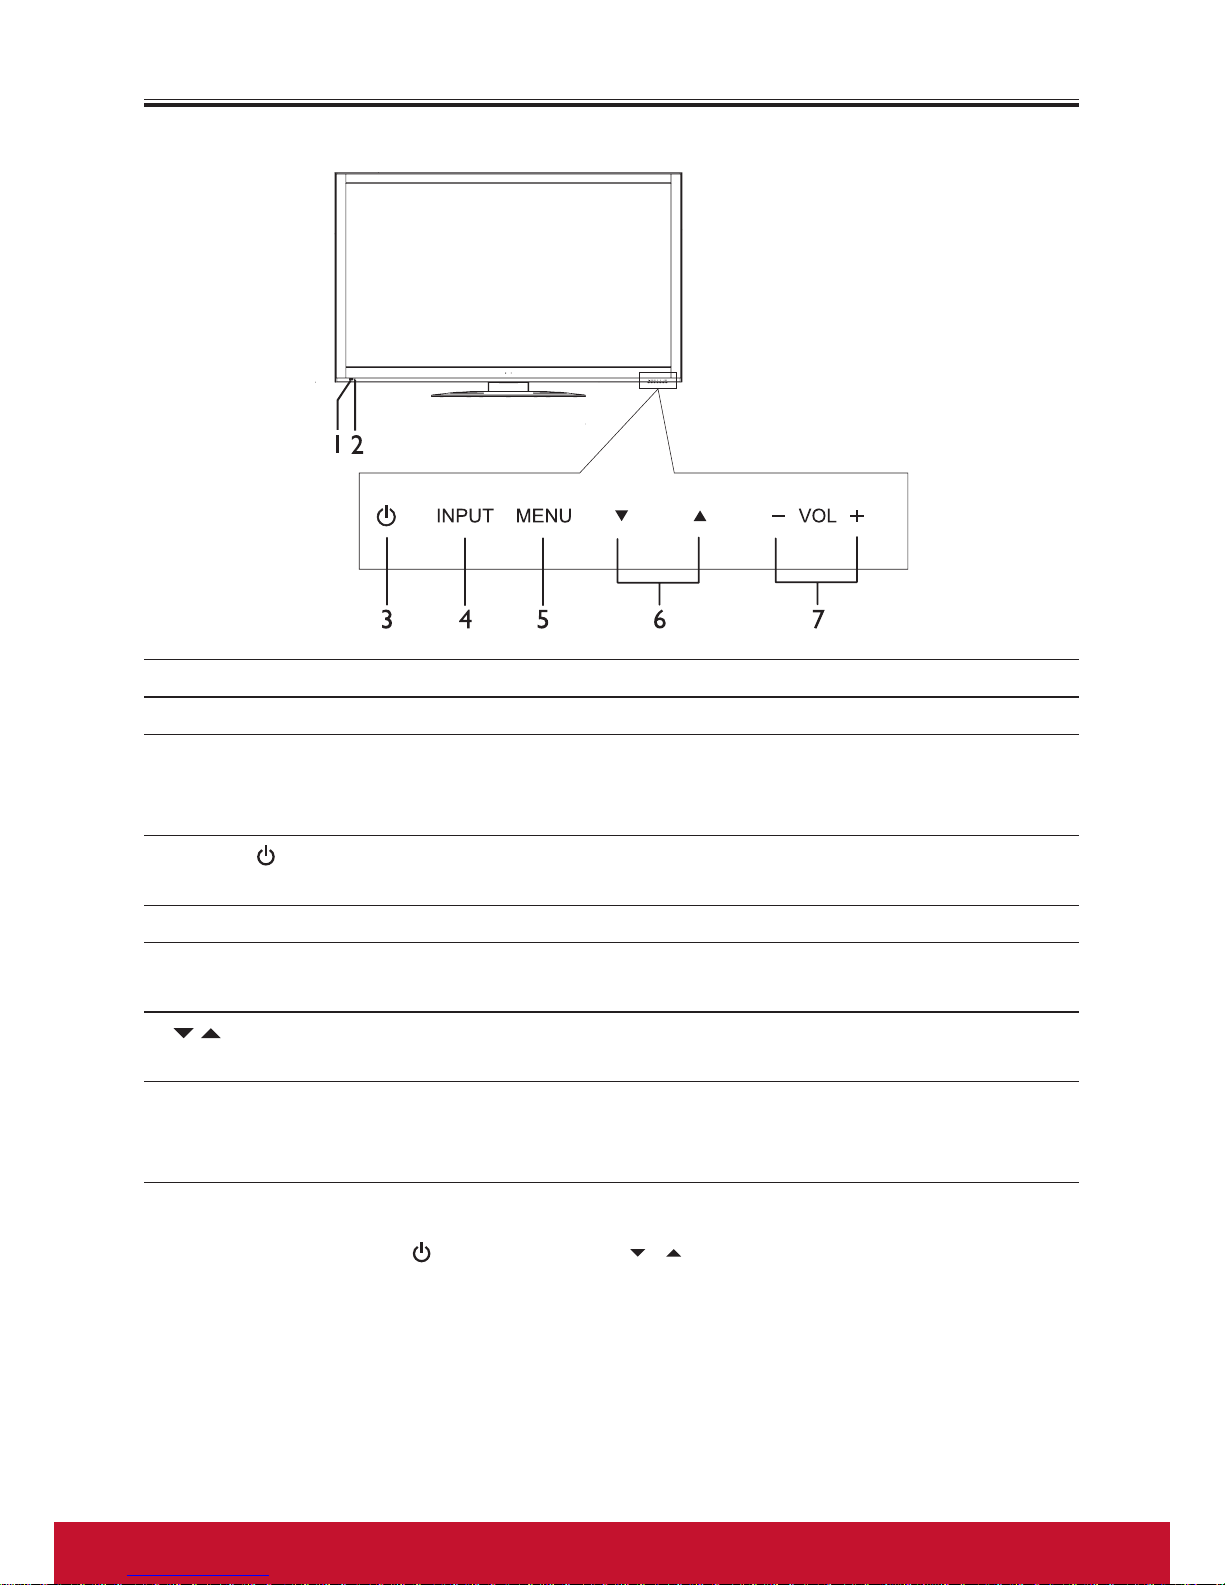
Front view of the Display
Item Description
1. Remote Sensor Receives signals from the remote control. Do not block.
2. Indicator Lights blue when your Display is turned on. Lights red
when your Display is in standby mode. Off when power
cord is unplugged.
3. Power
Press to turn the Display ON from STANDBY mode.
Press it again to turn the set back to STANDBY.
4. INPUT Press to access Input Source menu.
5. MENU Press to open the MENU main page; In OSD menu,press
to return to the previous menu or close the menu.
6. In menu operations, these buttons serve as down/up
buttons.
7. VOL -/+ Press the VOL+ or VOL- button to directly increase
or decrease the sound volume level; In menu
operations,these buttons serve as right/left buttons.
Note:
1. FunctionsofPOWER ,INPUT,MENU, / andVOL+/-arealsoprovidedto
theremotecontrol.Thisoperationmanualprovidesadescriptionbasedonoperating
functionswiththeremotecontrol.
2. ButtonsontheDisplayaretouchbuttons.Firsttouchofthebuttonwillilluminateit.
Secondtouchwillfulfillitsfunction.Ensure that the button is pressed quickly
before the illumination disappears. It is suggested to push the center of the
sensor, otherwise the operation may not be fulfilled successfully.
Page 16
5
Getting Started (Continued)
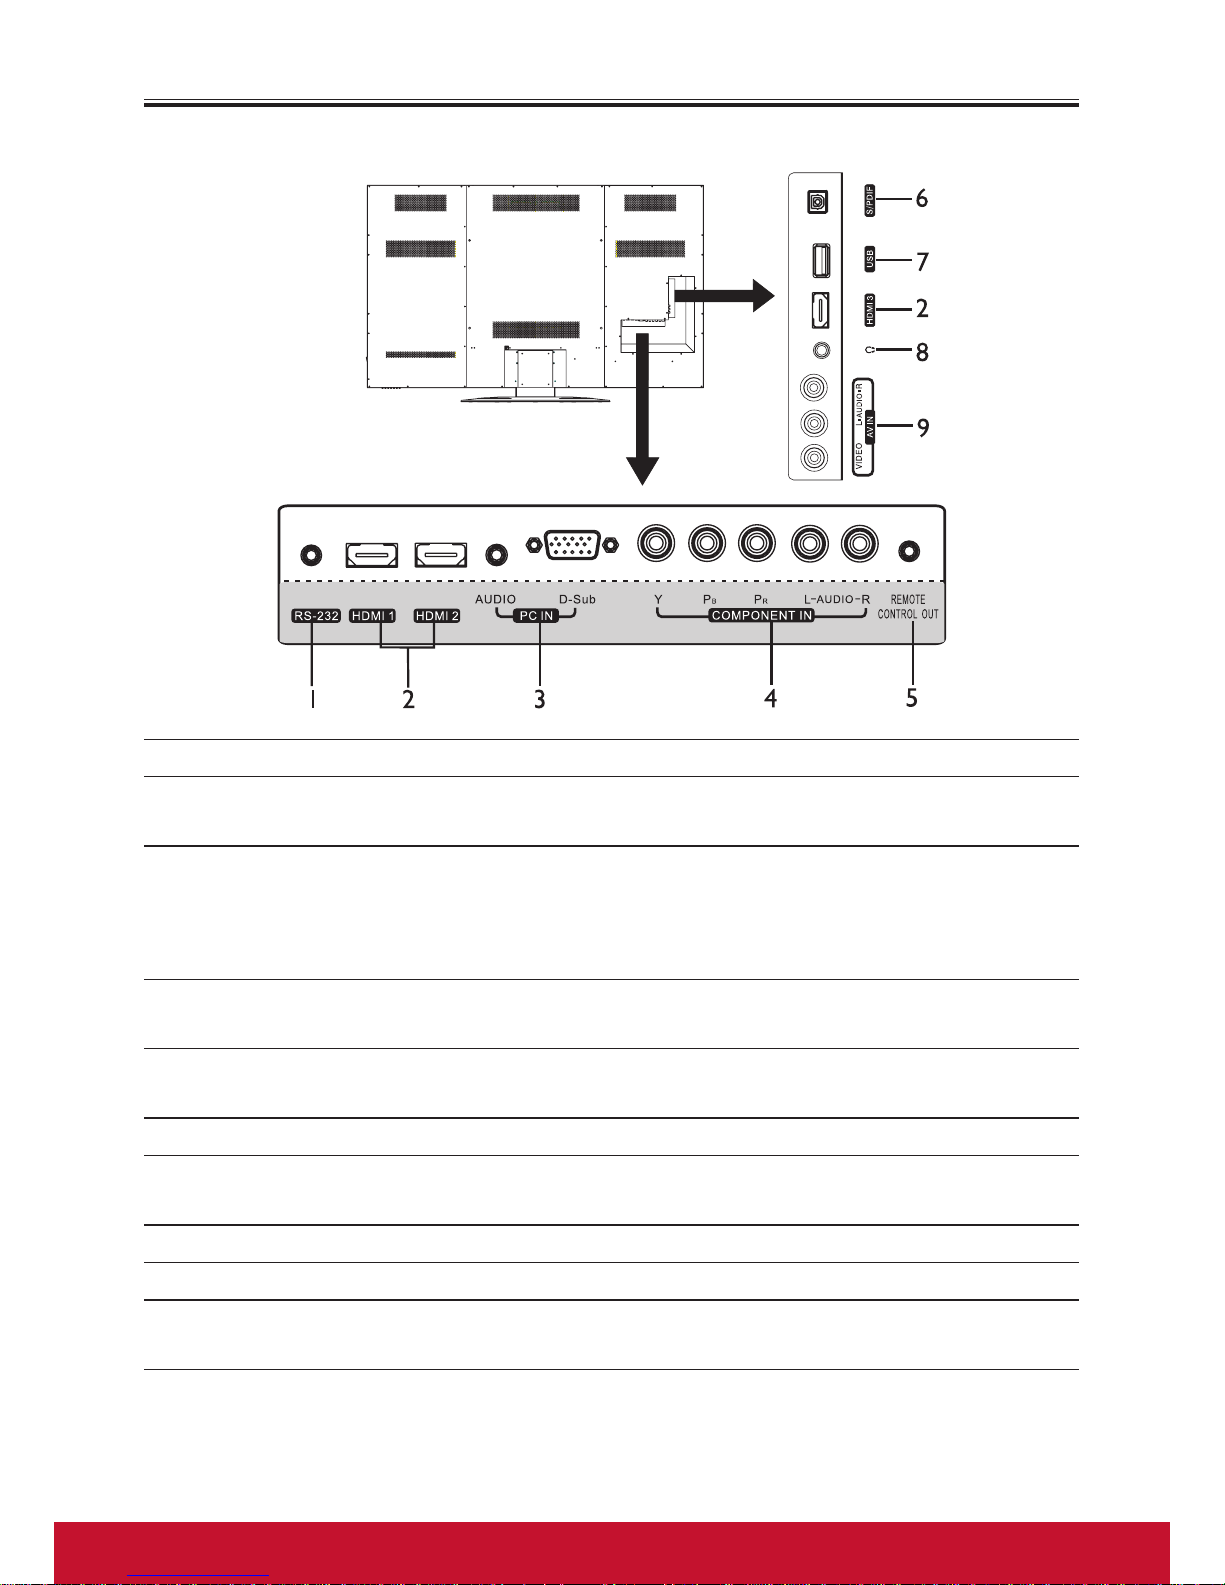
Back view of the Display
Item Description
1. RS-232 interface For service use . The user cannot operate the Display
through this terminal.
2. HDMI1/2/3 interface To connect with those equipments with HDMI or DVI
interface, for example, Set-top box or DVD player. (A
HDMI-to-DVI adapter cable is required when you are
connecting a DVI-equipped device to this Display.)
3. PC input Connect to the D-Sub/AUDIO output jack on your
computer.
4. COMPONENT inputs Connect to the audio and component output jacks of a
DVD player or Set-Top Box.
5. Remote Control Out IR pass through.
6. S/PDIF digital audio
out terminal
Connect to the digital audio input of a digital audio
component.
7. USB port Connect a USB device to this port.
8. Headphone jack Connect to your headphones.
9. AV inputs
(Video,Audio L, R)
Receive video/audio signal from external sources such as
VCR or DVD player.
Page 17
6
7
Getting Started (Continued)
Remote control
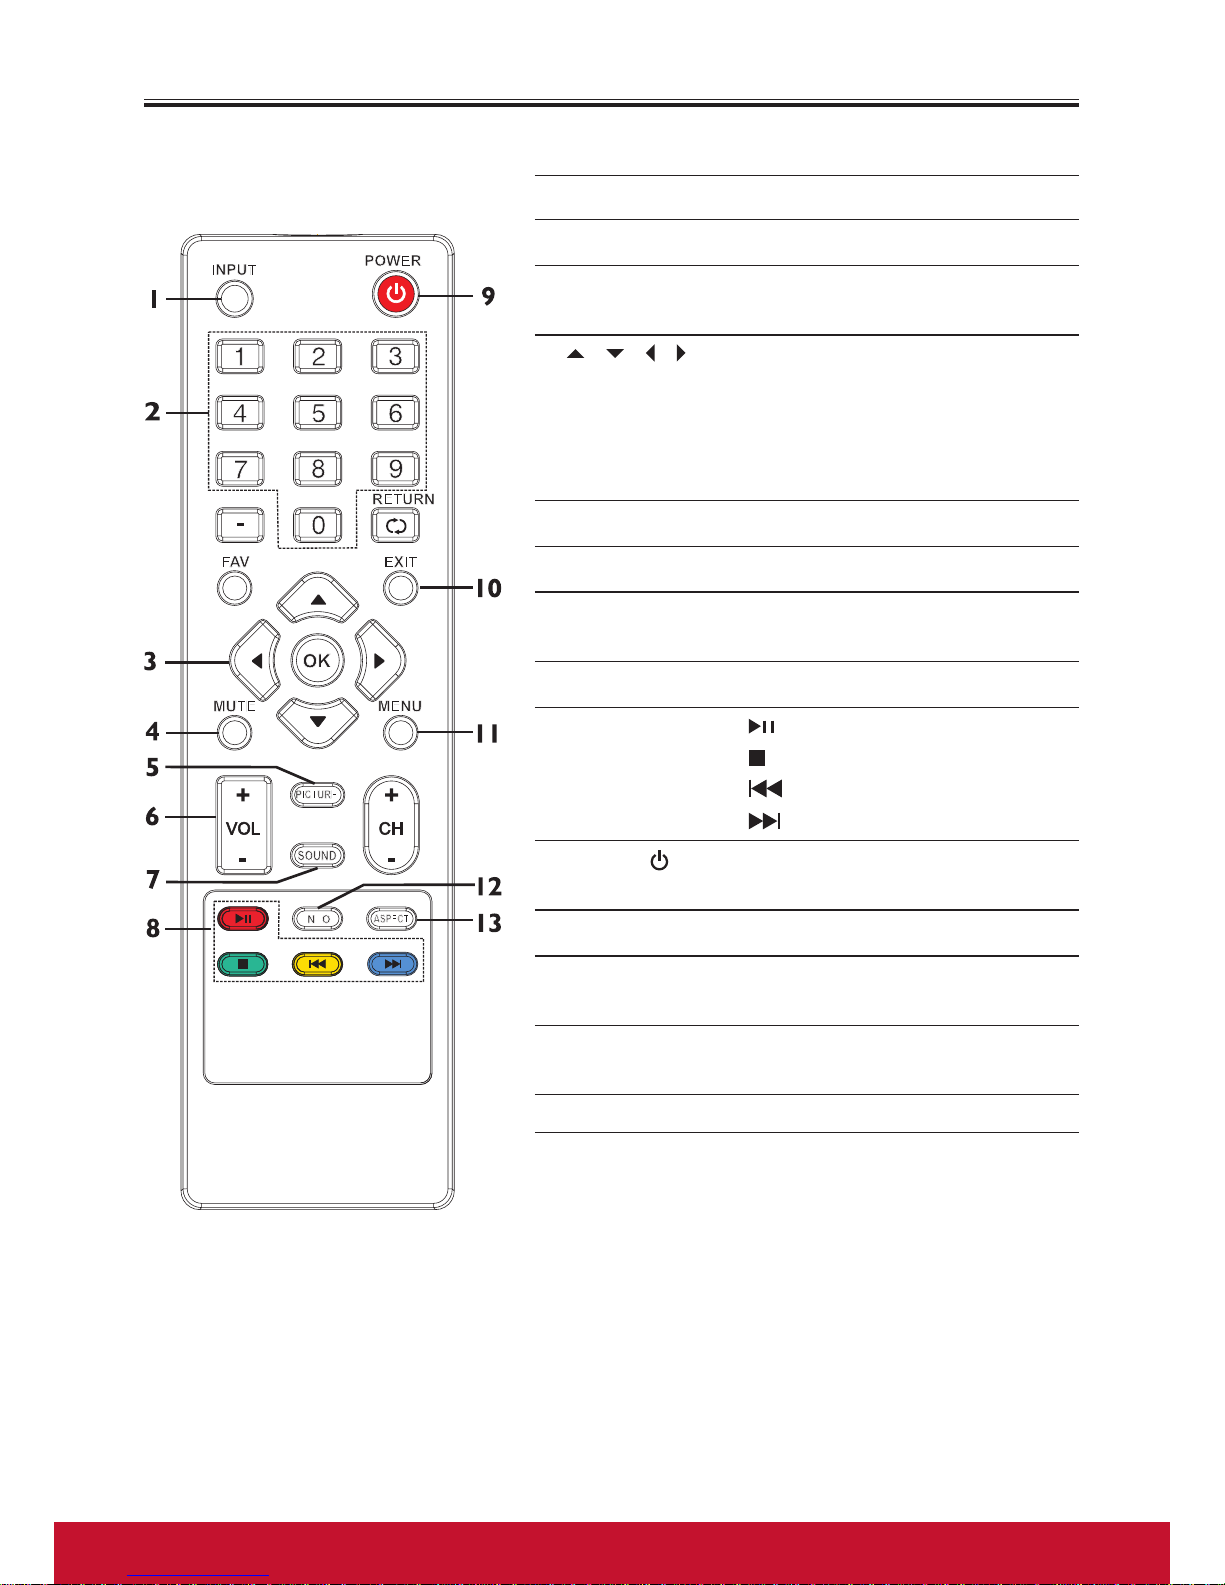
Button Description
1. INPUT Displays Input Source menu.
2. 0 – 9 number
buttons
Press to input password.
3. / / / /
OK
Press the arrows to navigate
through the menus or adjust
an item. Press OK to confirm
a selection or enter a submenu.
4. MUTE Mutes the sound.
5. PICTURE Selects picture mode.
6. VOL+/- Increases or decreases the
volume.
7. SOUND Selects sound mode
8. USB control
buttons
: Play / pause button.
: Stop button.
: Plays the previous.
: Plays the next.
9. Power
Switches the Display power
on or Standby.
10. EXIT Exits the menu screen.
11. MENU Open the main menu or
return to the previous menu.
12. INFO Displays the information
banner.
13. ASPECT Selects the screen size.
Note:
Thosebuttonswhicharenotdescribedabovehave
nofunctioninthismodel.
Page 18

7
Getting Started (Continued)
Selecting a location
You should select a location for the Display:
·Where direct light does not reflect on the screen.
·That has indirect and soft lighting.
·Where the Display has access to a power outlet.
Note: Watching in total darkness or with a reflection on the
screen may cause eyestrain.
Installing remote
control batteries
To install remote control batteries:
1 Open the battery cover.
2 Insert two AAA batteries into the battery compartment.
Make sure that the + and – symbols on the batteries
match the + and – symbols in the battery compartment.
3 Replace the cover.
Battery precautions:
Improper use of batteries can result in a leakage of
chemicals and/or explosion. Be sure to follow the
instructions below.
• Place batteries with their terminals corresponding to the
(+) and (–) indications.
• Different types of batteries have different characteristics.
Do not mix batteries of different types.
• Do not mix old and new batteries. Mixing old and new
batteries can shorten the life of new batteries and/or
cause old batteries to leak chemicals.
• Remove batteries as soon as they are non-operable.
Chemicals that leak from batteries can cause a rash. If
chemical leakage is found, wipe with a cloth.
• Dispose of batteries in a proper manner.
• If the remote control is not used for an extended period
of time, remove the batteries.
• The batteries shall not be exposed to excessive heat such
as sunshine, fire or the like.
Page 19

8
9
Getting Started (Continued)
Aiming the remote control
Use the remote control by pointing it towards
the remote sensor on the front of your Display.
Objects between the remote control and the
remote sensor may prevent proper operation.
Cautions regarding use of remote
control
• Do not expose the remote control to shock.
In addition, do not expose the remote control
to liquids, and do not place in an area with
high humidity.
• Do not install or place the remote control
under direct sunlight. The heat may cause
deformation of the Display.
• The remote control may not work properly
if the remote sensor window of the main
Display is under direct sunlight or strong
lighting. In such a case, change the angle of
the lighting or the set, or operate the remote
control closer to the remote sensor window.
Page 20

9
Connections
Cautions Before Connecting
• When connecting an external device to the Display, make sure that the Display and
the device are turned off.
• Check the plugs on the ends of cables to make sure that they are the correct type
before you try plugging them into jacks on the Display.
• Make sure that all plugs are securely inserted into the jacks. Loose connections can
result in image or color problems.
• The illustration of the external device may be different depending on your model.
• Refer to the operating manual of the external device as well.
Connecting power
Plug the AC power cord into a power outlet.
Household
power outlet
AC cord
Note:
•ThisDisplayshouldbeoperatedonlyfromthe
typeofpowersourceindicatedonthemarking
label.
•AlwaysunplugtheACcordfrompoweroutlet
whennotusingforalongperiodoftime.
•Thisillustrationisforreferenceonly.TheAC
plugmaybedifferentondifferentmodels.
Connecting digital sound system
Digital sound system
S/PDIF IN
Display Side
For a full Home Theater sound
experience,you must connect your digital
sound system to the S/PDIF OUT jack on the
Display.
To connect a home theater system
using a digital audio cable:
Connect one end of a digital audio cable to
the S/PDIF jack on the Display.Connect the
other end of the digital audio cable to the S/
PDIF jack on the digital audio system.
Page 21

10
11
Connections (Continued)
Connecting Headphones
Display Side
Headphones
To connect headphones:
Insert the plug of the headphone into the
Display’s Headphone jack.
When using headphones, adjust the
headphone volume so as to avoid excessive
levels as hearing damage may result
Connecting a USB storage
device
To USB port
Display Side
Insert your USB device into the USB port
To play from the USB device:
1. Turn on your Display, then press INPUT
button. The Input Source menu opens
2. Press or to select USB, then press
OK to confirm.
Never remove the USB device or turn off the
Display while using the USB device.
Connecting AV device (for playback)
Game console
Camcorder
or
AV cable
VCR
Display Side
or
Cablesareoften
colorcodedto
connectors.Connect
yellowtoyellow,redto
red,whitetowhite.
To connect an AV device (such as VCR,
camcorder, or game console) :
Connect the Audio/Video cables between the
Audio (L/R)/Video jacks on the Display and AV
device.
1. Turn on your Display, then press INPUT
button. The Input Source menu opens.
2. Press or to select AV, then press OK
to confirm.
3. Turn on your AV device , insert a
videotape and press the Play button.
Page 22

11
Connections (Continued)
Connecting HDMI device
Display Rear
HDMI cable
HDMI device
How to connect an HDMI device:
Connect the HDMI cable between the HDMI
jack on the Display (HDMI1 and HDMI2
located at the rear, while HDMI3 at the side)
and HDMI output jack on the device.
Note: IfyourdevicehasanHDMIconnection,
werecommendyouusethattogetthebest
qualitypossible
To play from the HDMI device:
1. Turn on your Display, then press INPUT
button. The Input Source menu opens.
2. Press or to select HDMI1 or HDMI2
or HDMI3 correspondingly, then press
OK to confirm.
3. Turn on the HDMI device and set it to the
correct mode. Refer to the instructions
that came with the HDMI device.
Note:
IftheexternaldevicehasDVIoutputonly,use
aDVItoHDMIadaptercabletoconnecttothe
HDMIterminal.Connecttheaudiocabletothe
PCINAUDIOjackontheDisplayrear.
Connecting component Video device
DVD Player,
etc.
Audio cable
Component
video cable
Display Rear
Componentcablesoftenhavered,green,andblue
colorcodedvideoconnectorsandredandwhiteaudio
connectors.Matchthecolorswhenmakingconnections.
To connect a component video device:
Connect the Component Video cable
between the Y, PB, PR input jacks on the
Display and Y, PB, PR output jacks on the
device .Connect the Audio cable between the
AUDIO input jacks on the Display and AUDIO
output jacks on the device.
To play from the component video
device:
1. Turn on your Display, then press INPUT
button. The Input Source menu opens.
2. Press or to select Component, then
press OK to confirm.
3. Turn on your external device and set it to
the correct mode. See the device’s user
guide for more information.
Page 23

12
13
Connections (Continued)
Connecting computer
Display Rear
To display port
(15-pin D-Sub)
D-Sub cable
Audio cable
To audio output jack
To connect a computer:
Connect a D-SUB(VGA) cable
between the D-Sub jack on the
computer and the D-Sub input jack
on the Display.
Connect an Audio cable between
the AUDIO output on the
computer and AUDIO input jack on
the Display
To play video from the
computer:
1. Turn on your Display, then press
INPUT button. The Input
Source menu opens.
2. Press or to select D-SUB,
then press OK to confirm.
3. Turn on your computer, and
adjust the Display properties as
required.
Note: SomecomputershaveanHDMIjack.You
canuseanHDMIcabletoconnectthecomputerfor
abetterpicture.
Page 24

13
Basic Operations
Turning the Display on or off
1 Make sure that the power cord is connected to a power outlet.
2 Now the Display is in standby mode. Wait some seconds until the power
indicator lights up, then press POWER to turn on your Display. (Be sure to wait
some seconds before pressing POWER button. If you promptly press POWER
button then the Display may not respond or act wrongly.)
3 Press button again to turn off your Display. Your Display enters standby mode.
Warning: WhentheDisplayisinstandbymode,powerisstillflowingintotheDisplay.For
thesakeofenergysavingandsafetyissue,pleasedisconnectthepowercordtocompletely
cutoffthepower.AfteryouturnofftheDisplay,youshouldwaitsomesecondsbeforeyou
turnitonagain.
Note: IftheDisplaydoesnotreceiveabroadcastsignalforseveralminutes,theDisplay
goesintostandbymode
Selecting the input source
To select the input source:
1 Press INPUT button. The Input Source list
appears.
2 Press or to select the input source, then
press OK or / to confirm your choice.
The Display switches to the selected source.
Using the OSD menu
To operate the OSD (on-screen display)
menu:
• Press MENU to call up the OSD main menu.
– The screen will now display PICTURE menu.
• Press or one or more times to select menu,
press to access.
– PICTURE, SOUND, TIME, OPTION, LOCK
menu can be selected.
• From the menu, press to navigate or
adjust. Press OK to confirm an entry or selection.
• To return to previous menu, press MENU.
• To close the menu, press EXIT.
Page 25

14
15
Basic Operations (Continued)
On-screen menu overview
PICTURE menu SOUND menu
TIME menu OPTION menu
LOCK menu Note:
•Dependingonthesignaltuned,you
mayseedifferentmenuoptionsonyour
screen.
•Menuitemsthatarenotselectableare
grayedout.
•Theillustrationsandon-screendisplays
inthismanualareforexplanation
purposes(someareenlarged,others
cropped)andmayvaryslightlyfromthe
actualones.
Adjusting the volume
• Press the VOL+/ – to increase or decrease the volume.
• Press the MUTE button to temporarily turn off the sound. To restore the sound,
press the MUTE button again.
Page 26

15
Adjusting the Picture
Adjusting the picture
To adjust the picture:
1 Press MENU. The on-screen menu
opens with the PICTURE menu
displayed, then press to access
2 Press to highlight an option, press
to adjust the option; If a sub-menu
exists, press or OK to access. You
can select:
• Picture Mode — Selects the picture mode. You can select:
. Dynamic (a bright and vivid picture)
. Standard (a standard picture)
. Soft (a soft picture)
. User (user customized picture).
Note: You can also press PICTURE on the remote control to select the picture
mode.
• Contrast — Adjusts the contrast.
• Brightness — Adjusts the brightness.
• Colour — Adjusts the colour saturation.
• Sharpness — Adjusts the sharpness.
• Tint — Adjusts the image tint. (Only for NTSC system)
• Backlight — Sets the overall brilliance of the screen.
• Colour Temperature — Selects the colour temperature. You can select Warm
(to enhance the reds), Cool (to enhance the blues), or Normal.
• Aspect Ratio — Selects the aspect ratio of the picture. You can select:
. 16:9 — Shows a full-screen picture in 16:9 mode.
. 4:3 — Shows picture in 4:3 display mode. (Recommended not let the Display
remain in this mode for extended period of time as to protect the screen.)
. Auto — Selects the correct aspect ratio automatically. (Note: In Component
mode, due to technology limited, for 480i/p,576i/p “16:9” signal, please select
“16:9” aspect ratio manually)
. Zoom1 — Enlarges the picture vertically. The top and bottom may be cropped.
. Zoom2 — Enlarges picture both horizontally and vertically. The edges may be
cropped.
. 1:1 pixel mapping (D-SUB, HDMI, Component only) — Displays an input
source without scaling it (This option is available when native resolution is
1920x1080 and input resolution is 1920 x 1080p)
Note: You can also press ASPECT to select the aspect ratio.
Page 27

16
17
Adjusting the Picture (Continued)
• Noise Reduction — Selects the noise reduction mode to reduce picture noise
(snow). You can select Low, Middle, High, or Off.
• Overscan (D-SUB, HDMI only) — Turn this On to adjust the picture’s
reproduction rate (available when the input signal is in video format).
• Adaptive Contrast — Turn this On to optimize the picture display for a more
vivid image.
• HDMI Black Level (HDMI only) — Selects the black level on the screen. Select
Low for darker screen, Normal for brighter screen. (Available when RGB signal is
input through HDMI jack).
• Screen (D-SUB only) — Adjusts the computer image.
Adjusting the computer image
Before adjusting the screen, make sure
that you select the correct source
(D-SUB).
To adjust the computer image:
1 Press MENU. The on-screen
menu opens with PICTURE menu
displayed.
2 Press or repeatedly to scroll
the menu page until you select the
Screen item, then press or OK to
access.
3 Press or to highlight an
option,press or to adjust the level,
or press OK to confirm. You can
select:
• Auto Adjust — Automatically
adjusts the image settings such as
position and phase.
• Horizontal Pos. — Moves the
image right or left.
• Vertical Pos. — Moves the image
up or down.
• Size — Adjust the horizontal width
of the image on the screen.
• Phase — Adjusts the focus of stable
images.
4 To close the menu, press EXIT
button.
Page 28

17
Adjusting the Sound
Adjusting the sound
To adjust the sound:
1 Press MENU. The on-screen menu
opens.
2 Press or to select SOUND
menu,press to access.
3 Press or to highlight an option,
press or to adjust the option. You
can select:
• Sound Mode — Selects the sound
mode. You can select:
. Standard (for normal programs)
. Music (for musical programs)
. Movie (for movies)
. Sports (for sports programs)
. User (for user setting sound mode).
Note: You can also press SOUND on
the remote control to select the sound
mode.
• Treble — Adjusts Treble (high sounds).
• Bass — Adjusts Bass (low sounds).
• Balance — Adjusts the balance between the left and right audio channels.
• Auto Volume — Turns On to equalize the overall volume levels for all channels.
• Surround Sound — Turns the Surround sound effect on or off.
• Visual Impairment — Sets the mix of visually impaired audio with regular audio.
When available, visually impaired audio includes audio descriptions of on-screen
action. Enable this by setting Mode to On, also you can adjust the volume from this
menu.
• Headphone Connection — Selects Speaker On if you want the speaker sound
keeps normal after the headphone is connected. Selects Speaker Off if you want
the speaker sound is muted when the headphone is connected.
4 To close the menu, press EXIT button.
Page 29

18
19
Adjusting Basic Settings
Adjusting basic settings
To adjust basic settings:
1 Press MENU. The on-screen menu
opens
2 Press or to display OPTION menu,
press to access.
3 Press or to select an option,
press or to adjust the option. If a
sub-menu exists, press OK to access,
then use to select and adjust.
• OSD Language — Selects on-screen menus language.
• S/PDIF Output (digital only) — Selects the digital audio output mode for S/PDIF.
You can select Auto or PCM.
. Auto: This mode outputs Dolby Digital or PCM to the digital audio output jack
(S/PDIF) providing it is being broadcast.
. PCM: Select this when a 2ch digital stereo amplifier is connected to the Display.
When you select a Dolby Digital or MPEG audio track, the sound is converted to
the PCM (2ch) format and output.
• Judder Adjustment — When viewing programs, picture problems such as Blur
and Judder may occur, and different programs have different amount of Judder. The
Judder Adjustment option will help you correct this picture problem by reducing
the amount of judder on your Display. You can select Weak/Normal/Strong that
suits your taste, select Off to turn off this feature.
. Weak: Select for news programs or similar programs.
. Normal: Select for movie or general programs.
. Strong: Select for sports programs.
• Note: Judder Adjustment is available only under certain formats. Sometimes it will
be turned off automatically when some OSD displays on the screen, then restore
automatically when the OSD disappears.
• Audio Only — When listening to MP3 music (through USB music play), you
can set Audio Only to Power Saving for energy save. The backlight will turn
off automatically after some seconds. Select Normal then the backlight works
normally.
4 To close the menu, press EXIT button.
Page 30

19
Setting Clock & Timer
Setting clock
To set clock
– If the clock is not set, you may set the
clock manually.
– To set OFF timer/ON timer, you should
set the clock first.
1 Press MENU. Press or to display
TIME menu, press to access.
2 Press or to select Clock, press
or OK to access its setting menu.
Within the menu, use or to
highlight the Date, Month, Year,
Hour or Minute item, and use or
to adjust the values.
When finished, use or to select
Close and press OK to confirm the
setting and close this sub-menu.
3 To close the menu, press EXIT
button.
Setting Off timer
To set OFF timer
You can set OFF timer to switch
the Display to standby at a specified
time. Once you set OFF timer, it will
effect every day.
1 Press MENU. Press or to
display TIME menu, press to
access.
2 Press or to select Off Time,
press or OK to access its setting
menu.
3 Now the Activate item is highlighted automatically, press or to select On to
turn on the function (To cancel the function, select Off).
4 After Activate is set to On, press or to select Hour or Minute, press or
to adjust the value.
5 When finished, use or to select Close and press OK to confirm the setting
and close this sub-menu.
6 To close the menu, press EXIT button.
Page 31

20
21
Setting Clock & Timer (Continued)
Setting ON timer
To set ON timer
ON timer feature allows you to set
the Display to turn on automatically to
a preset source at a certain time and
at certain volume. Once you set ON
timer,it will effect every day.
1 Press MENU. Press or to
display TIME menu, press to
access.
2 Press or to select On Time.
Press or OK to access the
submenu.
3 Now the Activate item is highlighted automatically, press or to select On to
enable ON timer (To cancel, select Off ).
4 After Activate is set to On, press or to go through the item list adding the
details of the on timer by using or to make selections.
• Hour/Minute: Sets the desired time to turn on the Display.
• Volume: Sets the volume level for the On Timer program.
• Input: Sets the input source to be viewed when the Display turns on.
5 When finished, use or to select Close item and press OK to close the sub-
menu. Press EXIT button to close the main menu.
6 Press to switch the Display to standby mode. At the preset time, the Display will
auto turn on and go to the preset source at the preset volume.
Setting Sleep timer
To set Sleep timer
Sleep timer lets you select the amount of
time before your Display turns itself off
automatically. This setting is cleared when
the Display is turned off.
1 Press MENU. Press or to display
TIME menu, press to access.
2 Press or to select Sleep Timer.
3 Press or to select the amount of time;
to turn off the timer, please select Off.
Note:
Afteryouhavesetsleeptimer,whenthelast60secondscomes,thePowerOffscreenwill
appeartoremindyouafterhowmanysecondstheDisplaywillpoweroff.Youcanpressany
buttontoquit.
Page 32

21
Setting Clock & Timer (Continued)
Setting Auto Sleep
To set Auto Sleep
Auto Sleep will bring the Display to
standby automatically when there is no
signal input (except USB) for a certain
time
1 Press MENU. Press or to display
TIME menu, press to access.
2 Press or to select Auto Sleep.
3 Press or to select On to turn on
Auto Sleep. (To cancel the function,
select Off.)
4 To close the menu, press EXIT
button
Page 33

22
23
Setting Lock Menu
Setting or changing the password
To set or change the password
From LOCK menu you can set a new
lock password or to change an existing
password. By default, the password is
0000 and you should change it. To access
LOCK menu, to restore factory default,
the child lock password is required.
1 Press MENU. Press or to display
LOCK menu, press to access.
2 Now a password is required to
input. Use number buttons to input
the correct password (the default
password is 0000).
3 Press or to select Set Password,
and then press or OK button to
access its submenu.
4 Use the number buttons to input
a new password (4-digit). Input
the new password again. Now the
new password has been created
successfully.
Note: Besuretowritedownyourpassword
andretainitforfutureuse.Ifyoudoforget
thepassword,theDisplayprovidesasuper
password“2580”.PleaseDONOTletyour
childrenknowthesuperpassword.
Restoring factory default
To restore factory default
Caution: When you restore factory
default, all settings including password
will be cleared and reset to default
(the password is reset to 0000). So
make sure you do want to reset
the settings to its original factory
condition before you perform this
operation.
1 Navigate to the LOCK menu and input
the correct password to access
2 Press or to select the Restore Factory Default item, and then press or OK
A message appears prompting you to confirm again.
3 Press to reset or press to cancel the reset.
4 Press MENU to return to previous menu. Press EXIT to close the menu directly.
Page 34

23
Setting Hotel Mode
Setting Hotel Mode
Hotel Mode feature enables you to set
maximum volume, set power on input,
etc. which is especially useful at Hotel
environment.
To set Hotel Mode
1 Press MENU button. The main menu
opens.
2 Press number buttons: [ 9, 9, 3 ] to
access the Hotel Mode screen. Be
sure to quickly input the numbers
while the main menu is still visible.
3 Within the menu, press or to
highlight an option, press or to set
or adjust the option. You can select:
• Write settings to Display — Writes the settings in USB file to Display.
• Volume def. — Sets power-on volume for the Display.
• Volume Max — Sets the maximum volume (30–100) for the Display.
• Read Settings from Display — Reads the settings from Display store to USB
disk.
• USB/AV/YPbPr/HDMI 1/HDMI 2/HDMI 3/PC — Sets Enable, you can
select USB/AV/YPbPr/HDMI 1/HDMI 2/HDMI 3/D-SUB on the Input Source
list. Sets Disable, the USB/AV/YPbPr/HDMI 1/HDMI 2/HDMI 3/D-SUB source
on the Input Source list is not selectable and grayed out.
• Power on input — Sets one input source to be viewed when the Display is
turned on.
• Display ID — Sets the ID number for the Display.
4 Press OK to save the setting. Press EXIT to exit the menu screen directly.
Page 35

24
25
Using USB Multi Media Player
Using USB multi media player
You can connect a USB storage device to your Display to view compatible photo,
movie, text on the large screen of the Display or play compatible music so that the
sound can be output from the Display’s speakers.
To use USB multi media player, please go to USB source through Input
Source menu by pressing INPUT button.
Notes:
• Never remove the USB device or turn off the Display while using the USB device.
• It is recommended that you back up your USB device data.
• The USB menu may vary in different situation.
• If you want to pull out the USB device, please exit USB mode first. For instructions
on using your USB device, refer to the owner’s manual of your USB device.
• Please use English to name your files. Otherwise the file names can not be shown
correctly.
• Certain types of USB device may not be compatible with this Display.
USB multi media interface introduction
1 Connect your USB device. Select USB mode through the Input Source menu,
the USB multi media interface (main menu) will appear automatically.
2 Press or to select your desired media, press OK to access. You can select:
• PHOTO — Selects to view compatible photos.
• MUSIC — Selects to playback compatible music.
• MOVIE — Selects to playback compatible movie.
• TEXT — Selects to view compatible text
Page 36

25
Using USB Multi Media Player (Continued)
Media 1: Viewing Photos
With the photo viewer, you can:
• View photos (in JPG, BMP or PNG format).
• View photos with background music.
• Pan, zoom, and rotate photos.
• Mark photos so you can just slide show those marked photos.
Note: The photo viewer supports JPG, BMP, PNG format images, but not all JPG,
BMP, or PNG files are compatible with the Display due to technical update.
Using photo viewer index and Photo Menu Bar
To access photo viewer index / Photo Menu Bar
1 Connect your USB device that contains the photo files you want to view, switch
to USB mode, the USB main menu will appear automatically. Press or to select
PHOTO, press OK to access.
2 Press or to highlight C disk, press OK to open the USB device; if you want to
go back, highlight Return and press OK.
3 After you open the USB device, you can
use to navigate and select folders
or photo files, then press OK to open the
highlighted folder or press to start slide
show from current photo file. Below we
will take it as an example that your desire
photo files are contained in a folder. Just
highlight this folder and press OK and
the Photo Viewer Index appears, which
displays thumbnail images of the files
stored inside this folder
Page 37

26
27
Using USB Multi Media Player (Continued)
4 The following describes how to use the Photo Viewer Index:
• To return to root (C: disk), highlight
Return and press OK.
• To go back to upper level folder,
highlight Up Folder and press OK.
• To start slide show from your desired
photo, highlight this photo then press .
• To mark photos so you can just slide
show those photos, use to
highlight the specific photo then press OK.
A check mark appears on it (press OK
again to cancel the mark). Repeat this way
to create your favourite photo list, then
slide show will go among these photos.
Return to
root
Path
Return to upper
level folder
Current page/total pages
Mark
Thumbnails
of photos
5 During slide show, you can make use of Photo Menu Bar to perform many
functions. To call out and operate the Photo Menu Bar, just press INFO button
during slide show. The Photo Menu Bar is displayed at the bottom screen. Then
use to select your desired function icon, press OK to fulfill the function. If the
function icon has several options, repeatedly press OK to select it. To clear the
Photo Menu Bar, press INFO again.
Play/Pause
Previous
photo
Next photo
Stop
Repeat mode selection
Play/stop background music
Show playlist
Show information
Rotate clockwise
Rotate counterclockwise
Zoom in
Zoom out
Pan
Press
continuously
for additional
options
The following describes every function icon on the Photo Menu Bar
or
Play/pause. Also you can directly press on the remote control for play/
pause
Go to the previous/next photo. Also you can directly press / on the
remote control for previous/next photo.
Stop and exit. Also you can directly press on the remote control for stop.
Repeat mode selection. Highlight this icon, press OK one or more times
to select Repeat 1, Repeat All, No Repeat.
Play/pause background music.
Note: You can make use of it to playback your marked compatible music file
as background music during photo slide show.
Page 38

27
Using USB Multi Media Player (Continued)
List of photo files. It will display a list of all marked compatible photo files
in current folder. If none marked, then all compatible photo files in this
folder .Press to move upward or downward, press OK to start slide
show from it. Press EXIT to exit the list.
File information. It will display current photo file information. Press EXIT
to clear the information.
Rotate the photo clockwise/counterclockwise by 90 degree upon every
press.
Zoom in/zoom out the photo image
Pan (left, right, up, down). You can use Pan only when the photo is
magnified using ZOOM. After you highlight this icon and press OK, a symbol
appears at the screen’s bottom right corner, now you can press to
pan around the photo.
Media 2: Playing Music
With the USB music player, you can:
• Play music bit rate up to 192kbps.
• Mark music files so you can just play back those music files.
Music Playback
To access music playback window
1 Connect your USB device that contains
the music files you want to play, switch to
USB mode through the Input Source
menu, the USB main menu will appear
automatically. Press or to select
MUSIC, and press OK to access
2 Press or to highlight C disk, then press OK to open the USB device; if you want
to go back, highlight Return and press OK.
3 After you open the USB device, you can use to navigate and select folders
or music files, then press OK to open the highlighted folder or press to start
music play from current music file. Below we will take it as an example that your
desire music files are contained in a folder. Just highlight this folder and press OK
to open it. All your music files are shown in a thumbnail index
Page 39

28
29
Using USB Multi Media Player (Continued)
4 The following describes how to use the music thumbnail Index:
• To return to root, highlight Return and press OK.
• To go back to upper level folder, highlight Up Folder and press OK.
• To start playback from your desired music file, highlight this file then press .
• To mark music files so you can just play those music files, use to
highlight this music then press OK. A check mark appears on it (press OK again
to cancel the mark). Repeat this way to create your favourite music list, then
music playback will go among these files.
5 During music playback, you can make use of Music Menu Bar to perform many
functions.
To call out and operate the Music Menu Bar, just press INFO button during music
playback. The Music Menu Bar is displayed at the bottom screen. Then use to
select your desired function icon, press OK to fulfill the function. If the function
icon has several options, repeatedly press OK to select it. To clear the Music
Menu Bar, press INFO again.
Play/Pause
Fast reverse
Fast forward
Previous
Next
Mute
Repeat
Stop
Show playlist
Information
Skip to specific point by input time
Press
continuously
for additional
options
The following describes every function icon on the Music Menu Bar.
or
Play/pause. Also you can directly press on the remote control for play/
pause
Fast reverse/fast forward.
Go to the previous/next file. Also you can directly press / on the
remote control for previous/next file.
Stop playback and exit. Also you can directly press on the remote
control for stop.
Repeat mode selection. Highlight this icon, press OK one or more times
to select Repeat 1, Repeat All, No Repeat.
Page 40

29
Using USB Multi Media Player (Continued)
Mute the sound. Also you can press MUTE button on the remote for mute.
List of music files. It will display a list of all marked compatible music files in
current folder; if none marked, then all compatible music files in this folder.
Press to move upward or downward, press OK to start music playback
from it. Press EXIT to exit the list.
File information. It will display current music file information. Press EXIT
to exit.
Skip to specific point by input time. Highlight this icon, press OK to call
out Input search time screen, use number buttons to input time, use
to move the cursor, then highlight OK and press OK button for time search,
and the playback starts from the specific time.
Note: If you want to show the associated lyrics on the screen with the
music, you must store these associated lyrics in the same folder using the
same file name with “ .lrc ” file extensions.
Media 3: Playing Movie
With the USB movie player, you can:
• Play movie resolution up to 1080p.
• Repeat playing any specified section (AB Loop).
• Mark movie files so you can just play back those movie files.
Movie Playback
To access movie playback window
1 Connect your USB device that contains the movie files you want to play, switch
to USB mode through the Input Source menu, the USB main menu will appear
automatically. Press or to select MOVIE, and press OK to access.
2 Press or to highlight C disk, then press OK to open the USB device; if you want
to go back, highlight Return and press OK.
Page 41

30
31
Using USB Multi Media Player (Continued)
3 After you open the USB device, you can use to navigate and select folders
or movie files, then press OK to open the highlighted folder or press to start
movie playback from current movie file. Below we will take it as an example that
your desire movie files are contained in a folder. Just highlight this folder and press
OK to open it. All your movie files are shown in a thumbnail index.
4 The following describes how to use the movie thumbnail Index:
• To return to root, highlight Return and press OK.
• To go back to upper level folder, highlight Up Folder and press OK.
• To start playback from your desired movie file, highlight this file then press .
• To mark movie files so you can just playback those movie files, use to
highlight this movie file then press OK. A check mark appears on it (press OK again
to cancel the mark). Repeat this way to create your favourite movie list, then movie
playback will go among these files.
5 During movie playback, you can make use of Movie Menu Bar to perform many
functions.
To call out and operate the Movie Menu Bar, just press INFO button during movie
playback. The Movie Menu Bar is displayed at the bottom screen. Then use to
select your desired function icon, press OK to fulfill the function. If the function
icon has several options, repeatedly press OK to select it. To clear the Movie
Menu Bar, press INFO again.
Play/Pause
Fast reverse
Fast forward
Previous
Next
A-B Loop
Repeat
Stop
Show playlist
Information
Speed down
Slow motion
Time search
Zoom in
Zoom out
Picture size
Press
continuously
for additional
options
Page 42

31
Using USB Multi Media Player (Continued)
The following describes every function
icon on the Movie Menu Bar.
or
Play/Pause.
Fast reverse/fast forward.
Go to the previous/next file.
Stop playback and exit
Repeat mode selection.
Highlight this icon, press OK one or more times to select Repeat 1, Repeat
All, No Repeat.
AB Loop. By AB Loop, you can pause and repeat any specified section
during playback. At the starting point set it as A by highlighting this icon and
pressing OK (the top screen will show Set A). At the ending point set it as
B by highlighting this icon and pressing OK (the top screen will show AB
Loop). Now AB Loop starts. To cancel, highlight this icon and press OK
List of movie files. It will display a list of all marked compatible movie files in
current folder; if none marked, then all compatible movie files in the folder.
Press to move upward or downward, press OK to start movie playback
from it. Press EXIT to exit the list.
Shows current movie information. Highlight this icon, press OK to call out
Information screen, press to move upward or downward, press
to adjust the item, such as audio track, subtitle language and programme (if
available). To exit, press EXIT.
Speed down. Highlight this icon, repeatedly press OK to speed down the
playback among 2x, 4x, 8x, 16x choice. Press to resume playback speed
Slow motion. Highlight this icon, repeatedly press OK for slow motion.
Skip to specific point by input time. Highlight this icon, press OK to call
out Input search time screen, use number buttons to input time, use
to move the cursor, then highlight OK and press OK button for time search,
and the playback starts from the specific time.
Note: The skip function may not work at some movies due to their
information limitation.
Also the input time value for skip is only served as a reference. The actual
point located may differ depending on the movie signal.
Zoom in/Zoom out the image.
Picture size selection. Highlight this icon, press OK repeatedly to select
your desired picture format among Auto, Zoom 1, Zoom 2, 16:9, 4:3
during movie play.
Pan (left, right, up, down). You can use Pan only when the photo is magnified
using ZOOM. After you highlight this icon and press OK, a symbol appears at
the screen’s bottom right corner, now you can press to pan around
the image.
Pan
Page 43

32
33
Using USB Multi Media Player (Continued)
Media 4: Playing text
With the USB text viewer, you can:
• View compatible text (in TXT format).
• View text with background music.
• Mark specific text files so you can just view those specific text files.
Note: TheUSBtextviewersupportsTXTformatfiles,butnotallTXTfilesarecompatible
withtheDisplayduetotechnicalupdate.
To access text viewer
1 Connect your USB device that contains the text files you want to view, switch to
USB mode through the Input Source menu, the USB main menu will appear
automatically. Press or to select TEXT, and press OK to access.
2 Press or to highlight C disk, then press OK to open the USB device; if you want
to go back, highlight Return and press OK.
3 After you open the USB device, you can use to navigate and select folders
or text files, then press OK to open the highlighted folder or press to start text
play from current file. Below we will take it as an example that your desire text
files are contained in a folder. Just highlight this folder and press OK to open it. All
your text files are shown in a thumbnail index.
4 The following describes how to use the thumbnail Index:
• To return to root, highlight Return and press OK.
• To go back to upper level folder, highlight Up Folder and press OK.
• To start play from your desired file, highlight this file then press .
• To mark specific files so you can just play those files, use to
highlight this text file then press OK. A check mark appears on it (press OK
again to cancel the mark). Repeat this way to create your specific text list, then
text play will go among these files.
Page 44

33
Using USB Multi Media Player (Continued)
5 During text playing, you can make use
of Text Menu Bar to perform many
functions. Press INFO button to call out
the TEXT Menu Bar. Then use to
select your desired function icon, press
OK to fulfill the function. If the function
icon has several options, repeatedly press
OK to select it. To close it, press INFO
again.
The following describes every function icon on the Text Menu Bar.
Page up/Page down.
Go to the previous/next. Also you can directly press / on the remote
for previous/next.
Stop and exit. Also you can directly press on the remote for stop.
Play/Pause background music
Note: You can make use of it to playback your marked compatible music file
as background music during text display
List of text files. It will display a list of all marked compatible text files in
current folder; if none marked, then all compatible text files in this folder.
Press to move upward or downward, press OK to start playing from it.
Press EXIT to exit the list.
Shows current file information. To exit, press EXIT.
Page 45

34
35
Other Information
Troubleshooting
If, after reading these operating instructions, you have additional questions related to
the use of your Display, please call the services center in your local area.
Before calling service, please check the symptoms and follow suggested solutions.
Remote Control
Problem Possible Solution
Remote control does not operate • The batteries could be weak. Replace the batteries.
• Check the orientation of the batteries.
• Make sure the power cord is plugged in.
Video and Audio
Problem Possible Solution
No picture (screen not lit),
No sound
• Make sure the power cord is plugged in.
• Press POWER on the Display or on the remote
control.
Dark, poor or no picture (Screen lit),
good sound
• Select a proper picture mode.
• Adjust the brightness in the video setting.
No color/dark picture/abnormal color • Adjust the color saturation in the video setting.
Good picture, no sound • The sound may be muted. Press MUTE again to
cancel.
Audio noise. • Communication problems may occur if infrared
communication equipment (e.g., infrared cordless
headphones) is used near the Display. Move the
infrared communication equipment away from the
Display until the noise is eliminated
General
Problem Possible Solution
Lost password • You may use the super password (2580).
Some items can’t be accessed • If a setting option appears in gray, this indicates that
the settings option is unavailable in current input
mode.
Cabinet creaks • When the Display is in use, there is a natural rise
in temperature, causing the cabinet to expand
or contract and may be accompanied by a slight
creaking noise. This is not a malfunction.
Remote control command is not effect
in some cases.
• During the timing of USB device detection (i.e. when
the Display is turned on with USB device connected,
or when you plug in USB device during Display
working),the Display may not act by remote control
buttons in such case. Wait some time, then it is OK.
Control buttons do not operate • Disconnect the power cord and wait for a few
seconds. Then re-plug the power cord and turn on
the Display again
Note: Ifyourproblemisnotsolved,turnyourDisplayoffandthenonagain.
Cautions: NeverattempttorepairadefectiveDisplayyourself.
Page 46

35
Other Information (Continued)
Specifications
Model: CDE6501LED
Panel: 65” TFT LCD (with LED backlight)
Power Requirement: AC 120 V, 60 Hz
Power Consumption: 250 W
Resolution: 1920 x 1080
Dimensions (W x H x D): 1533 (W) x 990 (H) x 300 (D)mm (stand
included)
Weight: 50 kg (stand included)
Terminals: Remote Control Out (1)
AV in (1)
COMPONENT in (1)
PC in (1)
HDMI in (3)
RS-232 (1)
Headphone (1)
SPDIF out (1)
USB port (1)
Note:
1. Design and specifications are subject to change without notice.
2. Weight and dimensions shown are approximate.
3. Specifications and external appearance may be changed for the sake of
improvement.
Page 47

36
37
Other Information (Continued)
RS232 Command Table
1. Introduction
This document describes the hardware interface spec and software protocols of RS232 interface
communication between Viewsonic LED Display and PC or other control unit with RS232 protocol.
The protocol divide into three sections:
• Set-Function
• Get-Function
• Remote control pass-through mode
※ In below document, “PC” will represents all the control units that can sent or receive the RS232
protocol command.
2. Description
Hardware specification
Viewsonic LCD communication port in the rear side
(1) Connector type: 3.5 Mini Jack
(2) Pin Assignment
Pin # Signal Remark
1 GND Ground
2 R Input to LCD Display
3 L Output from LCD Display
*Use of crossover (null modem) cable required for use with PC
Communication Setting
- Baud Rate Select: 9600bps (fixed)
- Data bits: 8bits (fixed)
- Parity: None (fixed)
- Stop Bits: 1(fixed)
Command Message Reference
PC sends to Display command packet followed by “CR”. Every time PC sends control command to
the Display, the Display shall response as follows:
1. If the message is receives correctly it will send “+” (02Bh) followed by “CR” (00Dh)
2. If the message is receives incorrectly it will send “-” (02Dh) followed by “CR” (00Dh)
Page 48

37
Other Information (Continued)
3. Set-Function Listing
The PC can control the LCD Display for specific actions. The Set-Function command allows you to
control the LCD Display behavior in a remote sit through the RS232 port. The Set-Function packet
format consists of 9 bytes.
Set-Function description:
Length: Total Byte of Message excluding “CR”
Display ID Identification for each of Display.
If we want to set all Display settings, Display ID can use “99” to achieve, and it
will not have Reply command on this function.
The Display ID can be set via the hotel menu for each Display set.
Command Identify command type,
Type “s” (0x73h) : Set Command
“+” (0x2Bh) : Valid command Reply
“-“ (0x2Dh) : Invalid command Reply
Command: Function command code: One byte ASCII code
Value[1~3]: Three bytes ASCII that defines the value
CR 0x0D
Set-Function format
Send: (Command Type=”s”)
Name Length ID Command Type Command Value1 Value2 Value3 CR
Byte
Count
1 Byte 2 Byte 1 Byte 1 Byte 1 Byte 1 Byte 1 Byte 1 Byte
Bytes
order
1 2~3 4 5 6 7 8 9
[NOTE] Set “Power on” command is the exception.
Page 49

38
39
Other Information (Continued)
Reply: (Command Type=”+” or “-”)
Name Length ID Command CR
Byte
Count
1 Byte 2 Byte 1 Byte 1 Byte
Bytes
order
1 2~3 4 5
[NOTE] There is no replay for “Power on” command for CDE6501LED.
Example1: Set Brightness as 76 for Display-02 and this command is valid
Send (Hex Format)
Name Length ID Command
Type
Command Value1 Value2 Value3 CR
Hex 0x38 0x30
0x32
0x73 0x24 0x30 0x37 0x36 0x0D
Reply (Hex Format)
Name Length ID Command
Type
CR
Hex 0x34 0x30
0x32
0x2B 0x0D
Example2: Set Brightness as 176 for Display-02 and this command is NOT valid
Send (Hex Format)
Name Length ID Command
Type
Command Value1 Value2 Value3 CR
Hex 0x38 0x30
0x32
0x73 0x24 0x31 0x37 0x36 0x0D
Reply (Hex Format)
Name Length ID Command
Type
CR
Hex 0x34 0x30
0x32
0x2D 0x0D
Table 4-1: PC Set-function command to LCD Display (ID=C0h)
Set Function Command
Code (ASCII)
Command
Code (Hex)
Value Range
(Three ASCII bytes)
Comments
Power on/off
(standby)
! 21 000: STBY
001: ON
Controlled the Display power status:
ON or Standby
Page 50

39
Input Select “ 22 001 : AV
003 : YPBPR
004 : HDMI
0014:HDMI2
0024:HDMI3
006 : PC/VGA
1. No need for USB
2. For the case of two more same
sources, the 2
nd
digital is used to
indicate the extension.
Contrast # 23 000 ~ 100
Brightness $ 24 000 ~ 100
Sharpness % 25 000 ~ 100
Color & 26 000 ~ 100
Tint ‘ 27 000 ~ 100
Color Mode ) 29 000: NORMAL
001: WARM
002: COLD
Bass . 2E 000 ~ 100 Sets Bass value
Treble / 2F 000 ~ 100 Sets Treble value
Balance 0 30 000 ~ 100 Sets Balance position
OSD Language 2 32 000: English
001: Francias
002: Spanish
Extend the value for more supported
languages
Power Lock 4 34 000:Unlock
001:Lock
Volume 5 35 000 ~ 100
Mute 6 35 000: OFF
001: ON (mute)
Button Lock 8 38 000:Unlock
001:Lock
Menu Lock > 3E 000:Unlock
001:Lock
Number @ 40 000 ~ 009
Key Pad A 41 000: UP
001: DOWN
002: LEFT
003: RIGHT
004: ENTER
005: INPUT
006: MENU/EXIT
Remote Control B 42 000: DISABLE
001: ENABLE
002: PASS THROUGH
Disable: RCU has no effect on Display.
Enabled: RCU controls the Display.
Pass through: RCU has no effect on
Display and all RCU command codes are
transmitted to FC via the RS232 port.
Other Information (Continued)
Page 51

40
41
Restore To Default
~ 7E 000 Rests Display to factory setting
[NOTE]
1.Behavior at lock modes
Lock Mode Behavior
Button Lock 1. Lock all buttons of front panel and RCU, except for “Power”
2. All the SET functions should be workable via RS32, even the ones with
according hot key in RCU like Mute,…etc.
MENU Lock 1. Lock “MENU’ key of front panel and RCU
2. The Factory and Hospitality modes should not be blocked for the
model using MENU-combined key to enter these two modes. Alternative
approach will be indicated separately if any limitation by model.
POWER Lock 1. Lock “POWER” key of front and RCU.
2. The SET_POWER on/off should be workable via RS232, but does not
mean the POWER lock will be released under this case.
3. Can not be un-locked by reset in OSD setting
4. Will auto AC power-on in power-lock
5. Under power-lock, the set will not enter power saving when no PC signal
and neither not turn off when no other video signals after 15min.
Remote control disable Lock the keys on RCU, but keep the buttons of front panel workable.
Get-Function Listing
The PC can interrogate the LCD Display for specific information. The Get-Function packet format
consists of 9 bytes which is similar to the Set-Function packet structure. Note that the “Value” byte
is always = 00.
Get-Function description:
Length: Total Byte of Message excluding “CR”
Display ID Identification for each of Display.
Command Identify command type,
Type “g” (0x67h) : Get Command
“r” (0x72h) : Valid command Reply
“-“ (0x2Dh) : Invalid command Reply
Command: Function command code: One byte ASCII code
Value[1~3]: Three bytes ASCII that defines the value
CR 0x0D
Other Information (Continued)
Page 52

41
Other Information (Continued)
Get-Function format
Send: (Command Type=”g”)
Name Length ID Command
Type
Command Value1 Value2 Value3 CR
Byte
Count
1 Byte 2 Byte 1 Byte 1 Byte 1 Byte 1 Byte 1 Byte 1 Byte
Bytes
order
1 2~3 4 5 6 7 8 9
Reply: (Command Type=”r” or “-”)
If the Command is valid, Command Type =”r”
Name Length ID Command
Type
Command Value1 Value2 Value3 CR
Byte
Count
1 Byte 2 Byte 1 Byte 1 Byte 1 Byte 1 Byte 1 Byte 1 Byte
Bytes
order
1 2~3 4 5 6 7 8 9
If the Command is Not valid, Command Type=”-“
Name Length ID Command
Type
CR
Byte
Count
1 Byte 2 Byte 1 Byte 1 Byte
Bytes
order
1 2~3 4 5
Example1: Get Brightness from Display-05 and this command is valid.
The Brightness value is 67.
Page 53

42
43
Other Information (Continued)
4Send (Hex Format)
Name Length ID Command
Type
Command Value1 Value2 Value3 CR
Hex 0x38 0x30
0x35
0x67 0x62 0x30 0x30 0x30 0x0D
Reply(Hex Format)
Name Length ID Command
Type
Command Value1 Value2 Value3 CR
Hex 0x38 0x30
0x35
0x72 0x62 0x30 0x30 0x30 0x0D
Example2: Get Brightness from Display-05 , but the Brightness command ID is error
and it is NOT in the command table.
Send (Hex Format)
Name Length ID Command
Type
Command Value1 Value2 Value3 CR
Hex 0x38 0x30
0x35
0x67 0xD3 0x30 0x30 0x30 0x0D
Reply (Hex Format)
Name Length ID Command
Type
CR CR
Hex 0x34 0x30
0x35
0x2D 0x0D 0x0D
Table 5-1: PC Get-function command to LCD Display
Get Function Command
Code (ASCII)
Command
Code (Hex)
Response Range
(Three ASCII
bytes)
Comments
Get-Contrast a 61 000 ~ 100 Gets Contrast value
Get-Brightness b 62 000 ~ 100 Gets Brightness value
Get-Sharpness c 63 000 ~ 100 Gets Sharpness value
Get-Color d 64 000 ~ 100 Gets Color value
Get-Tint e 65 000 ~ 100 Gets Tint value
Get-Volume f 66 000 ~ 100 Gets Volume value
Get-Mute g 67 000: OFF (unmuted)
001: ON (muted)
Gets Mute ON/OFF status
Page 54

43
Other Information (Continued)
Get-Input select j 6A 000~ See Set-function table
Get-Power status:
ON/STBY
l 6C 001: ON
000: STBY
Get-Remote Control n 6E 000: Disable
001: Enable
002: PASS THROUGH
Gets RCU mode status
Get-Power Lock o 6F 000:Unlock
001:Lock
Get-Button Lock P 70 000:Unlock
001:Lock
Get-Menu Lock q 71 000:Unlock
001:Lock
Get-ACK z 7A 000 This command is used to
test the communication link
4. Remote Control Pass-through mode
When PC sets the LCD Display to Remote Control Pass through mode, the LCD shall send a 7 bytes
packet (followed by “CR”) in response to RCU button activation. Note, that in this mode the RCU
shall have no effect on the Display function. For example: “+Volume” will not change the volume in
the LCD but only sends “+Volume” code to PC over the RS232 port.
RCU Pass-through Command Format
Reply: (Command Type=”p”)
Name Length ID Command
Type
Value1 Value2 CR
Byte
Count
1 Byte 2 Byte 1 Byte 1 Byte 1 Byte 1 Byte
Bytes
order
1 2~3 4 5 6 7
Example1: Remote Control pass-through when “VOL+” key is pressed for Display-05
Send (Hex Format)
Page 55

44
45
Other Information (Continued)
Name Length ID Command
Type
RCU
Code1
(MSB)
RCU
Code2
(LSB)
CR
Hex 0x36 0x30
0x35
0x70 0x31 0x30 0x0D
Table 6-1: Baseline RCU Pass-through codes
Key Code
(HEX)
Key Code
(HEX)
1 01 31
2 02 32
3 03 33
4 04 34
5 05 35
6 06 36
7 07 37
8 08 38
9 09 39
0 0A 3A
- 0B 3B
RECALL 0C 3C
0D 3D
0E 3E
ASPECT 0F 3F
VOLUME UP (+) 10 40
VOLUME DOWN (-) 11 41
MUTE 12 42
CHANNEL/PAGE UP (+) 13 43
CHANNEL/PAGE DOWN (-) 14 44
POWER 15 45
SOURCES (INPUTS) 16 46
17 47
18 48
SLEEP 19 49
MENU 1A 4A
UP 1B 4B
Page 56

45
Other Information (Continued)
DOWN 1C 4C
LEFT 1D 4D
RIGHT 1E 4E
OK (ENTER) 1F 4F
EXIT 20 50
21 51
22 52
23 53
24 54
25 55
26 56
27 57
28 58
29 59
2A 5A
2B 5B
2C 5C
2D 5D
2E 5E
2F 5F
[NOTE]
1. This IR-pass-through code is different with RCU key code
2. Special control sequence for POWER key under IR-pass through mode..
2-1. When Display is OFF and receives the POWER code: Display will turn on itself, then forward
the POWER code to the host via RS232.
2-2. When Display is ON and receives the POWER code: Display will forward the POWER code to
the host via RS232, then turns off itself.
Page 57

46
47
Other Information (Continued)
Customer Support
For technical support or product service, see the table below or contact your reseller.
Note: You will need the product serial number.
Use with other Wall-Mount kit may cause instability and possibly result in injury.To
find the perfect mount for CDE6501LED, please browse www.viewsonic.com or call
our service team: United States 1-800-688-6688, Canada 1-866-463-4775.
Country/Region Website T = Telephone
F = FAX
Email
United States www.viewsonic.com T (Toll-Free)= 1-800-688-
6688
T (Toll)= 1-424-233-2530
F= 1-909-468-3757
service.us@viewsonic.com
Canada www.viewsonic.com T (Toll-Free)= 1-866-463-
4775
T (Toll)= 1-424-233-2533
F= 1-909-468-3757
service.ca@viewsonic.com
Latin America
(Argentina)
www.viewsonic.com/la/ T= 0800-4441185 soporte@viewsonic.com
Latin America (Chile) www.viewsonic.com/la/ T= 1230-020-7975 soporte@viewsonic.com
Latin America
(Columbia)
www.viewsonic.com/la/ T= 01800-9-157235 soporte@viewsonic.com
Latin America (Mexico) www.viewsonic.com/la/ T= 001-8882328722 soporte@viewsonic.com
Renta y Datos, 29 SUR 721, COL. LA PAZ, 72160 PUEBLA, PUE. Tel: 01.222.891.55.77 CON 10 LINEAS
Electroser, Av Reforma No. 403Gx39 y 41, 97000 Mérida, Yucatán. Tel: 01.999.925.19.16
Other places please refer to http://www.viewsonic.com/la/soporte/index.htm#Mexico
Latin America (Peru) www.viewsonic.com/la/ T= 0800-54565 soporte@viewsonic.com
Page 58

47
Other Information (Continued)
Limited Warranty
VIEWSONIC LED Display
What the warranty covers:
ViewSonic warrants its products to be free from defects in material and workmanship, under normal use, during the warranty period. If a
product proves to be defective in material or workmanship during the warranty period, ViewSonic will, at its sole option, repair or replace
the product with a like product. Replacement product or parts may include remanufactured or refurbished parts or components.
How long the warranty is effective:
ViewSonic LED Displays are warranted for 3 year for all parts excluding the light source and 3 year for labor from the date of the first
customer purchase.
Who the warrant y protects:
This warranty is valid only for the first consumer purchaser.
What the warranty does not cover:
1. Any product on which the serial number has been defaced, modified or removed.
2. Damage, deterioration or malfunction resulting from:
a. Accident, misuse, neglect, fire, water, lightning, or other acts of nature, unauthorized product modification, or failure to follow
instructions supplied with the product.
b. Repair or attempted repair by anyone not authorized by ViewSonic.
c. Any damage of the product due to shipment.
d. Removal or installation of the product.
e. Causes external to the product, such as electric power fluctuations or failure.
f. Use of supplies or parts not meeting ViewSonic’s specifications.
g. Normal wear and tear.
h. Any other cause which does not relate to a product defect.
3. Any product exhibiting a condition commonly known as “image burn-in” which results when a static image is displayed on the product
for an extended period of time.
4. Removal, installation, and set-up service charges.
5. When you mount it on the wall, the following must be noticed:
a. The accessories attached with this product are applicable for this product only.
b. When the product is mounted on the wall, holes and fixed screws will remain in the wall body.
c. Wall face may discolor when this product has been mounted on the wall for a long time.
How to get ser vice:
1. For information about receiving service under warranty, contact ViewSonic Customer Support (please refer to Customer Support
page). You will need to provide your product’s serial number.
2. To obtain warranted service, you will be required to provide (a) the original dated sales slip, (b) your name, (c) your address, (d) a
description of the problem, and (e) the serial number of the product.
3. Take or ship the product freight prepaid in the original container to an authorized ViewSonic service center or ViewSonic.
4. For additional information or the name of the nearest ViewSonic service center, contact ViewSonic.
Limitation of implied warranties:
There are no warranties, express or implied, which extend beyond the description contained herein including the implied warranty of
merchantability and fitness for a particular purpose.
Exclusion of damages:
ViewSonic’s liability is limited to the cost of repair or replacement of the product. ViewSonic shall not be liable for:
1. Damage to other property caused by any defects in the product, damages based upon inconvenience, loss of use of the product, loss of
time, loss of profits, loss of business opportunity, loss of goodwill, interference with business relationships, or other commercial loss,
even if advised of the possibility of such damages.
2. Any other damages, whether incidental, consequential or otherwise.
3. Any claim against the customer by any other party.
Effect of state law:
This warranty gives you specific legal rights, and you may also have other rights which vary from state to state. Some states do not allow
limitations on implied warranties and/or do not allow the exclusion of incidental or consequential damages, so the above limitations and
exclusions may not apply to you.
Sales outside the U.S.A. and Canada:
For warranty information and service on ViewSonic products sold outside of the U.S.A. and Canada, contact ViewSonic or your local
ViewSonic dealer.
The warranty period for this product in mainland China (Hong Kong, Macao and Taiwan Excluded) is subject to the terms and conditions of
the Maintenance Guarantee Card.
For users in Europe and Russia, full details of warranty providedcan be found in www.viewsoniceurope.com under Support/Warranty
Information.
4.3: ViewSonic LED Display Warranty LTV_LW01 Rev. 1C 06-25-07
Page 59

48
49
Other Information (Continued)
Mexico Limited Warranty
VIEWSONIC LED Display
What the warranty covers:
ViewSonic warrants its products to be free from defects in material and workmanship, under normal use, during the warranty period.
If a product proves to be defective in material or workmanship during the warranty period, ViewSonic will, at its sole option, repair or
replace the product with a like product. Replacement product or parts may include remanufactured or refurbished parts or components &
accessories.
How long the warranty is effective:
ViewSonic LED Displays are warranted for 3 year for all parts excluding the light source and 3 year for labor from the date of the first
customer purchase.
Who the warrant y protects:
This warranty is valid only for the first consumer purchaser.
What the warranty does not cover:
1. Any product on which the serial number has been defaced, modified or removed.
2. Damage, deterioration or malfunction resulting from:
a. Accident, misuse, neglect, fire, water, lightning, or other acts of nature, unauthorized product modification, unauthorized attempted
repair, or failure to follow instructions supplied with the product.
b. Any damage of the product due to shipment.
c. Causes external to the product, such as electrical power fluctuations or failure.
d. Use of supplies or parts not meeting ViewSonic’s specifications.
e. Normal wear and tear.
f. Any other cause which does not relate to a product defect.
3. Any product exhibiting a condition commonly known as “image burn-in” which results when a static image is displayed on the product
for an extended period of time.
4. Removal, installation, insurance, and set-up service charges.
How to get ser vice:
For information about receiving service under warranty, contact ViewSonic Customer Support (Please refer to the attached Customer
Support page). You will need to provide your product’s serial number, so please record the product information in the space provided
below on your purchase for your future use. Please retain your receipt of proof of purchase to support your warranty claim.
For Your Records
Product Name: _____________________________________ Model Number:_____________________________________
Document Number: _________________________________ Serial Number: _____________________________________
Purchase Date: _____________________________________ Extended Warranty Purchase? _____________________(Y/N)
If so, what date does warranty expire? ___________________
1. To obtain warranty service, you will be required to provide (a) the original dated sales slip, (b) your name, (c) your address, (d) a
description of the problem, and (e) the serial number of the product.
2. Take or ship the product in the original container packaging to an authorized ViewSonic service center.
3. Round trip transportation costs for in-warranty products will be paid by ViewSonic.
Limitation of implied warranties:
There are no warranties, express or implied, which extend beyond the description contained herein including the implied warranty of
merchantability and fitness for a particular purpose.
Exclusion of damages:
ViewSonic’s liability is limited to the cost of repair or replacement of the product. ViewSonic shall not be liable for:
1. Damage to other property caused by any defects in the product, damages based upon inconvenience, loss of use of the product, loss of
time, loss of profits, loss of business opportunity, loss of goodwill, interference with business relationships, or other commercial loss,
even if advised of the possibility of such damages.
2. Any other damages, whether incidental, consequential or otherwise.
3. Any claim against the customer by any other party.
4. Repair or attempted repair by anyone not authorized by ViewSonic.
Page 60

49
Other Information (Continued)
Contact Information for Sales & Authorized Service (Centro Autorizado de Servicio) within
Mexico:
Name, address, of manufacturer and importers:
México, Av. de la Palma #8 Piso 2 Despacho 203, Corporativo Interpalmas,
Col. San Fernando Huixquilucan, Estado de México
Tel: (55) 3605-1099
http://www.viewsonic.com/la/soporte/index.htm
NÚMERO GRATIS DE ASISTENCIA TÉCNICA PARA TODO MÉXICO: 001.866.823.2004
Hermosillo:
Distribuciones y Servicios Computacionales SA de CV.
Calle Juarez 284 local 2
Col. Bugambilias C.P: 83140
Tel: 01-66-22-14-9005
E-Mail: disc2@hmo.megared.net.mx
Villahermosa:
Compumantenimietnos Garantizados, S.A. de C.V.
AV. GREGORIO MENDEZ #1504
COL, FLORIDA C.P. 86040
Tel: 01 (993) 3 52 00 47 / 3522074 / 3 52 20 09
E-Mail: compumantenimientos@prodigy.net.mx
Puebla, Pue. (Matriz):
RENTA Y DATOS, S.A. DE C.V. Domicilio:
29 SUR 721 COL. LA PAZ
72160 PUEBLA, PUE.
Tel: 01(52).222.891.55.77 CON 10 LINEAS
E-Mail: datos@puebla.megared.net.mx
Veracruz, Ver.:
CONEXION Y DESARROLLO, S.A DE C.V. Av.
Americas # 419
ENTRE PINZÓN Y ALVARADO
Fracc. Reforma C.P. 91919
Tel: 01-22-91-00-31-67
E-Mail: gacosta@qplus.com.mx
Chihuahua
Soluciones Globales en Computación
C. Magisterio # 3321 Col. Magisterial
Chihuahua, Chih.
Tel: 4136954
E-Mail: Cefeo@soluglobales.com
Cuernavaca
Compusupport de Cuernavaca SA de CV
Francisco Leyva # 178 Col. Miguel Hidalgo
C.P. 62040, Cuernavaca Morelos
Tel: 01 777 3180579 / 01 777 3124014
E-Mail: aquevedo@compusupportcva.com
Distrito Federal:
QPLUS, S.A. de C.V.
Av. Coyoacán 931
Col. Del Valle 03100, México, D.F.
Tel: 01(52)55-50-00-27-35
E-Mail : gacosta@qplus.com.mx
Guadalajara, Jal.:
SERVICRECE, S.A. de C.V.
Av. Niños Héroes # 2281
Col. Arcos Sur, Sector Juárez
44170, Guadalajara, Jalisco
Tel: 01(52)33-36-15-15-43
E-Mail: mmiranda@servicrece.com
Guerrero Acapulco
GS Computación (Grupo Sesicomp)
Progreso #6-A, Colo Centro
39300 Acapulco, Guerrero
Tel: 744-48-32627
Monterrey:
Global Product Services
Mar Caribe # 1987, Esquina con Golfo Pérsico
Fracc. Bernardo Reyes, CP 64280
Monterrey N.L. México
Tel: 8129-5103
E-Mail: aydeem@gps1.com.mx
MERIDA:
ELECTROSER
Av Reforma No. 403Gx39 y 41
Mérida, Yucatán, México CP97000
Tel: (52) 999-925-1916
E-Mail: rrrb@sureste.com
Oaxaca, Oax.:
CENTRO DE DISTRIBUCION Y
SERVICIO, S.A. de C.V.
Murguía # 708 P.A., Col. Centro, 68000, Oaxaca
Tel: 01(52)95-15-15-22-22
Fax: 01(52)95-15-13-67-00
E-Mail. gpotai2001@hotmail.com
Tijuana:
STD
Av Ferrocarril Sonora #3780 L-C
Col 20 de Noviembre
Tijuana, Mexico
FOR USA SUPPORT:
ViewSonic Corporation
381 Brea Canyon Road, Walnut, CA. 91789 USA
Tel: 800-688-6688 (English); 866-323-8056 (Spanish);
Fax: 1-800-685-7276
E-Mail: http://www.viewsonic.com
4.3: ViewSonic Mexico Limited Warranty LTV_LW02 Rev. 1A 06-25-07
Page 61

 Loading...