

ViewPlus VP Columbia VPTT2113-01 User Manual

VP Columbia User Manual
Revision: 20160613

1
Table of Contents
I. Introduction ............................................................................................................................................... 3
A. Preface .................................................................................................................................................. 3
B. Compliance Statements ........................................................................................................................ 4
C. Safety Instructions ................................................................................................................................ 6
II. General Information ................................................................................................................................. 7
A. Embosser specifications .................................................................................................................... 7
B. TigerPlus technology ......................................................................................................................... 8
C. System compatibility ......................................................................................................................... 8
III. Printer Setup ............................................................................................................................................ 9
A. Unpacking ............................................................................................................................................. 9
B. Cable Attachment ............................................................................................................................... 10
C. Software Installation ........................................................................................................................... 12
IV. Printer Properties .................................................................................................................................. 15
A. Introduction ........................................................................................................................................ 15
B. Printer Properties ............................................................................................................................... 15
Device settings tab .............................................................................................................................. 15
Service tab ........................................................................................................................................... 21
C. Printing Preferences ........................................................................................................................... 24
Layout tab ........................................................................................................................................... 24
Paper/Media tab ................................................................................................................................. 27
Tiger tab .............................................................................................................................................. 30
V. Operator Panel ........................................................................................................................................ 32
A. Button functions ................................................................................................................................. 32
B. Operator Panel Menu ......................................................................................................................... 33
C. Machine status and alerts ................................................................................................................... 34
VI. Paper Handling ....................................................................................................................................... 36
A. Paper Loading ..................................................................................................................................... 36
B. Paper Jams .......................................................................................................................................... 36
VII. Braille, Translation and Printing ........................................................................................................... 39
A. ViewPlus Tiger Software Suite ............................................................................................................ 39
B. Fonts ................................................................................................................................................... 39

2
C. Math and Braille .................................................................................................................................. 40
D. Printing ............................................................................................................................................... 40
VIII. Software Packages ............................................................................................................................... 41
A. Software Packages .............................................................................................................................. 41
IX. Training, Warranty, Maintenance and Support ..................................................................................... 42
A. Training ............................................................................................................................................... 42
B. Maintenance ....................................................................................................................................... 42
C. Support ............................................................................................................................................... 42
D. Warranty ............................................................................................................................................. 42

3
I. Introduction
A. Preface
VP Columbia Embosser
Owner's Manual
Congratulations on purchasing a VP Columbia Braille and tactile graphics embosser! This manual will
introduce you to basic information regarding your new embosser.
This embosser provides double sided embossing for Braille text with capabilities to include single sided
tactile graphics.
ViewPlus embossers use the standard Windows printer driver to mix text and graphics in mainstream
Windows software like Word and Excel. Use the computer to adjust settings and preferences. Print
documents exactly how they appear on the screen.
ViewPlus embossers are compatible to third party products like Duxbury and RTFC braille translation
software and they can be used to print Braille from Braille note takers.
Use the Tiger Software Suite to take braille translation and tactile graphics to a new level. The Tiger
Formatter is a Microsoft add-in that gives you advanced tools for translation and embossing. Tiger
Designer enables basic editing of documents for quick drawing and braille needs. Translator serves as a
basic translation tool for almost any Windows software- including PowerPoint and Corel Draw.
Keep up to date by checking the ViewPlus Technologies, Inc. webpage at:
http://www.ViewPlus.com
VP Columbia Product Number:
VPTT2113-01
USER MANUAL

4
B. Compliance Statements
FCC Compliance Statement (USA)
This equipment has been tested and found to comply with the limits for a Class A digital device, pursuant
to Part 15 of the FCC Rules. Operation is subject to the following two conditions: (1) this device may not
cause harmful interference, and (2) this device must accept any interference received, including
interference that may cause undesired operation. If this equipment does cause harmful interference to
radio or television reception, which can be determined by turning the equipment off and on, the user is
encouraged to try to correct the interference by one or more of the following measures:
Reorient or relocate the receiving antenna.
Increase the separation between the equipment and receiver.
Connect the equipment to an outlet on a circuit different from that to which the receiver is
connected.
Consult the dealer or an experienced radio/TV technician for help.
FCC Warning: Changes or modifications not expressly approved by the party responsible for compliance
could void the user's authority to operate the equipment.
Note the following:
The use of a non-shielded interface cable with the referenced device is prohibited.
The length of the power cord must be 3 meters (10 feet) or less.
This unit is also intended for connection to IT distribution systems.
Compliance Statement (Canada)
This digital apparatus is in conformity with standard ICES-003 of Canada.
Cet appareil numérique est conforme à la norme NMB-003 du Canada.
Compliance Statement (Germany)
Bescheinigung des Herstellers/Importeurs: Hiermit wird bescheinigt, dass der Drucker der
Maschinenlärminformationsverordnung 3. GSGV, 18.01.1991 entspricht: Der höchste Schalldruckpegel
beträgt 70 dB(A) oder weniger gemäß EN27779-1991.
Compliance Statement (Europe)
Warning: This product meets the interference requirements of EN 55032. In a domestic environment,
this product may cause radio interference in which case, the user may be required to take adequate
measures.

5
Compliance Statement (Korea)
This apparatus complies with CISPR32 requirements.
International Compliance
EN 55032:2012 Class B
Emissions series
EN 55024:2010
Immunity characteristics
EN 61000-3-2:2014
Power line harmonics
EN 61000-3-3:2013
Power line flicker
EN 55024:2010
Electrostatic discharge
EN 55024:2010
Radiated immunity
EN 55024:2010
Electrical fast transient/burst
EN 55024:2010
Surge
EN 55024:2010
Conducted immunity
EN 55024:2010
Magnetic Field Immunity
EN 55024:2010
Input voltage interruptions/DIPS

6
C. Safety Instructions
Read all of these safety instructions before using the embossing printer. In addition, follow all warnings
and instructions marked on the embossing printer itself.
o Do not place embossing printer on an unstable surface.
o Do not place embossing printer near a radiator or heat source.
o Do not block or cover slots and openings in the embossing embosser's cabinet; do not insert
objects through slots.
o Use only the type of power source indicated on embossing embosser's label.
o Connect all equipment to properly grounded electrical outlets.
o Do not use frayed or damaged power cord.
o The use of an extension cord with the embossing printer is not recommended.
o Unplug embosser before cleaning it; always clean it with a piece of damp cloth only.
o Do not spill liquid into embossing printer.
o Except as specifically explained in the user's manual, do not attempt to service the embosser by
yourself.
o Only adjust those controls that are covered by the operating instructions.
o Detach the embosser from power source and refer to qualified service personnel under the
following conditions:
If the power cord or plug is damaged.
If liquid has entered the embosser.
If the embosser has been dropped or the cabinet is damaged.
If the embosser does not operate properly or exhibits a distinct change in performance.

7
II. General Information
A. Embosser specifications
VP Columbia Embosser
Print Speed
Up to 100 CPS, double sided
Tactile Resolution
100 DPI
Embossed Dot Density
Up to 17 DPI
Braille Dot Spacing
Selectable from 5 international Standards
Tactile Graphic Dot Heights
7 steps for color representation
Braille Dot Heights
Adjustable in 3 heights
Paper Feed Method
Tractor feed from the back
Paper Width
7 to 11.5 inches (176 to 292mm)
Paper Weight
Adjustable in for different media from 90 g/m2 (Copy
paper) to 200 g/m2 (heavy Braille paper)
Power Supply
Voltage: 100 to 240 VAR (± 10%)
Frequency: 50/60 Hz (± 3%)
Power Consumption
Standby: 10 W
Average Embossing: <130 W
Heavy Embossing: <185 W
Fuse
5 A, 250 V slow blow long time lag 5x20mm
Embosser Dimensions
Width
Depth
Height
Weight
21.9" (557 mm)
10.8" (275 mm)
6.2" (158 mm)
19.8 lbs (9 kg)
Connectivity
USB and Ethernet
Operating Conditions
Operating Temperature
Storage Temperature
Relative Humidity
59 to 95 °F (15 to 35 °C)
-4 to 158 °F (-40 to 70 °C)
20 to 80% RH (non-condensing)
Acoustics
< 75 dBA per ISO 7779

8
B. TigerPlus technology
The TigerPlus Braille system, which is implemented with VP Columbia, allows to place dots on tactile
prints with an accuracy of 100 DPI. The physical size of each dot allows to place dots as close to each
other as 17 DPI. However, the resolution of actual dot placement may vary to yield to best possible
representation of shapes in tactile print.
The advantage of the TigerPlus Braille system versus traditional Tiger Braille system is the capability of
placing dots in variable distances with a resolution of 100 DPI. This allows to provide a special setting
with this embosser that is not available with other ViewPlus embosser models. The setting of the Braille
dot spacing to one of the five following international braille standards:
(1) Marburg Medium (German), equivalent to traditional Tiger Braille system
(2) American Library of Congress
(3) American National Library of the Blind
(4) Japanese Standard (Micro Braille)
(5) Korean Standard
Additional to these braille standards, Jumbo Braille can be created when using Tiger Software Suite (TSS)
in MS Office Word, or Excel. Or, when printing to a note taker in legacy mode, Jumbo Braille can be
selected in Braille spacing options of Device Settings (see section IV.B.).
C. System compatibility
The Windows driver for the Columbia is compatible with operating systems from Windows Vista to current
Windows versions, both 32- and 64-bit systems. The Windows driver allows to print to the Columbia from
virtually any program under the Windows operating system. See more about installation of Windows
printer driver in section III.C.
A Mac OS 10.9 printer driver is also available for the ViewPlus Columbia embosser. The printer driver
installation allows to use Braille fonts for uncontracted Braille translation as described in section VII.B.
regarding Windows system fonts that install with the printer driver.
9
III. Printer Setup
A. Unpacking
o Remove the embosser and all its accessories from its packaging.
Besides the embosser, the package should include power cord, USB cable, Warranty Card, Braille
Setup Instructions and a USB flash drive containing printer driver, user manual and other
documentation.
o Inspect the ViewPlus embosser and its packaging for any damage. If noticeable damage occurred,
please report to your ViewPlus product supplier immediately.
o Save the packing material and box. The packing material must be used to ship the ViewPlus
embosser for warranty maintenance service.
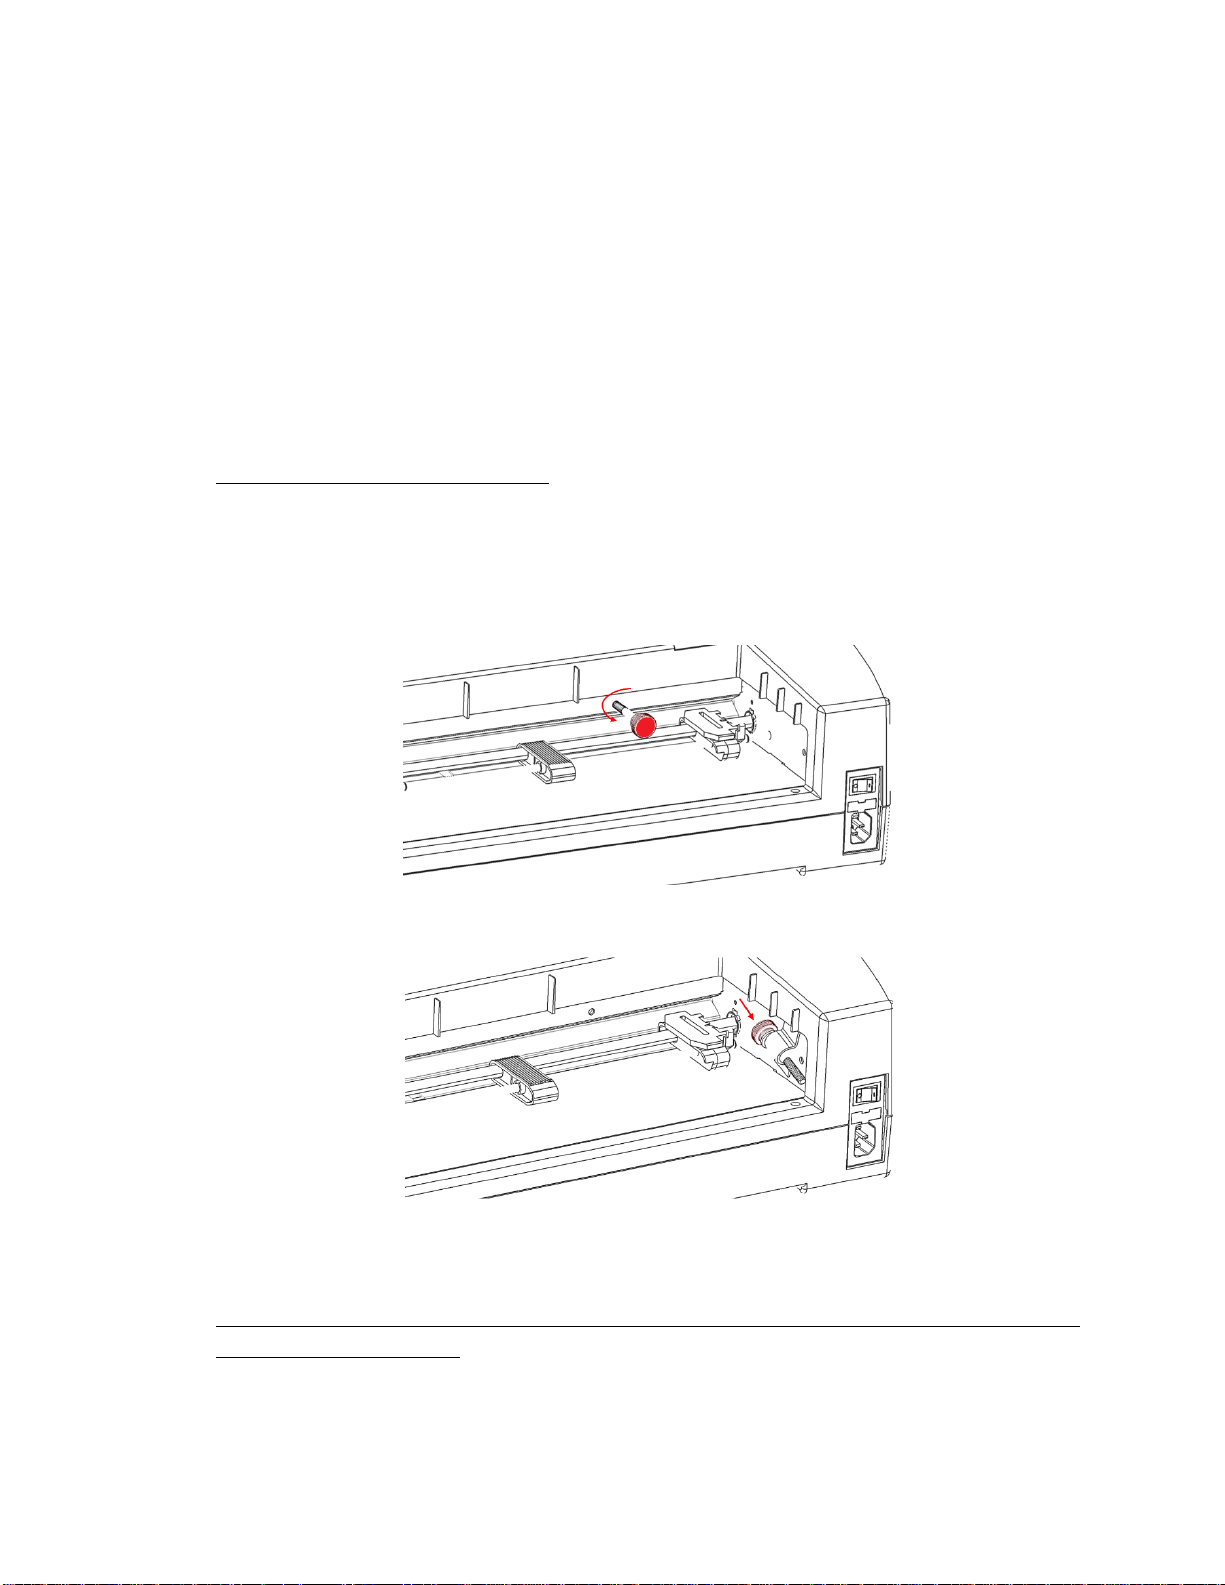
o Remove shipping lockout screw by opening the top lid of the embosser and taking out the thumb
screw as indicated in the picture below. Store the thumb screw behind the metal latch against the
right side frame as indicated in second picture below.
Shows thumb screw for carriage lock during shipping
Shows how to store the thumb screw
o Before packing up the embosser again for shipping, make sure to re-install the thumb screw for
carriage lockout properly! Please make sure, the thumb screw is installed properly, and the
embosser is secured with the specific VP Columbia foam end caps during shipping, otherwise your
warranty will be voided.
10
o Also, if any damage occurred during shipping, most shipping companies require the box and the
packing material in order to settle the insurance claim.
o For further embosser setup also follow the VP Columbia Setup Instructions included with your
other materials.
B. Cable Attachment
Power connection
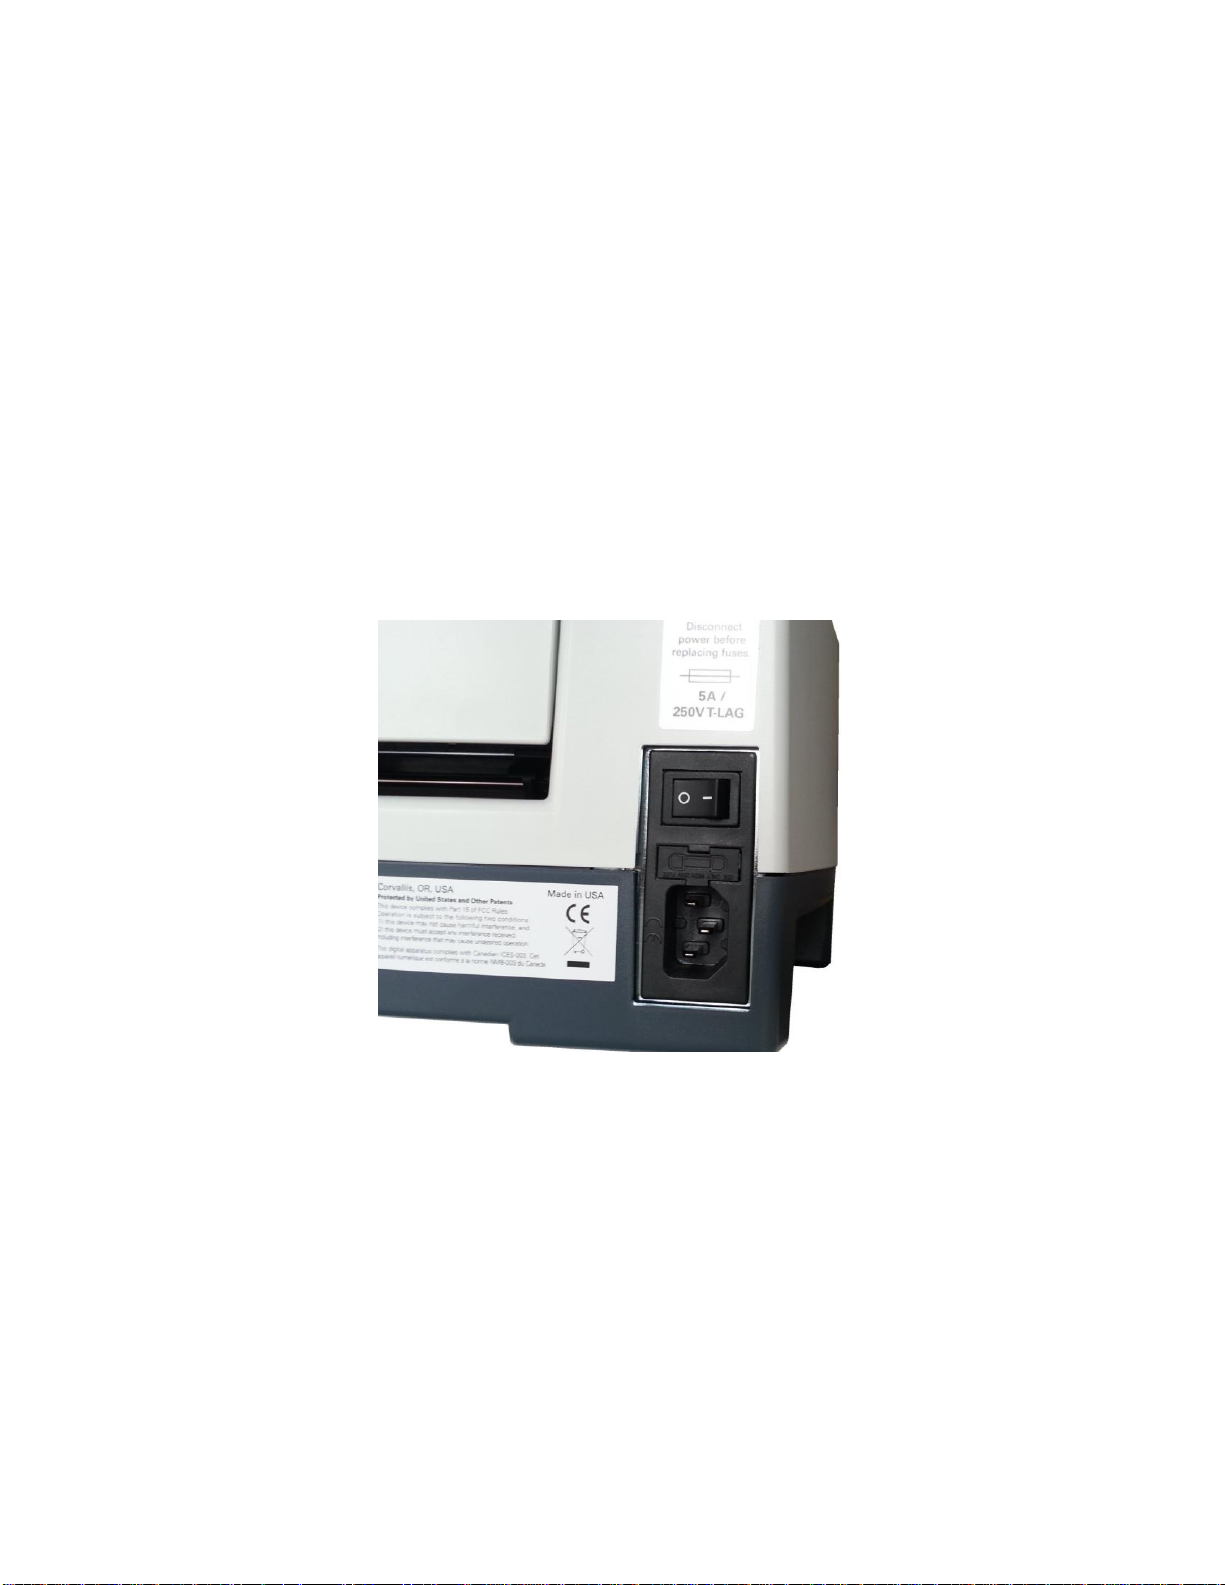
On the back of the VP Columbia embosser you find a power module with a power socket, on/off switch,
and a compartment holding one fuse. A sticker above the power module indicates what specific fuse is
required for the embosser. If the embosser will not power on, it might be necessary to replace the fuse.
Shows the power module in the back of the embosser
Insert the power cable plug into the VP Columbia power connector and the other end of the power cable
into a grounded outlet or a surge protector (recommended).
Turn the embosser on by pressing the power switch to the 'I' position. When facing the embosser from
the front, the 'I' position of the switch is towards the left side.
11
Data cable
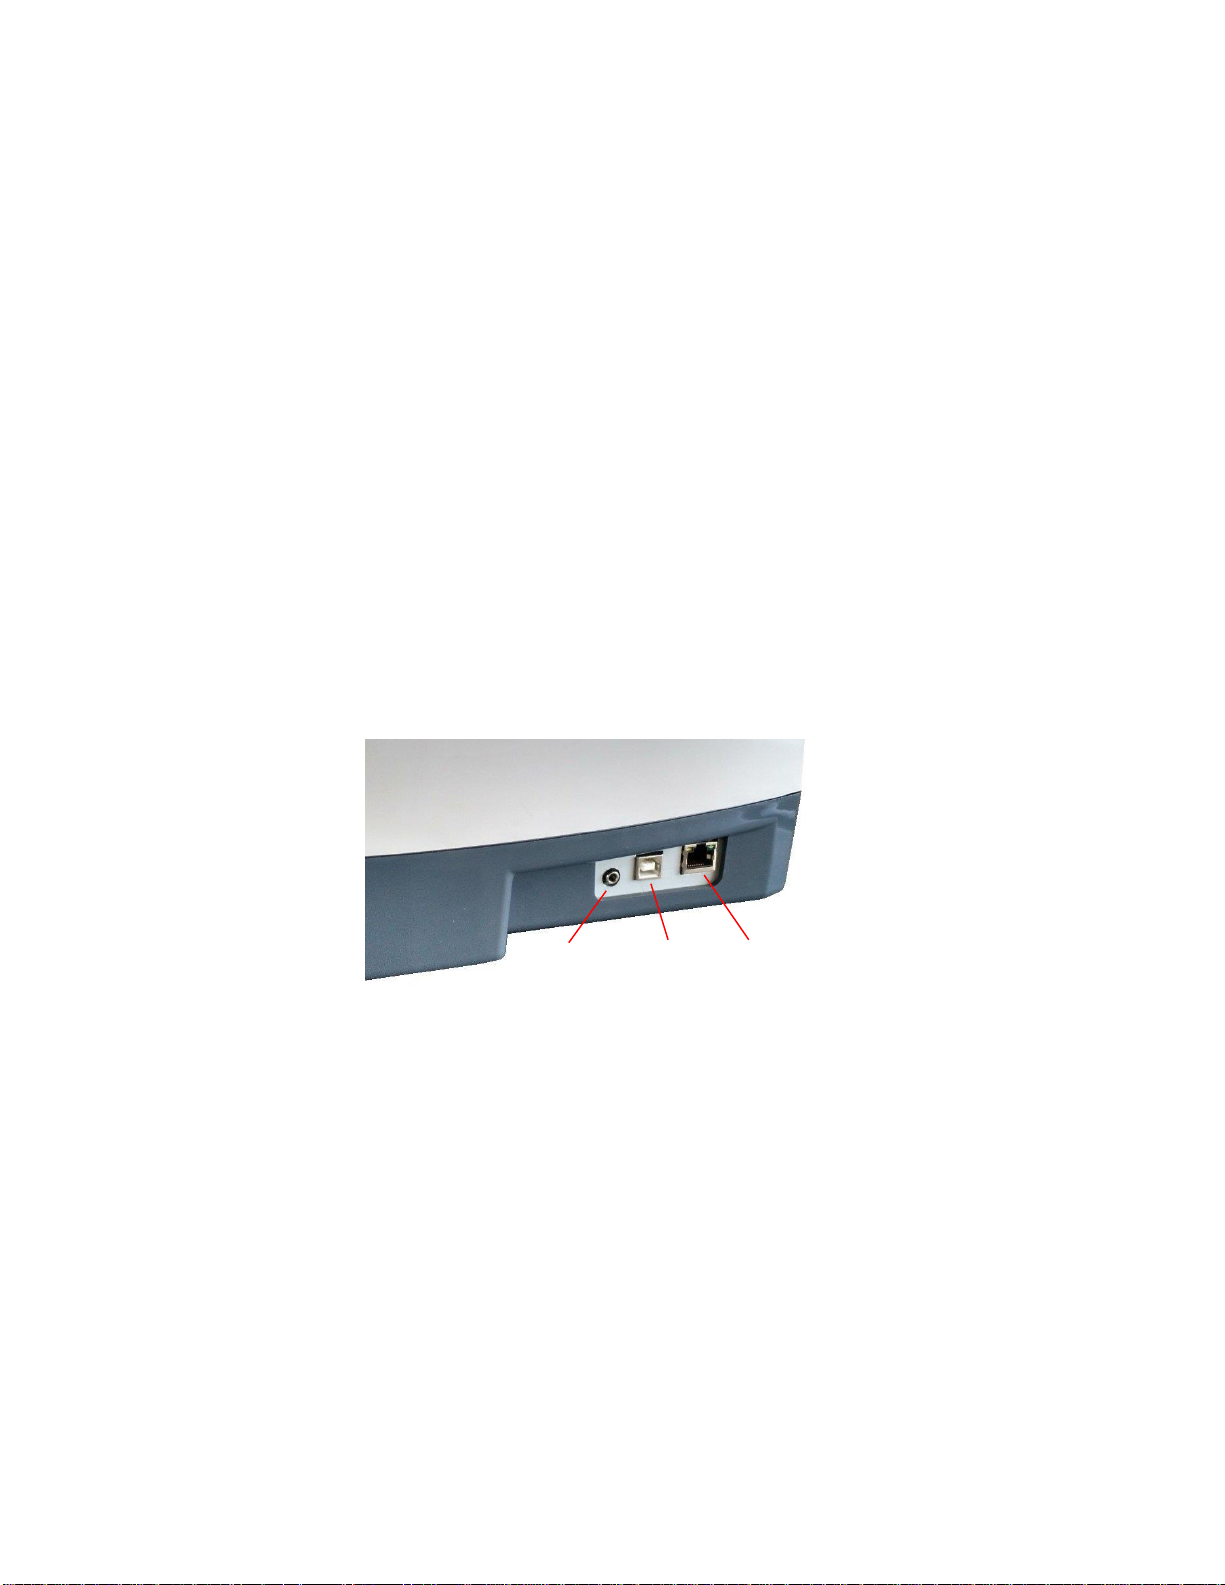
A USB printer cable was included in your box. To use it, attach the square end of the USB data cable into
the matching port of the embosser. The USB connection is the center one of three sockets located on the
right lower side of the machine when facing the front. Insert the rectangular end of the USB data cable
into host computer USB port.
You may also use a LAN cable to connect the ViewPlus Columbia to your network. The embosser is not
shipped with a LAN cable. To use this connection method, attach one end of a LAN cable to the connection
port furthest towards the back of the machine when facing the front, and attach the other end to a
network data port.
Audio output jack
The third connector socket, furthest towards the front of the three sockets on the lower ride side of the
machine, is an audio output jack. Plug in your powered speaker to pick up any audio message, like status
messages, on-board menu items and commands, and error messages here. The speaker must be powered
since there is no on-board audio amplifier.
Shows three sockets on the right side of the embosser
Audio USB LAN
12
C. Software Installation
Included with your VP Columbia embosser is an USB flash drive, that contains the Windows printer driver
as well as the ViewPlus Tiger Software Suite (TSS).
NOTE: DO NOT CONNECT YOUR COLUMBIA TO THE COMPUTER DURING INSTALLATION OF THE
WINDOWS PRINTER DRIVER, OR TURN IT OFF WHEN ALREADY CONNECTED.
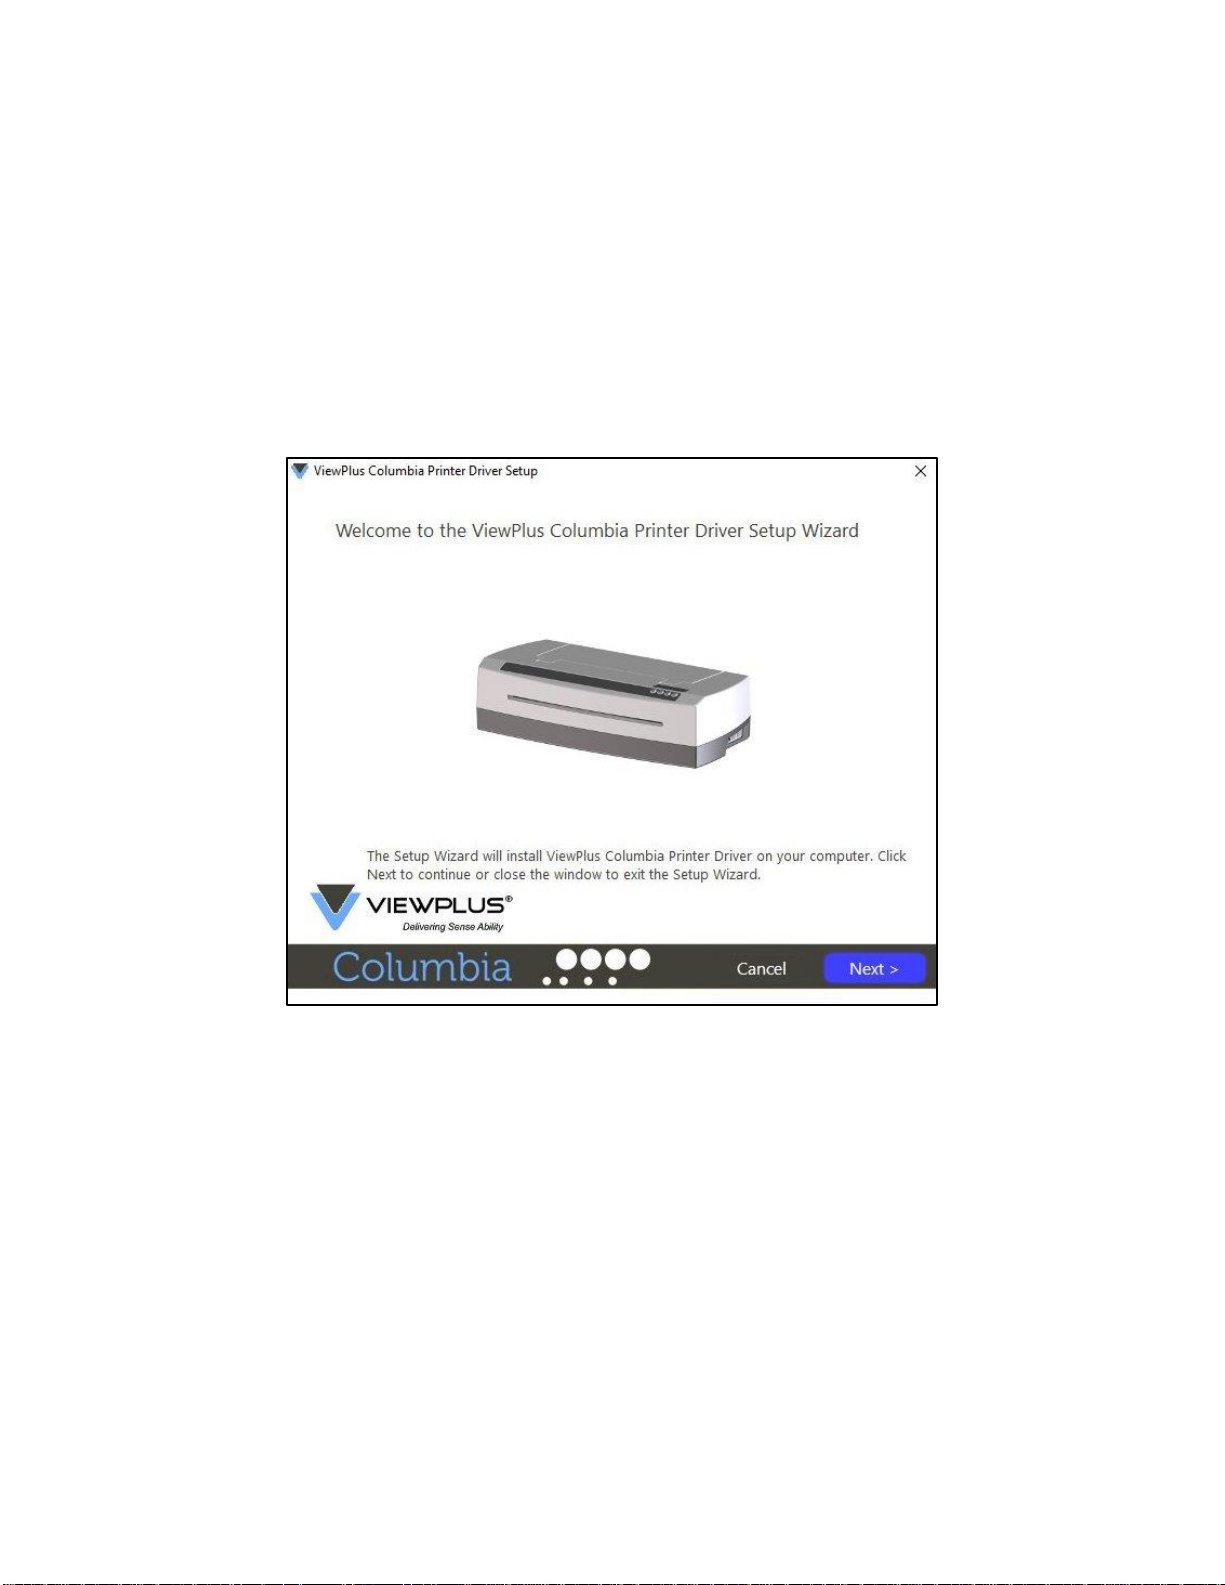
Run the driver setup from the USB, or download the current Columbia driver from the ViewPlus website,
www.viewplus.com. Follow the instructions from the installation program.
Shows printer driver installation welcome screen
If network installation of the Columbia embosser is desired, please pause at the screen, asking whether
to run the network installation utility and DO NOT click 'Finish' until the printer is connected and switched
on.
 Loading...