

Page 1

Installation Instructions
for use by heating contractor
Replacement of
Boiler Supply Piping
for Vitodens 200, WB2-44, -60
Safety and Installation Requirements
Please ensure that these instructions are read and understood before commencing installation. Failure to comply with the
instructions listed below can cause product/property damage, severe personal injury, and/or loss of life.
Working on the equipment
Please file in Service Binder
The installation, adjustment, service,
and maintenance of this product must
be done by a licensed professional
heating contractor who is qualified
and experienced in the installation,
service, and maintenance of hot
water boilers. There are no user
serviceable parts on the boiler,
burner, or control.
Ensure main power supply to
equipment, the heating system, and
all external controls has been
deactivated. Close main gas supply
valve. Take precautions in all
instances to avoid accidental
activation of power during service
work.
Removing Front Enclosure Panel and Cover Panel
1
2
It is not permissible to perform
service work on any component parts
ensuring safe operation of the heating
system.
When replacing parts, use original
Viessmann or Viessmann approved
replacement parts.
Ensure that the installation
literature of other
components of the Vitodens
200 boiler is referenced.
1. Close main gas supply valve.
2. Open flip-down cover of front
enclosure panel (by exerting slight
pressure with fingertip) and switch
off system on/off switch.
3. Turn off power supply to boiler and
ensure that power supply cannot
be activated during the duration of
the replacement procedure.
Fig. 1
Removing front enclosure panel
5285 614 v1.0 11/2003
4. Unlock enclosure panel by
giving cover lock
turn.
5. Remove front enclosure panel .
6. Remove cover panel
unlocking the four pull-down
latches located on both the top and
bottom of the panel, and slide out
panel.
a quarter
by
Page 2
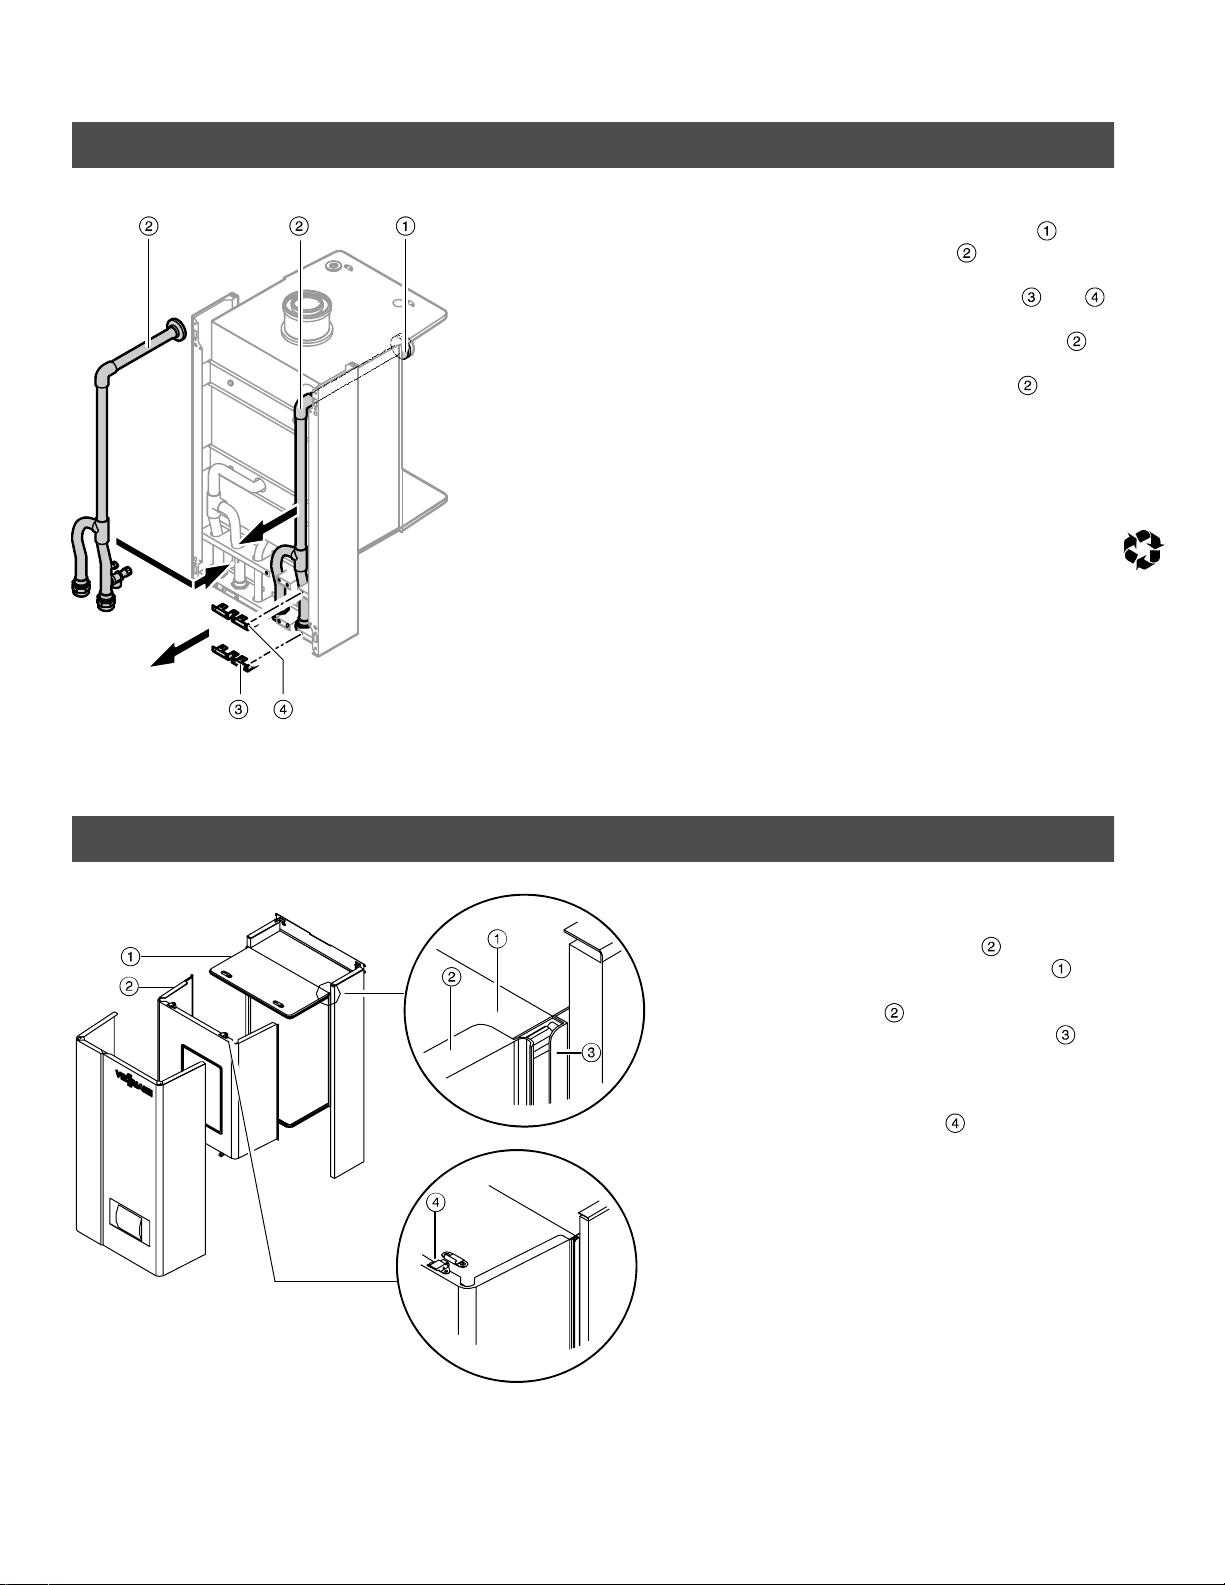
Replacing Boiler Supply Pipe
1. Loosen flange connection on
the supply pipe
.
Fig. 2
Replacing boiler supply pipe
Reinstalling Front Enclosure Panel and Cover Panel
2. Detach holding bracket
3. Remove existing supply pipe
4. Insert new supply pipe
reinstall front enclosure and cover
panel (as described below).
5. Reinstall front enclosure and cover
panel (see below).
and .
.
and
Printed on environmentally friendly
(recycled and recyclable) paper.
Fig. 3
Reinstalling the cover panel
Viessmann Manufacturing Company (U.S.) Inc.
45 Access Road
Warwick, Rhode Island • 02886 • USA
Tel. (401) 732-0667 • Fax (401) 732-0590
www.viessmann-us.com • mail@viessmann-us.com
1. Reinstall cover panel as follows
(see Fig. 3):
H Slide cover panel over the top
edge of supporting panel
H Make sure that end edge of cover
panel
seated properly in groove
Failure to do so can result in
damage to front enclosure panel
of boiler.
H Lock latches , one set at a
time (starting with either the top
or bottom set of latches).
2. Reattach cover panel.
Viessmann Manufacturing Company Inc.
750 McMurray Road
Waterloo, Ontario • N2V 2G5 • Canada
Tel. (519) 885-6300 • Fax (519) 885-0887
www.viessmann.ca • mail@viessmann.ca
is fully inserted and is
.
.
Technical information subject to change without notice
5285 614 v1.0
 Loading...