

Page 1

E C O L O G I C A L C O O L E R S
INTELLIGENT PLUS
User’s Manual
www.safertransamerica.com / 714-457-1046
Page 2

IMPORTANT
Installation requires an experienced mechanic with specific knowledge in the installation of
the VIESA Ecological Cooler. Installation, disassembly, repairs and maintenance
must be performed by an Authorized Installer. Authorized Installer must use proper
protective equipment when installing the system.
Improper installation or use of unauthorized parts can cause malfunctions, loss of battery life
or other consequences which may result in serious injury.
Manufacturer or Distributor will not be responsible for injuries or damages resulting from
misuse of equipment, use contrary to operating instructions or installation by any person
other than an Authorized Installer.
Information contained in this manual is subject to change. Manufacturer reserves the right,
without notice, to make changes in equipment design or components as progress in
engineering, manufacturing or technology may warrant.
World-wide Patents
VIGIA is a trademark of Col-Ven S.A.
Page 3

Function
VIESA Intelligent Plus is a roof mounted cab cooler that delivers cool air to the
truck's cabin using evaporative cooling and without running the truck's engine.
Operation
Cooling is generated by vaporized cool water delivered by a self-contained
electrical motor. During operation it only consumes water and it makes no use of
internal combustion engines, nor does it use chemical coolants or emit gases into
the atmosphere. The unit is equipped with a water pump located in an auxiliary
tank which takes water to the evaporator. A biturbo blower pushes the exterior
air to the interior of the truck forcing the air through the evaporator and
therefore cooling the warm air. The exceeding water backs to the water tank.
Application
Applied to any vehicle with an operating voltage of 12 V.
Page 4
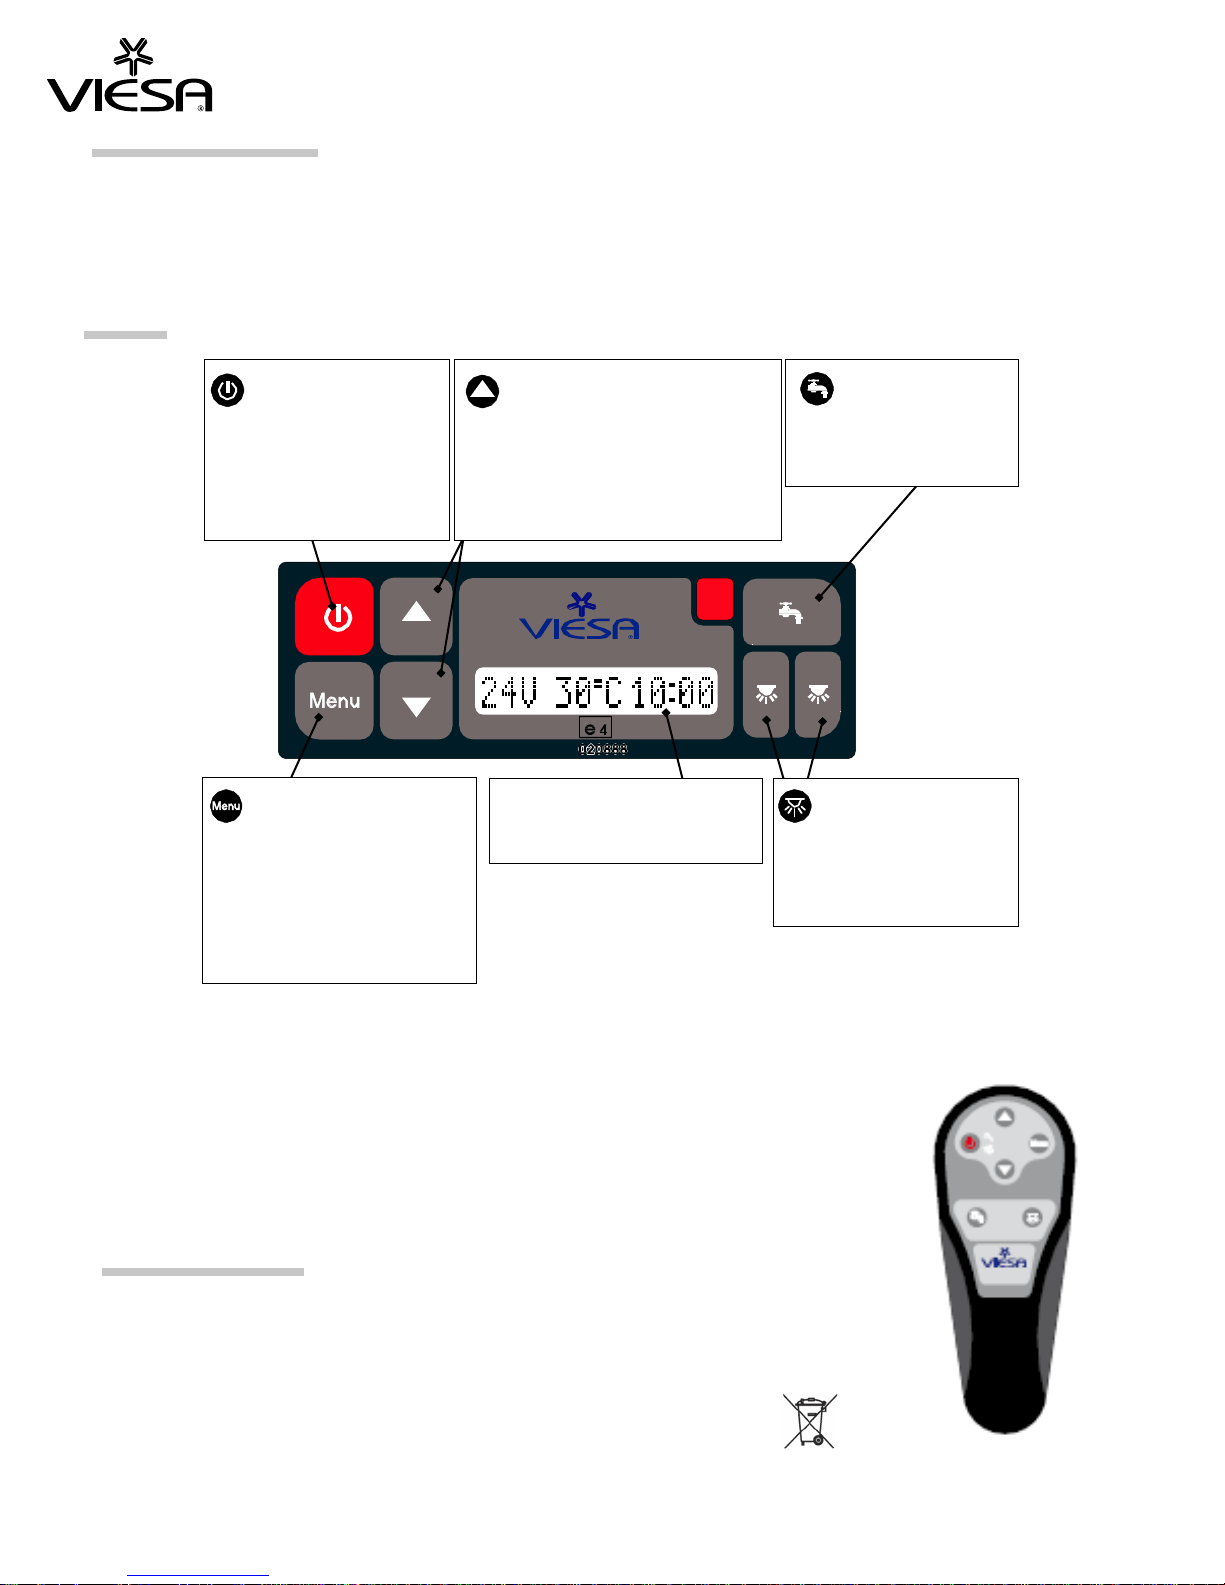
BOARD INDICATIONS
Keys must be held pressed for ± 1 second
A beep will be heard every time a key is pressed
By default, language is ENGLISH, time is in 24H format and
temperature is shown in °C.
Important: before switching on the equipment:
With parked vehicle: Open 2 to 3 cms.one of the windows
With the vehicle in motion: Open 2 to 3 cms and one of the windows
close all other air entrances to the cabin so that hot air does not enter from exterior.
BOARD
SYSTEM ON – OFF
SWITCH
TURBO FAN SPEED CONTROLS
IN MENU SET-UP MODE PRESS
TO SCROLL FUNCTIONS
WATER PUMP
ON –OFF SWITCH
MENU FUNCTION SET-UP:
LANGU
TIME
ALARM CLOCK
SELF POWER ON
SELF POWER OFF
A
UTOMATIC MODE
TEMPERATURE
AGE
L.C. DISPLAY:
BATTERY VOLTAGE
OUTSIDE TEMPERATURE
CLOCK
LEFT AND RIGHT LIGHT
SWITCHES
1. ON - DIM
2. ON -BRIGHT
3. OFF
Note: time is expressed in 24H mode.
REMOTE CONTROL
Performs all the functions explained before, except when the
equipment is off.
- Keep the batteries of the remote control away from children. Wrong use may
cause fire or burns. Do not recharge or heat batteries.
Dispose dead batteries according to local laws. Replace batteries with the
same type (AAA).
- Batteries may explode if not correctly inserted. Immediately dispose of dead
batteries. Do not throw them into fire.
Page 5
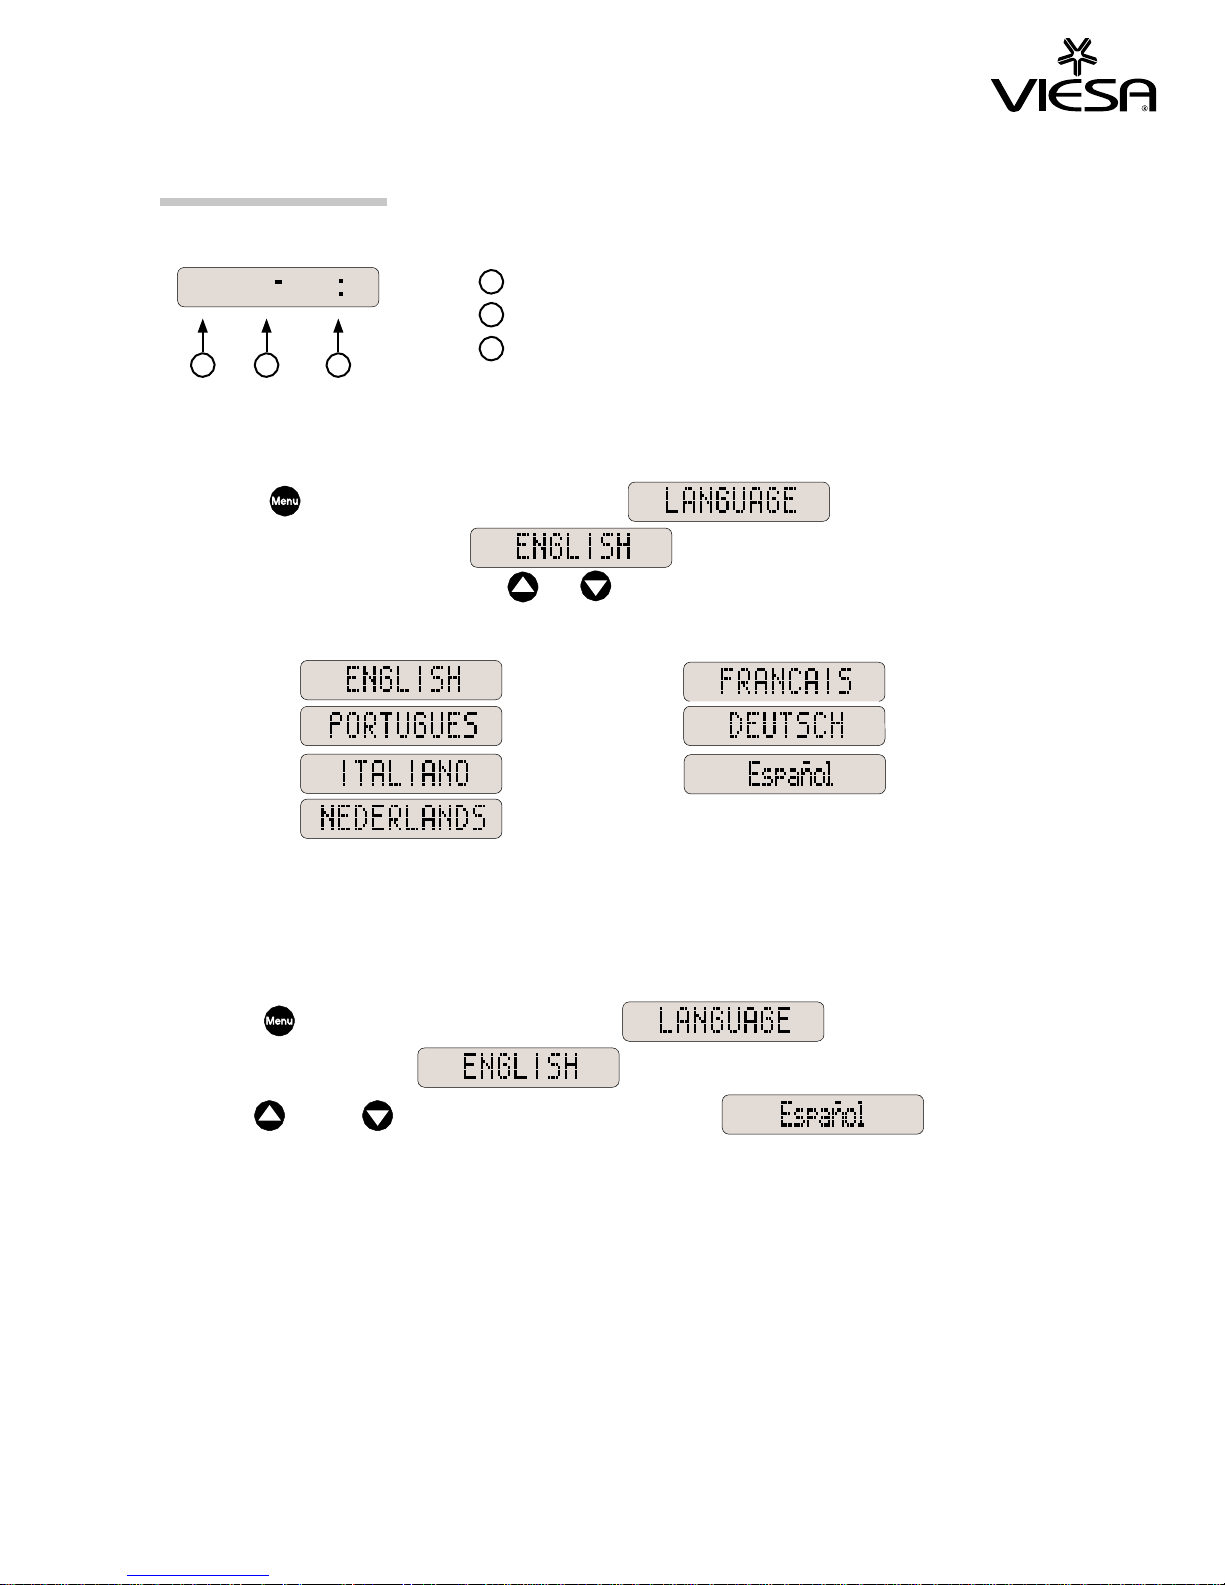
DISPLAY INDICATIONS
Permanent Information
Battery voltage
1
12V 30 C 10 00
1
2
3
External temperature: °C or °F
2
Clock: 24H (24 hours) or 12H (AM/PM)
3
Language Selection
Press the button. The display will show .
Wait for 3 seconds, the word will appear.
Select language by pressing
the
or
key.
English French
Portuguese Germany
Italian Spanish
Dutch
New language is stored after the desired language is selected and no
other key is pressed for 3 seconds.
Example to select Spanish language:
Press the bottom. The display will show . Wait
for 3 seconds, the word will appear.
Press the or the key until the display shows
Wait for 3 seconds. Spanish language is now stored.
Important: If the Viesa system is disconnected from the vehicle’s battery, all
set-up functions will revert to default.
Page 6
Please refer to the list below to change LANGUAGE to ENGLISH
English French
Portuguese German
Italian Spanish
Duch
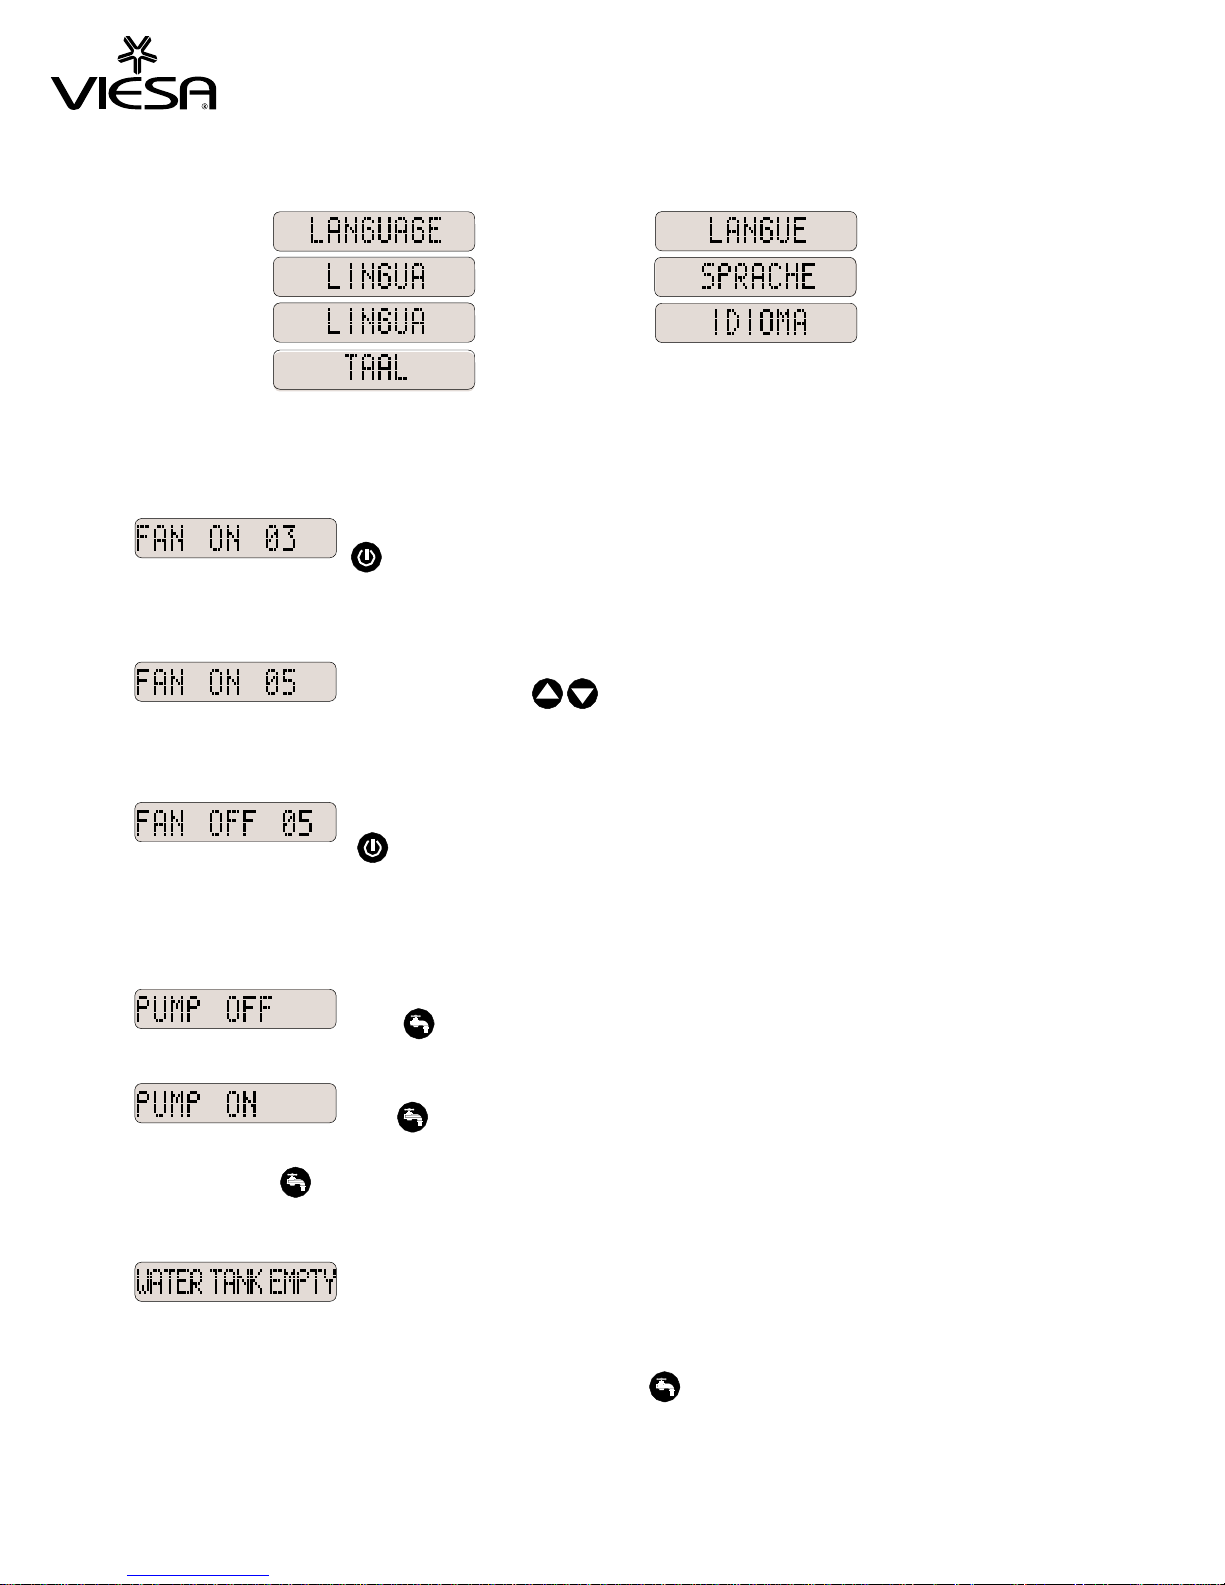
Turbo Fan
Water Pump
By pressing the ON-OFF switch,
turbo fan and water pump are activated.
The L.C. display will show FAN ON and speed.
There are 8 fan speeds which can be selected
by pressing the
eys.
k
By pressing again the ON-OFF switch,
the system will turn off.
The water pump will be disconnected by pressing
the
key.
The water pump will re-connect when pressing
the
Note: The key
the system is off.
will connect or disconnect the water pump even if
If the water tank is empty the pump will not
operate and a message and sound alarm will
result.
To turn off the alarm and message add water to
the tank or press the water
Important: Alarm and message will disappear approximately 3 minutes after
water is added to tank.
key again.
pump key.
Page 7
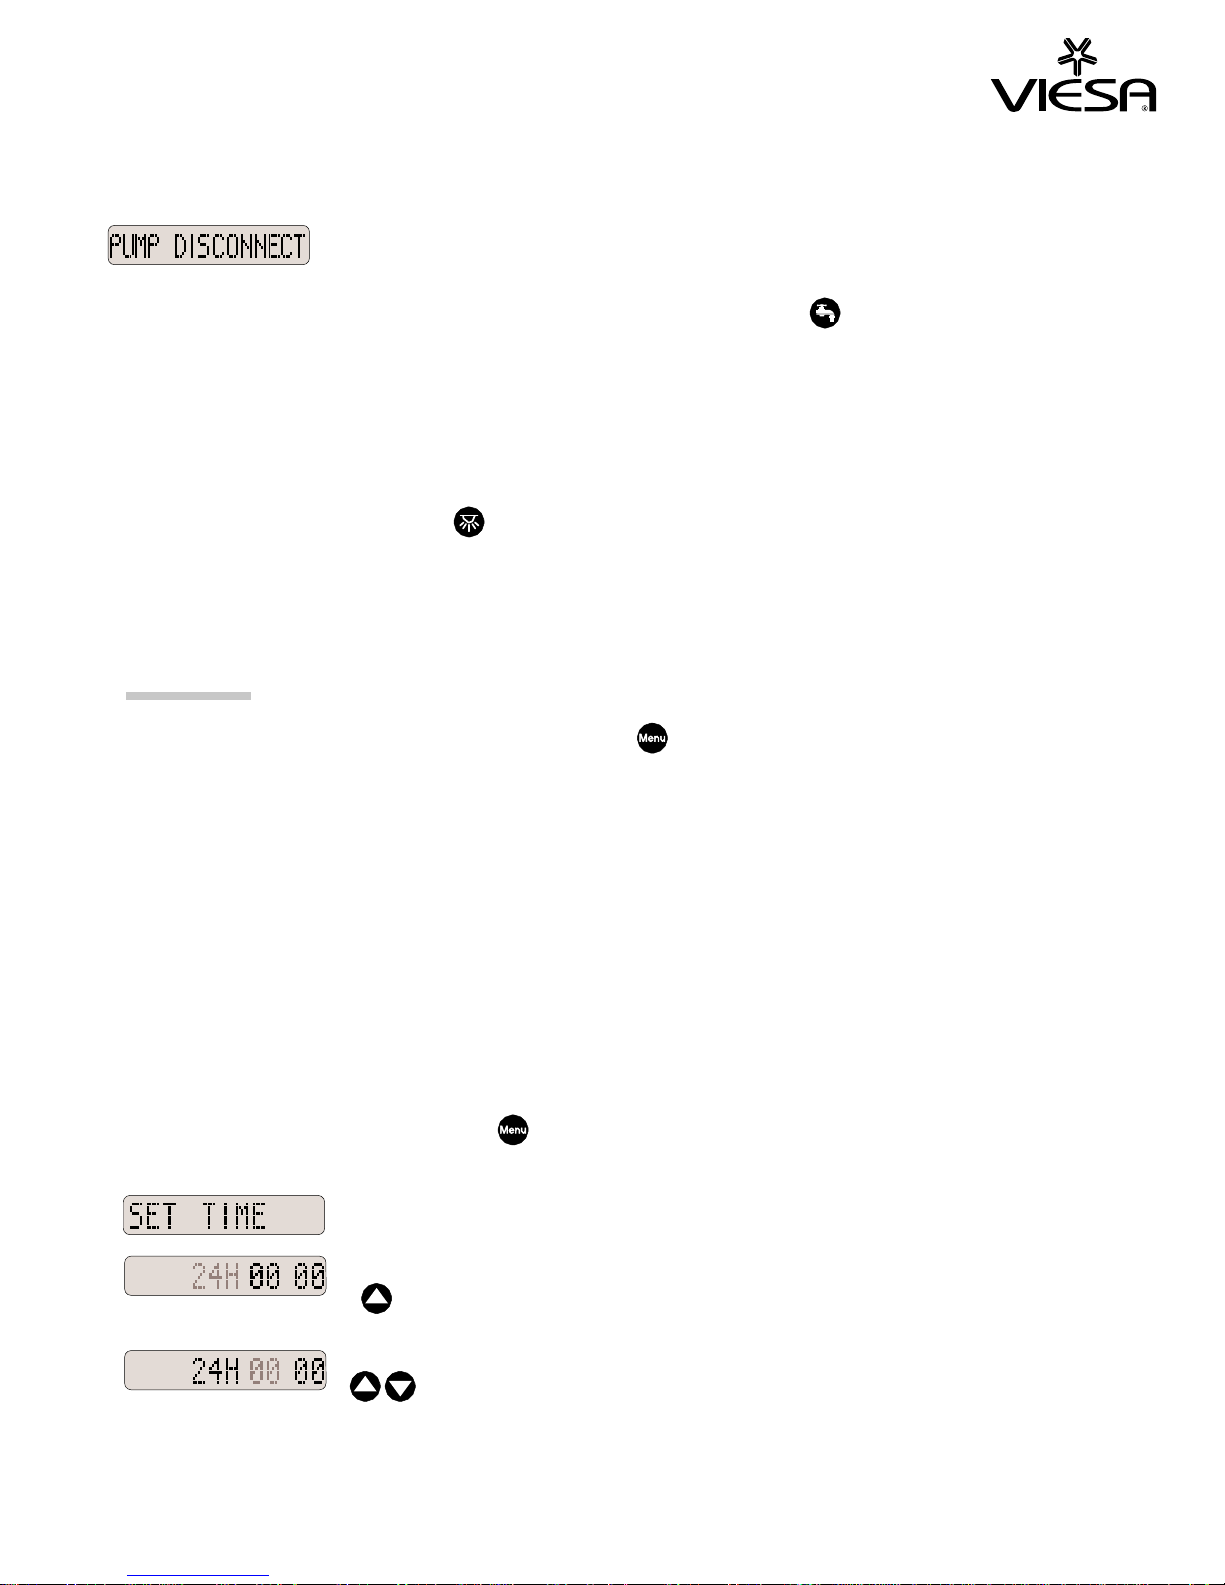
If the water pump is disconnected, a message
and sound alarm will result.
Alarm and message will disappear as soon as
the pump is re-connected or the pump on-off
Important: “WATER TANK EMPTY” and “PUMP DISCONNECT” messages
and alarm will only appear with the water pump ON.
switch is pressed.
Light Control
Every time the light switch (left or right) is pressed, the
corresponding light changes according to the following cycle: ON dim -
ON bright - OFF.
FUNCTIONS
To set-up menu functions, press the menu key and scroll to the
desired function. Wait for 3 seconds on the selected function and the
programming mode will start.
- Language (see Language Selection before)
- Time
- Alarm clock
- Self power on
- Self power off
- Automatic mode
- Temperature
Time Setting
Select this function with the menu key and wait for 3 seconds.
The following explanation is for 24H mode.
The 24H mode flashes, press the
key if you want the 12H mode instead
.
The hour flashes, press the
keys
to set the hour.
Page 8
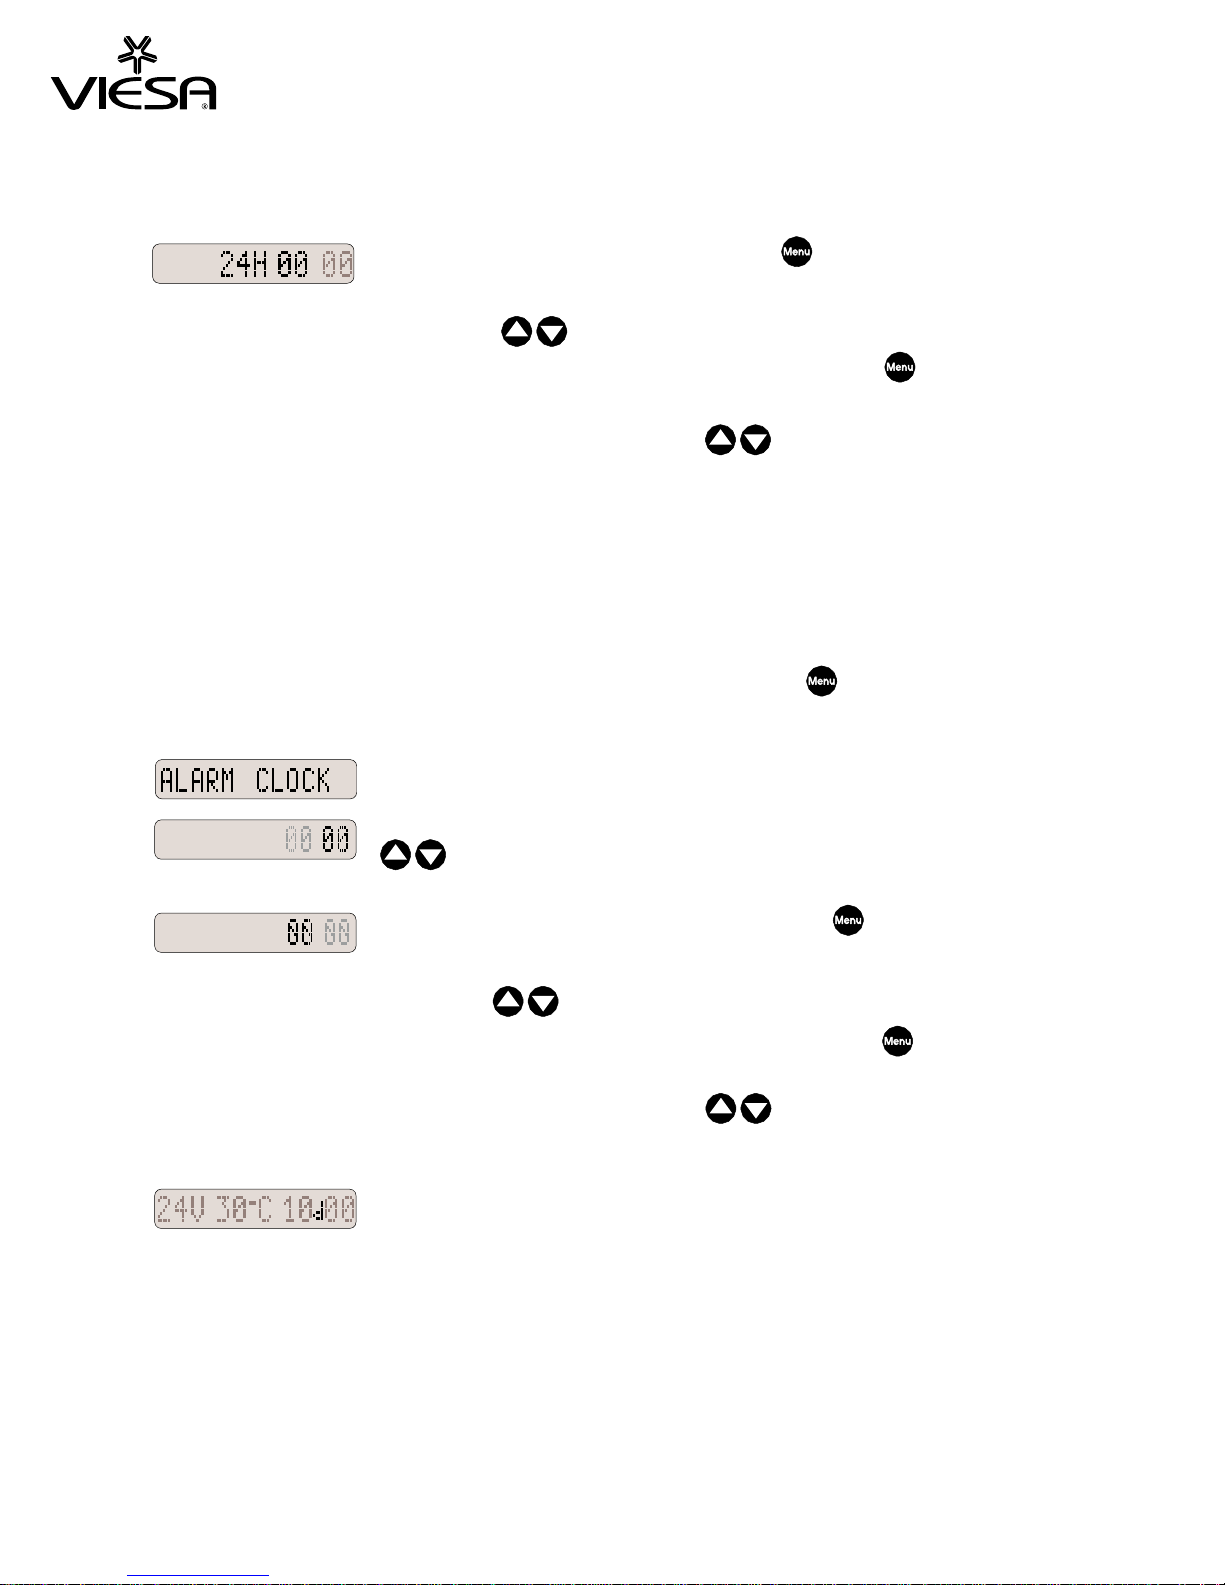
Wait for 3 seconds or press the menu
move to minutes.
key to
Press the
keys to set the
minutes and wait 3 seconds or press the menu
key to finish.
Note: To fast-scroll press and hold the up or down key.
Alarm Clock
To set the alarm clock, select this function with the menu key
for 3 seconds.
The following explanation is for 24H mode
The hour flashes, press the
keys
to set the hour.
and wait
Wait for 3 seconds or press the menu key
move to minutes.
Press the
keys to set the
minutes and wait 3 seconds or press the menu
key to finish.
Note: To fast-scroll press and hold the up or down key.
If the alarm clock is active, a flashing “d” will
appear instead of the semi-colon in the L.C.
display clock.
Important:
LCD messages will continue.
While the alarm clock is active, all other alarm sounds are cancelled.
to
Page 9
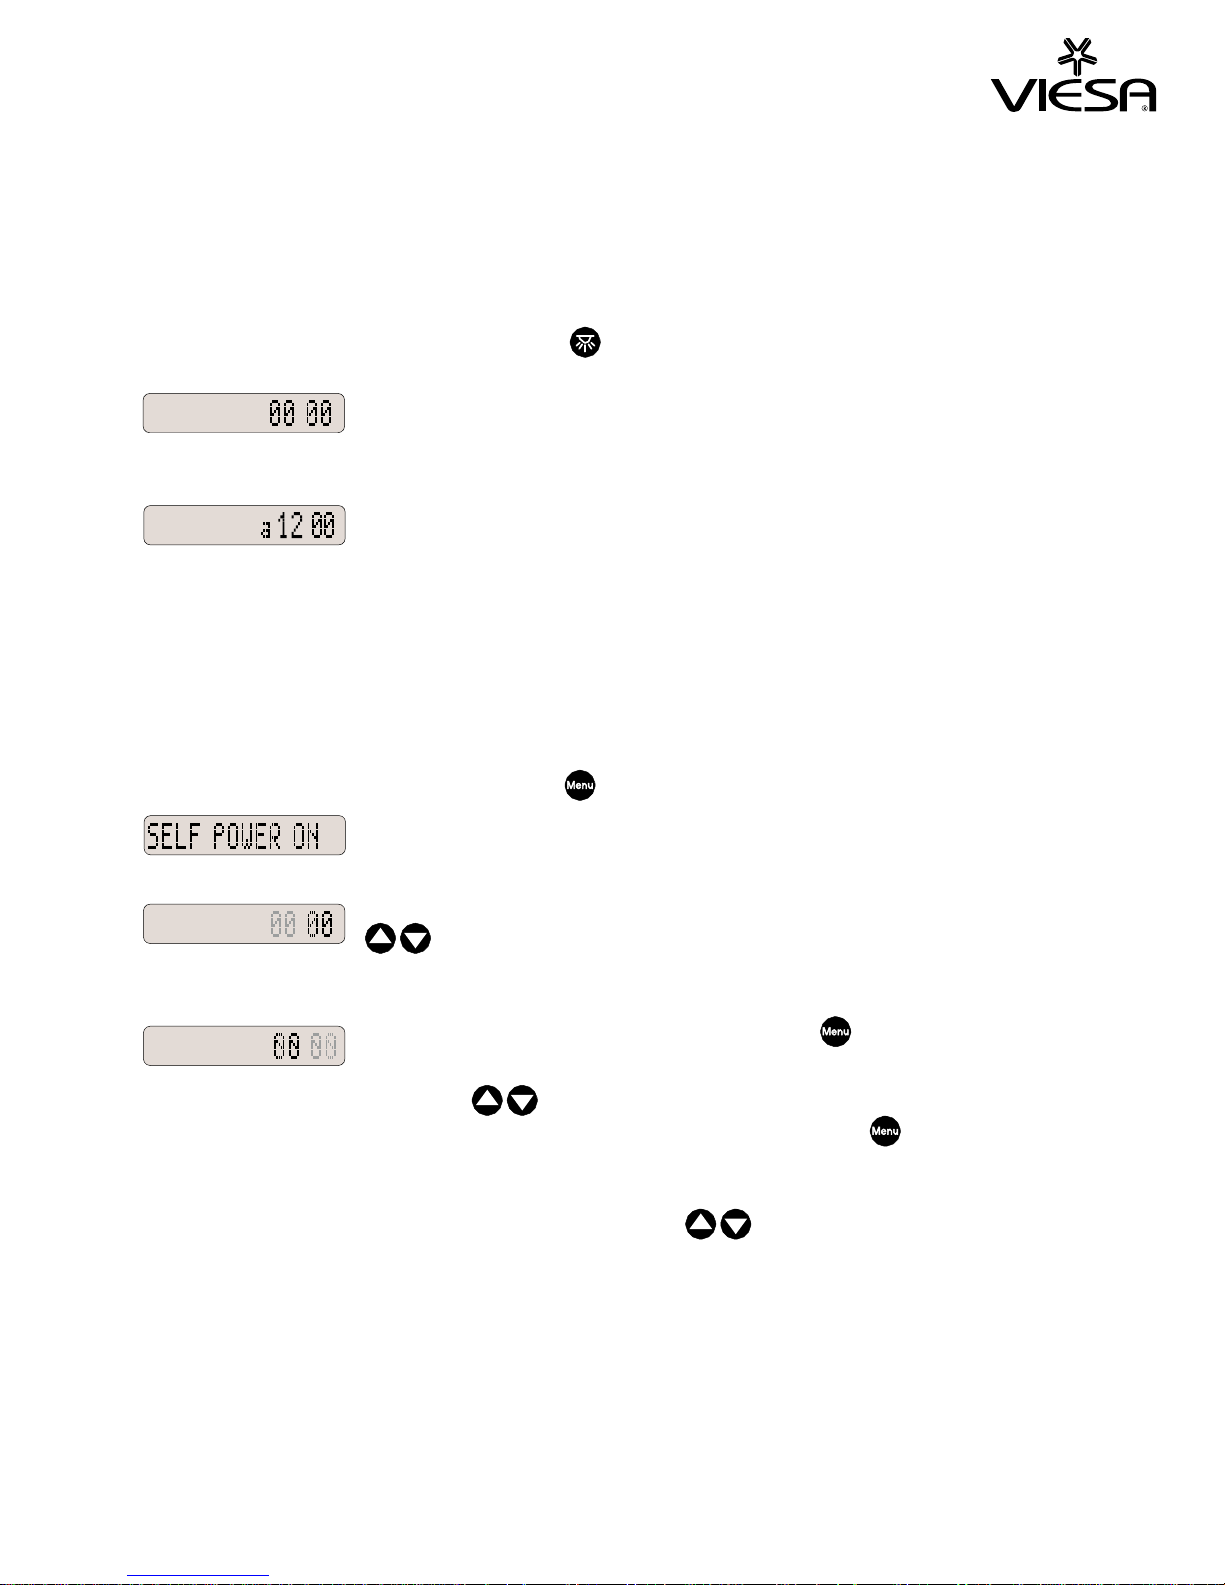
Note: When the alarm clock is activated, both system lights will turn on
matically in the dim position for one minute and then turn off. To
auto
switch lights off immediately, press any key on the
control panel or remote control and use the
key.
In 24H mode, the alarm clock is cancelled by
entering zero values for hours and minutes.
In 12H mode, the alarm clock is cancelled by
entering “a12:00”.
Note: The alarm clock cannot be set to “00:00” or ”a12:00”.
Self Power On
This function allows turning the system on automatically at a
predetermined time. The following explanation is for 24H mode.
Select this function with the menu key and wait for 3 seconds.
The hour flashes, press the
keys
to set the hour.
Wait for 3 seconds or press the menu key to
move to minutes.
Press the
keys to set the
minutes and wait 3 seconds or press the menu
key to finish.
Note: To fast scroll press and hold the up or down key.
Page 10
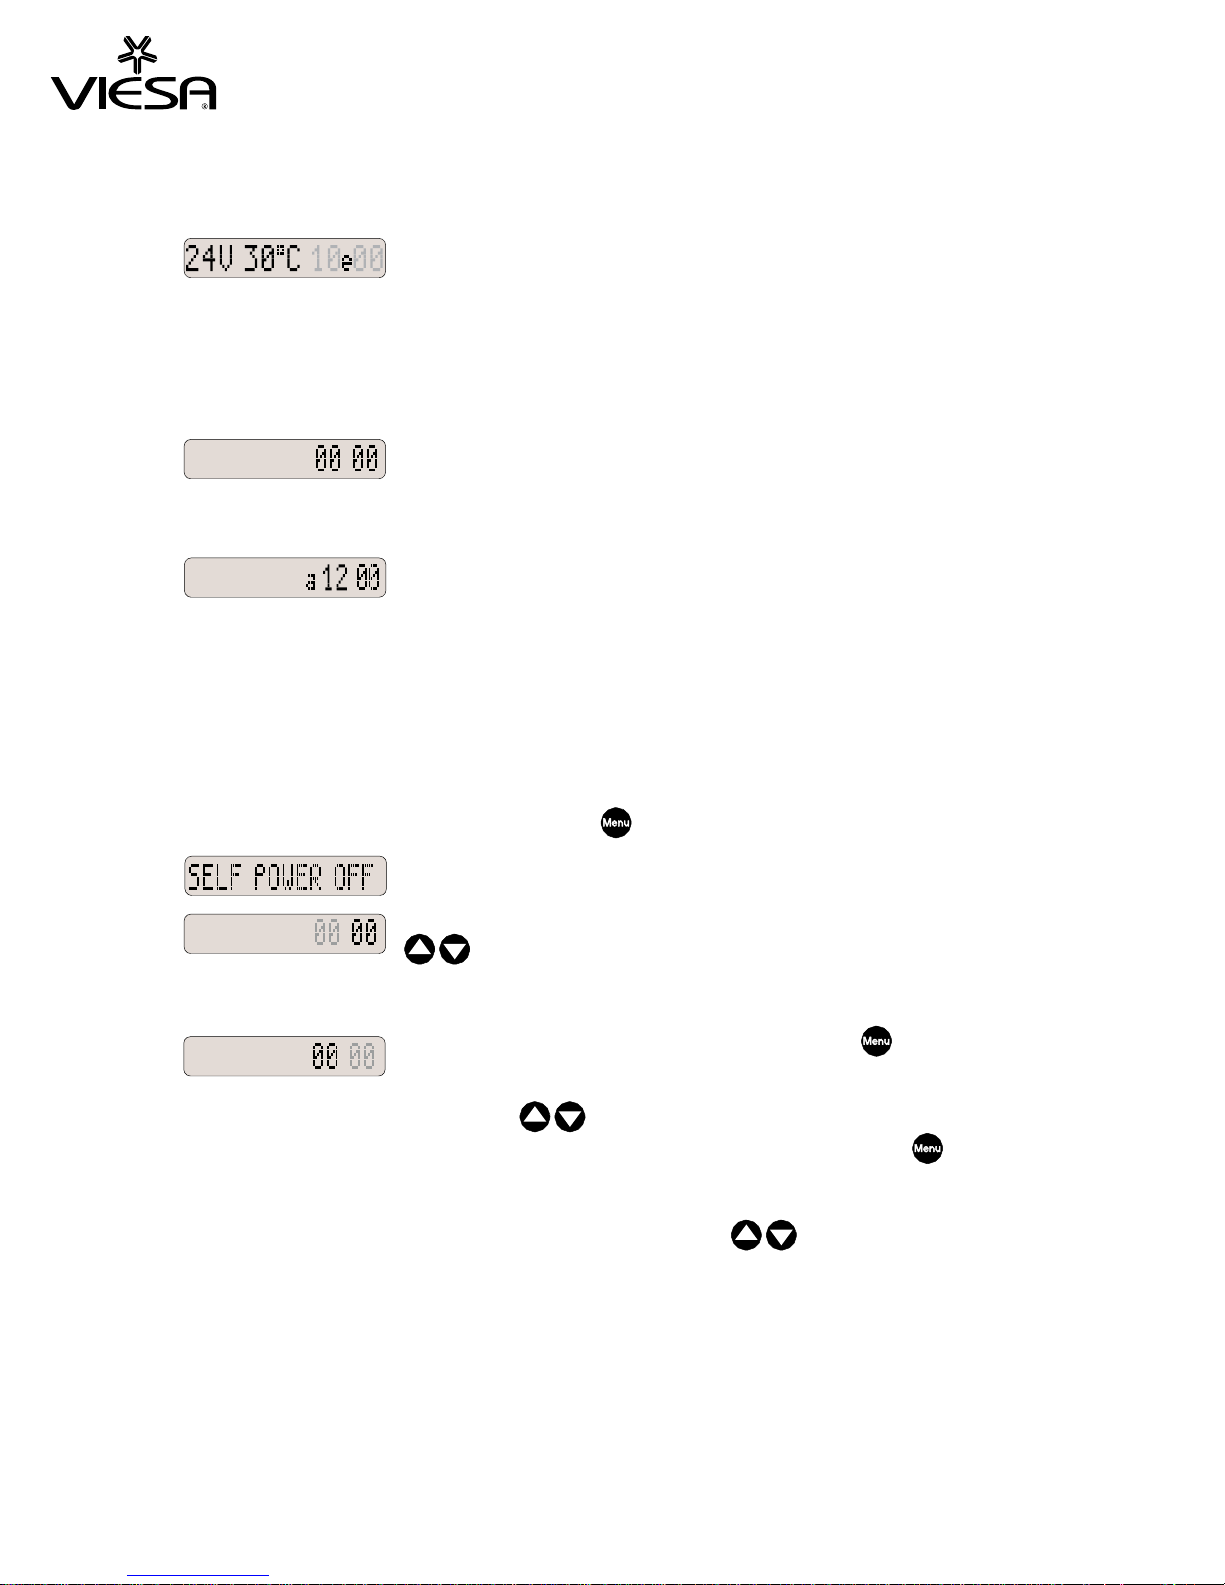
If self power on is active, a flashing “e” will
appear instead of the semi-colon in the L.C.
display clock.
Note: When both alarm clock and self power on are active, “d” and “e” will
flash alternatively.
In 24H mode, self power on is cancelled by
entering zero values for hours and minutes.
In 12H mode, self power on is cancelled by
entering “a12:00”.
Note: Self power can be programmed even with the system turned off.
Self Power Off
This function allows turning the system off automatically at a
predetermined time. The following explanation is for 24H mode.
Select this function with the menu key and wait for 3 seconds.
The hour flashes, press the
keys
to set the hour.
Wait for 3 seconds or press the menu key
move to minutes.
Press the
keys to set the
minutes and wait 3 seconds or press the menu
key to finish.
Note: To fast scroll press and hold the up or down key.
to
Page 11
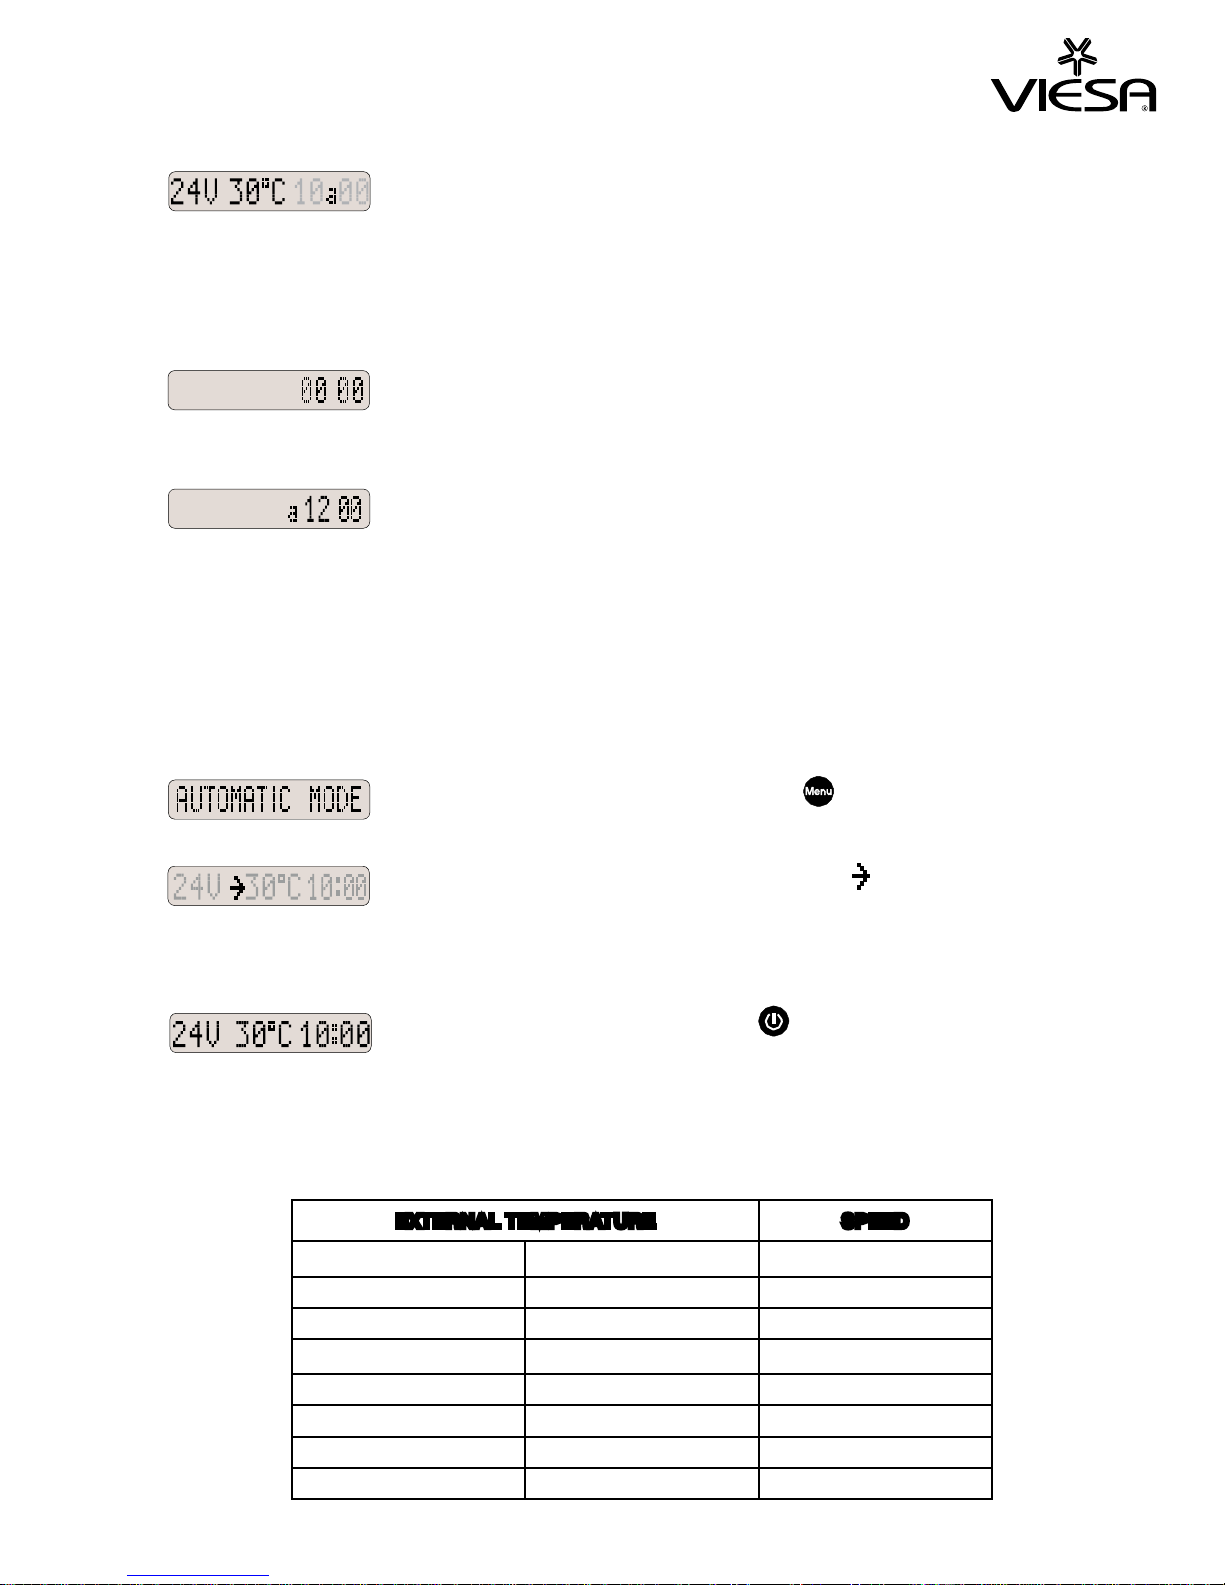
If self power off is active, a flashing “a” will
appear instead of the semi-colon in the L.C.
display clock.
Note: When alarm clock, self power on and self power off are all active ”a”,
“d” and “e” will flash alternatively.
In 24H mode, self power off is cancelled by
entering zero values for hours and minutes.
In 12H mode, self power off is cancelled by
entering “a12:00”.
Note: Self power can be programmed even with the system turned off.
Automatic Mode
This function automatically adjusts the turbo fan speed to the
temperature outside the vehicle.
Select this
function with the menu key
and
wait for 3 seconds.
If automatic mode is active, a flashing will
appear to the left of temperature in the L.C.
display.
Pressing the system on-off switch
automatic mode and turn the turbo fan off.
Note: In automatic mode, the system (water pump and turbo fan) is always
on. If temperature outside is very low, the turbo fan will work at minimum
speed.
EXTERNAL TEMPERATURE SPEED
29°C or higher 84°F or higher 8
28°C 82°F 7
27°C 81°F 6
26°C 79°F 5
25°C 77°F 4
24°C 75°F 3
23°C 73°F 2
22°C or lower 72°F or lower
will cancel
1
Page 12
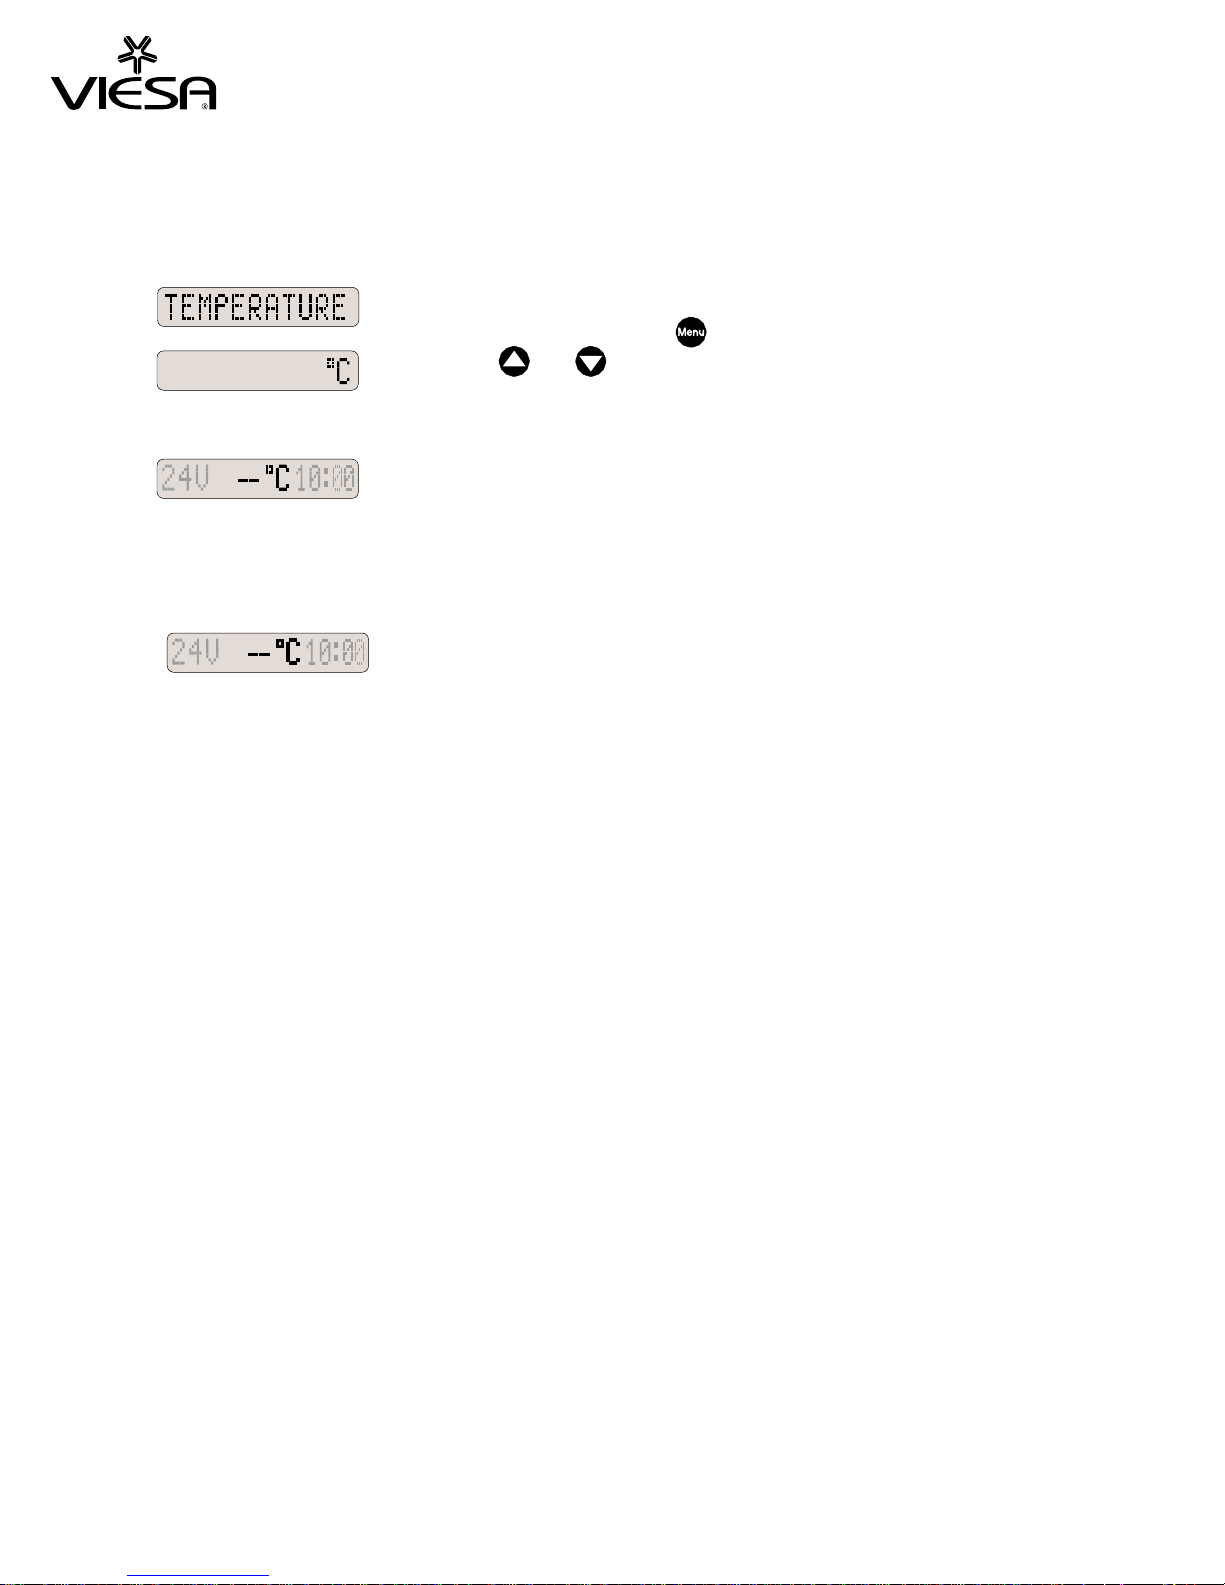
Temperature
This function allows selecting the outside temperature display in degree
Celsius (°C) or
function with the menu key
Press key
Fahrenheit (°F). Select this
and wait for 3 seconds.
or to select °C or °F and
wait for 3 seconds.
Note: Below -5°C (23°F) or above 70°C (158°F), the display will show
The temperature sensor is placed inside the system’s roof mounted unit.
Important: If the temperature sensor is not connected,
the following message will appear on the display:
Page 13
MAINTENANCE
The equipment will delay in cooling until the evaporator is totally wet.
Do not use fuses higher than 15 Amp.
The equipment will deactivate automatically due to low tension so
as to prevent damages to the battery.
Use only clean water.
Foresee replenishment of water taking into account that the
equipment consumes between 2 and 5 litres per hour depending on
the ambient temperature.
During short stops leave the equipment on so as to keep the cabin
fresh.
System must be turned off when exhaust fumes or toxic particles
could enter the cab through the system.
When performing maintenance of the equipment or if
the evaporator unit's cover or the upholstery cover are removed,
the system MUST NOT BE SWITCHED ON and
you must not switch it on with any of these elements removed.
VIESA SCENTED FLUID (EVERY 200 HOURS OF USE)
Keep the tank clean. Every 200 hours of use
- Drain all the water from the tank by removing the drain
plug..
- Rinse with clean water thoroughly.
- Pour one bottle of Viesa Scented Cleansing Fluid.
Each 6 months change the package of granulated Calfa Bas crystals.
- Fill-up the tank with clean water.
Do not use chemical products to clean the control panel.
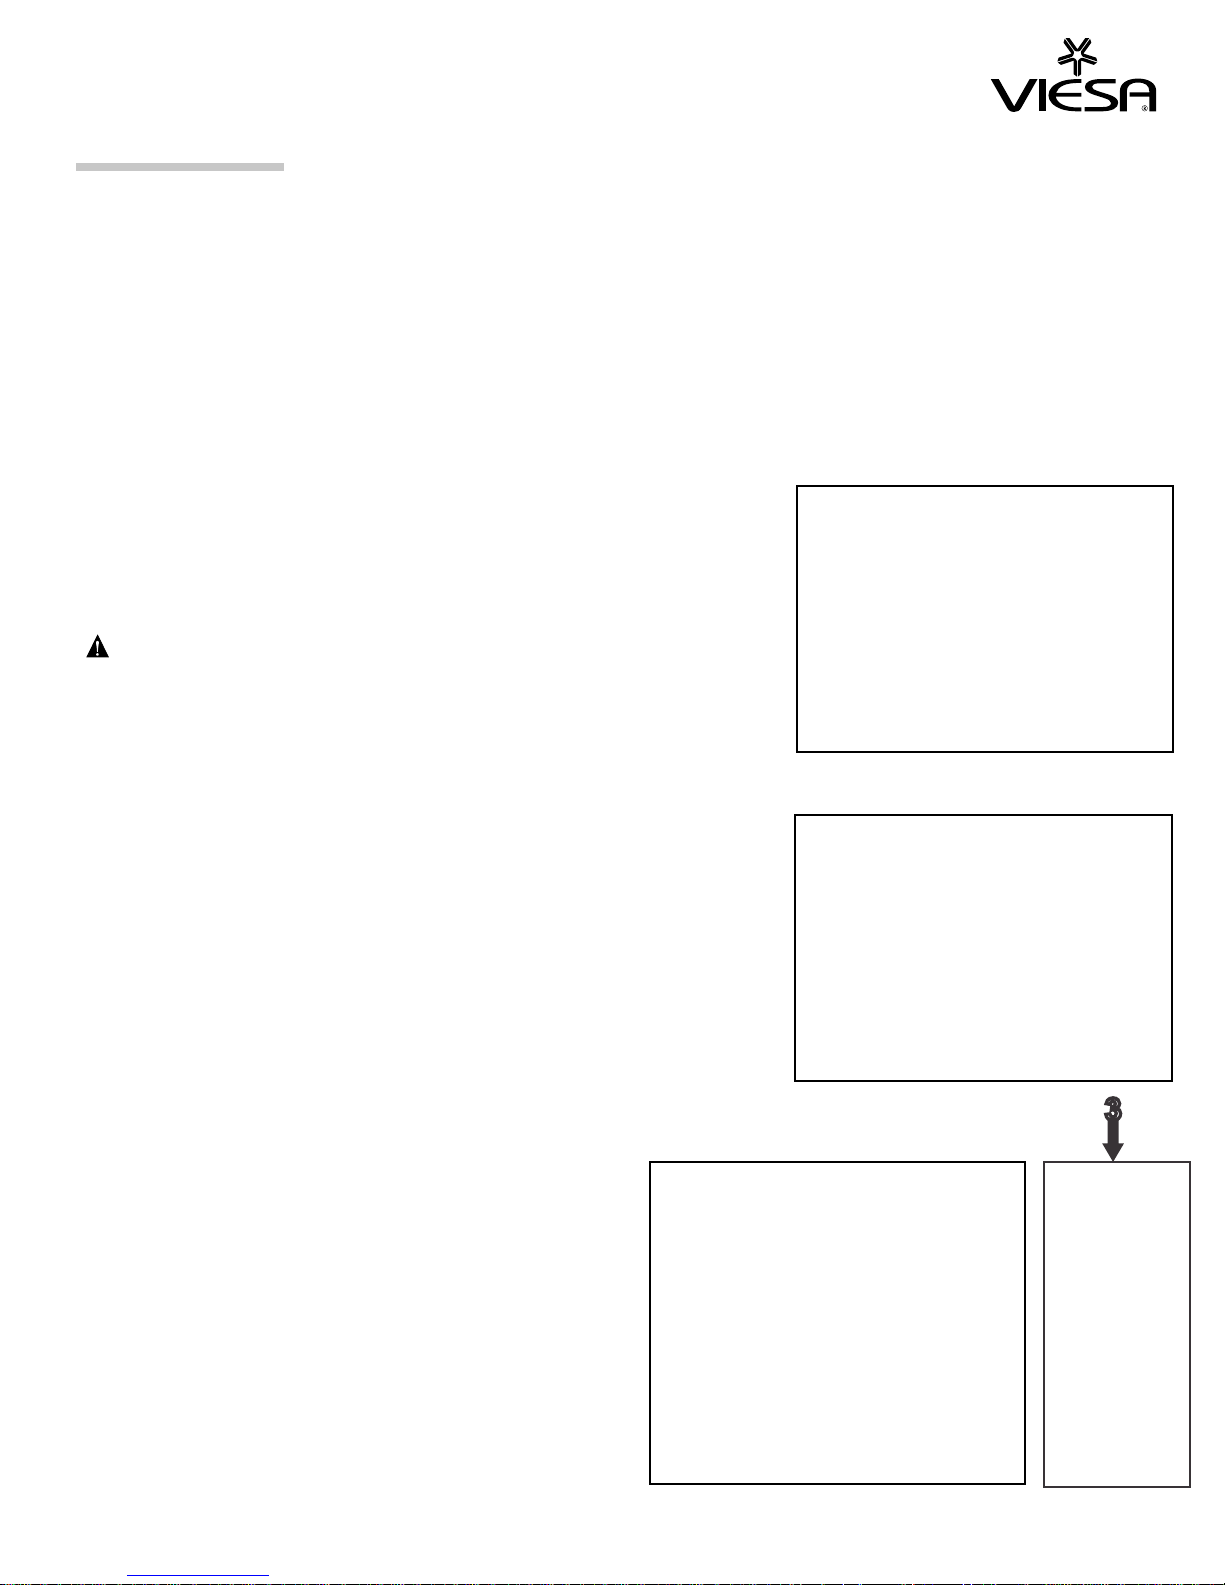
Every 2 months or according to working conditions:
- Submerge the evaporator in water with bleach (1).
- Clean the grids of the air entrances (2).
- Clean the filter of the collector tray (3).
Once a year replace the evaporator (1).
GRANULATED CALFA BAS EACH 6 MONTHS
3
Reconnect water returning hose to
the filter of the collector tray according to the figure.
Page 14

LIMITED WARRANTY
This limited warranty is provided to the original buyer only and covers the VIESA ECOLOGICAL CAB COOLER (the
"Product") manufactured by Col-Ven S.A. (the "Manufacturer") and distributed by RCR Systems Limited (the
"Distributor").
The warranty period is two years from date of original purchase by the buyer. During this period, if the product is
found to be defective in mechanical or electrical materials or workmanship during normal use, it will be repaired or
replaced at no charge to the buyer. The buyer will be required to show date and proof of purchase and to return the
Product pre-paid to an Authorized Dealer.
THIS LIMITED WARRANTY DOES NOT COVER, AND MANUFACTURER OR DISTRIBUTOR WILL NOT BE
RESPONSIBLE FOR, THE FOLLOWING:
-Normal wear of parts;
-Failures or defects due to negligent use, misuse, neglect, abuse, use on improper voltage or current, use contrary
to operating instructions, accidents, alterations, disassembly, installation, repair or alteration by any person other
than an Authorized Dealer, fire, floods or acts of God.
-Products or accessory equipment not manufactured by the Manufacturer.
-Performance of Product when used in combination with other products or equipment not manufactured by the
Manufacturer.
-Payments for labour or service to unauthorized representatives or service agents.
Manufacturer or Distributor will not be responsible for loss of time, inconvenience, loss of use of the Product, injury
to buyer or other persons or damage to vehicle or property caused by the Product or by its failure to work or for any
other incidental, punitive or consequential damages.
The Manufacturer reserves the right to make the final decision on any warranty claim that may be questionable.
This warranty is not transferable.
EXCEPT AS PROVIDED HEREIN, THIS WARRANTY EXPRESSLY EXCLUDES:
(i) all warranties and conditions, whether express, implied or statutory, including but not limited to warranties and
conditions of merchantability for a particular purpose; and
(ii) any agreements, representations, affirmations, warranties or conditions, whether oral or written, made by any
agent, employee or representative of seller.
This warranty sets forth the entire responsibility of Manufacturer and Distributor with respect to the Product. The
buyer's exclusive remedy is repair or replacement as stated herein. In no event shall Manufacturer or Distributor's
liability exceed the cost of correcting defects as provided herein and any such liabilities will terminate upon
expiration of the two year warranty period.
 Loading...