

1
USER
MANUAL
EN

2
SAFETY PRECAUTIONS
WARNING
• Never use a damaged device, cable or charger.
• Use only the USB cable that came with your device for charging.
• Do not expose to water or extreme temperatures.
• Properly dispose of your device when the battery life has expired.
• Do not replace the battery or open the unit.
• Do not attempt to tamper with or disassemble the device.
• Capsules, screens, chamber lid, mouthpiece and inserts should be replaced
regularly to avoid malfunction.
• To avoid injury, remain cautious of the high temperatures of the device’s
heating chamber, capsules and chamber lid’s ceramic screen.
• Do not leave device unattended near flammable objects.
• Be sure that the wall charger you use has been connected to ground wire.
• Keep the device air-paths clean and unclogged.
• Avoid radio interference.
• Do not block the ventilation holes while using the device.
• Avoid contact with strong magnets.
• Avoid extreme impact or shock to the device.
• Capsules may be hot. Please be cautious when handling.
• The reproduction, transmission or use of this document or its contents is
not permitted without express written authority.

3
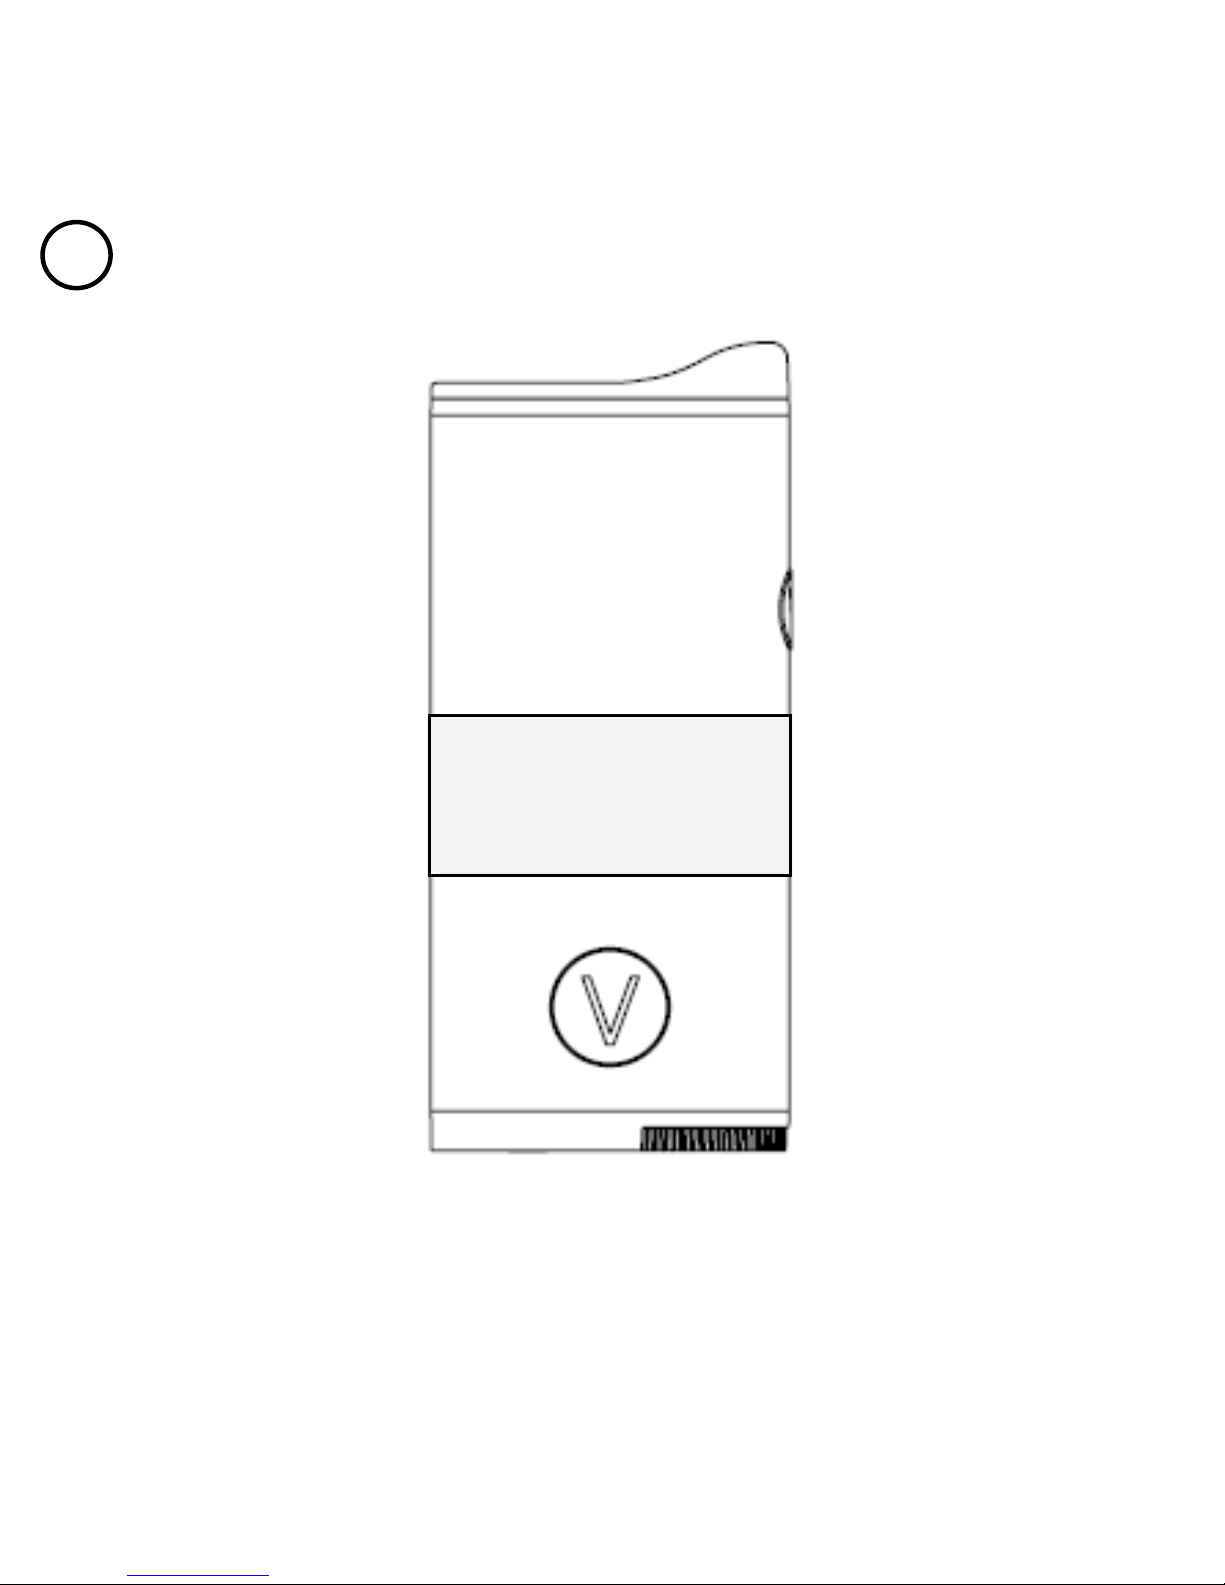
THE VIE VAPORIZER
○
1 Mouthpiece
○
2 Mouthpiece silicon inset (the maze)
○
3 Pick Tool Holding Hole
○
4 Pick Tool
5 Air-path hole - Mouthpiece
6 Mouthpiece lip curve
7 Mouthpiece snap
8 Reset Button Hole
9 Air-path hole - Base
10 power button
11 The power bottom indication light (the
12 Ventilation Holes
13 Battery Level Indication Light
14 Micro USB port
15 temperature level Indication Lights
16 temperature level Button
16 Heating chamber
17 Air-path hole – Chamber
18 Air-path holes - Chamber Lid
19 Chamber Lid
1. Mouthpiece
2. Mouthpiece Silicon Insert (maze side)
3. Pick Tool Holding Hole
4. Pick Tool
5. Airpath Hole - Mouthpiece
6. Mouthpiece Lip Curve
7. Mouthpiece Snaps
8. Reset Button Hole
9. Airpath Hole - Base
10. Power Button
11. Power Indication Light
12. Ventilation Holes
13. Battery Level Indication Light
14. Micro USB Port
15. Temperature Level Indication Lights
16. Temperature Level Button
17. Heating Chamber
18. Airpath Hole – Chamber
19. Airpath Holes – Chamber Lid
20. Chamber Lid
21. Chamber Lid Silicon Insert
22. Chamber Lid Ceramic Screen Insert
23. Capsule’s Top Silicon Cap
24. Capsule’s Body Tube
25. Capsule’s Bottom Silicon Cap
26. Heating Chamber Opening
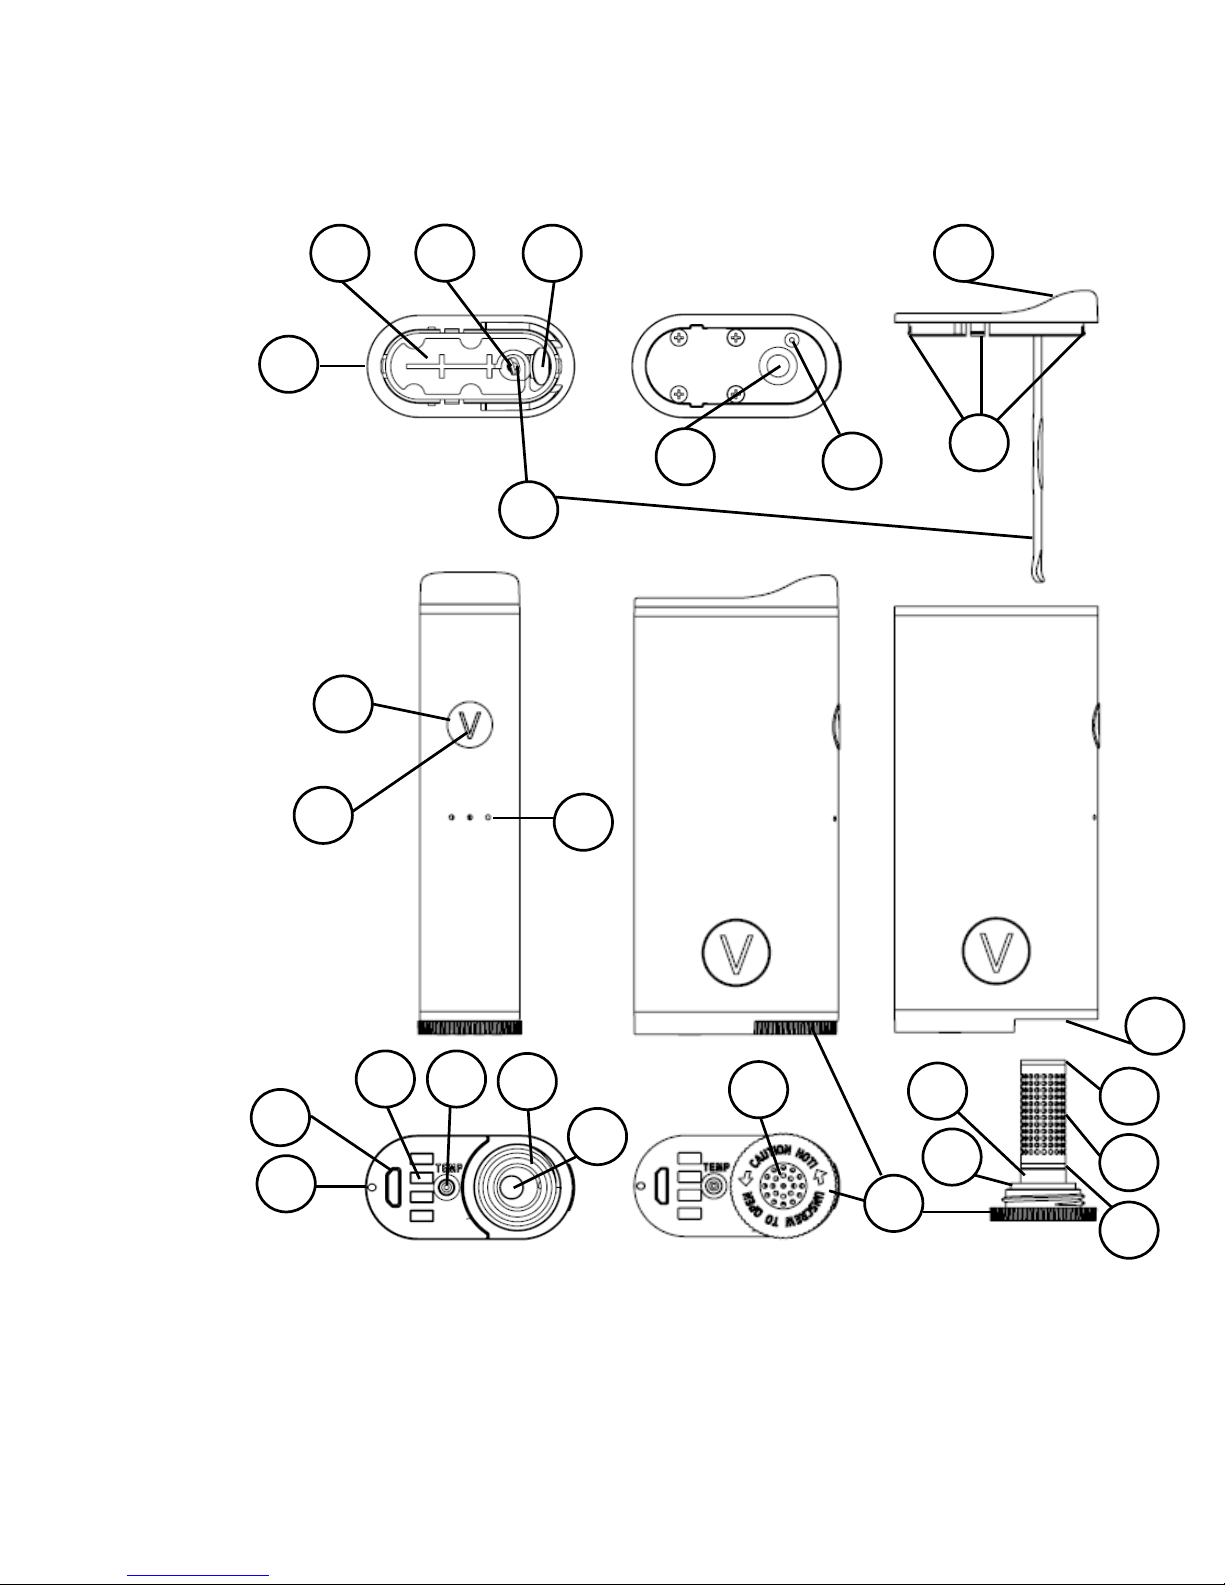
4
1
2 3 5 4 6 7 8 9 10
11
12
13
14
15
16
17
18
21
22
20
19
23
24
25
26

5
VIE APPEARANCE
TOOL & ACCESSORY KIT BOX
CAPSULES & USB CABLE BOX
3
2
9
2
1. Accessory Kit / Parts Box
2. Microfiber Cloth
3. Thick Brush
4. Thin Brush
5. Long Pick Tool
6. Portable Pick Tool
7. Screens (x4)
8. SIM Ejection Tool
9. Auto Packing Spring
10. Chamber Lid Ring
1. Capsules / USB Cable Box
2. USB Cable (12inch/30cm)
3. Capsules Carrying Tube
4. Capsules Carrying Tube Cap
5. Herb Capsules (x2)
6. Concentrate/Wax Capsule (x1)
1 4 5
6
7 8 9
10
1
3
4 5 6

6
HOW TO OPERATE THE VIE
POWER ON
Press the power button three consecutive times. The power indication light will turn
on and start blinking, which means the VIE is heating.
POWER OFF
Press the power button three consecutive times. The power indication light will turn
off. Note: If the VIE is left unused for three minutes, the device will automatically turn
off.
HEATING PERIOD
After power On, the VIE will heat your herb or concentrate to your desired
temperature. While heating, the power indication light will blink. The heating process
will take about 60 seconds.
TAKE A PUFF
When the power indication light is green and the VIE vibrates, take a puff.

7
PUFFING PERIOD
After you take a puff, the green light will turn to yellow automatically after 10 seconds,
which means that the VIE is in “Session Mode.”
SESSION MODE
When the power indication light turns from green to yellow, the VIE is in 60 seconds
of Session Mode. During these 60 seconds, the VIE will retain the preset temperature
level. While the power indication light is yellow, press the power button once and
wait 1-2 seconds until the VIE vibrates (the power indication light turns green), then
you (or your buddy) can take a puff.
STANDBY MODE
As opposed to continuing to heat your product in the chamber, the VIE enters
standby mode after 60 seconds. In standby mode, the power indication light will be
steady at your chosen heating mode color (see below for heating mode information).
Your VIE will require a quick tap of the power indication button to return to the preset
temperature. Standby mode lasts for two minutes, at which point the VIE will
automatically shut down.

8
HEATING MODES
The VIE offers three heating modes to customize your experience. Be sure to select
the correct mode based on the method in which you have loaded the chamber.
You can load the VIE chamber in three ways:
1. Direct Load (herb loaded directly into the chamber without a capsule)
2. Herb Capsules
3. Concentrates/Wax Capsules
HOW TO SWITCH BETWEEN HEATING MODES
Press and hold the temperature level button on the bottom of your VIE and tap the
power button. With each press, the power indication light will change color. Each
color indicates different heating mode:
• Blue power indication light – for use with direct load (load the herb directly
into the chamber without a capsule). This is the low heat mode.
• Red power indication light – for use with herb capsules. This is the medium
heat mode.
• Purple power indication light – for use with concentrates/wax capsules. This
is the high heat mode.

9
AIRFLOW OPTIONS
Under the mouthpiece you will find a silicon insert. On one side of the insert, you will
see a maze and on the other side you will see only a single hole. Use the side with the
single hole for direct airflow and the side with the maze for cooling path airflow.
• Cooling path airflow is usually used with herbs. This airflow cools the vapor
temperature slightly before it reaches your mouth.
• Direct airflow is for use with concentrates/wax, but be aware this airflow
may increase the vapor temperature.

10
LOADING THE VIE
Herb capsules are designed mechanically and thermodynamically to create 360o even
heating of the herb.
• Even heating eliminates the “burned popcorn taste, allowing for the full
spectrum of flavor.
• Cleaning and maintenance is easier with herb capsules.
• Pre-loaded capsules are convenient and easy to load.
Direct load of herb into the chamber heats faster. You will get more “smoky” vapor
and larger cloud. However, you may experience a decrease in flavor.
LOAD HERB CAPSULES
Caution! Capsules, screens, chamber lid and chamber can be very hot. Do not touch
directly until they have cooled completely.
1. Each capsule can hold around 0.3 grams
2. Open the top silicon cap (the shorter one) and fill capsule with ground herb.
3. Once the capsule is fully packed, replace the silicon cap.
4. Attach the capsule to the chamber lid and screw on the lid.
5. power on the VIE, switch the heating mode to herb capsule load mode (red
color power indication light), set the temperature level to match your
desired experience, and you are ready to go.

11
DIRECT LOAD
Caution! Capsules, screens, chamber lid and chamber can be very hot. Do not touch
directly until they have cooled completely.
1. Open the chamber lid and insert one screen from your accessory kit into the
chamber to prevent small particles from being inhaled into your mouth.
2. Use the flat side of the long pick tool from your accessory kit and tack the
screen into the bottom of the chamber.
3. Fill the chamber with ground herb. Pick tools can be used for packing, if
necessary.
4. Screw on the chamber lid.
5. power on the VIE, switch the heating mode to direct load mode (blue color
power indication light), set the temperature level to match your desired
experience, and you are ready to go.
To remove the screen, remove the chamber lid and mouthpiece. Insert the long pick
tool through the hole under the mouthpiece and push the long pick tool through the
hole.

12
LOAD CONCENTRATES/WAX
Caution! Capsules, screens, chamber lid and chamber can be very hot. Do not touch
directly until they have cooled completely.
1. Open by removing the top metal cap on the capsule (the shorter one) by
pinching, twisting and pulling it off.
2. Use a pick tool to place concentrates in the bottom of the capsule. Do not
fill completely.
3. Close the capsule and attach it to the chamber lid, then screw on the lid.
4. When using concentrates, it is best to use the direct airflow side of the
mouthpiece.
5. power on the VIE, switch the heating mode to concentrates/wax capsule
mode (purple color power indication light), set the temperature level to
match your desired experience, and you are ready to go.

13
TEMPERATURE LEVELS
Different temperatures create different vaping experiences.
• Low temperature levels will express the entire flavor spectrum of the herb
and the vapor will be mild and thin.
• High temperature levels will express a smoky taste and create a thicker cloud.
Select the temperature level by pressing the button located on the bottom of the VIE.
Each press will raise the temperature level.
One Bar - 170
o
C/338oF
Two Bars - 200
o
C /392oF
Three Bars - 220
o
C /428oF
Four Bars - 250
o
C /482oF

14
MASTERING YOUR VIE
OPENING THE MOUTHPIECE
Open the mouthpiece by placing your thumb on the elevated area on the wide side of
the VIE’s mouthpiece (not the narrow side where the power button is located) and
pushing the mouthpiece sideways and upwards.
AUTO EXPERIENCE MODE
Auto experience mode will make the most of your herb. This mode is preprogrammed and will guide you through all temperature levels to maximize your VIE
experience.
To set your VIE to auto experience mode, press the power button three times and
hold down the third press for five seconds. You will feel three vibrations. Use the VIE
as usual until you feel another three consecutive vibrations. This indicates you have
fully used the capsule and the session will end.
SINGLE HIT USE
Use the auto-packing spring chamber lid if you are not fully loading the capsule or
chamber with herb. The auto-packing spring chamber lid can be found in the
Accessory Kit box.

15
1. Remove the small silicon cap. Load capsule with the amount of herb you
desire. Do not replace silicon cap.
2. Insert the capsule with the closed side towards the mouthpiece, so you can
see the capsule’s open end.
3. Take the auto-packing spring chamber lid from the Accessory Kit box. Insert
the spring into the capsule and screw the chamber lid tightly. Your herb is
now packed tightly into the capsule or chamber to ensure a satisfying single
puff.
For direct load of a single hit, insert a screen into the chamber first, then follow the
instructions above.

16
CHARGING THE VIE
IMPORTANT NOTE! Use only the USB cable and accessories supplied with the VIE.
Otherwise, your warranty may be voided.
A fully-charged VIE performs best. Charging time is approximately one to two hours,
depending on charger output.
The light near to the micro USB port indicates the battery level:
• Green Light: 50-100%
• Orange Light: 20-49%
• Red Light: 5-19%
• Flashing Red Light: < 5%
USE WHILE CHARGING
The VIE has a unique feature called Safe Pass Through, which means you can use the
VIE while charging.

17
MAINTAINING THE VIE
Keeping your VIE clean is easy and will ensure pure flavors, great vapor and prevent
capsules from sticking inside the chamber. You can soak all the parts of the VIE in
isopropyl alcohol, except the VIE itself.
• When the device and capsules are completely cooled down, use isopropyl
alcohol or an alcohol swab to clean residue build-up in your VIE.
• Use the thick brush to clean the chamber.
• Use the thin brush to clean the air-path tube by opening the mouthpiece
and sliding the thin brush from the top air-path hole through the air-path
tube towards the chamber.
• Use the SIM ejection tool to clean the white ceramic screen holes in the
chamber lid.
• Use the long pick tool and the microfiber cloth provided to clean and wipe
the VIE parts.

18
CUSTOMER SERVICE
Call: 1 (855) 843-8431
Email: service@vierevolution.com
FACTORY RESET
If your VIE will not power on or you are experiencing other technical problems, first
try a factory reset.
The factory reset button can be found underneath the mouthpiece, next to the airpath hole. Use the SIM ejection tool provided in the Accessory Kit box to press the
reset button, then press three consecutive times on the power button and your VIE
should power on normally.
VIE LIMITED WARRANTY
To learn about the VIE warranty, visit vievape.com/warranty.

19
PRODUCT REGISTRATION
Thank you for purchasing the VIE. Please take some time to register your product
online for warranty purposes.
Visit http://www.vievape.com/vieregister/index/registration/
The required S/N number on the registration form is below:
S/N:

20
FOLLOW US
@VIEvaporizer
@VIEVaporizer
@VIEHerbalVape
@VIEvaporizer
www.vievape.com
+1 (855) 843-8431
2465 Dogwood Way
Vista, CA 92081
service@vierevolution.com
CONTACT US
 Loading...