

Vienna Acoustics Schoenberg Owners manual

SCHÖNBERG
WALL-MOUNTING KIT

To prepare the speakers for wall mounting
1. It is advised to put on the enclosed gloves so
as to avoid the potential of fingerprint oils
staining the cabinet during assembly.
2. It is recommended to start with the bottom of
the speaker.
3. Place the bottom mounting inlay on the
speaker, so that the two holes for the two bolt
sockets line up.
ATTENTION:
The two inlays are slightly different for use on
each of the respective sides. In order to mount
the inlays correctly the three conical milled
indent points must be visible and the mounting
bolts able to be inser-ted.
The bottom-side of each inlay is covered with
adhesive tape. This adhesive is intended for use
when attaching the top inlay only. Please do not
remove the protective film from the adhesive
from the inlay that is to be attached to the
bottom of the speaker. This will assure, that
should positioning on the floor be desired in the
future, the inlay can be easily removed, allowing
for the attachment of the floor mounting stand.
4. Attach the appropriate inlay with the two M6 x
20 mm bolts using the Allen wrench (hexagonal
tool).
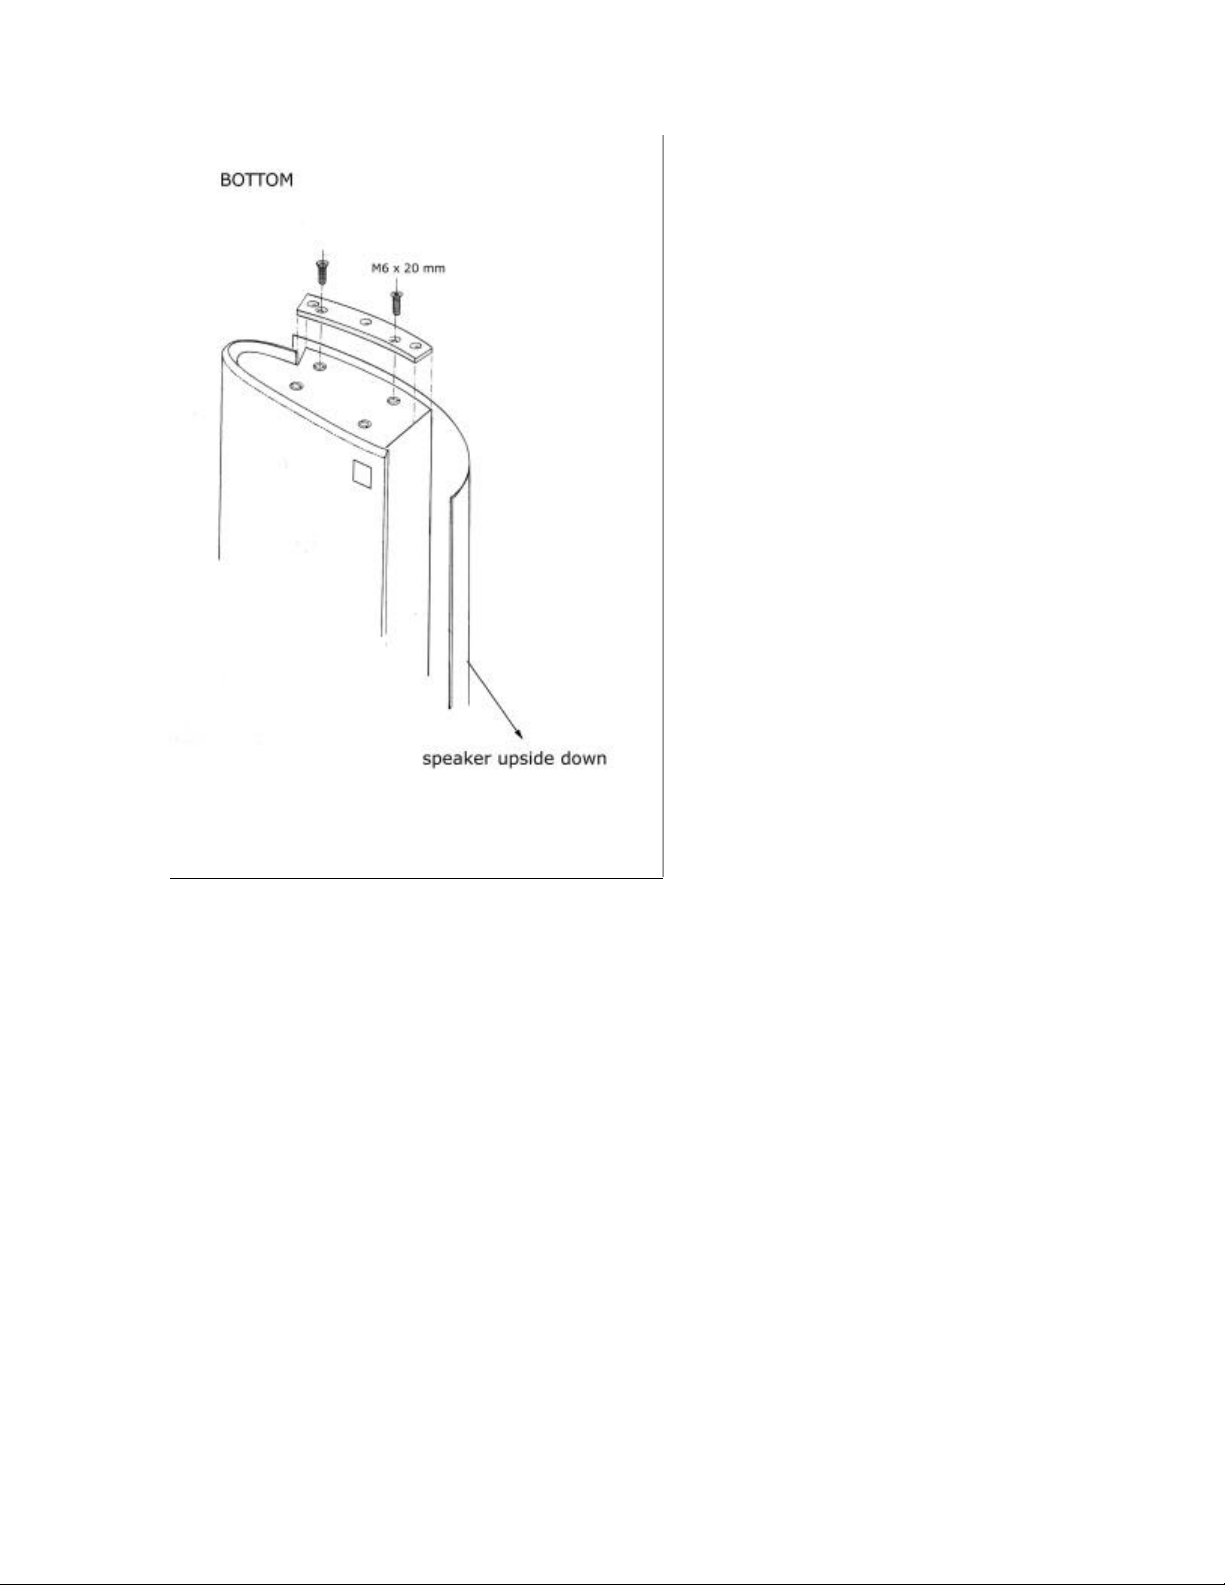

5. Turn the speaker over in order to attach the
other inlay to the top of the speaker.
ATTENTION:
Before putting on the inlay, please make sure
that the surface of the speaker is clean so that
the adhesive tape will adhere completely to the
cabinet. To clean the surface, use a dry cloth
with a little rubbing alcohol. Be careful to avoid
the use of oily detergents or any other cleaning
product that may prevent the adhesive from
sticking to the cabinet surface.
Be certain to determine the correct position of
the inlay prior to removing the protective film
from the adhesive tape. Position the inlay so
that it is against the rear cabinet wall and
centered side-to-side on the cabinet top (as
seen in the drawing when you turn over the
page).
Do not forget to remove the protective film from
the adhesive tape as it ensures that the inlay will
not move while the screws that hold it in place
are inserted after being carefully positioned on
the speaker.
6. After removing the protective film from the
adhesive tape, press the inlay down firmly, so
that
 Loading...