

Viega PureFlow Product Instructions
Product
Instructions
Compact Angled PureFlow® Crimp Hand Tool
The Compact Angled PureFlow Crimp Hand Tool
handles do not open like pliers. Forcing the handles
apart could cause tool failure.
Use this tool to crimp only copper crimp rings made to ASTM F1807,
F2159, and brass, copper, or plastic fittings for ASTM F876/F877
SDR9 PureFlow PEX tubing. Tool may also be used to make crimp
connections with PB tubing and appropriate rings and fittings.
1
3
5
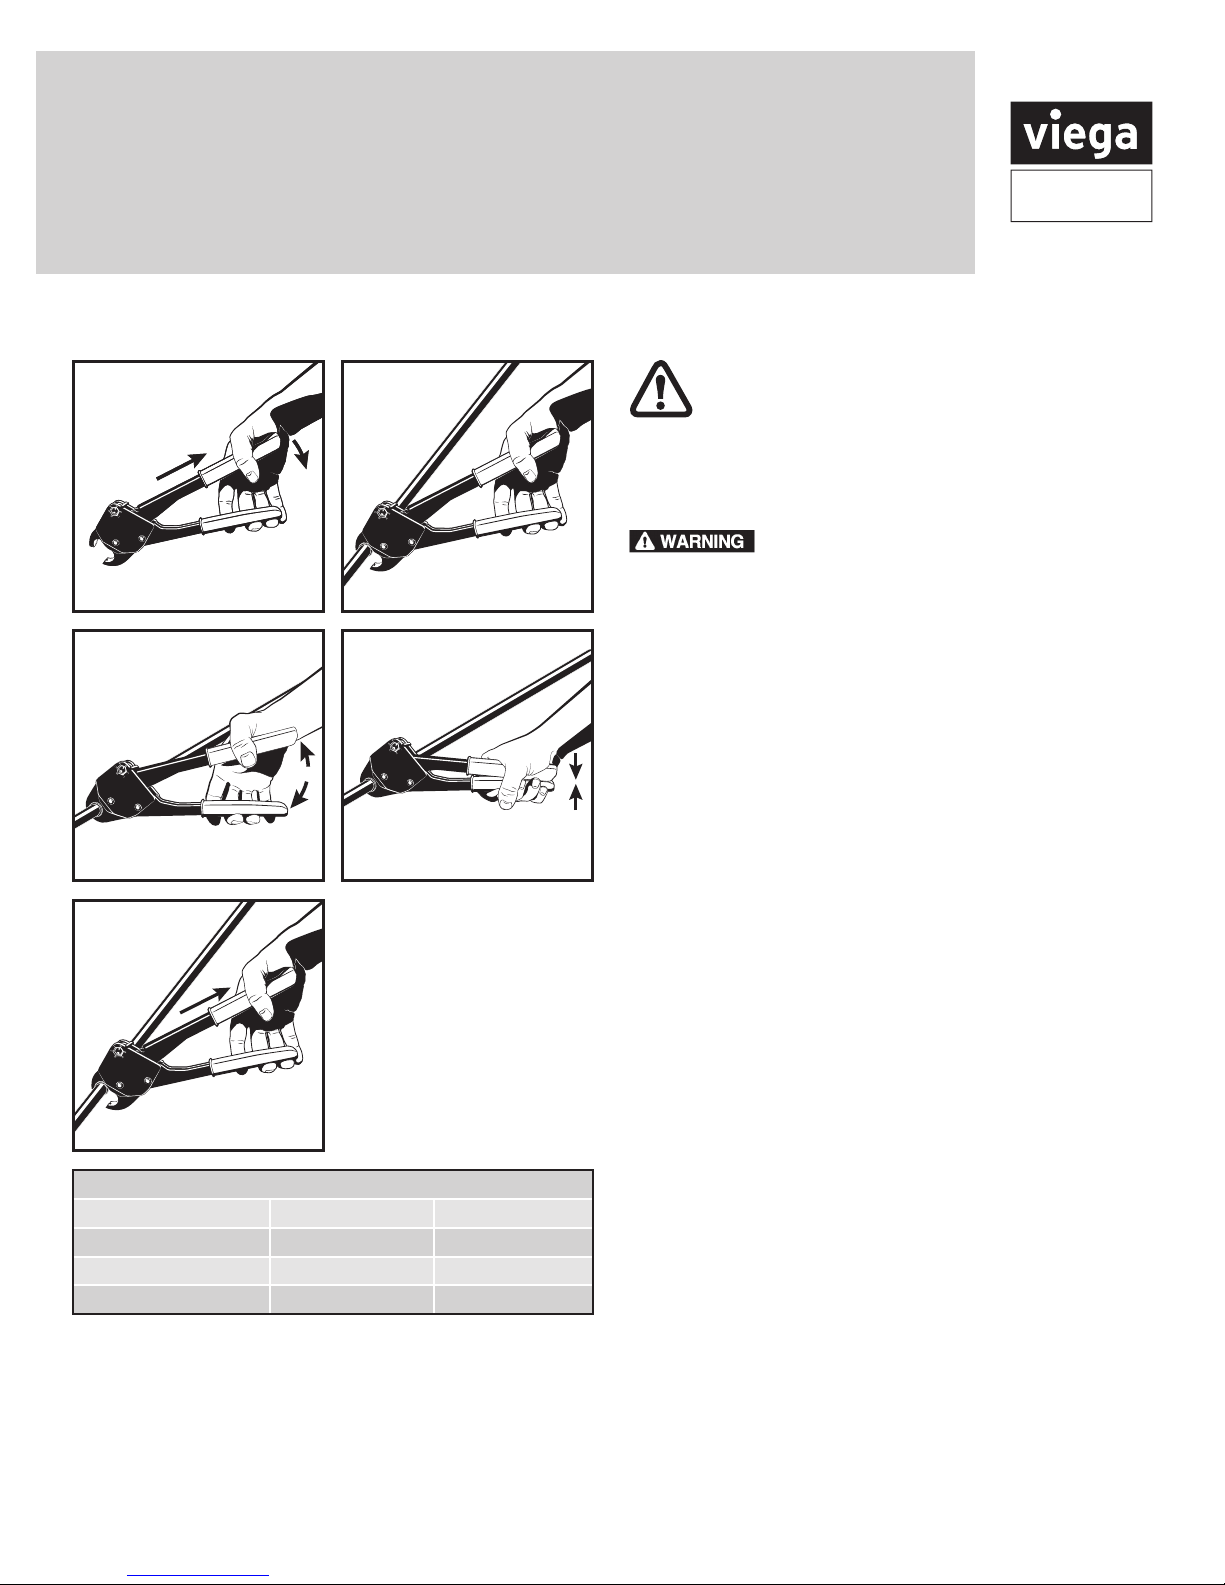
Dimensions of crimp ring after a proper, single crimp
Nominal Tube Size Minimum (in) Maximum (in)
⅜" 0.58 0.60
½" 0.70 0.72
¾" 0.95 0.96
Note: The maximum out-of-roundness of a completed crimp shall not
exceed 0.006". This is the difference between the minimum outside
diameter of a properly crimped ring and the maximum outside diameter
of the same properly crimped ring.
2
4
READ BEFORE US. Do not use this tool unless you can
execute a proper crimp according to approved methods and
recognized standards.
IMPORTANT CRIMP TOOL INSTRUCTIONS:
Making a Crimp
If you cannot complete a proper crimp with your tool (including
the ability to
discontinue use of the tool.
1. With the pipe, fitting, and crimp ring in assembly position:
Pull back on the upper, moving handle and hold both
handles closed with jaws in full open position.
2. Position jaws around the crimp ring.
3. Gently release hand pressure on the moving handle to let
the jaws close properly and squarely over the crimp ring.
4. Firmly press the handles together to complete the crimp.
DO NOT CRIMP TWICE.
5. Pull back on the moving handle to release the tool from the
crimp ring.
Note: Completed crimps must meet the dimensional
requirements of ASTM F1807 and F2159 tting standards.
• Check the rst and last crimp of the day using either the
included crimp caliper (GO gauge), Viega’s crimp caliper (part
number 53507) or other suitable measuring device.
• DO NOT make the measurement at the scarred (jaw overlap
point) portion of the ring.
• If the GO side does NOT t over the ring, it is under crimped.
The connection must be cut out, the tting replaced and
new crimp rings used. The tool must be adjusted before
proceeding.
• The dimensional accuracy of the Crimp Caliper can be
affected by normal eld wear and tear. Therefore, it is
recommended you check it with a suitable measuring device
or change to a new gauge regularly to ensure measurement
accuracy.
• The Compact Angled PureFlow Crimp Hand Tool is user
adjustable. When the tool makes unsatisfactory crimps it must
be adjusted.
apply enough force to make the tool work correctly)
Viega LLC • 585 Interlocken Blvd. • Broomfield, CO 80021 • Phone (800) 976-9819 • www.viega.us
PI-PR 560629 1218 Compact Angled PureFlow Crimp Tool (EN ES FR)
1 of 4
Product
Instructions
Maintenance Instructions
Tool maintenance can effect the life of your Compact Angled
PureFlow Crimp Hand Tool and the quality of the tool’s crimp.
Lubricate the pivot points frequently with light oil to ensure
smooth action and maximum tool life.
DO NOT ATTEMPT TO REPAIR THE TOOL. FOR TOOL
INFORMATION, CALL VIEGA, AT 800-976-9819.
1
2
IMPORTANT: The Compact Angled PureFlow Crimp Hand Tool
is under limited warranty for twelve (12) months from date of
purchase. To ensure warranty availability, fill out the information
on the reverse side and retain with a dated proof of purchase.
Please include a copy of your proof of purchase when returning
your tool for any adjustment or repair covered under warranty.
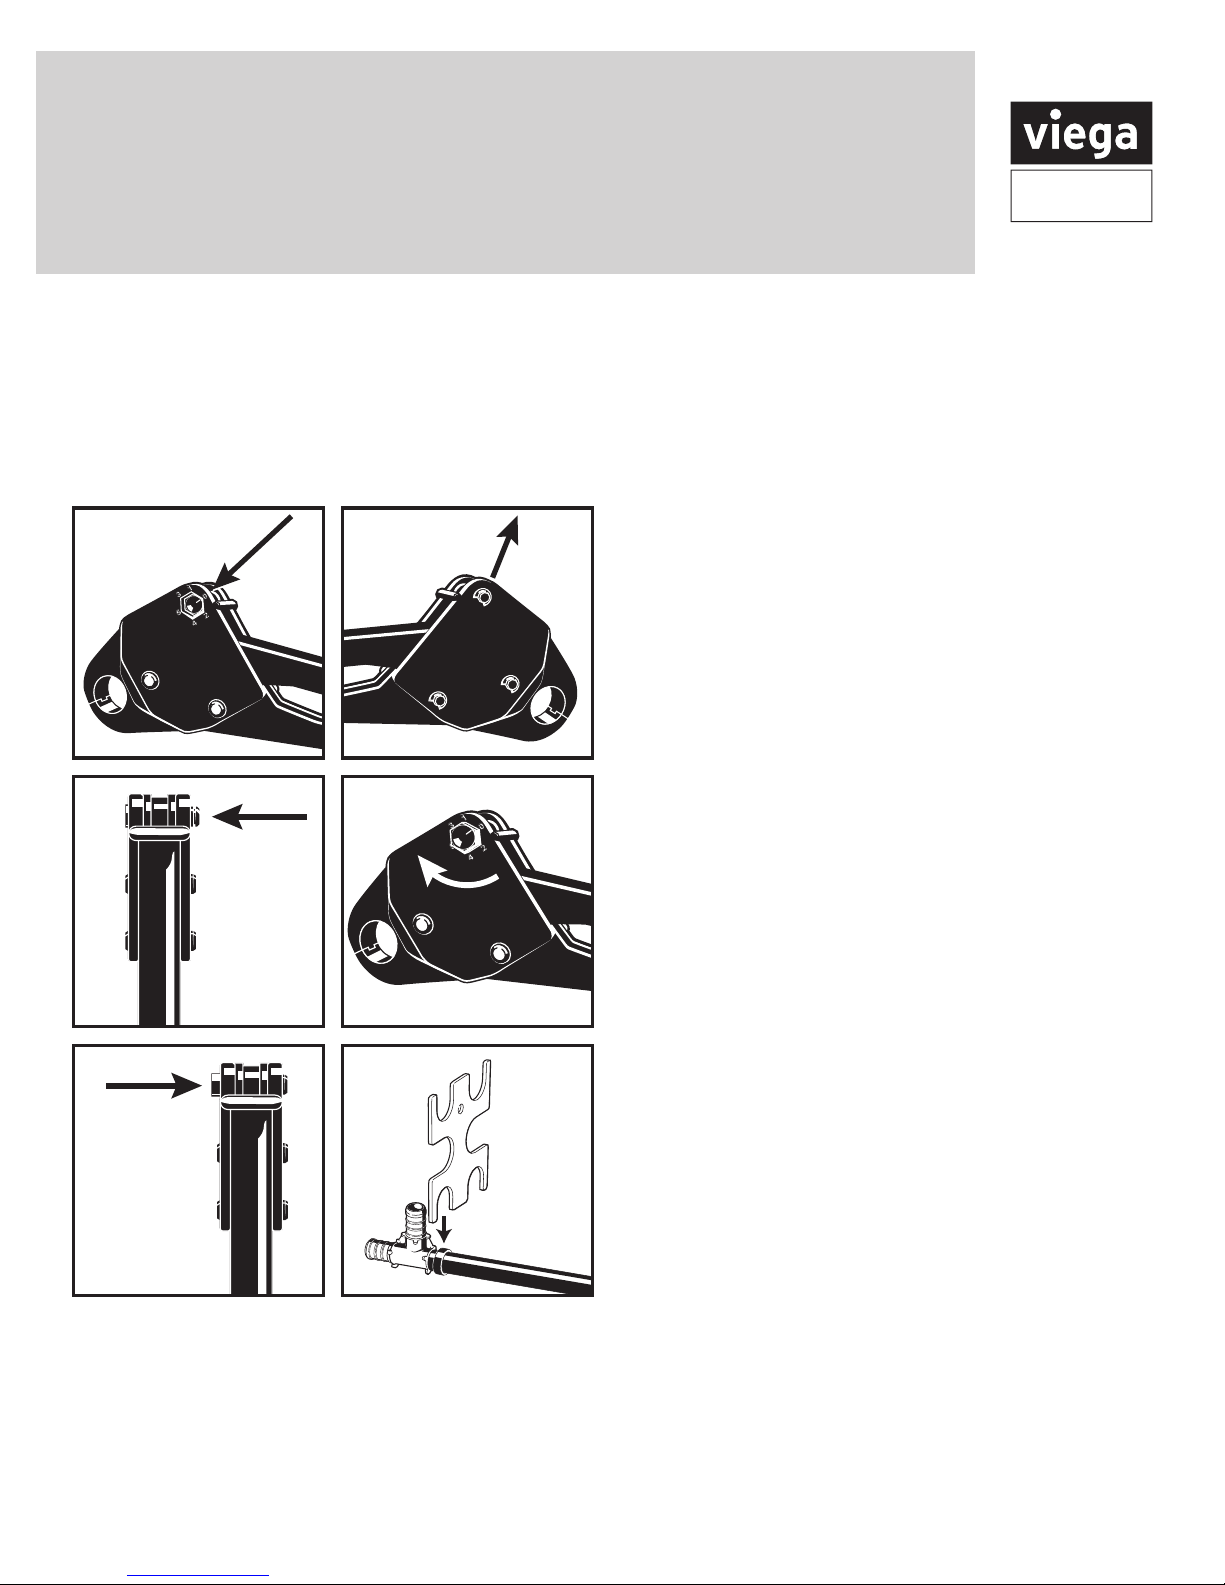
Tool Adjustment Procedures
1. Note the number to which the line on the hex head of the
back pin points.
2. Carefully remove the retaining clip by inserting a small
flat blade screwdriver in the loop of the clip and turning
the screwdriver. CAUTION! The retaining clip is made
from spring steel and may fly off of the pin if not removed
carefully, possibly causing eye damage and loss of the clip.
3. From the clip end of the back pin, push it towards the tool
body until the hex head on the other end of the pin just
clears the body.
4. Rotate the pin until the line on the hex head points to the
next higher number on the frame.
5. Push the pin back into the frame and replace the retaining
clip.
6. Crimp a test joint and check crimp ring for proper sizing with
GO gauge or measurement. Severely worn tools may require
further adjustment. As the tool continues to wear with use,
simply repeat these instructions as required.
3
5
Viega products are designed to be installed by licensed and trained plumbing and mechanical professionals who are familiar
with Viega products and their installation. Installation by non-professionals may void Viega LLC’s warranty.
This document is subject to updates. For the most current Viega technical literature please visit www.viega.us.
Viega LLC • 585 Interlocken Blvd. • Broomfield, CO 80021 • Phone (800) 976-9819 • www.viega.us
PI-PR 560629 1218 Compact Angled PureFlow Crimp Tool (EN ES FR)
4
6
2 of 4
 Loading...