

Vidyo VidyoGateway Administrator's Manual

Product Version 3.2
Document Version E
October, 2015
VidyoGateway™
Administrator Guide

TABLE OF CONTENTS
Overview ........................................................................................................................................... 1
1. VidyoGateway Server Models and Capacities............................................................................... 2
2. Understanding the VidyoGateway Configuration Procedure ......................................................... 6
3. Configuring Your Server ................................................................................................................ 8
Conventions Used in This Guide ....................................................................................................... 1
Identifying Your VidyoGateway Model .............................................................................................. 2
Capacity of the VidyoGateway Models ............................................................................................. 3
Maximum Number Concurrent Calls of the Same Type ............................................................... 3
Maximum Number Concurrent Calls of Different Types ............................................................... 4
Maximum Number Concurrent Calls of Different Types and Resolutions ................................... 4
Discontinued VidyoGateway Model Capacities ................................................................................ 4
VidyoGateway Physical Setup Guidelines ........................................................................................ 5
Making Configurations on Your VidyoGateway ................................................................................ 6
Making Configurations on Your VidyoPortal for Your VidyoGateway ............................................... 6
Making Additional VidyoGateway Configurations ............................................................................. 7
Logging in to the System Console of Your Server and Changing the Default Password ............... 9
Configuring Network Settings at the System Console ................................................................... 10
Supporting Multiple System Console Accounts ............................................................................. 14
Understanding System Administrator Console Menu Options ...................................................... 15
Understanding the More Options System Administrator Console Menu ................................... 18
Configuring FIPS on Your VidyoGateway Server ............................................................................ 19
Managing Network Routes .............................................................................................................. 20
Adding a Network Route .............................................................................................................. 21
Removing a Network Route ......................................................................................................... 22
Removing all of Your Network Routes ......................................................................................... 23
Navigating Your Network Routes................................................................................................. 23
Configuring SNMP ........................................................................................................................... 24
Enabling SNMP ............................................................................................................................ 25
Configuring an SNMPv2 Community String ................................................................................ 26
Configuring Local SNMPv3 User (User-based Security Model) ................................................. 27
Configuring an SNMP Notification ............................................................................................... 29
© 2015 Vidyo, Inc. all rights reserved. Vidyo’s technology is covered by one or more issued or pending United States patents, as more fully
detailed on the Patent Notice page of Vidyo's website http://www.vidyo.com/about/patent-notices/, as well as issued and pending
international patents. The VIDYO logotype is a registered trademark of Vidyo, Inc. in the United States and certain other countries, and is a
trademark of Vidyo, Inc. throughout the world. VIDYO and the Vidyo family of marks are trademarks of Vidyo, Inc. in the United States and
throughout the world.

TABLE OF CONTENTS
4. Configuring RADIUS ................................................................................................................... 45
5. Configuring Your System ............................................................................................................ 55
Managing Hostnames ..................................................................................................................... 32
Adding a Hostname ..................................................................................................................... 33
Removing a Hostname ................................................................................................................ 34
Removing all of Your Hostnames ................................................................................................ 35
Navigating Your Hostnames ........................................................................................................ 35
Configuring Your SSH Port .............................................................................................................. 35
Maintaining Pre-shared Keys .......................................................................................................... 36
Generating a Pre-shared Key ...................................................................................................... 37
Exporting a Pre-shared Key ......................................................................................................... 38
Importing a Pre-shared Key ......................................................................................................... 39
Selecting the Default Pre-shared Key ......................................................................................... 40
Logging in to the Admin Portal ........................................................................................................ 41
Setting the Language for the VidyoGateway Admin Pages ........................................................... 43
Disabling FIPS Mode ....................................................................................................................... 45
Enabling RADIUS ............................................................................................................................. 46
Viewing the Current RADIUS Configuration .................................................................................... 47
Modifying the RADIUS Configuration .............................................................................................. 48
Creating a RADIUS-Enabled Account ............................................................................................. 49
Viewing a RADIUS-Enabled Account .............................................................................................. 50
Removing a RADIUS-Enabled Account .......................................................................................... 51
Disabling RADIUS Authentication ................................................................................................... 51
Creating a Local System Console Account .................................................................................... 52
Configuring the General Settings .................................................................................................... 55
Configuring the VidyoPortal Settings ........................................................................................... 55
Configuring SIP Settings .............................................................................................................. 57
Configuring H.323 Settings .......................................................................................................... 60
Configuring Audio Settings .......................................................................................................... 62
Configuring Video Loopback Settings ........................................................................................ 64
Configuring Quality of Service (QoS) Settings ............................................................................ 65
Configuring the Waiting Room Prompts...................................................................................... 67
iii

TABLE OF CONTENTS
Configuring Advanced Settings ................................................................................................... 69
Understanding VidyoGateway Clusters .......................................................................................... 71
Clustering Benefits ....................................................................................................................... 72
Cluster Configuration with a Legacy Gatekeeper Interface ........................................................ 72
Deploying Multiple VidyoGateway Clusters ................................................................................ 73
Configuring Clusters ........................................................................................................................ 74
Understanding the Clustering Procedure.................................................................................... 75
Returning a Repaired Controller to Your System Setup ............................................................. 76
Replacing an Irreparable Controller to Your System Setup ........................................................ 76
Configuring Your Standalone VidyoGateway .............................................................................. 76
Configuring Controller 1 ............................................................................................................... 77
Configuring Controller 2 ............................................................................................................... 79
Configuring Your Cluster Node ................................................................................................... 80
Managing Services .......................................................................................................................... 81
Adding a Service .......................................................................................................................... 82
Activating and Deactivating Services .......................................................................................... 86
Deleting a Service ........................................................................................................................ 87
Editing a Service .......................................................................................................................... 88
Understanding Call Types and Service Examples ......................................................................... 90
H.323 Outgoing Call Examples ................................................................................................... 90
H.323 Incoming Call Examples ................................................................................................... 90
SIP Incoming Call Using a Prefix Example .................................................................................. 91
SIP Incoming URI Dialing Example ............................................................................................. 91
Dialing From a Legacy H.323 Endpoint into a Vidyo PIN Protected Room ............................... 92
TCS4 Delimiters............................................................................................................................ 93
Configuring Integrated Voice Response (IVR) Settings .................................................................. 93
Enabling Your IVR Settings .......................................................................................................... 94
Configuring General IVR Settings ................................................................................................ 94
Configuring Appearance IVR Settings ......................................................................................... 96
Configuring VidyoGateway IVR Screen Instruction Settings ..................................................... 100
Configuring VidyoGateway IVR Screen Prompt Settings .......................................................... 103
VidyoGateway IVR Screen Prompt Types ................................................................................. 105
iv

TABLE OF CONTENTS
6. Auditing ..................................................................................................................................... 150
7. Integrating VoIP Phones and IP PBXs ....................................................................................... 152
Importing and Exporting VidyoGateway IVR Media and Prompt Settings ............................... 107
Enabling and Disabling VidyoGateway IVR Settings ................................................................ 108
Checking the Status of Your VidyoGateway ................................................................................. 108
Capturing and Downloading Single Application Logs .............................................................. 108
Viewing Single Application Logs ............................................................................................... 110
Viewing Call Statistics ................................................................................................................ 112
Configuring a Public IP Address and Viewing Your VidyoGateway Network Settings ................ 114
Configuring a Public IP Address ................................................................................................ 114
Viewing Your VidyoGateway Network Settings ......................................................................... 115
Understanding VidyoGateway Security ......................................................................................... 116
Securing Your VidyoGateway System with SSL and HTTPS ........................................................ 117
Importing, Exporting, and Regenerating an SSL Private Key ................................................... 117
Generating and Viewing an SSL CSR ....................................................................................... 121
Certificates Received from Your Certificate Authority ............................................................... 123
Uploading or Editing Your Server Certificate ............................................................................ 125
Deploying Your Server CA Certificates (Intermediates) ............................................................ 129
Configuring HTTPS Port Settings for Your Admin Pages ......................................................... 131
Importing Client Root CA Certificates from the Advanced Tab ................................................ 132
Enabling HTTPS on Your Vidyo Server ...................................................................................... 139
Configuring Your Vidyo Server’s Management Interface and Port ........................................... 141
Configuring OCSP ......................................................................................................................... 143
Enabling OCSP in the VidyoGateway ........................................................................................ 143
Disabling OCSP from the System Console ............................................................................... 145
Upgrading Your VidyoGateway ..................................................................................................... 146
Shutting Down or Rebooting Your VidyoGateway ........................................................................ 147
Logging Out of Your VidyoGateway .............................................................................................. 149
Downloading Audit Logs from Your VidyoGateway ...................................................................... 150
Understanding Audit Log Content ................................................................................................ 151
Content Captured in the Audit Log ............................................................................................ 151
Sample Audit Log Content ........................................................................................................ 151
v

TABLE OF CONTENTS
8. Integrating Direct Phone Calls with IVR Functionality ................................................................ 155
9. Using VidyoGateway Virtual Edition (VE) ................................................................................... 156
Appendix A. Definitions ................................................................................................................. 167
Appendix B. Legacy TCS4 Delimiters ........................................................................................... 169
Appendix C. Deployment Examples ............................................................................................. 170
Appendix D. NAT/Firewall Traversal .............................................................................................. 173
Appendix E. Reliability................................................................................................................... 178
Network Topology .......................................................................................................................... 153
Connecting to VidyoConferences from VoIP Phones ................................................................... 153
Connecting to VidyoConferences Via an IP PBX .......................................................................... 154
Phone Setups Using the IVR Functionality.................................................................................... 155
Understanding VidyoGateway VE Requirements ......................................................................... 156
Virtual Machine Provisioning Requirements ................................................................................. 157
Example Configurations ............................................................................................................. 158
Understanding VidyoGateway VE Support of VMware Features ................................................. 158
Installing VidyoGateway VE ........................................................................................................... 159
Limitations of Reliability Prediction Models ................................................................................... 178
General Prediction Methodology ................................................................................................... 178
Electronic Equipment Procedure ............................................................................................... 179
Component Parameters and Assumptions ............................................................................... 179
Supplier MTBF Data ................................................................................................................... 179
Subsystem MTBF Data Release Policy ..................................................................................... 179
MTBF Reliability ............................................................................................................................. 179
vi

Overview
Overview
Note
Tip
Note
Caution
The VidyoGateway is a 1U rack-mountable server that connects VidyoPortal™ users with users on
systems using the SIP and H.323 videoconferencing protocols. The systems that use these
protocols are referred to as Legacy systems.
This document describes how to use the VidyoGateway to connect with a VidyoConferencing™
system that includes Legacy systems. It is written for system administrators who must set up and
maintain a VidyoConferencing system.
The VidyoGateway is also available as the VidyoGateway Virtual Edition, and can be run as a virtual
appliance. For more information, see Using VidyoGateway Virtual Edition (VE)
To perform the setup and configuration described in this manual, you must have Admin
access to your VidyoGateway and Super Admin access to your VidyoPortal.
Terms used in this guide are defined in a separate section. For more information, see
Appendix A. Definitions. For more standard VidyoConferencing definitions, refer to the
VidyoConferencing Administrator Guide
.
.
Conventions Used in This Guide
Items marked with
Items marked with
Items marked with
unwanted or undesirable outcomes.
Text you type into an on-screen field or a browser address bar displays in a bold Consolas
font. Variables are shown in blue, surrounded by brackets:
http://[IP or FQDN address]
Cross-references to pages are shown in blue.
Navigational paths are delimited with greater-than symbols: Click Settings > Options.
indicate that the information is useful and practical.
indicate that the information deserves special attention.
indicate that not following the information provided may result in
1
1. VidyoGateway Server Models and
Capacities
Identifying Your VidyoGateway Model
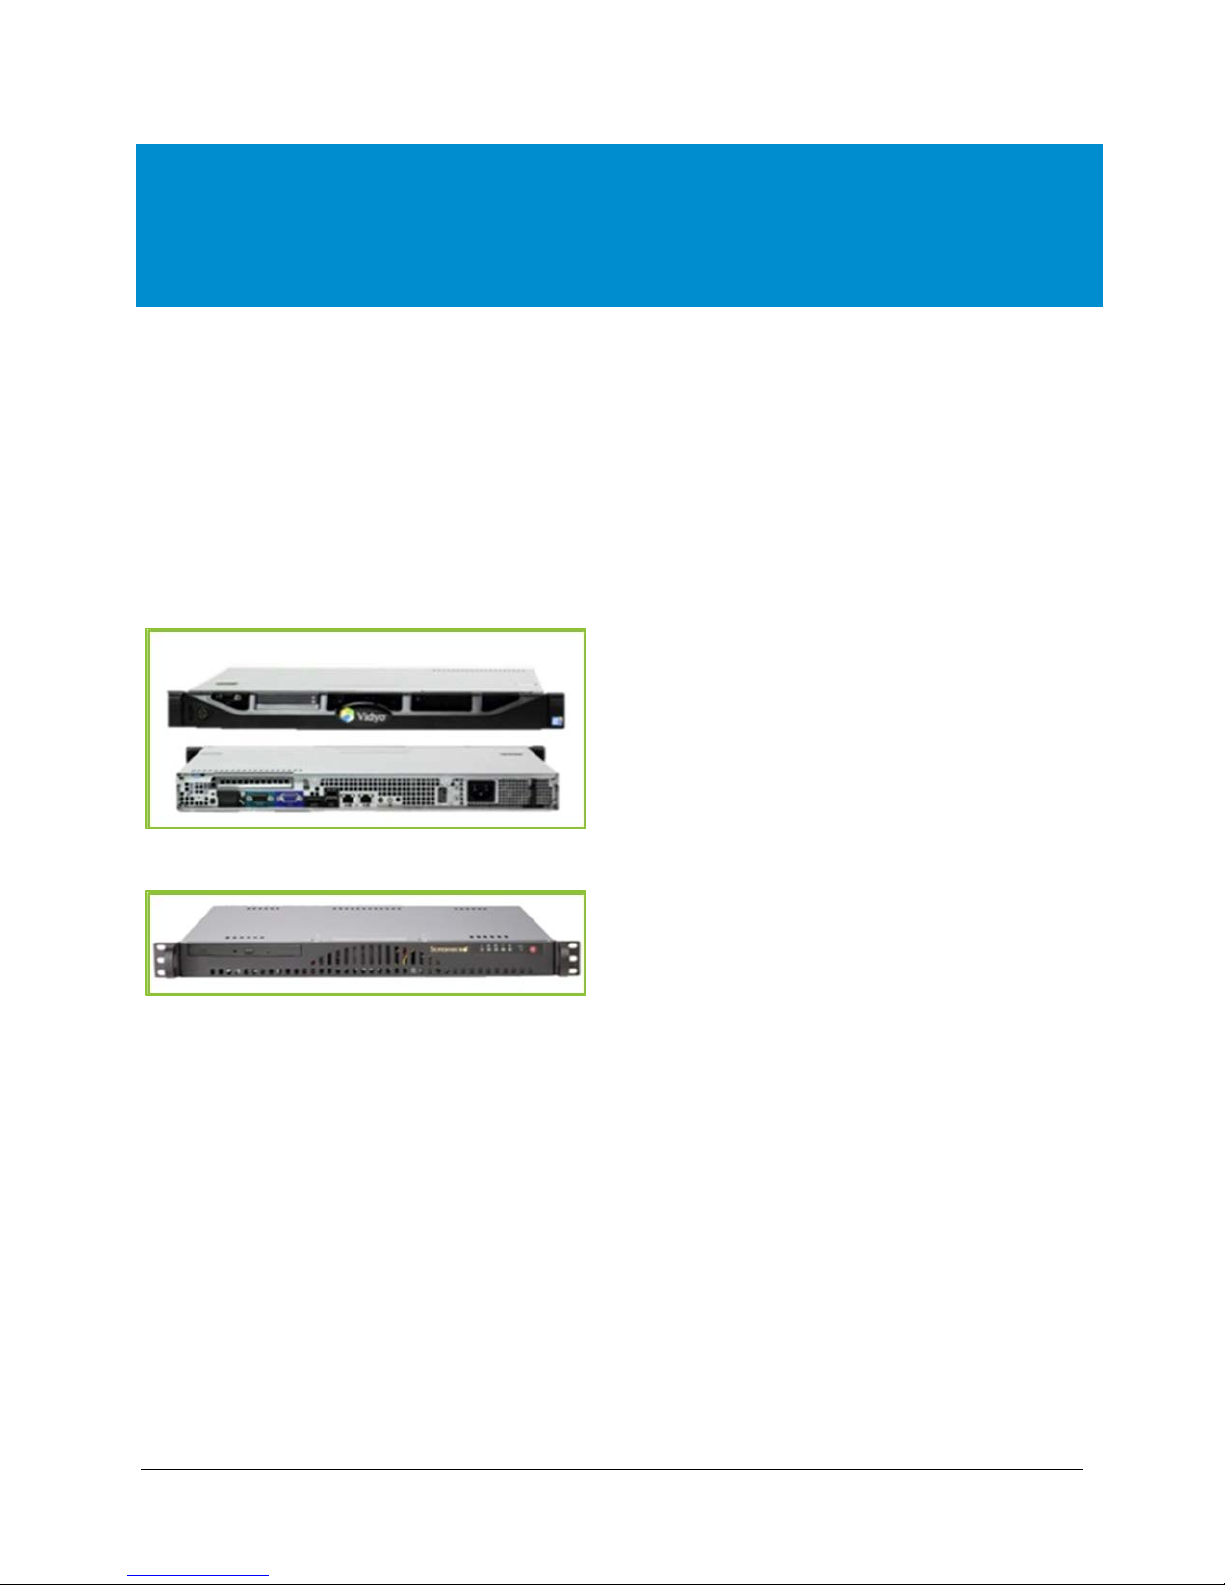
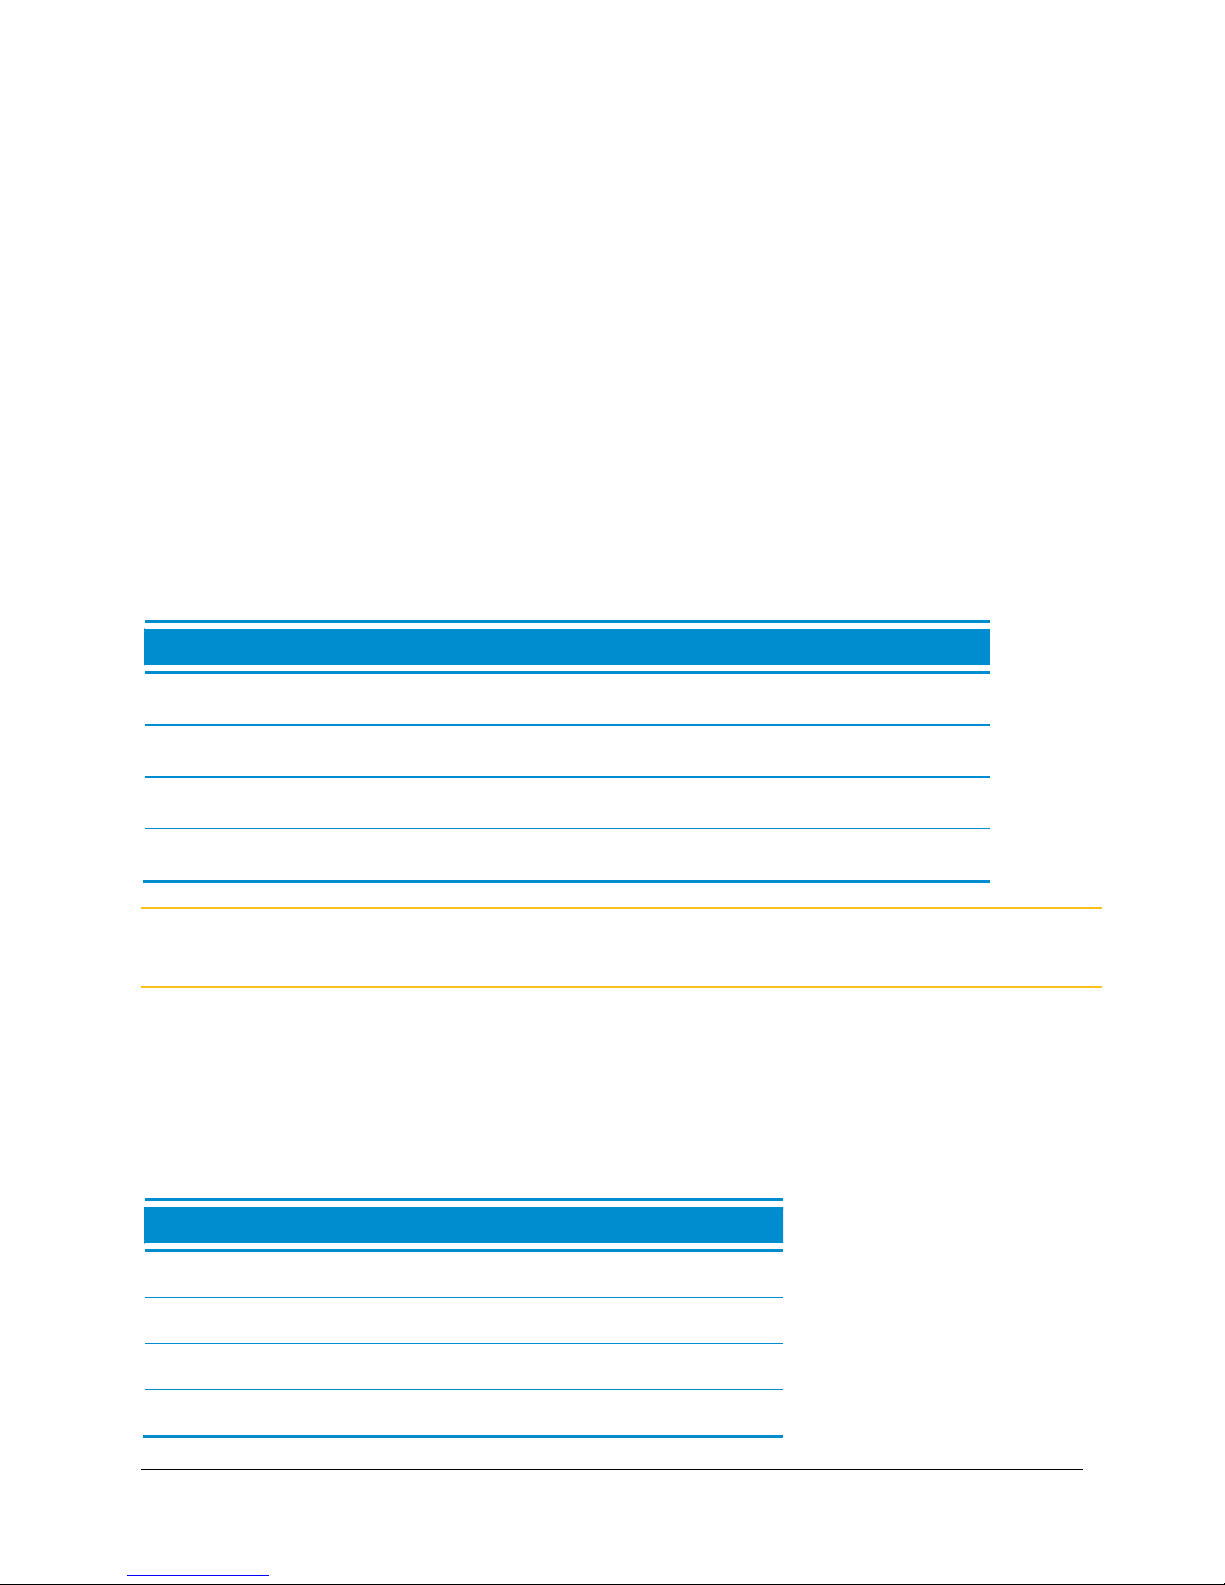
VidyoGateway is available in Standard and XL platforms. The previously offered VidyoGateway
MKII has been discontinued and replaced with the VidyoGateway XL model. The XL model is a
higher capacity, more powerful system for more demanding applications.
For more information, refer to the
The current VidyoGateway looks like the following:
The discontinued VidyoGateway MKII looks like the following:
You can identify your VidyoGateway model by checking the hardware:
Current VidyoGateway hardware version numbers contain 31230 or 5645 combinations
Current VidyoGateway hardware labels contain an 02-0A combination
Vidyo Server Installation Guide
.
Previous VidyoGateway hardware labels contain 00-0A, 01-0B or 01-0A combinations
Starting with software version 2.1.3.22, you can also identify your model by looking at the top of the
VidyoGateway Configuration Page
Model: VidyoGateway, VidyoGateway XL, or VidyoGateway MKII
Software version: 2.x.x.xx
Hardware Version: xxxxxxx
. The model information is shown as follows:
2

1. VidyoGateway Server Models and Capacities
Capacity
VidyoGateway
VidyoGateway
VidyoGateway
MKII
VidyoGateway
VidyoGateway
XL
Capacity of the VidyoGateway Models
The following tables show the maximum number of concurrent calls allowable for different
scenarios including: calls of the same type, different types, and different types and resolutions. All
capacity data is based on software version 2.1.3.22 and later.
Maximum Number Concurrent Calls of the Same Type
Hardware
Label
Status
H.235
Encryption
HD 1080P
Calls,
30 fps
HD 720P
Calls,
30 fps @
1 Mbps
SD Calls
@ 512
Kbps
xxxx-00-0A
xxxx-01-0A
xxxx-01-0B
Previous
model
Off On On/Off On/Off On/Off
N/A N/A N/A N/A 2
1 1 3 1 5
4 3 12 4 15
xxxx-00-0A
xxxx-01-0A
xxxx-01-0B
Previous
model
xxxx-MKII 000A
xxxx-MKII-010A
Previous
model
xxxx-02-0A
Current model Current model
xxxx-02-0A
CIF Calls
@ 384
Kbps
Voice
Calls
12 9 24 12 25
50 50 50 50 50
3
1. VidyoGateway Server Models and Capacities
HD & SD
HD/SD/CIF
SD & CIF
HD & CIF
Note
VidyoGateway (previous model)
Maximum Number Concurrent Calls of Different Types
The following list shows the maximum number of concurrent calls of different types and resolutions
that the VidyoGateway models can handle with software version 2.1.3.22 and later.
SD & CIF
1 SD + 9 CIF
2 SD + 6 CIF
3 SD + 3 CIF
Maximum Number Concurrent Calls of Different Types and
Resolutions
The following table shows the maximum number of concurrent calls of different types and
resolutions that the VidyoGateway XL can handle with software version 2.1.3.22 and later.
1 HD + 12 SD 1 HD + 6 SD + 6 CIF 3 SD + 18 CIF 3 HD + 6 CIF
2 HD + 9 SD 2 HD + 3 SD + 6 CIF 7 SD + 10 CIF
3 HD + 6 SD 3 HD + 1 SD + 4 CIF
4 HD + 3 SD
When a Legacy device attempts to join a conference whose VidyoGateway is operating at
full capacity, the call fails to connect.
Discontinued VidyoGateway Model Capacities
These tables show the maximum number of calls the previous VidyoGateway models running
2.1.3.20 or later software version can handle simultaneously when all calls are of the same type
and resolution with and without H.235 encryption.
1 x HD 720p30fps @ 1 Mbps
4 x SD @ 512 Kbps
12 x CIF @ 384 Kbps
50 x voice-only calls
4

1. VidyoGateway Server Models and Capacities
VidyoGateway (previous model) using H.235 Encryption
VidyoGateway MK II with or without H.235 Encryption
1 x HD 720p30fps @ 1 Mbps
3 x SD @ 512 Kbps
9 x CIF @ 384 Kbps
50 x voice-only calls
1 x HD 720p30fps @ 1 Mbps
12 x SD @ 512 Kbps
24 x CIF @ 384 Kbps
50 x voice-only calls
VidyoGateway Physical Setup Guidelines
When physically setting up your VidyoGateway, Vidyo recommends the following guidelines:
Locate the VidyoGateway as close as possible to your Legacy system(s), preferably on the
same LAN.
If the Legacy systems are in dispersed locations, install the VidyoGateway on the same LAN as
your VidyoRouter™.
If the VidyoGateway is on a QoS network, give high priority to the traffic between the
VidyoGateway and the Legacy system(s). Specify lower QoS for traffic between the
VidyoGateway and your VidyoRouter.
5

2. Understanding the VidyoGateway
Configuration Procedure
Note
To make configurations on your VidyoGateway:
1.
a.
b.
c.
2.
3.
To make configurations on your VidyoPortal for your VidyoGateway:
1.
The overall procedure for configuring your VidyoGateway requires cumulative steps performed on
both the VidyoPortal and the VidyoGateway as described in the following procedures. Complete all
of the following steps on your VidyoGateway and VidyoPortal in the order they appear.
If you are clustering VidyoGateways, perform the entire procedure for each VidyoGateway in
your cluster.
Making Configurations on Your VidyoGateway
Configure your network interface settings in the VidyoReplay System Console. The
following criteria should be met:
Set your production and management interfaces with IP addresses.
Rack your machine properly.
Successfully Ping your server before proceeding.
For more information, see Configuring Network Settings at the System Console.
Secure your VidyoGateway server (if applicable).
For more information, see Securing Your VidyoGateway System with SSL and HTTPS.
Register your VidyoGateway to your VidyoPortal by entering your VidyoPortal address in
your VidyoGateway.
For more information, see Configuring the VidyoPortal Settings.
Making Configurations on Your VidyoPortal for Your
VidyoGateway
Add the VidyoGateway as a component to the VidyoConferencing system.
6

2. Understanding the VidyoGateway Configuration Procedure
Note
2.
If you performing an initial VidyoGateway setup, you must add the VidyoGateway as a
component in your VidyoConferencing system.
For more information, refer to the “Adding a VidyoGateway to Your VidyoPortal” section in
VidyoConferencing Administrator Guide
the
Assign the VidyoGateway to a tenant. If you are running a multi‑tenant system, assign it to
the appropriate tenant.
For more information, refer to “Making the VidyoGateway Components Available” in the
VidyoConferencing Administrator Guide
.
.
Making Additional VidyoGateway Configurations
Now you can configure additional VidyoGateway features as needed, such as:
If desired, set up unique service prefixes, or use any of the predefined services.
For more information, see Managing Services and
Examples.
Understanding Call Types and Service
Perform the following configurations as needed:
To connect to an NTP server, see Configuring Network Settings at the System Console.
To upload image files for video loopback, see Configuring Video Loopback Settings.
To view the network settings, see Viewing Your VidyoGateway Network Settings.
To check the status of your VidyoGateway, see Checking the Status of Your VidyoGateway.
To upload a new security certificate, see Uploading or Editing Your Server Certificate.
To upgrade your VidyoGateway, see Upgrading Your VidyoGateway.
To restart the VidyoGateway, see Shutting Down or Rebooting Your VidyoGateway.
Create VidyoGateway clusters, if desired.
For information, see Configuring Clusters
.
Integrate VoIP phones and IP PBXs as needed.
For more information, see Integrating VoIP Phones and IP PBXs
VoIP Phones and IP PBX’s with VidyoGateway Vidyo Technical Note.
, and refer to the Integrating
For convenient access to Legacy systems (if you have them), add your video device in your
directory using
Users > Add Legacy Device
in your VidyoPortal Super Admin portal.
For more information, refer to the
VidyoConferencing Administrator Guide
7
.

3. Configuring Your Server
Note
Immediately after you have physically installed your Vidyo server as described in the Vidyo Server
Installation Guide, you must configure your VidyoGateway as described in this chapter.
For more information about installing the Vidyo server and for Vidyo server specifications, refer to
Vidyo Server Installation Guide
the
documentation by registering at https://selfservice.vidyo.com/register/.
As you begin the configuration, keep the following deployment guidelines in mind:
Vidyo utilizes SSH to provide remote access to the System Administrator Console on your
Vidyo server over port 22 or 2222. In addition, Vidyo Customer Support may request access to
your Vidyo server over this same port in order to assist in troubleshooting any of your customer
issues.
When setting up your Vidyo server, always be sure to configure your firewall to only permit SSH
access from authorized networks and users. You can restrict Vidyo Customer Support SSH
access by configuring your firewall or contact Vidyo Customer Support for other options.
. You can access this document and other Vidyo product
Restrict access to your VidyoGateway Admin portal by performing one of the following:
Block HTTP/HTTPS access from untrusted networks including the Internet.
Move the VidyoGateway Admin portal to the Management Interface (if you have not yet
configured your Management Interface, it must be configured at this time).
For more information, see Configuring Your Vidyo Server’s Management Interface and Port
Change your VidyoGateway System Administrator Console default password. This must be
changed after the first log in. For more information, see the following procedure.
Configure the network settings at the System Console. You can view the settings (read-only) in
the VidyoGateway Admin pages.
The screenshots in this section show the System Admin Console (also known as the Shell
menu) as seen after logging in via the terminal. The menu may look slightly different
depending on how you connect and what tool you use for your connection.
.
8

3. Configuring Your Server
To log in to the System Console (also referred to as the Admin Console) and change the default
password:
1.
2.
3.
4.
5.
Logging in to the System Console of Your Server and
Changing the Default Password
The very first time you log into your VidyoGateway server, you are required to change the default
System Console password to one that is more secure. This System Console account is also the
same one used when accessing the VidyoGateway Admin Portal.
Connect a keyboard and a VGA display directly to your server.
Log in using the default Administrator account:
User Name: admin
Password: password (case sensitive)
At the “login” prompt, enter admin.
At the “(current) UNIX Password” prompt, enter password.
The password is case sensitive. You’ll be prompted to enter a new password and asked to
enter it again.
At the “Password” prompt, type a new password.
When selecting a new password, follow these guidelines:
The password should not be too similar to the old password.
The default setting is at least three characters should be different from the old
password.
The password should not be too simple or too short.
The algorithm here is a point system to satisfy the min password length (the default is
length eight characters). The password gets extra points if it contains number, upper
case, lower case, or special character. Each point is equivalent to one character.
The password should not be a case change only of the old password or should not be
the reverse of the old password.
9
3. Configuring Your Server
6.
7.
192.168.1.110
To configure the network settings at the System Console:
1.
At the “Retype new UNIX password” prompt, type your new password again.
If the passwords don’t match, you’ll be prompted to try again. If the passwords match, the
System Console menu opens immediately.
When you need to reset the password, use 13. Set 'admin' password.
Configuring Network Settings at the System Console
Your Vidyo server default IP is
network.
A network setup must be performed for each of your Vidyo servers.
Log in to the System Console.
For more information, see Logging in to the System Console of Your Server and Changing
the Default Password.
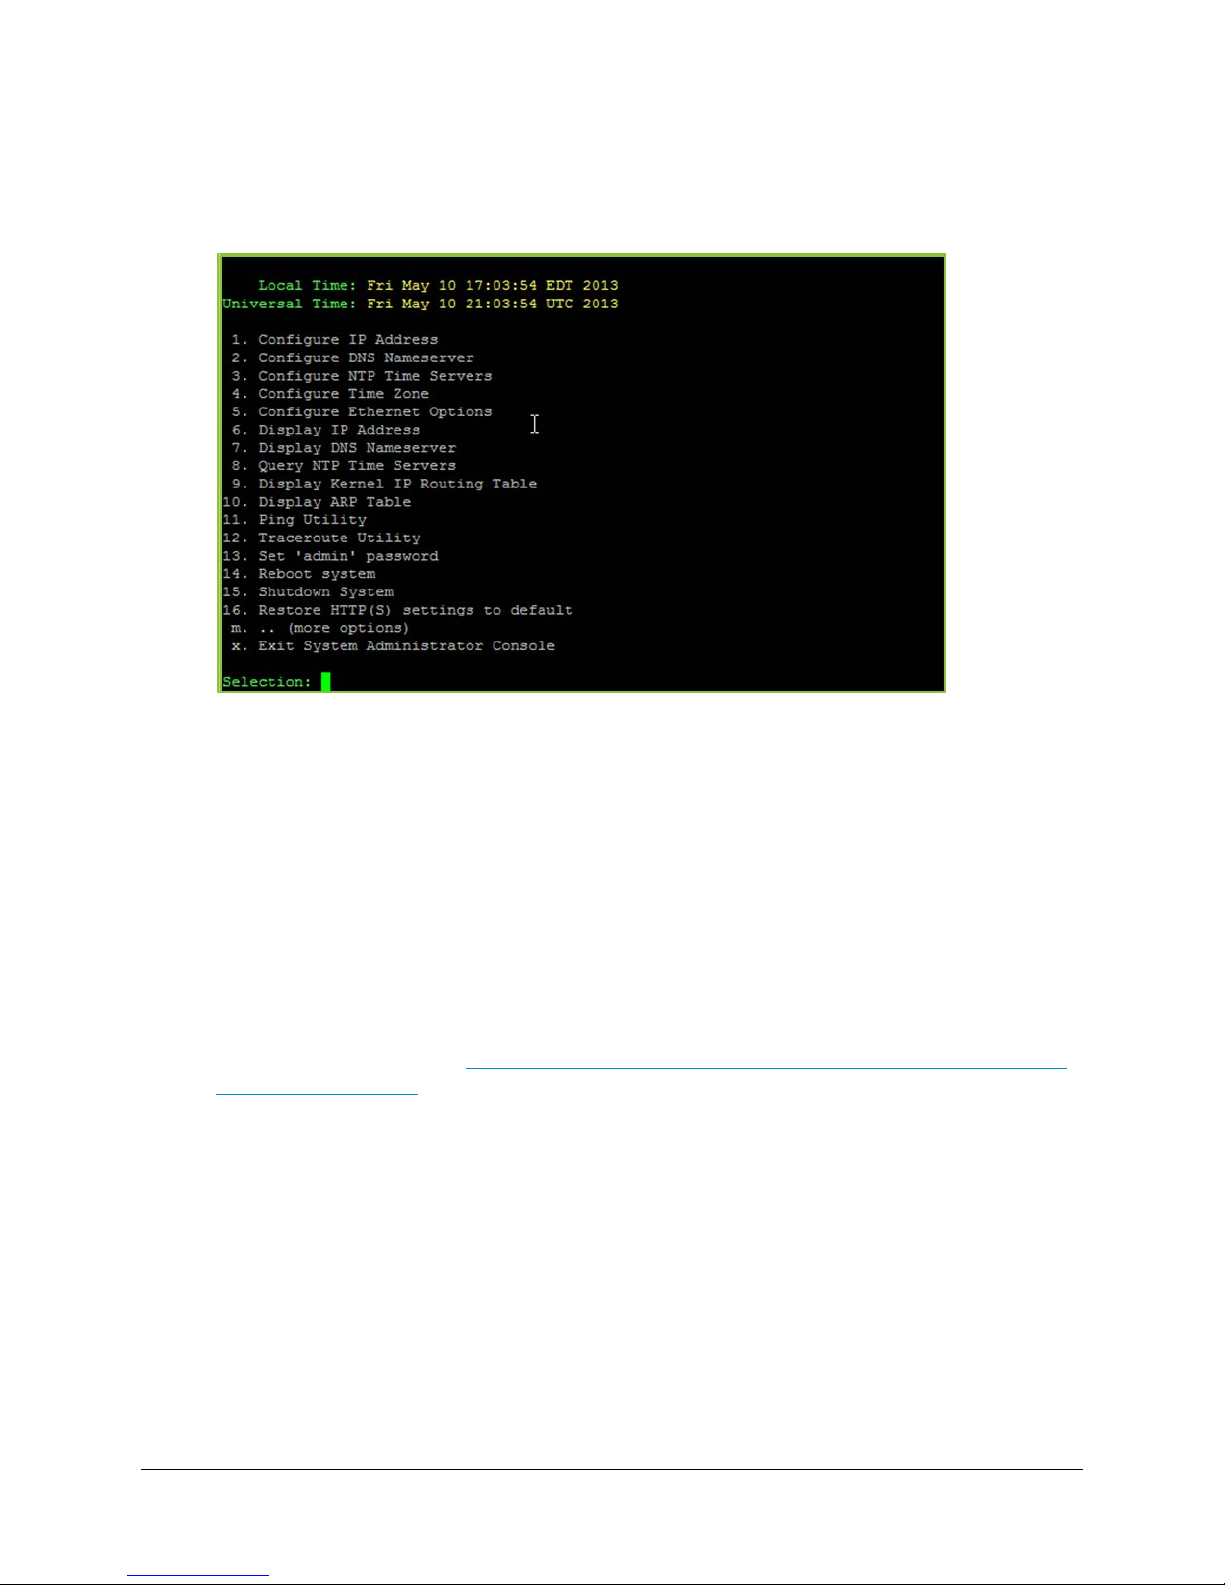
The following illustrations show the System Console after you have logged in using a
keyboard and VGA monitor plugged directly into a VidyoPortal server.
and should be changed to align with your local area
10
3. Configuring Your Server
2.
3.
Note
Enter 1 to configure IP Address.
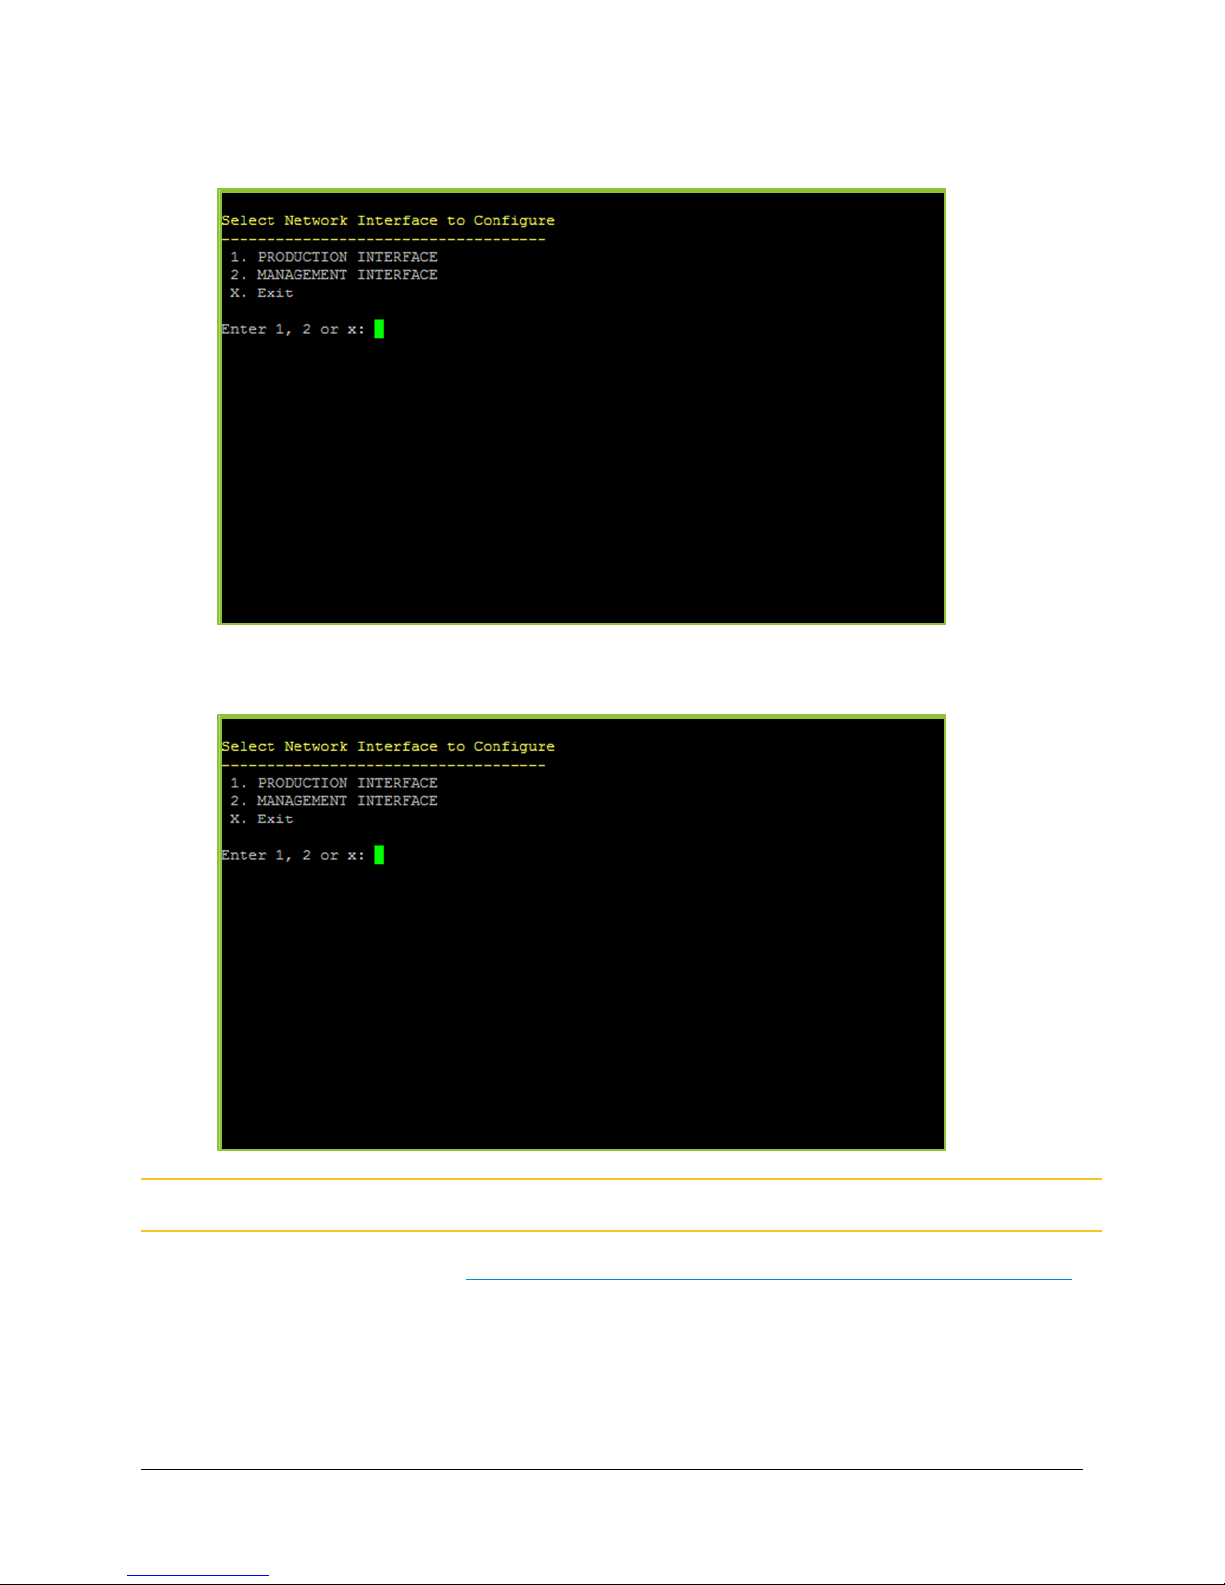
Enter 1 for PRODUCTION INTERFACE or 2 for MANAGEMENT INTERFACE depending on
which one contains the IP you want to configure.
The Management Interface should not be used to transfer any media.
For more information, see Configuring Your Vidyo Server’s Management Interface and Port.
11
3. Configuring Your Server
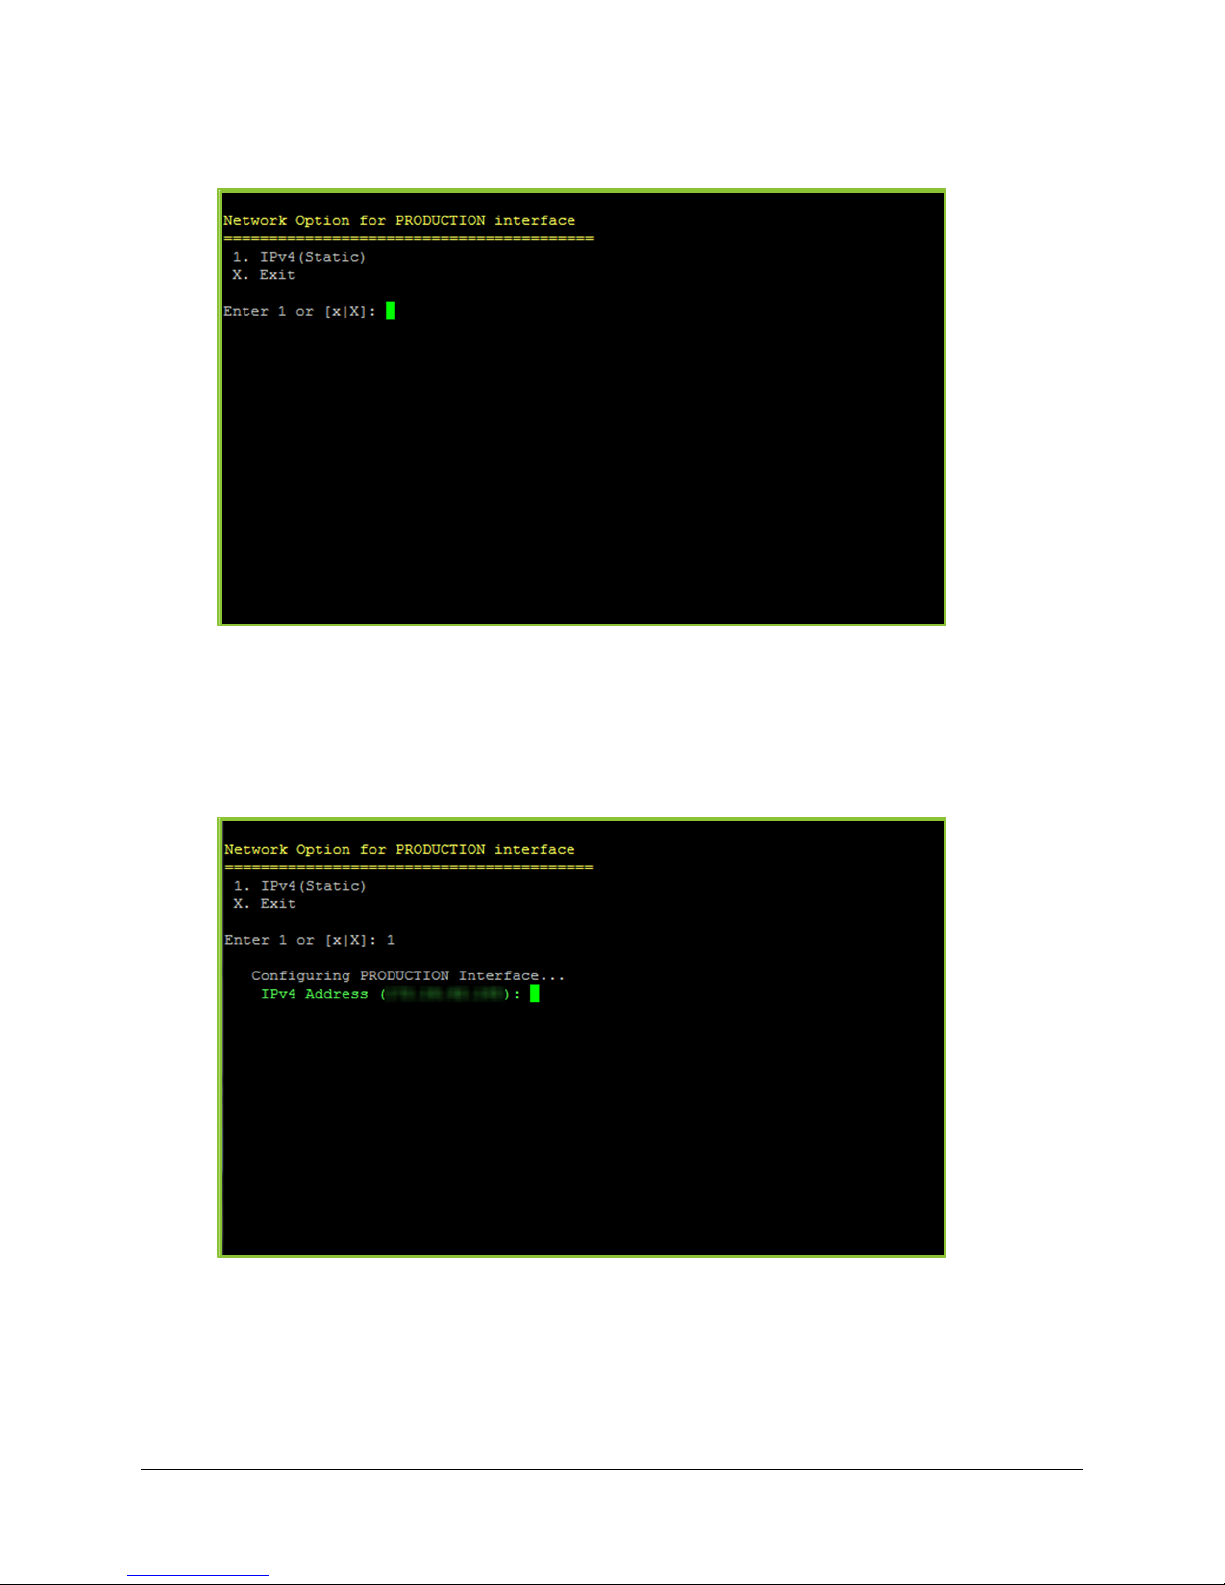
4.
5.
Enter
Enter 1 to select IPv4 (Static) as the address format.
The VidyoGateway system supports IPv4 only or IPv6 only mode. Dual stack mode is not
supported.
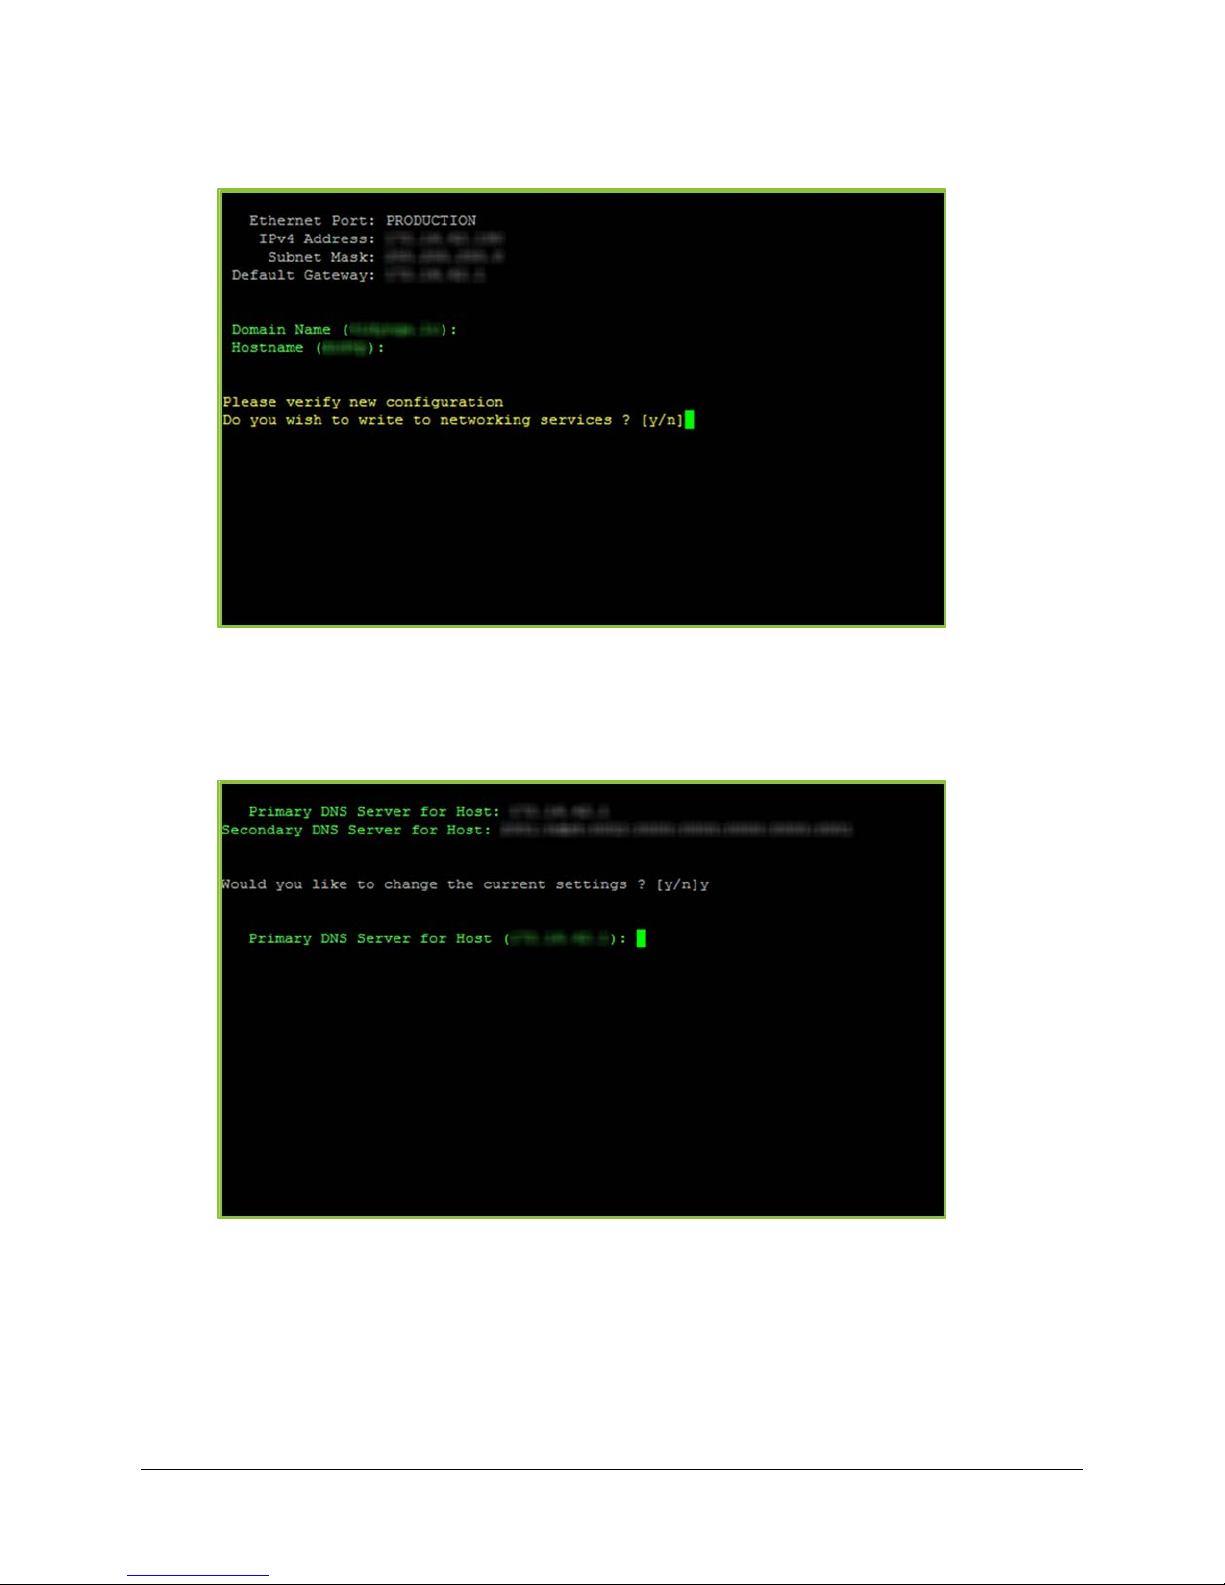
Enter the server IP address, subnet mask, default gateway, MAC addresses, hostname,
domain name, and FQDN.
Press
after entering each setting.
12
3. Configuring Your Server
6.
Enter
7.
a.
b.
Enter.
8.
Enter
a.
Once you have entered the required information, enter y and press
.
Enter 2 to configure the DNS Nameserver to set the fully qualified domain name (if it exists)
for the VidyoPortal and the IP addresses of the DNS servers:
Enter two DNS server IP addresses. If you have only one DNS server, use the same
one twice.
Once you have entered the required information, enter y and press
The System Console main menu appears.
Enter the remaining network settings for the server as needed, confirming by entering y
and pressing
Enter 3 to configure NTP Time Servers to set the NTP (Network Time Protocol) time
after entering each setting:
server.
13
3. Configuring Your Server
b.
c.
9.
To create System Console accounts:
1.
2.
3.
Enter 4 to configure Time Zone to specify the time zone you are working in.
If necessary, enter 5 to Configure Ethernet Options to set the MTU (Maximum
Transmission Unit) size.
Enter 14 to restart the server.
When the server restarts, it will have the new network settings. Be sure to record your
network settings, as you will need them for further configuration of your system.
Supporting Multiple System Console Accounts
System Console accounts can be used on the VidyoPortal, the VidyoRouter, and the
VidyoGateway.
The System Console menu allows for the creation of up to ten System Console accounts. These
accounts are created from the System Console.
Log in to the System Console.
For more information, see Logging in to the System Console of Your Server and Changing
the Default Password.
Enter m for more options.
Enter 19 for User Administration.
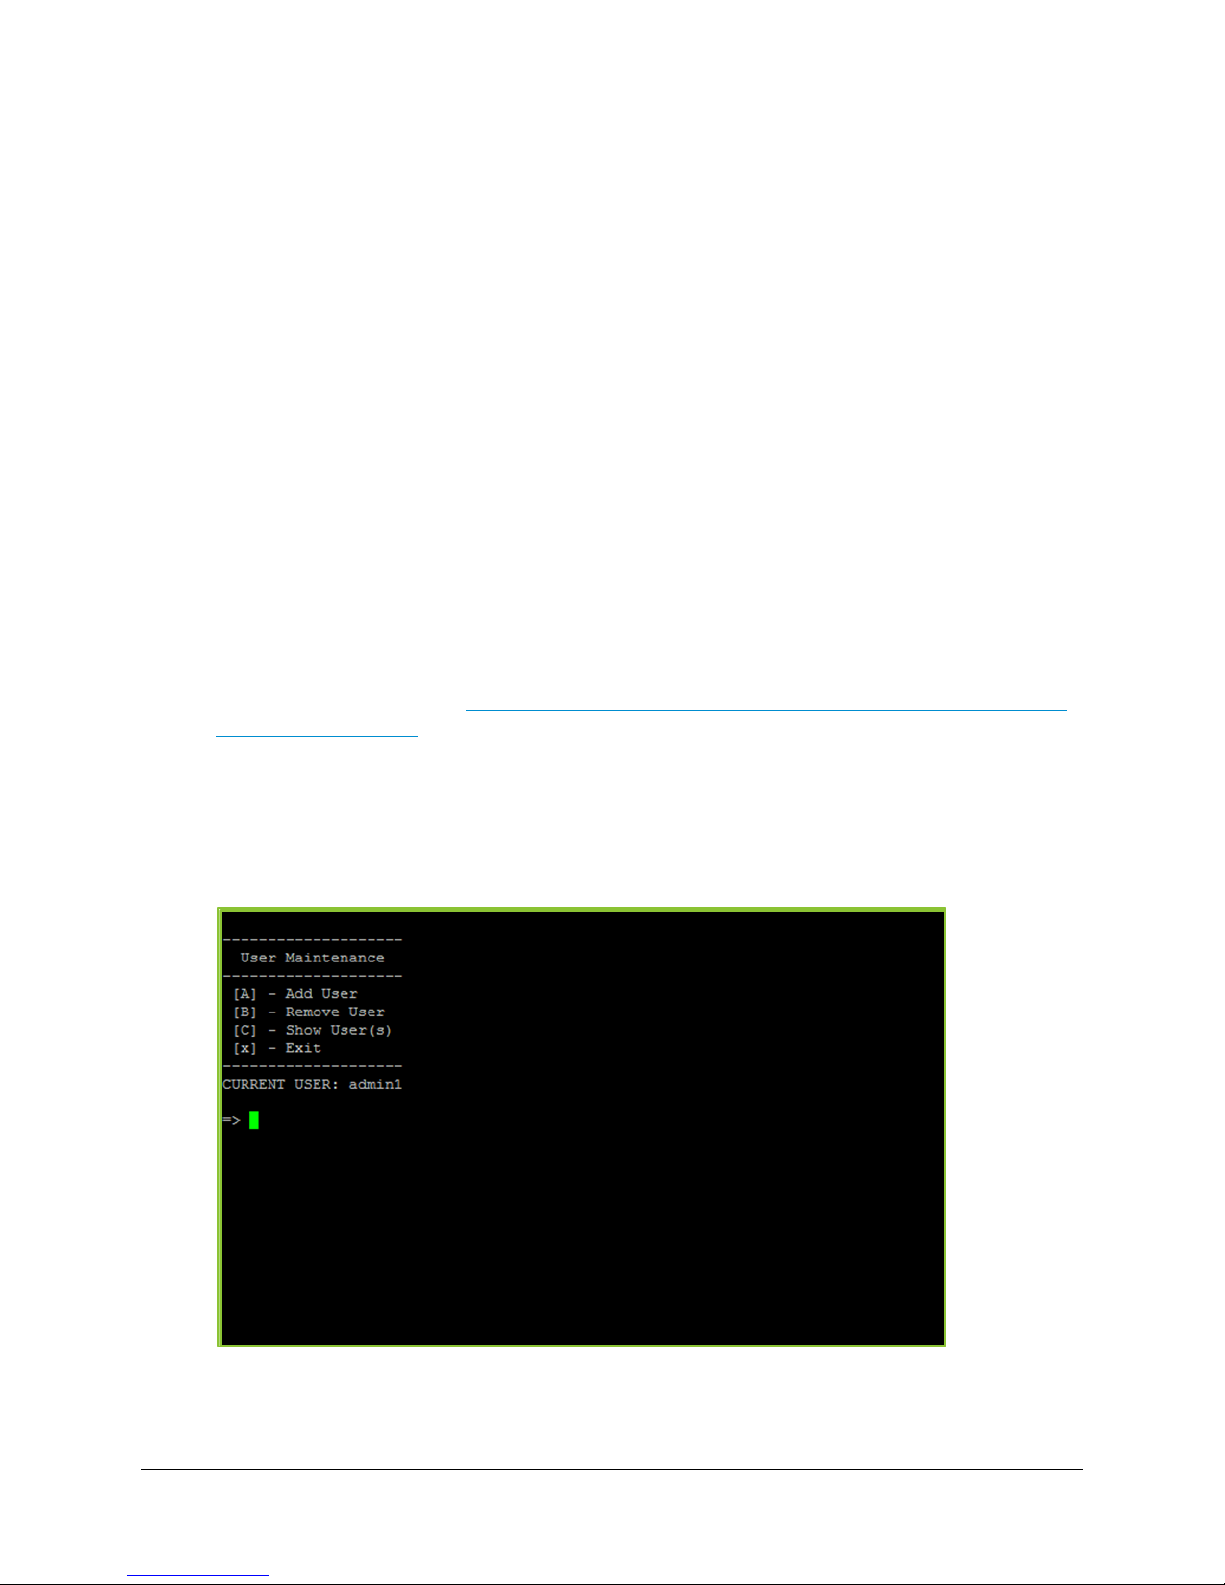
The User Maintenance screen provides the following options:
Enter A to add a user.
Enter B to remove a user.
Enter C to show all user accounts.
14
3. Configuring Your Server
Note
1. Configure IP Address
Enter x to exit.
The current user is also shown on the User Maintenance menu.
In addition to accessing the System Console menu, the ten System Console accounts can
also access the VidyoGateway Admin Pages.
Each new System Console account has a default password of password, which is case
sensitive.
The System Console accounts force a password change on first login. To prevent the use of
default passwords, each new System Console user must be present at the local console
during account creation. That user must log in and change their password and it must meet
JITC password complexity requirements.
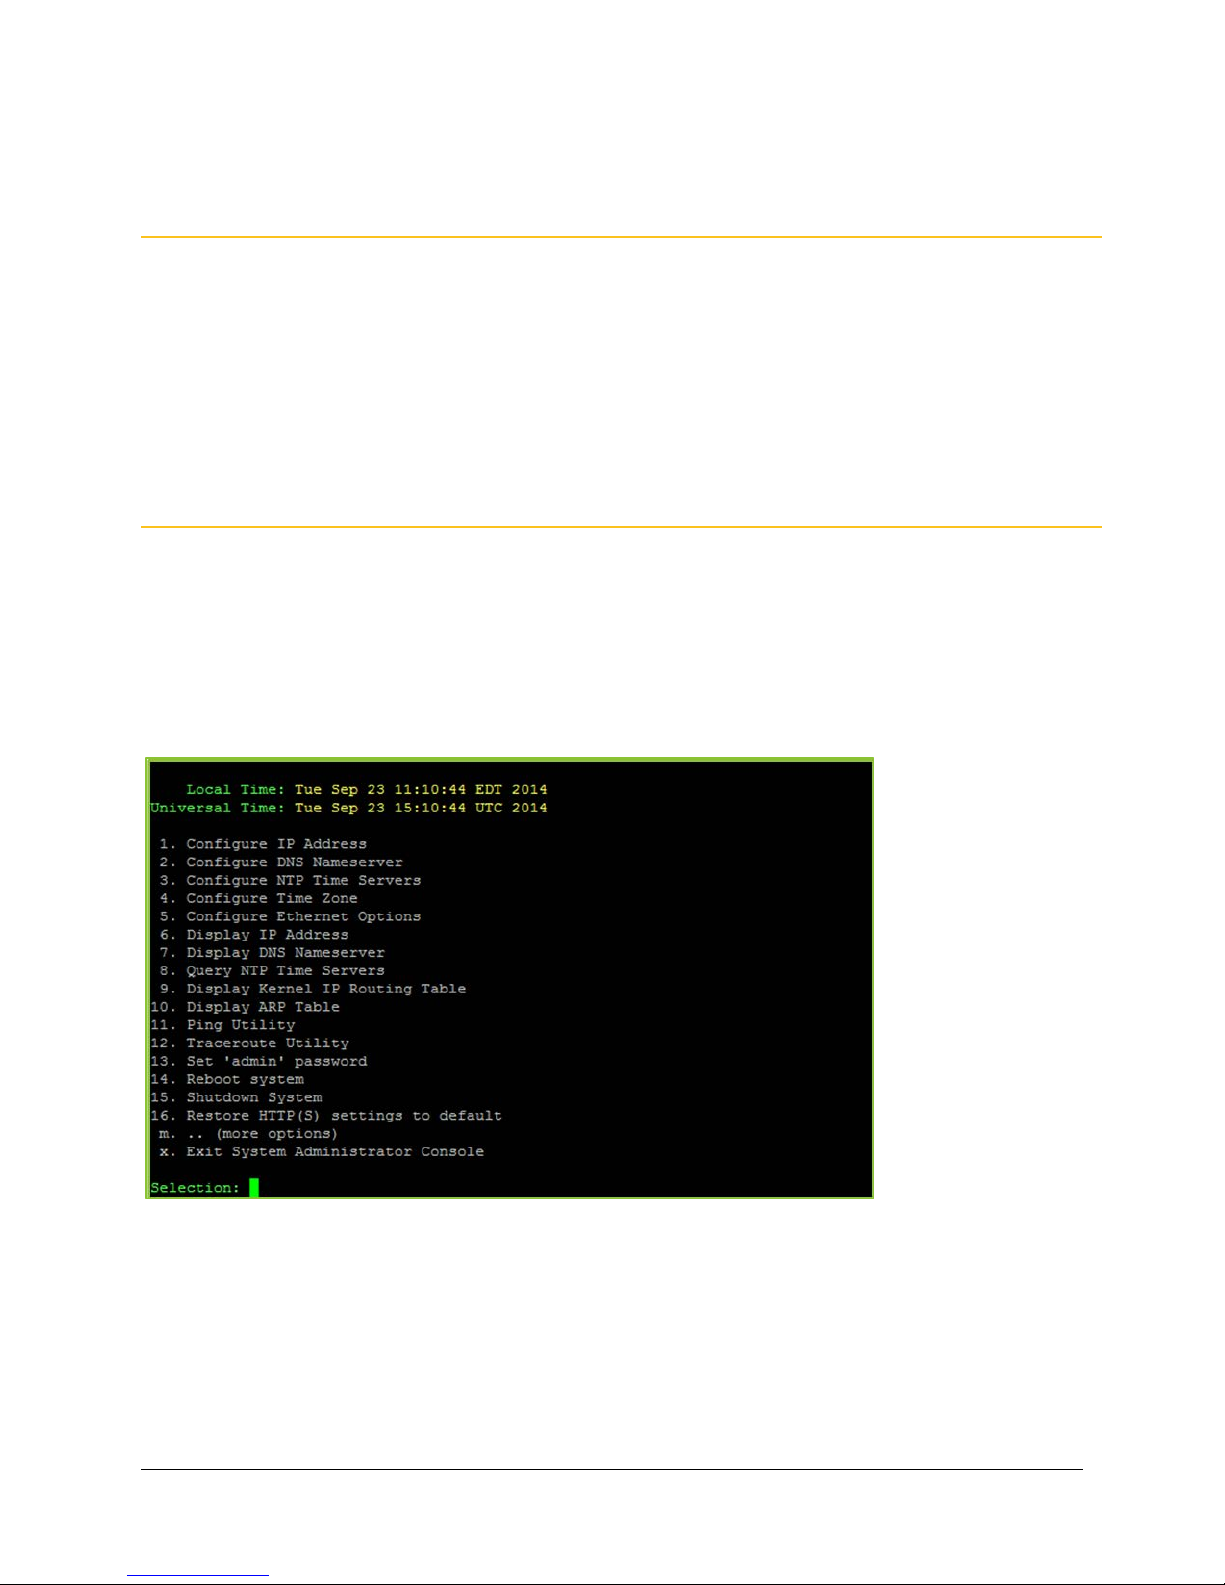
Understanding System Administrator Console Menu
Options
The following list includes steps taking you through configurations on System Admin Console
menu options.
gateway addresses. Initially, information must be configured locally. You can also use this
option to configure the hostname and domain name.
– Enter 1 to set the server IP address, subnet mask, and default
Examples:
IP Address Mode: static
15

3. Configuring Your Server
2. Configure DNS Nameserver
3. Configure NTP Time Servers
4. Configure Time Zone
5. Configure Ethernet Options
Note
Network Interface: Production
IPv4 Address: 192.168.1.100
Subnet Mask: 255.255.255.0
Default Gateway: 192.168.1.1
Hostname: gateway
Domain Name: examplecompany.com
Native FQDN: examplegateway.examplecompany.com
For more information, see Configuring Network Settings at the System Console
Configuring Your Vidyo Server’s Management Interface and Port.
– Enter 2 to specify the Domain Nameserver.
Examples:
Primary DNS Server for Host: 192.168.1.10
Secondary DNS Server for Host: 192.168.1.11
– Enter 3 to set the Network Time Protocol (NTP) time server.
Change to synchronize the system with a different time server.
Examples:
Primary NTP Server: pool.ntp.org
– Enter 4 to specify the time zone of your server. Change as
necessary for accurate billing records.
Examples:
US/Eastern
– Enter 5 to set the Maximum Transmission Unit (MTU) size.
The default is 1500. Only change this setting if your network MTU size is less than 1500.
You can also turn autonegotiation on or off. Autonegotiation is on by default.
and
Examples:
MTU Size: 1500
Autonegotiation: On
When Autonegotiation is set to Off, it means 100/Full.
16

3. Configuring Your Server
6. Display IP Address
7. Display DNS Nameserver
8. Query NTP Time Servers
Note
9. Display Kernel IP Routing Table
10. Display ARP Table
11. Ping Utility
Ctrl + C
12. Traceroute Utility
mode. Also displays the hostname, domain name, and FQDN.
Examples:
IP Address Mode: static
Network Interface: Production
IPv4 Address: 192.168.1.100
Subnet Mask: 255.255.255.0
MAC Address: 00:0c:29:4b:4c:3w
Default Gateway:
default via 192.168.1.1 dev eth0
Hostname: gateway
Domain Name: examplecompany.com
Native FQDN: examplegateway.examplecompany.com
– Enter 6 to view your current IP address settings and IP address
Examples:
Primary DNS Server for Host: 192.168.1.10
Secondary DNS Server for Host: 192.168.1.11
This command doesn’t work if the domain name server is not defined.
routing.
information is display only.
The system then prompts you for an IP address and port:
– Enter 11 to ping network addresses. Use
– Enter 12 to run the utility.
– Enter 7 to view the DNS servers.
– Enter 8 to query NTP servers.
– Enter 9 to view how your server is configured for Ethernet
– Enter 10 to display router and MAC address information. This
If you provide an IP address but do not provide the port, the system will display the
trace route to the IP address you specified.
to stop pinging.
If you provide an IP address and also provide the port, the system will check if any
ports in the firewall are blocking access to your Vidyo server, and then display them.
17

3. Configuring Your Server
Enter
13. Set ‘admin’ Password
14. Reboot system
15. Shutdown System
16. Restore HTTP(S) settings to default
17. ... (more options)
18. Exit System Administrator
1. User Administration
2. Advanced Options
3. ... (back to previous menu)
1. Enable FIPS-mode
Press
without providing an IP address to return to the Main Menu.
the admin password to the default value and change password.
Adhere to the password guidelines explained in Logging in to the System Console of Your
Server and Changing the Default Password.
Enter x to return to the Main Menu.
It can take up to a minute for your server to restart.
values (HTTP and port 80).
This option is not available on the VidyoGateway and VidyoReplay System Console menu.
For more information, see Understanding the More Options System Administrator Console
Menu.
closes SSH clients, if one is used.
– Enter 14 to restart your server.
– Enter 13 for password menu options including functions to reset
– Shuts down your server.
– Enter 16 to return HTTP settings to their default
– Select m for a submenu containing additional options.
Console – Enter x to close the SSH session. This command also
Understanding the More Options System Administrator Console
Menu
The following list describes commands on the More Options menu.
Console accounts.
For more information, see Supporting Multiple System Console Accounts.
For more information, see Understanding the Advanced Options System Administrator
Console Menu.
Understanding the Advanced Options System Administrator Console Menu
The following list describes commands on the Advanced Options menu.
For more information, see Configuring FIPS on Your VidyoGateway Server.
– Enter 19 to perform user maintenance and create additional System
– Enter A to access advanced options.
– Enter b to return to the Main Menu from More Options.
– Enter 1 to enable or disable FIPS-validated security.
18

3. Configuring Your Server
2. Network Route Management
Note
3. OCSP Information
4. SNMP Administration
5. Hostname Management
6. SSH Configuration
7. Pre-shared Key Maintenance
8. Exit Advanced Options
functions to Add, Remove, or Remove All (routes); navigate routes using Next or Previous;
and exit the Route Management menu and return to the Advanced Options menu.
For more information, see Managing Network Routes.
If you configure any static routes to the Management Interface, remember that subnet will not
transfer any media.
For more information, see Disabling OCSP from the System Console.
disable SNMP, delete the local user-based security model, or configure traps.
For more information, see Configuring SNMP.
functions to Add, Remove, or Remove All (hostnames); navigate hostnames using Next or
Previous; and Exit the Hostname Management menu and return to the Advanced Options
menu.
– Enter 3 to view OCSP settings and enable or disable OCSP.
– Enter 4 for SNMP menu options including functions to enable or
– Enter 2 to for Network Route Management options including
– Enter 5 for Hostname Management menu options including
For more information, see Managing Hostnames.
For more information, see Configuring Your SSH Port.
For more information, see Maintaining Pre-shared Keys.
Options.
– Enter 6 for SSH Configuration menu options.
– Enter K for Pre-shared Key Maintenance menu options.
– Enter X to return to the More Options menu from Advanced
Configuring FIPS on Your VidyoGateway Server
FIPS is the Federal Information Processing Standard 140-2. By default, FIPS mode is enabled on
your Vidyo server.
FIPS Certified Modules include the following:
Vidyo’s SDK has been FIPS 140-2 validated:
http://csrc.nist.gov/groups/STM/cmvp/documents/140-1/1401val2012.htm
Third party applications – Apache, Net-SNMP, OpenSSH and OpenSSL – have been built
using the FIPS-validated OpenSSL module.
19

3. Configuring Your Server
To disable or enable FIPS mode:
1.
2.
3.
4.
5.
6.
7.
Note
Address, Port, Username
Password
Confirm Password
Note
To manage network routes:
1.
The following steps show you how to enable or disable FIPS mode from the System Console.
Log in to the System Console.
For more information, see Logging in to the System Console of Your Server and Changing
the Default Password.
Enter m for more options.
Enter A for Advanced Options.
Enter 1 to disable FIPS-mode.
This setting toggles between disable and enable states.
Enter y to verify disabling (or enabling) the FIPS-mode change.
Enter X to exit Advanced Options.
Enter 14 to reboot system.
When your system comes back online, FIPS is then disabled (or enabled) on your Vidyo
server.
When FIPS is enabled, the SIP tab in the VidyoGateway Admin Portal contains Address and
Port fields. However, when FIPS is disabled, the
, and
fields. For more information, see Configuring SIP Settings.
SIP
tab contains
Managing Network Routes
Static routes are used in deployments where Vidyo servers are in a DMZ between two segregated
firewalls with no route for either internal or external traffic. Network Routes are also used when the
Management Interface is enabled and you want to route traffic across that network.
Vidyo recommends this feature not replace adding proper network router to your DMZ to
handle the proper subnet routes. Static route setup can lead to security vulnerabilities and
should only be configured by advanced network administrators. Vidyo is not responsible for
any possible security risk resulting from static route configurations.
Currently, you can only add a static route for one host at a time. Adding static routes for a
range of IP addresses (or subnet) is not supported at this time.
,
Log in to the System Console.
For more information, see Logging in to the System Console of Your Server and Changing
the Default Password.
20
3. Configuring Your Server
2.
3.
4.
5.
To add a network route:
1.
2.
3.
4.
5.
6.
Destination
Gateway
Interface
Enter m for more options.
Enter A for Advanced Options.
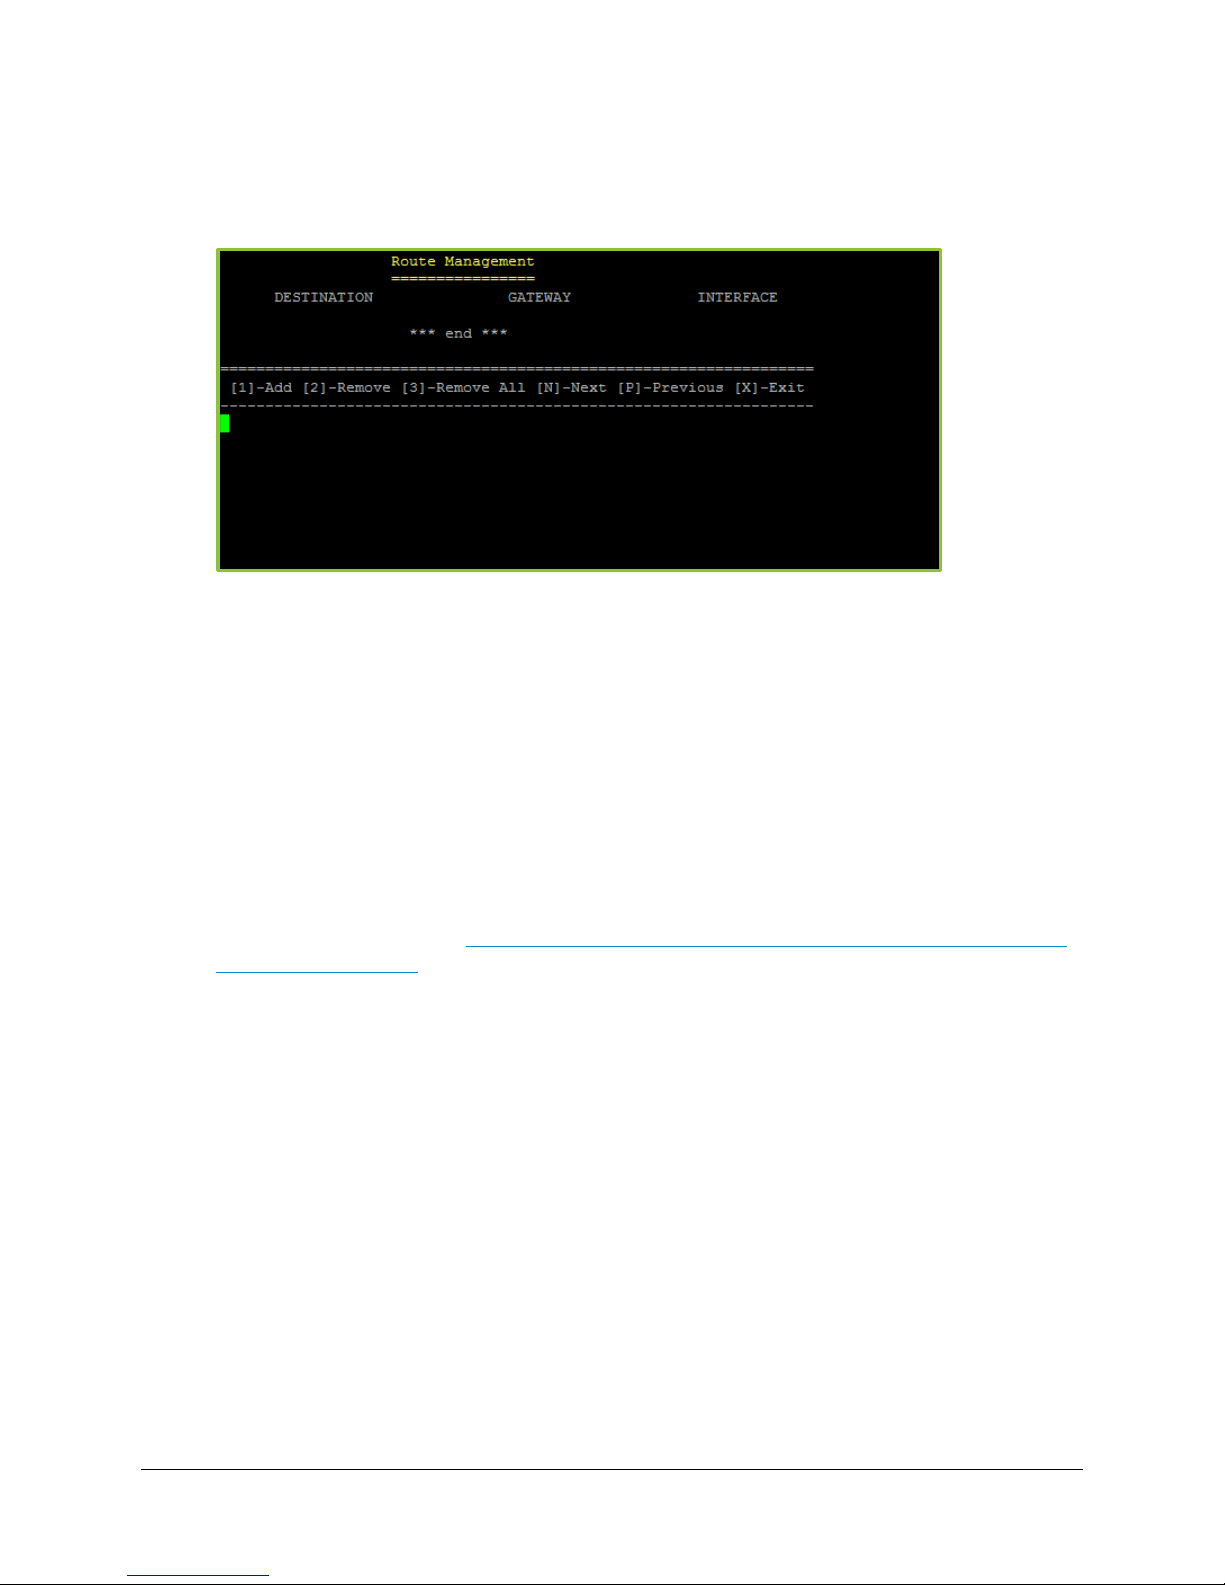
Enter 2 for Network Route Management.
The
Route Management
(routes); navigate routes using Next or Previous; and exit the
Enter X to return to the Advanced Options menu.
screen displays. Use this screen to Add, Remove, or Remove All
Route Management
screen.
Adding a Network Route
Currently, you can only add a static route for one host at a time. Adding static routes for a range of
IP addresses (or subnet) is not supported at this time.
Log in to the System Console.
For more information, see Logging in to the System Console of Your Server and Changing
the Default Password.
Enter m for more options.
Enter A for Advanced Options.
Enter 2 for Network Route Management.
Enter 1 to add a Network Route.
Enter the following information:
travel.
your network route to use.
– Enter an IP address of the target machine for your network route.
– Enter the IP address of the Gateway through which your network route will
– Enter the PRODUCTION (eth0) or MANAGEMENT (eth1) interface you want
21
3. Configuring Your Server
Note
7.
8.
To remove a network route:
1.
2.
3.
4.
5.
If you want to cancel adding your Network Route, press enter while providing no Destination,
Gateway, or Interface information. The system tells you that you must provide valid
information and to press any key. Press any key to return to the
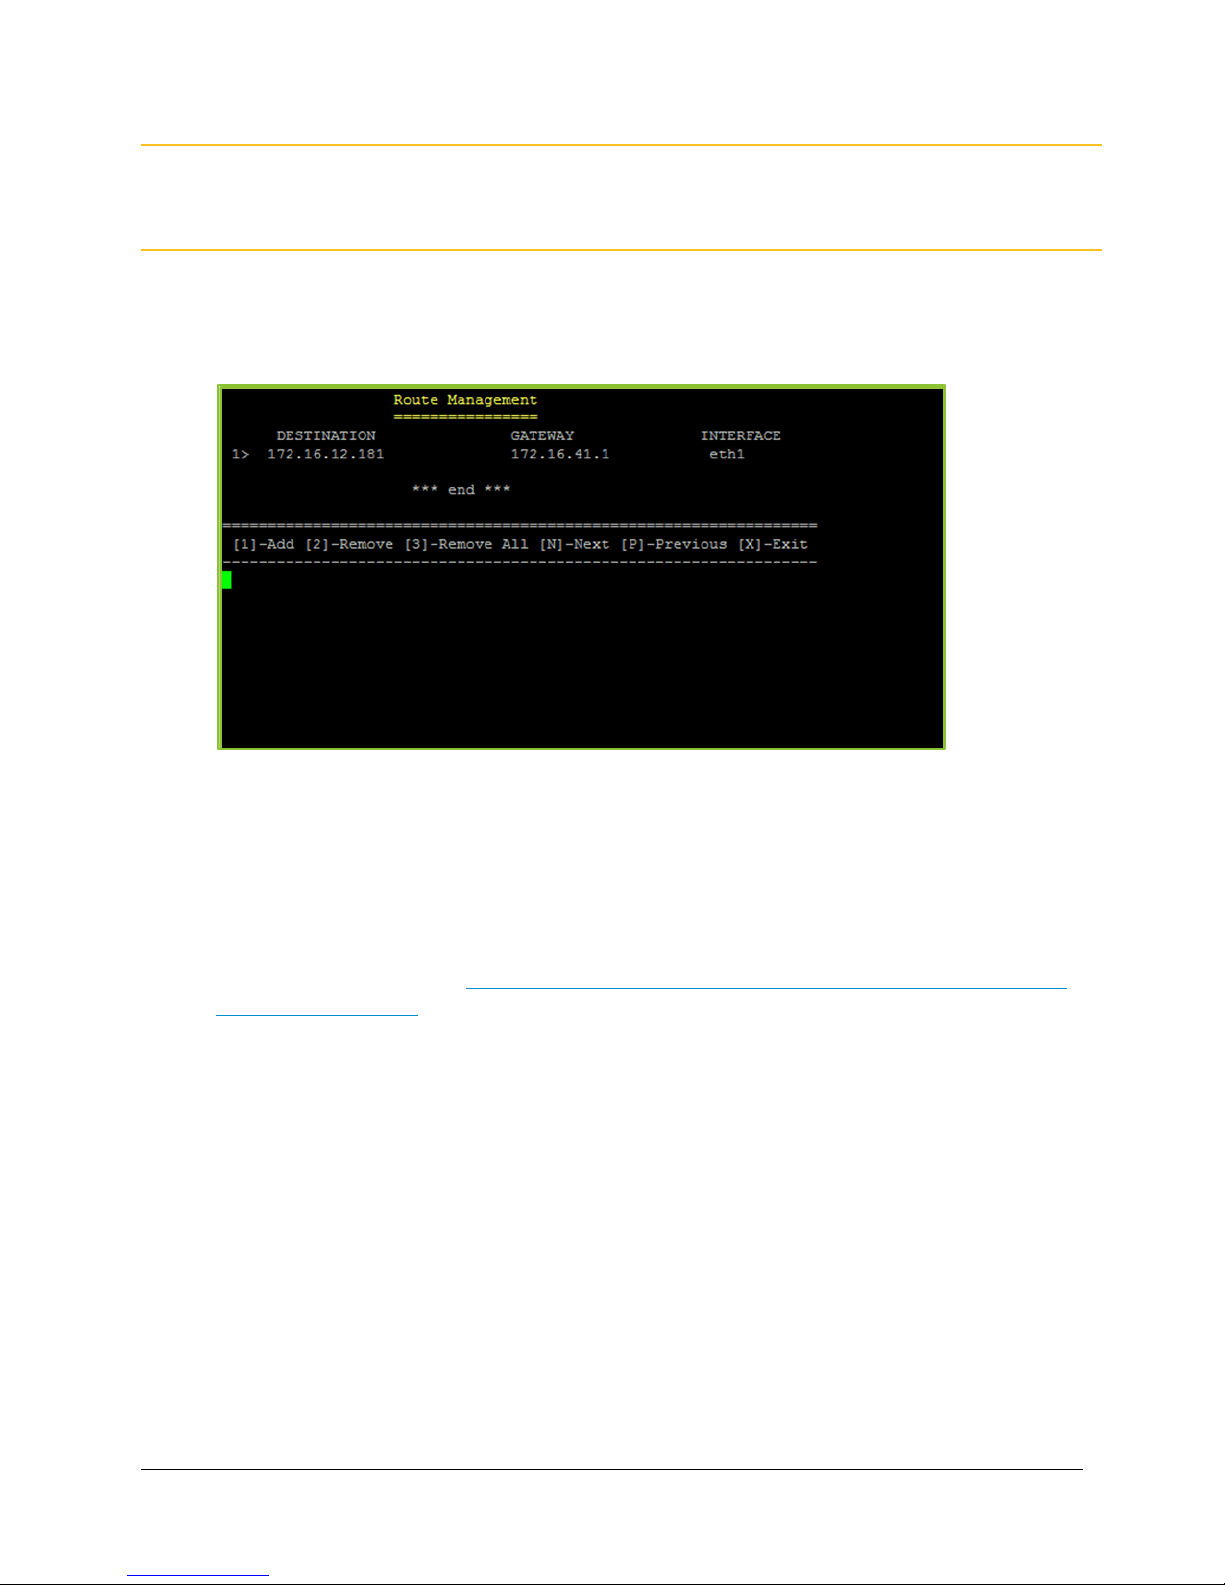
Enter y to confirm the change and add your Network Route.
Route Management
screen.
Your Network Route is then listed and numbered on the top of the
screen.
Enter X to return to the Advanced Options menu.
Removing a Network Route
Route Management
Log in to the System Console.
For more information, see Logging in to the System Console of Your Server and Changing
the Default Password.
Enter m for more options.
Enter A for Advanced Options.
Enter 2 for Network Route Management.
Enter 2 to remove a Network Route.
22
3. Configuring Your Server
6.
7.
8.
To remove all of your network routes:
1.
2.
3.
4.
5.
6.
7.
To navigate your network routes:
1.
2.
3.
4.
5.
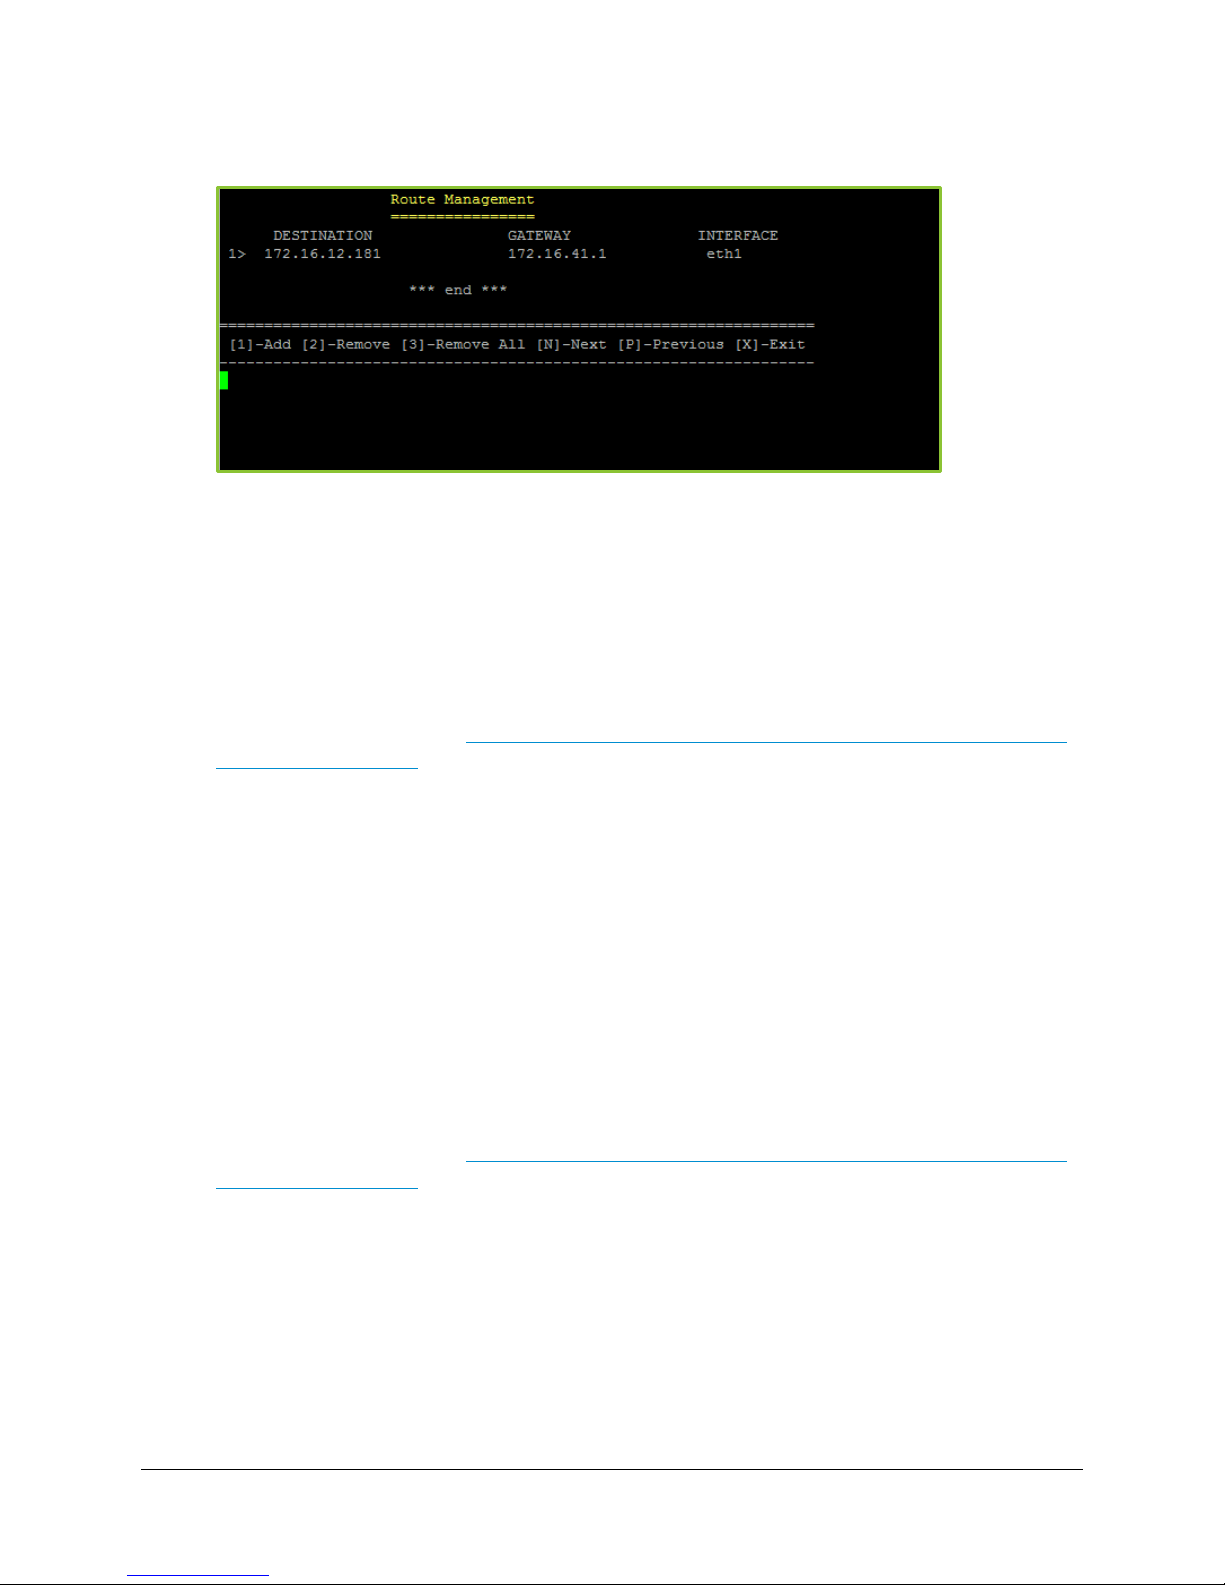
Enter the corresponding number of the network route you want to remove.
Enter y to confirm removing the selected Network Route.
Enter X to return to the Advanced Options menu.
Removing all of Your Network Routes
Log in to the System Console.
For more information, see Logging in to the System Console of Your Server and Changing
the Default Password.
Enter m for more options.
Enter A for Advanced Options.
Enter 2 for Network Route Management.
Enter 2 to remove all of your Network Routes.
Enter y to confirm removing all of your Network Routes.
Enter X to return to the Advanced Options menu.
Navigating Your Network Routes
Log in to the System Console.
For more information, see Logging in to the System Console of Your Server and Changing
the Default Password.
Enter m for more options.
Enter A for Advanced Options.
Enter 2 for Network Route Management.
Enter N to navigate to the next Network Route.
Enter P to navigate to the previous Network Route.
Enter X to return to the Advanced Options menu.
23

3. Configuring Your Server
1.
2.
3.
4.
5.
Configuring SNMP
You can use SNMP (Simple Network Management Protocol) to manage and monitor the
components over your entire Vidyo network. You can configure notifications or traps and send
them to your network management server via SNMPv2 community strings or SNMPv3 users.
The VidyoGateway traps include the following object identifiers (OIDs):
vidyoGatewayNodeLegacyMediaQualityThresholdAlert
This trap provides an indication that the MediaQuality threshold for a Legacy call has
been reached on the legacy side.
This trap can be turned on and off by setting the notification from the System Console
and a specific threshold can be set from the SNMP manager. The jitter is measured in
milliseconds and the default time setting is 0.
This trap repeats every 10 seconds as long as the condition persists.
vidyoGatewayNodeLegacyPacketLossThresholdAlert
This trap provides an indication that the PacketLoss threshold for a Legacy call has
been reached on the legacy side.
This trap can be turned on and off by setting the notification from the System Console
and specific threshold can be set from the SNMP manager. The packet loss is
measured in percentage and the default time setting is 0.
This trap repeats every 10 seconds as long as the condition persists.
vidyoGatewayControllerJoinedClusterAlert
This trap provides an indication that a new VidyoGateway has joined the cluster.
When a VidyoGateway node is added to the cluster, this trap can be turned on and off
by setting the notification from the System Console.
There is no notification frequency setting for this trap.
vidyoGatewayControllerLeftClusterAlert
This trap provides an indication that an existing VidyoGateway has been removed from
the cluster.
When a VidyoGateway node is removed from the cluster, this trap can be turned on
and off by setting the notification from the System Console.
There is no notification frequency setting for this trap.
vidyoGatewayControllerVmConnEstablishedAlert
This trap provides an indication that VidyoGateway has established a connection with
the VidyoManager.
There are no configuration settings for this trap.
There is no notification frequency setting for this trap.
24
 Loading...