

Vid Vision II Quick Start Manual
When using your VidVisonII glasses you must look slightly
above or below the object you’re intending to record
depending on distance from the object. We suggest
practicing a few times prior to attempting to
record an actual event.
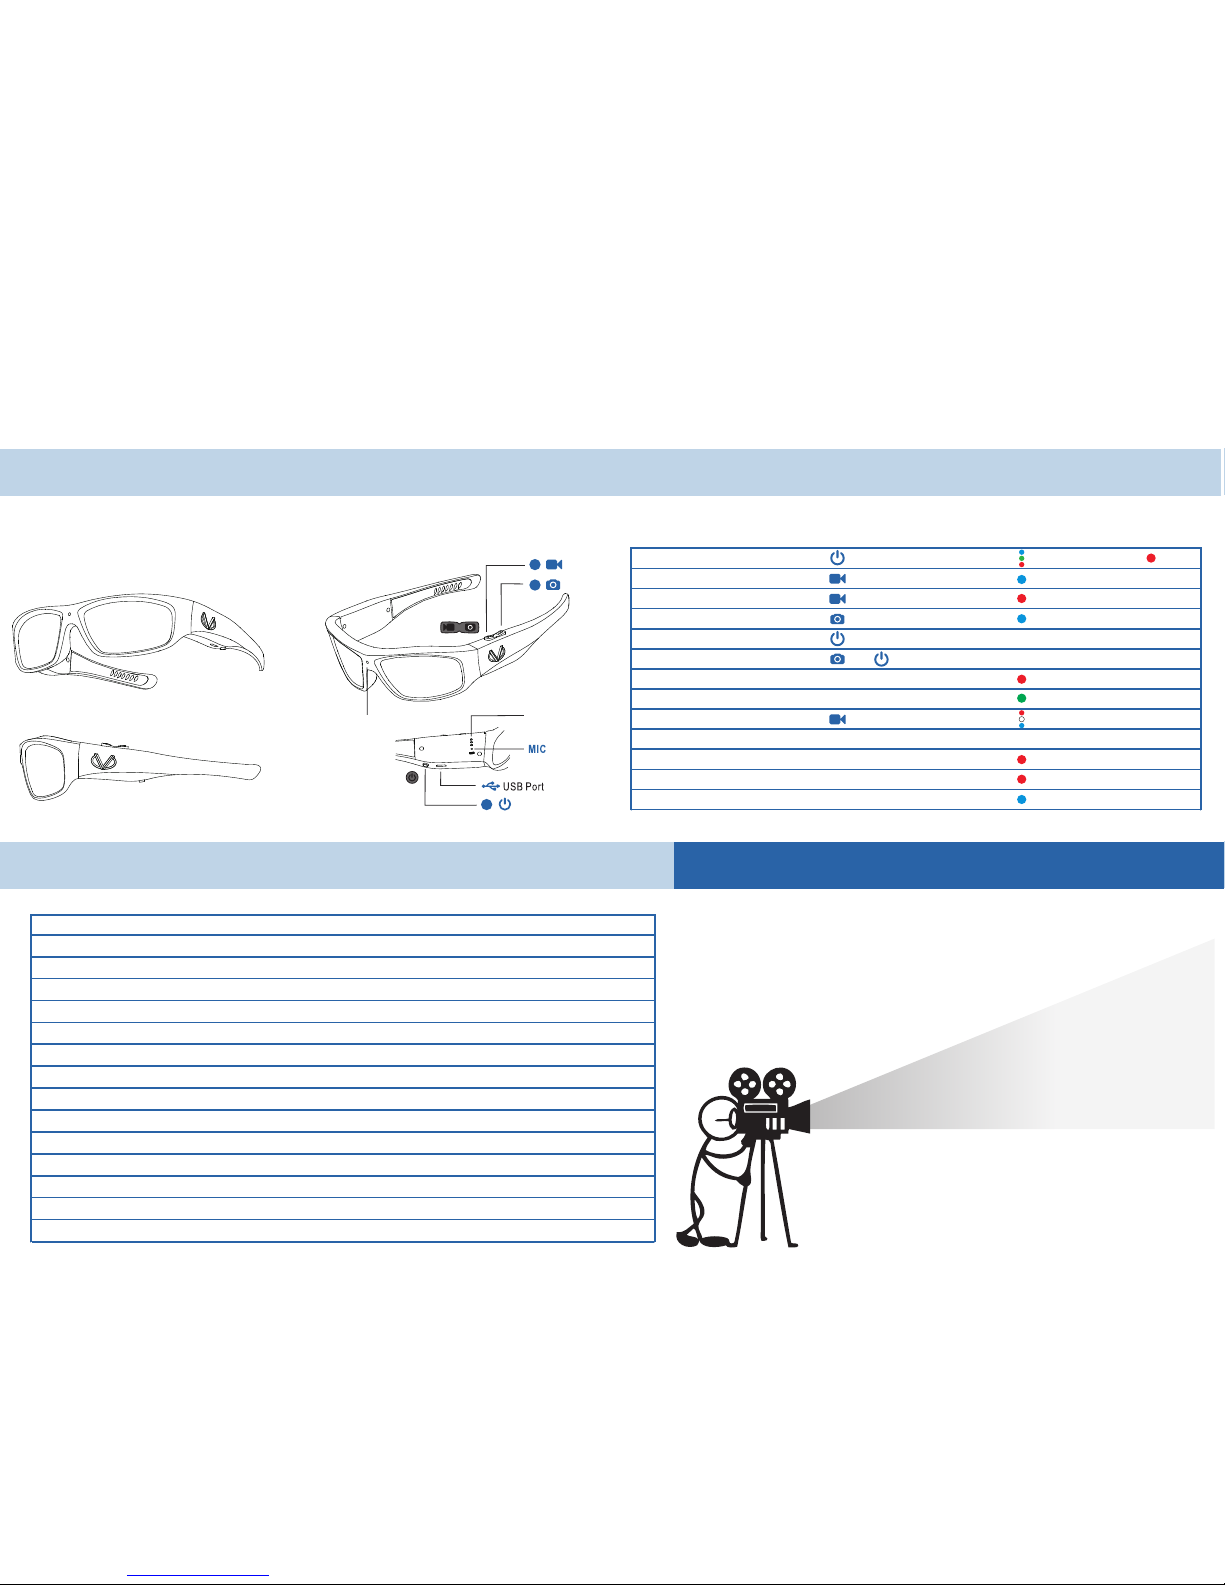
I nd i c at i o n
Video Recording Trick
0’ 5’ 10’ 15’
Vid Vision II
HD Video Sunglasses
Quick Start Guide
1
2
3
Illuminates Followed By
Indicates Glasses are Recording
Indicates Recording has Stopped
One Flash
Blinking Light Indicates Charging
On
On
Fast Flashing Then O
Fast Flashing Then O
Press And Hold for 3 Seconds
Press
Press
Press
Press
Press
Connect to a PC or Mac USB Port
Press
Again
and
During USB Connection
(Not available for Mac OS)
Reset or Reconnect to USB
(Automatically Power o)
(Automatically Power o)
Power On
Take Video
Stop Recording
Take Photo
Power O
Reset
Connect and Charge
PC Camera
Return to USB Connection
Battery Low
Memory Low
OnFully Charged
LE D lights
Cam era
CONTROLS
Overview of Controls
Status Controls Indicator
SPECIFICATIONS Very Important Viewing Angle
Camera
Video Format
Photo Format
Memory Capacity
Battery Type
Input Power Rating
Charge Time
Video Recording Time
Operation System
Operating Temperature
Storage Temperature
Charging Temperature
Weight & Dimension
Lense
5.0 Mega pixels color CMOS / View angle: 64°
AVI (1280x720@30fps)
JPEG
16GB
Build-in 650mAh 3.7V Li-ion polymer battery
DC 5V 500mAh
3 hours for full charging by computer USB port
3 hours after fully charged
Windows XP / Windows 7 / Windows 8 / Mac OS
32-104ºF (0-40ºC)
32-104ºF (0-40ºC)
32-104ºF (0-40ºC)
55g / W161 x D164 x H45 (mm)
Polarized lense, UV400 protection
Warranty
6 Months
Vid Vision II
HD Video Sunglasses
Quick Start Guide
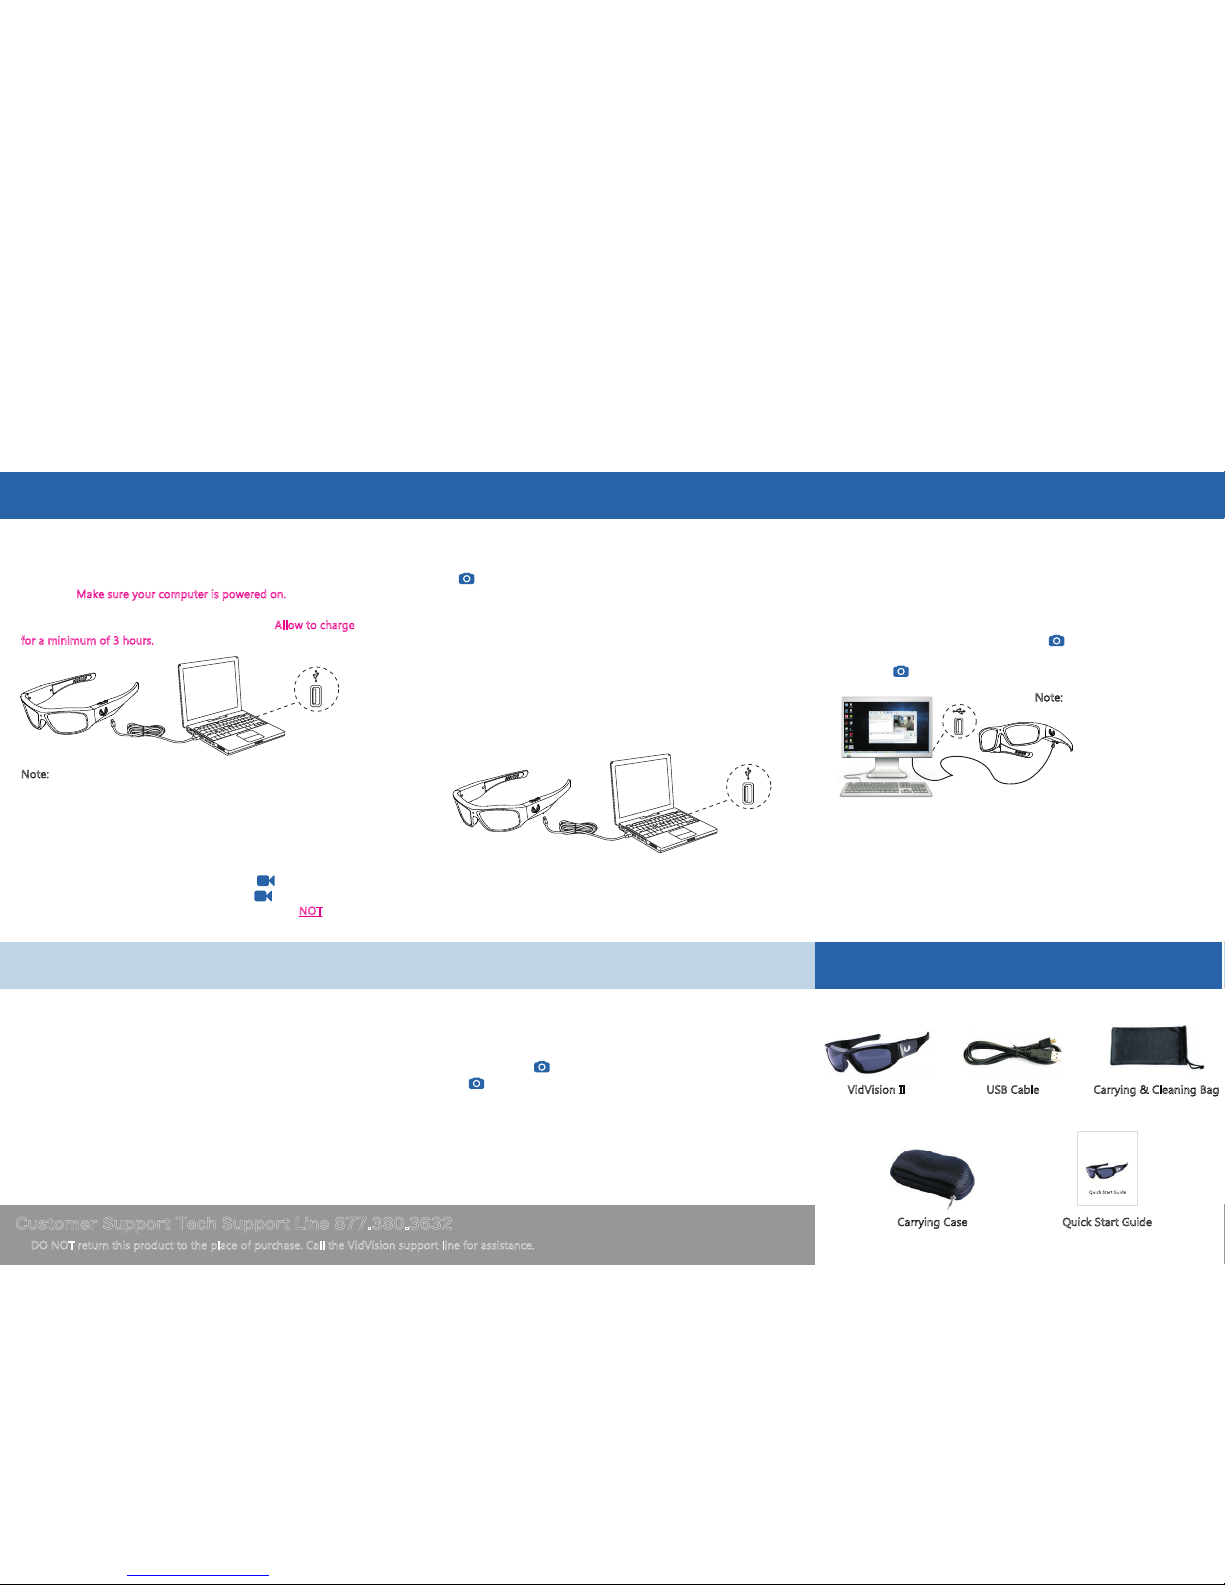
Connect the included USB cable directly to the USB port on your
computer. Make sure your computer is powered on.
Connect the
other end of the USB cable to your VidVisionII Glasses. A blinking
red light will indicate that the battery is charging. Allow to charge
for a minimum of 3 hours. (until the green indicator turns on)
Note:
Please do not use a wall outlet or other devices to charge
the VidVisionII sunglasses product. It could result in a faulty charge
of the battery and void warranty.
Although VidVisionII glasses record in HD resolution the video quality is limited
to your computer’s resolution. To see your recording in HD you must play the
video on a HD compatible device. For optimal performance save video and
photos to your computer before viewing.
O
TROUBLESHOOTING IN THE BOX
PERATIONS
1. Charge
Check the battery power. Recharge the battery if the power exhausted.
Unable to Turn on VidVisionII Glasses
Most problems can be solved by resetting. Simply reset the VidVisionII.
• Resetting will not erase the pictures, videos or other files stored in
memory.
• If the reset procedure does not work, charge the battery and try again.
Resetting
DO NOT return this product to the place of purchase. Call the VidVision support line for assistance.
Customer Support Tech Support Line 877.380.3632
Check if the USB connection is fine. If the blue indicator turns on, You
may have pressed and switched VidVision to Web Camera mode.
Press button again to switch to mass storage device mode.
USB Mass Storage Device is Not Found in
Windows and Mac
Please check if the memory is full. Delete or copy the old video files to
your computer hard disk.
Unable to Take Video
Check the battery power. Recharge the battery if the power exhausted.
If auto shut-off on Video Recorder mode, check if the memory is full.
Delete or copy the old video files to your computer hard disk.
Auto Shut-Off
After turning on your VidVisionII Glasses press and a blue light will
illuminate indicating recording has started, hit again to stop
recording. If you do not see a blue light the glasses are NOT
recording.
2. Take a Video
Connect VidVisionII to your computer. The device appears as a USB mass
storage device in Windows Explorer. Open the HD VIDEO folder in the
storage device, copy or cut the video files to your local hard disk. Play the
videos with “Windows Media Player” or other supported media player.
4. Download & Play Videos
USB PORT
USB PORT
Press one time to take a photo. You can take photos durning video
recoding, or take photos during standby mode.
3. Take a Photo
The Web camera function will require you to download a driver found in
the VidVisionII file that pops up when you plug the glasses into your
computer.
1. Connect VidVisionII to your computer. The USB mass storage device
appears in Windows Explorer. Press to enter Web Camera mode.
The blue indicator turns on.
2. Press again to return to USB mass storage device mode.
Connect your VidVisionII glasses to your computer then find and open the
"updatetime" folder in the glasses memory. Follow the instructions to run
the "updatetime.exe" program to update the time on your VidVisionII
glasses.
Note:
Video Recorder mode are
not usable in USB connection status.
Web camera feature is not
available for Mac computer.
5. Web Camera
6. Time Setting
USB PORT
USB Cable
Carrying Case
Carrying & Cleaning BagVidVision II
Quick Start Guide
VidV ision I I
HD Vide o Sungl asses
 Loading...