

Page 1
Installation and Assembly
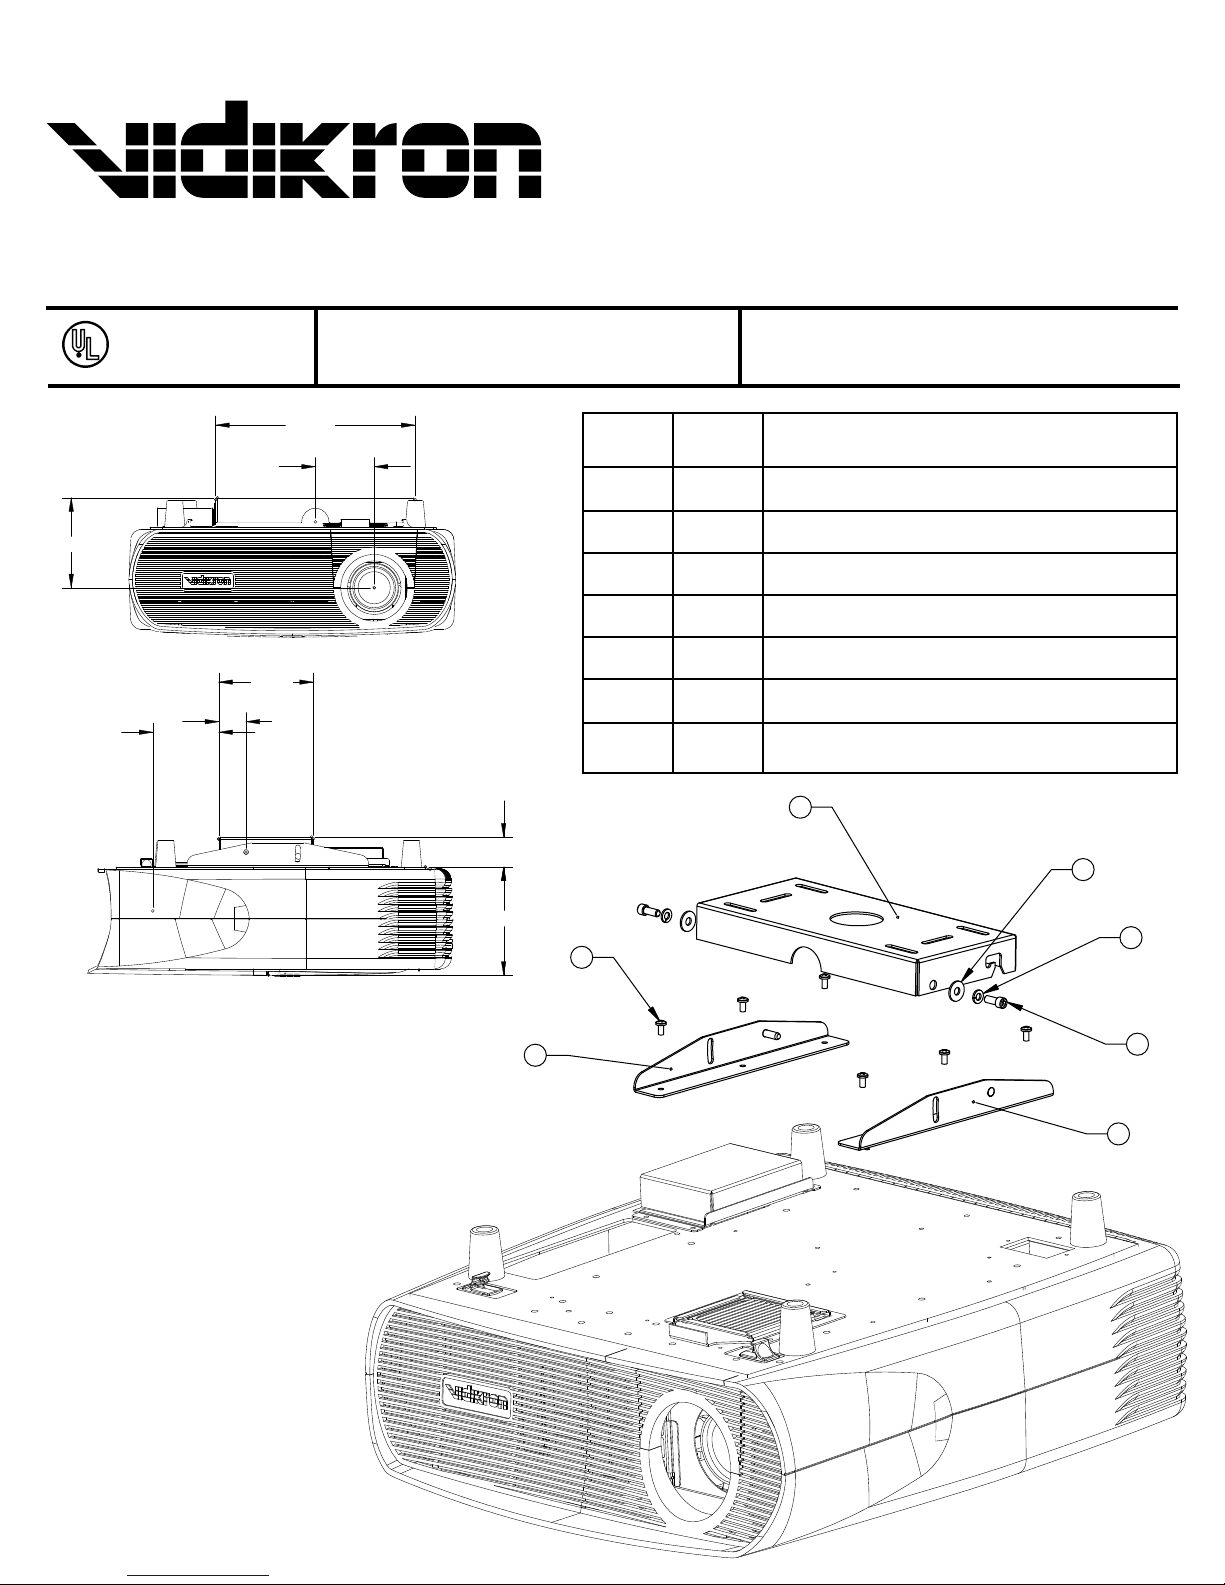
Secure Ceiling Mount for the
Model 60 / Model 80
VIHK-000150
IMPORTANT! Read entire instruction sheet before you start installation and assembly.
LISTED
4.954
3.630
Front of lens
to front of mount
This product must be
installed by a qualified,
professional installer.
5.208
1.504
For customer service or to order additional
mounting hardware call 1-888-4VIDIKRON.
10.979
3.241
ITEM QTY DESCRIPTION
1 6 8-32 x 3/8" Phillips-Pan Head screw
2 1 Ceiling Mount
3 2 1/4-20 Flat Washer
4 2 1/4-20 Lock Washer
5 2 Socket head cap screw 1/4-20 x 5/8
6 1 Ceiling Mount Bracket Left
7 1 Ceiling Mount Bracket Right
1.645
Before you start, check the parts list
below to make sure all parts are included.
2
3
5.959
1
7
4
5
6
Page 2
Q
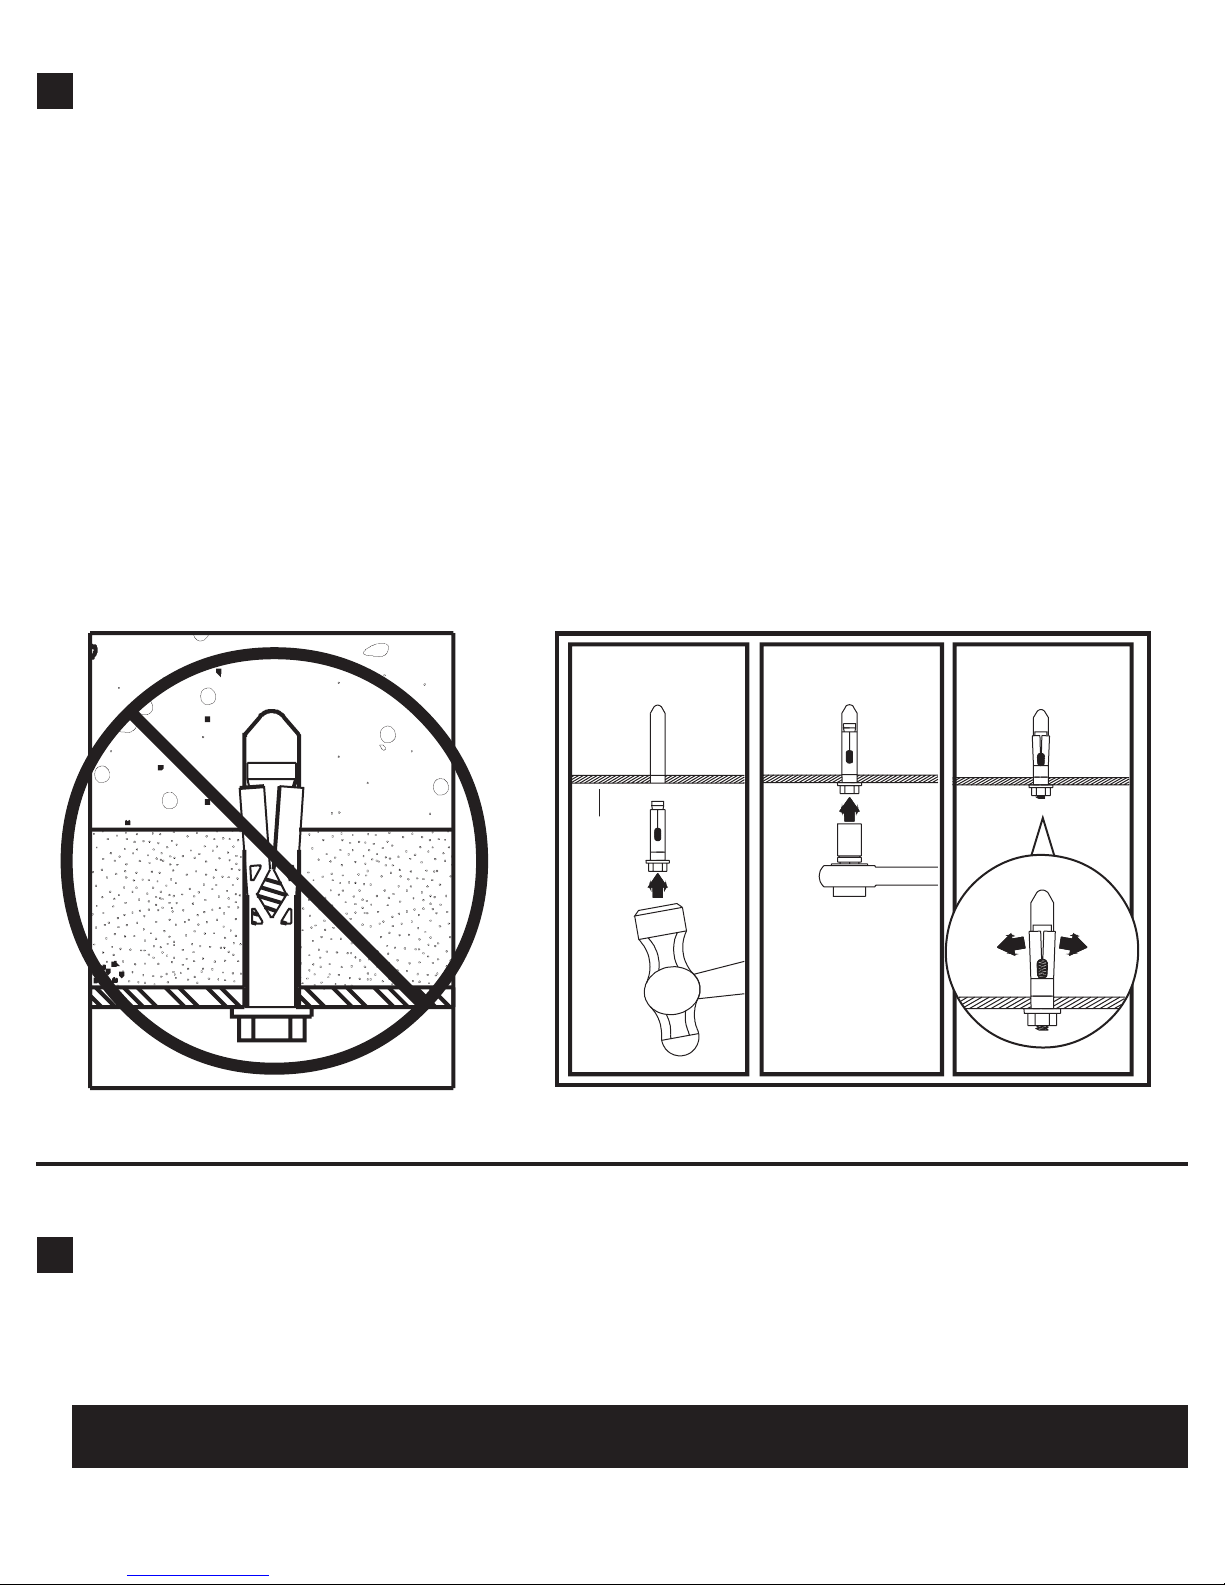
CONCRETE CEILING INSTALLATION
Hiˆ@ƒ™™ƒ…Š‹“‰@™”@ƒ@œ””†@Œ”‹˜™@…‡‹‘‹“‰@˜Ž‹•@™”@˜™‡•@RIN
noteZ@c”“…—‡™‡@ƒ“…Š”—˜@ƒ—‡@not@˜š••‘‹‡†N
use@only@rawltm@CUPPU@of@hilti
{NSQR@x@QNVRU@HX’’@x@TQ’’I}
d—‹‘‘@ˆ”š—@UOQVB@HX’’I@†‹ƒN@Š”‘‡˜@QNWUB@HTU’’I@†‡‡•N
a™™ƒ…Š@…‡‹‘‹“‰@„—ƒ…Ž‡™@HfI@š˜‹“‰@ˆ”š—@…”“…—‡™‡@ƒ“…Š”—˜N
t‹‰Š™‡“@™”@XP@‹“N@‘„˜@HY@nNmNI@’ƒž‹’š’@™”—–š‡N
s‡‡@ƒ‘˜”@concrete@anchor@installation@„‡‘”œN
CONCRETE ANCHOR INSTALLATION
these@concrete@anchors@are@for@direct@attachment@to@load@bearing@concrete@onlyA#
not@for@attachment@to@concrete@ceiling@covered@with@plasterL@drywallL
tile@or@other@finishing@materialN
tm@@
hlXQT@concrete@expansion@anchorsN
CROSS SECTION
…”“…—‡™‡
…‡‹‘‹“‰
t‹‰Š™‡“@™”@XP@‹“N
‘„˜N@HY@nNmNI
’ƒž‹’š’@™”—–š‡N
C
…”“…—‡™‡
ƒ“…Š”—
1
R
WOOD JOIST CEILING INSTALLATION
u˜‡@ƒ@˜™š†@ˆ‹“†‡—@™”@‘”…ƒ™‡@…‡‹‘‹“‰@Œ”‹˜™˜N@a‘‘@˜…—‡œ˜@’š˜™@‰”@‹“™”@˜”‘‹†@œ””†N@
d—‹‘‘@ˆ”š—@UOSRB@HT’’I@†‹ƒN@Š”‘‡˜L@RNUB@HVU’’I@†‡‡•@‹“™”@œ””†N
a™™ƒ…Š@…‡‹‘‹“‰@„—ƒ…Ž‡™@HfI@š˜‹“‰@CQT@ž@RNUB@HV’’@ž@VU’’I@œ””†@˜…—‡œ˜L@“”™@˜š••‘‹‡†N
t‹‰Š™‡“@™”@XP@‹“N@‘„˜@HY@nNmNI@’ƒž‹’š’@™”—–š‡N
2
3
cautionZ@t‹‰Š™‡“@œ””†@˜…—‡œ˜@˜”@…‡‹‘‹“‰@„—ƒ…Ž‡™@‹˜@ˆ‹—’‘Ÿ@ƒ™™ƒ…Š‡†N@bš™@do@not@tighten@with@excessive@forceA
o›‡—™‹‰Š™‡“‹“‰@…ƒ“@…ƒš˜‡@˜™—‡˜˜@†ƒ’ƒ‰‡@™”@œ””†@˜…—‡œ˜L@‰—‡ƒ™‘Ÿ@—‡†š…‹“‰@™Š‡‹—@Š”‘†‹“‰@•”œ‡—A
 Loading...