

Page 1
Call Recorder
Call Recorder Call Recorder
Call Recorder Octo | Quarto
Octo | Quarto Octo | Quarto
Octo | Quarto
M
MM
Manual
anualanual
anual
Version 1.003.10 © Vidicode 2010
Page 2
Manual Call Recorder Octo | Quarto © Vidicode 2010
2
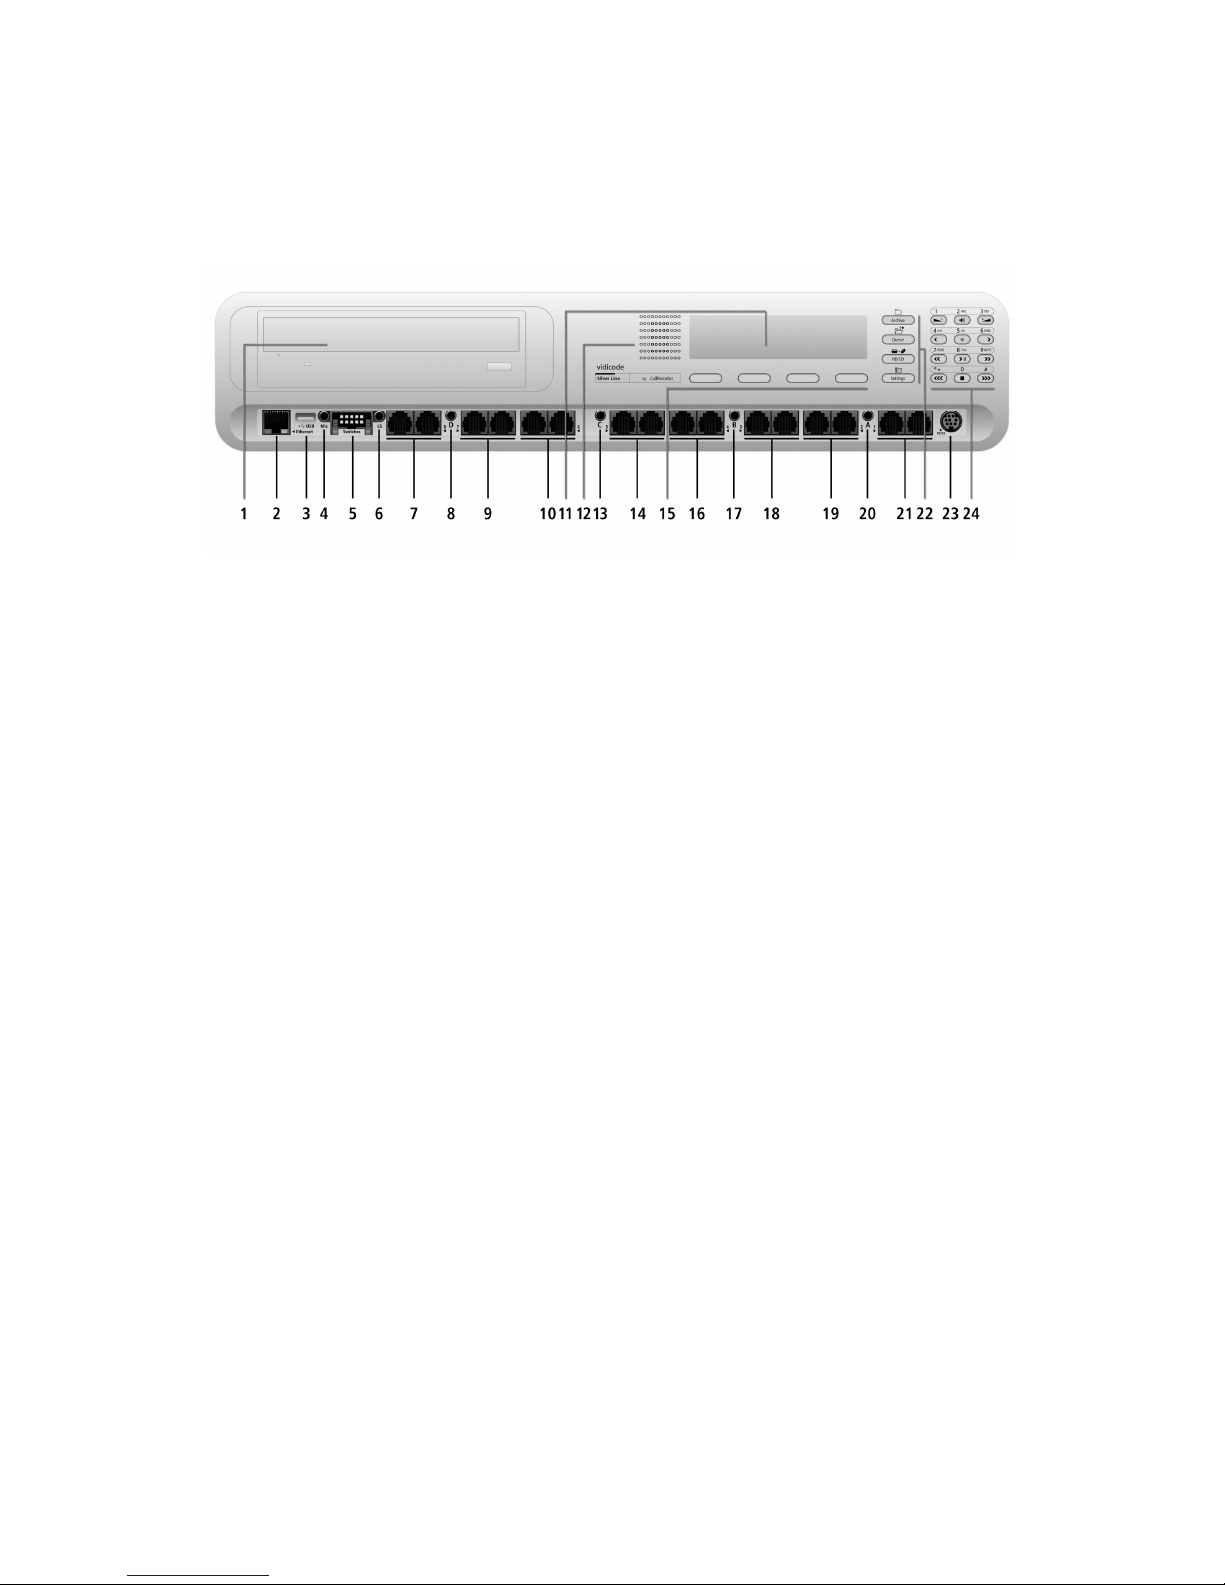
Call Recorder Octo
Call Recorder OctoCall Recorder Octo
Call Recorder Octo
1. CD-Drive
2. Ethernet/LAN
3. USB port (unused)
4. Microphone
5. 8 Channel Start/Stop switches
6. Headset/External Speaker
7. Telephone Line Input (channel #8)
8. Audio Input (channel D)
9. Telephone Line Input (channel #7)
10. Telephone Line Input (channel #6)
11. Backlight Display
12. Internal Speaker
13. Audio Input (channel C)
14. Telephone Line Input (channel #5)
15. Menu Keys
16. Telephone Line Input (channel #4)
17. Audio Input (channel B)
18. Telephone Line Input (channel #3)
19. Telephone Line Input (channel #2)
20. Audio Input (channel A)
21. Telephone Line Input (channel #1)
22. Function Keys
23. RS232 Serial Connection
24. Alfa-numerical/Recorder Keys
Page 3
Manual Call Recorder Octo | Quarto © Vidicode 2010
3
Call Recorder Quarto
Call Recorder QuartoCall Recorder Quarto
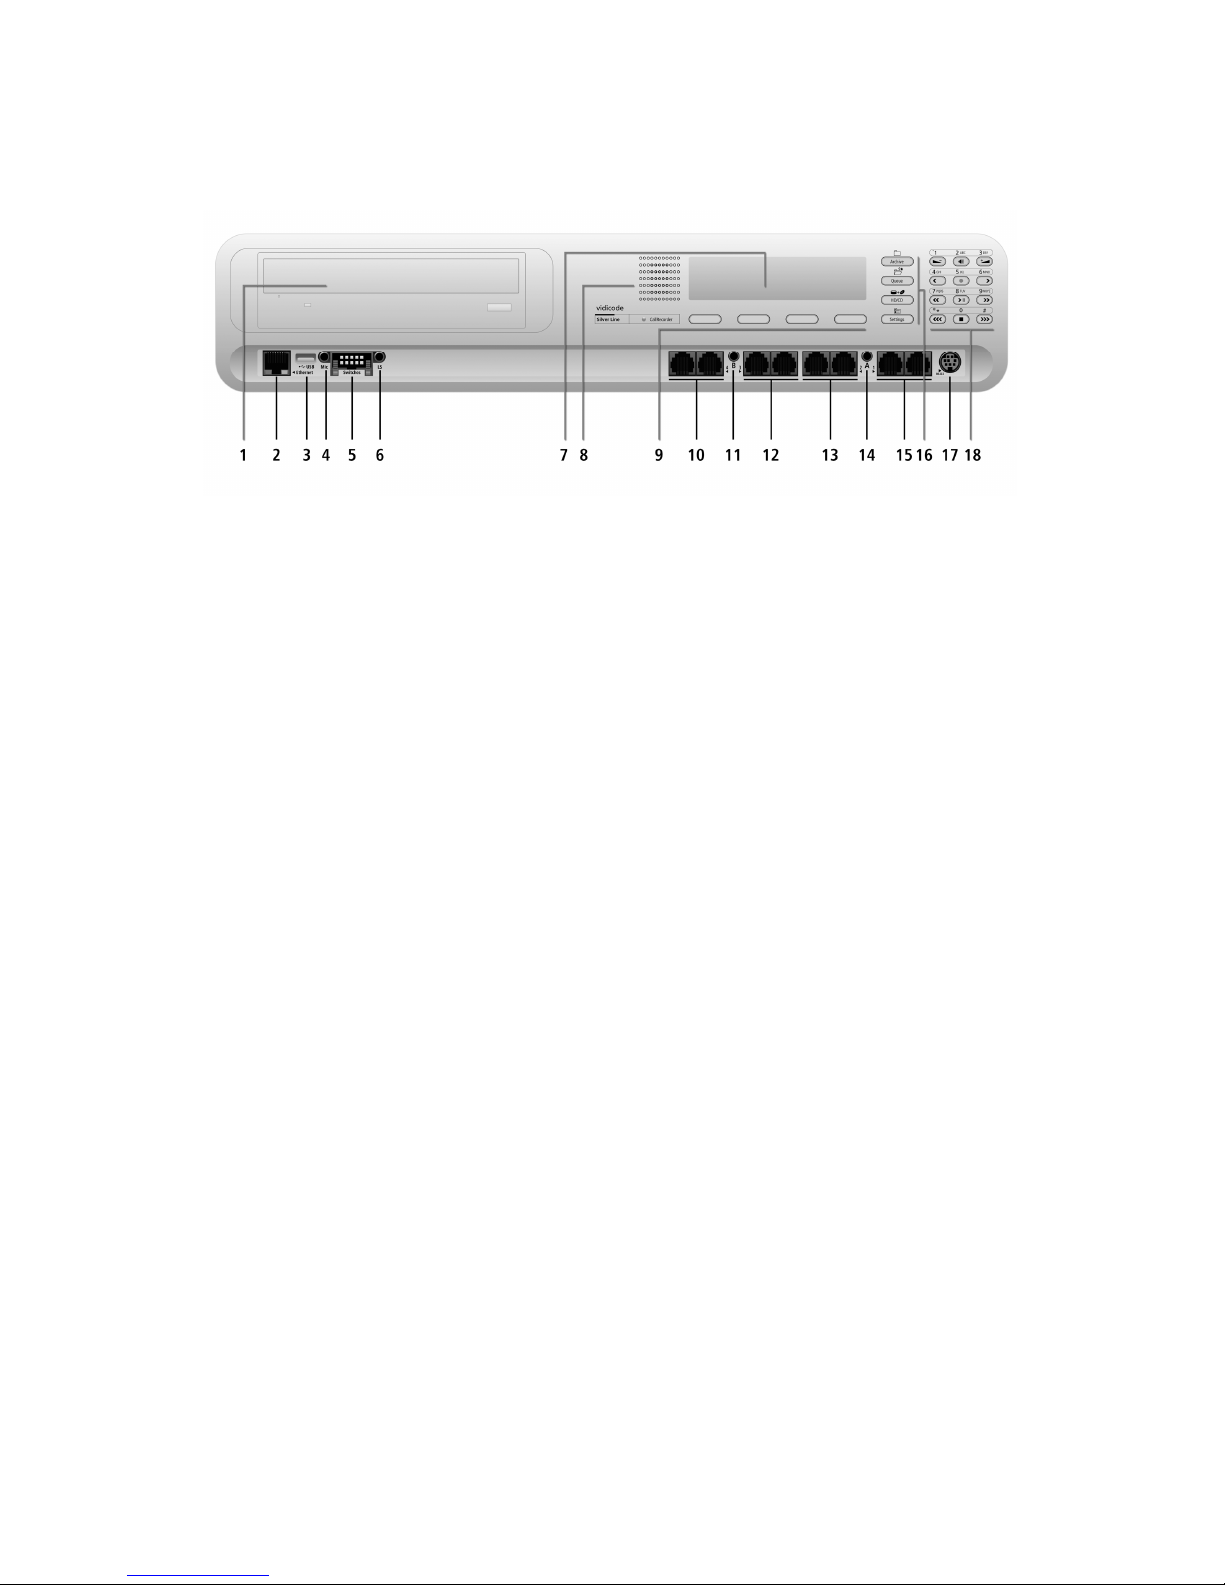
Call Recorder Quarto
1. CD-Drive
2. Ethernet/LAN
3. USB port (unused)
4. Microphone
5. 4 Channel Start/Stop switches
6. Headset/External Speaker
7. Backlight Display
8. Internal Speaker
9. Menu Keys
10. Telephone Line Input (channel #4)
11. Audio Input (channel B)
12. Telephone Line Input (channel #3)
13. Telephone Line Input (channel #2)
14. Audio Input (channel A)
15. Telephone Line Input (channel #1)
16. Function Keys
17. RS232 Serial Connection
18. Alfa-numerical/Recorder Keys
Page 4

Manual Call Recorder Octo | Quarto © Vidicode 2010
4
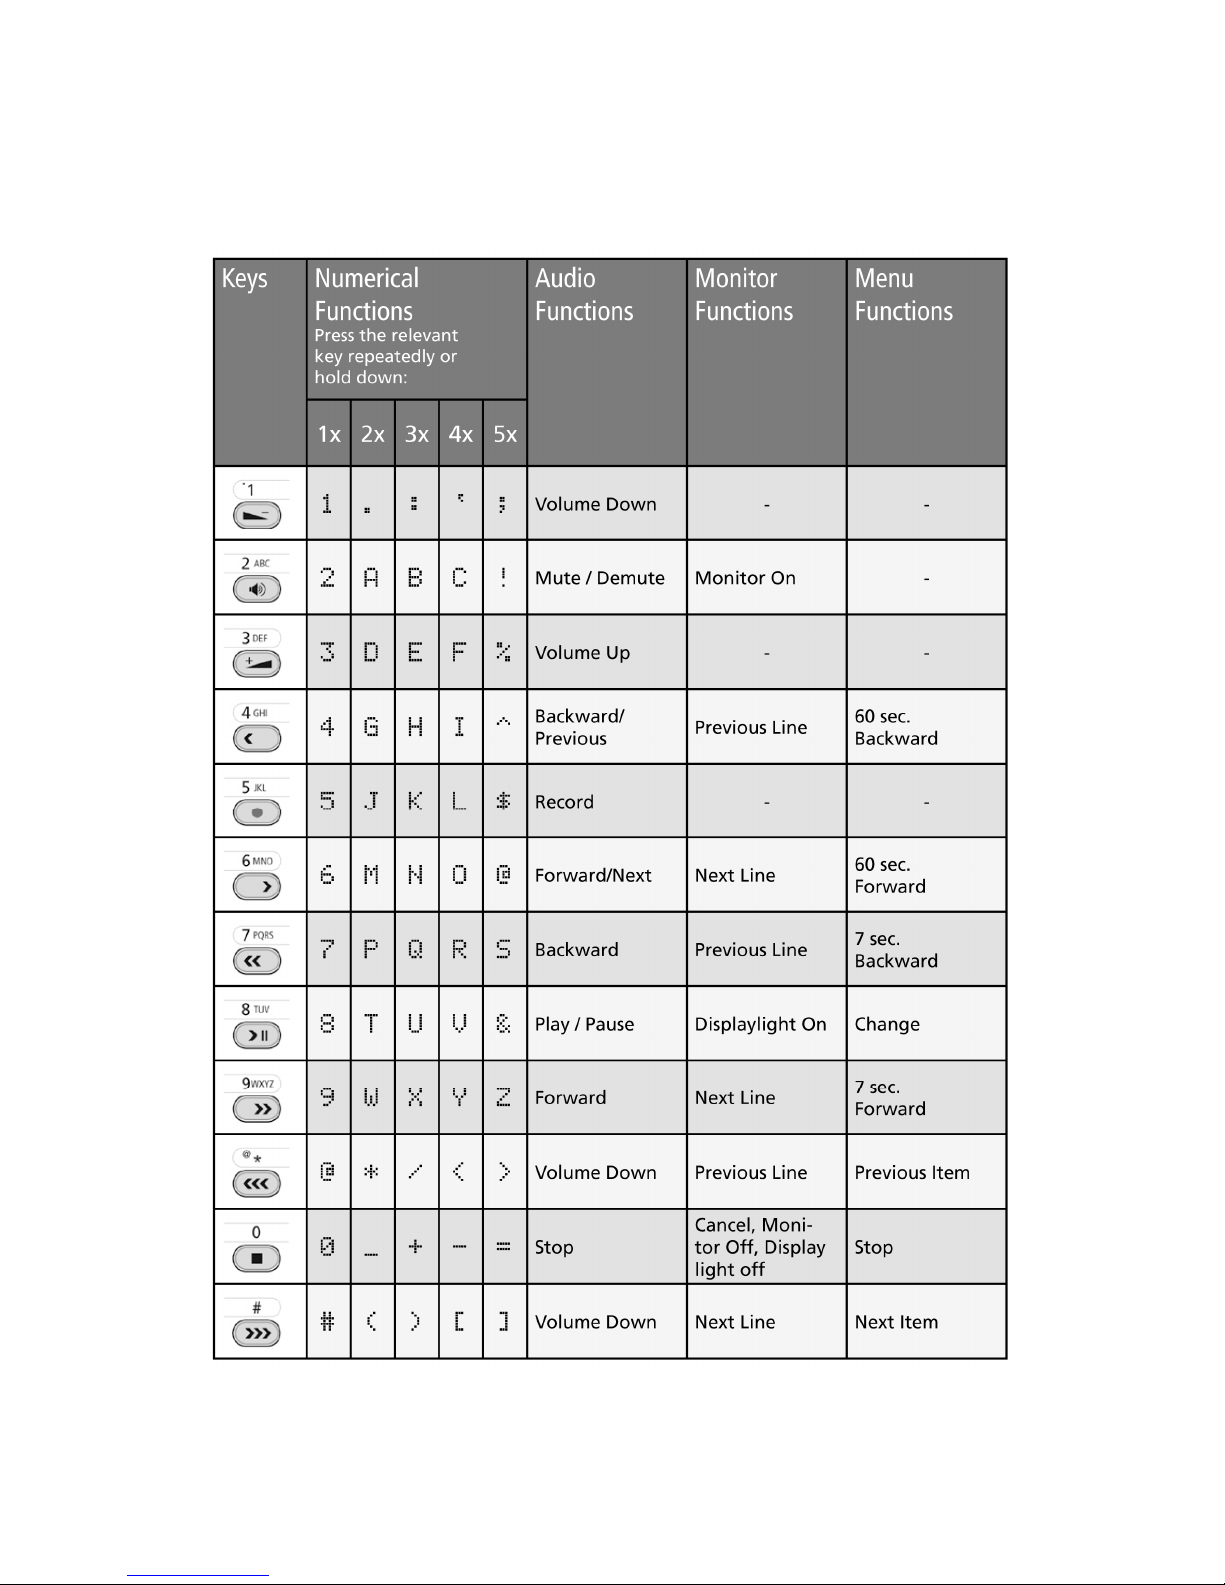
Numeric Keypad
Numeric KeypadNumeric Keypad
Numeric Keypad
These keys are used for different purposes depending on various modes
in the menu's.
Function keys
Function keys Function keys
Function keys
Page 5
Manual Call Recorder Octo | Quarto © Vidicode 2010
5
Al
AlAl
Alph
phph
phaaaa numerical functions
numerical functionsnumerical functions
numerical functions
Page 6
Manual Call Recorder Octo | Quarto © Vidicode 2010
6
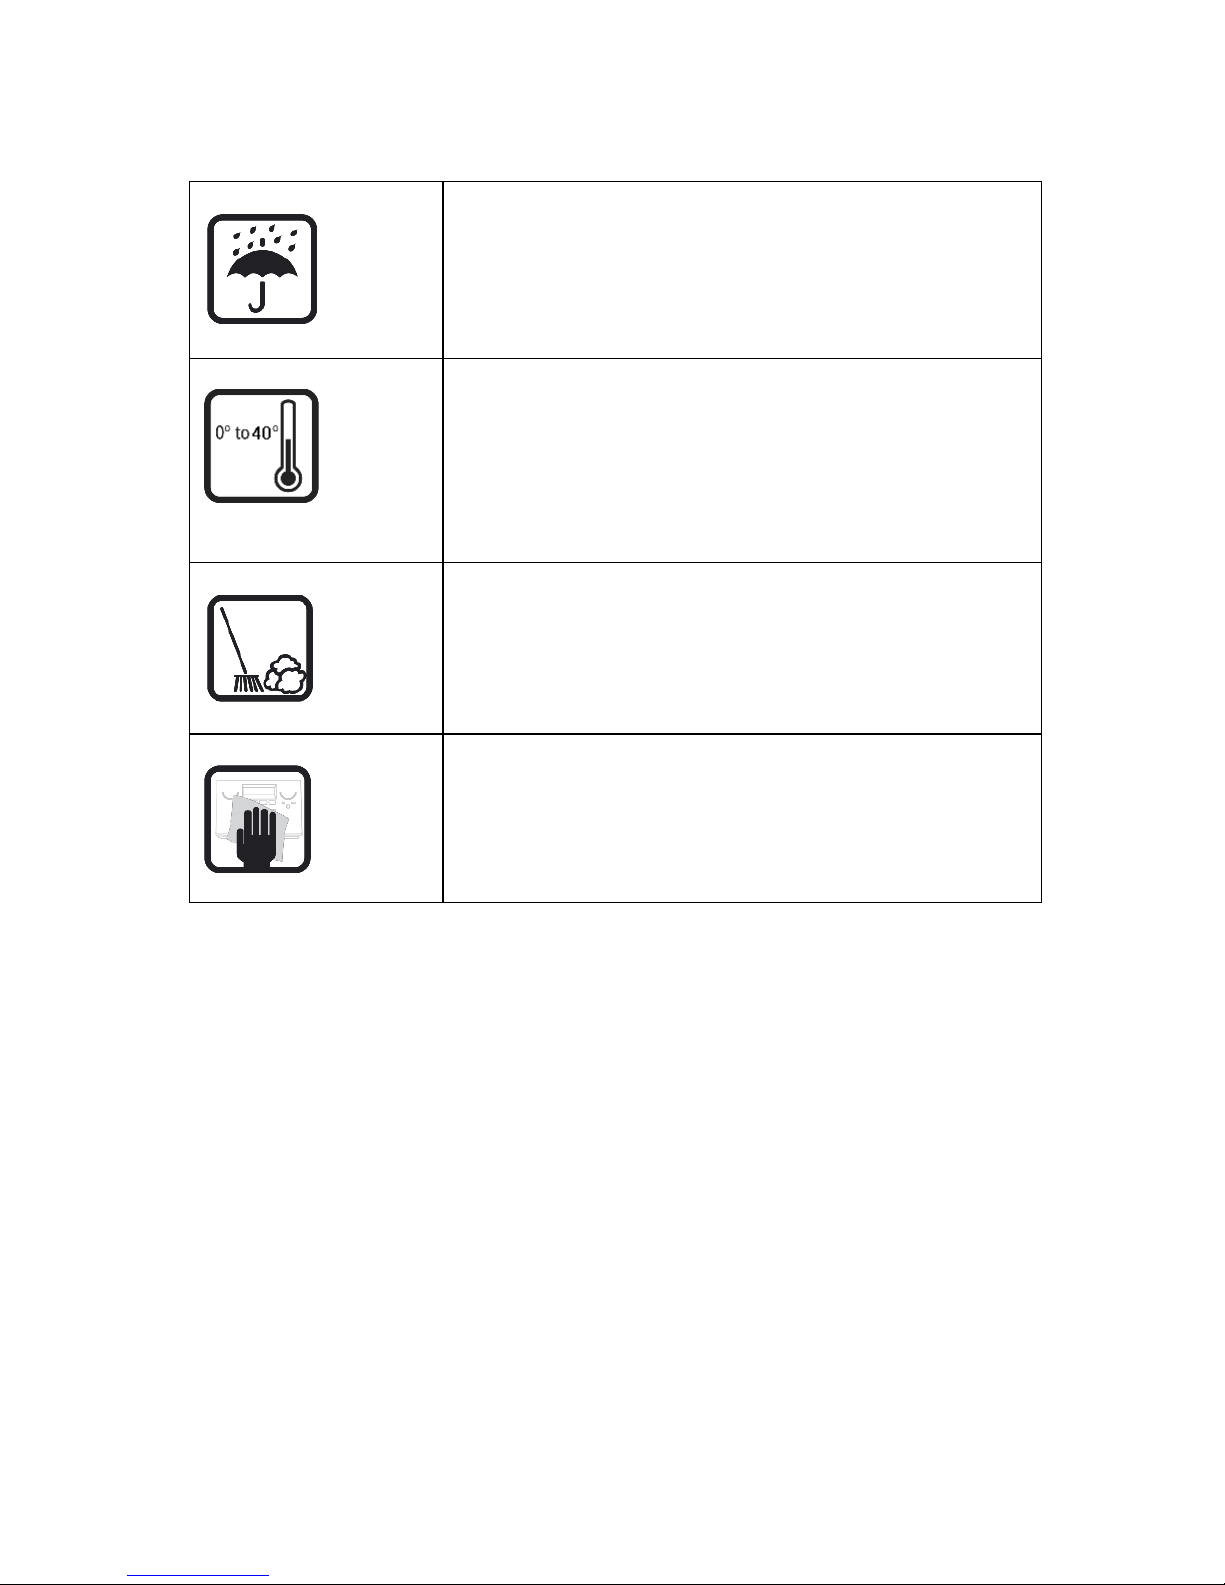
Care and Maintenance
Care and MaintenanceCare and Maintenance
Care and Maintenance
Keep the Call Recorder Octo | Quarto dry. If it gets
wet, wipe it dry immediately with a soft, clean
cloth. Liquids might contain minerals that corrode
the electronic circuits.
Use and store the Call Recorder Octo | Quarto only
in temperature conditions between 0 and 40
degrees Celsius. Temperature extremes can
shorten the life of electronic devices and distort or
melt plastic parts.
Keep the Call Recorder Octo | Quarto away from
excessive dust and dirt.
Do not use aggressive chemicals, cleaning solvents
or strong detergents to clean the Call Recorder
Octo | Quarto .
Page 7

Manual Call Recorder Octo | Quarto © Vidicode 2010
7
Contents
1 Introduction .............................................................11
1.1
Configuration .....................................................................12
2 Unpacking and installation .....................................15
2.1
What's in the box...............................................................15
2.2
Connecting the Power. ......................................................16
2.3
Connecting the telephone lines ........................................17
3 Configuration and operation ..................................19
3.1
Operation basics.................................................................19
3.1.1
How to use the keys.......................................................... 19
3.2
Frequently used key indicators .........................................20
3.3
Save Changes .....................................................................21
3.4
Initializing CD .....................................................................21
4 Recorder settings.....................................................23
4.1
Opening the Recorder settings menu ..............................23
4.2
Line settings .......................................................................23
4.3
The telephone line menu's ................................................23
4.3.1
Input source ....................................................................... 24
4.3.2
Start Method...................................................................... 24
4.3.3
Rings to Answer................................................................. 25
4.3.4
Silence Period..................................................................... 26
4.3.5
Fax Recording..................................................................... 26
4.3.6
Automatic Gain Control..................................................... 27
4.3.7
Compression....................................................................... 27
4.3.8
Notification ........................................................................ 28
4.3.9
Caller ID .............................................................................. 29
4.3.10
Inactive time....................................................................... 30
4.4
Speaker ...............................................................................30
4.5
Volume................................................................................31
4.6
Numberlist ..........................................................................31
4.7
CryptoCard..........................................................................31
4.8
CD Copy ..............................................................................32
4.9
CD Copy time......................................................................33
4.10
Auto Delete ....................................................................33
4.11
Protect the Call Recorder with a Password .................34
4.12
Remove Password protection .......................................36
Page 8

Manual Call Recorder Octo | Quarto © Vidicode 2010
8
4.13
Set the Clock ..................................................................36
4.14
Set the Language...........................................................37
4.15
Reset all values ..............................................................37
5 Search, playback, CD copy and monitoring............39
5.1
Playing the last recorded call ............................................39
5.2
Search stored recordings ...................................................40
5.2.1
Refined search according to remote number................... 42
5.2.2
Refined search according to line number......................... 42
5.3
Copy recordings to CD .......................................................43
5.3.1
Copy an individual recording............................................ 43
5.3.2
Copy a selection of recordings.......................................... 44
5.4
Monitoring..........................................................................45
6 Notification message and Numberlist.....................47
6.1
Record notification message .............................................47
6.2
View the numberlist ..........................................................48
6.3
Add a number to the list ...................................................48
6.4
Remove a number from the list ........................................49
7 Using the CD drive and the CD menu .....................51
7.1
The CD menu ......................................................................51
7.2
Free time left on CD ...........................................................51
7.3
Create CD directory............................................................51
7.4
Erase CD Re-writable .........................................................52
7.5
Software update ................................................................53
8 The Hard disk menu.................................................55
9 Encrypted recording ................................................57
9.1
Insert CryptoCard into Call Recorder................................58
9.2
The CryptoCard and its PIN and PUC code.......................59
9.3
Making an encrypted recording .......................................60
9.4
Playing an encrypted recording ........................................60
10 The Ethernet interface.............................................63
10.1
Network active...............................................................63
10.2
FTP active........................................................................63
10.3
FTP user...........................................................................63
10.4
FTP password .................................................................64
Page 9

Manual Call Recorder Octo | Quarto © Vidicode 2010
9
10.5
FTP server port ...............................................................65
10.6
DHCP server....................................................................65
10.7
IP address .......................................................................66
10.8
IP subnet mask ...............................................................66
10.9
Gateway .........................................................................67
10.10
IP address name .............................................................68
10.11
E-mail address ................................................................68
10.12
Reply address .................................................................69
10.13
SMTP server address......................................................69
10.14
SMTP server port ...........................................................70
10.15
Domain name.................................................................71
10.16
DNS server......................................................................71
10.17
NTP Server ......................................................................72
10.18
NTP Server Port ..............................................................72
10.19
GMT correction ..............................................................73
10.20
Telnet ..............................................................................74
10.21
Service timer ..................................................................74
10.22
Monitor active................................................................75
11 Call Recorder Quick CD Access System ...................77
11.1
Installing the software ..................................................77
11.2
Start and Play recordings ..............................................77
11.3
View recordings on CD..................................................78
11.4
Create an archive on Hard disk ....................................79
11.5
Recycle bin......................................................................80
11.6
Export recordings ..........................................................81
11.7
On Line software update ..............................................81
11.8
Search recordings ..........................................................82
11.9
Software Settings ..........................................................83
12 The Access and Monitor software ..........................85
12.1
The Call Recorder Access System software .................85
12.1.1
Playing recordings ............................................................. 86
12.1.2
Queries ............................................................................... 86
12.1.3
Fax viewing ........................................................................ 86
12.2
The RTR Call Monitor software ....................................86
13 Accessories...............................................................89
13.1
Bidirectional Handset adapter ......................................89
13.1.1
Connecting ......................................................................... 89
Page 10

Manual Call Recorder Octo | Quarto © Vidicode 2010
10
13.2
High Impendance Taping Adapter ...............................90
13.2.1
Connecting ......................................................................... 90
14 Technical specifications ...........................................91
15 Acknowledgements.................................................95
15.1
Privacy.............................................................................95
15.2
Warranty ........................................................................95
15.3
Liability ...........................................................................96
16 Index.........................................................................97
Page 11

Manual Call Recorder Octo | Quarto © Vidicode 2010
11
1 Introduction
The Call Recorder Octo | Quarto is a digital audio recorder which can
simultaneously record from eight/four analogue telephone lines or
eight/four mono audio-sources. The Octo |Quarto is designed for
continuous unattended recording. Recording is started and stopped
automatically for each individual call. The quality of recordings is
ensured by the Automatic Gain Control, which evens the recording levels
of the local and remote voices. When recording from other audio
sources, voice activated recording starts and stops recording
automatically. The Octo | Quarto also has connections for start/stop
switches.
Internal Hard disk
Internal Hard diskInternal Hard disk
Internal Hard disk
The Octo | Quarto has an internal hard disk, a network interface and an
optional CD writer. All recordings are stored digitally on the internal
hard disk. The large storage capacity of the hard disk ensures the Call
Recorder's ability of long term unattended recording. Other advantages
are that recordings are randomly accessible and that there is no risk of
erasing existing recordings by new recordings. The Octo | Quarto issues a
warning when the hard disk is getting full. If the warning is ignored the
oldest recordings will be overwritten by the newest. Stored recordings
can be archived using the optional Call Recorder Archiving System
software. It is also possible to copy recordings from the hard disk to a CD
if your Octo | Quarto is equipped with the CD recorder. Copying
recordings to a recordable-CD can be done in different ways for
different purposes. It is possible to copy single recordings, copy a
selection of recordings or continuous copy new recordings
automatically. Recordings on CD can be viewed and played-back with
the Call Recorder Quick CD Access System software that comes with the
Octo | Quarto.
Compression
CompressionCompression
Compression
The digital format of the recordings is determined by the use of speech
compression. The Octo | Quarto compresses recordings default according
to the G.723 High Rate format. G.723 High Rate compression provides a
good balance between audio quality and recording size and is
compatible with most Windows versions. Compressed recordings take up
1/10th of the size of uncompressed recordings. Therefore the
compression has a profound effect on the storage capacity of the Call
Recorder in terms of recording size.
Page 12

Manual Call Recorder Octo | Quarto © Vidicode 2010
12
Ethernet
EthernetEthernet
Ethernet
The Call Recorder is equipped with an Ethernet interface. Therefore the
Call Recorder can be connected to a PC or computer network through
the Ethernet interface. With its own IP address the Call Recorder acts as
an FTP-server from which recordings can be downloaded. The Call
Recorder Access System software can be used to connect to the Call
Recorder over the network to retrieve recordings from the Octo | Quarto
and archive the recordings on the PC. The Call Recorder Access System
software has extensive archiving capabilities including the creation of
special archives suited for backup on CD. A special version of the Call
Recorder Access System allows for fax image recovery of recorded audio
fax transmissions. The Ethernet connection also allows for RTR Call
monitoring over the network. The optional RTR Call Monitor software
can be used to monitor all connected telephone lines over the network.
The Octo | Quarto has its own menu driven search function to find and
playback specific recordings. Typical recording-file search parameters can
be Date, Called number and Telephone number. The Octo | Quarto has
an internal speaker for playback of recordings.
Encry
EncryEncry
Encrypppption
tiontion
tion
All recordings can be encrypted. The Call Recorder uses the CryptoCard
option for this feature. Playback of encrypted recordings is impossible
without the CryptoCard. Playback of encrypted recordings on a PC is
possible only with the optional CryptoCard reader in conjunction with
the original or a matching CryptoCard.
1.1 Configuration
The Call Recorder Octo | Quarto is connected in parallel to the
eight/four telephone lines but can also act as a telephone itself.
Recording is started and stopped separately for each conversation.
Recording is started when a telephone is taken Off-Hook and continues
until the telephone returns to On-Hook. The On- and Off-Hook status of
the telephone lines is detected automatically. Automatic Gain Control,
speech compression, notification and Caller ID can be configured
separately for each separate line.
Recordings can be started in several ways. Direct On- and Off-Hook
detection is the most common. Recording can also be started by a
switch-connection. Making or braking a contact can start or stop
recording for individual lines. Voice activated recording is another way
to start and stop recordings. This method is common for recording of
radio communication or other audio sources.
Page 13

Manual Call Recorder Octo | Quarto © Vidicode 2010
13
Individual lines can also be configured for the recording of fax traffic.
The configuration for fax recording differs from the recording of
telephone conversations in several ways. The recordings of fax traffic are
not compressed, Automatic Gain Control is disabled and the notification
is omitted. The original fax images of fax recordings can be recovered
and viewed with a special version of the Call Recorder Access System
software.
The Call Recorder allows the user to listen in to ongoing calls through
the internal speaker; this is called the Monitor function. The volume of
the internal speaker can easily be adjusted. The Call Recorder also allows
for the connection of a headset, which can be used to listen to
recordings.
Page 14

Manual Call Recorder Octo | Quarto © Vidicode 2010
14
Page 15

Manual Call Recorder Octo | Quarto © Vidicode 2010
15
2 Unpacking and installation
The various models of the Call Recorder Octo | Quarto are:
Call Recorder Quarto HD
Call Recorder Quarto HD + CD
Call Recorder Octo | Quarto HD
Call Recorder Octo | Quarto HD + CD
2.1 What's in the box
The Call Recorder Octo | Quarto comes supplied with the following
parts:
• Mains cable
• Headset
• This manual
If the CD recorder is built in:
• Quick CD Access software
• Software CD
• CD recordable (only with CD option)
Please note
Please notePlease note
Please note: We do not supply a mains cable for Australia and
Switzerland because such cables are not available in the country of
manufacture.
Page 16
Manual Call Recorder Octo | Quarto © Vidicode 2010
16
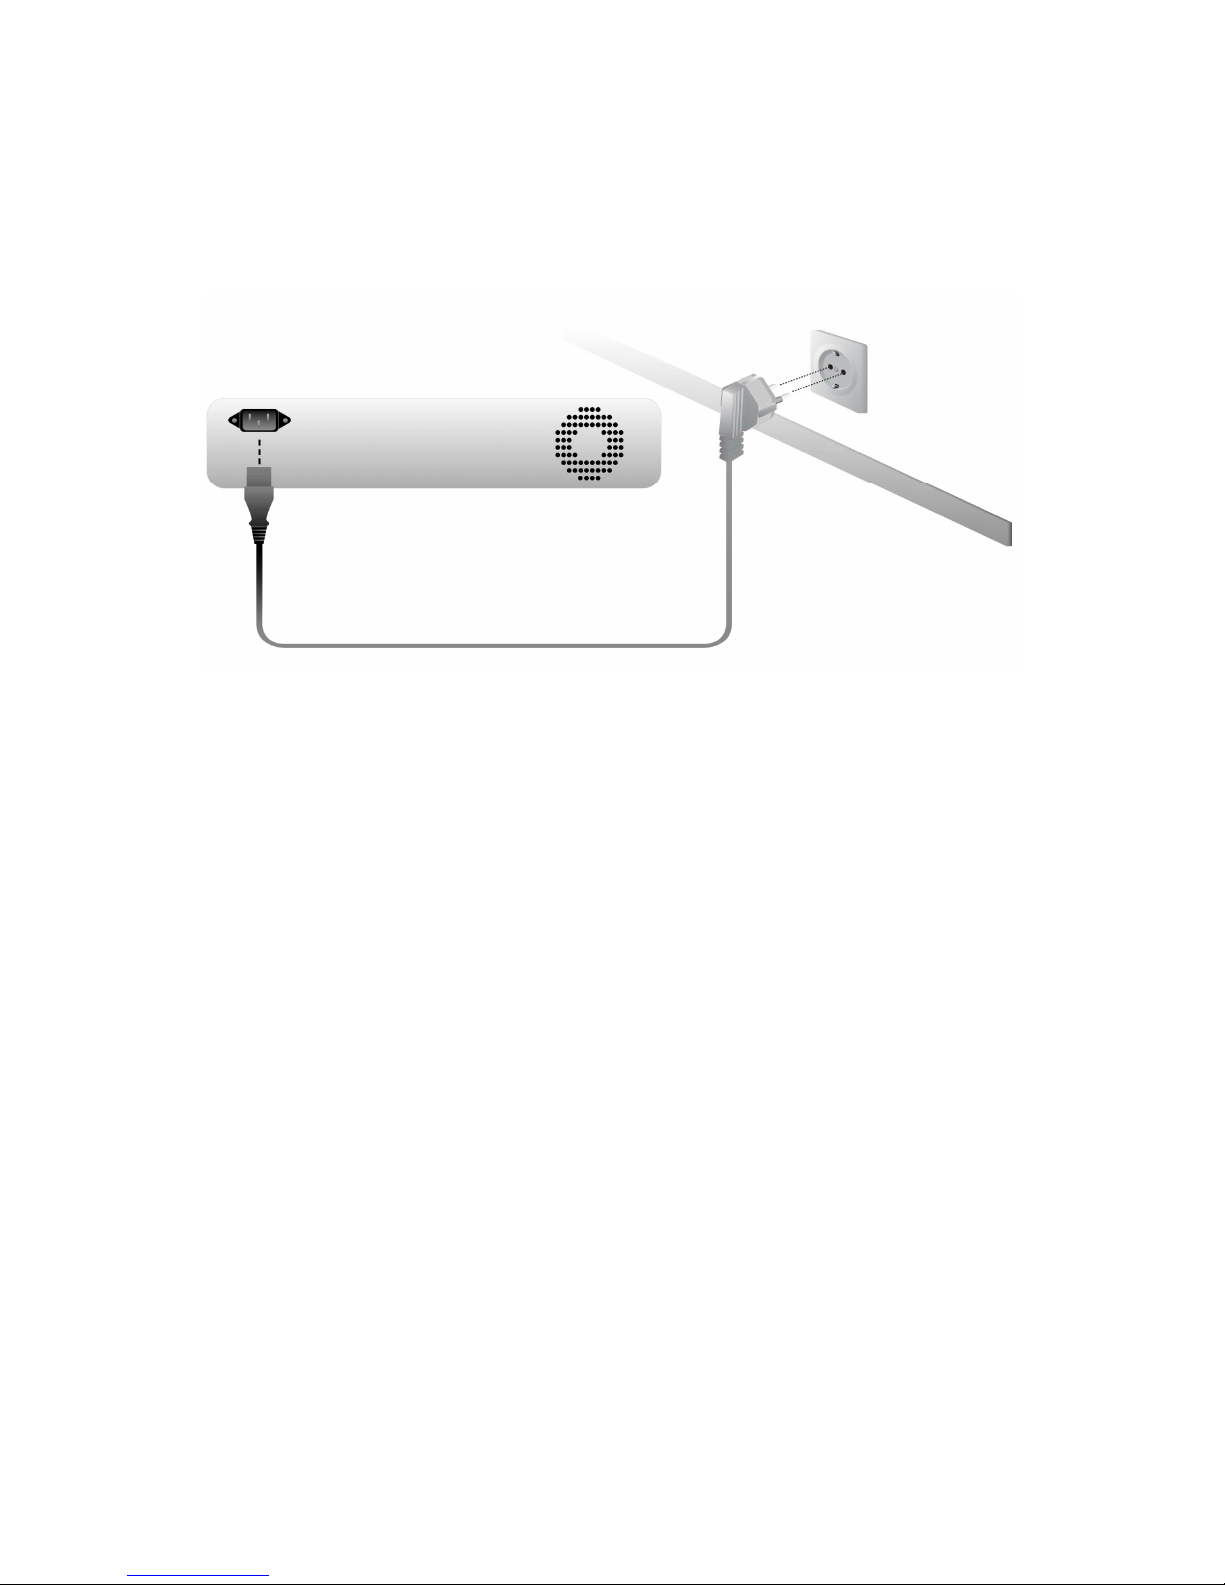
2.2 Connecting the Power.
The Call Recorder is not equipped with an On/Off switch. Use the
supplied power cable to connect it to the power supply. The power
supply is situated on the back of the Call Recorder
Page 17
Manual Call Recorder Octo | Quarto © Vidicode 2010
17
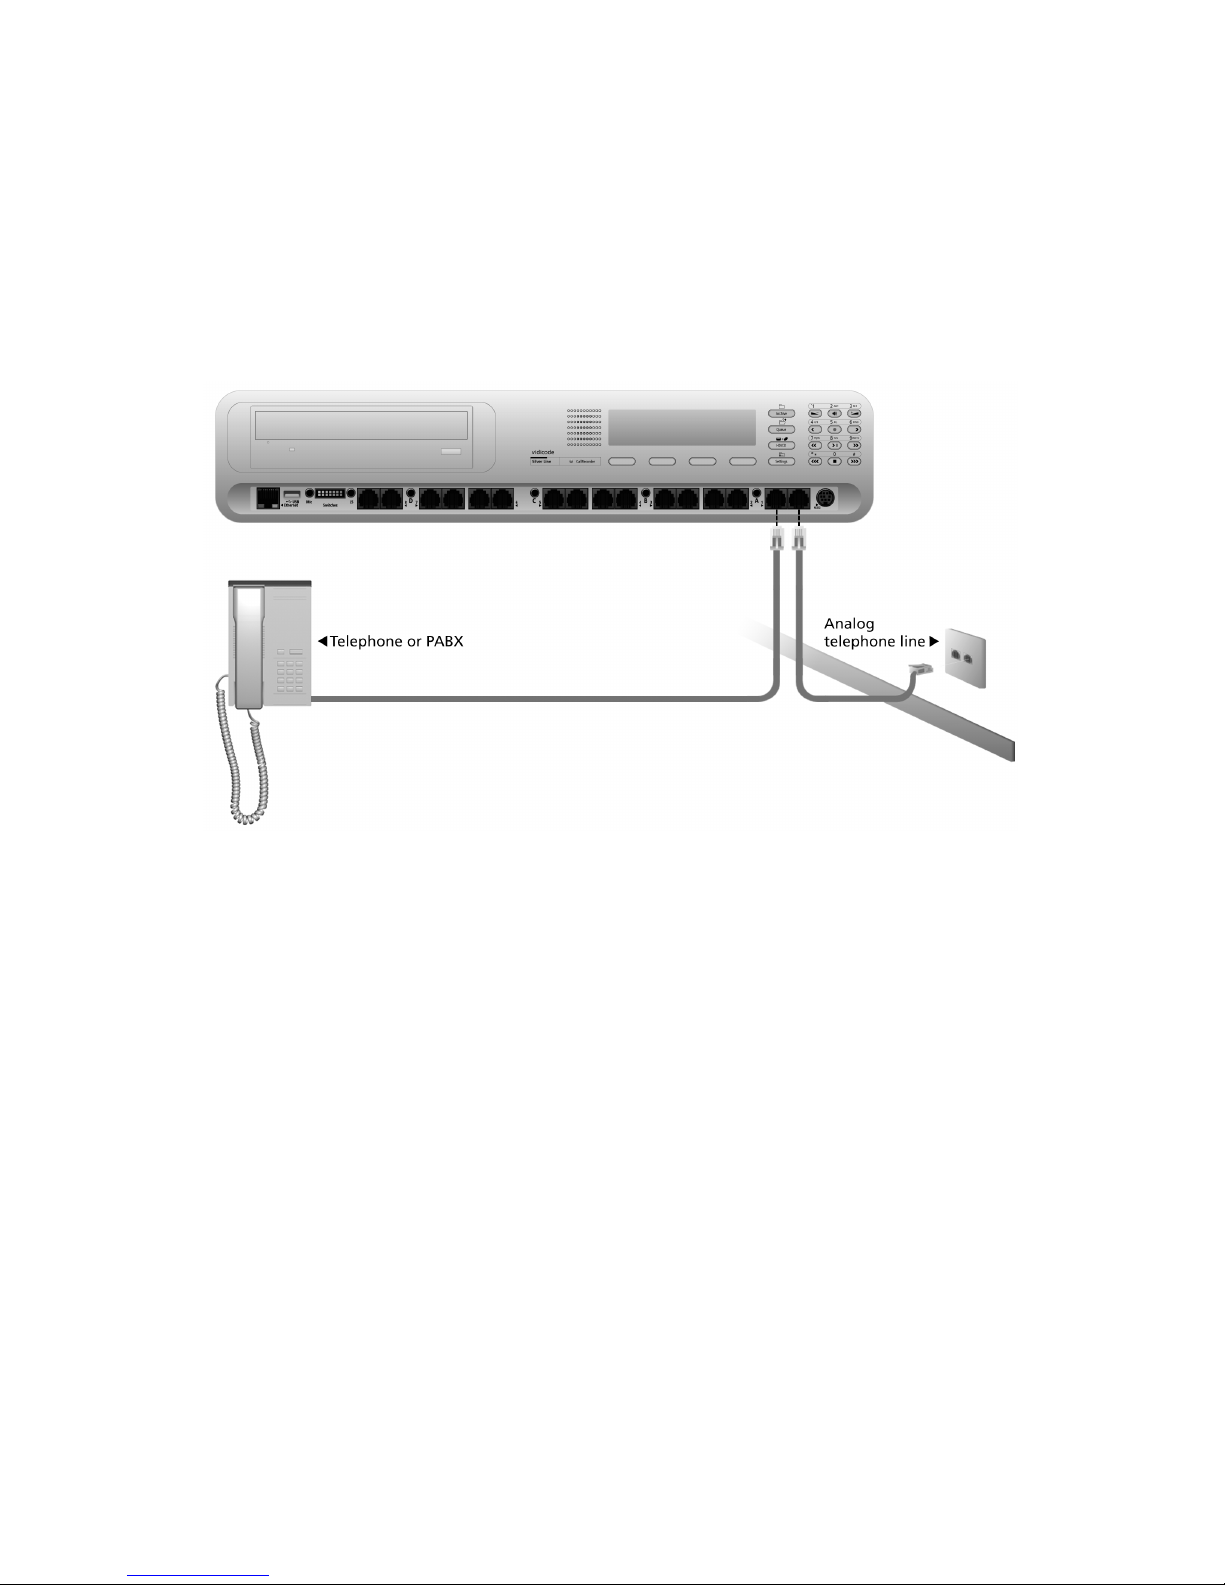
2.3 Connecting the telephone lines
The Call Recorder is connected to the telephone lines, as is shown in the
figure below for the Octo. The telephone line is connected to the IN jack
and possible equipment, such as a telephone or PBX, is connected to the
OUT jack. All eight/four lines can be connected in the same way.
For details on the connection of audio sources please refer to the
Technical specifications in Chapter 14.
The “Start/Stop” switch connection is used to connect eight/four
separate start/stop switches. For details please refer to the Technical
specifications in Chapter 14.
Page 18
Manual Call Recorder Octo | Quarto © Vidicode 2010
18
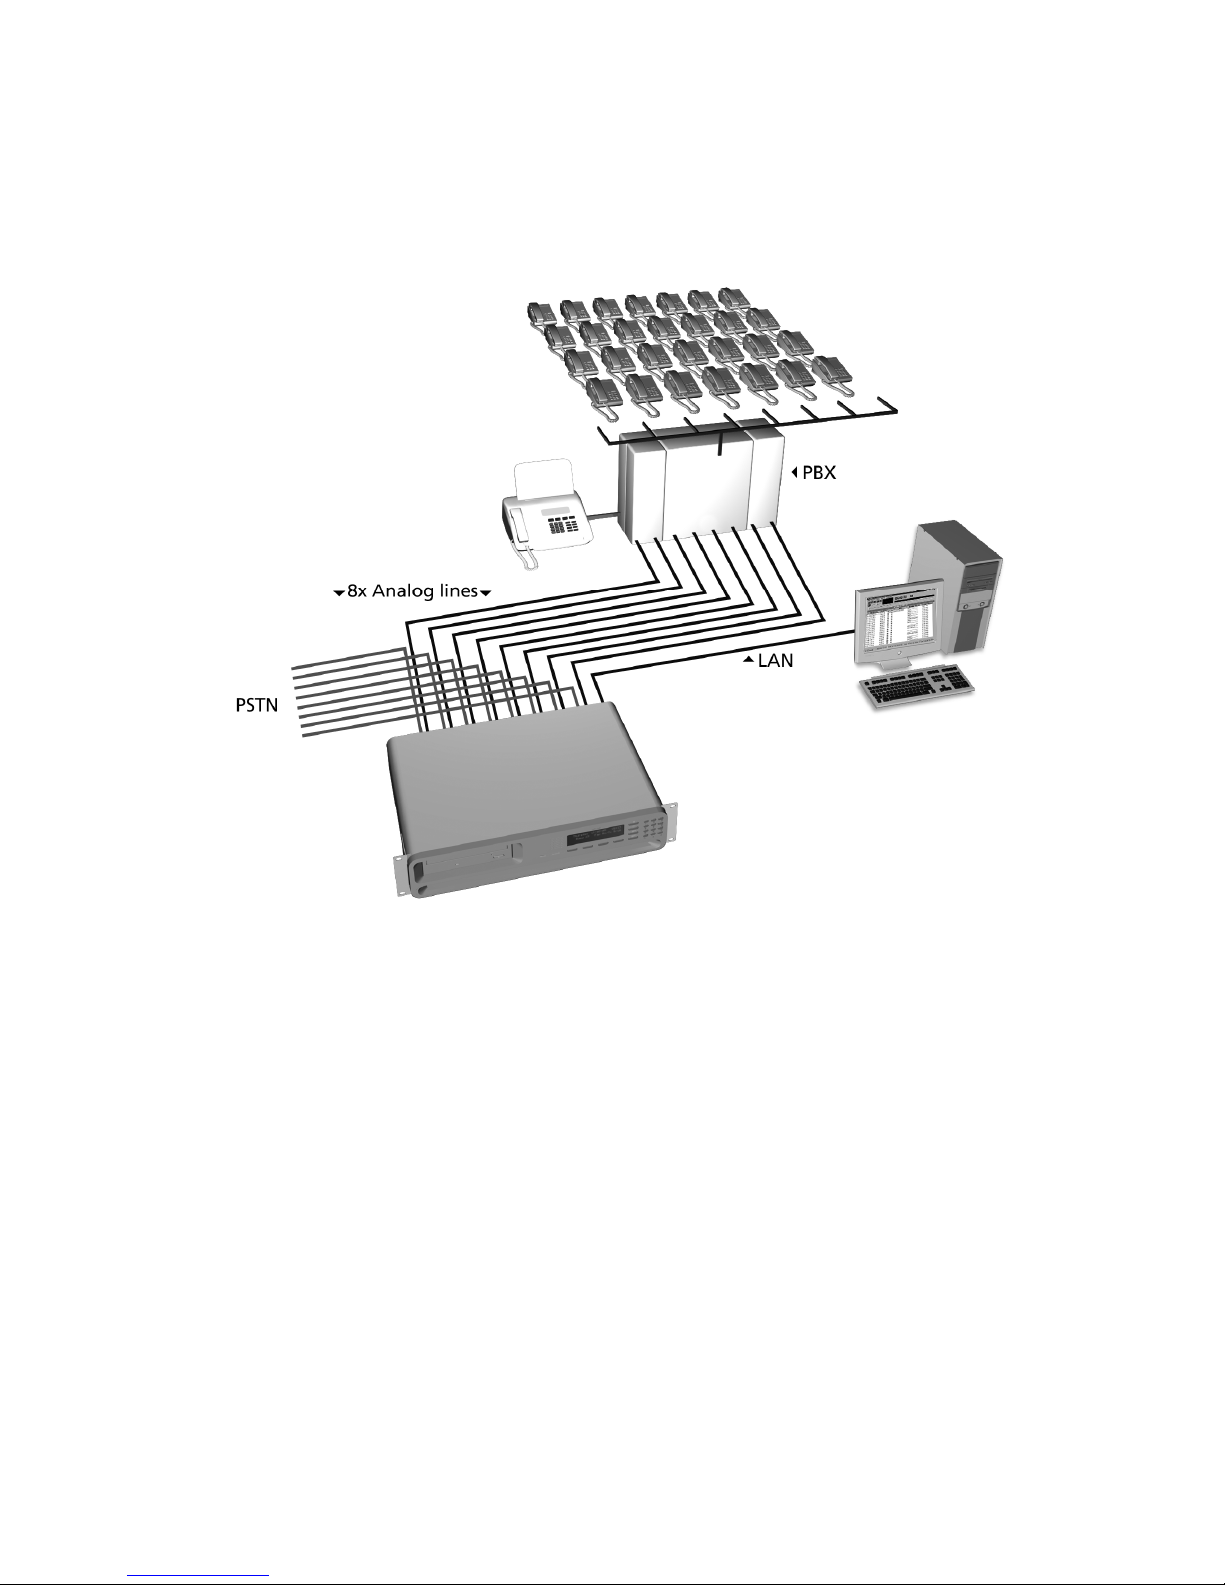
The figure below is an example of a possible setup of the Call Recorder
Octo.
For the Call Recorder Quarto the possible set-up is identical, but only for
four channels or analogue lines.
Page 19
Manual Call Recorder Octo | Quarto © Vidicode 2010
19
3333 Configurati
ConfiguratiConfigurati
Configuration and operation
on and operationon and operation
on and operation
After connecting the hardware the Octo | Quarto can be configured. In
this chapter you are guided through the user interface. In the following
chapters we guide you with the configuration.
Use the keyboard of the Octo | Quarto
• to make the required changes in the System Settings
• to make the required changes in the Network settings
• to edit the number list and attach e-mail addresses to the numbers.
• to arrange the user profiles and limit or extend the access to the
Octo | Quarto
3.1 Operation basics
The Call Recorder has a common menu driven user interface. Most
functions and operations are initiated by pressing a function key
followed by a sequence of menu keys of which the function is
determined by the text in the display.
3.1.1 How to use the keys
Function keys
Function keysFunction keys
Function keys
The most frequently used functions of the Call Recorder have been
grouped in the function keys. Throughout the entire manual, symbols
representing the function keys are used to indicate the function key
corresponding to the described function.
Page 20
Manual Call Recorder Octo | Quarto © Vidicode 2010
20
Menu keys
Menu keysMenu keys
Menu keys
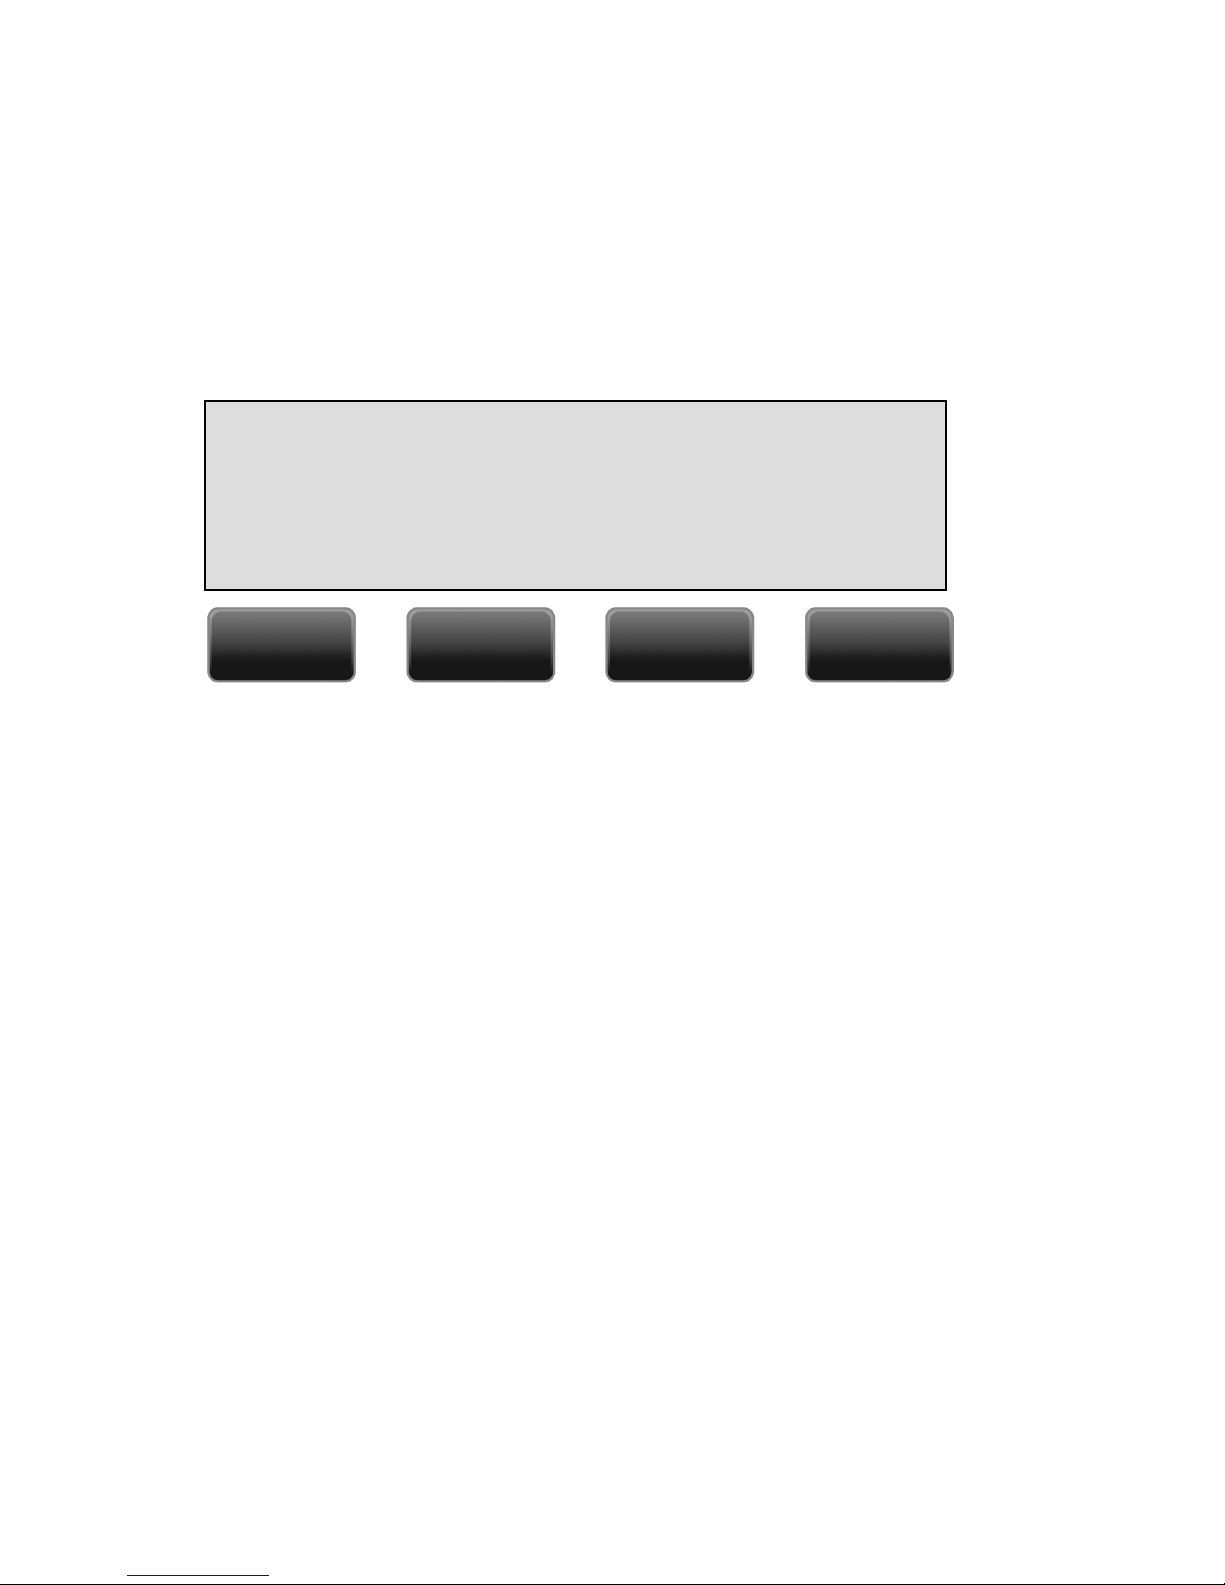
After pressing a function key the available functions are assigned to the
four menu keys. The function assigned to the menu keys is shown in the
display, right above the menu key.
Throughout the manual figures representing the display without the
menu keys are used to show the required action corresponding to the
described feature.
Example with the keys:
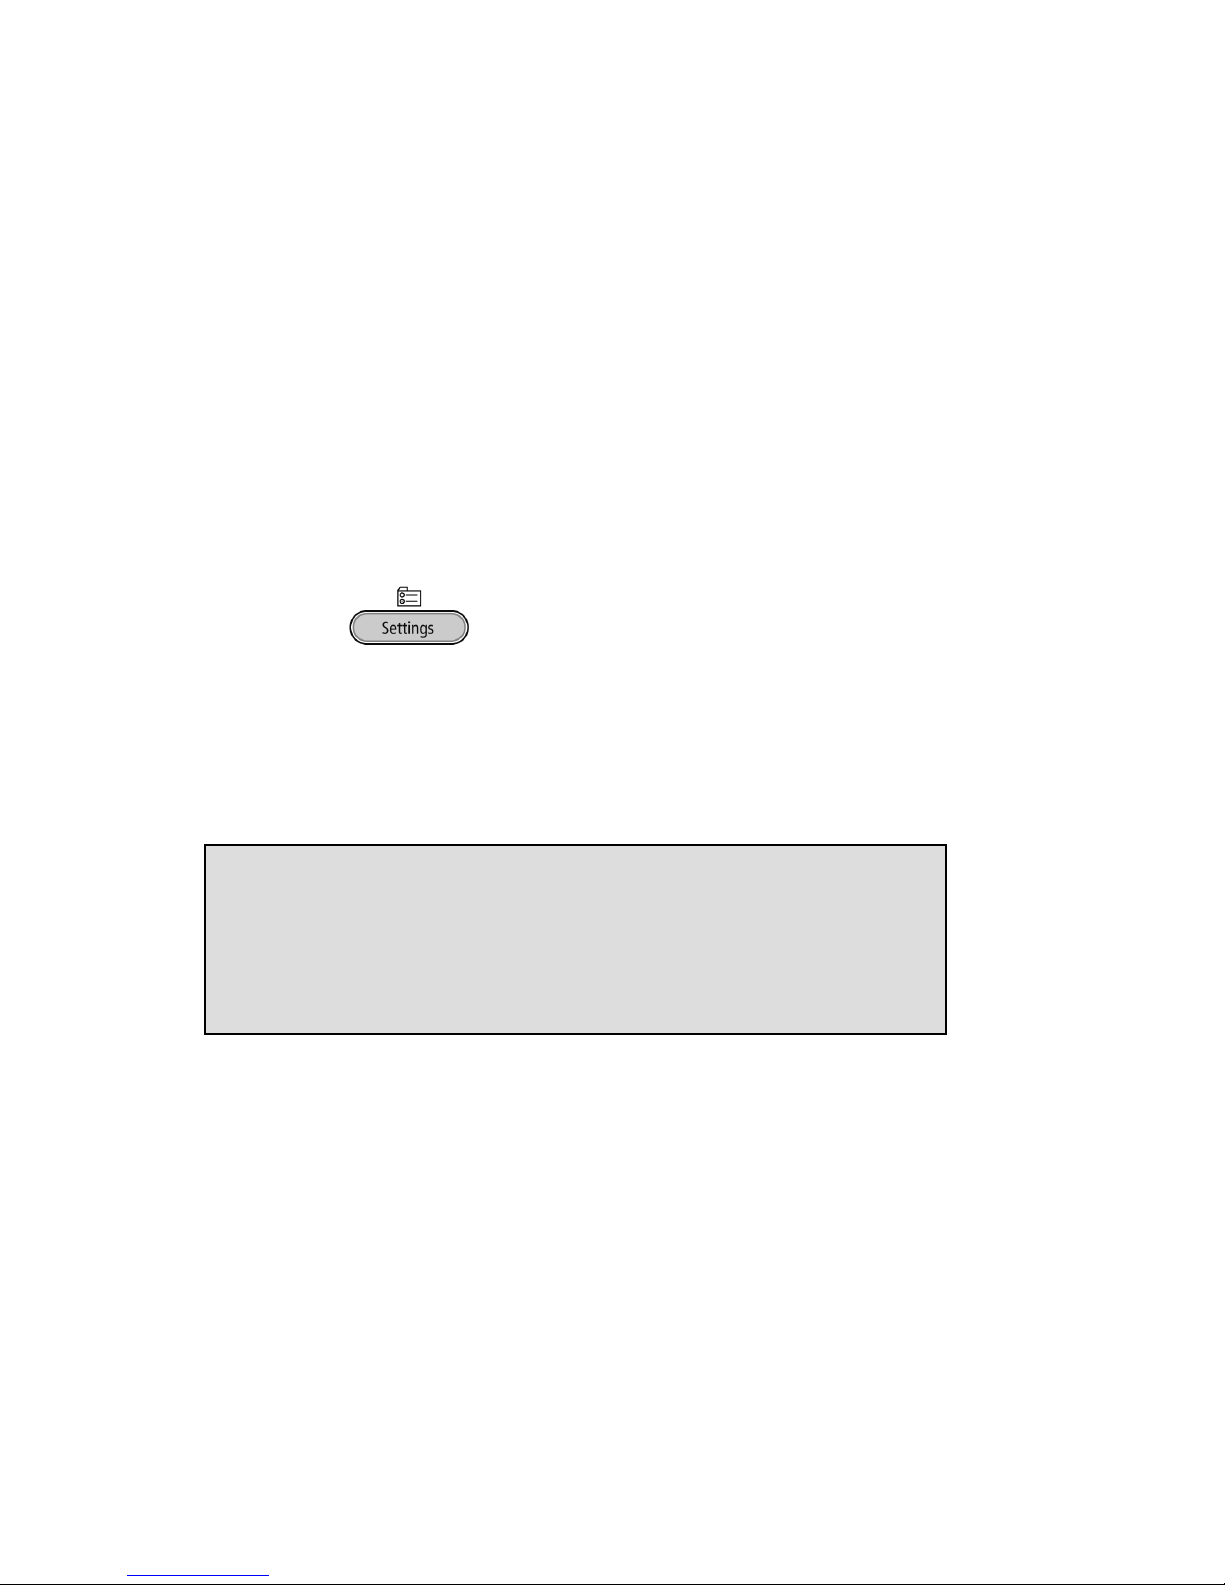
When you are instructed to press the SYSTEM key in the text it means
you are instructed to press the grey key below the text SYSTEM in order
to open the System setting menu.
3.2 Frequently used key indicators
The following menu key functions are consistently used throughout the
manual.
NEXT
NEXTNEXT
NEXT in the display indicates the presence of more menu items
Press NEXT
NEXTNEXT
NEXT to jump to the following menu item
CHANGE
CHANGECHANGE
CHANGE will toggle the item in the display between "On" and "Off"
In some cases CHANGE
CHANGECHANGE
CHANGE is used to increase or decrease a value.
ME
MEME
MENU
NUNU
NU in the display indicates the presence of an underlying menu.
Press MENU
MENUMENU
MENU to open the underlying menu.
BACK
BACKBACK
BACK in the display indicates the presence of an embracing menu
Press BACK
BACKBACK
BACK to return to the embracing menu
STOP
STOPSTOP
STOP in the display indicates the absence of an embracing menu
Press STOP
STOPSTOP
STOP to return to operating mode of the Call Recorder
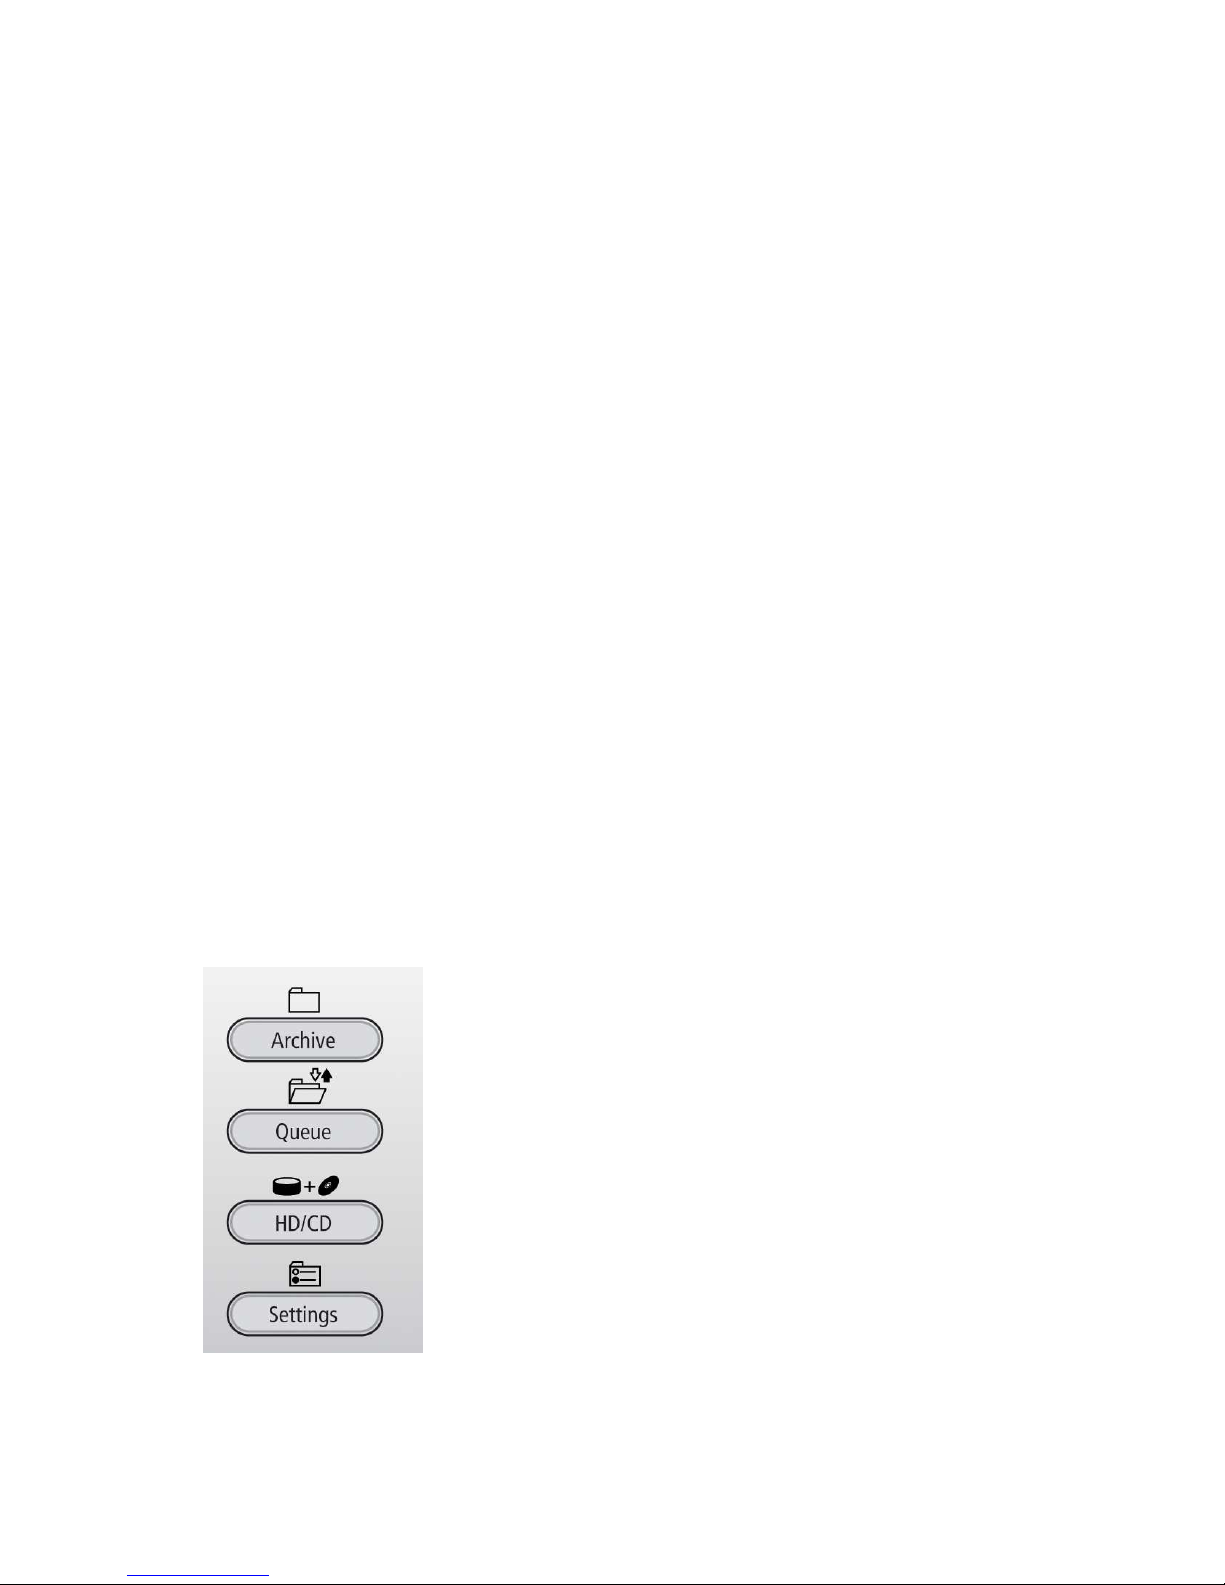
Settings
SYSTEM LAN LIST STOP
Page 21

Manual Call Recorder Octo | Quarto © Vidicode 2010
21
3.3 Save Changes
After changing the settings the user is forced to press YES
YESYES
YES or NO
NONO
NO before
returning to operation mode. Press STOP
STOPSTOP
STOP in the menu and the display
will show:
YES
YESYES
YES returns the Call Recorder to normal use with changed settings
NO
NONO
NO returns the Call Recorder to normal use without changed settings
CANCEL
CANCELCANCEL
CANCEL returns to the settings.
3.4 Initializing CD
A CD recorder is available as an option for the Octo | Quarto.
There are various moments where the CD drive has to be initialized
before it can read and/or write.
During initialization the display will show:
At this point the Octo | Quarto.can not be used for any other function.
The initialization of the CD may take up to 30 seconds.
Initializing CD
Save Changes?
YES NO CANCEL
Page 22

Manual Call Recorder Octo | Quarto © Vidicode 2010
22
Page 23
Manual Call Recorder Octo | Quarto © Vidicode 2010
23
4 Recorder settings
Recorder settings of the Octo | Quarto.consist of the default settings of
the Speaker and Volume, setting of the Clock, optionally protect the Call
Recorder with a password and setting the Language. Finally the Reset all
Reset all Reset all
Reset all
values
valuesvalues
values operation is used to return to the original factory settings of the
Call Recorder. All general settings are made in the Recorder settings
menu.
4.1 Opening the Recorder settings menu
The Call Recorder features line options to be set for each individual line.
The following line options can be set: Start Method, Fax Recording,
Automatic Gain Control, Speech Compression, Notification and Caller ID.
• Press the key.
• Press SYSTEM
SYSTEM SYSTEM
SYSTEM to move to the SYSTEM settings menu’s.
4.2 Line settings
The display will show:
4.3 The telephone line menu's
The configuration options are identical for all eight/four lines.
• Press NEXT
NEXTNEXT
NEXT to select the line that needs to be configured.
• Press MENU
MENUMENU
MENU to start configuring Line 1.
The display will show:
Install Line 1
NEXT MENU STOP
Page 24

Manual Call Recorder Octo | Quarto © Vidicode 2010
24
• Press NEXT
NEXTNEXT
NEXT repeatedly or use the and keys to scroll
through the menu items.
The following menu items will be shown.
4.3.1 Input source
The Input Source
Input SourceInput Source
Input Source setting allows for the selection of Telephone recording
or Audio recording. For telephone recording from analogue phone lines
the Input Source needs to be set to Line
LineLine
Line. For all other applications Audio
AudioAudio
Audio
needs to be selected. When Audio is selected the Call Recorder records
from the audio connections on the front of the device.
The display will show:
• Press NEXT
NEXTNEXT
NEXT to move on to the next menu item or press the line
number to move to the Start method
Start method Start method
Start method setting of the corresponding
line.
4.3.2 Start Method
The Start method
Start methodStart method
Start method refers to the condition the Call Recorder uses to
determine how and when to start recording. When recording from a
telephone line the Off-Hook method should be used. The Call Recorder
detects when the connected telephone becomes Off-Hook and starts
recording. Following the Input Source setting as described above the
display will show:
Install Line 1
Input source: Line
NEXT CHANGE BACK
Install Line 1
Input source: Line
NEXT CHANGE BACK
Page 25

Manual Call Recorder Octo | Quarto © Vidicode 2010
25
• Press CHANGE
CHANGECHANGE
CHANGE to select Off-Hook, Voice or Switch.
If Off-Hook is selected as start method the next item in the menu will be
"Off-Hook Level". This can be set to Low or High depending on the
desired Off-Hook detection sensitivity. Try the other setting when
automatic start and stop of recordings doesn't work properly.
In the Voice mode the Call Recorder monitors the input source for audio
signals and recordings are started accordingly. Voice recording is mainly
used to record from other sources than the telephone, like radio
communication.
Another option is to start and stop recordings with a connected switch.
Some digital telephones have a switch connection for this purpose. If
switch is selected as start method the next item in the menu will be
"Switch type". You can choose between Make or Break indicating
opening or closing the switch to start a recording.
• Press NEXT
NEXTNEXT
NEXT to move on to the next menu item or press the line
number to move to the Start method setting of the
corresponding line.
4.3.3 Rings to Answer
When this parameter is set to any value between 1 and 25, the recorder
will answer the telephone line by itself, as an answering machine. The
notification message is played first and then a recording is started. The
recording is stored on the disk as a normal call recording.
This Automatic Answering feature can also be used for example in the
situation that the recorder is added to a call on the line in conference
mode (3rd party listener).
Install Line 1
Rings to Answer: Off
NEXT - CHANGE + BACK
Install Line 1
Start method: Off-Hook
NEXT CHANGE BACK
Page 26

Manual Call Recorder Octo | Quarto © Vidicode 2010
26
• Press CHANGE
CHANGECHANGE
CHANGE to enable or disable Automatic Answering.
When set the next menu item will be "Silence Period", which is used to
detect a remote hang-up in case there is no normal disconnect tone.
4.3.4 Silence Period
If you have selected Voice
Voice Voice
Voice recording as Start method pressing NEXT
NEXTNEXT
NEXT will
display the Silence Period setting.
The display will show:
• Press ---- or ++++ to alter the Silence Period up to 120 seconds.
Select a value between 1 and 120 seconds. Keep in mind that when a call
is put on hold the audio level drops and the recording is possibly
stopped, when the call resumes a new recording may start again. In
order to keep the call in one recording a larger Silence Period is
suggested. For the recording of radio communication it is preferred to
keep the Silence period small to prevent consecutive communications in
one recording.
4.3.5 Fax Recording
Fax Recording
Fax RecordingFax Recording
Fax Recording configures the line for the recording of fax traffic.
Following the Start method setting as described above the display will
show:
• Press CHANGE
CHANGECHANGE
CHANGE to enable or disable Fax Recording.
When Fax Recording is enabled the Automatic Gain Control, Speech
Compression and Notification are omitted because they interfere with
the fax transmission.
Install Line 1
Fax Recording: Off
NEXT CHANGE BACK
Install Line 1
Silence period: 9s
NEXT - CHANGE + BACK
Page 27

Manual Call Recorder Octo | Quarto © Vidicode 2010
27
• Press NEXT
NEXTNEXT
NEXT to move on to the next menu item or press the line
number to move to the Fax Recording setting of the
corresponding line.
When Fax Recording is enabled the menu will skip the following options
and move straight on to the Caller ID of § 4.3.9.
4.3.6 Automatic Gain Control
Automatic Gain Control
Automatic Gain ControlAutomatic Gain Control
Automatic Gain Control adjusts the recording level of the local and
remote voice to attain similar audio levels during playback of the
recording. Following the Fax Recording setting as described above the
display will show:
• Press CHANGE
CHANGECHANGE
CHANGE to disable or enable Automatic Gain Control.
The audio levels of the local and remote voice may differ substantially
for consecutive calls. Therefore the Automatic Gain Control is enabled as
a standard factory setting.
• Press NEXT
NEXTNEXT
NEXT to move on to the next menu item or press the line
number to move to the Automatic Gain Control setting of the
corresponding line.
4.3.7 Compression
Compression uses the G.723 High Rate compression standard to
compress the digital data of the recording. Following the Automatic
Gain Control setting as described above the display will show:
• Press CHANGE
CHANGECHANGE
CHANGE to disable or enable Compression.
compression reduces the uncompressed data to 1/10th of the size.
Therefore the compression has a profound effect on the storage
capacity of the Call Recorder in terms of recording time. When
compression is turned Off the G.711 A-law standard is used.
Install Line 1
Compression: On
NEXT CHANGE BACK
Install Line 1
Auto Gain Control: On
NEXT CHANGE BACK
Page 28

Manual Call Recorder Octo | Quarto © Vidicode 2010
28
• Press NEXT
NEXTNEXT
NEXT to move on to the next menu item or press the line
number to move to the compression setting of the corresponding
line.
4.3.8 Notification
In some countries or regions a notification tone and/or message is
compulsory while recording telephone conversations. Check local
regulations and obligations.
Notification can be done in two ways. One is a regular repeated beep
sounded to both the local and remote telephones. The other is the
sounding of a recorded spoken message at the beginning of the call.
Following the Compression setting as described above the display will
show:
• Press CHANGE
CHANGECHANGE
CHANGE to change Notification method. Select one of the
following options:
• Tone
• Message
• Tone + Message
• Off
If "Message" is selected in the Notification the next item in the menu
will be "Message Ctrl" with the following options:
• Only incoming
• Always wait
• Always start
• Auto
These options work as follows:
• When "Only incoming" is selected the message will be played
when an incoming call is answered. The message will not be
played on outgoing calls!
Install Line 1
Notification: Off
NEXT CHANGE BACK
Page 29

Manual Call Recorder Octo | Quarto © Vidicode 2010
29
• When "Always Wait" is selected the message is only played when
the Call Recorder receives a key DTMF tone. After the message
is played the recording is started.
• When "Always Start" is selected the message is played directly at
the start of a call and recording is started directly after the
message.
• When "Auto" is selected the message is played automatically for
incoming calls. For outgoing calls the message is played when a
DTMF tone is received. Recording of the outgoing call is started
directly after that.
The notification is disabled as standard. Please refer to § 6.1 how to
record the message.
• Press NEXT
NEXTNEXT
NEXT to move on to the next menu item or press the line
number to move to the Notification tone setting of the
corresponding line.
4.3.9 Caller ID
Caller ID will show the telephone number of the remote telephone.
Following the Notification setting as described above the display will
show:
• Press CHANGE
CHANGECHANGE
CHANGE to select Caller ID method.
Caller ID has two basic methods; DTMF and FSK. Either one can be active
or passive. "Active" means Caller ID is activated by the Call Recorder,
"passive" means Caller ID is activated by another device on the line.
Caller ID must be supported by your service provider. Contact your
service provider for details. The Caller ID setting is the last option in the
Line installation menu.
• Press BACK
BACKBACK
BACK to return to the configuration menu.
The display will then show the first configuration screen, where we
started this section:
Install Line 1
Caller ID: Off
NEXT CHANGE BACK
Page 30

Manual Call Recorder Octo | Quarto © Vidicode 2010
30
• Press NEXT
NEXTNEXT
NEXT multiple times to select the Installation menus of the
other lines or press STOP
STOPSTOP
STOP to exit the configuration menu.
The following paragraph gives a description of the setting of the signal
levels for Voice activated recording.
4.3.10 Inactive time
The time period can be set per hour. Inactivity detection is meant as an
extra safety for unattended usage of the recorder. After detecting the
inactive period, the recorder will send an e-mail to notify the operator.
4.4 Speaker
The Speaker
SpeakerSpeaker
Speaker setting controls the standard speaker status when the
monitor function is started. That is if a specific line is monitored and the
line becomes active the call can be heard directly through the speaker.
• Press CHANGE
CHANGECHANGE
CHANGE to disable or enable the Speaker.
• Press NEXT
NEXTNEXT
NEXT to continue in the menu with the Volume setting or
press STOP
STOPSTOP
STOP to exit the settings menu.
Install Line 1
Inactive time: Off
- CHANGE + BACK
Speaker: On
NEXT CHANGE STOP
Install Line 1
NEXT MENU STOP
Page 31

Manual Call Recorder Octo | Quarto © Vidicode 2010
31
4.5 Volume
The Volume
VolumeVolume
Volume setting determines the speaker volume when the monitor
function is started.
• Press softkeys + or - to increase or decrease volume by one step.
• Press NEXT
NEXTNEXT
NEXT to continue in the menu with the Numberlist setting
or press STOP
STOPSTOP
STOP to exit the settings menu.
4.6 Numberlist
The Numberlist
NumberlistNumberlist
Numberlist is used to include or exclude telephone numbers from
recording. See the description of the numberlist in Chapter 6. The
setting Numberlist determines whether the numberlist is used as a
blacklist or whitelist.
• Press CHANGE
CHANGECHANGE
CHANGE to select Off, Black or White.
• Default the Numberlist is set to Off.
Off.Off.
Off.
• Press NEXT
NEXTNEXT
NEXT to continue in the menu with the CryptoCard
CryptoCardCryptoCard
CryptoCard setting
or press STOP
STOPSTOP
STOP to exit the settings menu.
4.7 CryptoCard
The CryptoCard
CryptoCardCryptoCard
CryptoCard is used for encrypting recordings. See Chapter 9 for a
detailed description. In the standard configuration the CryptoCard
function is disabled. With the CryptoCard function enabled all
recordings will be encrypted and is it no longer possible to make
recordings without a CryptoCard.
Numberlist: Black
NEXT CHANGE STOP
Volume: 11
NEXT + CHANGE - STOP
Page 32

Manual Call Recorder Octo | Quarto © Vidicode 2010
32
• Press CHANGE
CHANGECHANGE
CHANGE to enable or disable the CryptoCard function.
When the CryptoCard function is enabled and there is no card inserted
the Call Recorder will sound a warning and also displays:
The warning will disappear when a valid card is inserted. When the
CryptoCard has been enabled the Call Recorder's next menu item will be
the possibility to change the PIN of the CryptoCard. See § 9.2 for a
detailed description.
• Press NEXT
NEXTNEXT
NEXT to continue in the menu with the CCCCD Copy
D CopyD Copy
D Copy setting or
press STOP
STOPSTOP
STOP to exit the settings menu.
4.8 CD Copy
The CD Copy
CD CopyCD Copy
CD Copy setting can be set to Single
SingleSingle
Single or Double
Double Double
Double or OFF
OFFOFF
OFF. When set to
Single the Call Recorder will automatically copy all recordings to CD as a
means of single backup. When set to Double the Call Recorder will
automatically copy all recordings to CD as a means of backup just as
when CD Copy is set to Single. The difference is that each following CD
will be started with the last half of the recordings of the previous CD,
thereby creating a double backup. Downside to the Double CD Copy is
that the effective CD capacity is reduced to half that of the original
capacity.
CD Copy: Single
NEXT CHANGE STOP
Friday 04-04-08 15:39
Please insert CryptoCard
CryptoCard: Off
NEXT CHANGE STOP
Page 33

Manual Call Recorder Octo | Quarto © Vidicode 2010
33
• Press CHANGE
CHANGECHANGE
CHANGE to select Single
SingleSingle
Single, Double
DoubleDouble
Double or turn “CD Copy” Off
OffOff
Off.
• Default CD Copy is set to OFF
OFFOFF
OFF. If Double is selected for the first
time the first half of the first CD is filled with empty files.
• Press NEXT
NEXTNEXT
NEXT to continue in the menu with the CD Copy time
CD Copy timeCD Copy time
CD Copy time or
Auto Delete
Auto Delete Auto Delete
Auto Delete setting or press STOP
STOPSTOP
STOP to exit the settings menu.
4.9 CD Copy time
If in the previous item the CD Copy
CD CopyCD Copy
CD Copy parameter is set to Single
SingleSingle
Single or Double
DoubleDouble
Double
the CD Copy time
CD Copy timeCD Copy time
CD Copy time is the next item in the menu. If in the previous item
the CD Copy parameter is set to Off
OffOff
Off, Auto Delete
Auto DeleteAuto Delete
Auto Delete is the next item in the
menu, see the next paragraph.
The CD Copy time determines the time of the day when the recordings
are copied to the CD. Copying a group of recordings at the same time
prevents the CD drive to be started and stopped continuously. The CD
Copy operation takes place once a day, preferably at a time when the
phones are least busy.
• Press CHANGE
CHANGECHANGE
CHANGE to select the time, use + or – to increase or
decrease by steps of 15 min.
• Press NEXT
NEXTNEXT
NEXT to continue in the menu with the Auto Delete
Auto Delete Auto Delete
Auto Delete setting
or press STOP
STOPSTOP
STOP to exit the settings menu.
4.10 Auto Delete
The Auto Delete function is a feature meant to protect the privacy of
the people that are recorded. It is also there to be able to comply with
legal situations where recordings are not allowed to exist longer then a
certain period.
CD Copy time: 00:00
NEXT - CHANGE + BACK
Page 34

Manual Call Recorder Octo | Quarto © Vidicode 2010
34
• Press ++++ or ---- to increase or decrease the number of days. Select a
value between 1 and 400 days or choose Off to turn the feature
Off
OffOff
Off.
• Press NEXT
NEXTNEXT
NEXT to continue in the menu with the Password
PasswordPassword
Password setting or
press STOP
STOPSTOP
STOP to exit the settings menu.
4.11 Protect the Call Recorder with a
Password
The Call Recorder can be protected with a Password
Password Password
Password against
unauthorized use. When password protection has been enabled all
actions that change the operation of the Call Recorder require the
correct password to be entered first.
• Press CHANGE
CHANGECHANGE
CHANGE to enter a password using the Numeric Keypad.
• Press STORE
STORESTORE
STORE.
New Password: »
STORE << CANCEL
Password: Off
NEXT CHANGE STOP
Auto Delete: 3 days
NEXT - CHANGE + STOP
Page 35

Manual Call Recorder Octo | Quarto © Vidicode 2010
35
• Press STORE
STORESTORE
STORE to enable the entered password.
• Press NEXT
NEXTNEXT
NEXT to continue in the menu with the Clock setting
Clock settingClock setting
Clock setting (§
4.13) of the Call Recorder or the Remove Password Protection
Remove Password ProtectionRemove Password Protection
Remove Password Protection or
press STOP
STOPSTOP
STOP to exit the configuration menu.
If the Password has been set you will be prompted for the password
before entering the menus and before playback of recordings.
Repeat Pasword: »
STORE << CANCEL
Page 36

Manual Call Recorder Octo | Quarto © Vidicode 2010
36
4.12 Remove Password protection
To remove password protection, do the following:
• Press CHANGE
CHANGECHANGE
CHANGE to disable the password (On
OnOn
On changes to Off
OffOff
Off again).
The password protection has now been disabled.
• Press NEXT
NEXTNEXT
NEXT to continue in the menu with the Clock setting
Clock settingClock setting
Clock setting of the
Call Recorder or press STOP
STOPSTOP
STOP to exit the configuration menu.
4.13 Set the Clock
• To set the Clock
ClockClock
Clock do the following:
• Press CHANGE
CHANGECHANGE
CHANGE to change the setting of the clock.
• Press key's 1-7 to set the day of the week starting with 1 for
Sunday.
Clock: »ri 04-01-08 15:09
STORE << >> CANCEL
Clock: Fri 04-01-08 15:09
NEXT CHANGE STOP
Password: On
NEXT CHANGE STOP
Page 37

Manual Call Recorder Octo | Quarto © Vidicode 2010
37
The default date and time format is DD-MM-YY and mm:HH (when
American has been set as language the format is changed to MM-DDYY). Use the arrowed keys to move the blinking character left or right.
• Press STORE
STORESTORE
STORE to store the changes or press CANCEL
CANCELCANCEL
CANCEL to return to the
previous values.
• Press NEXT
NEXTNEXT
NEXT to continue in the menu with the Language setting of
the Call Recorder or press STOP
STOPSTOP
STOP to exit the configuration
configurationconfiguration
configuration menu.
4.14 Set the Language
• To set the Language
LanguageLanguage
Language do the following:
• Press CHANGE
CHANGECHANGE
CHANGE multiple times to select the preferred language.
• Press NEXT
NEXTNEXT
NEXT to continue in the menu with the Reset all values
Reset all valuesReset all values
Reset all values
operation or press STOP
STOPSTOP
STOP to exit the configuration menu.
4.15 Reset all values
Use Reset all values
Reset all valuesReset all values
Reset all values to reset all system values.
• Press CHANGE
CHANGECHANGE
CHANGE to enable the Reset all values operation.
• Press STOP
STOPSTOP
STOP to execute the Reset all values
Reset all valuesReset all values
Reset all values operation.
Reset al values: Yes
CHANGE STOP
Reset all values: No
CHANGE STOP
Language: English
NEXT CHANGE STOP
Page 38

Manual Call Recorder Octo | Quarto © Vidicode 2010
38
Attention
AttentionAttention
Attention
::::
Reset all values operation will disable password protection
and LAN settings are also lost.
Page 39

Manual Call Recorder Octo | Quarto © Vidicode 2010
39
5 Search, playback, CD copy and monitoring
All stored recordings can be played back on the Call Recorder. To play a
certain recording it has to be found and selected first. To find a
recording the Call Recorder has a search function. The search function is
described in § 5.2.
The Call Recorder also has a simpler and faster way to play the last
recorded call. Playback of a selected recording is the same as playback of
the last recording as described in the following paragraph.
5.1 Playing the last recorded call
• Press the Playback key to open the playback menu.
The display will show:
• Press LAST
LASTLAST
LAST to play the last recording.
• Press the key to start playback of the selected recording.
The display will show:
The display shows the remote telephone number. Next to that is the
arrow indicating an incoming or outgoing call and the duration of the
call. Below that is the date and time of the call, the line number and the
current playback position.
During playback the recorder keys have the usual recorder functions.
The
and recorder keys are used to move the playback
Remote number 00:01:11
04-01-08 15:39 3 00:00:03
Playback Calls
CD DISK LAST STOP
Page 40

Manual Call Recorder Octo | Quarto © Vidicode 2010
40
position 60 seconds backward or forward. The and recorder
keys are used to move the playback position 300 seconds backward or
forward. The key is used to stop playback.
For playback of older stored recordings it is required to select the
recording first. Read the next paragraph for an explanation on how to
search for the desired recording.
5.2 Search stored recordings
The Call Recorder has a search function to find stored recordings. The
search function starts with prompting for the date. The search can be
further refined by a search according to remote number and line
number. The entered search string for the date will always be preceded
by the remote number, which in turn precedes the line number.
Wildcards (****) can be used to search for remote number or line number
only.
• Press the Playback key to open the playback menu.
The display will show:
• Press CD
CD CD
CD or DISK
DISK DISK
DISK to open the search menu.
The display will show:
• Use the numerical keys to enter a date.
Calls from »4-01-08
SEARCH NUMBER STOP
Playback Calls
CD DISK LAST STOP
Page 41

Manual Call Recorder Octo | Quarto © Vidicode 2010
41
Entering the date or code to search for. You can use the key as
wildcard. For example enter :01:08 to search for all messages from
Jan 2008.
It is also possible to refine the search according to remote telephone
number or line number. In that case continue to read on § 5.2.1.
• Press SEARCH
SEARCHSEARCH
SEARCH to search for recordings by the entered date.
The display will show:
For the entered date 04-01-08 there were 75 recordings found. The first
of the 75 recordings is selected for playback, the date and time of the
call is displayed to the left. Use the
and keys to move the
selected recording one up or down.
• Press the key to start playback of the selected recording.
The display will show:
The display shows the remote number. Next to that is the arrow
indicating an incoming or outgoing call and the duration of the call.
Below that is the date and time of the call, the line number and the
current playback position.
During playback the recorder keys have the usual recorder functions.
The and recorder keys are used to move the playback
position 60 seconds backward or forward. The
and recorder
keys are used to move the playback position 300 seconds backward or
Remote number 00:01:11
04-01-08 15:39 3 00:00:03
04-01-08 15:39 1/75
SEARCH NUMBER STOP
Page 42

Manual Call Recorder Octo | Quarto © Vidicode 2010
42
forward. The key is used to stop playback. The next section
describes how to refine your search in tracing for a specific number.
5.2.1 Refined search according to remote number
Open the search menu as described in § 5.2. Enter the date of the
recording that you want to search for or enter wildcards to search for all
recordings with the same remote number. Remember that the entered
date will always be incorporated in the search.
• Press NUMBER
NUMBERNUMBER
NUMBER to enter a number to search for.
The display will show:
• Use the numerical keys to enter a remote number.
Entering the remote number to search for you can use the key as
wildcard. For example enter 03520 to search for all recordings which
start with the number 03520. It is also possible to refine the search even
further according to line number. In that case continue to read on §
5.2.2.
• Press SEARCH
SEARCHSEARCH
SEARCH to search for recordings with the entered number.
5.2.2 Refined search according to line number
It is possible to refine your search even further according to line number.
This is done by performing the search described in the paragraphs
above. Remember that the entered date and remote number will always
be incorporated in the search. Use wildcards as described to widen your
search. After entering the remote number to search for the display will
show:
• Press LINE
LINELINE
LINE to refine your search according to line number.
Number 07936*»
SEARCH LINE STOP
Number »_________________
SEARCH LINE STOP
Page 43

Manual Call Recorder Octo | Quarto © Vidicode 2010
43
The display will show:
• Enter the number of the line that you want to search.
• Press SEARCH
SEARCHSEARCH
SEARCH to execute the search.
The display will show:
The search has resulted in two recordings found. The first of the two
recordings is selected for playback, the date and time of the call is
displayed to the left. Use the
and keys to move the
selected recording one up or down.Press the key to start
playback of the selected recording.
During playback the recorder keys have the usual recorder functions.
The and recorder keys are used to move the playback
position 60 seconds backward or forward. The and recorder
keys are used to move the playback position 300 seconds backward or
forward. The key is used to stop playback.
5.3 Copy recordings to CD
There are two possibilities for copying recordings from the hard disk to
CD.
5.3.1 Copy an individual recording
First select the recording you want to copy as described above.
04-01-08 15:39 1/2
SEARCH DATE STOP
Line Number = »
SEARCH DATE STOP
Page 44

Manual Call Recorder Octo | Quarto © Vidicode 2010
44
• Press the function key.
The display will show:
• Press YES
YESYES
YES to start copying the recording.
When the recording has been copied the display will show:
• Press STOP
STOPSTOP
STOP to finish.
Beware
BewareBeware
Beware: After copying the recording the CD is not yet usable for the PC.
To make the CD usable for the PC a directory has to be created. Please
see § 7.3 for a description.
5.3.2 Copy a selection of recordings
First define the search to locate the recordings you want to copy as
described above.
The display will show:
Copy completed
STOP
Copy Recordings to CD
YES Start? NO
04-01-08 15:39 1/75
SEARCH NUMBER STOP
Page 45

Manual Call Recorder Octo | Quarto © Vidicode 2010
45
• Press the
function key instead of SEARCH
SEARCHSEARCH
SEARCH.
The display will show:
• Press YES
YESYES
YES to start copying the recording.
When the recording has been copied the display will show:
• Press STOP
STOPSTOP
STOP to finish.
Beware
BewareBeware
Beware: After copying the recording the CD is not yet usable for the PC.
To make the CD usable for the PC a directory has to be created. Please
see § 7.3 for a description.
5.4 Monitoring
Monitoring of the telephone lines is a separate feature of the Call
Recorder that allows the user to listen in on the telephone
conversations.
Finished. (Files in Queue)
STOP
Recordings found: 75
Copy to CD?
YES NO
Calls from »4-01-08
SEARCH NUMBER STOP
Page 46

Manual Call Recorder Octo | Quarto © Vidicode 2010
46
• Press the or or function key button to select
the next line number,
• or press the or or function key button to
select the previous line number.
The display will show:
• Press to activate the monitor
• The display will show:
• Pressing the key again toggles the speaker on or off.
• Change again lines by pressing the , , ,
, or keys.
• Stop the monitor by pressing soft-key STOP
STOPSTOP
STOP or pressing the
key.
Line 3 - 07936181
Free
Monitor on line 3
Line 3 - 07936181
Free
Page 47

Manual Call Recorder Octo | Quarto © Vidicode 2010
47
6 Notification message and Numberlist
In this chapter the recording of the notification message is described
and the use of the numberlist is explained.
The notification message is used to announce to the remote party that
the call is being recorded. The activation and setting of the notification
message is described in § 4.3.8.
The numberlist can be used as Blacklist or Whitelist and can contain 250
numbers. Using the list as Blacklist means the calls to or from the
numbers in the list are not recorded. Conversely, when the numberlist is
used as Whitelist the calls to and from the numbers in the list are
recorded while the rest of the calls are not. The selection of Whitelist or
Blacklist is described in § 4.6.
6.1 Record notification message
To record the notification message do the following:
Connect the supplied headset. The black connector is the loudspeaker,
the red connector is the microphone.
Press the to enter the Settings menu, then softkey NOTIF
The display will show:
• Press the Softkey REC or the key to record the message.
• Speak the message into the microphone of the headset.
• Press the Softkey STOP or the key when you are finished.
• Press the Softkey PLAY or the
key to listen to the recorded
message.
Notification message
PLAY REC DELETE STOP
Page 48

Manual Call Recorder Octo | Quarto © Vidicode 2010
48
• When you are satisfied with the recording press STOP
STOPSTOP
STOP.
• When you want to record again press DELETE
DELETEDELETE
DELETE.
6.2 View the numberlist
• Press the to enter the Settings menu, then softkey
LIST.
The display will show:
The number "0123456789" is the first of 3 numbers in the list.
• Press NEXT
NEXTNEXT
NEXT to view the next number in the list
• or use the and keys to scroll through the list.
6.3 Add a number to the list
To add a number to the numberlist you need to view the list first as
described above.
• Press NEW
NEWNEW
NEW to add a number to the list.
The display will show:
• Enter the number that needs to be added to the list.
Wildcards are allowed to enter a range of numbers, e.g. 079 will block
or include all the numbers that start with 079.
• Press STORE
STORESTORE
STORE to add the number to the list.
Number:
CANCEL
Blacklist - 1/3
NEXT NEW DELETE STOP
Page 49

Manual Call Recorder Octo | Quarto © Vidicode 2010
49
• Press STOP
STOPSTOP
STOP to leave the numberlist-menu to acknowledge and
save the changes.
6.4 Remove a number from the list
To remove a number from the numberlist you need to view the list first
as described above. Select the number you want to remove from the list.
The display will show:
• Press DELETE
DELETEDELETE
DELETE to remove the number from the list.
The display will show:
• Press YES
YESYES
YES to remove the number from the list.
• Press STOP
STOPSTOP
STOP to leave the numberlist-menu to acknowledge and
save the changes.
Blacklist - 1/3
0123456789
YES Delete? NO
Blacklist - 1/3
0123456789
NEXT NEW DELETE STOP
Page 50

Manual Call Recorder Octo | Quarto © Vidicode 2010
50
Page 51

Manual Call Recorder Octo | Quarto © Vidicode 2010
51
7 Using the CD drive and the CD menu
Most Call Recorder recorders have a CD drive. The CD drive is used to
copy recordings onto CD recordable for backup purposes.
7.1 The CD menu
The following paragraphs describe the operation of the CD functions
that are grouped in the disk menu. The disk menu is opened with the
Disk function key .
7.2 Free time left on CD
• Press the function key to enter the cd menu.
The display will show:
The number in the display is an indication of the available recording
space on the CD in units of hours and corrected for the selected
compression mode. Effectively the available recording space is slightly
smaller due to space consumed when a directory is being made. The
available time free on disk also depends on the kind of compression
used. See § 4.3.7 for details.
7.3 Create CD directory
Creating a directory on the CD is needed to make a CD usable for the PC.
• Press NEXT
NEXTNEXT
NEXT once.
The display will show:
Create CD Directory
NEXT EJECT START STOP
Free on CD = 250 hours
NEXT EJECT STOP
Page 52

Manual Call Recorder Octo | Quarto © Vidicode 2010
52
• Press START
STARTSTART
START to start creating a directory.
The display will show:
• Press OPEN
OPENOPEN
OPEN or CLOSE
CLOSECLOSE
CLOSE to create an open or closed directory.
An "open directory" leaves the remaining space on the CD open for
recording. A "closed directory" disables the CD for further recording.
Important
ImportantImportant
Important:
: :
: A CD Directory will include only the recordings that are on
the CD when making the directory!
7.4 Erase CD Re-writable
If a CD-rewritable is used the recordings on the CD can be erased
selectively.
• Press NEXT
NEXTNEXT
NEXT two times.
The display will show:
• Press STA
STASTA
START
RTRT
RT to proceed erasing the CD
The display will show:
• Press QUICK
QUICKQUICK
QUICK or FULL
FULLFULL
FULL to proceed
• Choose QUICK
QUICKQUICK
QUICK to erase the CD directories only.
Erase CD Re-Writable?
QUICK FULL BACK
Erase CD Re-Writable?
NEXT EJECT START STOP
Create CD Directory
OPEN CLOSE CANCEL
Page 53

Manual Call Recorder Octo | Quarto © Vidicode 2010
53
• Choose FULL
FULLFULL
FULL to erase the entire CD.
The display will show:
• Press YE
YEYE
YESSSS to start erasing.
When the Call Recorder is finished erasing the display will show:
• Press STOP
STOPSTOP
STOP to finish.
7.5 Software update
The Call Recorder has the ability to update its own internal operating
software from CD.
• Press NEXT
NEXTNEXT
NEXT three times.
The display will show:
• Place the CD with the software update in the CD drive and press
START
STARTSTART
START
It may take a few seconds for the Call Recorder to recognize the CD.
The display will show:
Software update
EJECT START STOP
CD Erase completed
EJECT STOP
CD Quick Erase?
YES Start? NO
Page 54

Manual Call Recorder Octo | Quarto © Vidicode 2010
54
• Press YES
YESYES
YES to start the software update.
While searching for the update the display will show:
The various software components will be updated automatically when
newer versions have been found. During the updating the display will
show:
WARNING!
WARNING! WARNING!
WARNING! Do not interrupt the Call Recorder in any way at this point!
Interrupting the software update may cause an un-resolvable failure in
the Call Recorder!
When the Call Recorder is finished the display will show:
• Press STOP
STOPSTOP
STOP to finish.
The recordings in memory and your settings will remain intact after the
software update.
Update finished
STOP
One moment please!
Software update
Busy.... ...
Software update
YES Start? NO
Page 55

Manual Call Recorder Octo | Quarto © Vidicode 2010
55
8 The Hard disk menu
The Call Recorder has a hard disk menu with merely some statistical
information.
Press the function key 2x to open the disk menu.
The display will show:
In this example there is 13840 hours of free recording space on the hard
disk. Note that the free recording space on disk is corrected for the
selected compression mode. See § 4.3.7 for details.
• Press NEXT
NEXTNEXT
NEXT to continue with the Oldest recording.
The display will show:
The date of the oldest recording on the hard disk is displayed.
• Press NEXT
NEXTNEXT
NEXT to continue with the Total number of recordings
The display will show:
The total number of recordings is displayed.
• Press STOP
STOPSTOP
STOP to leave the disk menu.
Total recordings: 75
STOP
Oldest recording: 04-01-08
NEXT STOP
Free on Disk: 13480 Hours
NEXT STOP
Page 56

Manual Call Recorder Octo | Quarto © Vidicode 2010
56
Page 57

Manual Call Recorder Octo | Quarto © Vidicode 2010
57
9 Encrypted recording
Encrypted recordings are made to prevent unauthorized playback of and
listening to recordings. The Call Recorder uses a CryptoCard to encrypt
recordings. The CryptoCard is a chip card that holds the key to the
encryption and decryption. Encrypted recordings can only be played
back with the original or a matching CryptoCard.
The Call Recorder is equipped with an internal card reader specifically
for this purpose. CryptoCards can be obtained from your Call Recorder
supplier. The use of the CryptoCard encryption function is controlled in
the Recorder settings menu. See § 4.6 to enable the use of a CryptoCard.
Page 58

Manual Call Recorder Octo | Quarto © Vidicode 2010
58
9.1 Insert CryptoCard into Call Recorder
First unpl
First unplFirst unpl
First unplug the power
ug the powerug the power
ug the power cord as there are
cord as there arecord as there are
cord as there are d
d d
dangerous voltages inside
angerous voltages insideangerous voltages inside
angerous voltages inside!!!!
Unscrew and lift the top of the enclosure as shown in the schematic
figure below. Locate the chip card holder in the top right hand side and
insert the card in the proper orientation as shown.
Page 59

Manual Call Recorder Octo | Quarto © Vidicode 2010
59
9.2 The CryptoCard
The CryptoCard The CryptoCard
The CryptoCard and its PIN and PUC code
and its PIN and PUC code and its PIN and PUC code
and its PIN and PUC code
The CryptoCard is supplied with a PUC code and a PIN code. The PIN is a
four-digit code and is requested by the Call Recorder to enable playback
of recordings. The PUC code is a twelve-digit code and is used only when
the card has been disabled.
The PIN can be changed. This can be done only when the “Use
CryptoCard” function has been enabled. See § 4.6 to enable the use of a
CryptoCard.
• Press the and SYSTEM function key.
• Press NEXT
NEXTNEXT
NEXT twelve times.
The display will show:
• Press CHANGE
CHANGECHANGE
CHANGE to change the card code.
First enter the original card code.
• Press CONTINUE
CONTINUECONTINUE
CONTINUE.
Enter the new card code.
• Press CONTINUE
CONTINUECONTINUE
CONTINUE.
Repeat the new card code for confirmation.
• Press CONTINUE
CONTINUECONTINUE
CONTINUE.
The display will show:
New Car Code accepted
STOP
Change Card Code
NEXT CHANGE STOP
Page 60

Manual Call Recorder Octo | Quarto © Vidicode 2010
60
A CryptoCard allows for two invalid PIN entries. After the third invalid
PIN entry the CryptoCard is disabled. The next time the Call Recorder will
ask for the PUC to enable the card again. The CryptoCard allows for
four invalid PUC entries. After the fifth invalid PUC entry the Call
Recorder will disable the card indefinitely. It is advised to keep the PUC
in a safe place.
9.3 Making an encrypted recording
To make an encrypted recording it is essential that the “Use CryptoCard”
function is enabled in the Settings menu. Enable the “Use CryptoCard”
function as described in § 4.6. With “Use CryptoCard” enabled it is no
longer possible to make normal, unencrypted recordings without
disabling the “Use CryptoCard” function again.
Insert the CryptoCard in the card reader of the Call Recorder. The display
will show:
When a valid CryptoCard has been inserted all recordings made
thereafter will be encrypted as long as the card remains inserted.
Removing the card disables recording automatically.
Encrypted recordings are stored as such and can be played only with a
matching CryptoCard inserted. Encrypted recordings can also be
downloaded to a PC with the Call Recorder Access System software,
however, they cannot be played on the PC without a CryptoCard
matching the card used when the recording was made. See the
following section for a detailed explanation.
9.4 Playing an encrypted recording
Encrypted recordings can only be played back with the original or a
matching CryptoCard. Playback of an encrypted recording on the Call
Recorder works quite simple. Search and select the desired recording as
described in Chapter 5. If playback of the encrypted recording is started
the Call Recorder will automatically ask for the Card code.
The display will show:
Friday 04-01-08 15:39
Card insterted
Page 61

Manual Call Recorder Octo | Quarto © Vidicode 2010
61
After entering your PIN the soft-key function CONTINUE
CONTINUECONTINUE
CONTINUE is added in the
display.
• Press CONTINUE
CONTINUECONTINUE
CONTINUE to start playback of the selected recording.
It is not necessary to enter your card code every time.
Recordings can also be downloaded to a PC with the Call Recorder
Access System. Encrypted recordings cannot be played on the PC without
the original or a matching CryptoCard. Your supplier of the Call
Recorder can supply you with a Card reader for your PC together with
the necessary drivers. The Call Recorder Access System will show whether
or not recordings are encrypted in the "Use of CryptoCard" column.
When an encrypted recording is played the Call Recorder Access System
will prompt you for the insertion of a matching card and the matching
PIN. After that the recording will play. The Call Recorder Access System
has the ability to remove the encryption. Encrypted recordings can be
exchanged with other PC's just as any other recording. Encrypted
recordings can be played on any PC with Call Recorder Access System on
it and with the original or matching CryptoCard.
Card Code: »
CANCEL
Page 62

Manual Call Recorder Octo | Quarto © Vidicode 2010
62
Page 63

Manual Call Recorder Octo | Quarto © Vidicode 2010
63
10 The Ethernet interface
The Call Recorder has mature Ethernet capabilities. When the network
configurations have been made the Call Recorder can be accessed over
the network using the archive software. Messages can be downloaded
and played with this software. See the following section for instructions.
10.1 Network active
• Press the and LAN function key to enter the
Network settings menu.
When you enter the Network settings menu the display will show:
• Press CHANGE
CHANGECHANGE
CHANGE to enable or disable the network.
• Press NEXT
NEXTNEXT
NEXT to save and move on to the next menu item.
10.2 FTP active
FTP stands for File Transfer Protocol. This is the protocol used by the Call
Recorder to transfer files over the network. This is a widely used
protocol that is also being used for the Internet.
• Press CHANGE
CHANGECHANGE
CHANGE to enable FTP.
• Press NEXT
NEXTNEXT
NEXT to save and move on to the next menu item.
10.3 FTP user
The FTP user is the user name of the Call Recorder. It is used by the
Archive software to log on to the Call Recorder.
FTP active: No
NEXT CHANGE STOP
Network active: No
NEXT CHANGE STOP
Page 64

Manual Call Recorder Octo | Quarto © Vidicode 2010
64
• Press CHANGE
CHANGECHANGE
CHANGE to change the FTP user name.
Use the alpha-numerical keys to enter the FTP user name. Use the
to switch between upper case and lower case characters.
• Press STORE
STORESTORE
STORE to save the FTP user name.
• Press NEXT
NEXTNEXT
NEXT to save and move on to the next menu item.
10.4 FTP password
The FTP password of the Call Recorder is the password that goes with
the FTP user name of the Call Recorder. It is used by the Archive
software to log on to the Call Recorder.
• Press CHANGE
CHANGECHANGE
CHANGE to change the FTP password.
Use the alpha-numerical keys to enter the FTP password.
FTP pwd: »
CANCEL
FTP pwd: 0000
NEXT CHANGE STOP
FTP user: »
CANCEL
FTP user: 0000
NEXT CHANGE STOP
Page 65

Manual Call Recorder Octo | Quarto © Vidicode 2010
65
• Press STORE
STORESTORE
STORE to save the FTP password.
• Press NEXT
NEXTNEXT
NEXT to save and move on to the next menu item.
10.5 FTP server port
FTP server port is the port number through which the Archive software
can log on to the Call Recorder. The FTP server port is default set to 21,
as is the setting of the port number in the Archive software. If there is
no direct reason to change the FTP server port it is best left unchanged.
• Press CHANGE
CHANGECHANGE
CHANGE to change the FTP server port number.
Use the numerical keys to enter the FTP server port number.
• Press STORE
STORESTORE
STORE to save the FTP server port number.
• Press NEXT
NEXTNEXT
NEXT to save and move on to the next menu item.
10.6 DHCP server
In case a DHCP server is used on the network the “Use DHCP server”
option must be enabled. In case a DHCP server is not used on the
network the “Use DHCP server” option must be disabled.
• Press CHANGE
CHANGECHANGE
CHANGE to enable DHCP server.
Use DHCP server: No
NEXT CHANGE STOP
FTP server port: »
CANCEL
FTP server port: 21
NEXT CHANGE STOP
Page 66

Manual Call Recorder Octo | Quarto © Vidicode 2010
66
• Press NEXT
NEXTNEXT
NEXT to save and move on to the next menu item.
When a DHCP server is used, the IP and Gateway addresses are
automatically assigned. Without DHCP server you must manually enter
an IP address, as indicated in section 8.8.
10.7 IP address
As part of the network the Call Recorder needs an IP address. In case a
DHCP server is used (see previous item) the DHCP server will assign the
Call Recorder an IP address. In case a DHCP server is not used a static IP
address must be assigned to the Call Recorder.
• Press CHANGE
CHANGECHANGE
CHANGE to enter the IP address of the Call Recorder.
Use the numerical keys to enter the IP address of the Call Recorder.
• Press STORE
STORESTORE
STORE to save the IP address of the Call Recorder.
• Press NEXT
NEXTNEXT
NEXT to save and move on to the next menu item.
10.8 IP subnet mask
The IP subnet mask is used by the Call Recorder if access from outside
the network is required. In this case the Gateway will need to be
entered as well.
IP address: »00.000.000.000
STORE << >> CANCEL
IP address: 0:0:0:0
NEXT CHANGE STOP
Use DHCP server: Yes
NEXT CHANGE STOP
Page 67

Manual Call Recorder Octo | Quarto © Vidicode 2010
67
• Press CHANGE
CHANGECHANGE
CHANGE to change the IP subnet mask of the Call Recorder.
Use the numerical keys to enter the IP subnet mask of the Call Recorder.
• Press STORE
STORESTORE
STORE to save the IP subnet mask of the Call Recorder.
• Press NEXT
NEXTNEXT
NEXT to save and move on to the next menu item.
10.9 Gateway
The Gateway is used by the Call Recorder if access from outside the
network is required. If so the Gateway and the IP subnet mask will need
to be entered.
• Press CHANGE
CHANGECHANGE
CHANGE to enter the Gateway of the Call Recorder.
Use the numerical keys to enter the Gateway of the Call Recorder.
Gateway: 000.000.000.000
STORE << >> CANCEL
Gateway: 0.0.0.0
NEXT CHANGE STOP
IP Mask: 255.255.255.000
STORE << >> CANCEL
IP Mask: 255.255.255.000
NEXT CHANGE STOP
Page 68

Manual Call Recorder Octo | Quarto © Vidicode 2010
68
• Press STORE
STORESTORE
STORE to save the Gateway of the Call Recorder.
• Press NEXT
NEXTNEXT
NEXT to save and move on to the next menu item.
10.10 IP address name
Aside from the IP address the Call Recorder can also be addressed by an
IP name if your DNS server supports this function.
• Press CHANGE
CHANGECHANGE
CHANGE to enter an IP name for the Call Recorder.
Use the numerical keys to enter an IP name for the Call Recorder.
• Press STORE
STORESTORE
STORE to save an IP name for the Call Recorder.
• Press NEXT
NEXTNEXT
NEXT to save and move on to the next menu item.
10.11 E-mail address
The Call Recorder has E-mail capabilities. All problems, information and
reports can easily be forwarded to an E-mail address.
• Press CHANGE
CHANGECHANGE
CHANGE to enter an E-mail address.
E-mail:
NEXT CHANGE STOP
IP name: »
STORE << CLEAR CANCEL
IP name: OCTO-101010
NEXT CHANGE STOP
Page 69

Manual Call Recorder Octo | Quarto © Vidicode 2010
69
Use the alpha-numerical keys to enter the E-mail address.
• Press STORE
STORESTORE
STORE to save the E-mail address.
• Press NEXT
NEXTNEXT
NEXT to move on to the next menu item.
10.12 Reply address
Because the Call Recorder cannot handle E-mails the E-mails sent by the
Call Recorder require another reply address.
• Press CHANGE
CHANGECHANGE
CHANGE to enter the E-mail reply address.
Use the numerical keys to enter the E-mail reply address.
• Press STORE
STORESTORE
STORE to save the E-mail reply address.
• Press NEXT
NEXTNEXT
NEXT to move on to the next menu item.
10.13 SMTP server address
The Call Recorder uses the IP address of the SMTP server to send E-mail.
In case a local SMTP server is used the IP number can be entered directly.
In case of an SMTP server outside the network both the Gateway
GatewayGateway
Gateway and
the Subnet Mask
Subnet MaskSubnet Mask
Subnet Mask need to be set later on.
Reply: info@vidicode.com
STORE << CLEAR CANCEL
Reply:
NEXT CHANGE STOP
E-mail: info@vidicode.com
STORE << CLEAR CANCEL
Page 70

Manual Call Recorder Octo | Quarto © Vidicode 2010
70
• Press CHANGE
CHANGECHANGE
CHANGE to enter the IP address of the SMTP server.
Use the numerical keys to enter the IP address of the SMTP server. Both
an IP number or IP name are allowed. In case an IP name is used the DNS
server needs to be configured.
• Press STORE
STORESTORE
STORE to save the IP address of the SMTP server.
• Press NEXT
NEXTNEXT
NEXT to move on to the next menu item.
10.14 SMTP server port
SMTP-server port is the port number through which the Call Recorder
connects with the SMTP server. The SMTP-server port of the Call
Recorder is default set to 25. Do not change the SMTP-server port
number when this value is not explicitly changed in the SMTP server.
• Press CHANGE
CHANGECHANGE
CHANGE to change the SMTP-server port number.
SMTP-server port: »
CANCEL
SMTP-server port: 25
NEXT CHANGE STOP
SMTP srv: 000.000.000.000
STORE << CLEAR CANCEL
SMTP srv: 0.0.0.0
NEXT CHANGE STOP
Page 71

Manual Call Recorder Octo | Quarto © Vidicode 2010
71
Use the numerical keys to enter the SMTP-server port number.
• Press STORE
STORESTORE
STORE to save the SMTP-server port number.
• Press NEXT
NEXTNEXT
NEXT to move on to the next menu item.
10.15 Domain name
The domain name of the SMTP server is required as domain name in the
Call Recorder. In case the SMTP server is on the network the network
domain is required. In case the SMTP server is outside the network the
domain name of the SMTP server is required. Contact your provider for
more information.
• Press CHANGE
CHANGECHANGE
CHANGE to enter the domain of the SMTP server.
Use the numerical keys to enter the domain of the SMTP server.
• Press STORE
STORESTORE
STORE to save the domain of the SMTP server.
• Press NEXT
NEXTNEXT
NEXT to move on to the next menu item.
10.16 DNS server
In case an IP name has been configured for your SMTP server you need
to configure the IP number of the Domain Name Server (DNS server).
DNS srv: 0.0.0.0
NEXT CHANGE STOP
Domain: »
STORE << CLEAR CANCEL
Domain:
NEXT CHANGE STOP
Page 72

Manual Call Recorder Octo | Quarto © Vidicode 2010
72
• Press CCCCHANGE
HANGEHANGE
HANGE to enter the DNS server.
Use the numerical keys to enter the DNS server.
• Press STORE
STORESTORE
STORE to save the DNS server.
• Press NEXT
NEXTNEXT
NEXT to save and move on to the next menu item.
10.17 NTP Server
NNNNetwork TTTTime SSSServer refers to the IP address of the Network Time
Server, which is used to synchronize the time the Call Recorder uses
internally with the time on the Network Time Server.
• Press CHANGE
CHANGECHANGE
CHANGE to enter the IP address of the NTP server.
Use the numerical keys to enter the IP address of the NTP server.
• Press STORE
STORESTORE
STORE to save the IP address of the NTP server.
• Press NEXT
NEXTNEXT
NEXT to save and to move on to the next menu item.
10.18 NTP Server Port
NTP server port is the port number through which the Call Recorder
connects to the Network Time Server. The NTP server port is default set
to 123, as is the setting of the port number in most NTP servers. If there
NTP srv: 000.000.000.000
STORE << CLEAR CANCEL
NTP srv: 0.0.0.0
NEXT CHANGE STOP
DNS srv: 000.000.000.000
STORE << >>
CANCEL
Page 73

Manual Call Recorder Octo | Quarto © Vidicode 2010
73
is no direct reason to change the NTP server port it is best left
unchanged.
• Press CHANGE
CHANGECHANGE
CHANGE to change the NTP server port number.
Use the numerical keys to enter the NTP server port number.
• Press STORE
STORESTORE
STORE to save the NTP server port number.
• Press NEXT
NEXTNEXT
NEXT to save and to move on to the next menu item.
10.19 GMT correction
GMT correction
GMT correctionGMT correction
GMT correction property is used to identify the time zone. An NTP server
normally issues GMT. A GMT correction can be set in units of half hours
from -15:00 to + 15:00.
• Press CHANGE
CHANGECHANGE
CHANGE to set GMT correction. Keep pressing CHAN
CHANCHAN
CHANGE
GEGE
GE to
increase the correction. It will start with + 1:00, keep pressing
CHANGE
CHANGECHANGE
CHANGE to increase. After + 15:00 there will appear - 15:00.
• Press NEXT
NEXTNEXT
NEXT to save and move on to the next menu item.
GMT correction refers to winter time. Summer time and winter time are
corrected automatically.
GMT corection: 00:00
NEXT CHANGE STOP
NTP server port: »
CANCEL
NTP server port: 123
NEXT CHANGE STOP
Page 74

Manual Call Recorder Octo | Quarto © Vidicode 2010
74
10.20 Telnet
Telnet can be used to log on to the Call Recorder and configure it from
your PC. If required contact your supplier for more details.
• Press CHANGE
CHANGECHANGE
CHANGE to enable TelNet.
• Press NEXT
NEXTNEXT
NEXT to save and move on to the next menu item.
10.21 Service timer
The Service timer determines the performance of the network
connection. Default the Service timer is set to Automatic. Changing the
setting should only be done when advised by a service engineer to solve
problems.
• Press CHANGE
CHANGECHANGE
CHANGE to change the Service timer.
The following settings are available:
S1-S5, F1-F3 and U1-U3. Where S stands for Slow, F for Fast and U for
Ultrafast.
• Press NEXT
NEXTNEXT
NEXT to save and move on to the next menu item.
Service Timer: Auto
NEXT CHANGE STOP
TelNet active: Yes
NEXT CHANGE STOP
TelNet active: No
NEXT CHANGE STOP
Page 75

Manual Call Recorder Octo | Quarto © Vidicode 2010
75
10.22 Monitor active
The monitor function allows you to listen in to the conversations that
take place using the Call Recorder. This is done remotely with the RTR
Call Monitor software, which connects with the Call Recorder over the
network. This option enables this recorder to be accessible to the RTR
Call Monitor software.
• Press CHANGE
CHANGECHANGE
CHANGE to enable the Monitor.
• Press NEXT
NEXTNEXT
NEXT to move on to the setting of the Monitor password.
The monitor password is a special password that is used to log on to the
Call Recorder. This password is also set in the RTR Call Monitor software.
• Press CHANGE
CHANGECHANGE
CHANGE to enter a password
• Press BACK
BACKBACK
BACK to exit the network setting menu
Monitor pwd: 0000
CHANGE STOP
Monitor active: No
CHANGE STOP
Page 76

Manual Call Recorder Octo | Quarto © Vidicode 2010
76
Page 77

Manual Call Recorder Octo | Quarto © Vidicode 2010
77
11 Call Recorder Quick CD Access System
The Call Recorder comes with special PC software, the Call Recorder CD
Quick Access System. The object of the software is to be able to locate
and play recordings quickly. Place the CD with the recordings in the CD
player of your PC and the Call Recorder Quick CD access System will
quickly create a clear list of the recordings on the CD. Recordings are by
default sorted according to date and time. Recordings can be selected
and played from the CD. Remember that the CD has to be made suitable
for the PC by making a CD directory on the Call Recorder.
It is also possible to create an archive on your hard disk. Recordings in
the archive on your hard disk can also be given a name. All recordings
with the same remote number will acquire the same name
automatically.
An extensive query screen allows for the definition of a query to be
executed in the current archive. Queries can be made according to date
and time, remote number, name, incoming and outgoing calls,
answering machine messages and microphone recordings.
11.1 Installing the software
Placing the “Quick CD Access System” installation CD-ROM in your
computer starts software installation. If the installation is not started
automatically, locate the file setup.exe on the CD and start it by doubleclicking. Follow the instructions on the screen.
11.2 Start and Play recordings
• Click “Start“ in the lower left corner on your desktop.
Go to Programs/Vidicode and click on “Call Recorder Quick CD Access
System”. The application will start right away.
The main dialog looks as follows:
Page 78

Manual Call Recorder Octo | Quarto © Vidicode 2010
78
To play a recording select a recording in the listing and click on the
button to start playback. The and keys are used to skip 60
seconds forward or backward. The lower slider is used to move playback
to a particular point in the recording.
11.3 View recordings on CD
Start the Call Recorder CD software.
Place a CD from the Call Recorder into the CD drive.
Select File
FileFile
File in the menu
Select Archive
ArchiveArchive
Archive on CD
Select Show
ShowShow
Show the archive on CD
The
key is a shortcut to the above described function.
Page 79

Manual Call Recorder Octo | Quarto © Vidicode 2010
79
The software will now start to read the recordings on the CD and create
a list. Every row in the list represents a recording on the CD. The
recording properties are displayed in the various columns.
Recording properties are
Recording properties areRecording properties are
Recording properties are:
• Date and Time,
• Duration,
• Source e.g. Call, message or microphone recording,
• Incoming or outgoing,
• Name,
• Telephone number or Code,
• CryptoCard number,
• Compression Technique used,
• and the filename.
At the bottom of the application dialog the general properties of the CD
are displayed like:
• Number of recordings on the CD,
• The Recorder ID
• Date and time of the first recording,
• Date and time of the last recording,
• and the total recording time on the CD.
To locate an archive in another location choose:
• File=>Archive on CD=>Path for the archive on CD.
11.4 Create an archive on Hard disk
To create an archive on your hard disk you need to view an archive on
CD first as described above.
Select the recordings you want to transfer to your hard disk.
Select Act
ActAct
Action
ionion
ion in the menu,
Select Transfer
TransferTransfer
Transfer to PC,
Select Selected
SelectedSelected
Selected Records
RecordsRecords
Records.
The
key is a shortcut to the above described function.
Your selection of records will now be copied to the archive on the hard
disk. Default the hard disk archive is located in the Archive folder in the
Page 80

Manual Call Recorder Octo | Quarto © Vidicode 2010
80
directory where the program was installed. The program is installed in
C:\Program Files\Vidicode\Quick CD Access. To view an Archive on HD:
Select File
FileFile
File in the menu,
Select Archive
ArchiveArchive
Archive on hard disk.
Select Show
ShowShow
Show the current
currentcurrent
current archive on hard disk.
The key is a shortcut to the above described function.
The application will now make a list of the recordings in the default
archive on your hard disk. To locate a different archive on your hard
disk:
Select File
FileFile
File in the menu,
Select Archive
ArchiveArchive
Archive on hard disk,
Select Locate
LocateLocate
Locate another
anotheranother
another archive
archivearchive
archive on hard disk.
There are two tool buttons to show the archives on CD and on your hard
disk:
to show the archive on CD and
to show the archive on hard disk
11.5 Recycle bin
Once an archive on hard disk has been created it is also possible to
remove recordings from that archive.
Select the recordings you want to remove from the archive,
Select Action
ActionAction
Action in the menu,
Select Delete
DeleteDelete
Delete Selection.
The key is a shortcut to the above described function.
The selection of recordings is now moved to the recycle bin.
The recycle bin works like the standard Windows Recycle Bin. Recording
removed from an archive are placed in the recycle bin. Recordings can
be restored from the recycle bin. Recordings removed from the recycle
bin are lost. To view recordings in the recycle bin:
Select File
FileFile
File in the menu,
Page 81

Manual Call Recorder Octo | Quarto © Vidicode 2010
81
Select Recycle
RecycleRecycle
Recycle bin.
The program will now generate a list of recordings in the recycle bin.
The
key is a shortcut to the above described function.
In the recycle bin recordings can be selected to be removed or restored.
Both options are available in the Action
ActionAction
Action menu.
11.6 Export recordings
Recordings can be exported from the application.
Select the recording you want to export,
Select Action
ActionAction
Action in the menu,
Select Export
ExportExport
Export.
You now have the option to export the file without changing the
format or to export the recording as a .WAV file.
11.7 On Line software update
The Call Recorder Quick CD Access System has the ability to perform an
automatic on Line update. You need an open internet connection for
this feature to work.
Select Information
InformationInformation
Information in the menu
Select Update product on Line
The following dialog appears:
Page 82

Manual Call Recorder Octo | Quarto © Vidicode 2010
82
• Click Check for updates
Check for updatesCheck for updates
Check for updates to check for available updates.
The available update will be listed.
• Click Execute Update
Execute UpdateExecute Update
Execute Update to install the update.
Keep in mind that an update may be of considerable size which can take
a while to download.
11.8 Search recordings
The Call Recorder CD software has an extensive query screen to search
and select recordings.
The query screen looks like this:
Page 83

Manual Call Recorder Octo | Quarto © Vidicode 2010
83
To the left a group of radio buttons can be selected to view recordings
from the specified time interval.
• Check Use Calendar
Use CalendarUse Calendar
Use Calendar to select a date range within the calendars.
Select the starting date in the left calendar
Select the end date in the right calendar.
• Click OK
OKOK
OK to execute the selected query.
11.9 Software Settings
The settings of the software are located in a separate dialog.
Settings are divided over 5 tab pages as you can see in the following
dialog screen:
Page 84

Manual Call Recorder Octo | Quarto © Vidicode 2010
84
Selected changes are executed when you click Apply
ApplyApply
Apply. Click Cancel
CancelCancel
Cancel to
return to the main dialog retaining the original settings.
In the Database tab the various recording properties columns can be
selected to show in the main dialog.
• Click Font
FontFont
Font to change the font of the list of recordings.
Other settings include:
• Fax conversion settings in the Fax Conversion
Fax ConversionFax Conversion
Fax Conversion tab
• CryptoCard settings in the CryptoCard
CryptoCardCryptoCard
CryptoCard tab
• Password protection in the Securi
SecuriSecuri
Security
tyty
ty tab
• The Language
LanguageLanguage
Language tab will allow you to select a desired language.
For a detailed description of the settings we refer to the help-files of the
program. These are always in compliance with the software version and
the available settings.
Page 85

Manual Call Recorder Octo | Quarto © Vidicode 2010
85
12 The Access and Monitor software
The Call Recorder is equipped with an Ethernet interface that can be
used for the two main applications of the system. With the Call Recorder
Access System it is possible to connect to the Call Recorder over the
network and download stored recordings for archiving purposes. With
the RTR Call Monitor software it is possible to connect to the Call
Recorder over the network and listen-in real-time to ongoing telephone
communications. For the communication between the Call Recorder
Access System and the Call Recorder it is essential that the network
settings of the Call Recorder have been properly configured. See
Chapter 6 for details.
12.1 The Call Recorder Access software
The Call Recorder Access software is a versatile system that allows for
the manipulation and archiving of stored recordings. The Call Recorder
Access System holds a list of different recorder devices it can connect to.
The Call Recorder Access System can connect to the Call Recorder over
the network and retrieve a listing of all the recordings in the Call
Recorder. Recordings can then be selected and downloaded from the
Call Recorder. Downloaded recordings can be listened to or archived.
For Call Recorders with a CD drive there is an other version of this
program called Call Recorder Access System, where the calls are
downloaded the moment you want to play the recording. This can be
useful if it is required to save storage capacity on the PC. The thought
behind it is that the CD drive is used for backup and archiving
applications.
Page 86

Manual Call Recorder Octo | Quarto © Vidicode 2010
86
12.1.1 Playing recordings
The Call Recorder Access System receives a listing of recordings first. To
play a recording the actual recording will need to be downloaded. A
downloaded recording can be played using the incorporated recorder
keys. Select a recording in the database and click on the button to
start playback. The and keys are used to skip 60 seconds
forward or backward. The lower slider is used to move playback to a
particular point in the recording.
12.1.2 Queries
The Call Recorder Access System has the ability to make a selection of
recordings according to date, time or other call properties. A query can
be performed for a certain a range of dates and times or duration. The
entire database can also be sorted according to date and time or
duration. Recordings can be assigned a name according to Caller ID or
Remote number. Once a particular recording with a certain Caller ID or
remote number has been assigned a name all recordings with the same
Caller ID or remote number will be assigned the same name. A query can
be performed to search the database for recordings with the same name
or number.
12.1.3 Fax viewing
As described in § 4.3.5 the Call Recorder can be configured to record fax
transmissions. The Call Recorder Access System has the ability to
differentiate between a fax transmission recording and a normal speech
recording. Furthermore the Call Recorder Access System can reconvert
the recorded fax transmission to the original image. A built-in viewer is
used to view the original fax image.
12.2 The RTR Call Monitor software
RTR Call Monitoring stands for Real Time Remote Call Monitoring. The
Call Recorder features the RTR Call monitoring option. The optional RTR
Call Monitor software keeps track of the status of all eight/four lines of
the Call Recorder. Once a call is started on a particular line the RTR Call
Monitor application can connect to the Call Recorder over the network.
The Call Recorder then transmits the call over the network to the RTR
Call Monitor application. In this way it is possible to listen-in on all lines
of the Call Recorder with only a couple of seconds delay. The RTR Call
Monitor application can be used to listen-in on calls on all the Call
Recorders connected to the network.
Page 87

Manual Call Recorder Octo | Quarto © Vidicode 2010
87
For the communication between the RTR Call Monitor application and
the Call Recorder it is essential that the network settings of the Call
Recorder have been properly configured. See Chapter 6 for details.
Page 88

Manual Call Recorder Octo | Quarto © Vidicode 2010
88
Page 89

Manual Call Recorder Octo | Quarto © Vidicode 2010
89
13 Accessories
13.1 Bidirectional Handset adapter
This sophisticated device is the ideal way to connect a Quarto or Octo
Call Recorder to the handsets of digital or IP phones.
The Bidirectional Handset Adapter (BIHA) will not only provide the Call
Recorder with a mixed microphone/speaker signal taken from the
handset cord, but will also enable the Call Recorder to send out a
recording announcement to the calling party.
With the BIHA adapter the Octo or Quarto can be used to record from a
cluster of digital phones or a mix of digital and analogue phones. The
unit can also be used to easily connect an external audio source to the
Call Recorder, like a radio system or a microphone signal.
13.1.1 Connecting
The adapter is plugged into any line input of the recorder, using a RJ45
cable.
The line must be set up for Voice activated recording. No other settings
are needed to start recording.
Using the notification message in combination with the handset adapter
it needs an extra setting, found in the hidden System Parameters menu.
The notification beeps can not be used with the handset adapter. To
change the setting:
• Press Settings then SYSTEM
• Press the >>> key until “System Parameters”
• Press softkey START
• Press softkey NEXT until “Use Handset Adapter”
• Press softkey YES
• Press NEXT to enter
• Press STOP then YES to save the setting.
When using the handset adapter with a specifically internally strapped
Octo 19” port the handset adapter is powered from the Octo. Contact
Vidicode for the port strapping. Alternatively a 10 to 12V DC power
supply can be connected to the power port of the handset adapter. A
Page 90

Manual Call Recorder Octo | Quarto © Vidicode 2010
90
green LED on the handset adapters RJ45 port will light up when it
receives power. The other, yellow, LED will light up when a notification
message is sent.
On the handset side are two modular connectors, the RJ-11 (6 pins) plug
of the supplied cable is plugged in the RJ-11 connector of the handset
adapter, the other end of the cable is plugged in to the handset
connector of the telephone, and the RJ-10 (4 pins) connector of the
curled handset cable is plugged into the RJ-10 connector of the adapter.
13.2 High Impendance Taping Adapter
This adapter allows high impedance connections to analogue lines as
used for tapping purposes.
The High Impedance Tapping Adapter (HITA) will make it virtually
impossible to detect the recorder on the lines that are being recorded.
This makes this unit suitable for official tapping purposes.
The unit can be used in combination with a Quarto or Octo Call
Recorder without the need for an external power supply. If used with
other recorders the HITA can be powered externally with an optional
power supply. The adapter also signals the line voltage for off-hook
detection, and forwards it to the Octo/Quarto to start recording.
13.2.1 Connecting
When using the tap adapter with a specifically internally strapped Octo
19” port the tap adapter is powered from the Octo. Contact Vidicode
for the port strapping. Alternatively a 10 to 12V DC power supply can be
connected to the power port of the tap adapter. A green LED on the tap
adapters RJ45 port will light up when it receives power. The other,
yellow, LED will light up when the adapter detects an off-hook
situation. Power is internally galvanic isolated from the tap adapter
circuitry.
Page 91

Manual Call Recorder Octo | Quarto © Vidicode 2010
91
14 Technical specifications
Power supply
Internal open frame power supply 65watt type PW-65A001 with input
100-240VAC 2A max and output of 5V @ 4A + 12V @ 3,75A.
Working environment
Temperature 0 to 40 degree centigrade
Relative Humidity 10% - 90% Condensation must be avoided.
Connections
Ethernet.
10/100-BASE-T with RJ-45 UTP connector.
Telephone line.
Octo | Quarto : 8x/16x RJ-45 connectors for compatibility
with patchcables. Right connector = input, left connector = output to
phone.
General purpose audio inputs
. Octo | Quarto : Eight/four channels using
four 3.5mm mini stereo jack input's, each input has a DC bias to feed FET
microphones.
Octo | Quarto : Two/Four mini-jacks can be connected.
Quarto:
1. Odd Audio channels, from right to left 1 and 3
2. Even Audio channels, from right to left 2 and 4
3. Ground
Octo:
1. Odd Audio channels, from right to left 1, 3, 5 and 7
2. Even Audio channels, from right to left 2, 4, 6 and 8
3. Ground
Page 92

Manual Call Recorder Octo | Quarto © Vidicode 2010
92
Input range 20mV to 2V.
Input resistance 1,5K
As an option each channel's input gain level can be automatically
regulated by an AGC circuit.
Loudspeaker
mono output. 0.1 Watt/16 Ohm using a 3.5mm output jack
(an internal speaker is also available)
Start switches Octo | Quarto
eight/four switches (or logical levels) can be
connected to a 0.1" pitch 10 pins ribbon cable connector. These can be
used to optionally start/stop recordings.
1. Switch channel 1
2. Switch channel 2
3. Switch channel 3
4. Switch channel 4
5. Ground or common connection for switches
6. Led driver/Digital output
7. Switch channel 5 (NA for Quarto)
8. Switch channel 6 (NA for Quarto)
9. Switch channel 7 (NA for Quarto)
10. Switch channel 8 (NA for Quarto)
Pin 6 can be used to control a “Recording active” led or for controlling
a special electronic circuit to control multiple leds, contact Vidicode for
details.
Page 93

Manual Call Recorder Octo | Quarto © Vidicode 2010
93
Speech compression
Algorithm data-rate in bytes/sec
G.711 A-law 8000
G.711 µ-law 8000
Digitalk8.5 1062.5
G.729 1000
G.723 High rate 800
G.723 Low rate 662.5
Encryption (with CryptoCard option)
Triple DES
Dimensions (L/W/H)
45x30x9cm
Weight
5,5 Kg
Technical Standards
EU telecommunications CTR21
EU Emission
EN50081 part 1
EU Immunity
EN50082 part 1
Special functions of line inputs (each line)
Reception and decoding of DTMF and FSK for Caller ID and dialing
information, including all detectors needed for all versions of caller id.
AGC circuit for leveling of recording levels of remote and local speaker
Audio level detector to be used for speech triggered recording (trigger
level is software controllable) .
Parallel voltage controlled Off-Hook detector (or serial line current
detector when using “loop through” wiring) with two voltage settings
(10Volt/20 Volt, software controlled) for starting/stopping recordings.
Ring detector to discriminate between outgoing and incoming calls.
Audio injection for a spoken messages and/or warning beeps into the
recorded line.
Line interface can go into “sniff mode” or go online
Page 94

Manual Call Recorder Octo | Quarto © Vidicode 2010
94
Over-voltage protection using tranzorbs protects each input channel
against lightening etc.
Recording FAX traffic is possible, external PC software is available to
decode the fax-recordings.
Mass storage and backup storage.
Internal hard disk.
Internal CD-writer.
A thermal overheating protection circuit protects the hard disk and CDwriter against overheating.
Other Features
Battery backed real time clock
Graphical LCD with back-lighting
Keyboard with 20 keys
Extensive PC software is available to create a database of recordings
using the 10/100 Mb Ethernet interface.
Page 95

Manual Call Recorder Octo | Quarto © Vidicode 2010
95
15 Acknowledgements
15.1 Privacy
When recording telephone conversations the privacy of your
conversation partner must be considered.
In some countries there is an obligation to notify your conversation
partner of the recording. Check your national legal obligations on this
and other issues concerning the use of Call Recorder devices.
In the United States, the Federal government requires that at least one
person involved in a conversation must know the call is being recorded.
However, each state has its own legislation. The vast majority of states
have laws complying with the Federal “one party” requirement. A few
states, such as Florida and others, do require both parties to be aware
the call is being recorded.
The Call Recorder can comply both with the one party or two party
requirements. One party simply means the person with the Call Recorder
knows the call is being recorded. Compliance is made with two party
requirements by sounding a notification tone during the call.
15.2 Warranty
Your Call Recorder has a 12-month factory warranty. The warranty is
effective for normal use only. We would like to emphasize that the
warranty is not valid under exceptional environmental conditions, such
as extreme temperatures or humidity levels, nor in the unlikely event of
a lightning strike. The warranty is not valid if the machine has not been
handled or installed properly, for example when it has been dropped, or
bumped into. In order to qualify for warranty , you should contact your
supplier, and show the receipt. If your supplier cannot help you, you
should contact the manufacturer. The manufacturer reserves the right to
determine the final date of the warranty period on the basis of the date
of production. Costs of transport to and from the supplier or the
manufacturer are for the buyer’s account. Warranty is for parts only and
does not cover any costs resulting from the breakdown of the Call
Recorder.
The Call Recorder has various extra features that have not been
described in this manual. Additional information about this is given in a
technical information bulletin. Subjects discussed in this technical
documentation are further configuration options, remote configuring,
and how to update the firmware in the Call Recorder. The further
Page 96

Manual Call Recorder Octo | Quarto © Vidicode 2010
96
configuration options concern all aspects of operation. In our experience
most people are interested in configurations related to user’s access.
15.3 Liability
Correct functioning of the Call Recorder cannot be warranty d under all
conditions and thus we do not accept any liability for loss of information
or other damages due to the use of the Call Recorder.
Vidicode assumes no liability regarding incorrect notification of call
recording.
Vidicode is not a source of official interpretation of laws of any country
or state and shall not be construed as a source for making decisions.
Page 97

Manual Call Recorder Octo | Quarto © Vidicode 2010
97
16 Index
AAAA
Acknowledgements 95
Alfa-numerical functions 5
Archive 79
Auto Delete 33
Automatic Gain Control 27
CCCC
Call Recorder Access System 85
Caller ID 29
CD copy 32, 39
CD menu 51
CD writer 11
Clock 36
Compression 27
Configuration 12
Connect
power supply 16
telephone lines 17
Create CD directory 51
CryptoCard 31, 59
DDDD
DHCP server 65
Domain name 71
EEEE
E-mail address
Fax Server 68
Encrypted recording 57
Erase CD Re-Writable 52
Ethernet interface 12
Export 81
FFFF
Fax Recording 26
Free time left 51
FTP 63
password 64
user name 63
Function keys 19
GGGG
G.723 11
Gateway 67
Guarantee 95
HHHH
Hard disk 11, 79
Hard disk menu 55
IIII
Index 97
Initialize CD 21
Input source 24
Install 77
Introduction 11
IP address 66
IP name 68
LLLL
Language 37
Last recording 39
Liability 96
MMMM
Menu keys 20
Menu-key indicators 20
Monitor 75
Monitoring 39, 45
NNNN
Network 63
FTP 63
gateway 67
IP address 66
Page 98

Manual Call Recorder Octo | Quarto © Vidicode 2010
98
Service timer 74
subnet mask 66
Notification 28, 47
record 47
Numberlist 31
add number 48
blacklist 31
remove number 49
view 48
whitelist 31
OOOO
Octo 15
On Line software update 81
PPPP
Password protection 34
remove 36
Playback 39
QQQQ
Quattro 15
Quick CD Access System 77
RRRR
Recorder settings 47, 48
Recycle bin 80
Reply address 69
Reset all values 37
RTR Call Monitor 87
SSSS
Search 39
line number 42
recordings 40
remote number 42
Server port 65
Service timer 74
Set-up Wizard 77
Silence Period 26
SMTP server 69
SMTP-server port 71
Software
query 82, 86
Software installation 77
Software Settings 83
Software update 53
Speaker 30
Speech compression 27
Start 77
Start Method 24
Stored recordings 40
Subnet mask 66
TTTT
Technical specifications 91
Telephone line menu 23
TelNet 74
UUUU
User interface 19
VVVV
Voice activated recording 26
Volume 31
WWWW
Wildcard 41
Wizard 77
 Loading...