

Videotel VP70 Owners Manual And Specifications
Owners manual and specications
digital
VP
70
Packing list
(2)
With your order you should receive...
1 - External Power Supply (1)
1 - Remote Control (2)
1 - 8 Gig SD Card (3)
1 - 8 Gig USB Drive (4)
1 - VP70 HD Video Player (5)
(1) (3)
(4)
1 - 6’ HDMI Cable (6)
1 - 6’ RCA Video/Audio Cable (7)
Basic operation of the VP70
The VP70 is an auto on and auto looping HD video player (picture and audio les do not
auto start on power up). Once you connect the player to a TV or monitor, simply load
your video les on the enclosed SD card or USB drive and insert it into the player. The
order in which the les are sorted on the card is the order in which they play . Once you
load the card or drive, simply remove the power cord for a few seconds then reconnect
the power. Your player will start play and continue to do so until power is turned o or
the remote is used to stop or pause the video.
Note - The VP70 only outputs 1 video source at a time and the default is HDMI out. If
you are using VGA (40) or Composite video out (38), you can switch the video output
by pressing the VGA (10) or CVBS (composite) (9) on the remote.
(5) (6) (7)
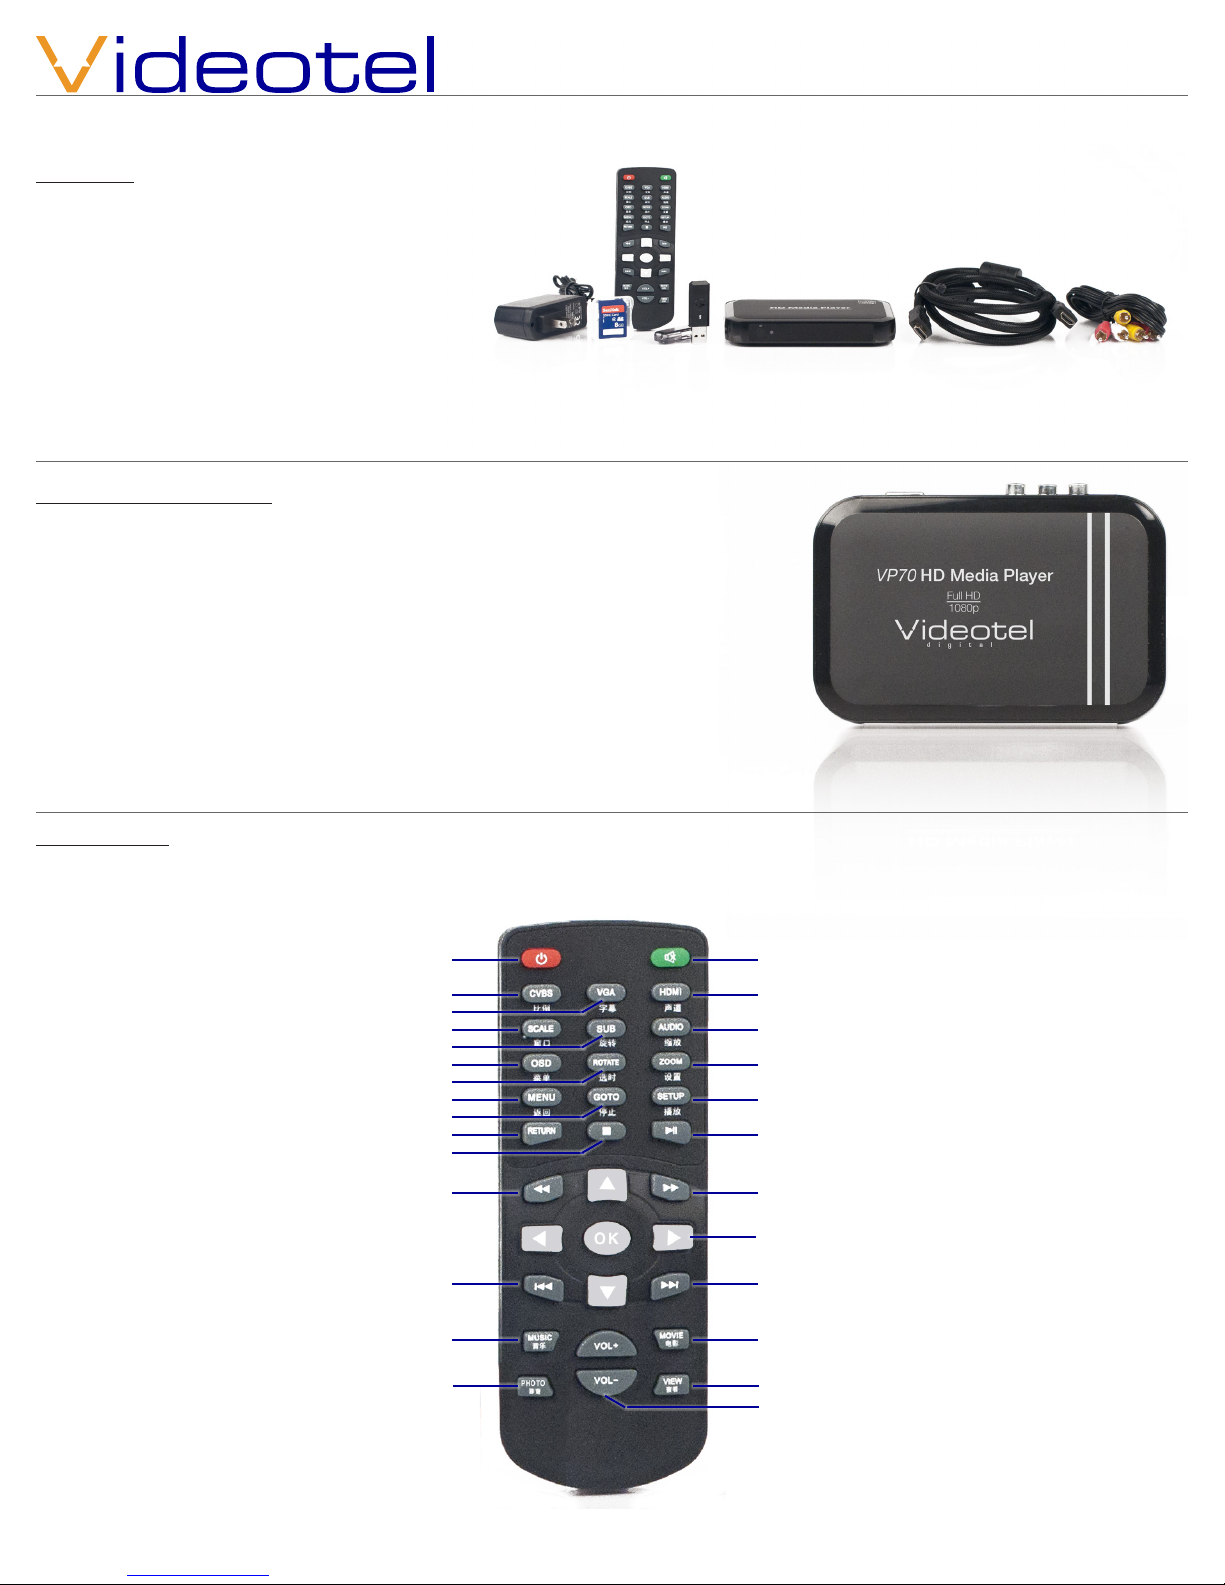
Remote control
(8) Power - turns VP70 on and o
(9) CVBS - switches video output to
composite video (yellow RCA) (15)
(10) VGA - switches video output to
VGA (15 pin for computer monitor) (15)
(11) Scale - This button switches between
4:3, full screen and default
(12) Sub -N/A
(13) OSD - rotates through repeat options
Repeat all / Repeat current / Repeat o
(14) Rotate - N/A
(15) Menu - activates the main menu
for the player (41)
(16) Goto - N/A
(17) Return - returns you to the previous
menu selection
(18) Stop - stops the current audio, video or
picture le that is playing
(19) Rewind - rewinds the current audio or
video that is playing in steps of 1.5x, 2x,
4x, 8x, 16x, 32x
(20) Previous - jumps backwards to the
previous audio, video or picture le
(21) Music - N/A
(22) Photo - N/A
(8)
(9)
(10)
(11)
(12)
(13)
(14)
(15)
(16)
(17)
(18)
(19)
(20)
(21)
(22)
(23)
(24)
(25)
(26)
(27)
(28)
(29)
(30)
(31)
(32)
(33)
(34)
(23) Mute - mutes current audio output
(24) HDMI - switches video and audio output
to HDMI Jack (15)
(25) Audio - switches between audio formats
(26) Zoom - N/A
(27) Setup - Enter the set up menu (54) for
the player. Access selections like video
resolution output, language, etc..
(28) Play and pause - press once to pause &
again to resume play of current le
(29) Fast forward - fast forwards the current
audio or video that is playing in steps of
1.5x, 2x, 4x, 8x, 16x, 32x
(30) Arrow buttons for navigating the menu
or le selection section
(31) Next - jumps forwards to the
next audio, video or picture le
(32) Movie - N/A
(33) View - displays details about the current
video, audio or picture le
(34) Volume - adjust the output volume up
and down
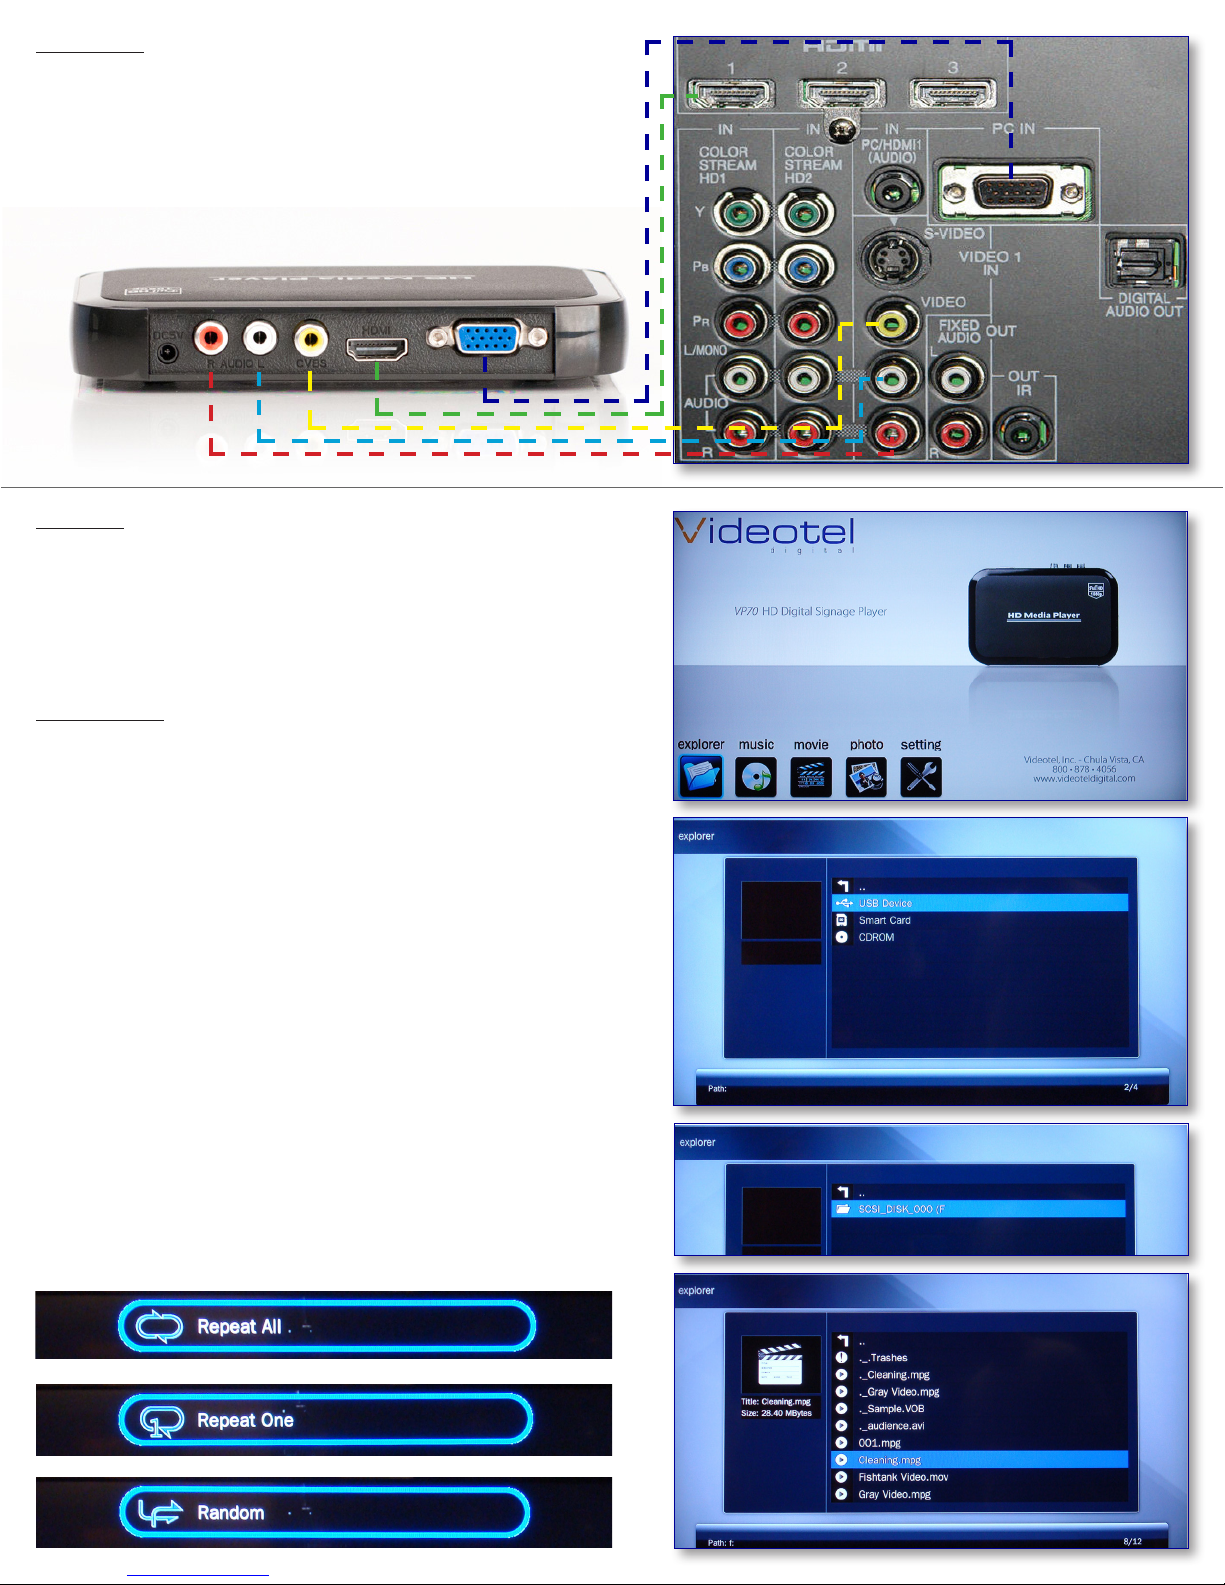
Connections
The VP70 has 3 possible video outputs. Composite video (38), HDMI
(39) and VGA (40). Your audio can be outputted by either the right and
left jacks (36 & 37) or through the HDMI jack (39) HDMI transfers a true
digital audio and video signal through 1 cable. Only 1 video output
can be used at a time.
(36) (37) (38) (39) (40)
Example of a
TV connection
panel
Operation
As mentioned in the basic operation of player section, if you simply
want to auto play and auto loop les, you just need to load them onto
a SD or USB drive and insert into the player. Upon power up, the player
will begin to play and continue to loop the les contained. The following sections explain how the menu and settings function.
Play video les
When you press the “Menu” (15) button on the remote, the screen to
the right (41) will appear. The menu options are... Explorer (42), Music
(43), Movie (44), Photo (45) and Settings (46). Explorer will display all
the les on the card. Movie will only show video les, Music will only
show audio les and Photo will only show picture les.
When you select Movie, Music, Photo or Browser and press the “OK”
button (between the arrow keys) a menu like the one to the right (47)
will appear. Select your media (USB or SD Card) (48). Press the Enter
button on the next screen (49) and a list of available les will appear
(50). Use the arrow keys to select a desired video, audio track or pic-
ture le. Information about the selected le will appear on the upper
left (51). If you are using a Macintosh, you may see duplicate le names
with a under score before each one. This is normal and will not eect
the operation of the player. You can select either the top list of les or
the lower list.
Once you select a le to play, you can press the OSD button (13) to
select a repeat option (repeat all (53) (default), repeat one (54) or random (55).
(42) (43)
(44)
(41)
(46)(45)
(47)
(48)
(49)
(53)
(54)
(55)
(50)
(51)
(52)
 Loading...