

Video Systems VSD-31 User Manual
4Ch Real time / Triplex / Mux
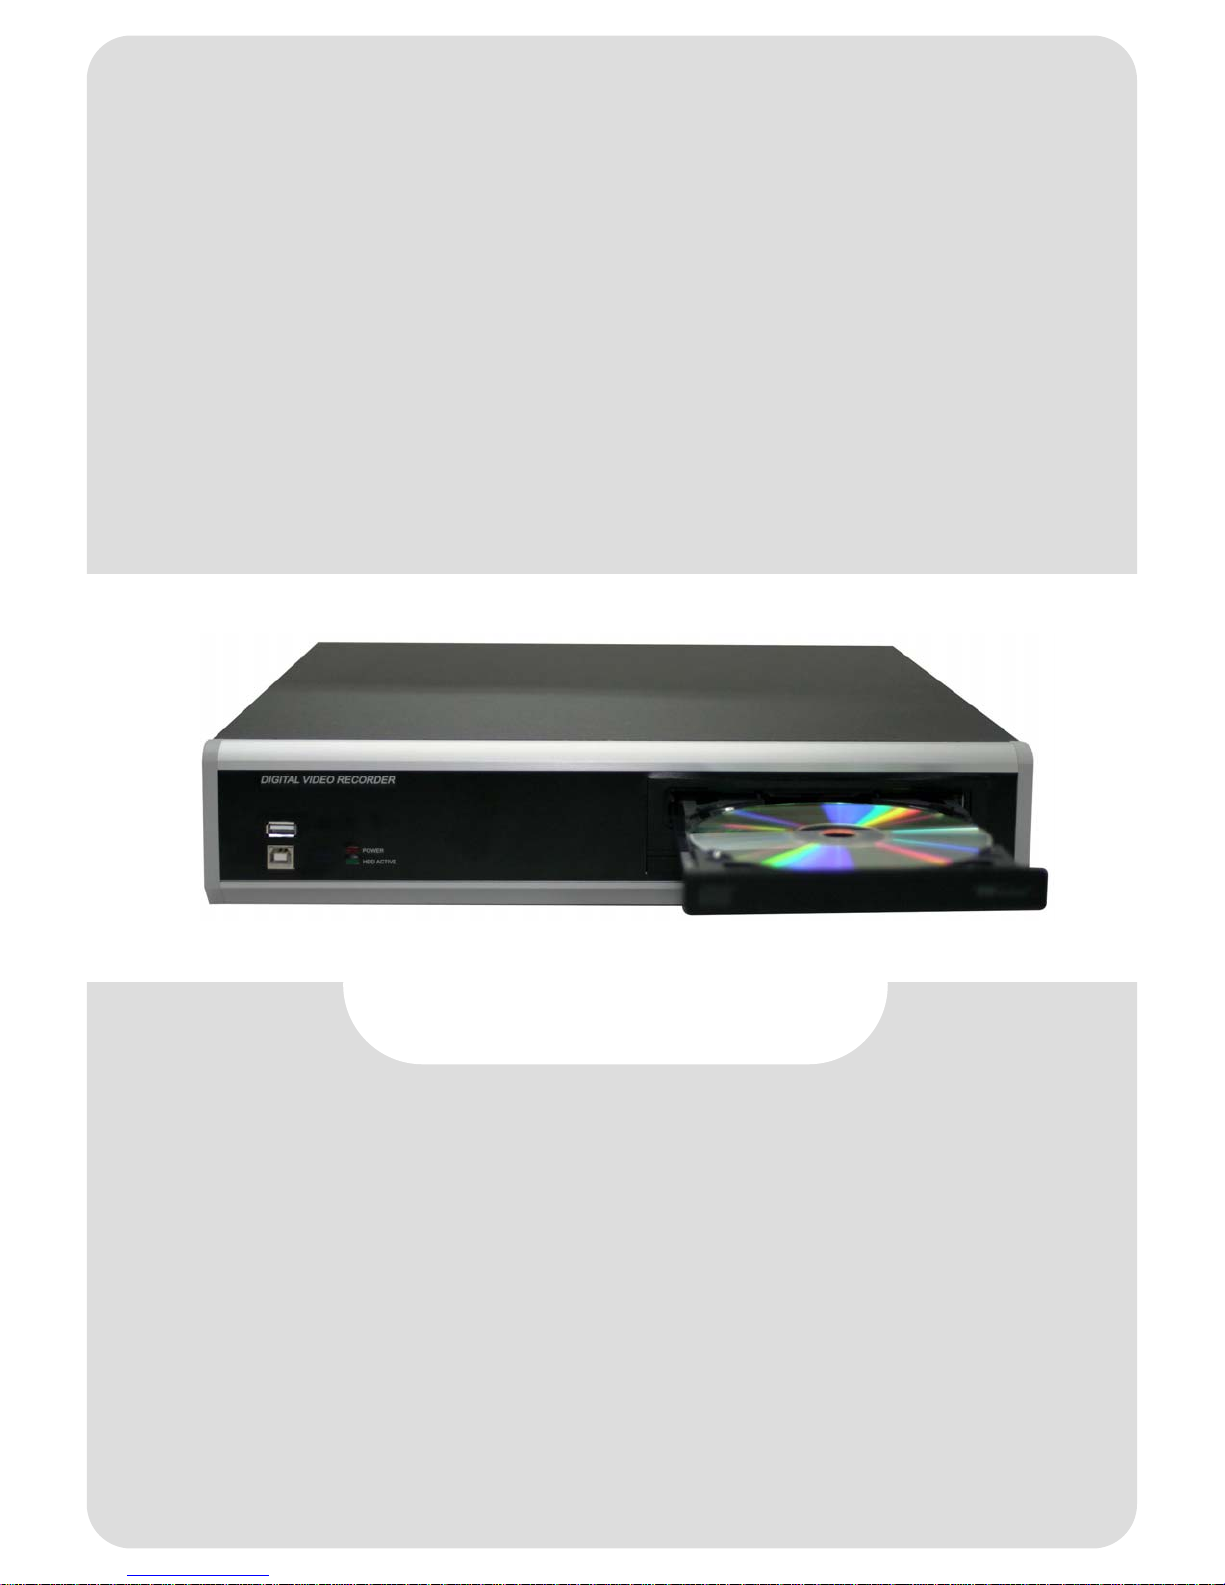
Stand Alone DVR
VSD-31
4 Channel Stand Alone DVR
User’s Manual
USB Backup available
VER 1.2
The most stable and reliable real stand alone Digital Video Multiplex Recorder
4Ch Real time/Triplex/Mux
INSTALLATION & SAFEGUARDS
All the safety and operating instructions should be read before the unit is operated.
Environment Condition for Installation
1. To prevent electric shock or other hazard, do not expose units to rain, moisture, or dust.
2. Place this unit in a well-ventilated place and do not place heat-generating objects on this unit.
3. This unit should not be located in an area where it is likely to be subjected to mechanical shocks.
Before You Start
1. Ensure the power switch is in the OFF position prior to starting.
2. Do not attempt to open or remove the covers. That may expose you to dangerous voltage or
other hazards.
3. Installation should be performed by qualified service personnel only.
4. This unit should be operated only from the type of power source indicated on the manufacturer’s
label and with the power supply included with the unit.
- Stand Alone DVR
Installation & Safeguards
Notice
1. Before initial configuration or operation you must first set the TIME/DATE, followed by HDD clear.
If you don’t follow this steps first, that may cause non recording on the HDD or non saving
setting value. Even though it is recorded, you cannot search recorded data.
2. When it comes to HDD capacity, you can use a big size of HDD.
3. A jumper setting for CD-RW must be master.
4. When you set the record setup, you have to set the Record Configuration and also Schedule
Setup. This unit records as per the Record type & Schedule setup. The default setting value for
Schedule setup is Continuous mode.
1
4Ch Real time/Triplex/Mux
Contents
- Stand Alone DVR
Contents
4----------------------------------------------------------------Features & Package ContentsCHAP. 1
4----------------------------------------------------------------Features1-1.
5----------------------------------------------------------------Package Contents1-2.
6----------------------------------------------------------------Function of Each ButtonCHAP. 2
6----------------------------------------------------------------Front2-1.
7----------------------------------------------------------------Rear2-2.
8----------------------------------------------------------------InstallationCHAP. 3
8----------------------------------------------------------------Installation Configuration3-1.
9----------------------------------------------------------------Detailed Installation3-2.
9----------------------------------------------------------------HDD(Hard Disk Drive) 1)
9----------------------------------------------------------------Camera2)
10----------------------------------------------------------------Monitor3)
10----------------------------------------------------------------Power4)
11----------------------------------------------------------------Other External Device5)
11----------------------------------------------------------------RS-232 ASCII-Code6)
12----------------------------------------------------------------OperationCHAP. 4
12----------------------------------------------------------------System Log In4-1.
12----------------------------------------------------------------Factory Default4-2.
13----------------------------------------------------------------Display Configuration4-3.
14----------------------------------------------------------------Live View Setup4-4.
14----------------------------------------------------------------Full / Multiple View1)
14----------------------------------------------------------------SEQ 2)
14----------------------------------------------------------------PIP View3)
14----------------------------------------------------------------ZOOM View4)
15----------------------------------------------------------------Record4-5.
15----------------------------------------------------------------Playback4-6.
16----------------------------------------------------------------Search4-7.
17----------------------------------------------------------------PTZ Camera Operation4-8.
17----------------------------------------------------------------Data Back-up4-9.
2

4Ch Real time/Triplex/Mux
- Stand Alone DVR
Contents
18----------------------------------------------------------------Set upCHAP. 5
18----------------------------------------------------------------General Operation5-1.
19----------------------------------------------------------------Display Setup5-2.
19----------------------------------------------------------------VGA Setup1)
19----------------------------------------------------------------Screen Display Setup2)
20----------------------------------------------------------------OSD Setup2)
21----------------------------------------------------------------Record5-3.
21----------------------------------------------------------------Record Setup1)
22----------------------------------------------------------------Schedule Setup2)
23----------------------------------------------------------------Configuration5-3.
23----------------------------------------------------------------HDD Management1)
24----------------------------------------------------------------Time/Date Setup2)
24----------------------------------------------------------------Camera Setup3)
25----------------------------------------------------------------Motion Setup4)
26----------------------------------------------------------------Interval Setup5)
26----------------------------------------------------------------Alarm Setup6)
26----------------------------------------------------------------Password Setup7)
27----------------------------------------------------------------External Device Setup5-4.
27----------------------------------------------------------------TCP/IP Setup1)
28----------------------------------------------------------------Pan Tilt Zoom Setup2)
28----------------------------------------------------------------Spot Setup3)
29----------------------------------------------------------------Back up 5-5.
29----------------------------------------------------------------CDR Setup1)
29----------------------------------------------------------------USB Setup2)
30----------------------------------------------------------------Firmware Upgrade5-6.
31----------------------------------------------------------------Network SetupCHAP. 6
31----------------------------------------------------------------DVR Network Configuration6-1.
35----------------------------------------------------------------Remote Viewer Program6-2.
40----------------------------------------------------------------Backup CD Player6-3.
42----------------------------------------------------------------Web Viewer SetupCHAP . 7
42----------------------------------------------------------------Registering DVR for DDNS 7-1.
44----------------------------------------------------------------DDNS Setup in DVR7-2.
48----------------------------------------------------------------Web Viewer7-3.
49----------------------------------------------------------------Web Backup Player7-4.
51----------------------------------------------------------------Web Backup7-5.
3
54----------------------------------------------------------------SpecificationsCHAP. 8

4Ch Real time/Triplex/Mux
- Stand Alone DVR
CHAP 1. Features & Package Contents
CHAP 1. Features & Package Contents
1-1. Features
Live Display
Real time display per camera
Auto Sequence
PIP (Picture in picture)
Digital Zoom of display
Simple playback mode
Simple PTZ camera control
Record
Variable Record resolution (For higher picture quality or higher recording speed)
Efficient Image Quality step in 5 steps
Schedule recording
Event Record by alarm and motion detection
Network
Monitoring and Search by using Remote Viewer via network
Playback
Search and playback by recorded data size and date/time
Various steps in forward playback speed (X2, X4, X8, X16, X32 fast playback. 1/16, 1/8 ,1/4,
1/2 slow playback)
Various steps in backward playback speed (X2, X4, X8, X16, X32 fast playback. 1/16, 1/8, 1/4,
1/2 slow playback)
Data backup
Simple backup using CD-RW
Remote viewer backup in AVI, JPEG file
Supports bigger capacity of HDD
USB Device Back-Up available
Others
Supports UNI-CODE
Supports SPOT Monitor
PAL/NTSC Auto detection
4

4Ch Real time/Triplex/Mux
1-2. Package Contents
1. DVR Main Unit
2. Power Cable
3. Power Adapter
- Stand Alone DVR
4. User’s Manual
CHAP 1. Features & Package Contents
5. Software CD
6. Rubber Pad 7. HDD absorber 8. Bolts
DescriptionPackage Contents
Stand-Alone Digital Video Recorder1. DVR Main Unit
AC power supply to adapters for 12V DC power2. Power Cable
DC power supply3. Power Adapter
User’s Manual4. User’s Manual
Remote Viewer Software & Backup CD Player5. Software CD
Prevent DVR from slipping. Attach it to the bottom of main unit6. Rubber Pad
Absorbing the mechanical shock of HDD against the case bottom7. HDD absorber
Bolts for fixing HDD8. Bolts
A mouse controlling all functions of DVR9. Mouse
9. Mouse
5
4Ch Real time/Triplex/Mux
- Stand Alone DVR
CHAP 2. Function of Each Button
CHAP 2. Function of Each Button
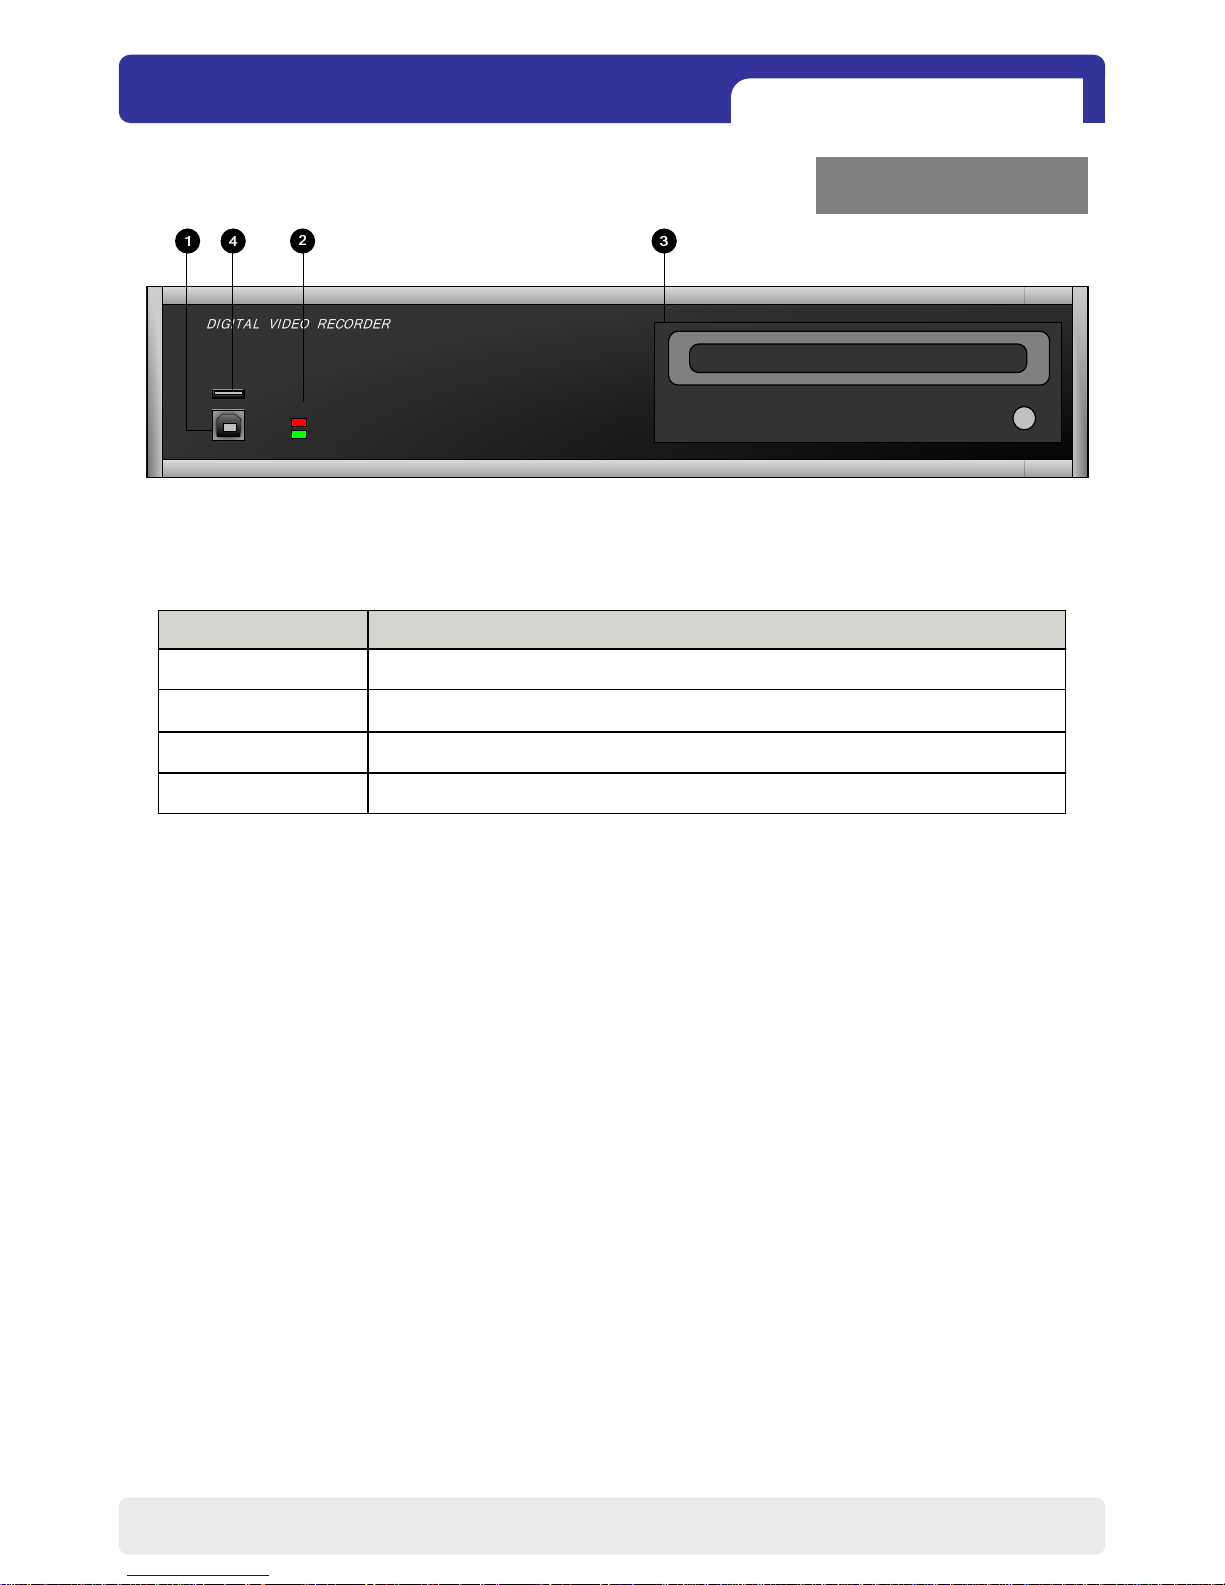
USB
POWER
HDD FULL
Used for updating Firmware①USB Device
Used for Data Backup②USB HOST
2-1. Front
FunctionName
④CD – RW
Shows status of operation③LED Lamps
Used for Data Backup and Firmware upgrade
6
4Ch Real time/Triplex/Mux
- Stand Alone DVR
CHAP 2. Function of Each Button
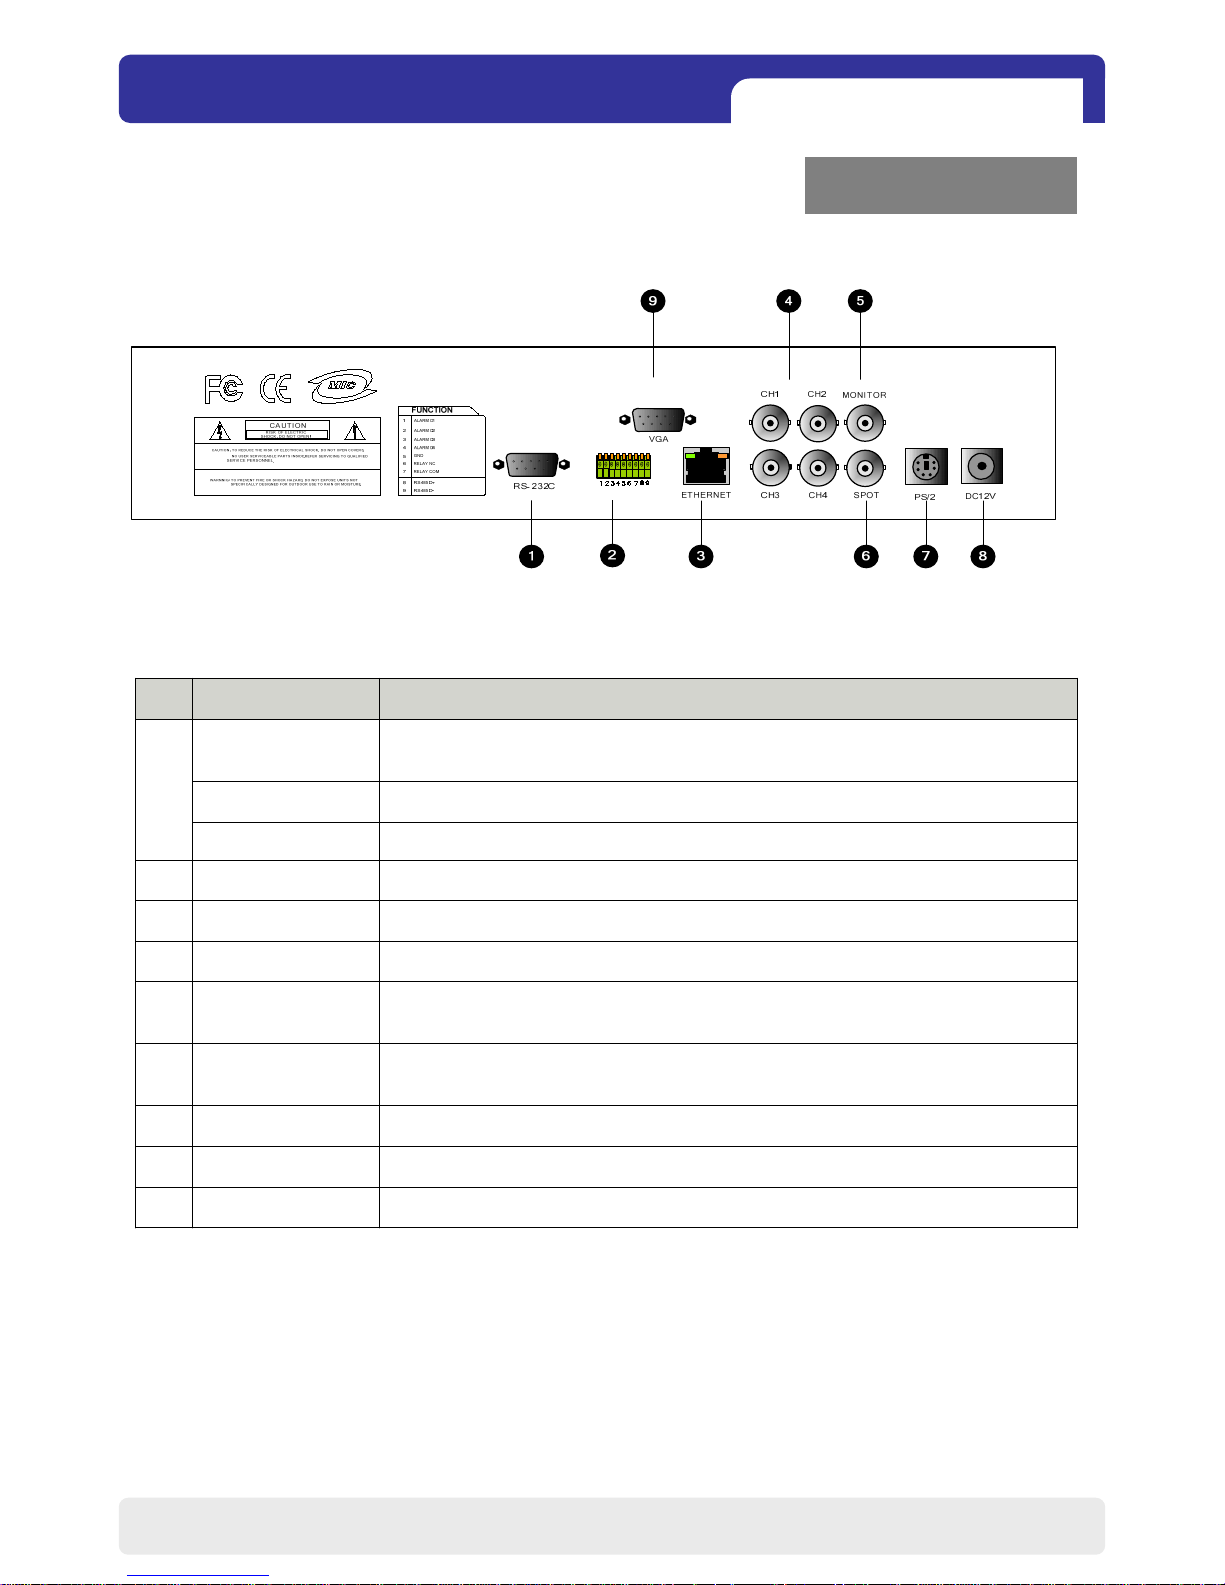
2-2. Rear
1
2
4
5
6
9
RS 485
RELAY Output
SENSOR Input
RS-232C
CAMERA Input
MONITOR
Output
SPOT Monitor
Output
VGA
FunctionName
Connection with PTZ camera or other external device using RS 485
interface
Relay out terminal
Sensor input terminal
Connection to external device as PC using RS-232C to control the DVR
Connection to ETHERNET deviceETHERNET3
Connection with camera (NTSC / PAL)
Connection with Composite Monitor (NTSC / PAL)
Connection with Composite Monitor (NTSC / PAL)
Connection with PS/2 MOUSEPS/27
DC over 12V adapter DC Power8
Connection to VGA Monitor (CRT type or TFT LCD monitor)
7
4Ch Real time/Triplex/Mux
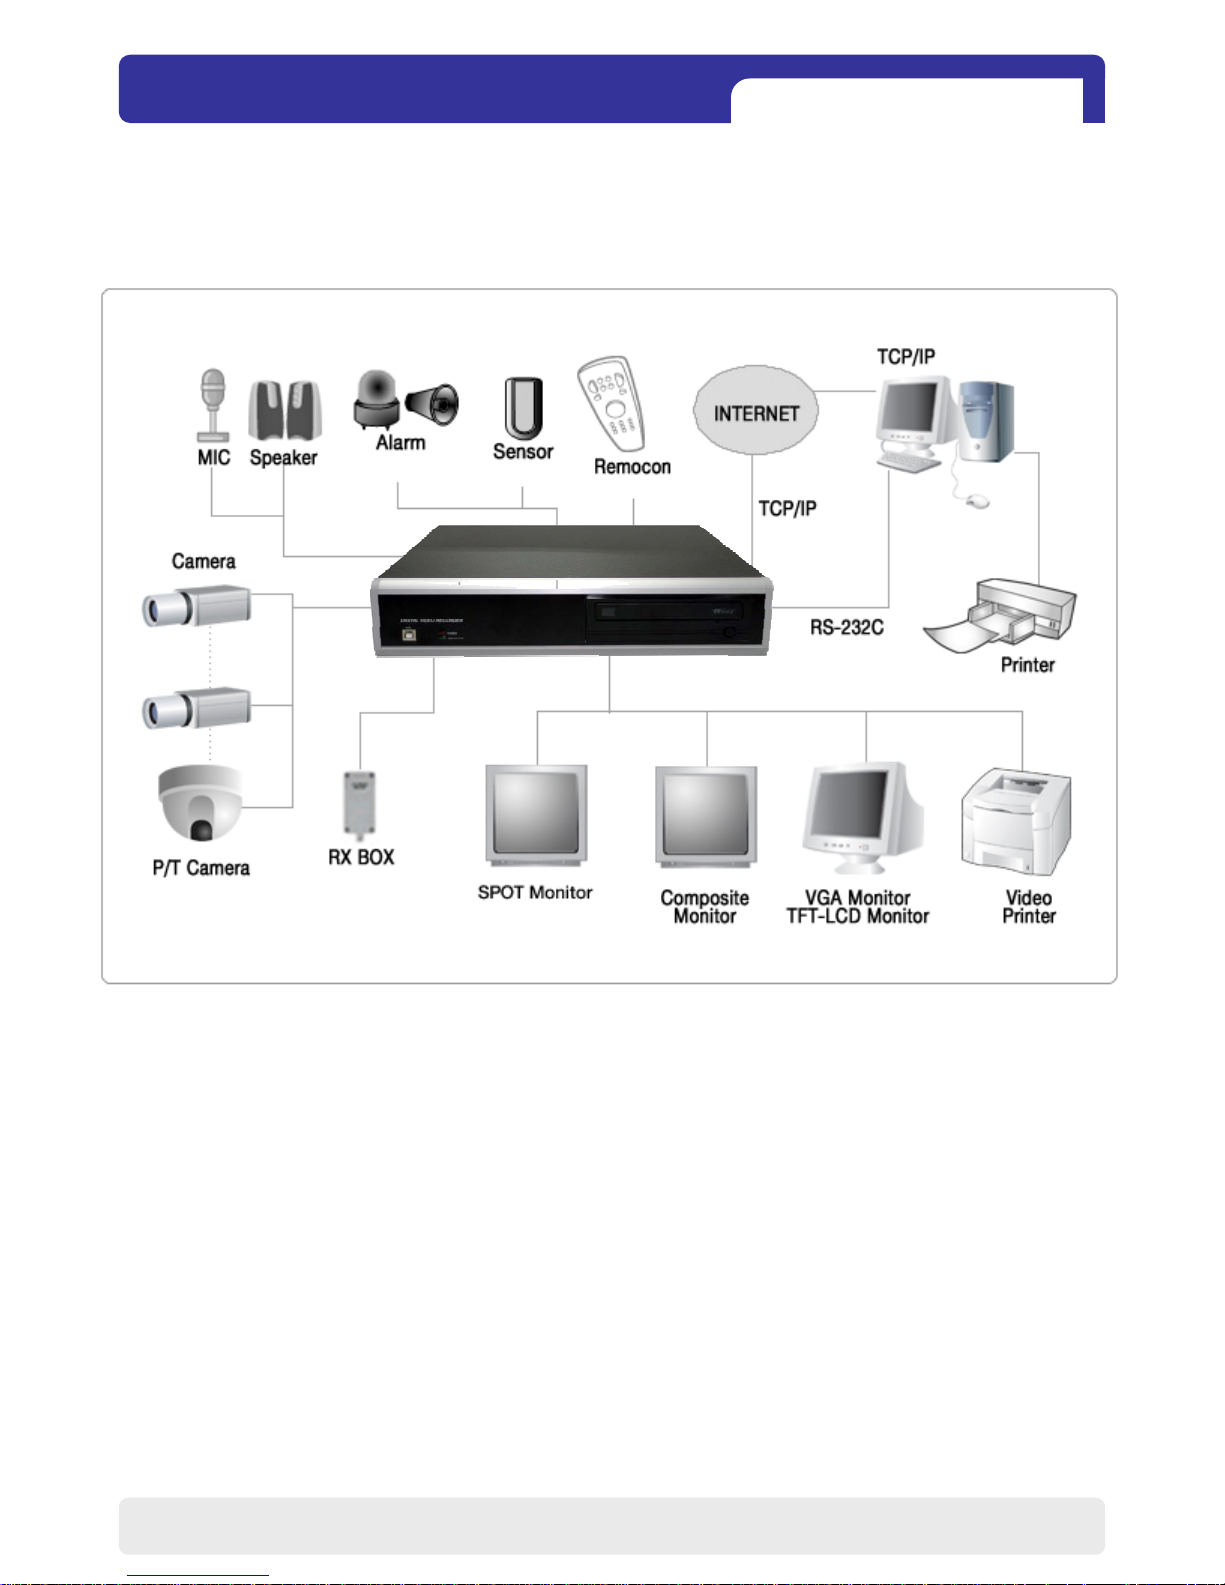
CHAP.3 Installation
3-1. Installation Configuration
- Stand Alone DVR
CHAP. 3 Installation
8
4Ch Real time/Triplex/Mux
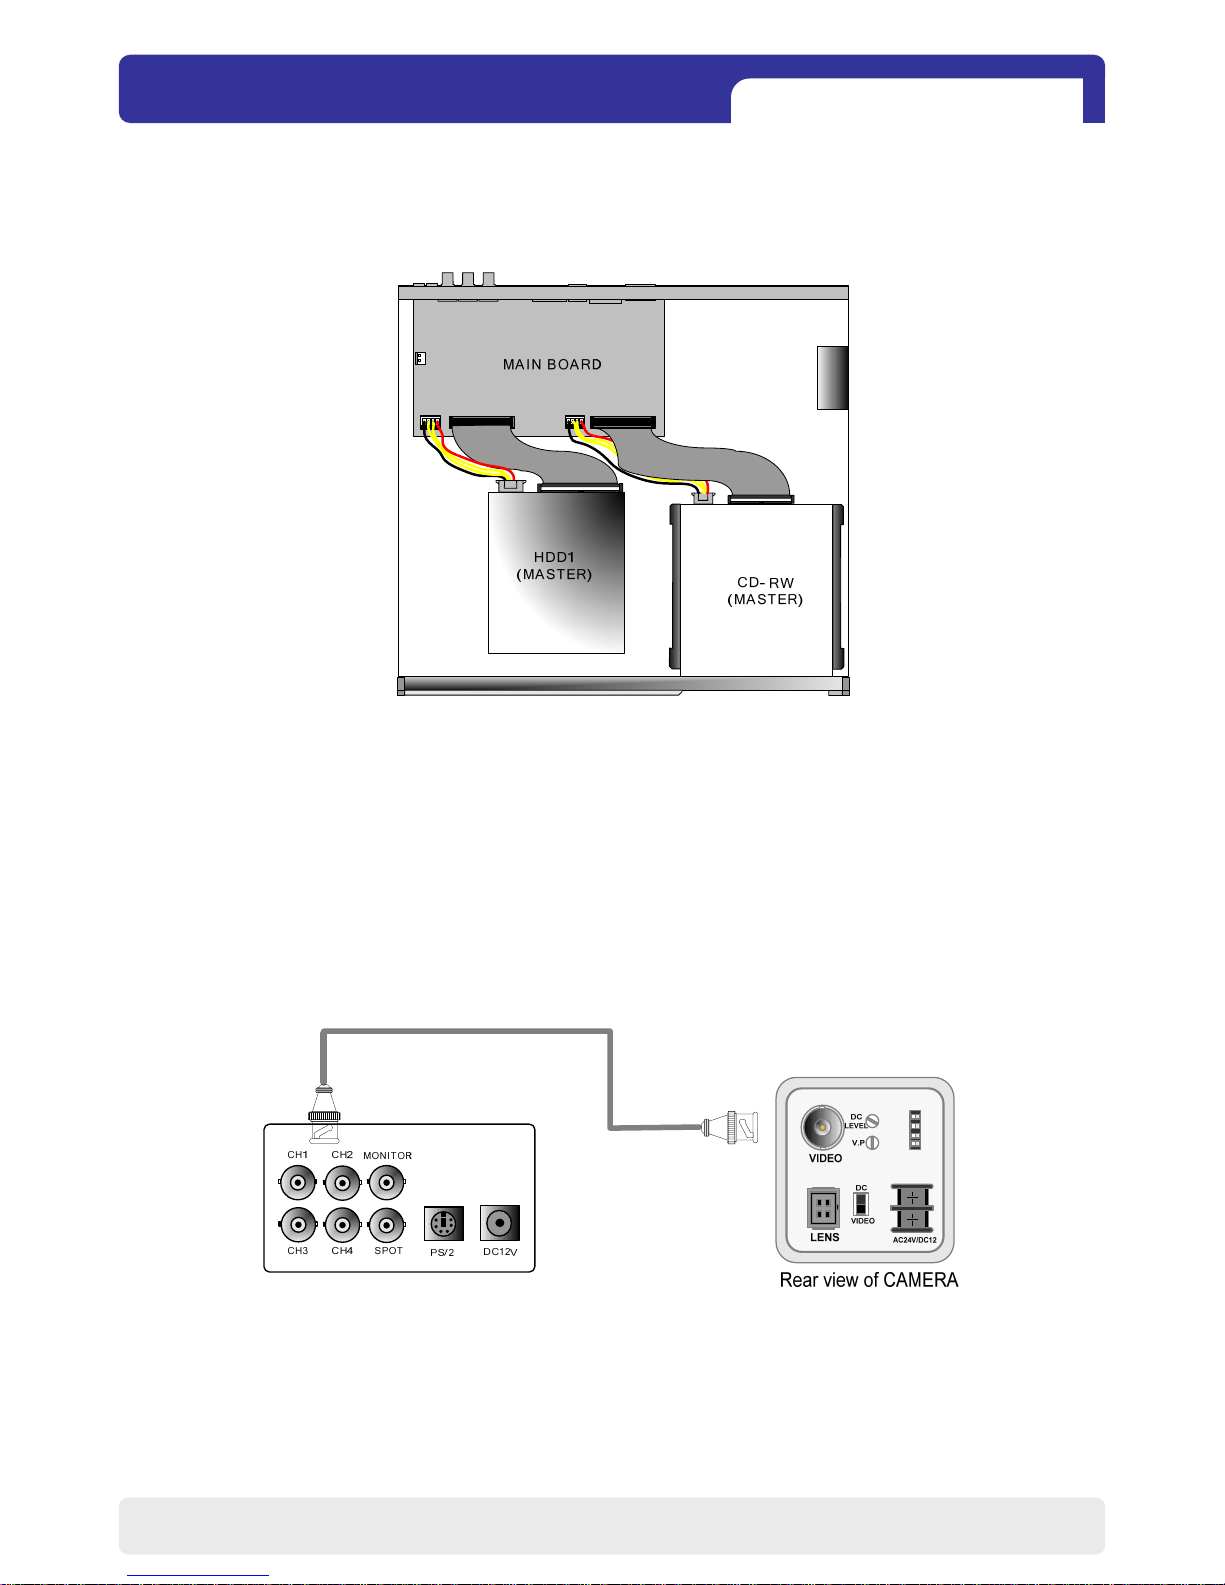
3-2. Detailed Installation
1) HDD
- Stand Alone DVR
CHAP. 3 Installation
1. Connect Main Board and HDD1 using IDE cable and HDD power cable.
2. The jumper setting of HDD should be on Master when you install HDD.
3. Stick the HDD absorber (included in package) on the bottom of case and then install the
HDD on top of them by using the bolts (included in package).
4. Screws must be inserted from outside of the case bottom.
2) Camera
Connect camera to the camera input on rear panel of DVR marked CAMERA IN.
9
 Loading...