

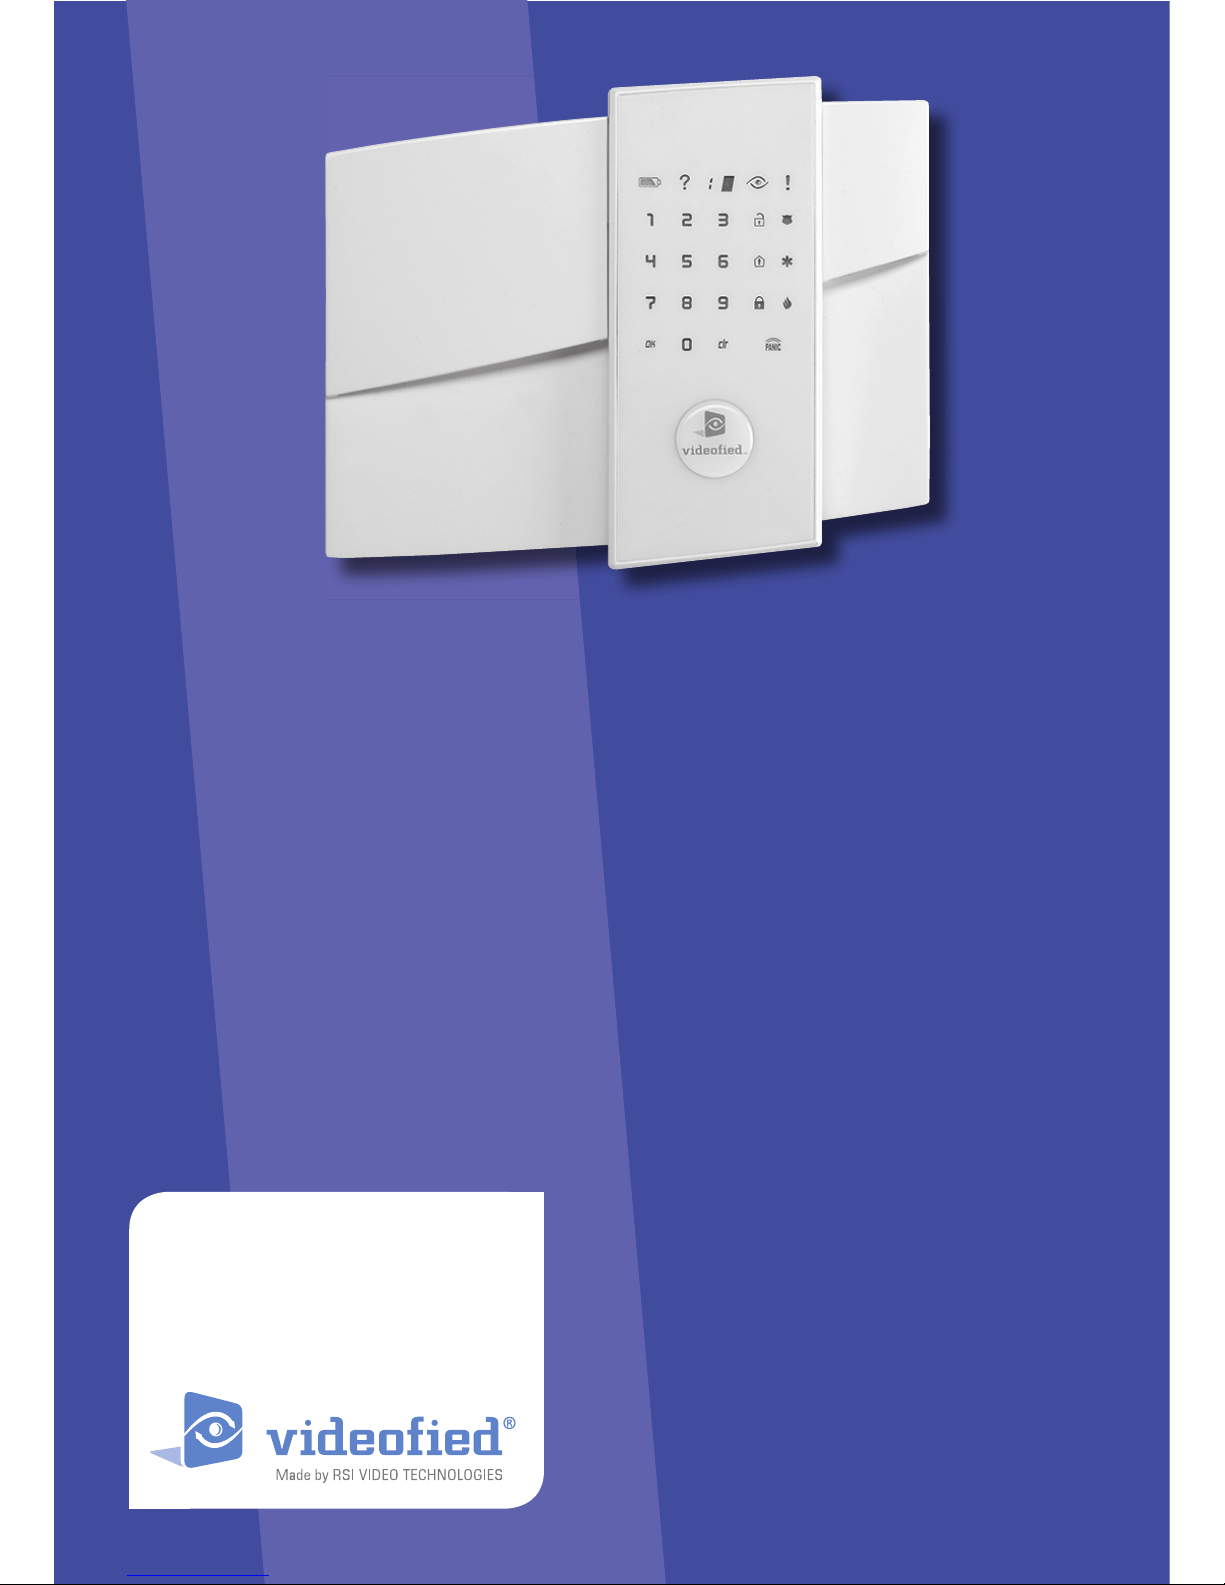
Videofied xl series User Manual
Get Videofi ed,
visit us at
www.videofi ed.com
> User’s manual
> Notice d’utilisation
> Manual de uso
> Gebrauchsanleitung
> Manuale d’uso
> Gebruiksaanwijzing
> Bruksanvisning
> Folheto de utilização
> Instrukcja uz˙ytkowania
> Bruksanvisning
>
И
нструкция по
эксплуатации
> Kullanıcı el kitabı
> Brugsanvisning
Your local installer: www.eaglesecuritysolutions.co.uk

För att använda din säkerhetsanläggning med högsta effektivitet och på bästa sätt läs denna
bruksanvisning noga.
Videofi ed® system är i överensstämmelse med europeiska radionormer, det är anpassade till
att fungera på frekvenser som är ofarliga för användaren.
Afi n d’utiliser votre système de sécurité avec un maximum d’effi cacité et dans les meilleures
conditions, nous vous conseillons de lire attentivement cette notice.
Le système Videofi ed®, répondant aux exigences radio européennes, est prévu
pour fonctionner dans des gammes de fréquences sans aucun danger pour l’utilisateur.
Français p. 5
Please read the user’s manual to ensure maximum effi ciency and optimal operating conditions
of your security system.
Videofi ed® systems comply with the European radio standards and operate
in the frequency range harmless to users.
English p. 2
Para usar su sistema de seguridad con la máxima efi cacia y en las mejores condiciones
posibles, le recomendamos leer detenidamente el presente manual de uso.
El sistema Videofi ed® está preparado para funcionar en gamas de frecuencias que no
constituyen un peligro para el usuario, conforme a las exigencias de las normas radiotécnicas
europeas.
Español p. 8
Damit Sie Ihr Sicherheitssystem mit maximaler Effi zienz und unter bestmöglichen
Bedingungen nutzen können, raten wir Ihnen, diese Gebrauchsanleitung aufmerksam
durchzulesen.
Das Videofi ed® System entspricht den europäischen Radioanforderungen und ist für die
Verwendung in Frequenzbereichen vorgesehen, die für den Benutzer völlig harmlos sind.
Deutsch p. 11
Al fi ne di utilizzare il vostro sistema di sicurezza con il massimo dell’effi cacia e nelle migliori
condizioni, vi consigliamo di leggere attentamente questo manuale.
Il sistema Videofi ed®, rispondente ai requisiti radio europei, è progettato per funzionare in
gamme di frequenze senza alcun pericolo per l’utente.
Italiano p. 14
Om uw veiligheidssysteem zo doeltreffend mogelijk te gebruiken en onder de beste
omstandigheden, raden wij u aan deze gebruiksaanwijzing zorgvuldig te lezen.
Het systeem Videofi ed® voldoet aan de Europese eisen voor radiogolven en is ontworpen
om te functioneren op frequenties die geen enkel gevaar opleveren voor de gebruiker.
Nederlands p. 17
Svensk p. 20
NOTES
Pointillés, HOENHEIM - 03 88 81 10 47
9FCNT0107
Your Dealer
© 2009 RSI VIDEO TECHNOLOGIES.
Videofi ed® is a Registered Trademark
of RSI VIDEO TECHNOLOGIES.

Para obter um desempenho máximo do sistema de segurança com óptimas condições, deve
ler com atenção este folheto.
O sistema Videofi ed®, conforme às exigências rádio comunitárias, está previsto para
funcionar em gamas de frequência sem nenhum perigo para o utilizador.
W celu użytkowania naszego systemu bezpieczeństwa w najbardziej skuteczny sposób i w
najlepszych warunkach, zalecamy uważne przeczytanie niniejszej instrukcji.
System
Videofi ed®
, spełniający europejskie wymagania dotyczące przekazu radiowego,
funkcjonuje w zakresie częstotliwości nieszkodliwych dla użytkownika.
For å bruke sikkerhetssystemet mest mulig effektivt og på best mulig måte anbefaler
vi at du leser denne bruksanvisningen nøye.
Systemet Videofi ed®, etterkommer de europeiske radiokravene og er bygd til å fungere
i frekvensskalaene uten noen risiko for brukeren.
Sisteminizi azami guvenlik ve en iyi kosullarda kullanabilmeniz icin, bu el kitabini dikkatle
okumanizi tavsiye ediyoruz.
Avrupa radyo frekanslari gereklerine uyan Videofi ed® sistemi kullanici acisindan
hicbir tehlike arz etmeyen frekanslarda calismak uzere tasarlanmistir.
For at kunne udnytte Deres systems sikker med maksimal virkning og under de bedste
betingelser raader vi Dem til at laese dette opmaerksomt.
Videofi ed® systemet svarer til europaeiske radiokrav og er konstrueret med henblik paa at
fungere i frekvensomraader uden fare for brugeren.
Português p. 23
Polski p. 26
Norsk p. 29
Р
усский p. 32
Turkish p. 35
Dansk p. 38
Для максимально эффективного использования системы безопасности рекомендуем
внимательно ознакомиться с настоящей инструкцией.
Система
Videofi ed®
, соответствует европейским требованиям по радиосвязи,
предназначена для безопасной работы во всей полосе частот.
1
ENGLISH
FRANÇAIS ENGLISHESPAÑOLDEUTSCHITALIANO
NEDERLANDS
SVENSK
PORTUGUÊS
POLSKINORSK
РУ ССК ИЙ
РУССКИЙ
TURKISHDANSK
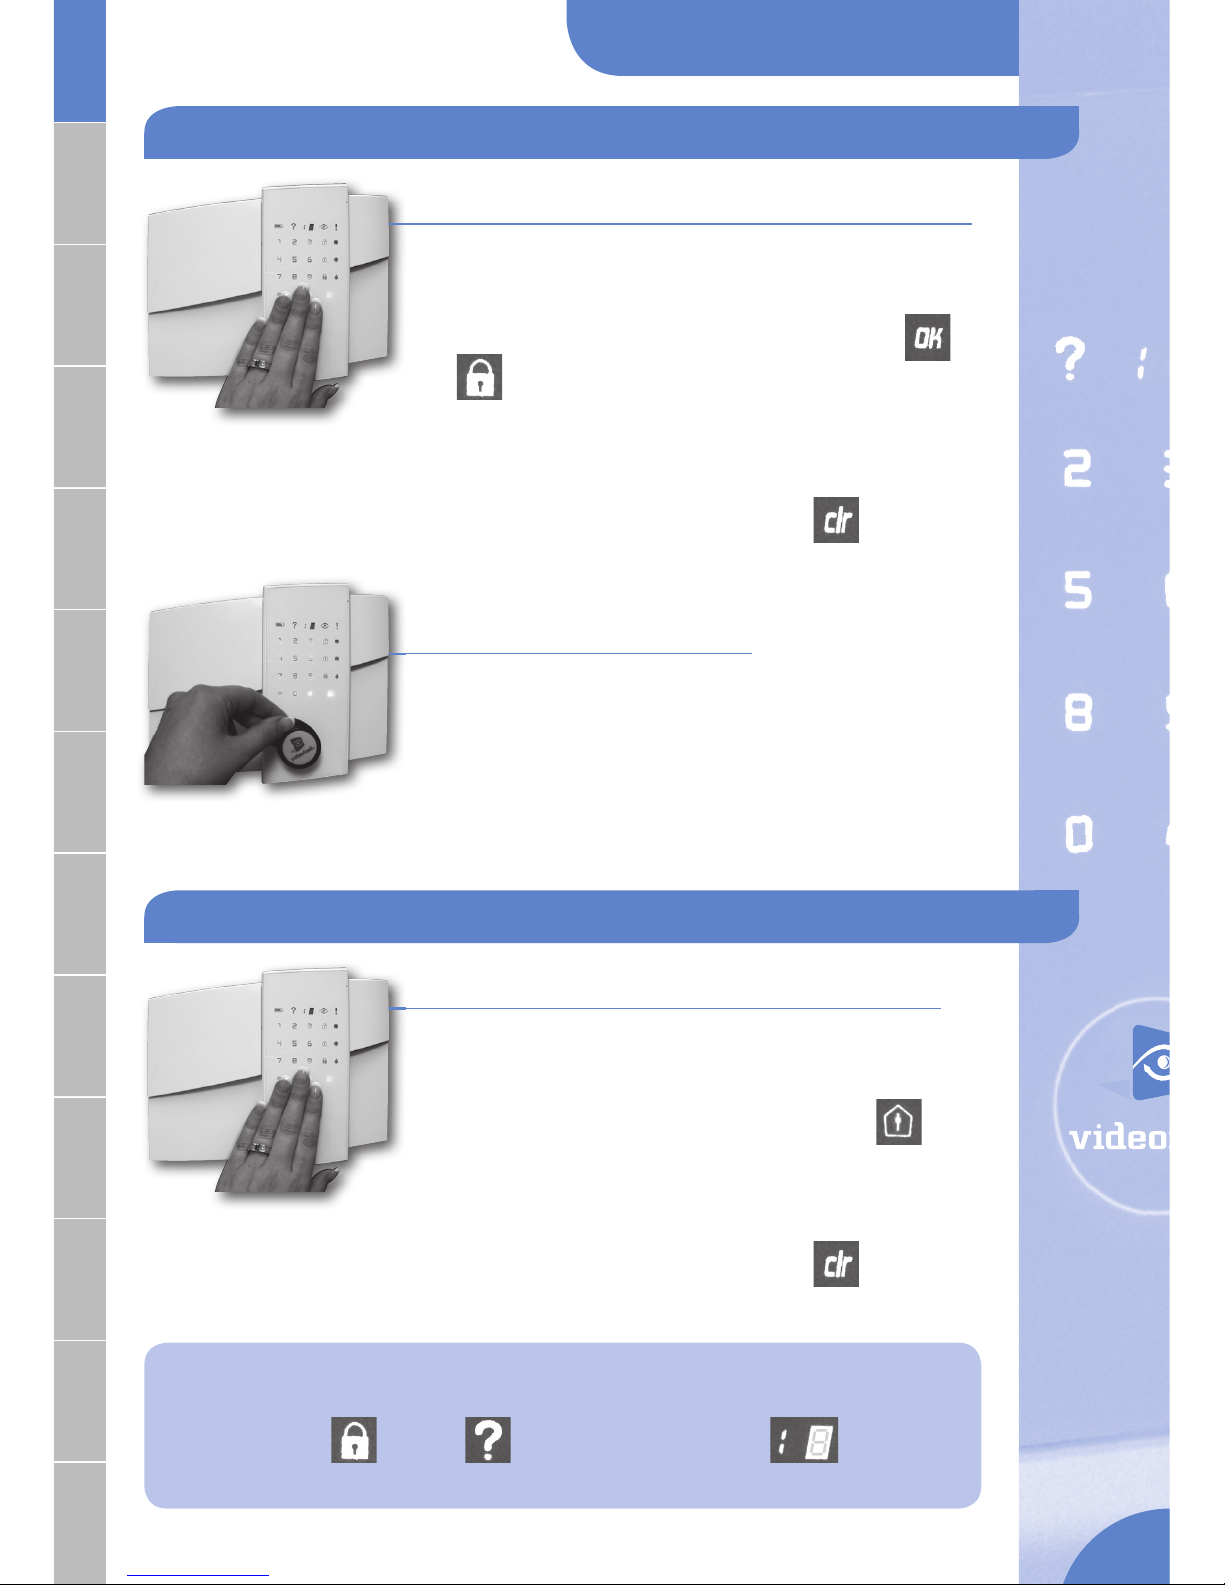
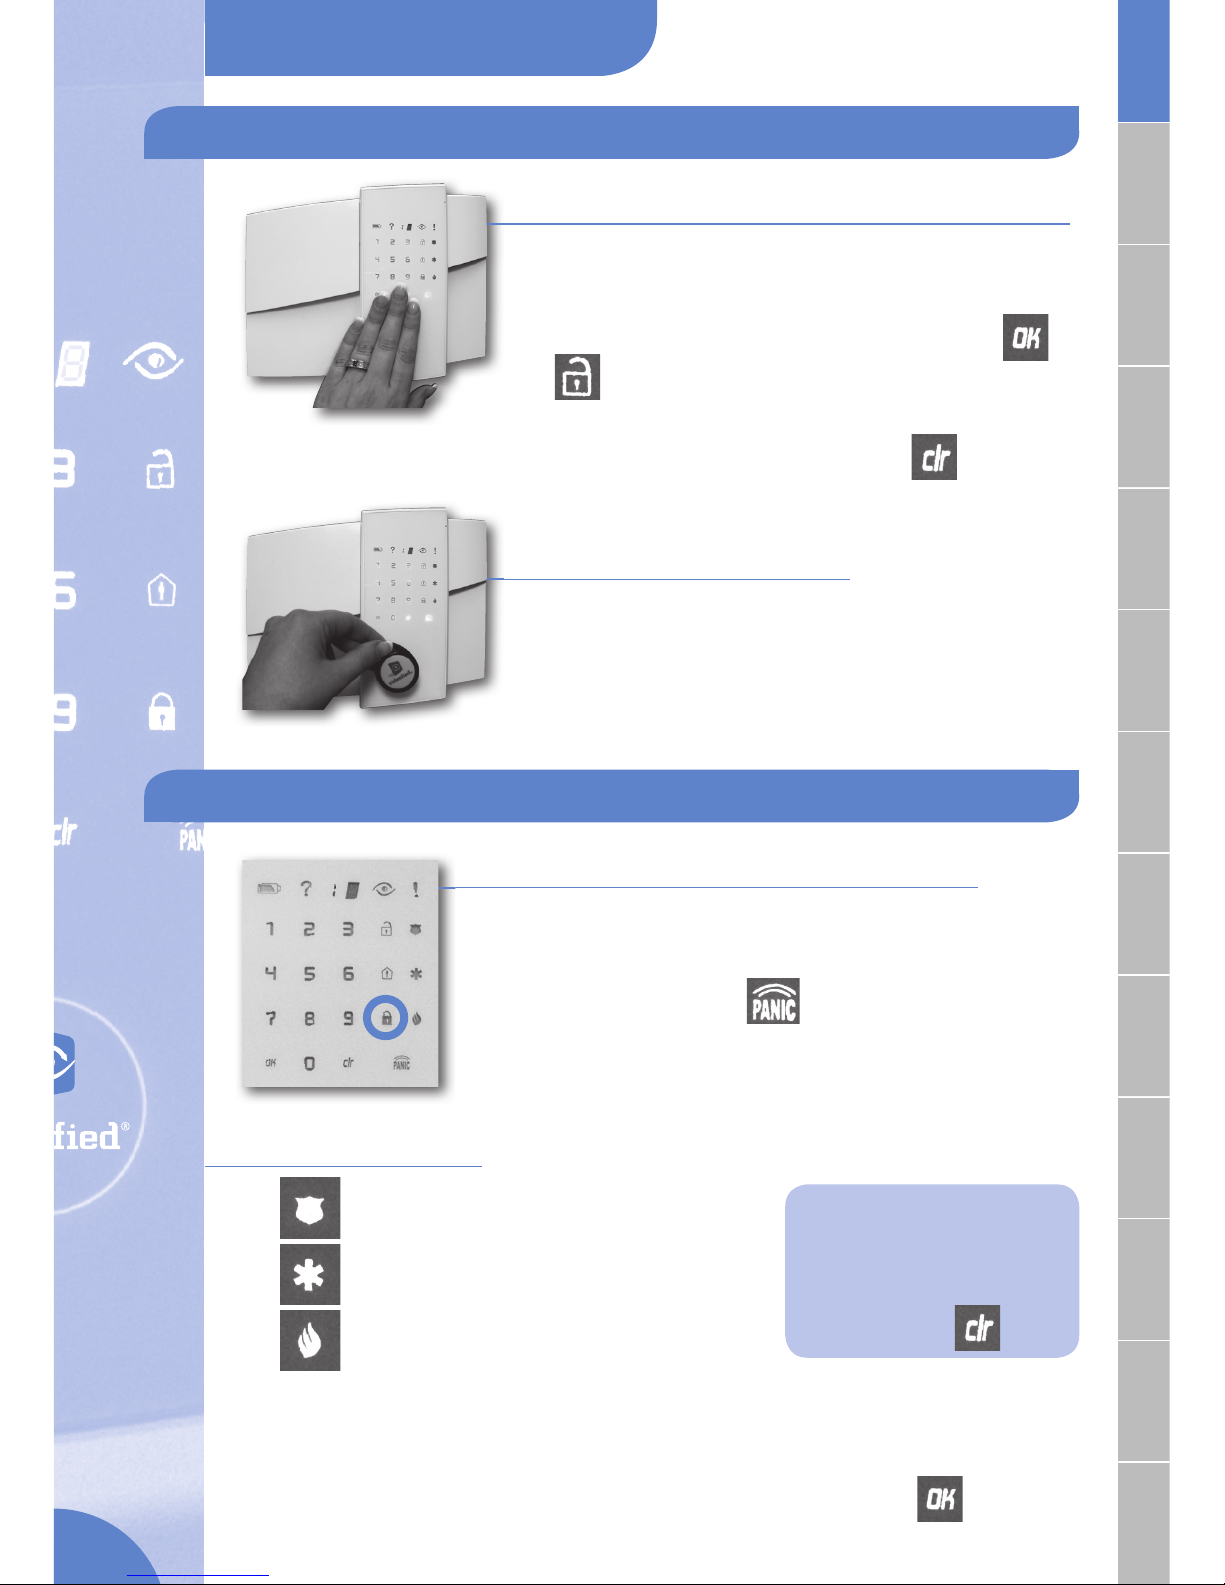
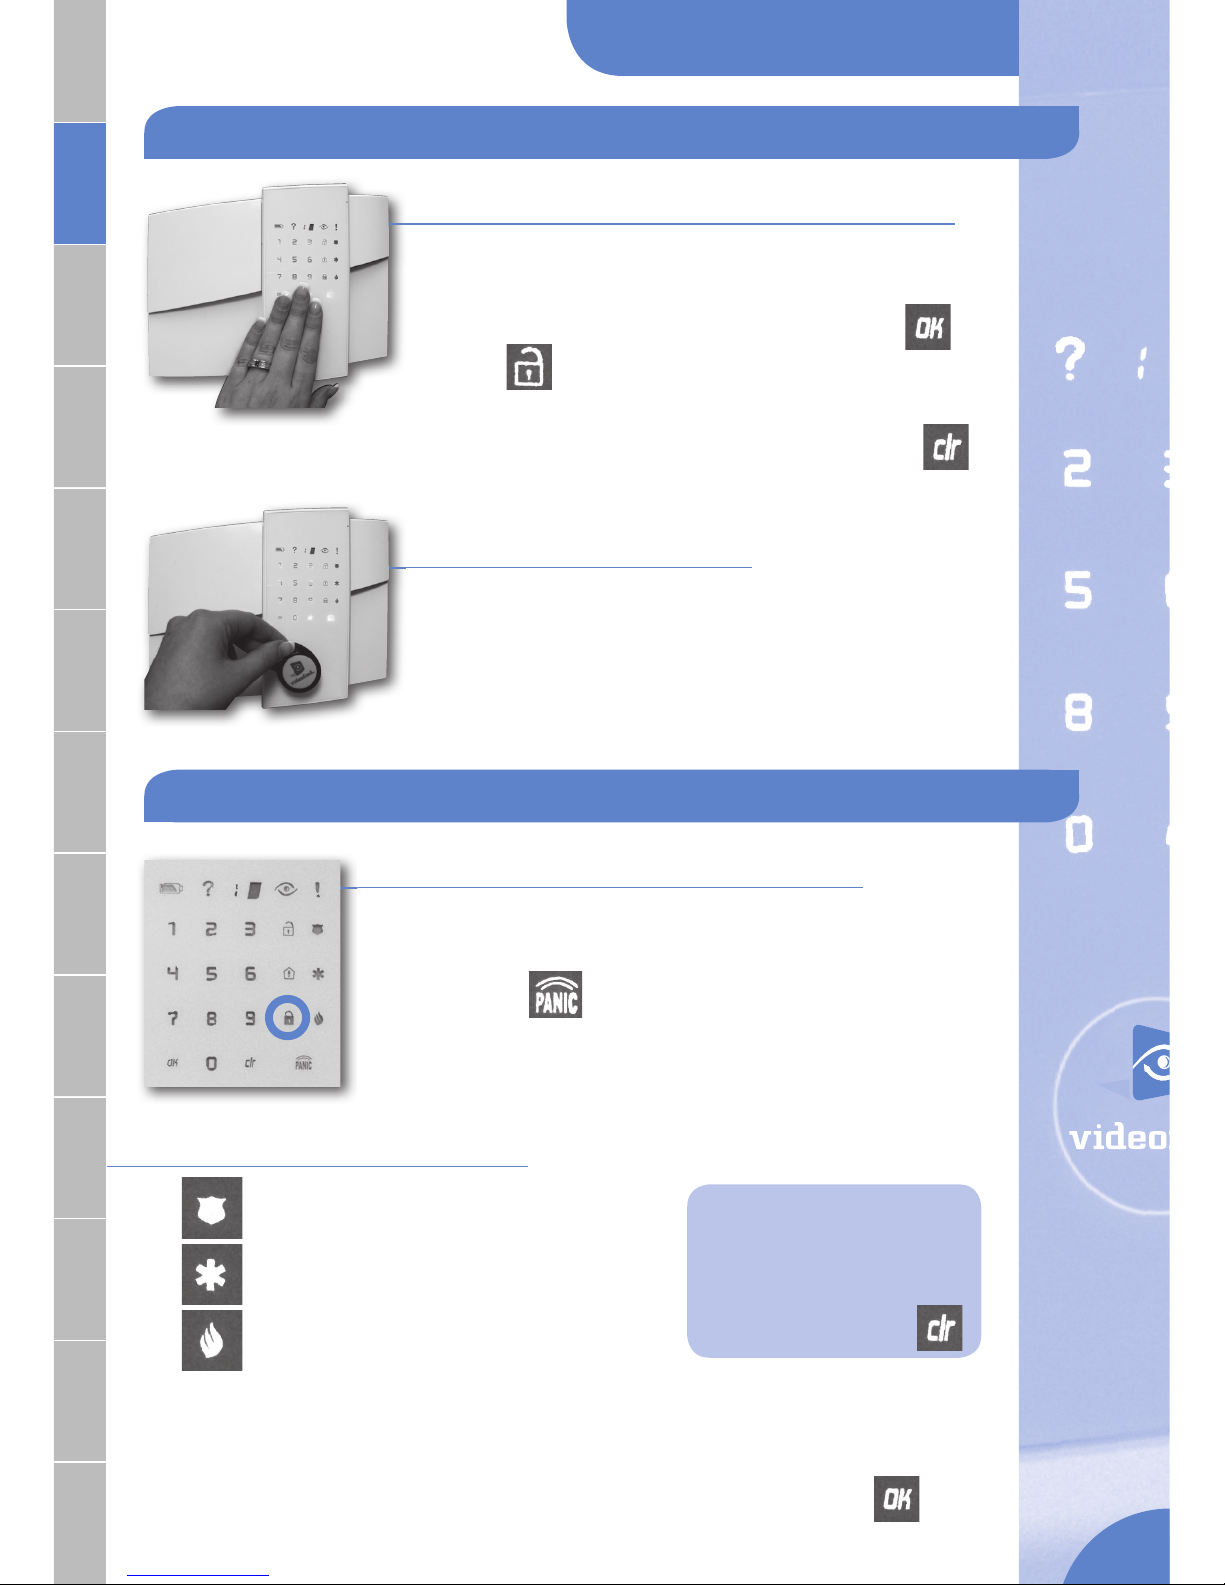
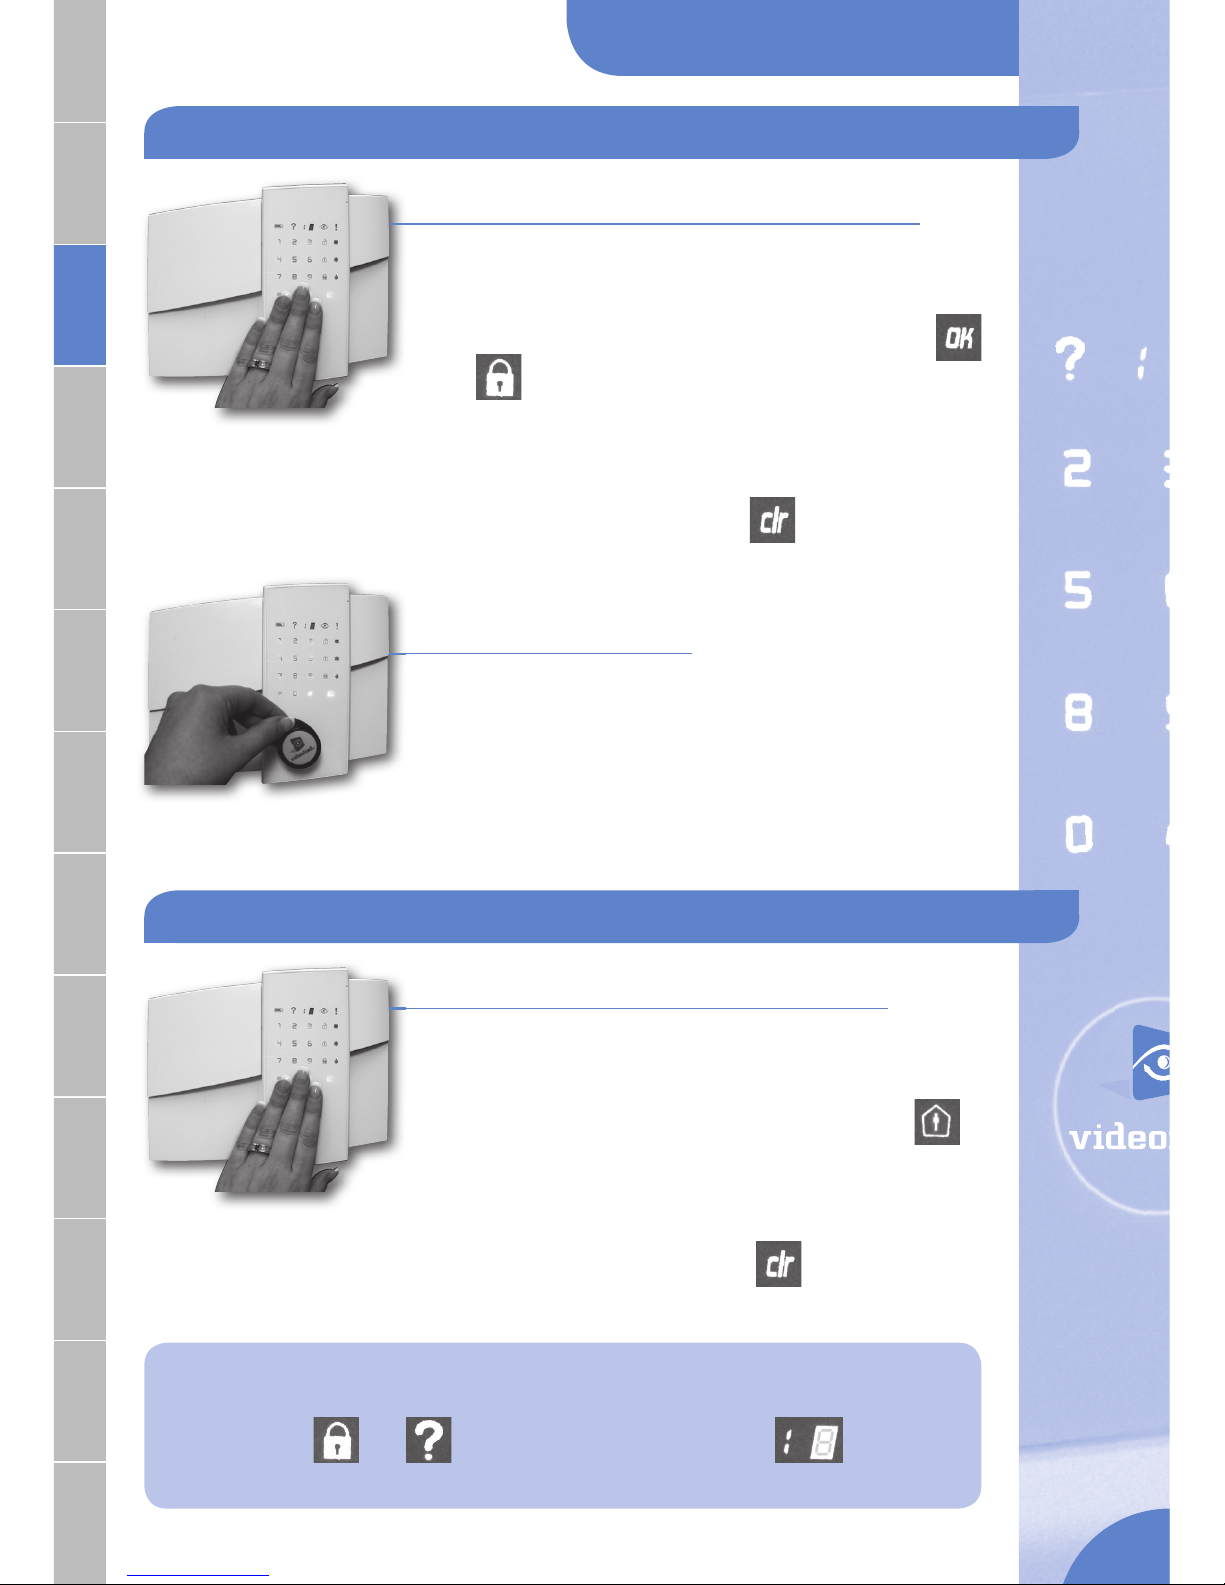
1. From the keypad integrated in the panel
 Put your hand on the keypad for activation, the back
light turns on.
 Enter your access code and confi rm with
or
 After the confi rmation bip, the panel emits two
bips to validate the command and start the delay
sequence.
Notice: In case of typing error, use
2. From the badge reader
integrated in the panel
 Present the badge in front of the panel and match the
badge logo with the panel logo. Wait for the two bips
confi rming the badge has been red and the start of
the delay sequence.
From the keypad integrated in the panel
 Put your hand on the keypad for activation, the back
light turns on.
 Enter your access code and confi rm with
 After the confi rmation bip, the panel emits two
bips to validate the command and start the delay
sequence.
Notice: In case of typing error, use
Arming your system in Monitoring Mode
Arming your system in Partial Arming Mode
Notice: If a door contact has been left open during the arming sequence,
the panel will emit two short bips every two seconds.
The
and the
blink red and the display
indicates the Nº of the device in question.
2
ENGLISH
FRANÇAIS ENGLISHESPAÑOLDEUTSCHITALIANO
NEDERLANDS
SVENSK
PORTUGUÊS
POLSKINORSK
РУ ССК ИЙ
РУССКИЙ
TURKISHDANSK
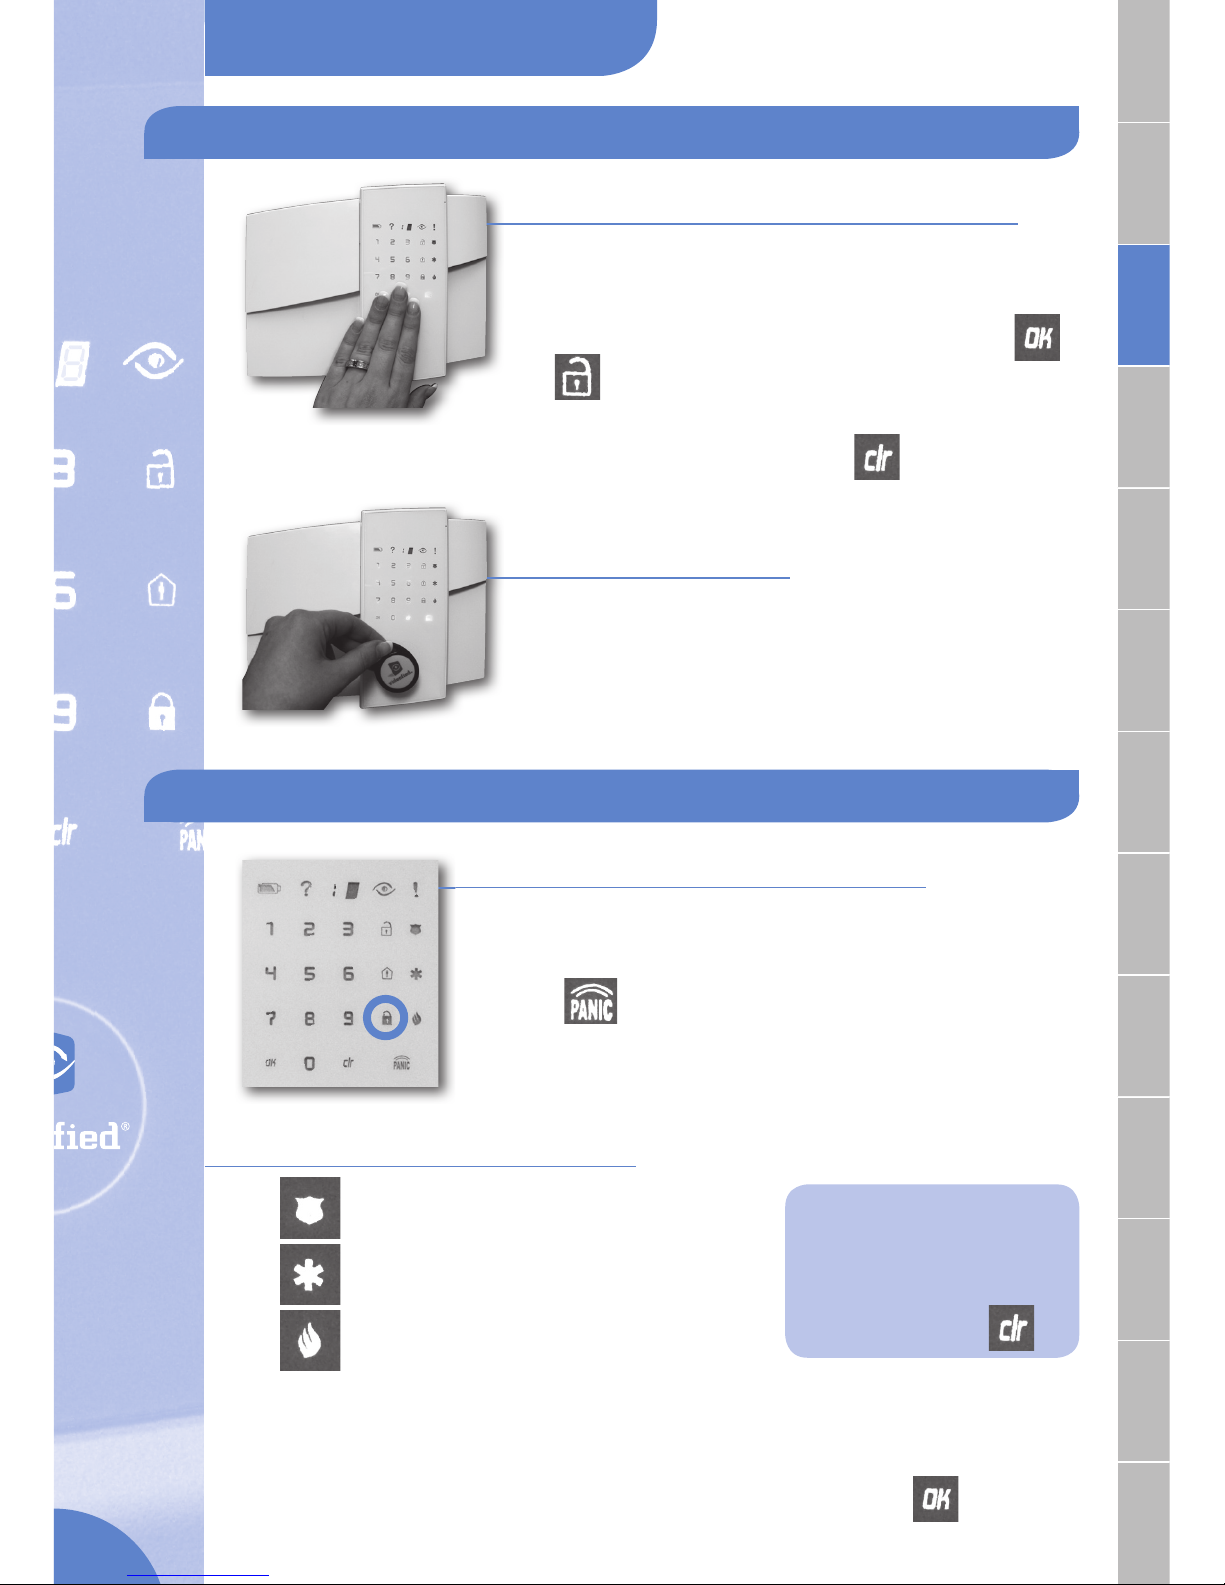
1. From the keypad integrated in the panel
 Put your hand on the keypad for activation, the back
light turns on.
 Enter your access code and confi rm with
or
. The red padlock stops blinking. Your system
is turned off.
Notice: In case of typing error, use
2. From the badge reader
integrated in the panel
 Present the badge in front of the panel and match
the badge logo with the panel logo. Wait for the two
bips confi rming the badge has been red. The red
padlock stops blinking. Your system is turned off.
Disarming your system
Panic Alert
3 Panic Buttons
: Request Police dispatch.
: Request Ambulance dispatch.
: Request Fire Department dispatch.
 Touch the button corresponding to the emergency type. All sirens will imme-
diately start sounding.
 To stop the sirens, enter your access code and validate with
From the keypad integrated in the panel
 Put your hand on the keypad for activation, the back light
turns on.
 Maintain your fi nger on
for 2 seconds. After three
short bips, the panel emits a loud bip and the 3 panic
buttons are illuminated.
Notice:
To exit the panic menu,
wait for 15 seconds
or touch
3

ENGLISH
FRANÇAIS ENGLISHESPAÑOLDEUTSCHITALIANO
NEDERLANDS
SVENSK
PORTUGUÊS
POLSKINORSK
РУ ССК ИЙ
РУССКИЙ
TURKISHDANSK
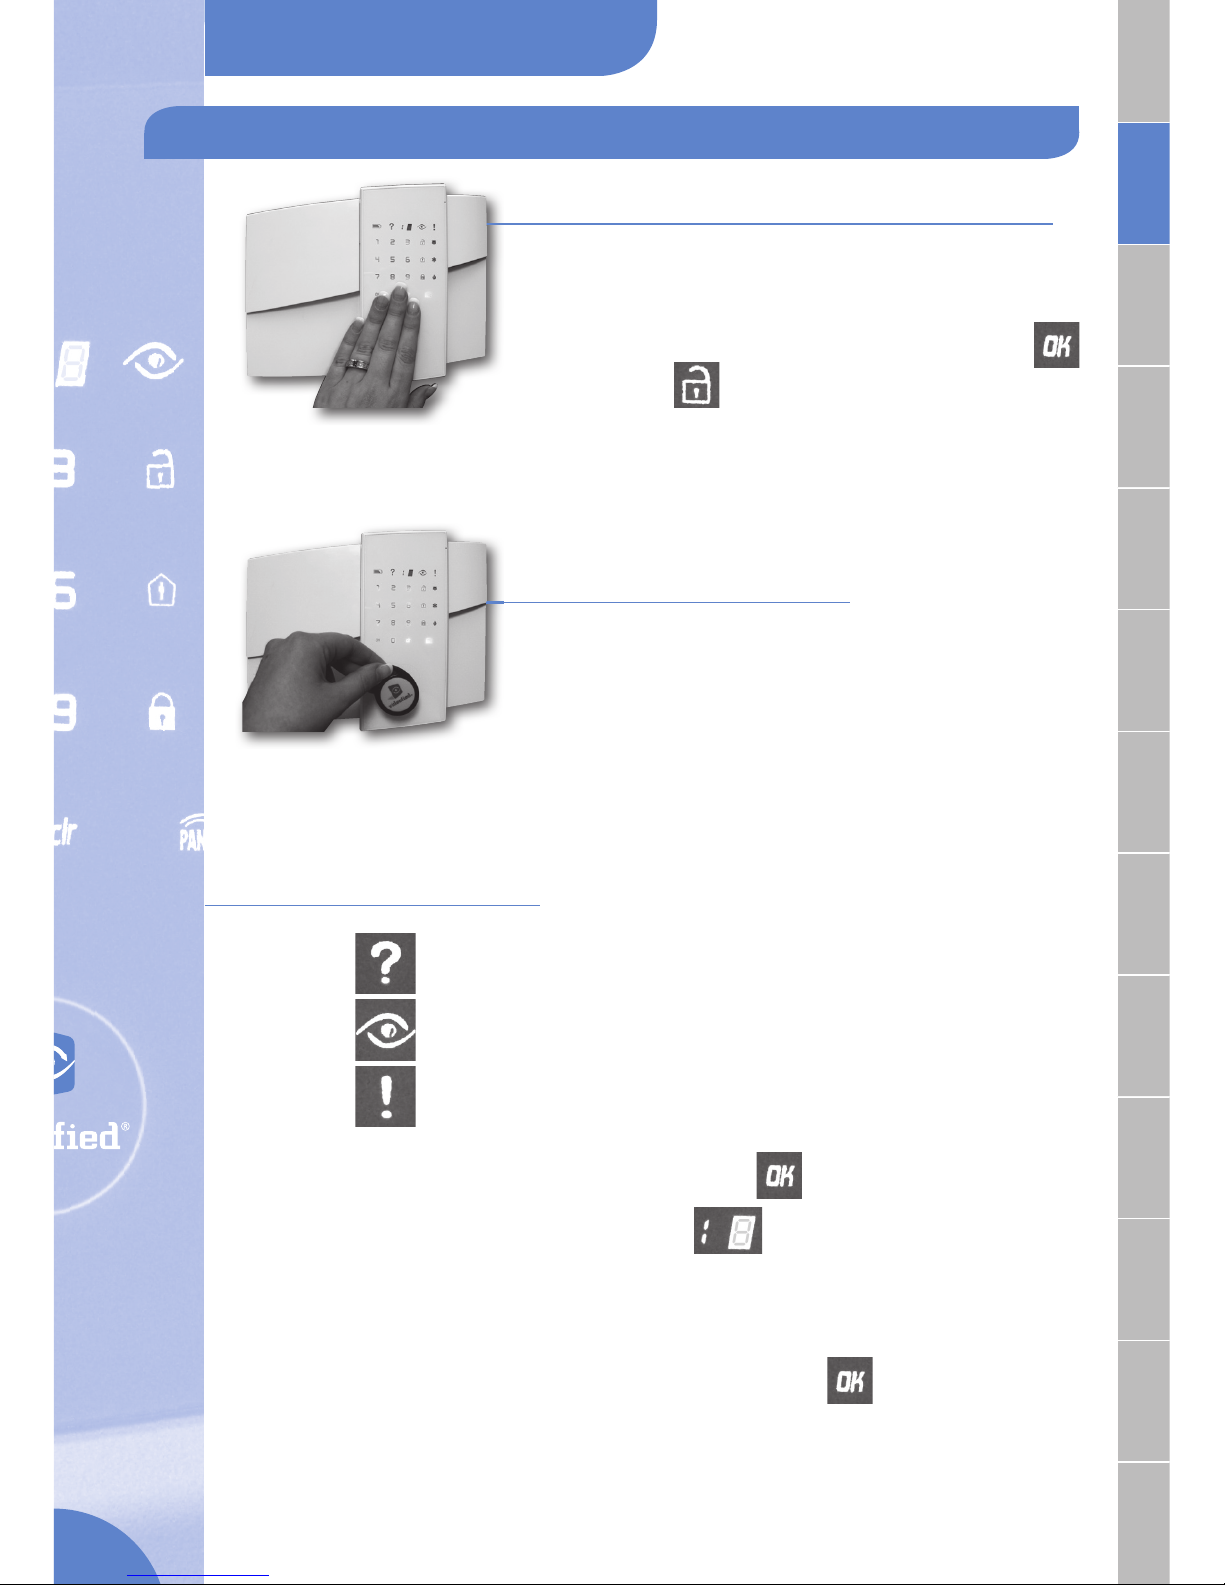
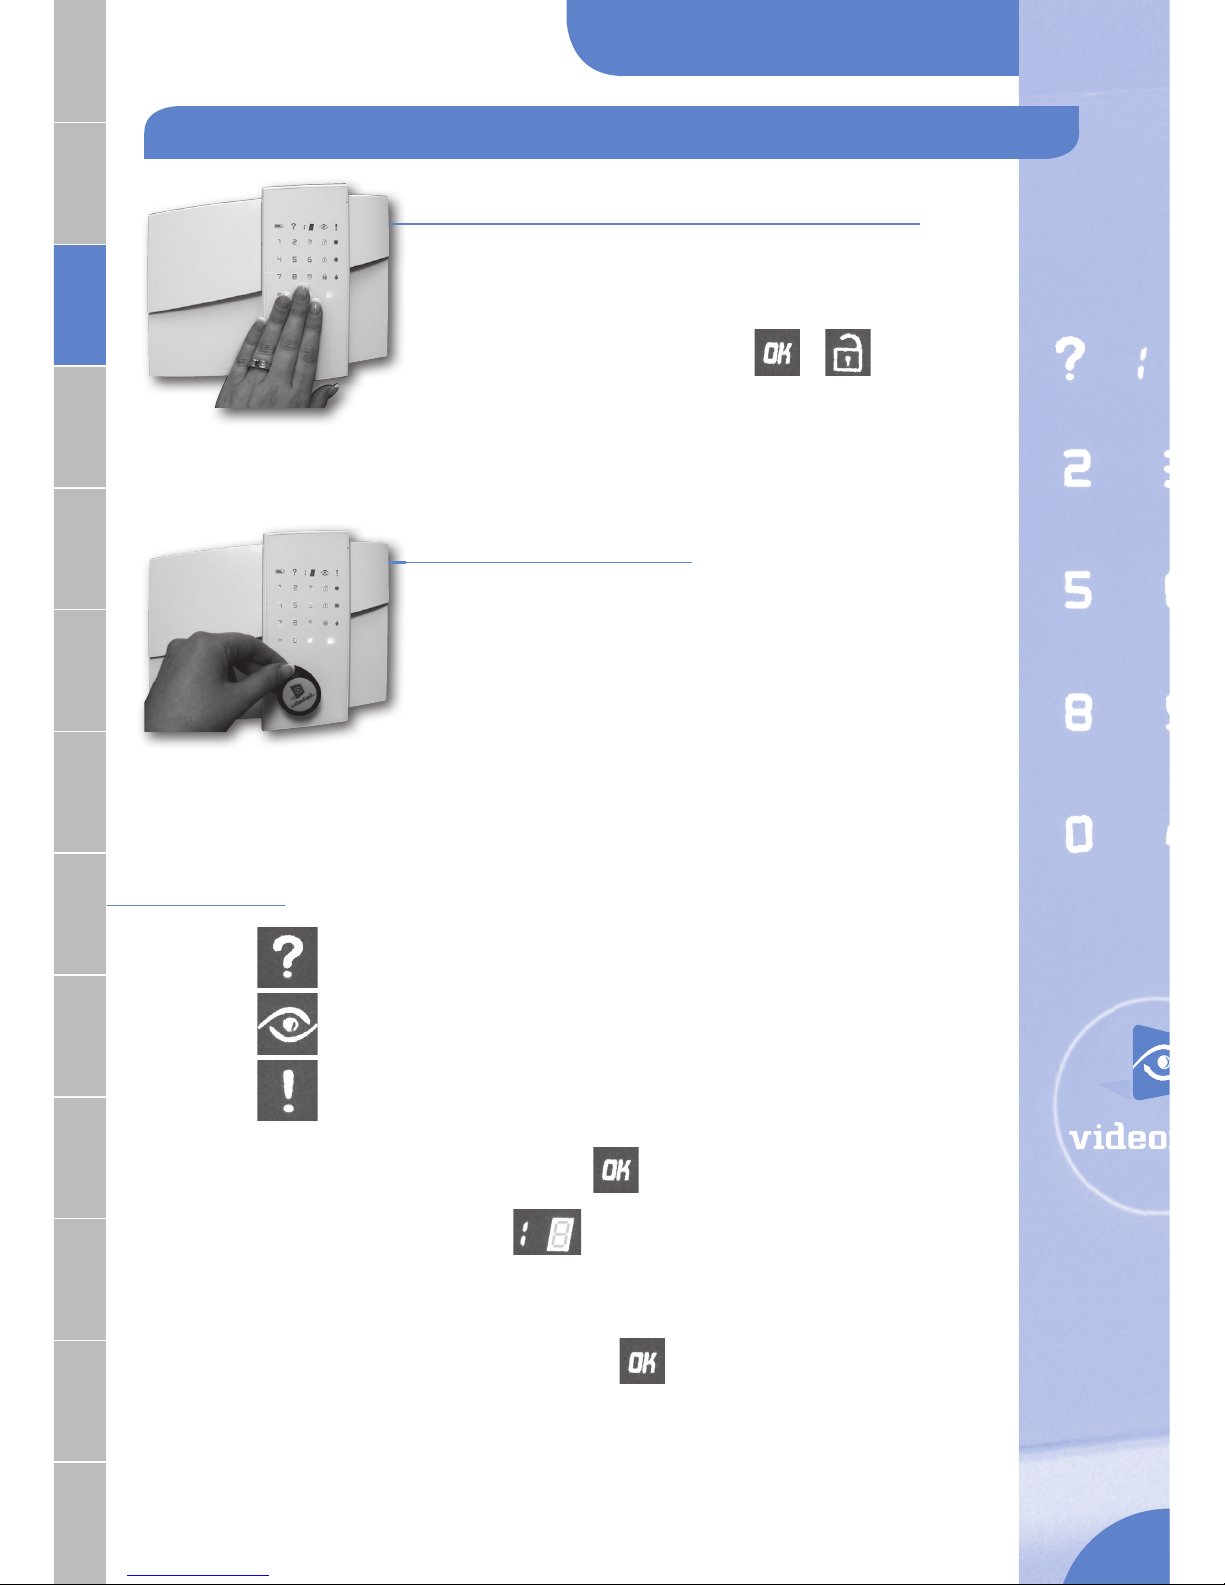
Alarm Meaning
: Tamper (The enclosure of a device has been open).
: Intrusion.
: Technical issue.
 You must validate the info and touch
 On the red display
is indicated the N° of the device.
which caused the alarm or the technical issue
0 => for the panel
1 à 19 => Number of the device in question.
 You must then validate the device and touch
1. From the keypad integrated in the panel
 Put your hand on the keypad for activation, the back
light turns on.
 Enter your access code and confi rm with
or
 The panel emits four rapid bips indicating there was
an alarm.
2. From the badge reader
integrated in the panel
 Present the badge in front of the panel and match
the badge logo with the panel logo. Wait for the two
bips. Your system is off.
 The panel emits four rapid bips indicating there was
an alarm.
Disarming your system after an alarm
4
FRANÇAIS
FRANÇAIS ENGLISHESPAÑOLDEUTSCHITALIANO
NEDERLANDS
SVENSK
PORTUGUÊS
POLSKINORSK
РУ ССК ИЙ
РУССКИЙ
TURKISHDANSK
1. A partir du clavier intégré à la centrale
 Posez la main sur le clavier pour le réveiller, le pavé
numérique s'illumine.
 Composez votre code d’accès et validez par
ou bien
 Après le bip de validation, la centrale émet deux
bips de confi rmation de la commande et lance la
temporisation d'armement.
Remarque : En cas d'erreur de saisie, utilisez
2. A partir du lecteur de badges
présent sur la centrale
 Posez le badge en contact sur le cercle de la zone
de lecture et attendez les deux bips de prise en
compte de la commande, puis lancement des bips
de temporisation d’armement.
A partir du clavier intégré à la centrale
 Posez la main sur le clavier pour le réveiller, le pavé
numérique s’illumine.
 Composez votre code d’accès et validez par
 Après le bip de validation, la centrale émet deux
bips de confi rmation de la commande et lance la
temporisation d’armement.
Remarque : En cas d’erreur de saisie, utilisez
Mettre son système sous surveillance en mode total
Mettre son système sous surveillance en mode partiel
Remarque : Si un contact non temporisé est resté ouvert lors de l’armement,
la centrale émettra deux bips rapides toutes les deux secondes.
Le
ainsi que le
clignotent rouge et l’affi cheur
indiquera le N° du périphérique concerné.
5
FRANÇAIS ENGLISHESPAÑOLDEUTSCHITALIANO
NEDERLANDS
SVENSK
PORTUGUÊS
POLSKINORSK
РУ ССК ИЙ
РУССКИЙ
TURKISHDANSK
FRANÇAIS
1. A partir du clavier intégré à la centrale
 Posez la main sur le clavier pour le réveiller, le pavé
numérique s’illumine.
 Composez votre code d’accès et validez par ou
bien
. Le cadenas rouge fermé ne clignote plus,
le système est à l'arrêt.
Remarque : En cas d’erreur de saisie, utilisez
2. A partir du lecteur de badges
présent sur la centrale
 Posez physiquement le badge sur le cercle de la zone
de lecture, attendez les deux bips de confi rmation,
le système est à l’arrêt.
Mettre son système hors surveillance
Déclencher une alerte
Signifi cation des 3 boutons
: Demande d’appel police.
: Demande d’appel d'urgence.
: Demande d’appel détection de fumée.
 Choisissez l’appel correspondant à l’urgence en appuyant sur l’un des trois
boutons. Toutes les sirènes présentes sur le site déclencheront.
 Pour arrêter les sirènes, saisissez votre code secret et validez par
A partir du clavier intégré à la centrale
 Posez la main sur le clavier pour le réveiller,
le pavé numérique s'illumine.
 Appuyez sur
pendant 2 secondes.
Après 3 bips courts, la centrale émet un bip aigu
et les 3 boutons d'appels de secours s'illuminent.
Remarque :
Pour sortir du menu panic,
attendre 15 secondes
ou bien appuyez sur
6
FRANÇAIS ENGLISHESPAÑOLDEUTSCHITALIANO
NEDERLANDS
SVENSK
PORTUGUÊS
POLSKINORSK
РУ ССК ИЙ
РУССКИЙ
TURKISHDANSK
FRANÇAIS
Lecture des alarmes
: Autoprotection (ouverture du boîtier d'un périphérique).
: Intrusion détectée.
: Problème technique.
 Vous devez valider l’alarme en appuyant sur
 S’affi che alors sur l’affi cheur en rouge
le N° du périphérique
qui a déclenché l'alarme ou le problème technique
0 => pour la centrale
1 à 19 => nombre représentant le numéro du périphérique concerné.
 Vous devez valider le périphérique en appuyant sur
1. A partir du clavier intégré à la centrale
 Posez la main sur le clavier pour le réveiller, le pavé
numérique s'illumine.
 Saisissez votre code d'accès et appuyez sur
ou bien sur
 Quatre bips rapides se font entendre, indiquant qu’il
y a eu une alarme.
2. A partir du lecteur de badges
présent sur la centrale
 Posez physiquement le badge sur le cercle de la
zone de lecture, attendre les deux bips, le système
est à l'arrêt.
 Quatre bips rapides se font entendre, indiquant qu’il
y a eu une alarme.
Mettre à l’arrêt après un déclenchement (mémo d’alarme)
7
FRANÇAIS ENGLISHESPAÑOLDEUTSCHITALIANO
NEDERLANDS
SVENSK
PORTUGUÊS
POLSKINORSK
РУ ССК ИЙ
РУССКИЙ
TURKISHDANSK
ESPAÑOL
1. Desde su teclado integrado al panel
 Poner su mano en el teclado para activarlo, el
teclado se ilumina.
 Marcar su codigo de acceso y confi rmar con
o
 Despues de la señal sonora de confi rmacion el panel
emite dos señales de confi rmacion y empieza la
temporizacion.
Ojo: En caso de error, utilice
2. Desde su lector de tarjeta
integrado al panel
 Poner la tarjeta frente al logo del panel y esperar dos
bips luego se activan los bips de temporizacion.
Desde su teclado integrado al panel
 Poner su mano en el teclado para activarlo, el
teclado se ilumina.
 Marcar su codigo de acceso y confi rmar con
 Despues de la señal sonora de confi rmacion el panel
emite dos señales de confi rmacion y empieza la
temporizacion.
Ojo : En caso de error, utilice
Activacion de su sistema en modo supervision
Activacion de su sistema en modo particion
Ojo : si un magetico no temporizado se queda abierto durante el armamiento,
el panel emitira dos bips rapidos todos los segundos.
La
y la
parpadean en rojo y la pantalla
indicara el N° del periferico.
8
FRANÇAIS ENGLISHESPAÑOLDEUTSCHITALIANO
NEDERLANDS
SVENSK
PORTUGUÊS
POLSKINORSK
РУ ССК ИЙ
РУССКИЙ
TURKISHDANSK
ESPAÑOL
1. Desde su teclado integrado al panel
 Poner su mano en el teclado para activarlo, el
teclado se ilumina.
 Marcar su codigo de acceso y confi rmar con
o
. El candado rojo cerrado parra de parpadear, el
sistema esta desarmado.
Ojo : En caso de error, utilice
2. Desde su lector de tarjeta
integrado al panel
 Poner la tarjeta frente al logo del panel y esperar dos
bips de confi rmacion, el sistema esta desarmado.
Desactivar su sistema
Boton Panico
Signifi cacion de las 3 teclas
: Llamada a la policia.
: Llamada de emergencia.
: Llamada de detccion de humo.
 Elegir el tipo de llamada correspondiente a la emergencia pulsando una de las
tres teclas. Todas las sirenas disparan.
 Para parrar las sirenas introduzca su codigo y pulse la tecla
Desde su teclado integrado al panel
 Poner su mano en el teclado para activarlo, el teclado se
ilumina.
 Pulse
durante 2 segundos. Despues de 3 bips
cortos, el panel emite un bip y las 3 teclas de emergencia
se iluminan.
Ojo :
Para salir del menu panico,
esperar 15 segundos
o pulse la tecla
9
ESPAÑOLDEUTSCHITALIANO
NEDERLANDS
SVENSK
PORTUGUÊS
POLSKINORSK
РУ ССК ИЙ
РУССКИЙ
TURKISHDANSK
ESPAÑOL
Alarmas
: Autoproteccion (apertura de un periferico).
: Intrusion detectada.
: Problema tecnico.
 Teneis que validar la alarma pulsando
 En la pantalla aparece en rojo
el N° del periferico que disparo
o el problema tecnico
0 => para el panel
1 a 19 => Valor representando el numero del periferico.
 Teneis que validar el periferico pulsando
1. Desde su teclado integrado al panel
 Poner su mano en el teclado para activarlo, el
teclado se ilumina.
 Introduzca su codigo y pulse
o
 Se oira 4 bips indicando que hubo un disparo de
alarma.
2. Desde su lector de tarjeta
integrado al panel
 Poner la tarjeta frente al logo del panel y esperar dos
bips de confi rmacion, el sistema esta desarmado.
 Se oira 4 bips indicando que hubo un disparo de
alarma.
Desactivar su sistema despues de un disparo
FRANÇAIS ENGLISH
10
 Loading...