

Videofied SE651, SE601 Product Installation Sheet
Outdoor Siren SE651
PRODUCT INSTALLATION SHEET
2204-SEOIS February 2012Made by RSI VIDEO TECHNOLOGIES
Product Summary
The Outdoor Siren SE651 is a wireless siren designed for
use in Videofied security systems. The siren includes the
following features:
Totally wireless, battery operated.
>
Dual tamper function provides detection for both wall
>
and cover tamper.
Transmits check-in/status signal every 8 minutes.
>
Programming/RF Testing
The following provides summarized steps for device
programming and testing. For complete details, refer
to the control panel installation manual.
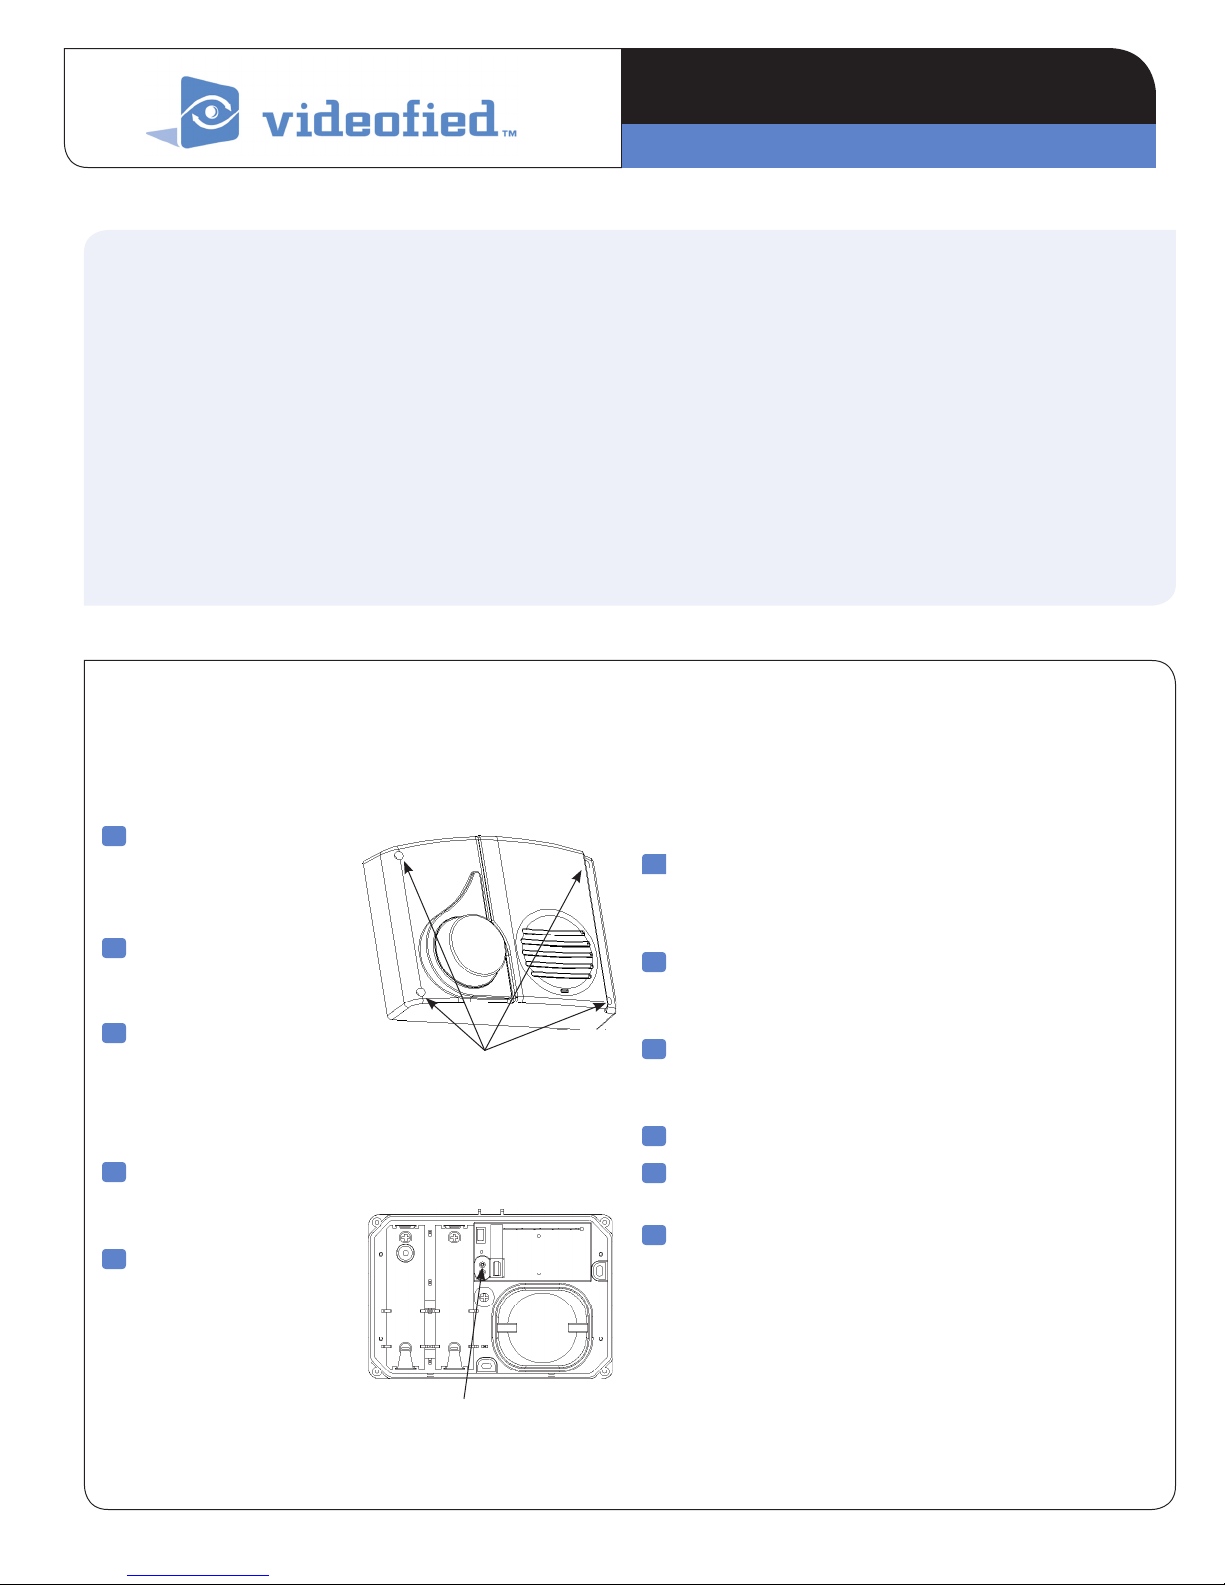
1
Remove four cover
screws, separate cover
from siren and install
batteries.
Installation Guidelines
For easier installation, programming and RF testing should
be done to check for good communication between the
control panel and all system devices before mounting
system devices. Install the siren and other system devices
in the order of the following steps:
Programming/RF Testing - program siren and
>
all other devices into the control panel and test
RF communication from each intended device
location to the control panel.
Mounting - mount siren at the tested location.
>
6
To the question “REMOTE CONTROLLED?” press:
No to be automatically controlled by the alarm panel
Yes if the siren is controlled by the monitoring station.
2
Put control panel
into programming/
configuration mode.
3
Using a programmed
alphanumeric keypad,
proceed through menus
until the display shows
ADD A NEW DEVICE.
4
Press Yes . The display
shows PRESS PROGRAM
BUTTON OF DEVICE.
5
Press and release
program button on siren
using a paper clip end.
The siren LED flashes.
Wait for keypad display
to show SIREN (1 - 24)
RECORDED.
Screws
Program Button
Press Yes . The display shows RADIO RANGE TEST?
7
Press Yes again. The siren LED starts flashing and
keypad display shows TEST IN PROGRESS.
Take the siren to its intended mounting location and
8
make sure LED flashes continuously, indicating good
communication with control panel.
Press Yes to end radio range test, then press Esc/No.
9
The display shows ADD A NEW DEVICES?
10
Repeat steps 4 - 8 for remaining sirens.
When finished, exit from configuration mode.
11
www.videofied.com
Mounting
Use proper tools and hardware for mounting the unit.
>
Mount outdoors under eves to help prevent direct contact
>
from elements.
Mount on front of structure where strobe light is clearly
>
visible to responding authorities.
INSTALLATION DATA SHEETOutdoor Siren SE651
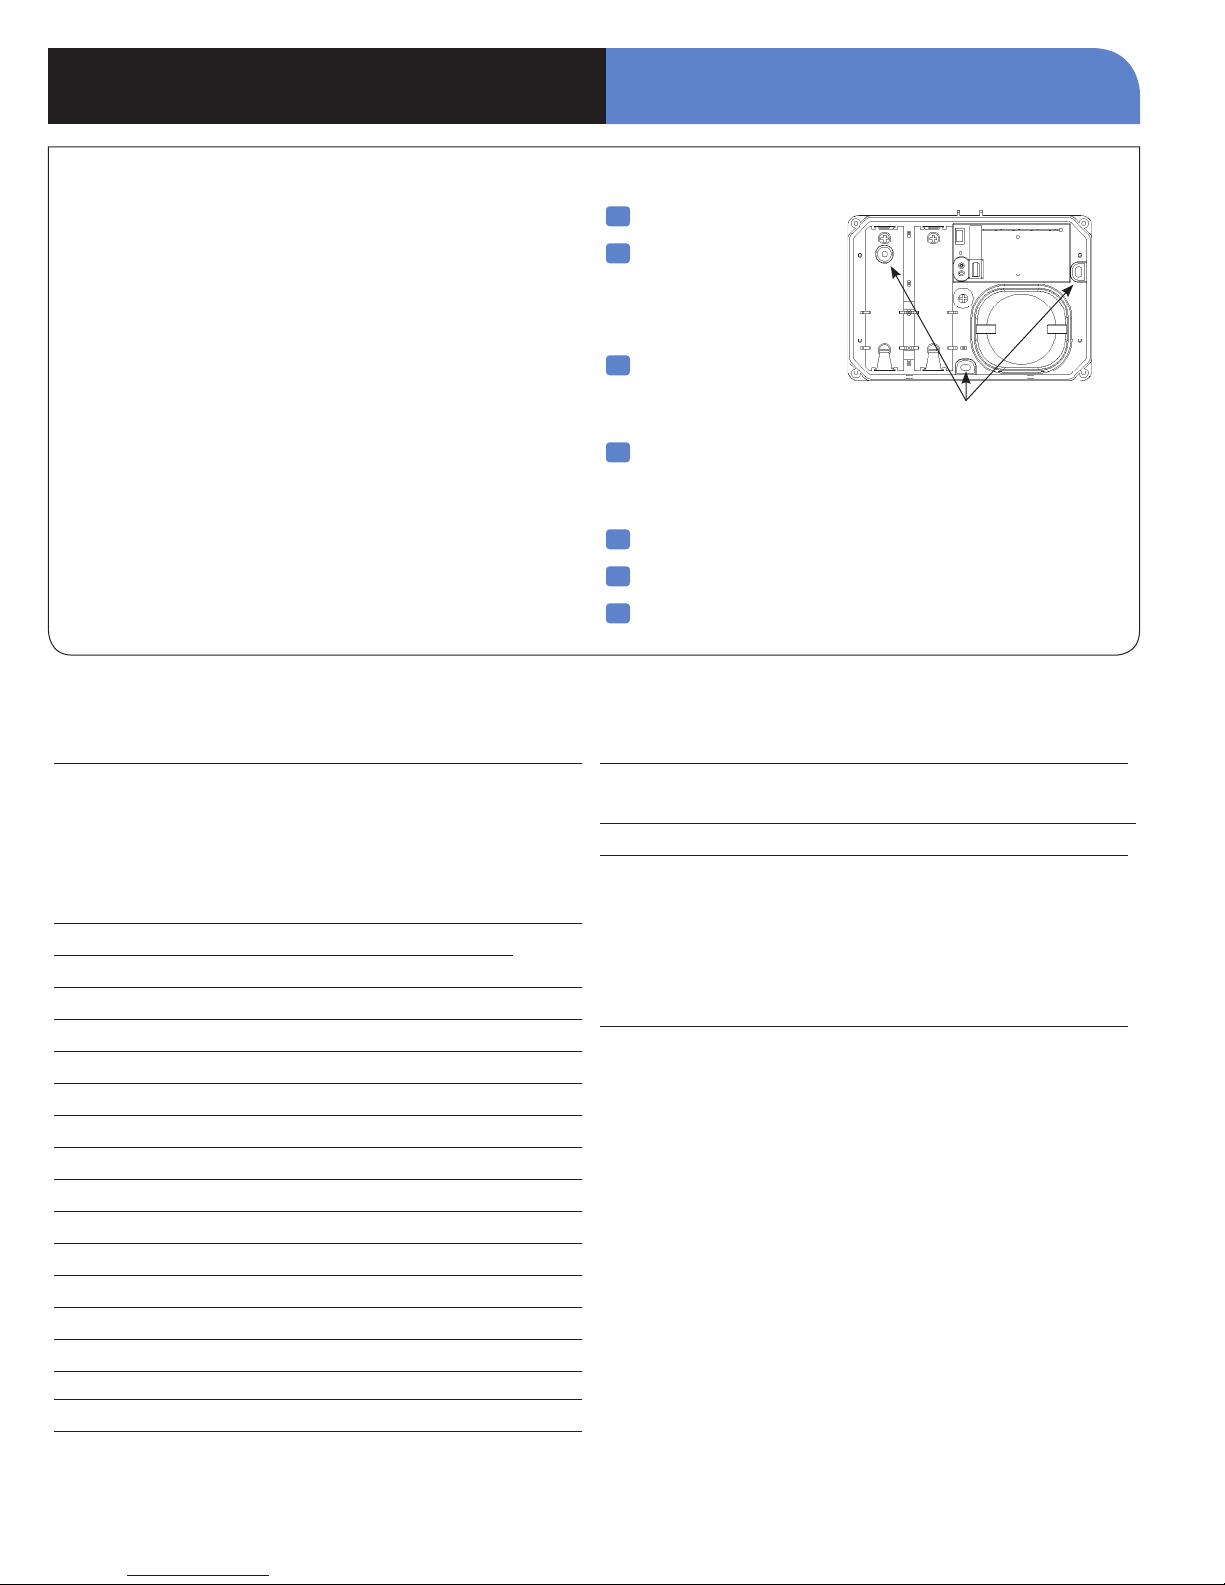
1
Remove batteries.
2
Hold unit up against
mounting surface and
mark the three
mounting holes.
3
Drill pilot holes
and install anchors
where needed.
4
Place unit on mouning surface so mounting holes
line up with pilot holes/anchors and secure unit with
appropriate screws.
5
Install batteries, observing correct polarity.
Place the flash wire of the cover to the siren.
6
Attach front cover.
7
Mounting Holes
Electrical Data
Panel Compatibility XL, Visio, XT, XTIP
Power requirements Four 1.5 V Alkaline Batteries
Nominal Voltage 6V
Low Battery Limit 4.8V
Battery type Energizer Alkaline D cell - LR20
Battery life Up to 4 years
RF technology S2View
Radio type Spread Spectrum Bidirectional
Operating frequency 915 MHz
Transmission security AES encryption algorithm
Supervision Polled signal every 8 minutes
Antenna Integrated
Tamper detection Wall and cover tampered
Speaker impedance 4 ohms
Output level 105 dB @ 1 meter
Output duration Configured in Control Panel
Flash type Strobe light tube
Flash duration Matches Programmed Siren Length
Flash sequence Four flashes/sec
Operating temperature -30°/+60°C (-20°/+140°F)
Maximum relative humidity 90%, non-condensing
Approvals FCC Part 15C
®
Physical Data
Material ABS—ULV0
Dimensions 227 mm x 166 mm x 80 mm
(LxWxD): 9 in. x 6-1/2 in. x 3 in.
Weight 880 g/31 oz. (without batteries)
Installation/Mounting
Unit/Base Four screws secure unit to base; three screws
secure unit base to mounting surface.
www.videofied.com
 Loading...