

Page 1
User’s Manual
V1417
Legal Notices
All right s reserved. Reproductio n, transfer,
dist ribut ion or sto rage of pa rt or all of th e
contents in this document in a ny form without
the prior written p ermission of “VIDEOCON” is
prohibited. “VIDEOCON” operates on a policy of
continuous development. “VIDEOCON” reserves
the right to make changes and improvements to
any of the products described in this document
without prior notice . Unde r no circum stances
shall “VIDEOCO N” be re sponsible for any loss
of d ata o r inc ome o r any spec ial, inciden tal,
consequential or i ndirect d amages how soever
caused.
The contents of this document are provided
as it is. Ex cept as required by app licable l aw,
no warranties of any kind, either deselected or
implied, including, but not limited to, the implied
warranties of merc hantability and fit ness for a
particular purpose, ar e made in relatio n to t he
accuracy, reliability or contents of this document.
“VIDEOCON” reserves the right to revise this
document or withdraw it at any time without prior
notice. The availability of particular products may
vary by region. Please check with “VIDEOCON”
Executive.
Software Update Information
To enh an ce de vic e pe rfo rm anc e, we
reco mmen d t hat you ge t in touc h w ith the
nearest “VIDEOCON” Authorized Service Center,
regarding the availability of updated rmware for
your dev ice. Pleas e see the encl osed Servi ce
Cente r Di rector y f or t he Au thoriz ed Servic e
Center nearest to your location.
Safety Precautions
Please compl y wit h the se pr ecautio ns to
avoid putting yourself or other aro und you i n a
dangerous or illegal situation, and ensure peak
performance of your device.
Icons Descripon
ROAD SAFETY
Do not use your device while driving.
INTERFERENCE
All wireles s de vices coul d aff ect your
device performance.
HOSPITALS
Switch off the device near hospitals and
medical equipment.
AIRCRAFT
Switch off the device in aircraft. Wireless
devices can cause interference in aircraft.
REFUELLING
Switch off the device when refueling. Do
not use the device at refueling point.
BLASTING AREAS
Switch off the device near blasting areas.
USE SENSIBLY
Use in normal condition. Do not touch the
antenna unnecessarily.
QUALIFIED SERVICE
Only qu alified personnel may install or
repair phone.
BATTERIES
Use only app rove d ba tter ies. Do not
connect incompatible products.
WATER-RESISTANCE
Your device is not water-resistant. Keep it
dry.
Important safety measures
Your phone is des igned to comply with all
the n ecessary prec autions and requir ements
and should be treated with care. The suggested
safety measures will help you to use this product
without causing you any health hazard.
• When buy ing a cell phon e, make sure i t
has a low SAR (Specic Absorption Rate).
• Use a wi rel es s han ds -f ree s ys tem
(headphone , heads et) wit h a low pow er
Bluetooth emitter.
• Either keep cal ls sh ort or se nd a SMS
instea d. Th is ad vice applie s esp ecially
to child ren ado lesce nts and pre gnant
women.
• Whenever possible, only us e cell phone
when the signal quality is good.
• People hav ing a ctive medic al i mplants
should keep their cell phone at least 15cm
away from the implant.
• The FCC advice: “Many people mistakenly
assume tha t usi ng a cell pho ne w ith a
lower rep orted SAR va lue neces sarily
dec rea ses a u ser ’s exp osu re to R F
emissi ons, or i s so mehow “safe r” t han
using a cell phone with a high SAR value.
While SAR values are an important tool in
judging t he maximum possible exposure
to RF energy from a particula r model of
cell phone, a sing le SAR value does not
provide suffi cient informat ion ab out t he
amoun t o f R F e xposu re under ty pical
usag e c ondi tions to r eliab ly comp are
individual cell phone models.”
• World Health Organization (WHO) Advice:
Organization s such as th e World Health
Organization a nd the US Food an d Drug
Administration have sta ted that if people
are con cerned and want to reduce their
exposu re they could use a hands -free
device to keep the phone a way from the
head and bod y du ring phon e c alls, or
reduce the amoun t of time spe nt on the
phone.
Disclaimer
Some application s accessible through your
mobile belong to third parties and are protected
by c opyright , pat ent, tradema rk an d/or other
intellectual property laws. Those applications are
provided solely for your personal noncommercial
use. You may not us e a ny appli cati on in a
manner that has not been authori zed by th e
application owner or provider.
“Th ird pa rty c onte nt an d s erv ice s are
provided “as is.” “VIDEOCON” does not warrant
content or services so provided, either expressly
or implie dly, for any purpo se. “VIDE OCON”
expre ssly discl aims any impl ied warran ties,
incl udi ng but no t limi ted to , w arr anti es of
mer chan tab ilit y or fit nes s f or a par tic ular
purpose.
“VID EOC ON” does no t guar ante e the
acc urac y, val idi ty, ti meli nes s, le gali ty, or
completeness of a ny conten t or service made
avail able thro ugh this dev ice and unde r n o
circ umsta nces , i nclu ding ne glig ence, sh all
“VIDEOCON” be liable, whether in contract or
tort, fo r any direct, i ndirect, incidental, special
or con sequ enti al dam ages , a tto rney fe es,
expenses, or any other damages arising out of,
or in connection with, any information contained
in, or as a result of th e use of any content or
service by you or any third party, even if advised
of the possi bility of such damages.” Third party
services may be terminated or interrupted at any
time, and “VIDEOCON” makes no representation
or warran ty that any cont ent or servi ce w ill
remain available for any period of time.
Video con rese rves th e r ight, in it s so le
discretion to change/modify/update the software
(including without limitat ion, th e availa bility o f
any feature or content) of the phone at any time
without prior notice.
Content and services are transmitted by third
parties by means of networks and transmission
faci lit ies ov er whi ch “VI DEOC ON” ha s no
control. Witho ut limi ting t he gen erality of t his
disclaim er, “VI DEOCON” expre ssly d isclaims
any responsibility or liability for any interruptio n
or suspen sion of any conte nt or service ma de
available through this device.
“VI DEOCON” is neit her r espons ible nor
liable for customer service related to the content
and services. Any question or request for service
relatin g to the content or service s sho uld b e
made direc tly to t he r espect ive conten t an d
service providers.
SAR
Your pho ne mee ts the SAR requirem ents
for expos ure to r adio waves , re commen ded
by Govt. o f India. Your mobi le phone is a radio
trans mitter and re ceiver. It is desi gned and
manufac tured so as no t to excee d the lim its
for e xposure to r adio-freq uency (RF) energy,
as recommen ded by the Govt. of India . These
limit s ar e p art of c ompre hensiv e g uideli nes
and establi sh p ermitte d le vels of R F ene rgy
for the general populatio n. The limit s include a
substanti al saf ety ma rgin de signed to ens ure
the safety of all persons, regardless of age and
health.
The expo sure stan dard for mobile phones
empl oys a unit o f m easu reme nt know n a s
SAR (Specic Absorption Rate ). The SAR limit
recommended by the Govt. Of India is 1.6 Watt/
kg taken over a volume co ntaining a mass of 1
gram of tissue. The highest SAR value for V1417
is
1.28W/Kg
. Press
*#07#
to check the SAR
value on your phone display.
Getting Started
Assembling the device
1.Gently h old the b ack cover of the device
and slide in downward direction to open.
2.If the ba ttery i s in the compartme nt, li ft
and pull it out in the direction of the arrow
(shown below).
3.Insert th e SIM card s into the ir respective
slots. Make sure that the contact areas on
the cards are facing the connectors on the
device as shown below.
10
4.Ins ert memo ry card . Tak e c ompat ible
mic ro SD ca rd, a nd pla ce it i nto i ts
respective slot.
5.Al ig n th e co nt act s o f ba tte ry wit h
correspond ing conn ectors i n the battery
compartment, and then replace the back
cover.
Charge the battery
To charge the device baery:
1.Take th e U SB cab le fro m t he dev ice
packaging, and attach it to power adapter.
Now connect the powe r ad apter into a
standard AC wall outlet.
2.Conn ect the mic ro USB conn ector on
the cabl e into its desi gnated port on t he
bottom of the d evice. The battery level
indicator on the de vice sc reen w ill sta rt
scrolling horizontal ly to indicate that t he
battery is being charged.
Note: Exercise extreme caution while connecting
the charger to the device. The connectors on the
11
charger and on the ph one may get damaged if
too much force is applied while connecting them.
3.If the b attery is c ompletely disc harged,
it may take a while before the on-sc reen
charging indicator starts scrolling.
4.When the bat tery is fully cha rged, the
battery level indicator on the device screen
will stop scrolling.
5.Once the charging is complete, disconnect
the charger from the device and then from
the wall outlet.
Battery Use
To extend the baery life of your device:
• Use the standard wall charger to cha rge
the battery for the rst time.
• During the rst 3-4 charge cycles, charge
the bat tery un til the battery indicat or on
the display stops scrolling.
• Avoid par tial charg ing. Also, wait f or the
batter y to disc harge compl etely before
charging it again.
• Charge th e battery using the USB cable
only if the recommended wall charger isn’t
readily available.
• Avoid keeping the device on vibrate mode.
12
Know your device
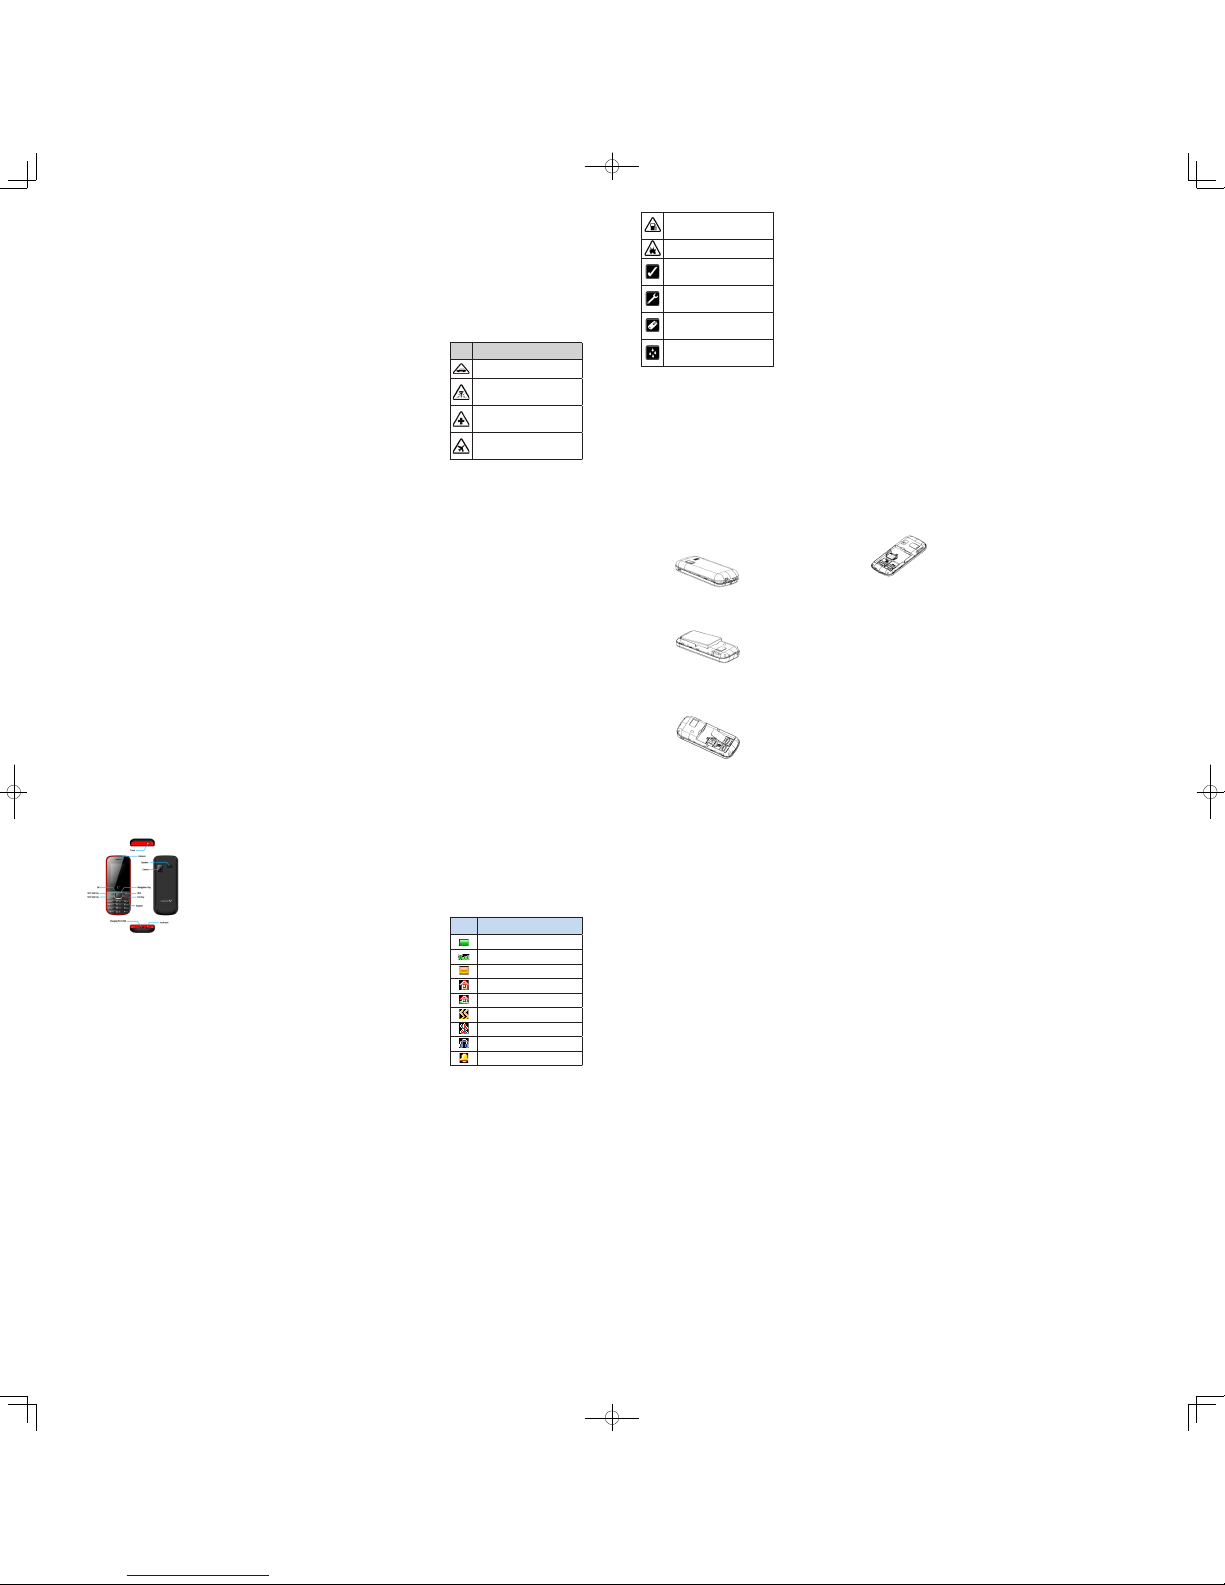
Phone Layout
Key Layout
Le so key
In idle mode, press
Left soft key
to access
the main Menu. When navi gating the menu ,
press
OK (Left soft key)
to select the desired
option.
Right so key
In idle mode, press right soft key to access
Contacts
.
Use to perform functions that display in th e
lower right of the display screen. For example, it
works as a key to navigate the previous screen.
13
Dial Key1/2
• In i dle mode, ente r th e ph one number
to cal l a nd the n p ress
Dial Ke y1/2
selecting the desired SIM card to initiate a
call.
• Pr ess
Dia l Ke y1 /2
t o an sw er a n
incoming call.
• In the idle mode, press
Dial Key 2
once
to view the Call
History
of both the SIM
cards.
Power/ End Key
• End or reject calls.
• Press and hold to
Switch On
or
Off
the
device.
• Cancel active
Menu
and return to the idle
screen.
OK key
In men u, pr ess
OK key
t o s ele ct the
functio ns th at di splay in t he low er le ft of the
display screen.
Keypad
• In idle mode, use the
0-9 keys
to enter a
number to call.
• In idl e mode, press and hold “
1
” key to
enter
SIM1/SIM2 Voice mail
..
• In th e app lic ati on me nu, sel ect t he
corresponding number to quickly access
14
its corresponding menu.
• You can operate
Torch
from number key
‘0’. Pr ess an d hold ‘0’ to switch on t he
torch
and press and hold it again to turn
off the torch.
• Press “
#
” key to toggle between Silent,
Meeting and General user proles.
Notication Icons
Not ifi cat io n (in dic ato r) i con s pro vid e
information such as battery level, network signal
strength, current date & time and so forth.
Icons Descripon
Battery level indicator
Network signal strength
Unread SMS
Indoor prole is On
Outdoor prole is On
Meeting prole is On
Silent prole is On
Earphone inserted
Alarm is activated
15
Basic Operations
Switch on or off the device
To swi tch on t he p hone, pre ss a nd h old
the
Power/ End
key. To switch off the phone,
press and hold the
Power/End
key again.
Accessing menu
To access your device menu:
• In idle mode , p ress
Left Soft key
to
acce ss vario us devi ce func tions , a nd
sett ing s r equ ired f or con figu rin g t he
device.
• Use the navigation keys to scroll to menu.
• Pr ess the
OK
k ey, to c on fir m t he
highlighted option.
• Press
Back
to move up one level. Press
End
key to return to idle mode.
Make a Call
Using Keypad
To make a c all using the keypad, ente r the
phone nu mber inclu ding the area code. Pres s
Delet e
to er ase a d igit, or pre ss and hold
Delete
to erase the complete number.
For international calls, add the “+”character
that repla ces t he i nternat ional acces s co de,
and enter the country code, area code (omit the
leading 0, if n ecessar y), a nd pho ne nu mber.
16
Press
Dial Key1/2
by selecting d esired SIM
card, which you want to use to initiate the call.
Using Phonebook
Press
Right soft key
in the idle mod e
to a cc es s
Con ta cts
o r p res s
Men u
Phonebook
to vi ew the con tacts. Use the up
and down nav igation keys to select the contact
you w ish to call, and press
Dial K ey1/2
by
selecting d esired SIM card, whi ch you want to
use to initiate the call.
Using the Call History
Press
Menu Call History
and retrieve
a number from the recen tly diale d, missed, or
received lists, a nd then press
Dial Key1/2
by
selecting d esired SIM card, whi ch you want to
use to initiate the call.
Using Headset
Use the headset from the product packaging
and connect it to its designated slot at the bottom
of the device. The headset acts as the antenna
for your device and helps to detect radio signals
from nearby stations.
Answer calls
To answer an incoming call, press the
Dial
Key 1/2
or
Left soft key (Answer)
. To put
phone’s rin gtone on silent mo de, press
Right
17
Soft key
to
Silent
the ringtone.
Press
Power/End key
to reject or cancel
the call.
Working with Call Options
During an active call, press
H-Free (Right
Soft k ey)
to put the c all on loud speaker, or
press
H-Held
again to use the earpiece of the
phone. Sel ect
Options (Le ft So ft k ey)
to
view the following options:
•
Add new call
: To add a new caller in the
conversation.
•
Hold
: Sel ect Ho ld to put active call on
hold.
•
Start recording
: To st art re cording of
the call.
•
Mute
: Turn on/off the microphone during
an active call.
•
Adjust volume
: To adjust volume of the
call.
•
Contacts
: During an active call, you can
access the contacts.
•
Call History
: View t he dialed, received,
missed, and rejected calls.
•
Mes sag es
: A ll ows y ou t o vie w the
messages stored in your phone.
Compose and send a text message
Your device supports text messages beyond
the limit for a single message.
18
To write a text message:
1.Pr es s
Me nuMe ss ageWr it e
Message
, to display the Write mess age
screen.
2.In the Write messag e sc reen, type the
message text. Press
OptionsInsert
template
to use built-in template.
3.Press
OptionsAdd con tact
info to
send contact details.
Note: Whil e writing a text mes sage, press ‘#’
key to toggle the letter to
Hindi
and
English
alphabet and number.
4.Pres s
Optio nsSend
an d m anual ly
ent er the pho ne n um be r or s el ect
Phonebook
to add a contact from the
device
phonebook
. Scroll to the desired
contact and press
Select (OK key)
and
then press
OK (Left soft key)
to select
the contact number. Select
Send
to send
the mes sage af ter sele cting t he desir ed
SIM card.
5.Pr ess
Bac k
t o ret urn t o the
Wri te
message
screen, and modify the message.
Press
Send
and select
SIM1
or
SIM2
to
send the message.
Lock the keypad
The device keypad is set to lock automatically
19
after congurable time delay when the device is
in the idle mode and no function has been used.
To unlock the keypad manually, press
Left
soft key
followed by
Lock/Unlock Ke y (*)
.
Similarly, t o lock the key pad, press
Left Soft
Key
fo llowe d by
Lock/U nlock Key (*)
in
succession.
Pr es s
Men uSet ti ng sSec ur it y
SettingsAuto Key pad Lock
. Selec t
Off
to disable automatically locking of the keypad, or
set the duration (in seconds/min) after which the
keypad is locked automatically.
Note: Whe n the keyp ad is loc ked, you c an
press
Dial K ey1/2s
to answer an incomin g
call.
V-Connect
Internet
Inte rne t s ervi ce pro vide s all th e b asic
services of a computer based web browser but
is simplied to operate within the restrictions of
a mobile phone. Enter the URL of the website or
webpage you want to visit. Internet service has
the following options:
•
Bookmarks:
Bookmar ks enable you to
mark a place in an electronic document or
a pointer (prima rily to an internet URL) in
20
a browser.
•
History:
the viewed will be saved here.
•
Offline pages:
List of recently visit ed
websites.
Press
options
to access the follow ing
options:
•
Homepa ge:
A llows yo u t o op en the
default URL on the phone. This will enable
you to go to the same page every time you
access the homepage.
•
Settings:
set a bout the i nternet service.
Suc h a s: C lea r lo gs , se t fo nt , se t
homepage, etc.
•
Exit:
exit.
STK
Short for SIM Tool kit, it is a standard for
providing value added services and e-commerce
over the GSM network s, u sing the phone to
make the nec essar y t ransa ctions . S ervic es
depend on your network service provider.
Call History
On the idle sc reen, pre ss
MenuCall
History
.
The
Call History
menu comprises following
options:
•
ALL:
To show all calls.
21
•
Dialed Calls:
List of the recently dial ed
numbers.
•
Received Calls:
Displays the list of latest
received calls.
•
Missed Calls:
Calls you were unable to
answer before the termination of ringing.
•
Rejected Calls:
Displays the list of calls
which you have blacklisted.
Press th e o k ke y t o a ccess ot her
options:
such as edit, details, call, save,
edit before call , wri te me ssage, add to
blacklist, delete, delete all, Mark.
Multimedia
Camera
Use t he in- built camera to ta ke and save
pic tur es. S ele ct
Menu M ulti med ia
Came ra
, to laun ch the
came ra
f unct ion.
Alternatively, press the
Up navigation key
in
the
idle mode
to lau nch the Cam era. To take
a picture, focus the camera towards the objec t
you wish t o click, and then press the
OK key
.
Press
Back (Right Soft Key)
to return to the
previous screen.
Not e: D o not m ove y our h and u nti l the
captured photo displays on the screen as a still
22
image. Before t aking a picture, press
Options
(Left soft key)
to view and use other camera
functions:
•
Video Mode:
To switch for video recording.
•
Effect:
To select different effects to want
to add to picture.
•
Sett ings :
Th is op tion i ncl ude
Size ,
Quality , Ba nding, Shut ter sound,
Auto save and Storage.
Video Recorder
Pre ss
Men uMul tim ed iaVid eo
Reco rde r
, to la unc h the Vi deo r eco rde r
application.
To re cord a vid eo, posi tion the ca mera
towards the moving o bject, and select the
OK
key (Record )
. The video tha t you record wi ll
be of
3GP
and
AVI
le formats . Note that this
feature is memory card dependent.
To stop reco rding, pres s the
Stop (Left
soft key )
, the recorded videos will be save d
automat ically in the selecte d sto rage space.
To watch the recor ded vi deos, select
Video
player
. Press
Options ( Left Soft Key)
to
perform additional functions.
•
View v ideo d irectory:
Allow s you to
view the recorded videos on the phone.
•
Camer a mo de:
To swit ch to camer a
mode.
23
•
Effect:
To select different effects to want
to add to picture.
•
Setti ngs:
Th is opti on inclu des
Size,
Quality , Ba nding, Shut ter sound,
Auto save and Storage.
Audio Player
Your phone provides a friendly audio player
device for entertainment purpose.
Pre ss
Men uMul tim edi aAud io
Player
, to lau nch the audio player appli cation.
The device automatically searches the songs or
music stored in the memory card and adds them
to the default playlist.
The support ed file formats are MIDI, MP3,
AMR and WAV. After re freshing t he list, press
Options
to p erform additional functions, such
as music list, music mark, add, set as r ingtone,
play mode and so forth.
To play music through audio player:
• Press
OK K ey
to
play
or
pause
th e
audio.
• Press the
Left and Right Navigation
keys to switch the
Previous
and
Next
songs respectively.
• Long press
Left
and
Right navigation
keys to
rewind
and
forward
the song
respectively.
• Press “
#
” and “*” key to
increase
and
Page 2

24
decrease
the
volume
respectively.
• Press
Up navigation key
to
stop
the
audio player.
Video Player
Play videos stored on the micro SD card.
If yo u are a fi rst-time user, let t he devi ce
automatically search for videos stored either on
the Video folder of memory card and adds them
to the default playlist. With the video player, you
can watch videos in
3GP
and
MP4
formats.
You can also selec t
Options
to perfor m
additional functions:
•
Play List :
Select
Play list
to view and
directly play the selecte d rec ord. W hile
watching a selected video:
▫ Press
OK key
to
pause
and
resume
the video.
▫ Pres s
Left
and
Right Navig ation
keys
to
switch
between the videos.
▫ Long press
Left
and
Right navigation
keys
to
rewind
and
forward
th e
video respectively.
▫ Press “
*
” to inc rease volume and “#”
to decrease volume.
Press options to view following options:
•
Open:
To open the le you want.
•
FullScreen pla y:
Select it to watch the
video in full screen.
25
•
Adjust Brightness:
To adjust brightness
of the video.
•
Shuffle:
Select On or Off, which will allow
you to play all the videos in the order.
•
Details:
Allows you to view the details of
recorded videos, suc h as title, date, time,
resolution, duration and size of the video.
•
Sett ing re set:
To re set th e defa ult
settings of video payer.
Image Viewer
To view photos stored on your device, press
MenuMultimedi aImage viewer
. The
Image viewe r stores all the pictures which are
available in
Photos
folder of
memory car d
.
The available options are change folder, send,
slid e p lay, dele te, set im age as wall pape r,
rename and so forth.
Sound Recorder
With audi o recorder, you ca n record voice
conversa tions and sa ve th e voic e reco rdings
as a sound clip, and play the sound clip. Sound
recorder supports the WAV le format.
Select
Option
for other options:
•
Start Recording:
Start recording sound.
•
Rec ord F ile L is t:
V iew the l is t of
recorded sounds.
•
Stora ge:
You can sa ve the reco rded
conversatio n to phone me mory or micro
26
SD card.
•
File format:
To select between AMR and
WAV.
FM Radio
The FM radio application turns the mobile
phone into a porta ble FM r adio device . Th e
quality of the radio broadcast depends on the
coverage of the radio s tation in that particular
area.
Use the headset from the product packaging
and connect it to the device to operate FM radio.
The headset acts as the antenna for your device
that hel ps to detect radio sig nals from nearby
stations.
Listening to the FM radio
To listen to the FM radio:
1.The he adset ac ts as an ante nna and
helps receive radio broadcast signals. To
operate FM radio via headset, you can
connect t he headset into t he designat ed
headset jack of your device.
2.In idle mode, press
MenuMultimedia
FM radi o
or you c an use naviga tion
key t o dir ect ly lau nch t he FM r adi o
application from smart style screen o f the
phone.
3.Turn on the F M radio. If you turn o n the
FM r adio for the f irst time, confi rm t he
27
automatic tuning for channels.
4.Use th e
left
an d
right na viga tion
keys
to
change the frequency
of the
channels.
5.Use “
#
”to increase the volume, and “*” to
decrease the volume.
6.Press
OK key
to tu rn on or
off
the
FM
while playing FM Radio.
Note: You ca n cha nge the c hannels of the
radio with numeric keypad of the device.
FM radio Options
In FM r adio, press
Options
to acc ess the
following options:
•
Auto Search And Save:
Your device will
search and save channels automatically.
•
Channel List:
View and edit your favorite
channels, also give name to the channels.
•
Save:
You can save the channel’s name.
• Manu al Sear ch: Man uall y sear ch the
channel frequency.
•
Open Spea ker:
You can turn on or off
the speaker.
•
Backgr ound Play:
You can play FM
radio in the background while using other
applications.
28
Games
Press
MenuGames
, to play game.
The av ailable game is
Push Bo x
. Unde r
Push Box game, you can start new game, resume
a game, select level of the game among 1 to 15,
or select help to know more about the game.
Messages
In M essage s, y ou ca n se nd a nd r eceive
SMS, MMS and Broadcast message and set up
voice message.
Fro m the i dle s cree n, pr ess
Menu
Messages
to view the a vailable functi ons of
messagi ng. M essage functi ons a re av ailable
depending on network services that your service
provider supports.
The various options for messages are:
•
Write Message:
Allows you to compose
and send text messages. To know mo re
about w rite mes sage ref er to “Compose
and sen d a te xt m es sag e” s ect io n
mentioned earlier in the document.
•
Inbox:
Use to view received messages.
•
Outb ox:
I f the d evic e is un abl e to
transmit a message, it is stored temporarily
in the Outbox folder.
•
Drafts:
While writing a messa ge, press
OptionSave
to kee p it in the
Drafts
folder.
29
•
Sentbox:
Use to view the sent messages.
•
Broadcast Message:
A network service,
via wh ich y ou rec eiv e mess age s on
various topics from your serv ice provider,
can set the receive mode to ON/OFF. This
service also provides location update, and
messages prom oting operator prod ucts
or s ervic es. When you recei ve s uch a
message Broadcast messages are ashed
on the device screen, but can be viewed
later from the Broadcast message folder. If
Broadcast Message Receive mode is on,
it will also. To activate Broadcast message
Pre ss
Opti ons
t o per form a ddi tio nal
functions:
•
Tem pla te s:
U se b ui lt- in m ess ag e
templates to co mpose me ssage qu ickly.
Templ ates s tore s 5 p relo ade d a nd 5
editable text messages for ready usage.
•
Settings:
View SIM 1/2 message center,
chec k mess age va lid ity per iod , v iew
status re port, selec t preferred options to
save sent messages, and view preferred
storage location for storing messages fo r
SMS and broadcast message.
•
Mess age Ca paci ty:
Vi ew th e used
and available memory of SIM1/SIM2 an d
phone memory.
30
File Manager
File Manager comprises two tabs phone and
memory card. With Left a nd Rig ht nav igation
keys you can access les and folders availa ble
in phone or memory card.
With navigation key, you can select phone or
memory card, and the n press
Option
to v iew
the additional options:
•
New folder:
You can create a new folder
in memory card.
•
Delete:
Select to delete the selected folder.
•
Details:
Select to view the details of th e
selected folder.
•
Edit :
S ele ct to re nam e or cop y the
selected folder.
•
Search:
Select search, and then enter the
name of the folder that you want to search.
•
Sort:
Select sort to arrange the memory
card folders by name, date, size, and type.
•
Mark:
You can mar k a nd u nmark th e
selected folder or all the folders available
in the Phone or memory card.
•
More:
Se lect to vi ew the capa city of
phone memor y, mem ory c ard and a lso
prov ide yo u t he opt ion to fo rmat t he
memory card and phone memory.
Note :
Delet e
op tion is onl y a vail able for
memory card
.
31
Settings
Use Se tti ngs to c ust omiz e the d evic e
sett ing s, suc h as pho ne set tin gs, di spla y
settings, call settings, network settings, secur ity
set ting s and ot her op tio ns, wh ich ca n be
accessed by navigation keys to secure the data
you have stored on the device.
Pres s
MenuSetti ngs
to di spla y t he
settings menu.
Dual SIM Settings
You have following options listed under Dual
SIM:
•
Stan dby mod e:
You ca n sele ct the
standby mode for SIM card, either to have
only SIM1 enable, only SIM2 enable, or to
have dual SIM dual standby.
•
Flight Mo de:
Di sable s a ll R F b ased
communication for both SIM1 and SIM2.
Howev er, y ou can use other fe atures /
funct ions of the phone, suc h as au dio
player, camera, games, and alarm.
•
Reply by original SIM
- You can select
the function to reply from current SIM card
for phone call and SMS.
•
Set SIM nam e:
You ca n c hang e t he
name of SIM1/SIM2 card.
32
Call Settings
Use to customize the call settings f or both
the SI M cards. Th e avail able opt ions fo r call
settings are:
Network Settings
Network selection provides you the option
to sel ect a desired networ k and additio n of a
new network to the network list for both the SIM
cards. Under network selection , the availabl e
options are:
•
Au to Se le ct :
Le t t he de v ic e t o
automatic ally se lect t he netw ork for the
selected SIM card.
•
Manual Select:
You can manually select
the network for the selected SIM card
Call Divert
This f eature allows you to divert in coming
calls from SIM1/2 to anothe r pho ne n umber.
The options available are unconditional transfer,
divert if busy, d ivert if no answer options, divert
if unreachab le, and cancel all diverts. You can
select the available option and activate, off, and
also check the query status for the call divert.
Call Barring
Use t his f unction to restric t the calls you
make or rece ive wi th you r devi ce. Un der cal l
barring, the options are all ou tgoing calls, all
33
incoming calls, incomin g calls when roaming,
intern ationa l cal ling, Dial when int ernatio nal
roaming, an d so f orth. In order to activate this
service, you need to check the availability w ith
your netwo rk service provider. While changi ng
the barring password, you may required to put
the old password.
Call Waiting
You can activate or deactivate this function
to answ er an inco ming c all in bet ween an
existing call. U nder Query status, you can view
the current activation or deactivation status.
Hide ID
Enables to set t he cal ler ID stat us of the
device. It is a network based service . You can
select the option as hide ID, display own ID, and
display ID by network.
Auto Call Recording
Select On or Off to record the incoming calls
automatically. The recorded phone conversations
will be saved in the Audio folder of memory card.
If the number is saved in the contacts list, then
phone will create the folder with the saved name
else it will save with the pho ne number. All the
future conversat ions will be saved in the sam e
folder. This featu re is memory card dependen t.
Please note if the memory card storage is full,
34
then the phone will stop the auto call recording
function. You need to ensure to t ake back-u p
of earlier conversations periodically on a PC so
that memory card is kept sufciently free.
Advanced
•
Call time minute reminder
– You will
get a reminder at the 50th second of every
minute durin g your call, so that you may
end the call timely to save the phone fare.
You may select activate or off.
•
Vibration When Connected
– Provide
you a vibration alert whe never the voice
call connected.
•
Reject By SMS
- You can select whether
to reply an SM S a fter rej ectin g a ca ll
and also you can select any-key an swer
option, so that y ou can receive a call by
pressing any key.
•
Auto Redial
– You can select to re dial
the num ber autom atically when a call is
not connected.
Phone Settings
You h ave follo wing opt ions list ed under
phone settings:
•
Time And Date:
Lets you set time/date,
time format, and date display type for your
device.
•
La ng ua ge s et ti ng s:
Se le ct th e
35
language for the d evice a s Engl ish an d
Hindi only.
•
Shortcut setti ngs:
To set shortcuts by
urself.
•
Schedule d Powe r On/O ff:
Lets you
set a particular time on the phone when
the phone should power on/off itself.
•
Restore Factory Settings:
By selecting
thi s o pti on wil l ask yo u to ent er th e
password to restore the phone to factory
settings. The def ault pass word is set as
0000.
Display Settings
Under display, you can set a host of different
characteristics for the device, such as:
•
Wal lpa per S ett ing s:
Yo u can se t
defau lt, wallpa per 1, wallpa per 2, and
Wallpaper 3 or select more wallpaper from
your memory card on t he main scree n of
your device.
•
Idle Display Settin gs:
Sel ect t ime &
date and name of th e service p rovider to
be displayed on the device screen.
•
Contrast:
Set the contrast settings of the
display.
•
Backlight:
Select time of the backlight as
5secs, 10 secs, 15 secs, 20 secs, 30 secs,
or always on for the device.
•
Keypad Backl ight Time:
Sel ect the
36
keypad light time as 5 secs, 10 secs, 20
secs, night mode, or off.
Security Settings
Adjust settings to sec ure your device and
data:
•
PIN:
PIN code is the personal identication
number for SIM card. By default the initial
password set by network operator is 0000.
If activated the powe r-on PIN code, then
you have to enter PIN password each time
you switch on the device. You can modify
the P IN cod e to preven t you r SIM card
being used by others. Select the desired
SIM type and have the following options:
▫
On
– You have to enter PIN code each
time you switch on the device.
▫
Modify
– You have to act ivate P IN
code before modifying it.
▫
Off
– You have to enter the correct
PIN code before deactivating it.
•
Modify PIN2:
PIN2 code is the personal
identi ficati on c ode requir ed f or c ertain
functions such as s et fixe d numb er, set
phone fare and so forth.
•
Privac y:
It all ows you to secure yo ur
phone functions to avoid any unauthorized
access. You can s elect th e functio ns on
which you want t o act ivate the f eature,
37
such as Call History, Messages, Camer a,
Phonebook, File Manager, Calendar, and
Mass Stora ge. The default password in
“0000”. Under
Settings
, input the password
to access the available options, which you
want to l ock. You ca n als o ch ange the
passwo rd, under Chang e pas sword by
entering the old password.
•
Auto Keypad Lock:
Enable Auto keypad
lock t o h ave th e d evic es dis able th e
keypad after st aying id le for some time.
This has to be done to prevent your device
agai nst ac cid enta l dial ing. F or mor e
informat ion o n thi s feat ure, refer to th e
“
Lock the keypad
” secti on ment ioned
earlier in this document.
•
Power-On Passwo rd:
You have to set
the power on password. Once you activate
this function, you have to enter the password
each time you switch the device on.
•
Blacklist:
To add calls to blacklist .
•
Whitelist:
To add calls to whitelist.
User Proles
To ac cess user pro files , pr ess
Menu
Settings User Profiles
.
The ava ilable p rofiles are Gene ral, Sile nt,
Meeting, Indo or, and Outd oor. Press
Options
Activated
to select the de sired profile for
38
your phone and press
OptionsCustomize
to customize the settings of the current pro le,
such as ring settings, adjust v olume, call alert,
message alert, alarm & cal endar r emind, key
tone and so fort h for your device to differen t
typ es of ca ll env iro nmen ts. You c an als o
Rename
the desired prole.
Connections
Contact the network operator to obtain the
following network services:
♦
Networ k acc ount:
You can manag e
network account through this function.
♦
GPRS Service :
You can select to turn
on/off this function.
♦
Data connecti on se ttings:
You can
select connec t whe n nee ded or alwa ys
connect.
Phonebook
Save and update contact information, suc h
as name and p hone numbe r of your cont acts.
You can set caller image and a pers onalized
ring tone t o t he cont act an d o rgan ize yo ur
cont act s i nto ca ller g roup s t o send g roup
messages.
Press
MenuPhoneboo k
to open the
conta cts or pres s Ri ght soft ke y to di rectl y
39
access all contacts.
The
Phonebook
comprises follo wing tabs
such as All, Uncla ssified, SI M1, SIM2, Family,
Friends, Business, and so forth. Use Left/Right
navigati on keys to access the following tabs.
Press
Option
to view the following options:
New
To add a new contact:
1.Press
MenuContacts
, and then press
OptionNew
to add a new contact.
2.Choose the desired storage location such
as SIM1/SIM2 or phon e, and t hen select
Name to enter the
Name
of the contact.
3.Select
Mobile
to e nter the number, and
then press OK to save the contact.
Note: If you choose the storage location other
than SIM 1 or SIM2, th en you can ent er home
number e-mail, and also assign image, ringtone,
group with that number.
Search
Search a contact just by entering the name
of t he contac t in the na me s creen. Use th e
navigat ion k eys t o mak e you r sel ection, and
press the
Dial Key1/2
to initia te a call to this
contact.
Write SMS
Comp ose and s end tex t m essa ges. To
40
know more about wri te S MS pl ease refer to
“
Comp ose an d sen d a t ext me ssag e
”
section mentioned earlier in this document.
Call
You can make a voice call by SIM1/2 card.
Delete
Dele te the se lect ed con tact s. You can
choose to delete contacts from the selected SIM
cards.
Mark
Lets yo u mark a sin gle or several contact
numbers to send a text message or to delete the
selected contacts from phonebook.
Copy
Use Copy func tion to copy the sel ected
contact to ph one mem ory, to SIM 1 /2, an d to
memory card.
Advanced
•
Memor y St atus:
Vi ew the used an d
available memory for storing contacts.
Organizer
Alarm
Pres s
MenuOrgan izerAlarm
, t o
41
set the alarm to ring at a specic date and time.
Press
On/Off (Left Soft Key)
to activate and
deactiv ate t he al arm s ettings . Pre ss
Edit
to
access the following sub-options:
•
Message:
Enter name of the Alarm. Press
Edit
to modify the name of the Alarm.
•
Time:
Set t he time a t which y ou wish to
ring the alarm by using 0-9 Number keys.
•
Ringtone:
Display the ring of the alarm.
•
Repeat Mode:
You can repeat the alarm
once, daily, and weekly.
Bluetooth
You can communicate with other compatible
device t hrough wir eless Blu etooth con nection.
Compatible devices may include Mobile Phones,
Personal Computers, and Bluetoo th headsets .
Through Blu etooth, you can send or receive
pictures, videos or music les.
To acc ess t his m enu , pre ss
Men u
Orga niz er B luet oot h
. The a vail abl e
options are:
•
Bluetoot h On:
Sel ect t o ac tivate the
Bluetooth.
•
Bluetooth V isibility:
Set the Visibility
of the Bluetooth
•
Paired Device:
It shows a list of devices
which have been paired with you r phone
before.
42
•
Device Name:
You can view or edit the
name of the Bluetooth device.
•
Bluetooth file stor age:
To selec t the
storage for le transfer.
Note : Blue tooth ne eds to be act ivat ed to
perform all the above mentioned functions.
Calendar
You can us e the calendar to keep track of
important meetings. To access c alendar pre ss
MenuOrga nize rCale ndar
. Yo u can
select year, m onth an d date using navigat ion
keys. On a selected date you can press left soft
key to view the available options:
•
Add N ew Sc he dul e:
T he o pti on s
available for add task are:
▫
Subject
– You can add subject for the
task.
▫
Date
– Enter date for the s elected
task.
▫
Time
– Enter time for the s elected
task.
▫
Ringtone
- You can add the ringtone
for the selected task.
▫
Type
– You can select once, every
day, every w eek, every month, every
year and no reminding options for add
task.
▫
Deadl ine
– You can also pu t t he
43
deadline date to select the end date
for the task.
•
View Schedules:
Display date and time
of the task. Press Options to vie w, edit,
add task, delete, and delete all options for
the task.
•
All Schedules:
View date and time for all
stored tasks.
•
Clear Today’s Task:
Remove the tasks
that are added in the calendar today.
•
Clear All:
You can remove all the tasks
from the calendar.
•
Go T o D ate:
En ter a date, an d t hen
selec t OK to go to a s pecifi c da te for
entry/edit and viewing of task for that date.
•Weekly:
Select it to view the calendar by
Weekly and Monthly.
•D aily:
Sel ect to view the calen dar by
daily.
Calculator
To acc ess c al cul ato r, pr ess
Men u
OrganizerCalculator
Your phone comes with a built-in conversion
app lic ati on t hat y ou ca n us e to pe rfo rm
calculations on a daily basis, such as additi on,
subtraction, division, and multiplication.
To make a calculation:
1.Enter the first number o f the calculation.
44
Select clear to delete the last digit entered.
2.Sel ect a fu ncti on, ‘+ ’ ( Up nav igat ion
key), ‘÷’ (R ight navigation key), ‘-‘ (Down
navigation key) or ‘×’ (left navigation key).
3.Enter the second number of the calculation,
and select OK to get the result.
Options
Allows you to view the memory functions.
M+:
Pre ss Up nav igation key twic e an d
then press OK key. This adds the v alue to the
value stored in memory. By default it is zero.
M- :
Press
Down
navigation key twice and
then press OK key. This subtract s the value
from the value stored in memory.
MR (M emor y Rec all ):
P res s
Rig ht
navigation key twice and then pres OK key. This
recalls the value from the memory.
MC ( Me mo r y Cl ea r) :
Pr es s
Le ft
navigation key twice a nd then press OK key.
This clears the value from the memory.
Clear:
Allows you to clear al l the memory
functions.
World Clock
World clock can be used t o know the time
in various cities across the world. You can see
a world map and immediate time in those cities
using world clock.
To see the c urrent time in any city of t he
45
World , p ress
MenuOrgan izerWorld
Clock
, a nd selec t t he city nam e u sing the
navigation keys.
Torch
Switch on or off the dev ice
Torch
that is
available at the top of the device. Or, long press
‘0’ to switch on the torch and again long press ‘0’
to switch off the torch.
 Loading...