

VideoComm Technologies IPC-2MPSR50w Owner's Manual

IPC-2MPSR50w Owners Manual Rev.1.0
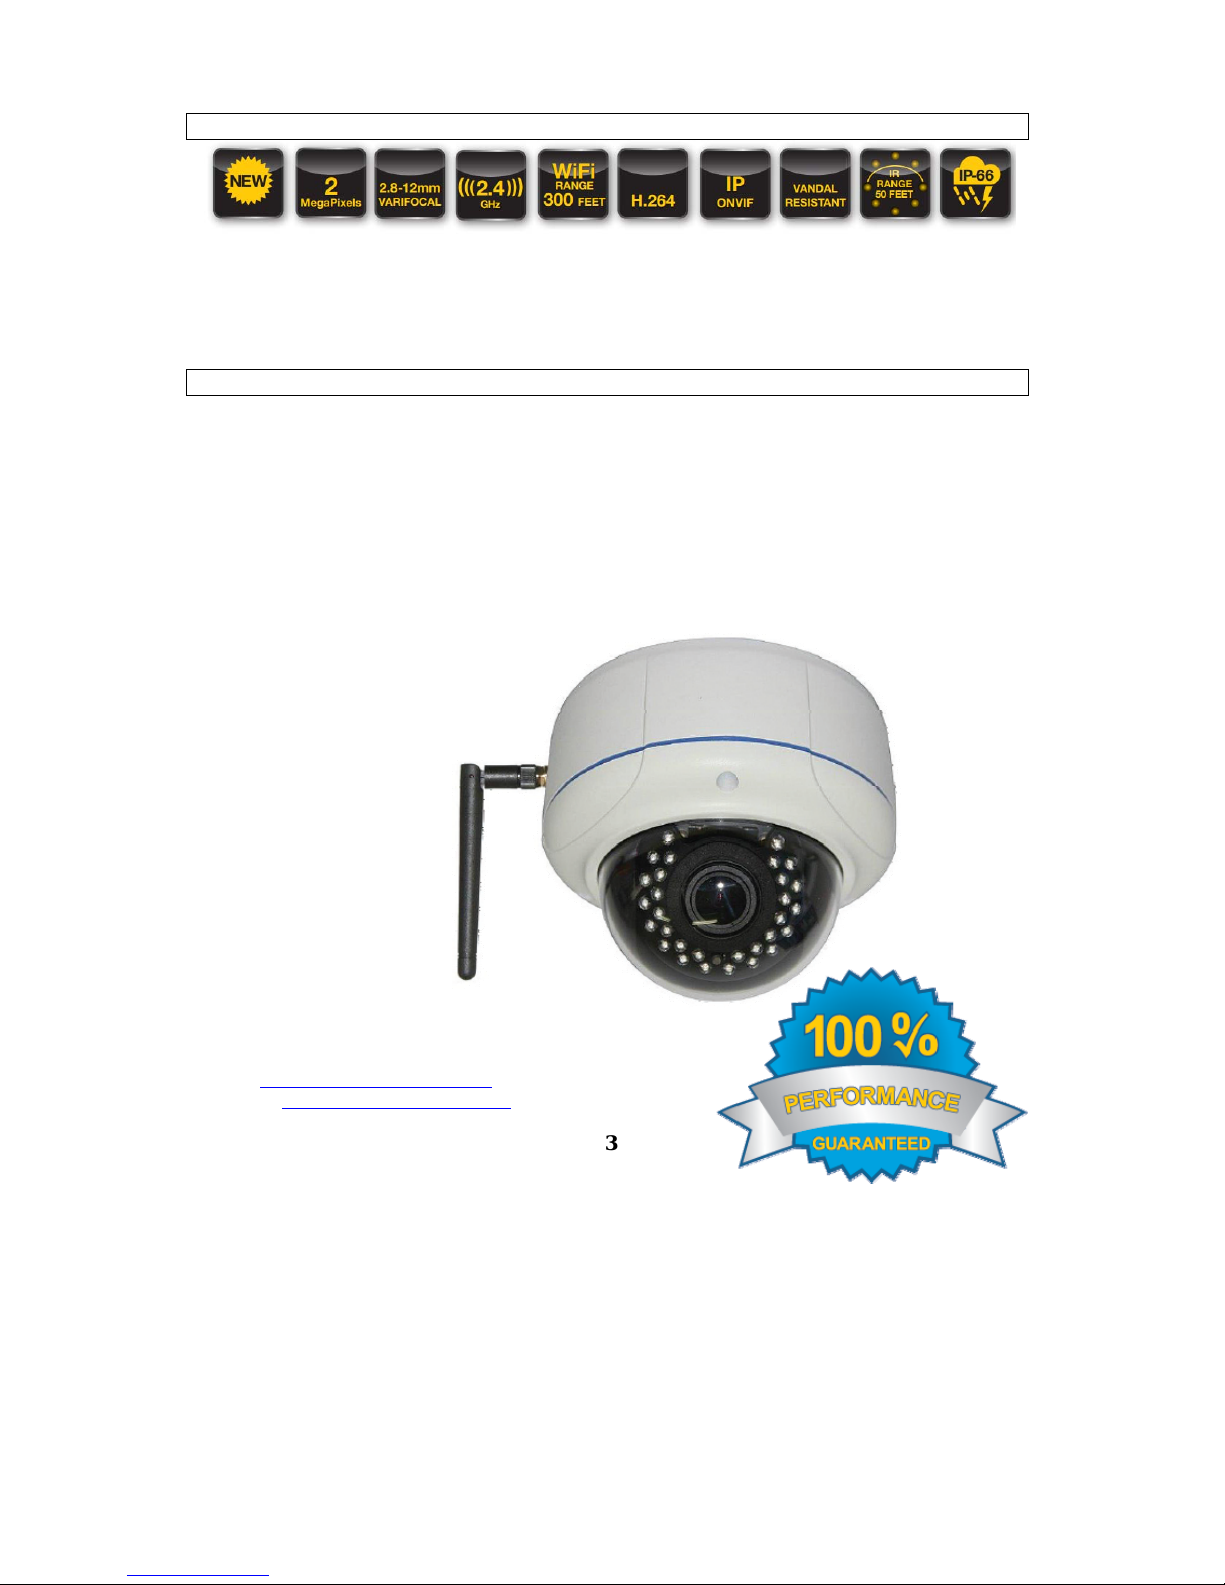
It’s About Real Time
Day-Night All Weather WiFi IP Dome Camera
IPC-2MPSR50w
OWNER’S MANUAL
(888) 379-2666 US Toll Free
(905) 336-9665 Phone
(905) 336-9662 Fax
www.VideoTransmitters.com
1

TABLE OF CONTENTS
It’s About Real Time...................................................................................................…......1
TABLE OF CONTENTS.........................................................................................................2
INTRODUCTION .................................................................................…..........................…3
Advantages.......................................................................................…….........................….3
PARTS LIST...............................................................................................…...............….....4
Setting a Static IP..............................................................................…….........................….4
CONFIGURING IP CAMERA...........................................................................….............…..5
HARD RESET………………............................................................................….............…..8
INSTALLATION……………............................................................................….............…..9
SPECIFICATIONS…………............................................................................….............….10
NOTES…………..…………............................................................................….............….11
WARRANTY INFORMATION/ TERMS & CONDITIONS..........................………………...12
2
IPC-2MPSR50w Owners Manual Rev.1.0
INTRODUCTION
IPC-2MPSR50w Owners Manual Rev.1.0
Economical 2-MegaPixel ONVIF + PoE ready IP all-weather Network camera with WiFi
connection up to 300 Feet. Featuring a 2.8-12.0mm Varifocal lens and infrared night-vision
up to 50 Feet, this all-in-one camera is perfect for day & night surveillance applications
including: Parking lots, offices, schools, hospitals and other high-risk areas where pulling
cable is not possible, convenient or economical.
ADVANTAGES
• High-Performance, Economical IP Network Camera
• Convenient WiFi Network Access up to 300 Feet
• Hi-Def H.264 2-MegaPixels (1920 x 1080) @ 30fps
• True IR Night-Vision Range up to 50 Feet
• Dynamic 2.8mm-12.0mm Varifocal Zoom Lens
• Vandal-Resistant IP-66 Rated All-Weather Design
• ONVIF 2.0 Compliant & PoE Ready for Easy Installation
• Easy to Configure with user-friendly Client-Management Software
• Perfect for Parking lots, offices, schools, hospitals and other high-risk areas
• 100% Performance Guarantee
VideoComm Technologies
Customer Service
Bus (905) 336-9665
US Toll Free 888-379-2666
Fax (905) 336-9662
E-mail- info@VideoTransmitters.com
Web Site- www.VideoTransmitters.com
Monday - Friday 8:30am- 5:00pm
3

IPC-2MPSR50w Owners Manual Rev.1.0
Eastern Standard Time
PARTS LIST
The All-Weather IP Camera has been carefully manufactured, tested, inspected and packaged.
Please inspect the packaging carefully to ensure you have received all the necessary parts and
accessories listed. If any parts are missing or damaged, contact your re-seller immediately.
Setting a Static IP Address on your Workstation
Setting a Static IP address on your Workstation (PC or Laptop) is essential for configuration prior to
connecting the IP Camera.
Using Windows 7:
Using Windows XP:
1. Open “Control Panel” & Select “Network and Internet Connections”
2. Select “Network Connections” & Double Click “Local Area Connection”
3. Highlight “Internet Protocol (TCP/IP)” & Click the “Properties” Button
4. Change the IP Address to an available address & Click “OK” when complete
5. You MUST close out of the “Network Connection Properties” screen before the
changes will take effect
1. Open “Control Panel” & Select “Network and Internet Connections”
2. Select “Network and Sharing Center” & Double Click “Local Area Connection”
3. Select “Properties” & Highlight “Internet Protocol Version 4 (TCP/IP V4)” & click
“Properties” button
4. Now Change the IP Address to an available address & Click “OK” when complete
(Figure A)
5. You MUST close out of the “Network Connection Properties” screen before the
changes will take effect
Using Mac OS:
1. Launch System Preferences
2. Click on “Network”
3. Click on the protocol you are using
4. Click on the “TCP/IP” tab
5. click on the drop-down menu next to “Configure IPv4″ and select “Using DHCP with
manual address” (you can also use full manual mode)
6. Now Change the IP Address to an available Address
4
 Loading...