

Page 1
1
MP3 & Video Player Quick-Start Guide models 215/415/418/818
Important -A full version of the Instruction Manual (IM) for this player model has been pre-loaded into the
players’ flash memory and is located in the main root directory. To access the IM file view it on your computer,
connect the player to your PC using the USB cable. Open the MP3 USB file directory and “Drag & Drop” the
document title; VIDAO 215-818 Instruction Manual.pdf from the players’ memory to the desktop of your PC.
Double-click the icon of this IM to open and view the manual.
NOTE: If your PC is not capable of viewing files in the PDF file format, type the following address into your
internet browser, http://get.adobe.com/reader/otherversions, and download a free version of Adobe Reader
to instantly view the instruction manual file.
Important – Before Video files can be viewed on this Player the “Video File Conversion Utility” (pre-loaded on
this Player) must be installed on your computer and video files must be converted to properly play. It may take
from 2 up to 5 minutes for this software to install on your computer. See the full instructions for this process
which are found in the Full Instruction Manual pre-loaded on the Players’ flash memory drive.
For the experienced computer users, this Player will be very easy to use. This Quick-start guide allows users to
quickly load and start playing music, video and photo files, but we recommend reading the entire manual to
understand all of the Players’ features.
As with any ‘plug and play’ USB storage device, most digital media files can be added to the Player from a
computer by simply using the ‘drag and drop’ approach familiar to most Windows users.
Charging the Player
Before attempting to use the Player, be sure to fully charge the battery by connecting the Player to your PC
using the USB Charging and Transfer Cable. A complete charge takes around three hours.
• BATTERY LEVEL ICON: The batter icon shows remaining battery power in 4 levels
Solid Icon: Battery is fully charged
Blank Icon: Battery is fully depleted and needs to be recharged to continue operation
Turning On / Off the Player
After charging the Player and loading digital media files, switch the Player ‘ON’ by sliding the master power
switch on the side to the ‘ON’ position. If the Player screen does not power up, press and hold the [PLAY]
button until the screen powers on. To turn the PLAYER off, slide the master power switch to the ‘OFF’ position
or press and hold the [PLAY] button until the screen powers off.
Loading music, pictures, videos or eBooks to the MP3 player.
1. Connect the MP3 player to your PC or laptop with provided mini USB (B) cable. Windows should detect,
install, and auto play the device.
NOTE: This MP3 player is only compatible on PC’s
and laptops running Windows 2000 or newer. This
unit will not work with Apple operating systems.
NOTE: This MP3 player is only compatible on PC’s and
laptops running Windows 2000 or newer. This unit will
not work with Apple operating systems.
Page 2
2
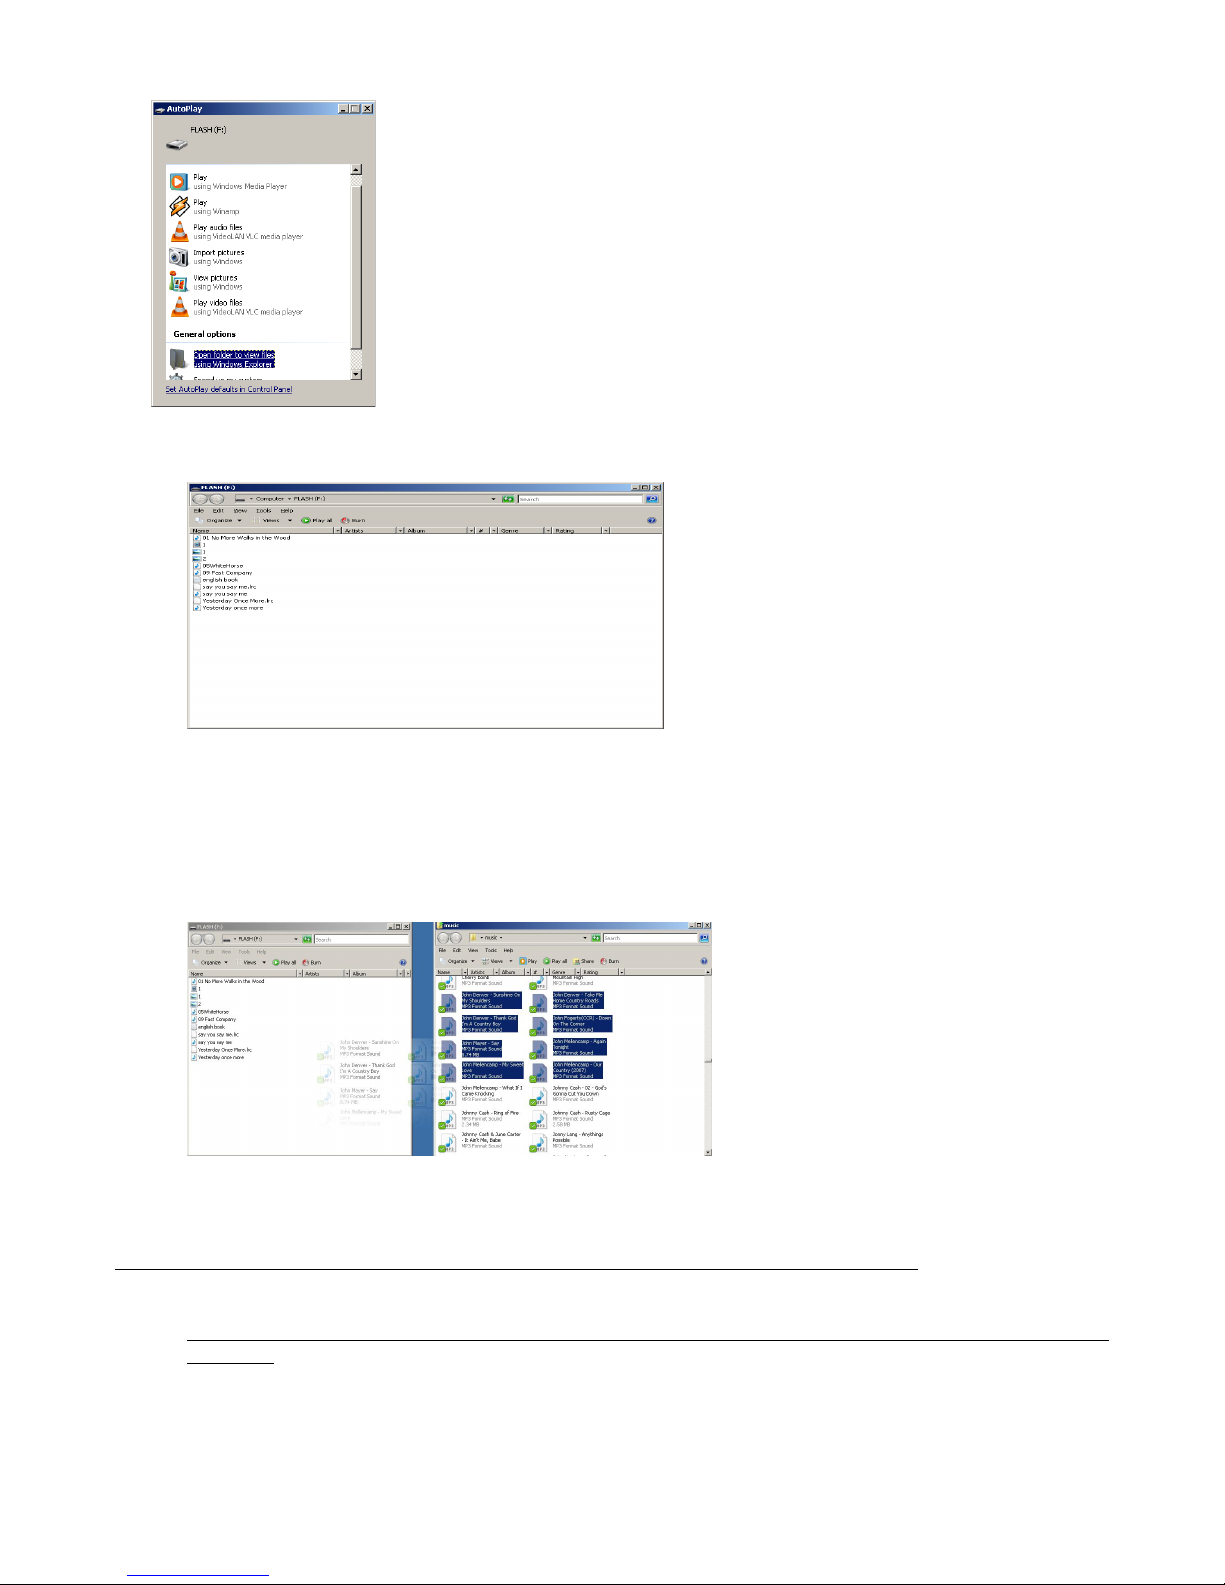
2. Under General Options select “Open folder to view files using Windows Explorer”. This will open the
MP3 player’s FLASH drive (F:).
(MP3 Player’s FLASH drive (F:)
*** NOTE: If Windows doesn’t run auto detect, click on “My Computer” and select FLASH drive (F:).
3. Open the folder that contains the music, pictures, videos, or eBooks that you want to load on the MP3
player.
4. Drag and drop the file(s) from your PC to the MP3 player’s FLASH drive (F:).
You can also highlight a selection of files, right click, and select “Copy”. Next, right click on FLASH drive
(F:)and select “Paste”. This will also transfer files from your computer to the MP3 player.
The Proper Way to Disconnect or “Eject” the MP3 & Video Player from the Computer
If the MP3 & Video Player is not properly ‘Ejected” from the computer, music & other recorded files may be lost
or damaged and the Player may not function correctly.
• For all computer systems, follow the normal system procedures for the SAFE ejection of a “USB
DEVICE”.
o First, make sure all Player functions have stopped and all programs using the Player on your
computer (i.e. Media Player or others) are closed.
o Right-click on the USB icon in the bottom right (system tray) of your computer screen and a box with
the message, “Safely Remove Hardware” will appear. Click on the “Safely Remove Hardware”
message and your computer will indicate that it is OK to remove the device.
Page 3

3
Getting Started
Controls Overview
DESCRIPTION OF THE BUTTON FUNCTIONS
NOTE: Some of the Player functions are controlled by pressing some of the buttons in two different
ways; “Press” and “Press & Hold” (for 1-2 seconds)
o ON/OFF: Master Power switch
o PLAY / PAUSE / CONFIRM: Press; Play / Pause current function / Confirm selection. Press &
Hold; Power ON or OFF
o HOME/MENU: Press; Sub-menu access when file is playing or paused /Add to Favorites.
Press & Hold: return to Main Menu functions
o UP/VOL+: Press: Increase volume when playing / move Up for menu selection.
o DOWN/VOL-: Press: Decrease volume when playing, move Down for menu selection.
o RIGHT/NEXT : Press: select next file when playing / move right in other modes.
o LEFT/PREV : Press: select previous file when playing / move left in other modes
o RETURN : Press: to return to menu or level
o MIC: Build-in microphone
o USB: Mini USB connection port
o Headphone Jack: Standard 3.5mm headphone jack
o Micro SD Card Slot: Insert a Micro SD Card to expand the memory of the Player
For Models; FL418 & FL818 only
Page 4

4
Playing Music.
Press [▲] or [▼] to highlight MUSIC, then press [▶II].
Press PLAY [▶ II] to enter the All Music menu.
Press [▲] or [▼] to highlight desired track, then press [▶II].
Music Playing Screen Example
Volume Control:
Press [▲] or [▼] while in the music screen to increase or decrease the volume.
Play Modes:
Press HOME while in the Music playing function to access repeat mode, play mode, and equalizer options.
Playing Video
Press [▲] or [▼] to highlight VIDEO, then press [▶II].
Press [▲] or [▼] to highlight desired video, then press [▶II].
Video Playing Screen Example
Volume Control:
Press [▲] or [▼] while in the video screen to increase or decrease the volume.
Press HOME while in the Video playing function to access the sub-menus options.
***NOTE: This device will only play AVI video
format.
Page 5

5
LIMITED 90-DAY WARRANTY
We warrant this product to be free from defects in material and workmanship under normal use for a ninety-day
period from the original date of purchase from an authorized VIDAO dealer.
Should you be missing any of the included accessories or other components (screws, pieces, etc.), please contact
the Customer Support Center to secure a replacement. It is not necessary to bring the unit back to the store. When
calling, please reference the parts list found in the Instruction Manual to help us accurately identify the missing
parts and promptly provide replacements.
We will replace the unit free of charge should it become defective under this warranty, providing you, the original
purchaser, have your original dated sales receipt.
To obtain warranty service or replacement within the ninety-day warranty period, please return the product with all
parts and accessories along with your original dated store receipt to the original place of purchase and the unit will
be exchanged at no charge. It is not necessary to contact the manufacturer for warranty replacement.
Our Customer Support Center is available Monday - Saturday (10:00AM to 7:00PM EST) for technical assistance
or troubleshooting. To contact us, please call 1-855-998-4326.
This warranty applies only under conditions of normal use. Our products are not intended for outdoor use.
There are no consumer serviceable parts contained in this product and any attempt by the owner to service or
repair the unit will immediately void all warranty coverage.
This warranty does not cover any product which has been subject to damage due to an act of nature, misuse,
neglect, accident, abuse, commercial use, or modification of, or to, any part of the product, including the antenna.
Damage to any external media such as DVD & CD discs, and/or USB or other memory devices are not covered
nor is the cost incurred in shipping the unit for warranty repair or exchange. Under no circumstances shall VIDAO
be liable for any loss (direct, indirect, incidental, foreseen, unforeseen, special or consequential) or for any
damage arising out of, or in connection with, the use of this product.
UNDER NO CIRCUMSTANCES WILL VIDAO BE LIABLE FOR ANY INCIDENTAL OR CONSEQUENTIAL
DAMAGES.
This warranty does not cover re-manufactured, refurbished, or repaired units, or any products sold 'As Is'.
This warranty is valid only to the original purchaser of the Product in the United States and Canada and grants
specific legal rights.
 Loading...