

Page 1
Bluetooth CD Stereo System
Model: ITCDS-5001
Instruction Manual
PLEASE READ THIS INSTRUCTION MANUAL CAREFULLY BEFORE USE
AND KEEP IT FOR FUTURE REFERENCE.
Page 2
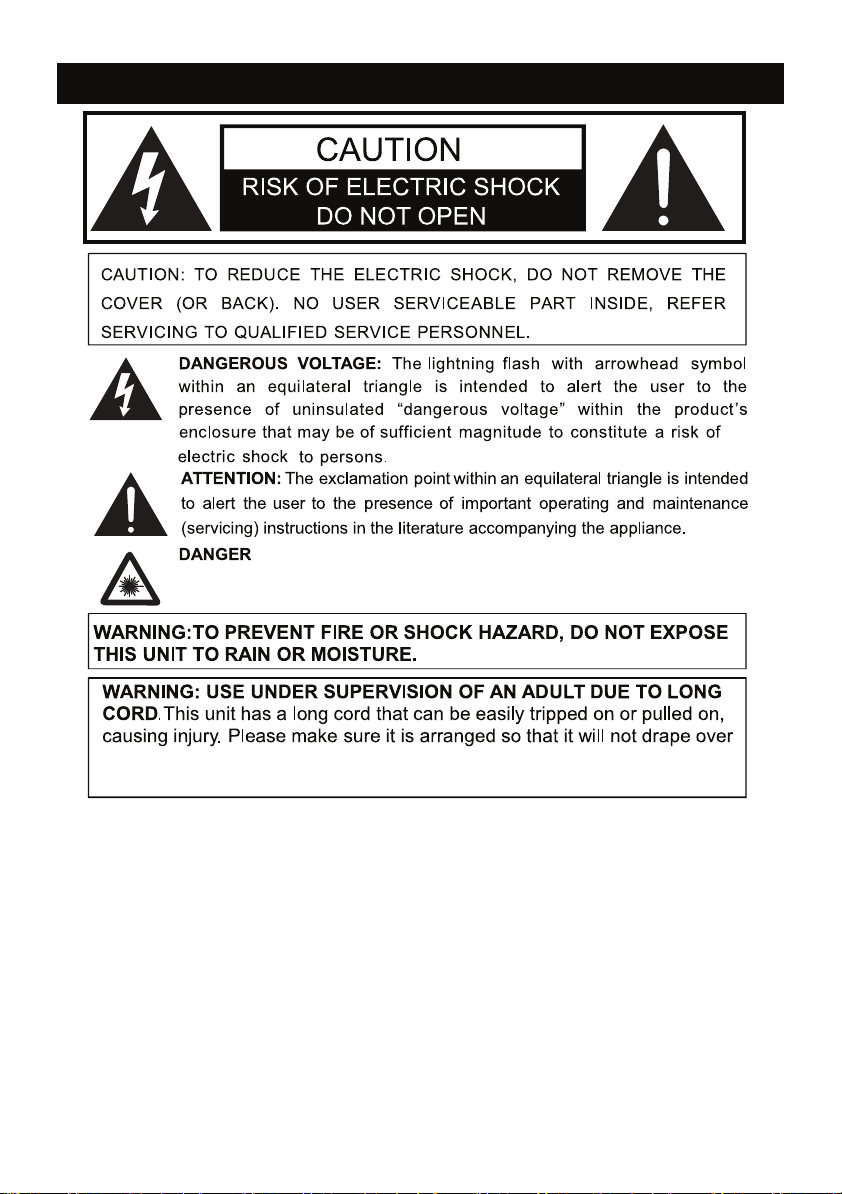
IMPORTANT SAFETY INSTRUCTIONS
Invisible and hazardous laser radiation when open and interlock failed or
Defeated. Avoid direct exposure to beam.
a tabletop, etc., or where it can be pulled on by children or tripped
over accidentally.
FCC Warnning:
This equipment has been tested and found to comply with the limits for a Class B
digital device, pursuant to part 15 of the FCC Rules. These limits are designed to
provide reasonable protection against harmful interference in a residential
installation. This equipment generates, uses and can radiate radio frequency
energy and, if not installed and used in accordance with the instructions, may
cause harmful interference to radio communications. However, there is no
guarantee that interference will not occur in a particular installation. If this
equipment does cause harmful interference to radio or television reception, which
can be determined by turning the equipment off and on, the user is encouraged to
try to correct the interference by one or more of the following measures:
• Reorient or relocate the receiving antenna.
• Increase the separation between the equipment and receiver.
• Connect the equipment into an outlet on a circuit different from that to which
the receiver is connected.
• Consult the dealer or an experienced radio/TV technician for help.
1
Page 3
Caution: Any changes or modifications to this device not explicitly approved by
manufacturer could void your authority to operate this equipment.
This device complies with part 15 of the FCC Rules. Operation is subject to the
following two conditions: (1) This device may not cause harmful interference, and
(2) this device must accept any interference received, including interference that
may cause undesired operation.
This equipment complies with FCC radiation exposure limits set forth for an
uncontrolled environment. This equipment should be installed and operated with
minimum distance 20cm between the radiator and your body.
ISED Statement
‐ English: This device complies with Industry Canada license‐exempt RSS
standard(s). Operation is subject to the following two conditions: (1) This device
may not cause interference, and (2) This device must accept any interference,
including interference that may cause undesired operation of the device.The
digital apparatus complies with Canadian CAN ICES‐3(B)/NMB‐3(B).
‐ French: Le présent appareil est conforme aux CNR d'Industrie Canada
applicables aux appareils radio exempts de licence. L'exploitation est autorisée
aux deux conditions suivantes: (1) l'appareil ne doit pas produire de brouillage, et
(2) l'utilisateur de l'appareil doit accepter tout brouillage radioélectrique subi,
même si le brouillage est susceptible d'en compromettre le fonctionnement.
l'appareil numérique du ciem conforme canadien peut ‐ 3 (b) / nmb ‐ 3 (b).
This device meets the exemption from the routine evaluation limits in section 2.5
of RSS 102 and compliance with RSS 102 RF exposure, users can obtain
Canadian information on RF exposure and compliance.
cet appareil est conforme à l'exemption des limites d'évaluation courante dans la
section 2.5 du cnr - 102 et conformité avec rss 102 de l'exposition aux rf, les
utilisateurs peuvent obtenir des données canadiennes sur l'exposition aux
champs rf et la conformité.
This equipment complies with Canada radiation exposure limits set forth for an
uncontrolled environment. This equipment should be installed and operated with
minimum distance 20cm between the radiator & your body.
Cet équipement est conforme Canada limites d'exposition aux radiations dans un
environnement non contrôlé.
WARNING: This product can expose you to chemicals including lead,
which is known to the State of California to cause cancer and birth
defects or other reproductive harm. For more information go to
www.P65Warnings.ca.gov.
IMPORTANT SAFETY INSTRUCTIONS
2
Page 4
3
Page 5
4
Page 6

FRONT VIEW
1 2 3 4 5 6
PRODUCT OVERVIEW
IR
POWER FUNCTION
AUX IN
VOLUME BALANCE BASS
SCAN
TREBLE
TUN- TUN+
7 8 9 10 11 12 13 14 15 16 17 18 19 20 21
1 & 2. VU Meters
3. CD Drawer
4. Open/Close Button
5. Display
6. Remote Sensor
7. Power Button
8. Headphone Jack
9. Aux In Jack
10. Function Button
11. Stop Button
12. Volume Button
13. Previous Button
14. Balance Control Knob
15. Play/Pause Button
16. Bass Control Knob
17. Next Button
18. Treble Control Knob
19. Scan Button
20. Tune Down Button
21. Tune Up Button
5
Page 7

REAR VIEW
FM ANT.
22 23 24
SPEAKER OUTPUT
DC 12V 2A
R+ R- L- L+
22. FM Antenna
EXTERNAL SPEAKER
25. External Speaker Connectors
23. Speaker Output Connectors
24. DC IN Jack
25
6
Page 8

REMOTE CONTROL
1
2
3
4
5
6
7
8
9
10
11
12
13
1. Power ON/OFF Button
2. Function Button
3. Random Play Button
4. Treble Up Button
5. Right Balance Button
6. Treble Down Button
7. Left Balance Button
8. Stop Button
9. Volume Down Button
10. Play/Pause Button
11. Previous Button
R
BALANCE
L
FUNC
PROG.
TREBLE
SCANTUN-
REPEAT
BASS
TUN+
14
15
16
17
18
19
20
21
12. Scan Button
13. Tune Down Button
14. Open/Close Button
15. Repeat Button
16. Program Button
17. Bass Up Button
18. Bass Down Button
19. Volume Up Button
20. Next Button
21. Tune Up Button
7
Page 9

REMOTE CONTROL BATTERY INSTALLATION
FIRST TIME USE
Remove and discard the insulation film as shown on Fig. 1.
BUTTON CELL REPLACEMENT
1. Push and slide out the battery holder as shown on Fig.2.
2. Replace the battery with a new CR2025 button cell as the polarity
marking facing upward as shown on Fig.3.
3. Close the battery door as shown on Fig.4.
Fig.1
C
R2025
SN
OPEN
+
PUSH
RELEA SE
Fig.2
Fig.3
Fig.4
BATTERY PRECAUTIONS
Follow these precautions when using a battery in this device:
1. Use only the size and type of battery specified.
2. Be sure to follow the correct polarity when installing the battery as indicated in the battery
ompartment, a reserved battery may cause damage to
c
the device.
3. Do not mix different types of batteries together (e.g. Alkaline and Carbon-zinc)
or old batteries with fresh ones.
period of time,
4. If the batteries in the device are consumed or the device is not to be used for
remove the batteries to prevent damage or injury from
possible
leakage.
5. Do not try to recharge the battery as it is not intended to be recharged; it can
a long
overheat
(Follow the battery manufacturer’s instructions.)
6. The batteries shall not be e
7. Clean the battery contacts and also those of the device prior to battery
sed to excessive heat such as sunshine or fire.
xpo
installation.
8. The remote control is supplied with a coin/button
cell battery. If the coin button cell battery is
swallowed, it can cause severe internal burns in
just 2 hours and can lead to death. Keep new
and used batteries away from children. If the
Battery compartment does not close securely,
stop using the product and keep it away from
CR2025
children. If you think batteries might have been
swallowed or placed any part of the body, seek
immediate medical attention.
CAUTION
●Danger of explosion if the battery is incorrectly replaced.
●Replace only with the same or equivalent type.
and rupture.
Remote Control Operation Range
●
When there is an obstacle between the transmitter and the unit, the unit may not operate.
● When direct sunlight, an incandescent lamp, fluorescent lamp or any other strong light
shines on the REMOTE SENSOR of the unit, the operation of the
remote may be
unstable.
8
Page 10

GENERAL OPERATION
1. Connect the external speakers by connecting the respective
R & L wires on the back of the unit.
Note: Make sure the cables are connected firmly. If there is no sound,
please reconnect. Make sure the red cable is connected to the red connector,
and the red-black cable is connected to the black connector.
2. Connect the adapter to the AC outlet and the DC IN jack at the rear of the unit.
3. Press the POWER button on the unit or the button on the remote control to
turn on the unit.
4. Press the FUNCTION button on the unit or the FUNC button on the remote
control to switch to desired mode.
BALANCE, BASS, AND TREBLE ADJUSTMENT
- Rotate the VOLUME knob on the unit or press the or button on
remote control to adjust the volume.
- Rotate the BALANCE knob on the unit or press the BALANCE + or - button
on remote control to adjust set the balance.
- Rotate the BASS knob on the unit or press the BASS + or - button on
remote control to adjust bass level.
- Rotate the TREBLE knob on the unit or press the TREBLE + or - button on
remote control to adjust treble level.
HEADPHONE OPERATION
Plug your headphones (not included) into the headphone jack to listen and adjust
the volume to proper level to avoid damaging to your ears.
VU METERS
VU Meters are used to measure power levels of audio frequency signals.
9
Page 11

FM RADIO OPERATION
1. Press the FUNCTION button on the unit or the FUNC button on the remote
control to switch to FM mode, the FM frequency will appear on the display.
2. Press and hold TUN- or TUN+ to search automatically until a station is
found, and it will play automatically.
3. Press TUN- or TUN+ button to manually adjust the frequency.
4. Press the REPEAT button on the remote control to switch between stereo
and mono.
Automatic Scanning and Programming
- Press and hold the SCAN button on the unit or remote control to scan and
save the available stations automatically, it can save 20 stations in total.
- After scanning is finished, it will play the first programmed station.
- Press the or button to select and play the desired programmed station.
Manual Programming
- Press TUN- or TUN+ button to set and play the desired station
- Press the PROG button on remote control, "PXX" will appear on display, here
"XX" stands for "01-20".
- Press the or button to select the desired storing location.
- Repeat the above steps to store more programmed stations.
- Press the PROG button on the remote control to confirm storing. Note: The
station that was stored before will be replaced.
NOTE: For best reception, extend the antenna on the back of the unit.
CD OPERATION
1. Press the FUNCTION button on the unit or on the remote control
to switch to CD mode. If there is no disc in disc compartment, "diSC" will appear
on display.
2. Press the button to open the disc compartment, place a CD disc with label
side facing up, then press the button again to close.
3. The unit will play the CD automatically within a few seconds.
Operation while playing:
- Press the button to pause, the track number will blink on the display,
press the button again to resume.
- Press the or button to skip to the previous or next track.
- Press the button to stop playing, press the button to play the first track.
10
Page 12

- Press the REPEAT button on the remote control once to repeat one track, press
it again to repeat all tracks, press it the third time to cancel repeat playing.
- Press the button repeatedly to switch to random track and play randomly.
Programming:
- During playing, press the button to stop.
- Press the PROG button on remote control, "P01" will appear on display for
one second then "00" will blink on the display.
- Press the or button to select the track for P01.
- Press the PROG button on the remote control to confirm programming.
- Repeat the above steps to program up to 20 tracks.
- After programming, press the button to play the programmed tracks.
- To cancel programming playing, press the button twice.
AUX-IN OPERATION
An external device (e.g. smartphone, MP3 player, tablet, etc.) can be connected
to this unit's speakers via AUX-IN.
1. Plug one end of the AUX-IN Cable into the AUX-IN jack on the unit.
2. Plug the other end of the AUX-IN Cable into the headphone jack or Aux Port
on your external device.
3. Press the FUNCTION button on the unit or on the remote control to switch to
AUX-IN mode, "AUX" will appear on the display.
4. Power on the connected external device and start playing the music as usual.
BLUETOOTH OPERATION
1. Press the FUNCTION button on the unit or on the remote control to switch to
Bluetooth mode, "BLUE" will blink on the display.
2. Turn on Bluetooth on your external Bluetooth device and open your device’s
Bluetooth Setting Menu.
3. Select "ITCDS-5001" from the pairing list to connect to the unit.
4. Once your device is connected successfully, "BLUE" will stop blinking on
the display.
While playing:
- Press the button to pause, press the
- Press the or button to skip to the previous or next track.
button again to resume.
11
Page 13

CARE AND MAINTENANCE
Caring for Discs
Treat the disc carefully. Handle the disc only by its edges.
Never allow your fingers to touch the shiny, unprinted side of the disc.
● Do not attach adhesive tape, stickers, etc. to the disc label.
● Clean the disc periodically with a soft, lint-free,dry cloth, Never use detergents or abrasive cleaners
to clean the disc. If necessary, use a CD cleaning kit.
● If a disc skips or gets stuck on a section of the disc, it is probably dirty or damaged(scratched).
● When cleaning the disc, wipe in straight lines from the center of the disc to the outer edge of the
disc. Never wipe in circular motions.
● Discs should be stored in their cases after each use to avoid damage.
● Do not expose discs to direct sunlight, high temperatures or dust, etc. Prolonged exposure or
extreme temperatures can warp the disc.
● Do not stick or write anything on either side of the disc. Sharp writing instruments, or the ink, may
damage the surface.
Cleaning the Unit
● To prevent fire or shock hazard, disconnect your unit from the AC power source when cleaning.
● The finish on your unit may be cleaned with a dust cloth and cared for as other furniture. Use
caution when cleaning and wiping the plastic parts.
● Mild soap and a damp cloth may be used on the front panel.
12
Page 14

TROUBLESHOOTING GUIDE
SYMPTOM
No power.
No sound or
weak sound.
Remote Control
is not working.
Radio has static.
Disc not played.
POSSIBLE CAUSE
The adapter is not connected. Connect the adapter to the unit to a
The unit is off.
Volume level is too low.
Incorrect function mode is selected.
Remote Control is out of range.
Remote Control battery is dead.
Weak radio reception.
Condensation has formed.
Disc is not the correct format or
the disc is corrupted.
POSSIBLE SOLUTION
wall outlet.
Press the button to power on the unit.
Raise the volume level by rotating the
volume knob on the unit or press the
button on the Remote Control.
Press the FUNCTION button on the unit
or press the FUNC button on the Remote
Control to switch to the desired mode.
Point the remote control to the remote
sensor on the unit within 16 feet,
+/- 30 degrees.
Replace with new battery.
Extend the FM Antenna Wire to get
better reception.
Unplug the unit and wait about two hours
until the player is dry.
Try a different disc.
Bluetooth is not
working.
Disc is dirty or inserted incorrectly.
The external device is too far from
the unit.
The external device is not paired
correctly.
13
Clean disc and insert with label side up
Move the external device within the
Bluetooth Range of 33 ft (10 meters).
Disconnect the bluetooth connection
with the external device and
reconnect.
Page 15

SPECIFICATIONS
AMPLIFIER
Output Power ..........................................................................................10W+10W
Frequency Response ..................................................................... 60 to 20,000 Hz
TUNER
Frequency Range.......................................................................... 87.5- 108.0 MHz
CD PLAYER
Frequency Response ..................................................................... 60 to 20,000 Hz
Signal-to-Noise Ratio ......................................................................... 55dB (IEC-A)
Compatible Disc ........................................................................CD, CD-R, CD-RW
SPEAKER SYSTEM
Impedance.................................................................................................... 6 ohms
Input Power ........................................................................................10W (woofer)
Max 3W (tweeter)
GENERAL
Adaptor Input.................................................................... 100-240V~50/60Hz 0.6A
Adaptor Output ............................................................................12V 2000mA
Power Consumption ......................................................................................... 24W
Main Unit Dimension .................L 360mm (14") x W 204mm (8")x H 110mm (4.3")
Speaker Dimension .................... L 203mm (8") x W 130mm (5") x H 250mm (9.8")
BLUETOOTH
Bluetooth Version ............................................................................................. V5.0
Bluetooth Profiles .......... A2DP/AVCTP/AVDTP/AVRCP/HFP/SPP/SMP/ATT/GAP
GATT/RFCOMM/SDP/12 CAP Profile
Bluetooth Frequency Range................................................. 2.402 GHz-2.480 GHz
Operating Distance.................................................................................. 10m (33ft)
ACCESSORIES INCLUDED:
User Manual, AC/DC Adapter, Remote Control, AUX-in Cable,
Speaker Connection Cables
Design and specification are subject to change without notice.
Bluetooth is a registered trademark of Bluetooth SIG, Inc.
Other trademarks and trade names are those of their respective owners.
Made in China.
14
Page 16

Victrola is a registered trademark of Innovative Technology Electronics LLC.
Innovative Technology Electronics LLC.
Limited Warranty: 90 Days Labor, One Year Parts
Innovative Technology Electronics LLC. (IT) warrants the product to be free from “Defects”
in materials under normal use for a period of “One Year” from the date of the original
purchase. The Warranty is “Not” transferable. IT agrees, within the initial “90 Day” period,
to repair or replace the product if it is determined to be defective at “No Charge”. It is
further agreed that IT will cover the cost to repair or replace damaged “Parts” only for a
total period of “One Year” from the date of the original purchase. The warranty does not
cover cosmetic damage, antennas, AC cords, cabinets, headbands, ear-pads, or damage
due to line power surges, connection to improper voltage supply or settings, misuse,
mishandling, accident, acts of God or attempted repair by an unauthorized service agent.
To obtain service, the purchaser MUST present an original sales receipt / proof of
purchase. Please contact us at www.victrola.com to request an RMA (Return
Material Authorization) number to return products for service or replacement.
Returns without an RMA number on the package will be refused and returned to sender.
Upon receipt of the returning item and our full inspection (IT) may issue a replacement to
customer for the same item or of one that has equivalent value and features. To return an
item, supply full name, return address, phone number, item purchased, receipt of
purchase and reason for return to obtain RMA number.
All returns must be in the original packaging or reasonable substitute to prevent damage.
Customer “Must” include full name, shipping address and telephone number inside of
package. No return will be shipped back to a PO Box or APO address.
Please include your check or money order in the amount of:
• USD $5.00 for items $10.00 to $39.99. (Price Paid Per Unit)
• USD $10.00 for items $40.00 to $99.99. (Price Paid Per Unit)
• USD $16.00 for items $100.00 and up. (Price Paid Per Unit)
• Shipping fees are non-refundable.
to be payable to Innovative Technology Electronics LLC. (for handling and return shipping
charges) (IT) will not be responsible for delays or unprocessed claims resulting from a
purchaser’s failure to provide any / all of the necessary information. Send all inquiries or
RMA request via our website www.victrola.com/pages/technical-support.
Innovative Technology Electronics LLC.
1 Channel Drive
Port Washington, NY 11050
Toll free: 1-877-483-2497
Website for support: www.victrola.com/pages/technical-support
There are no express warranties except as listed above.
REPAIR OR REPLACEMENT AS PROVIDED UNDER THIS WARRANTY IS THE
EXCLUSIVE REMEDY OF THE CUSTOMER, (IT) SHALL NOT BE LIABLE FOR ANY
INCIDENTAL OR CONSEQUENTIAL DAMAGES FOR BREACH OF ANY EXPRESS OR
IMPLIED WARRANTY ON THIS PRODUCT EXCEPT TO THE EXTENT PROHIBITED BY
APPLICABLE LAW. ANY IMPLIED WARRANTY OF MERCHANTABILITY OR FITNESS FOR
A PARTICULAR PURPOSE ON THIS PRODUCT IS LIMITED IN DURATION TO THE
DURATION OF THIS WARRANTY.
Some states do not allow the exclusion or limitation of incidental or consequential
damages, or limitations on how long an implied warranty lasts, so the above exclusions or
limitations may not apply to you. This warranty gives you specific legal rights and you may
also have other rights, which vary from state to state.
15
 Loading...