

Victory Range Hoods Victory SKY Instruction Manual
Instruction Manual
Ceiling type range hood
Victory SKY
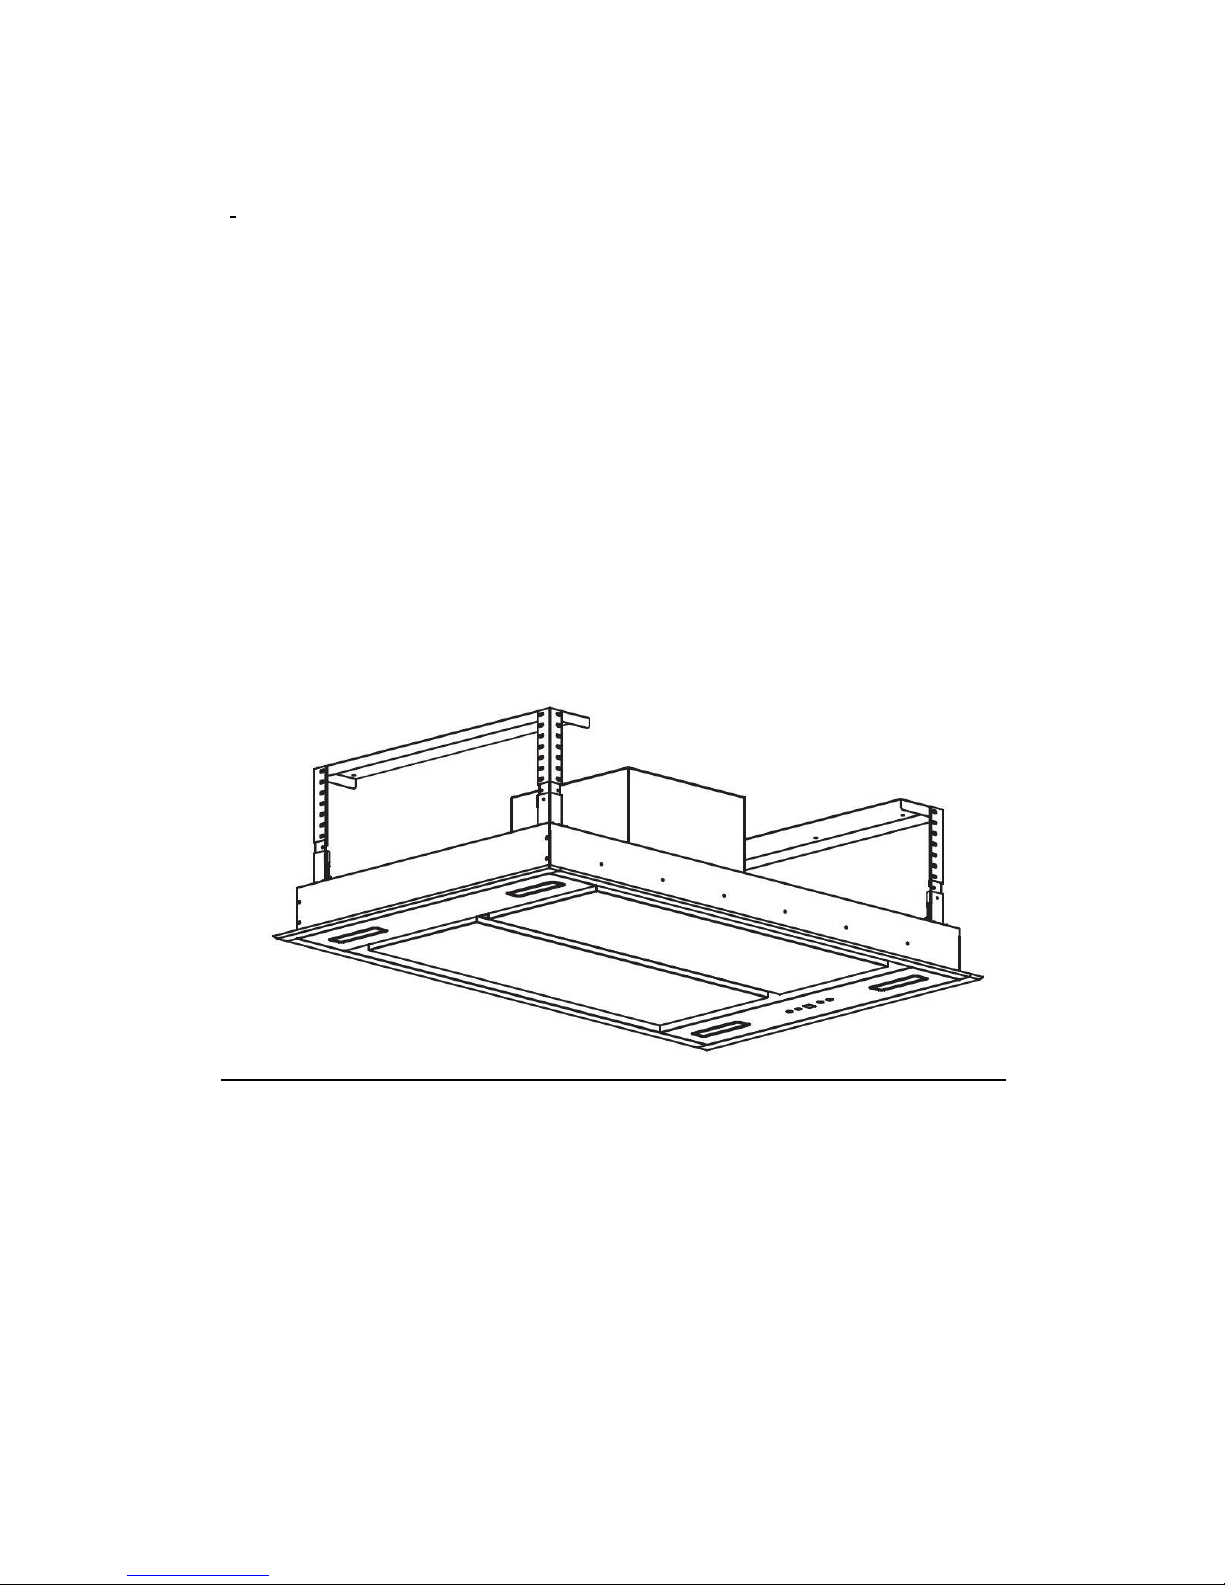
This Installation manual only applicable to Detachable ceiling
decorative board

SAFETY PRECAUTION
Keep children away from the product when it is operating and do not
allow them to play with or near the product.
The range hood is for HOME USE only, not suitable for barbecue, roast
shop and other commercial use.
All installation work must be carried out by a competent person or
qualified electrician.
The range hood and its filter mesh should be cleaned regularly in order to
keep in good working order.
The range hood must be disconnected to from the power supply before
cleaning procedures
Clean the range hood according to the instruction manual to avoid the
risk of electric shock or product damage.
Do not light up any fire directly under the range hood.
If there is any fault with your range hood, please call the service
department immediately
Please ensure there is enough ventilation when you are using the range
hood and hob at the same times.
Do not connect the ducting system of the range hood to existing
ventilation system which it is being use for gas hob or other fuel burning
appliance.
Make sure that the voltage (V) and wattage (W) shown on the range
hood label are same as the local require before installation and use.
To ensure the range hood perform in perfect condition, please read the
instruction manual carefully before installation and usage, keep it in a
right place
In order get our best service on range hood, please keep the
maintenance card and invoice. Otherwise, the warranty service will be
void.
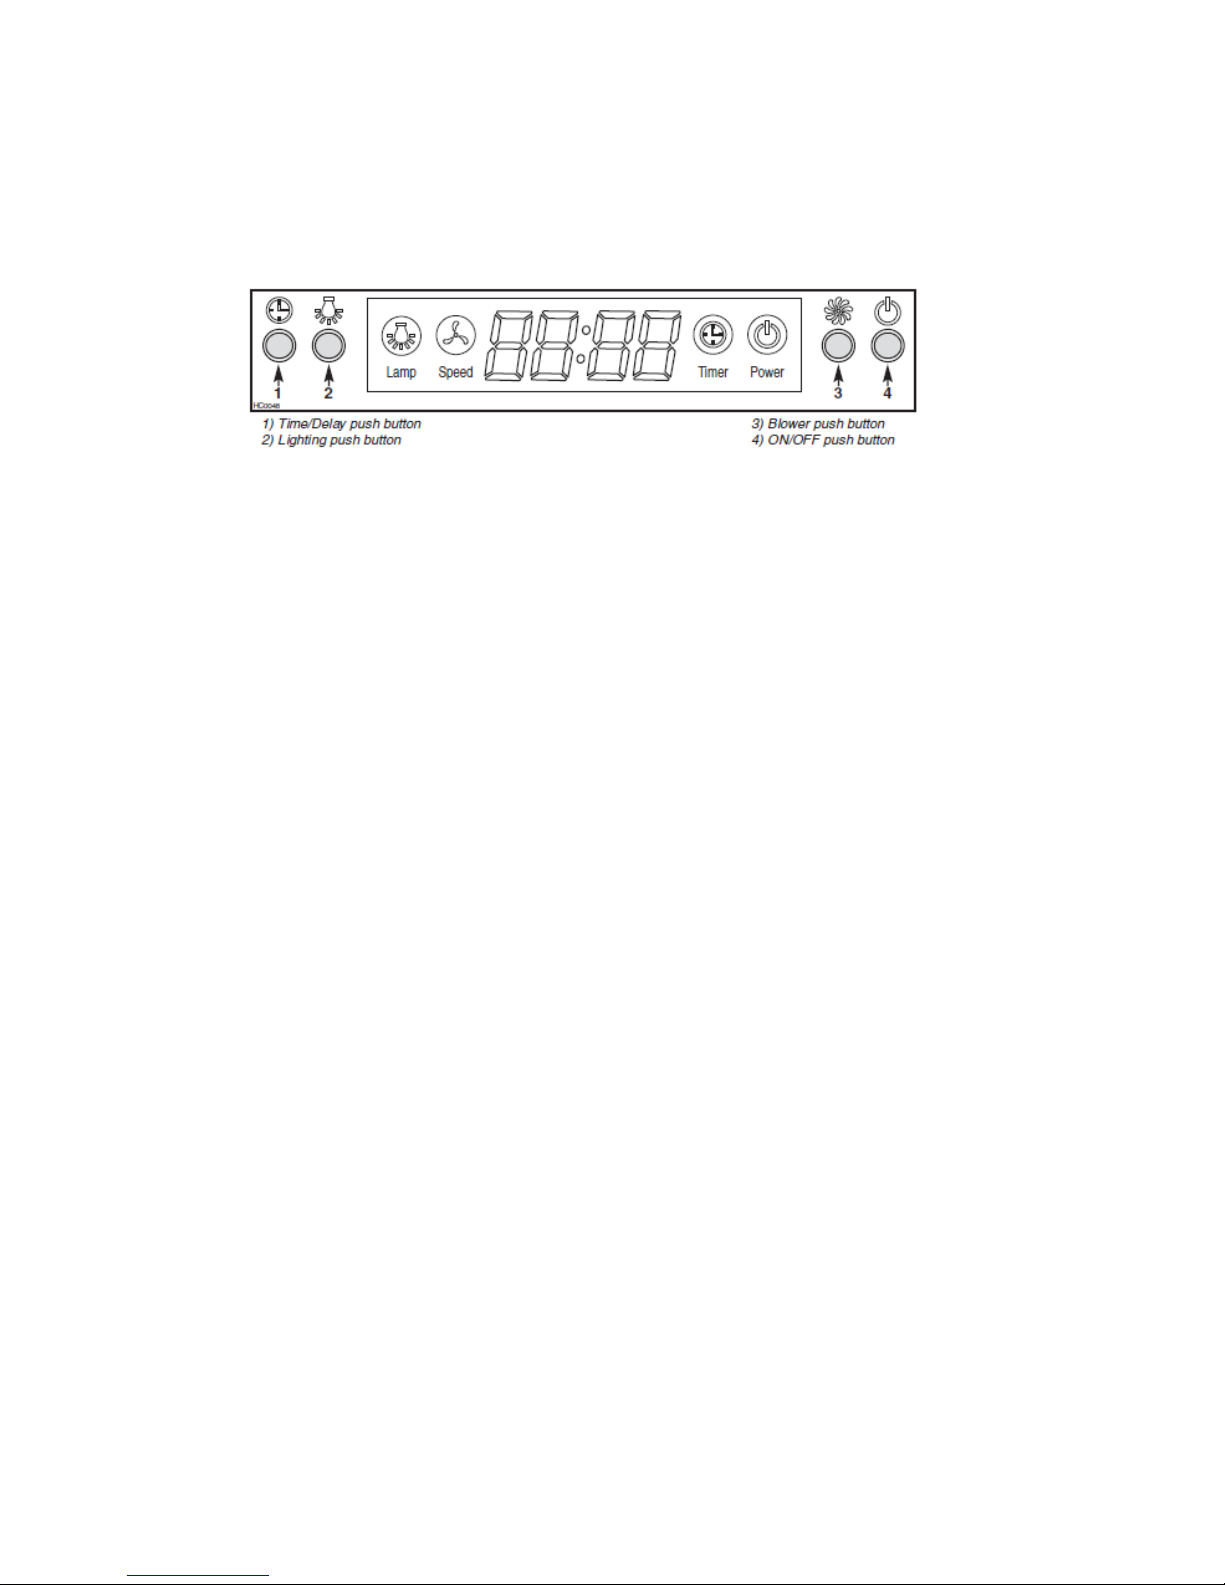
Controls
The control inside the stainless steel panel, you can find it when
open the panel
1. TIME/DELAY (2 Functions):
- Time Setting: This button is used to set time when lighting and blower are not in use.
Time is displayed in 24 hour cycle. To set time, press the push button (1) for 3
seconds. The first two digits will flash. Use the blower push button (3) to increase and
the lighting push button (2) to decrease. Press the time/delay push button (1) again,
the last two digits will flash. Use the blower push button (3) to increase and the
lighting push button (2) to decrease. Press the time/delay button (1) again to confirm
and exit time setting mode.
- Delay Setting: When blower is in use, this button is the delay setting button. To set
delay, press the push button (1). The delay is factory set at 5 minutes, but can be set
from 1 up to 60 minutes. Use blower push button (3) to increase and lighting push
button (2) to decrease. Countdown will be displayed on the LCD screen and blower
symbol will be activated. Blower will continue to operate for the programmed minutes
and then will stop automatically (delay setting mode does not affect lighting as it
works independently). The last time used will be memorized. To cancel delay
function, press time/delay push button (1) again, the blower will continue to operate
and won’t stop until ON/OFF push button (4) is pressed. To turn delay function and
blower OFF at once, press ON/OFF push button (4).
NOTE: Delay will be reset if blower speed is modified during delay setting mode.
2. LIGHTING: Pressing the lighting push button (2) once will turn the LCD screen on.
To turn the lights on, press the lighting push button (2) once more. Press it again to
turn the lights OFF. The LCD screen will turn automatically off after 15 seconds of
inactivity (blower and/or lights).
3. BLOWER: The blower push button (3) turns the blower on to three speed settings:
LOW, MEDIUM or HIGH. Press the blower (3) or ON/OFF (4) push button once to
turn the LCD screen on. Pressing the blower (3) or ON/OFF (4) push button once
more will turn the blower on at the last selected speed and blower symbol will be
activated. To change the blower speed, press the blower push button (3) until the
desired speed is obtained. Press the ON/OFF push button (4) to turn the blower OFF.
The last speed used will be memorized.

NOTE: When blower is turned on, 100% of power level is activated during 1 to 2
seconds acting as a “kick-start”. It will then operate at the previous setting.
Connecting the remote control
·A New remote control has to establish a new connection to the range hood
when used for first time. One remote control could possibly control several
range hood at the same time.
Connection process between remote control and range hood
·Press on control panel of the range hood, the backlight display is on,
the range hood is in standby mode.
·Press for 5 seconds, the indicators light begin flashing from one button
to another ,the range hood it in connection mode, press any bottom on
remote control to confirm the connection. The connection process finished
and the remote control can be used for speed selection, lighting and timer
setting.
·If you want to connect again, you will need to clear the code that has been
set up previously.
·To clear the code, press for 5 seconds, the indicators light begin
flashing from one button to another; the range is in connection mode. Then,
press again for 5 seconds, the previous connection code is cleared.
·When the previous code has been cleared, the range hood back to standby
mode, press for 5 seconds, the indicate light flashing from one button
to another ,the range hood it in connection mode, then, press any bottom on
remote control to confirm the connection.
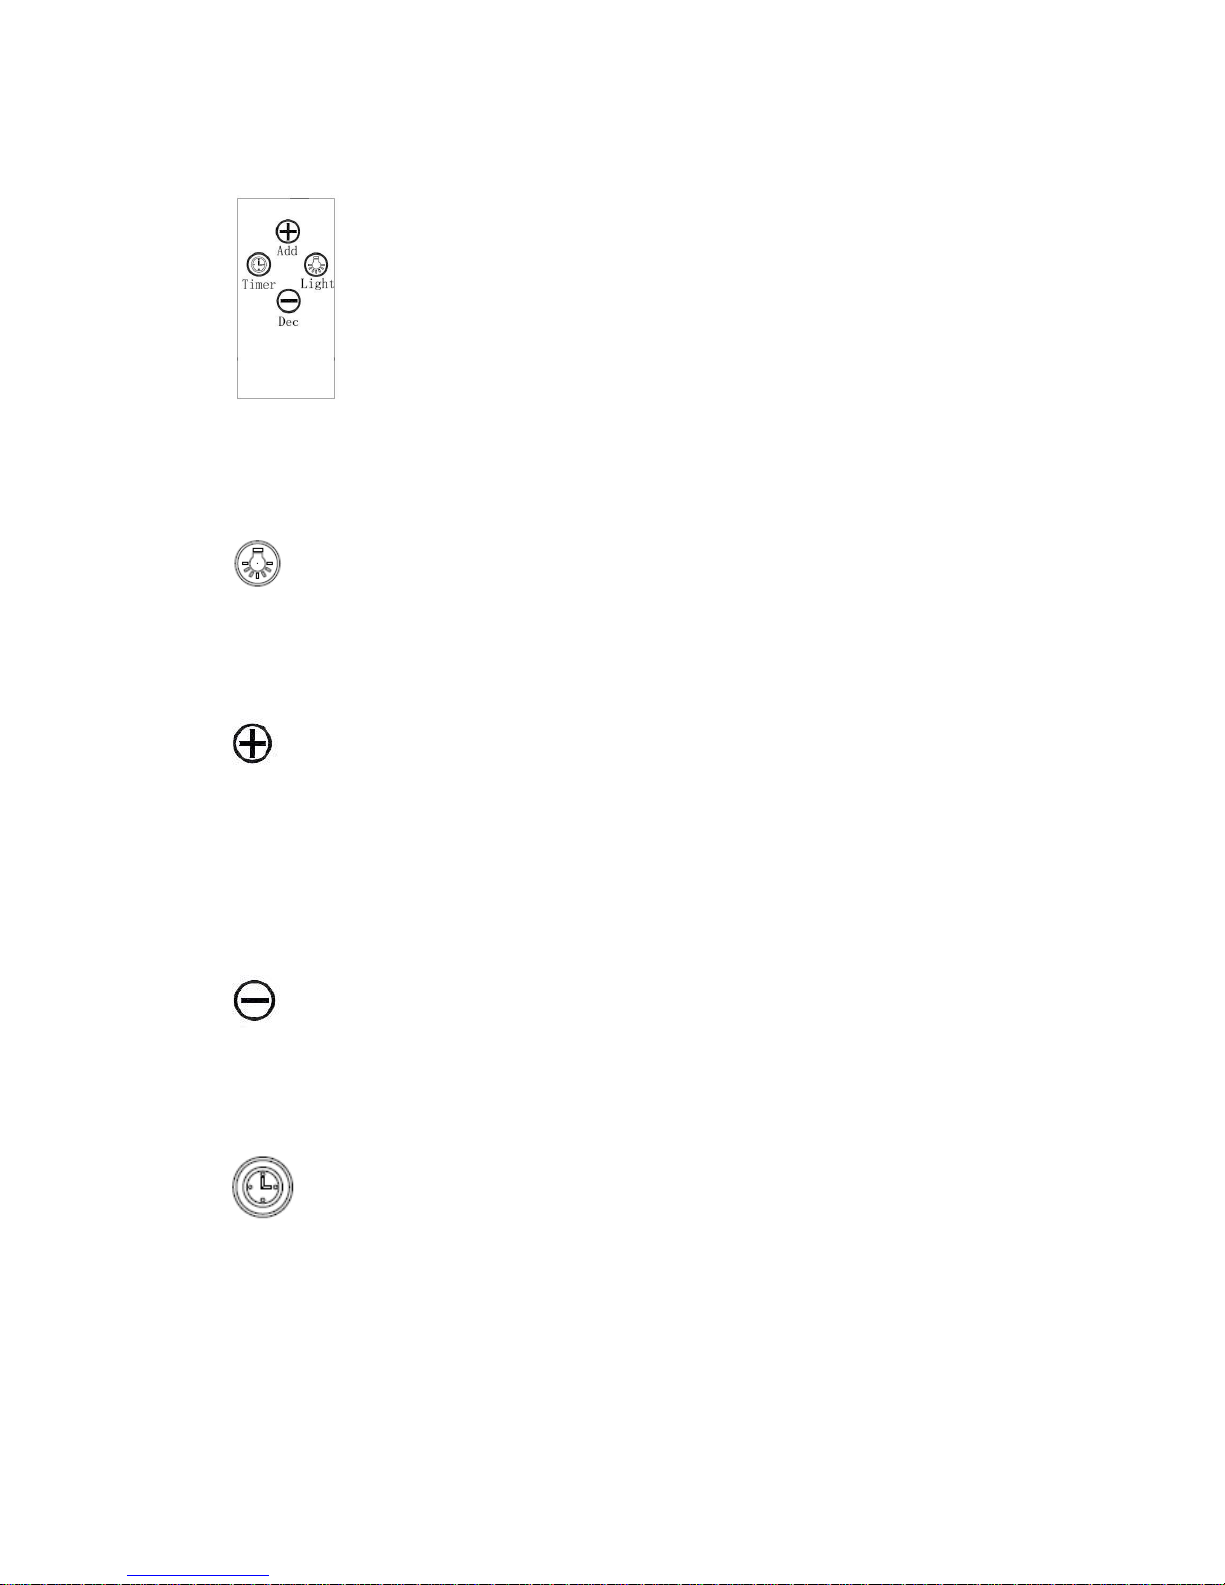
Remote control
Lighting
press button once, the light is on, press again, the light is off. The
lighting button it is controlled separately and will not affect any other
functions.
Turning on/ increasing motor speed
1st press, Low speed
2nd press, Medium 2 speed
3rd press Medium 1 speed
4th press High speed
Turning off/Decreasing motor speed
press the button and the motor begins shift to a lower speed and the
LCD screen display the speed level. Repeating press the button, it keep on
decreasing the motor speed to till the range hood turning off.
Timer
Press the button to set up the timer on/off function.
 Loading...